


Upcycle Window Blinds into Mini Christmas Trees

When the strings broke on my faux wood window blinds a while back, I had to buy new ones, but I just couldn't bring myself to throw the old slats out. They held too much potential for reuse so I saved them for a future project.
This year, I finally came up with the perfect way to upcycle my old window blinds. I turned them into a set of mini Christmas trees that perfectly fit my modern Christmas decor.
VIDEO: Upcycle broken window blinds into Christmas decor
Here's a video showing the entire process of making these mini Christmas trees from repurposed faux-wood window blind slats.
If you can't see the video, try viewing it directly on YouTube.
If you prefer step-by-step instructions, keep reading to see exactly how I turned these faux wood window blinds into something special.
How to upcycle broken blinds into mini Christmas trees
I started by removing all the strings from the blinds and separating them. These were faux wood blinds, made of plastic, with each slat about 2" wide.
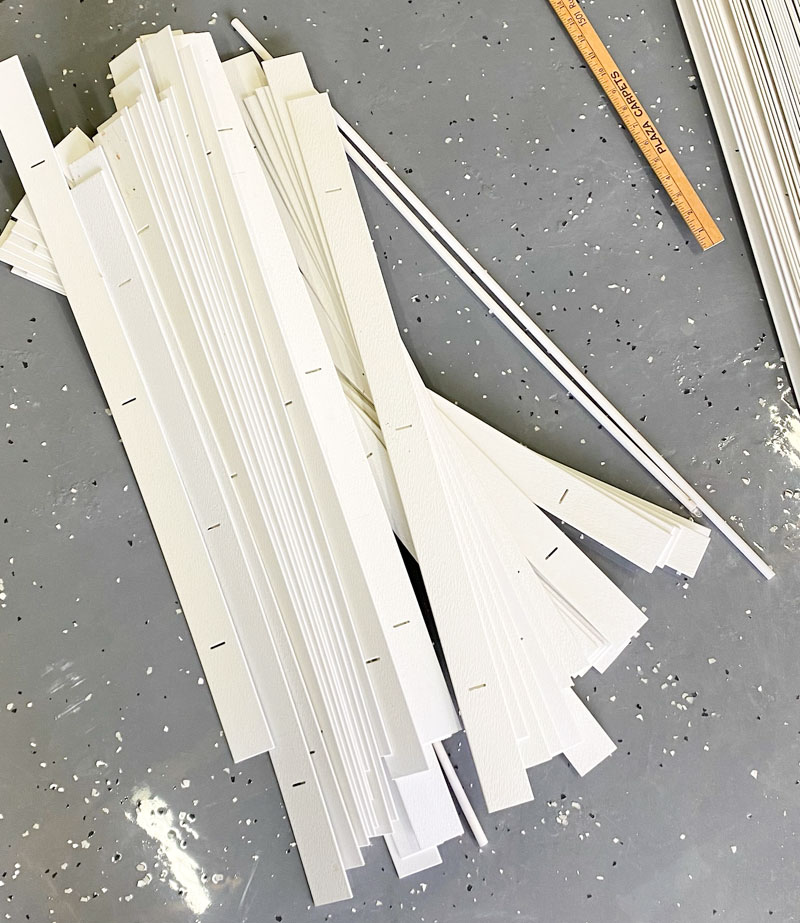
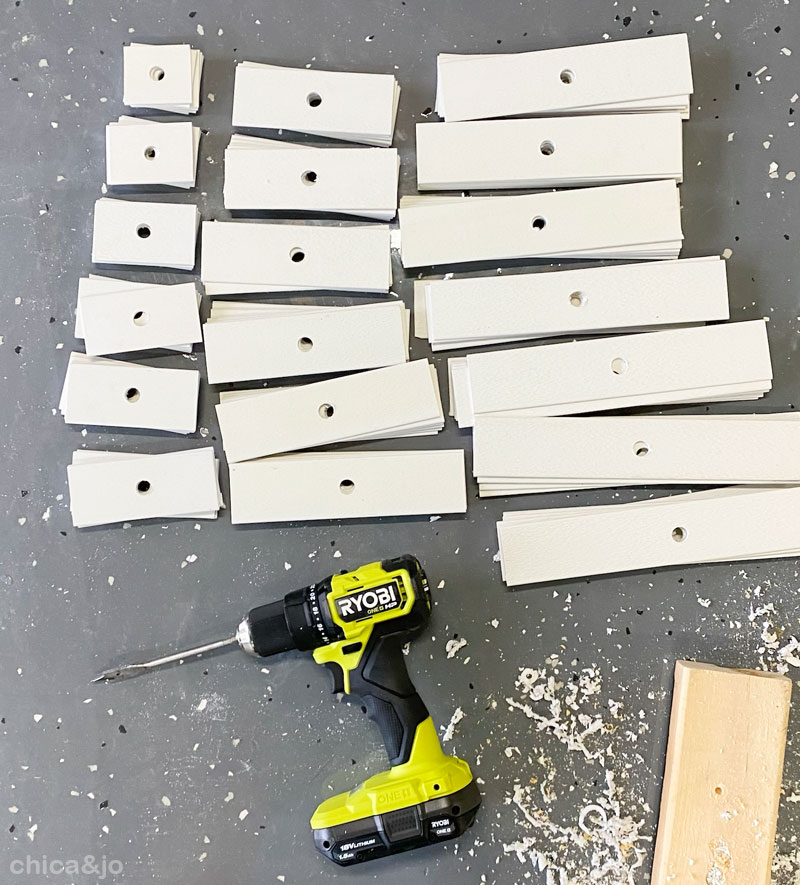
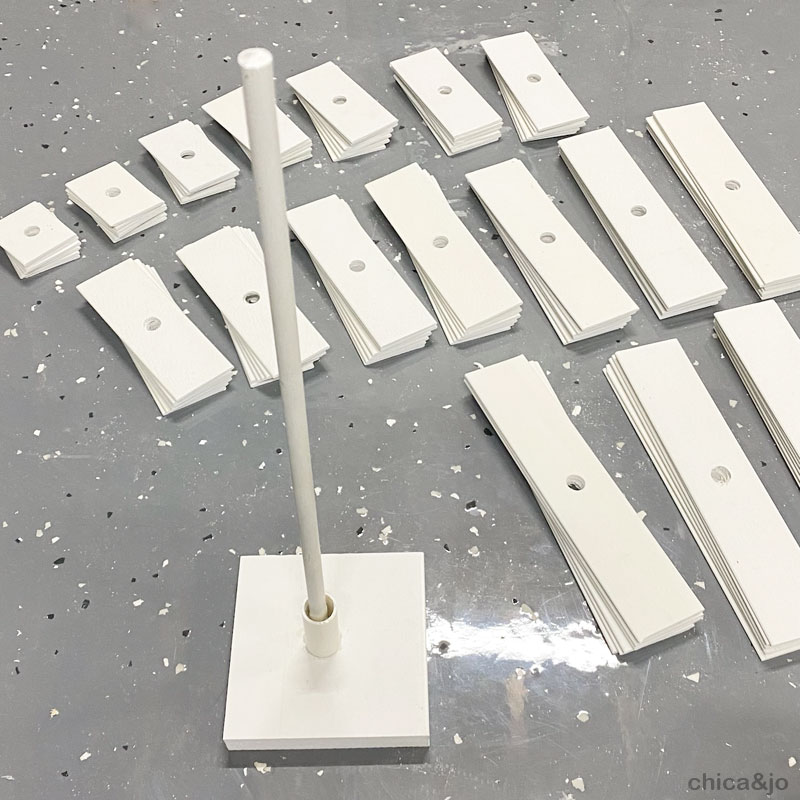
Since the slats have holes in them from the strings, I started by cutting those portions away and getting down to solid pieces I could work with. Then I stacked six pieces together and cut them to the same length.
I cut six more slats 1/2" longer than the first set, and then another six 1/2" longer than that.
I kept going with more sets of six, cutting each set to 1/2" shorter or longer than the set before or after it. The smallest set was as long as the slats were wide (so, square) and the longest set was as long as I could get them within the limits of the slat length.
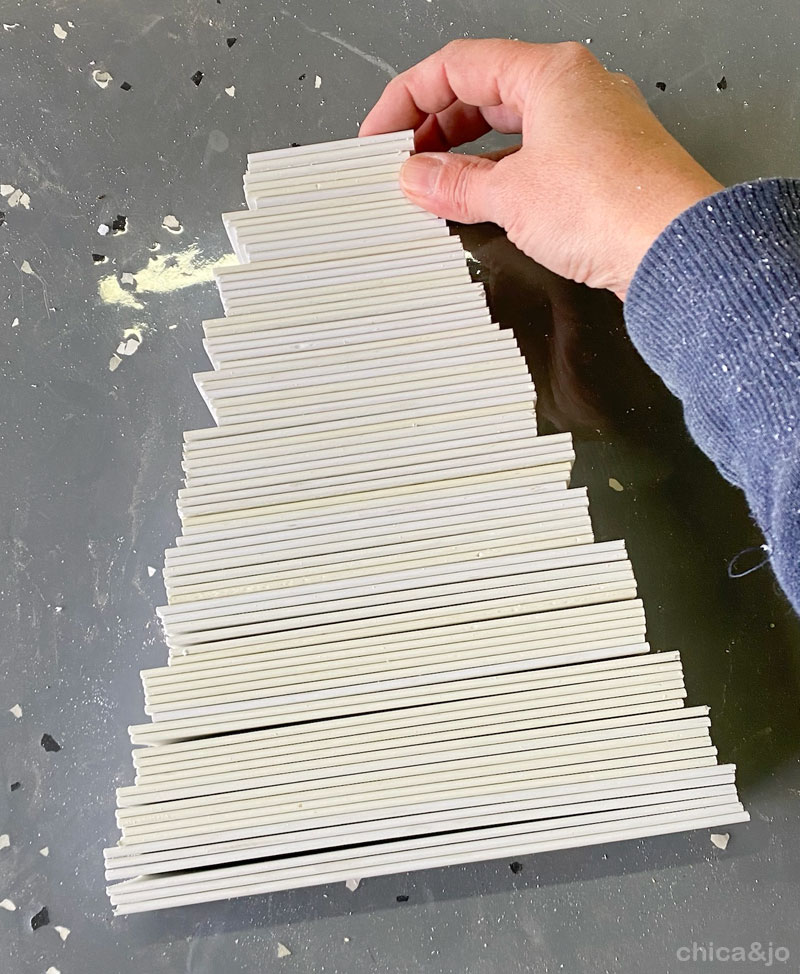
At this point, I took a minute to measure the height of all the slats stacked up, which is a measurement I would need later when building the base.
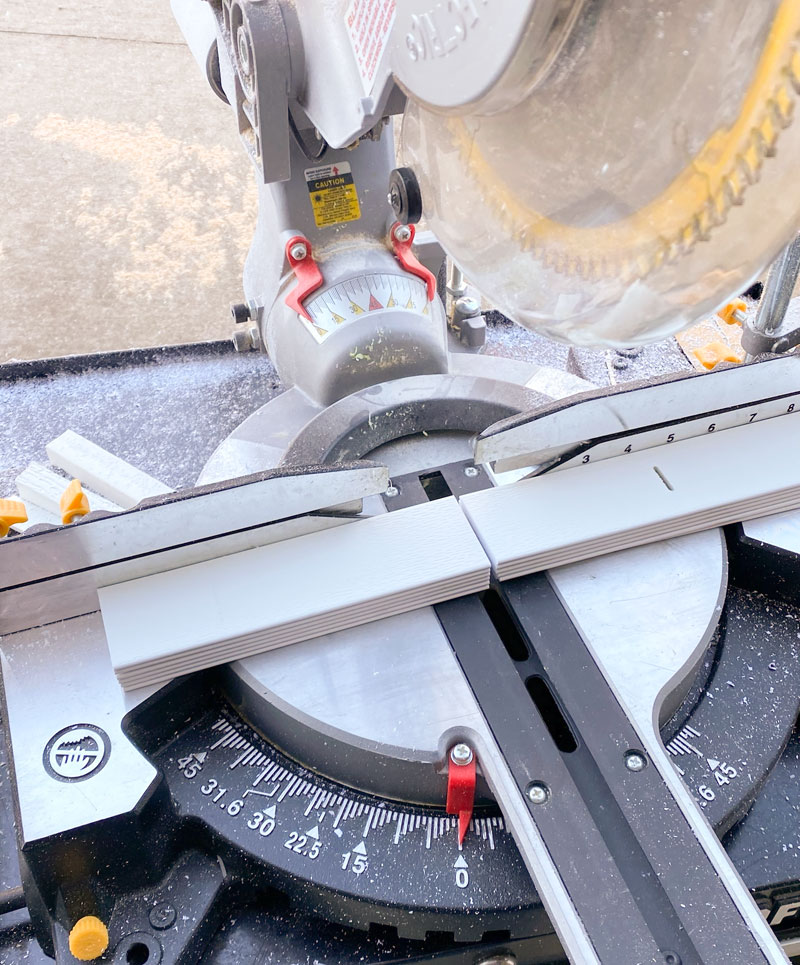
Then I grabbed a set of six slats and used my drill and a 1/2" bit to make a hole in the middle, drilling right through all six of them at the same time.
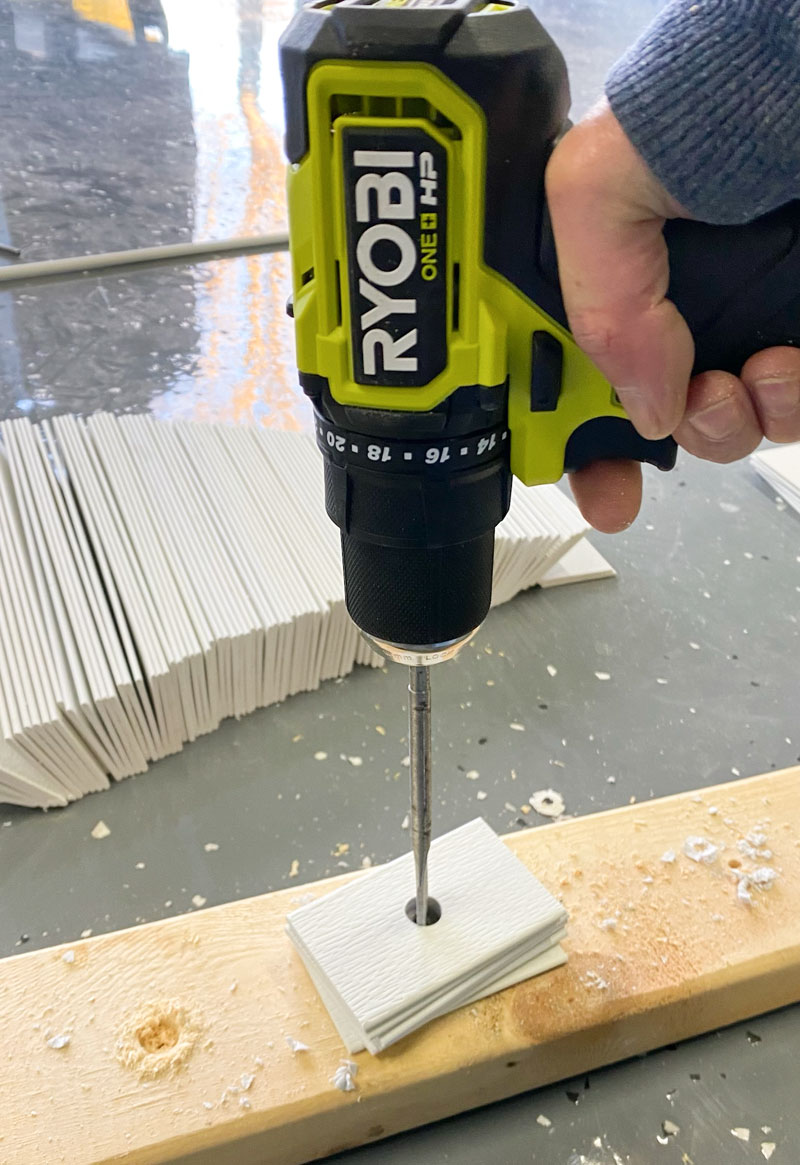
I repeated this for each set of six slats, until everything had a hole in it.
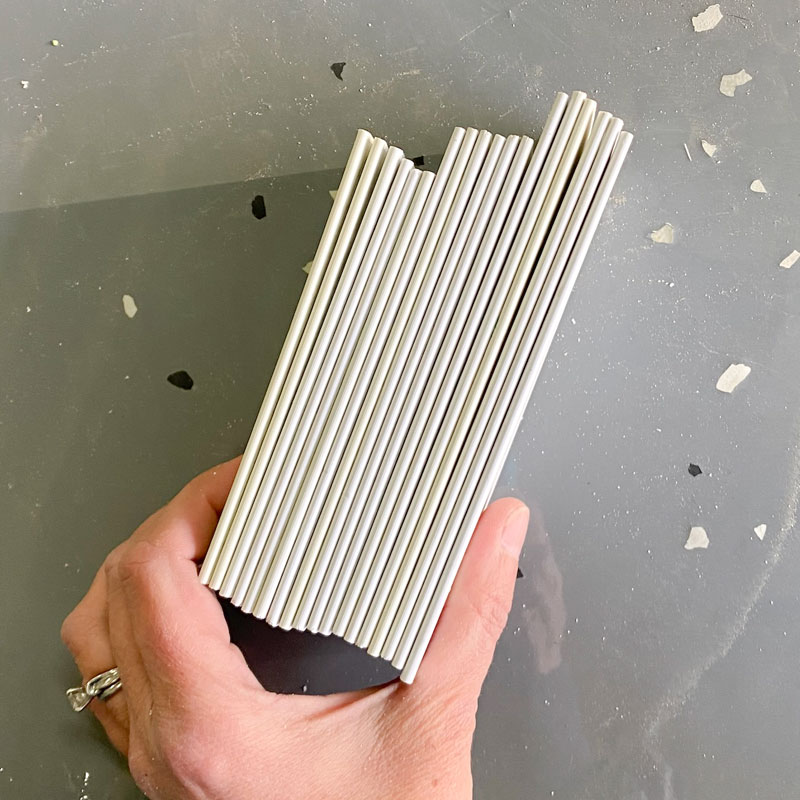
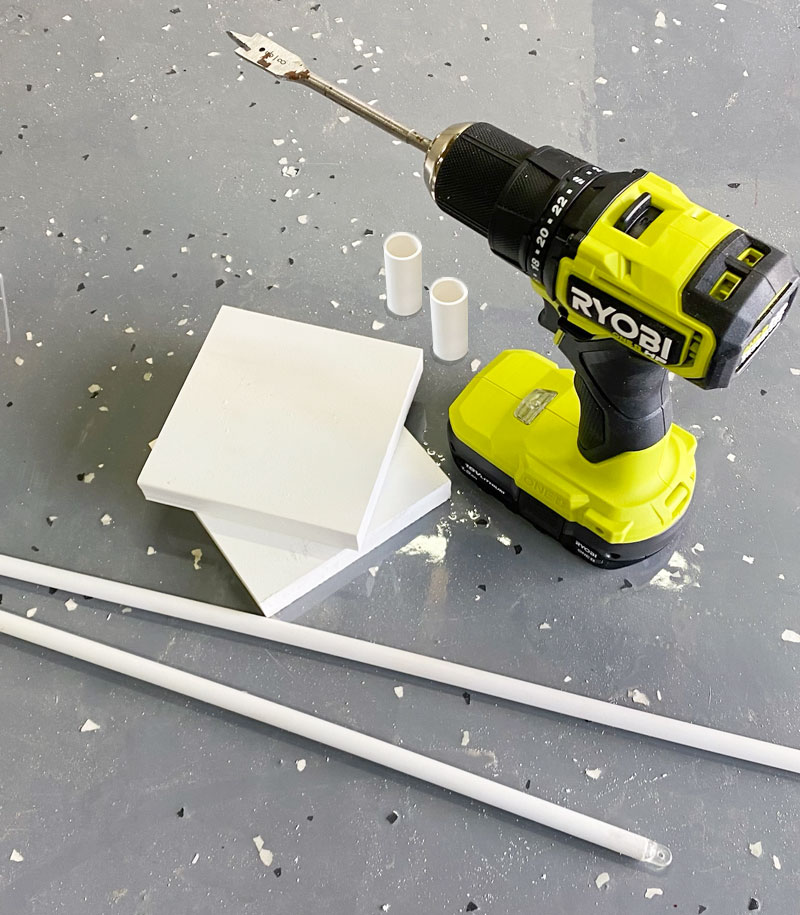
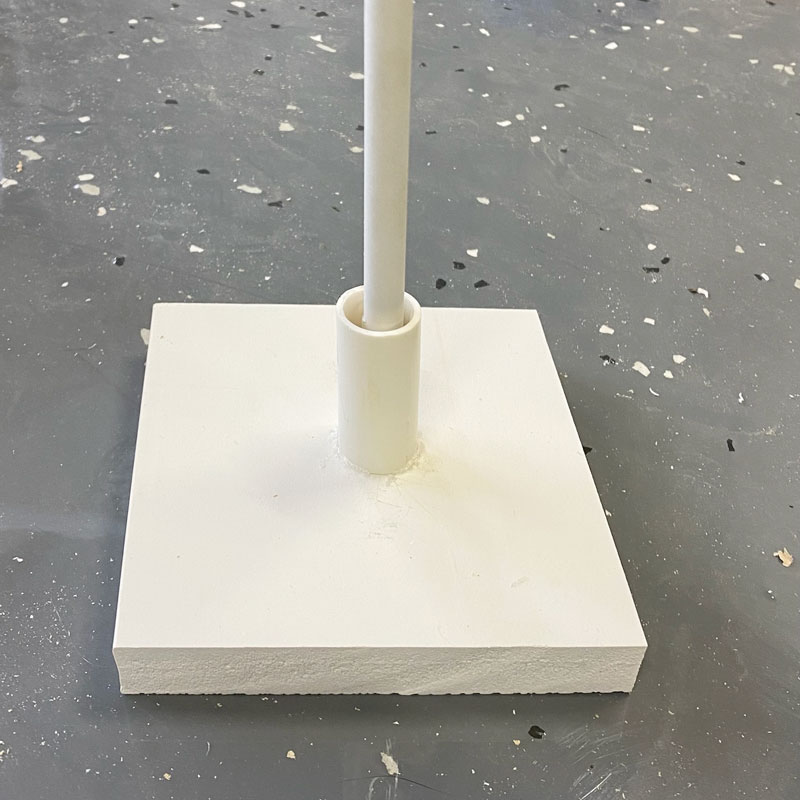
Next, I worked on the base for the tree. I started with some leftover scraps of PVC trim I had on hand (though painted wood would have worked just fine). I grabbed the original wands that came with the blinds and some pieces of PVC pipe that I cut to 2" long.
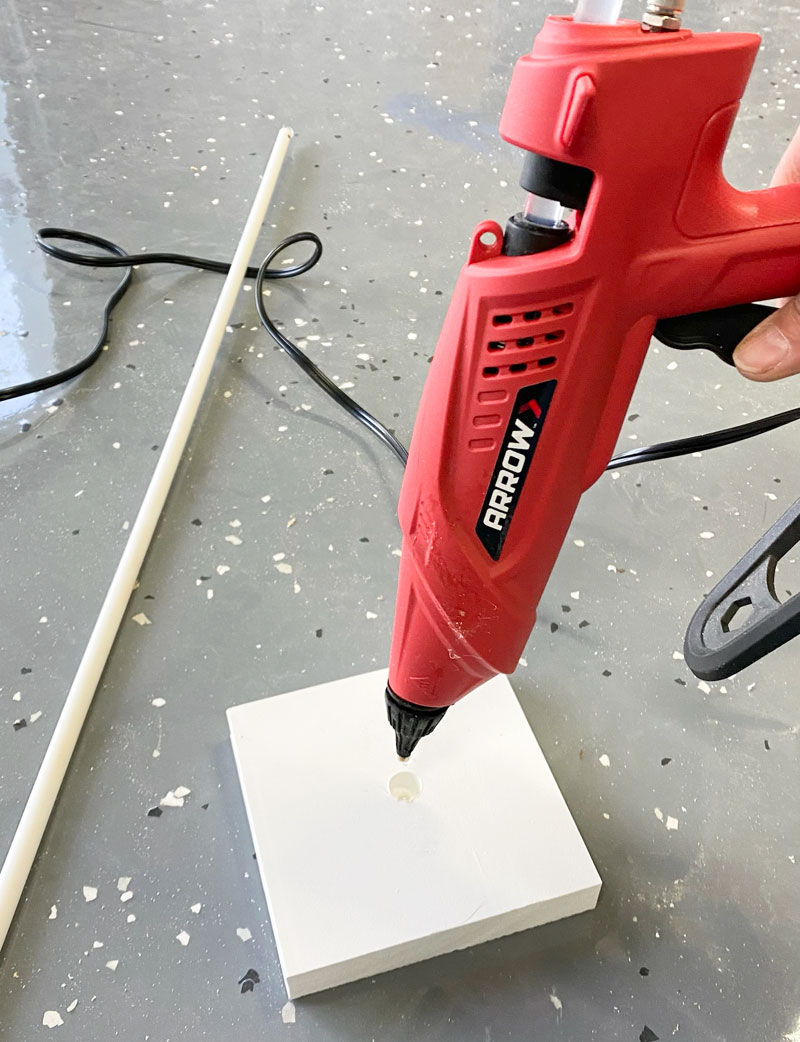
To build the base, I drilled a half-deep hold in the block and filled it with a puddle of hot glue, then stuck the end of the wand into that.
I slipped a pipe piece over the wand and filled it with hot glue, creating a nice solid tree trunk that was firmly attached to the base block. The pipe also serves to keep the bottom row of slats suspended for a more natural tree trunk look.
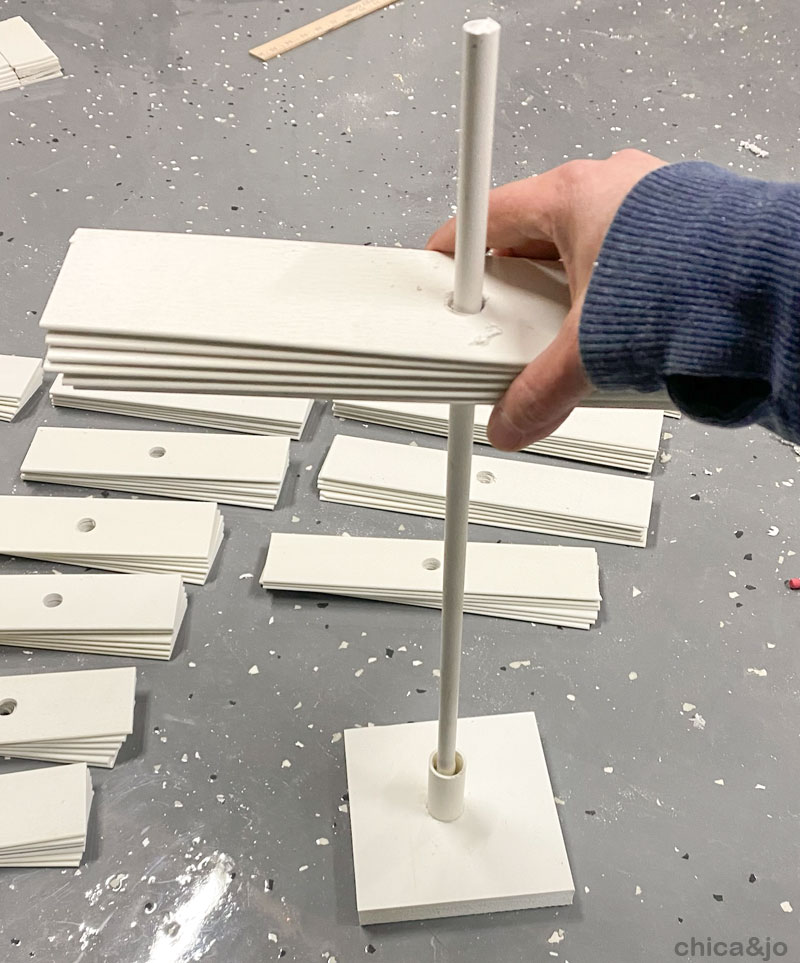
Using the measurement I made earlier of all the slats stacked up, I cut the length of the wand accordingly, measuring from the top of the pipe and leaving an extra inch at the end for adding a topper later. With that, all the pieces were ready to assemble!
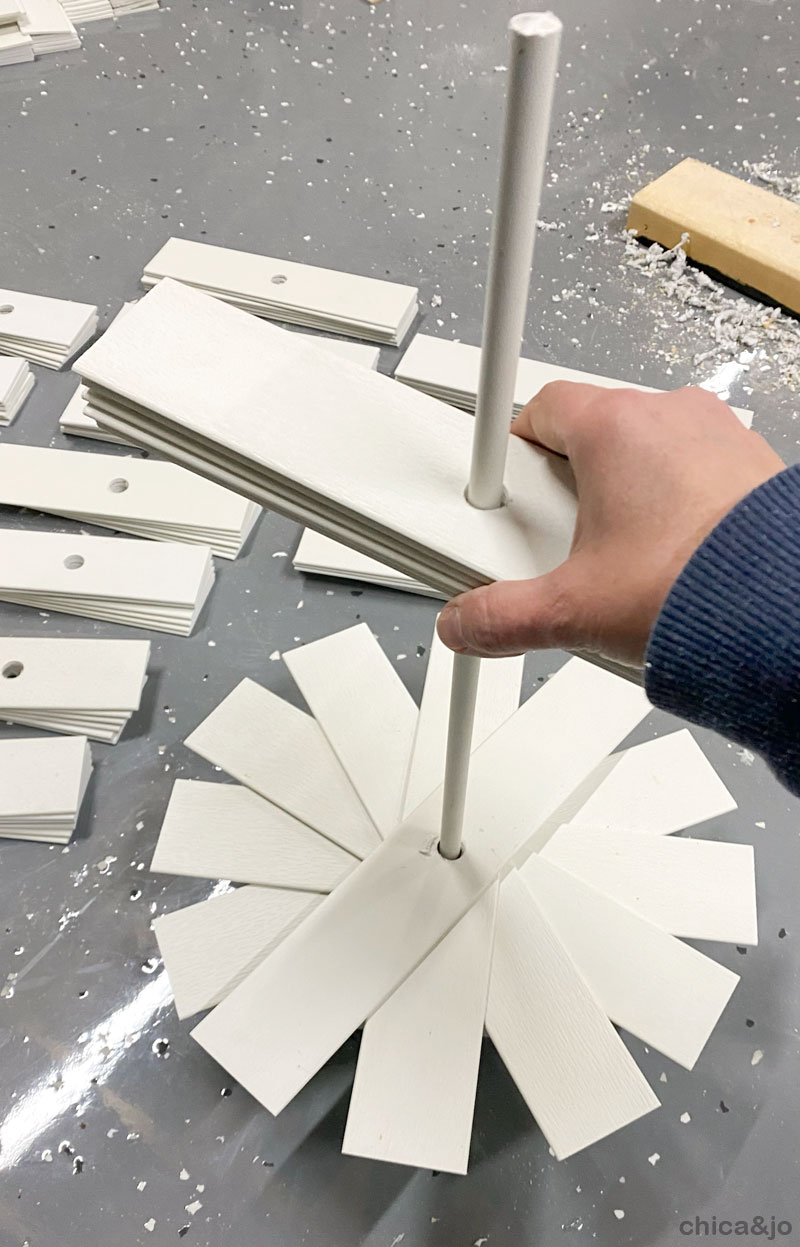
I started with my longest set of slats, and slipped them right down over the pole and let them rest on the pipe trunk.
Then I fanned the slats out into a circle, spreading them so they were spaced pretty evenly.
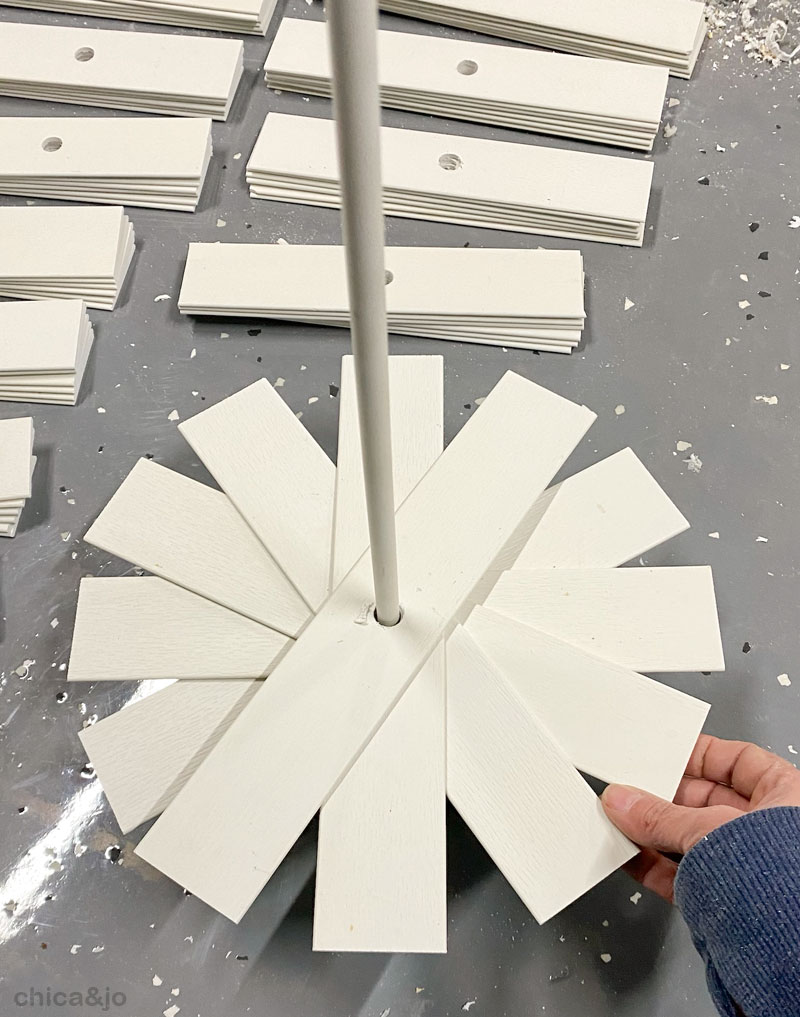
Then I grabbed the second longest set of slats and slid them down onto the pole.
Once again, I spread them out evenly, starting right after the last one from the first row.
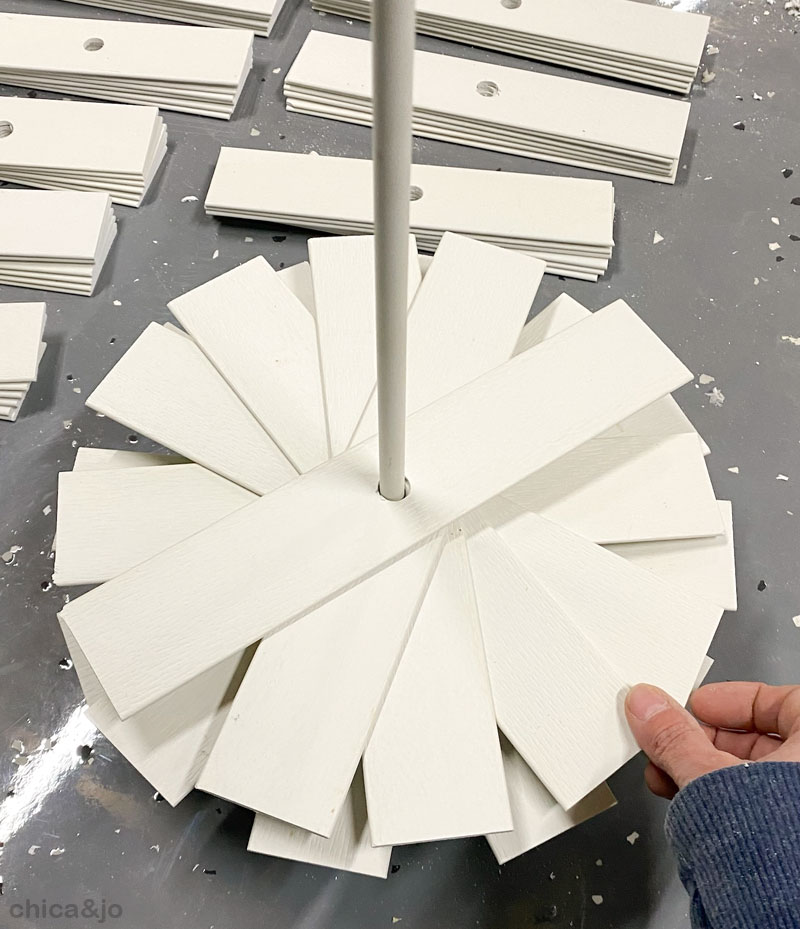
I continued with the sets of slats, and as they got shorter and shorter, my tree really started to take shape.

In minutes, it was done. I couldn't believe how great it looked from this simple stacking technique.

It looked so great that I made two more smaller ones, to create a decorative trio.

I decided not to use any sort of glue to hold the slats in place because it is more fun this way and would also be easier to flatten and store after Christmas.
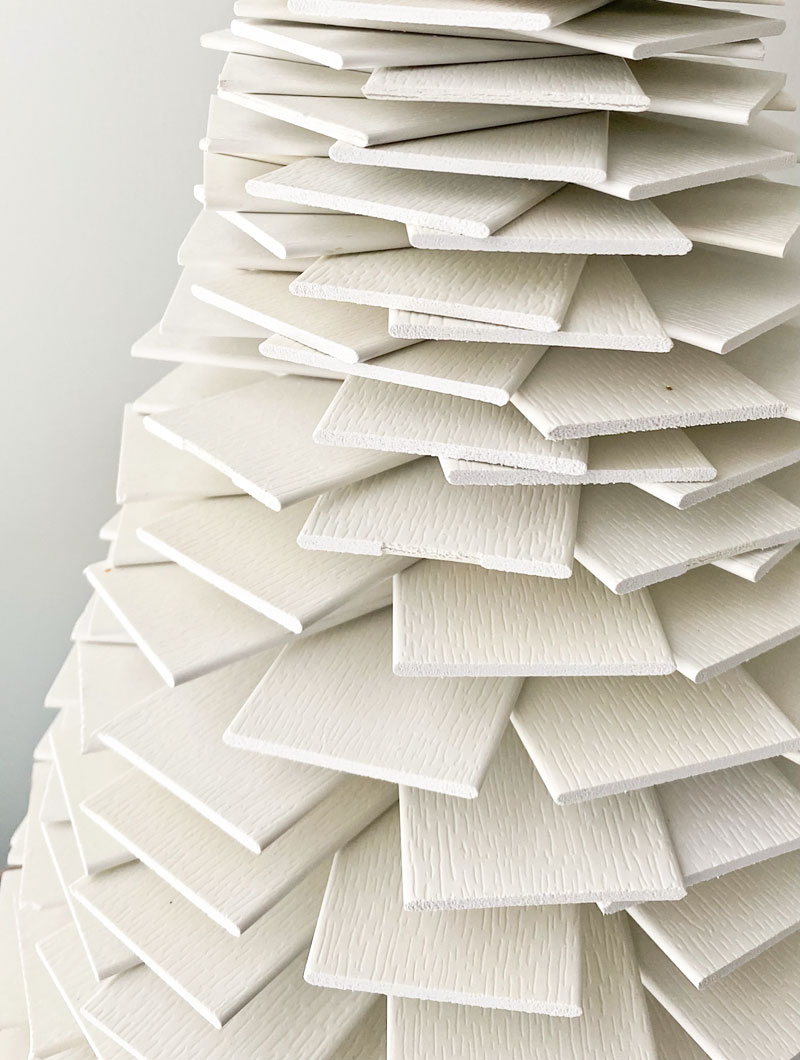
I decided to leave them white to look like snow, and I topped them each with a glittery gold star.

I am completely in love with how this upcycling project came out, and even I can't believe I made these modern trees out of broken window blinds.

similar projects

Faux Malachite Christmas Trees

Upholstered Fabric Christmas Trees with Tufting

Christmas Trees Made from Tomato Cages and Ornaments


2 comments so far:
May I ask how tall each of your trees are? I guess mainly the tall one, as I can guestimate the others from there. Thanks and really nice repurpose up cycled project! ?????
Angela, the trees are packed away until Christmas, so I can't measure exactly, but I believe the tall one is about 14-16" tall. I recommend taking guidance from the size of the slats. Watch our video from about the 4 to 5 minute mark to see how I cut the center rod to fit.