


Faux Malachite Christmas Trees

I spotted some gorgeous malachite Christmas trees at a local antiques shop and as much as I loved them, they were a bit out of my budget. I decided to try and make some faux-malachite trees to give me that look without that price tag.
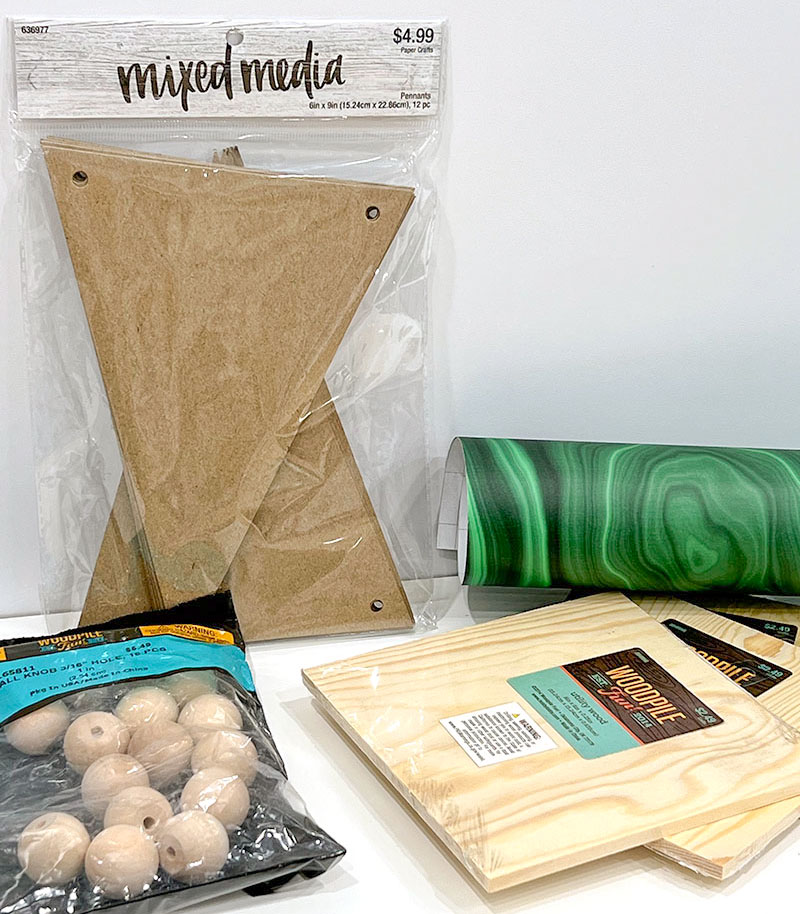
I found a pretty easy way to make them using some basic craft supplies. The key supply for achieving that finished look easily and affordably was some malachite wrapping paper.
And the key to creating that perfect pyramid tree shape was a pack of 6" x 9" chipboard pennants. I also picked up some 6" wood squares and small 1" ball knobs to help form the pedestals.
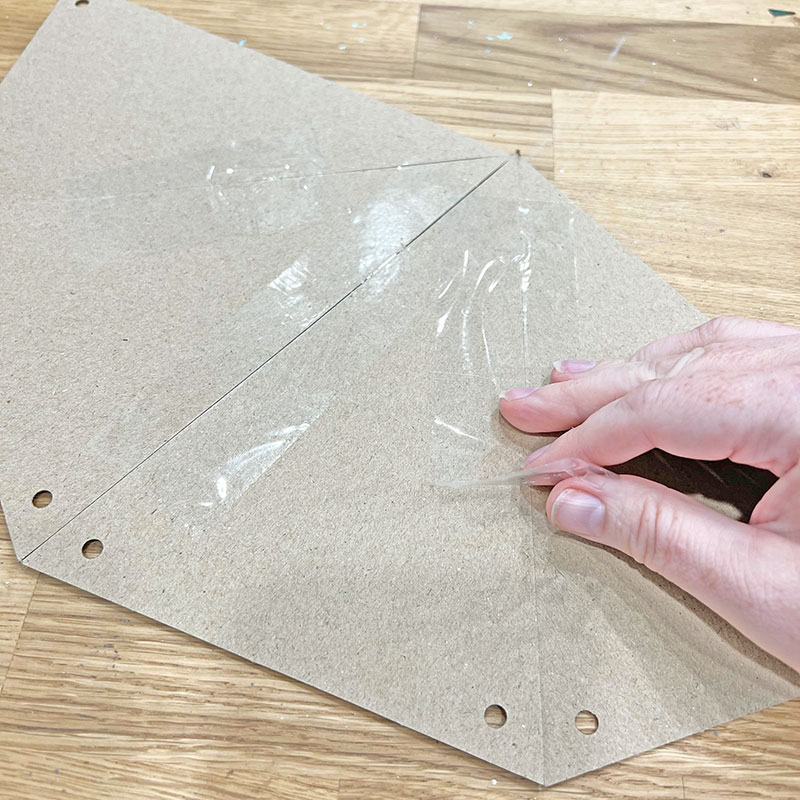
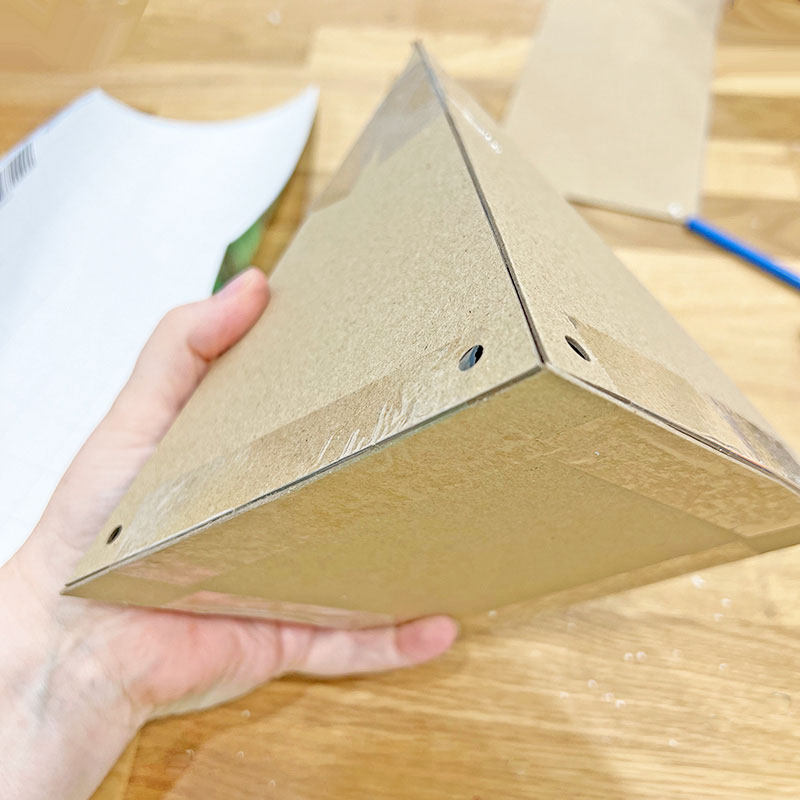
To easily create the pyramid shape, I taped four of the triangular chipboard pennants together using packing tape to form a hinge between each one.
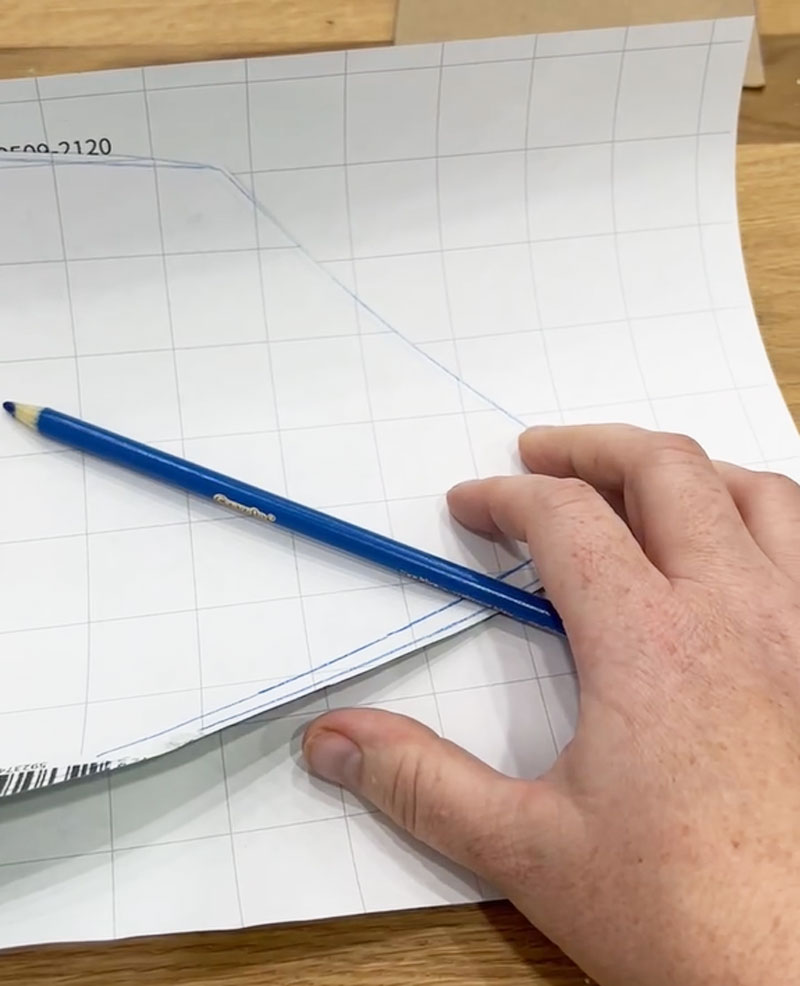
Then I traced this four-panel piece onto some scrap paper to create a pattern to use for covering it with the malachite paper later. I cut the pattern slightly larger than the chipboard to be sure it would be big enough to cover the edges when the panels were folded up.
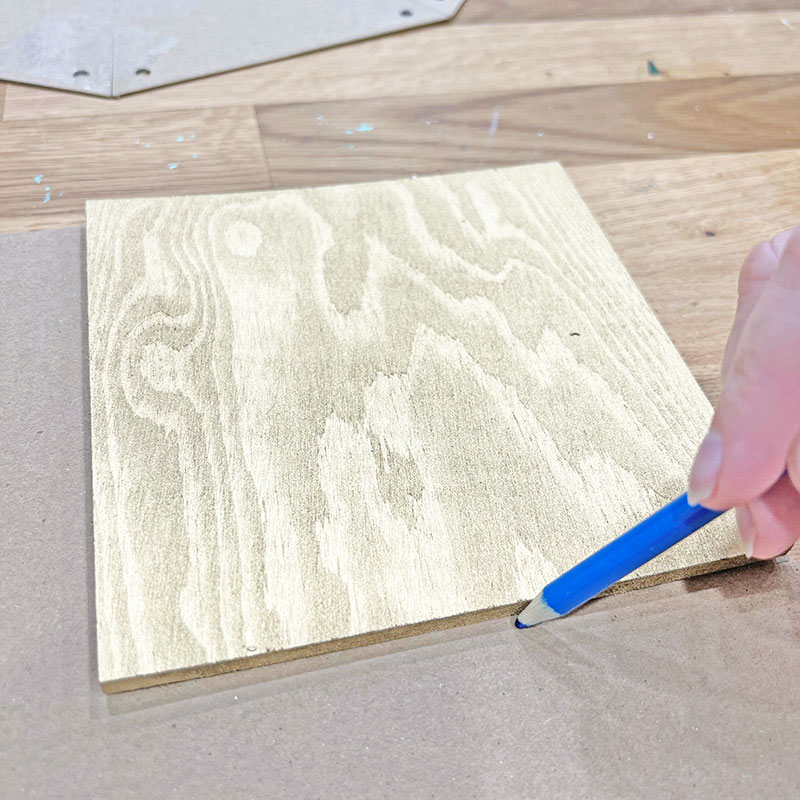
I also traced the 6" square wood base onto some extra chipboard to create a bottom for the pyramid. Since my pennants were 6" wide and the wood was 6"x6", it was the perfect size.
Then I folded those packing tape hinges to arrange the four triangles into a pyramid shape, and added one more piece of tape to the end to hold the first and last ones together. Then I attached the chipboard square to the bottom and taped all those edges together too.
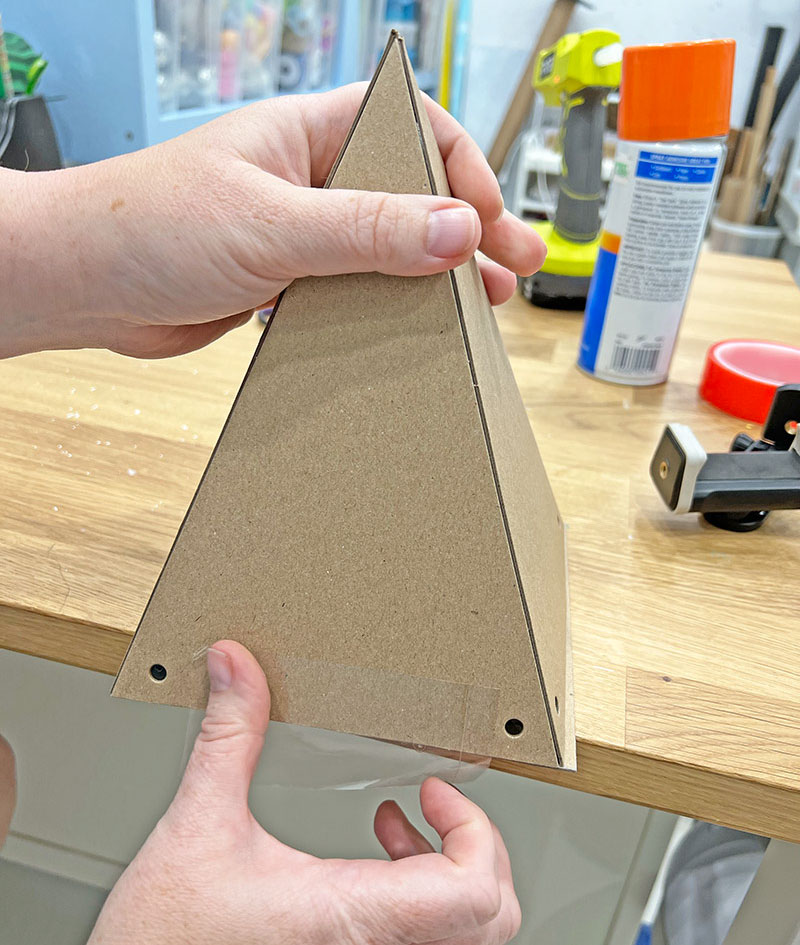
With all four sides of the 6" square taped to the bottom, the pyramid shape was nice and solid.
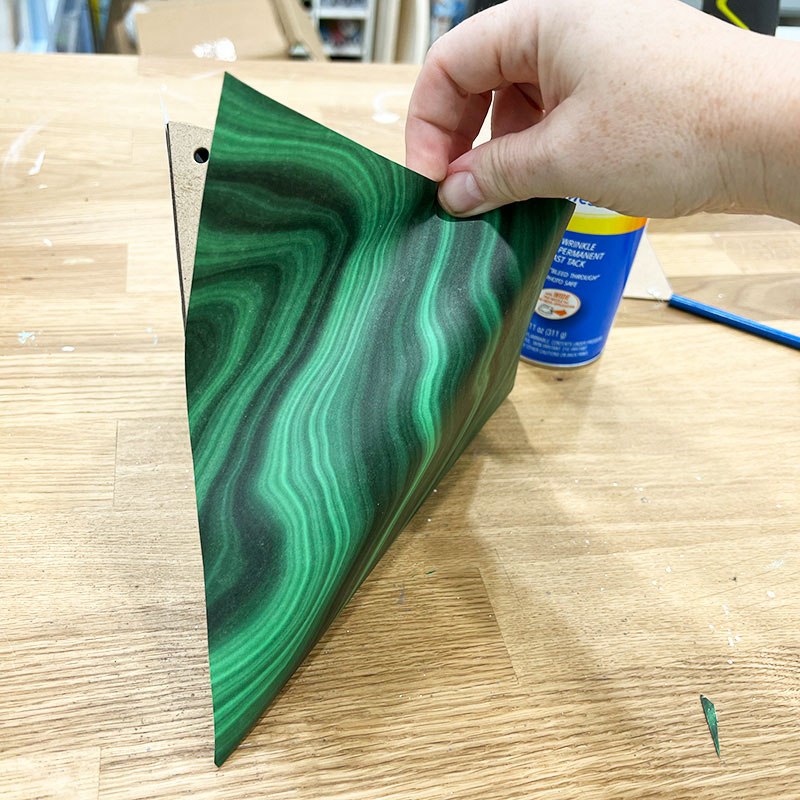
Now it was time to cover that pyramid with the pretty malachite paper! I traced the pattern I made earlier onto the back of the malachite wrapping paper and cut it out.
I tested the fit on the pyramid, and when I was satisfied with it, I used spray adhesive to affix the paper to the pyramid.

I found it easiest to apply the spray to the chipboard and then wrap the paper up and around, lining up the edges and the top as well as possible. Since I made it a little larger than necessary, I was able to trim off any excess with a craft knife afterwards.
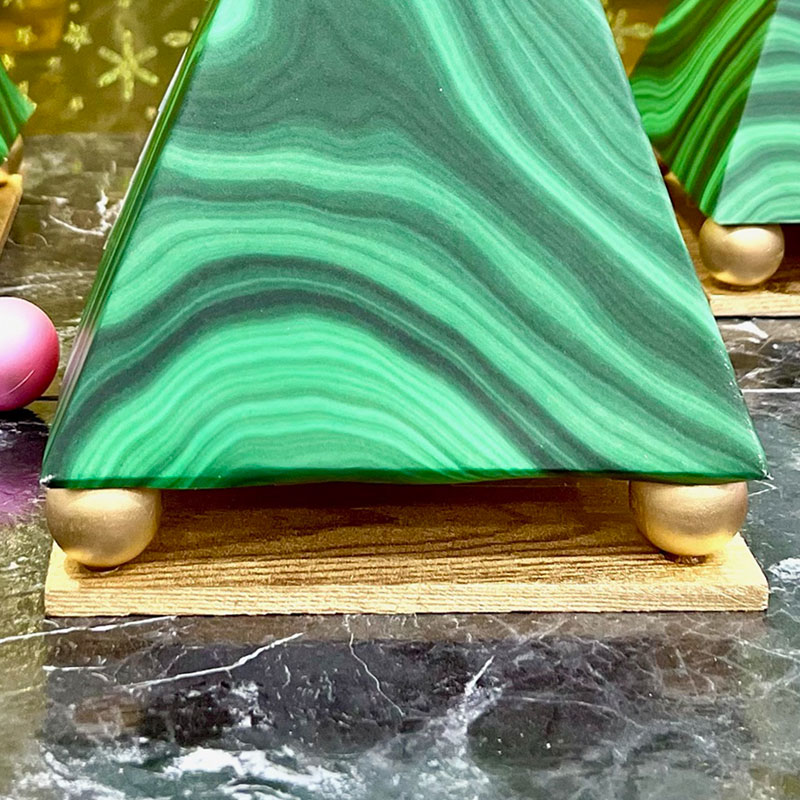
To add some little feet to the bottom, I painted four of those small 1" ball knobs with metallic gold paint and then used my Ryobi hot glue gun to stick them to the bottom, one on each corner.
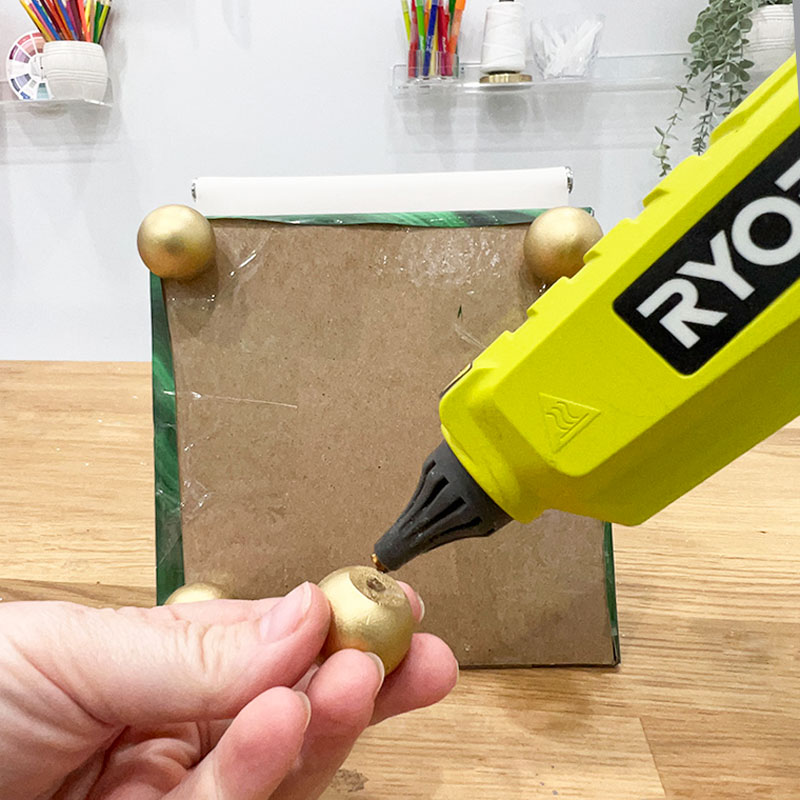
To finish it off, I also painted that 6" wooden square with the same metallic gold paint, then glued it to the bottom. This creates sort of a double-pedestal with the round feet and the square below. It's a design element I saw on the original malachite pieces I had seen shopping, and I really love the extra dimension it adds.
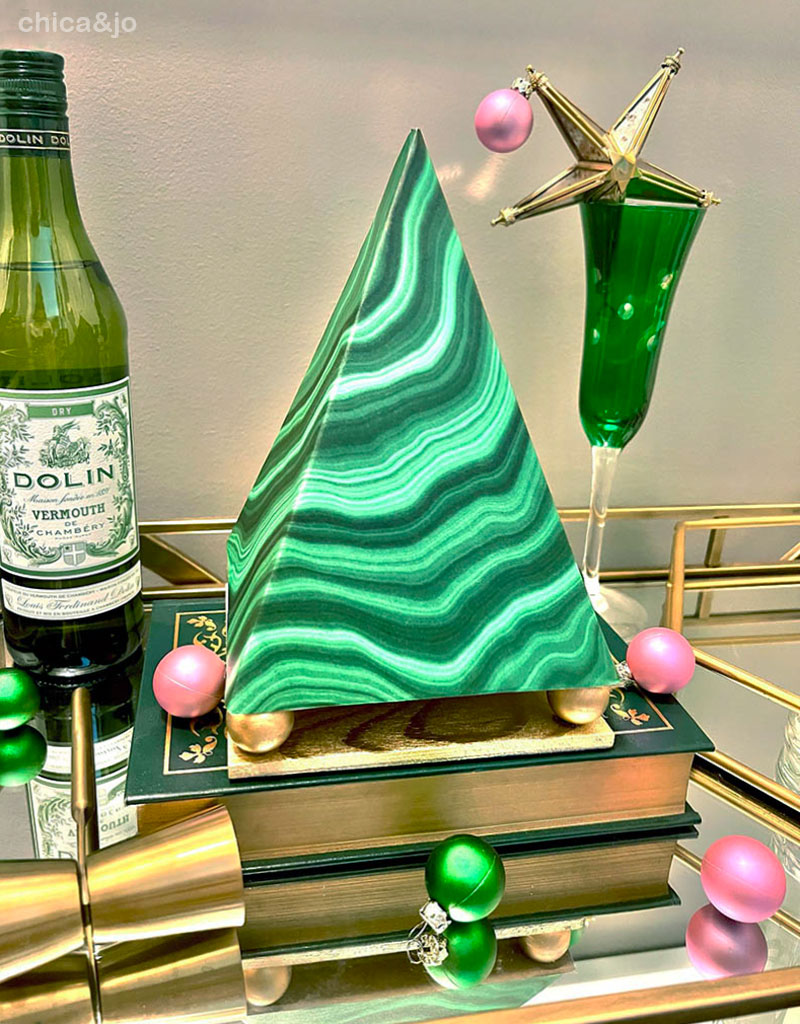
Just look how gorgeous the finished faux malachite pyramids look on my gold bar cart!
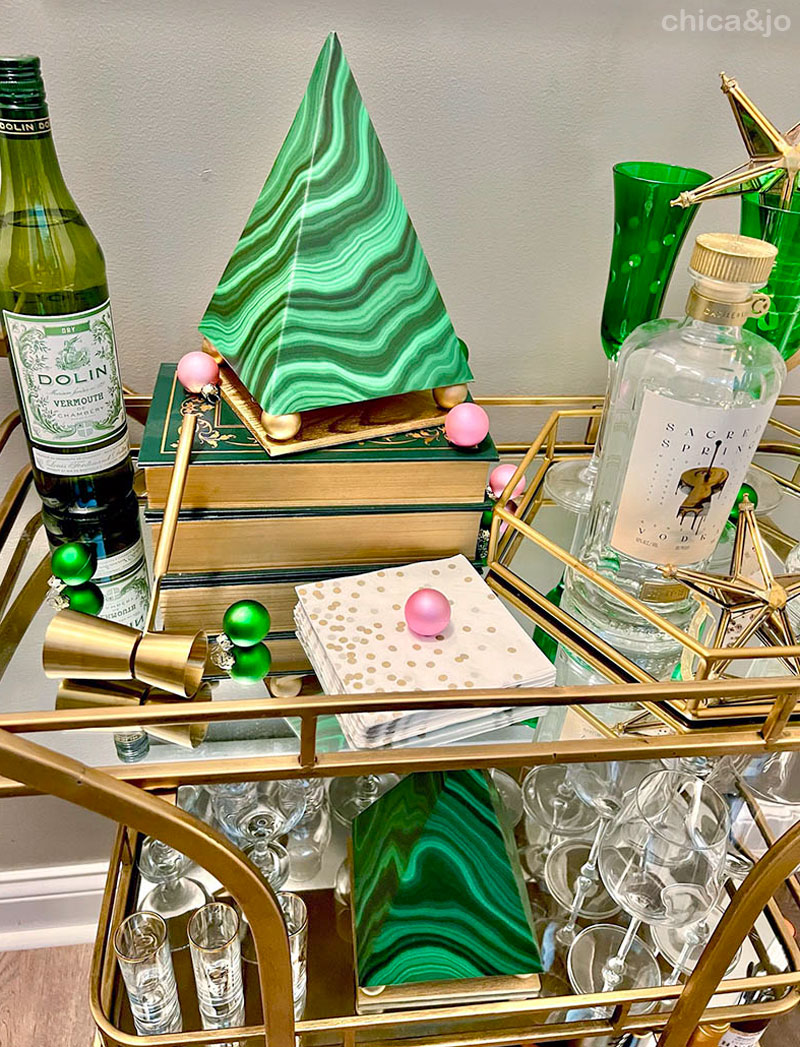
The malachite wrapping paper and gold metallic paint easily gave me the luxe feeling I wanted without the exorbitant price of real malachite.
Using the pre-cut banner pieces and wooden squares made it so easy to assemble these, so I was able to quickly make several to add to my decor.
similar projects
Upholstered Fabric Christmas Trees with Tufting

Modern DIY Rainbow Christmas Trees
Upcycle Window Blinds into Mini Christmas Trees


