


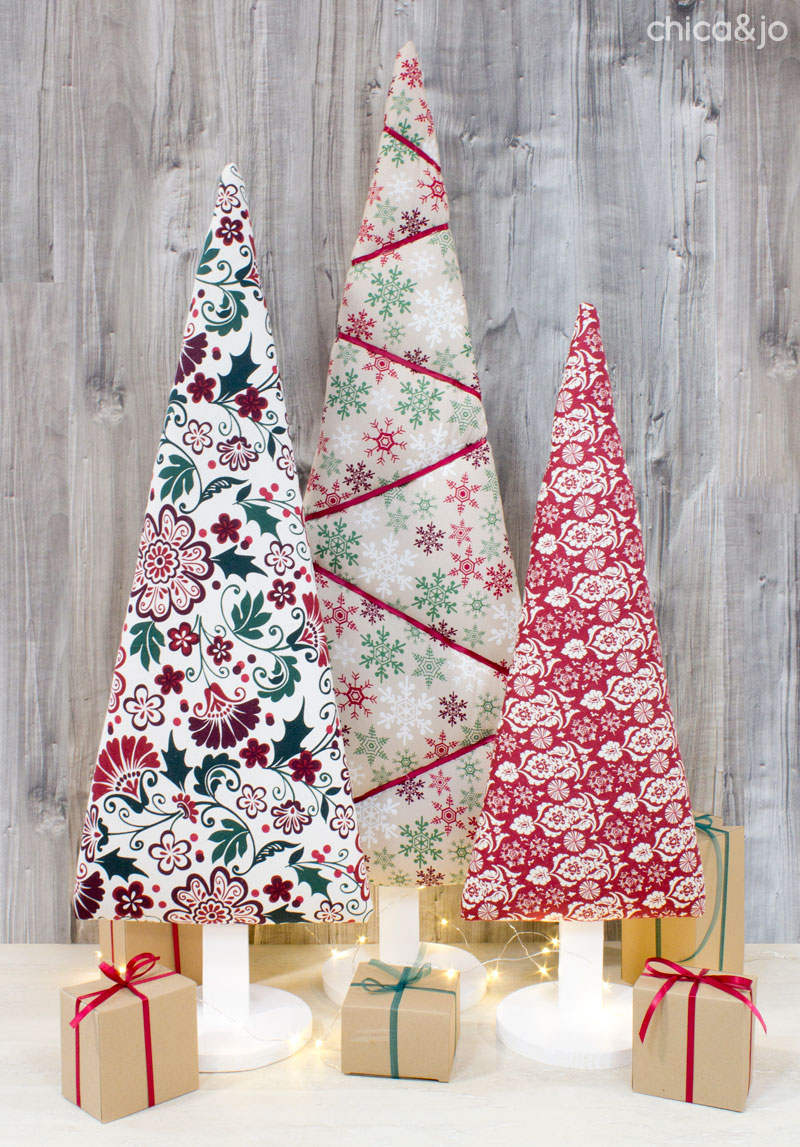
Upholstered Fabric Christmas Trees with Tufting

I wanted some simple, modern Christmas decor for my house this year, and enlisted Jo's help to find a unique spin on decorating the classic Christmas tree shape. We were really inspired by a collection of fabric we found in her aunt's scrap stash, and decided to use it to create upholstered wooden tree shapes. We even came up with an easy way to create a tufted finish with a staple gun, and I just love how it came out.
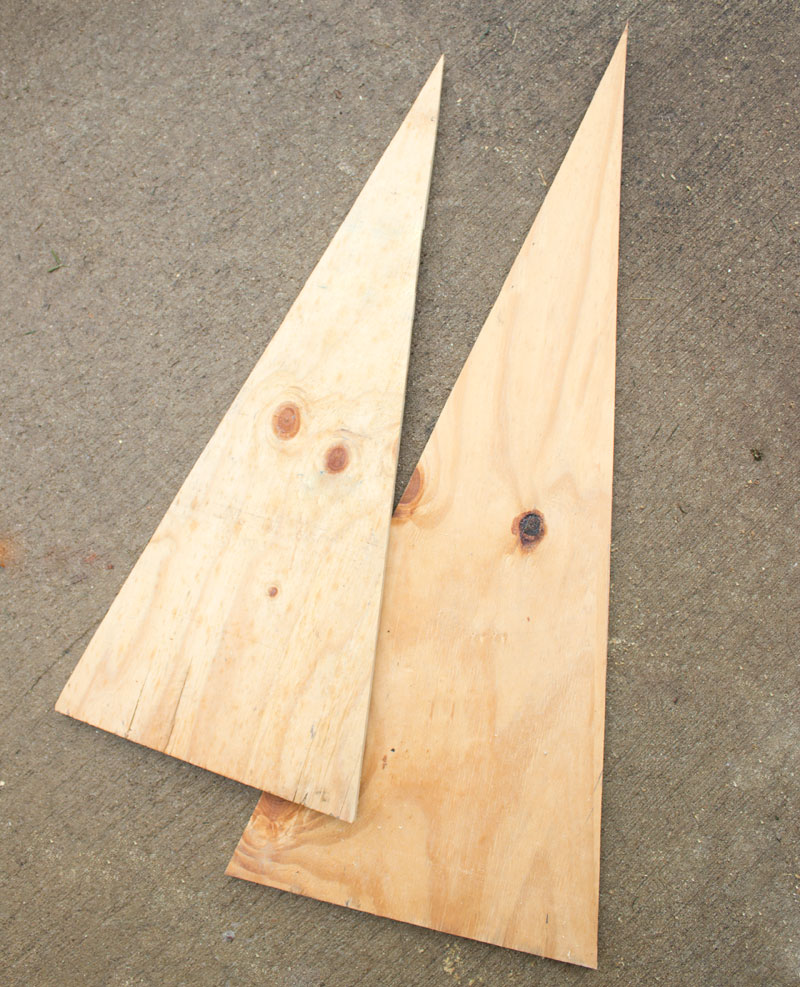
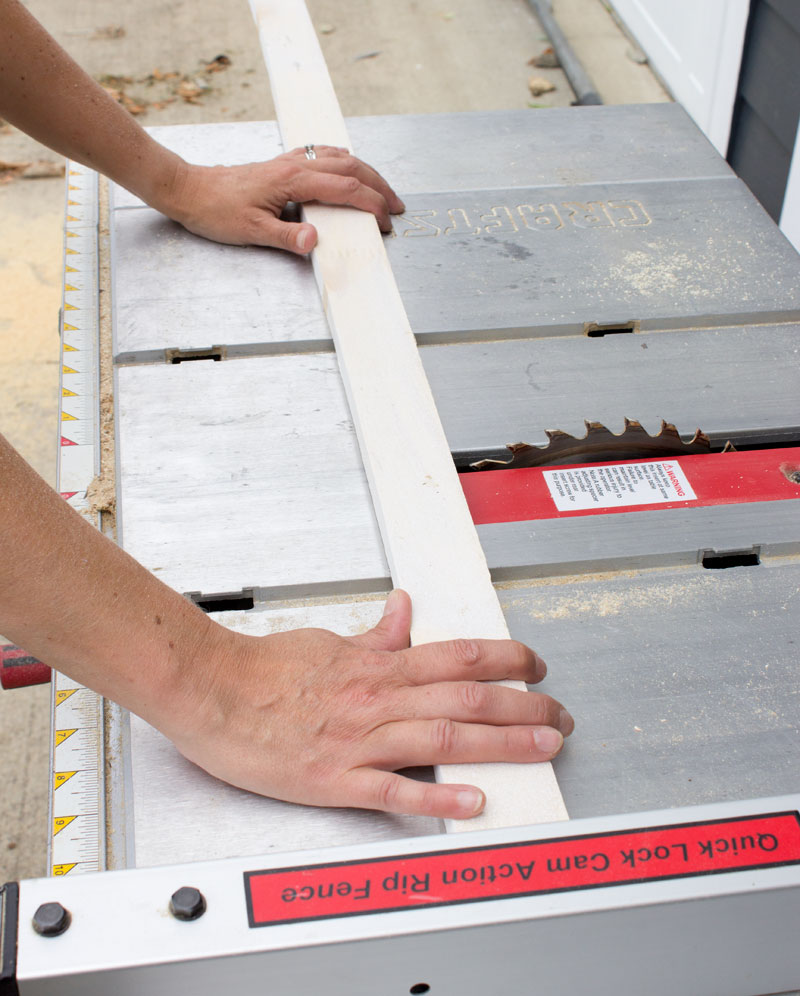
This project started in the garage, where we cut out all our wood pieces. First, we cut out the tree shapes, which were just tall triangles cut out of some 3/4" plywood. We made three sizes, with the biggest about 3' tall with a 14" base. To make an even triangle, I first measured 14" from one side of the bottom of the wood.
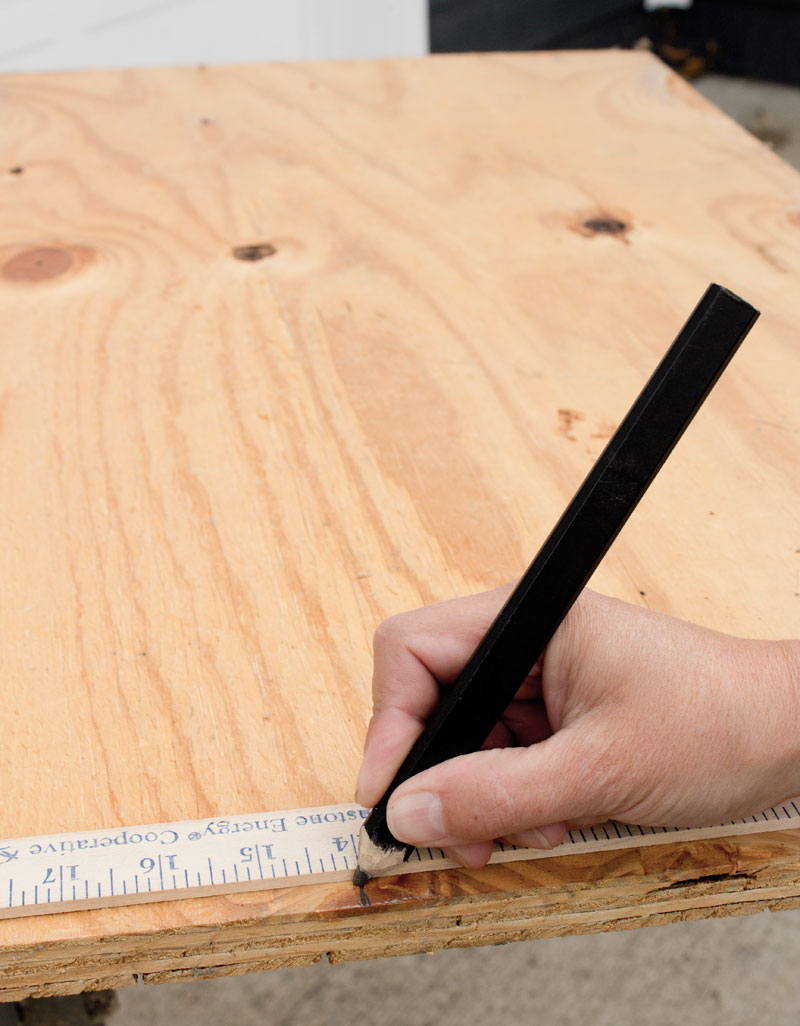
On the other end of the wood, I marked 7" from the edge — half the width of the bottom.
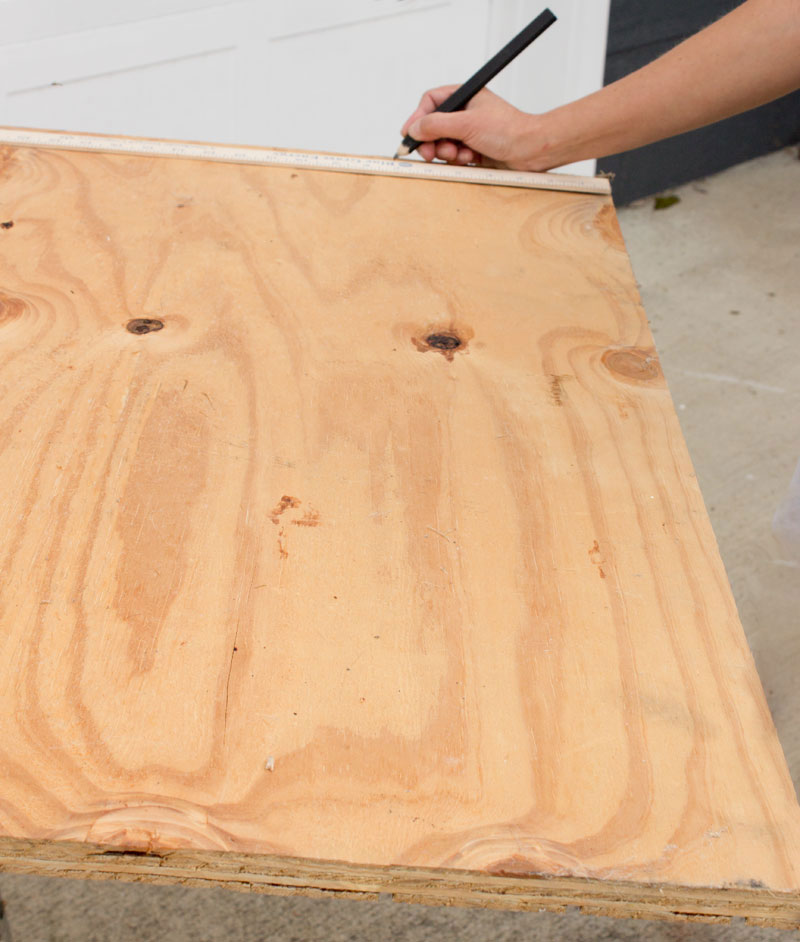
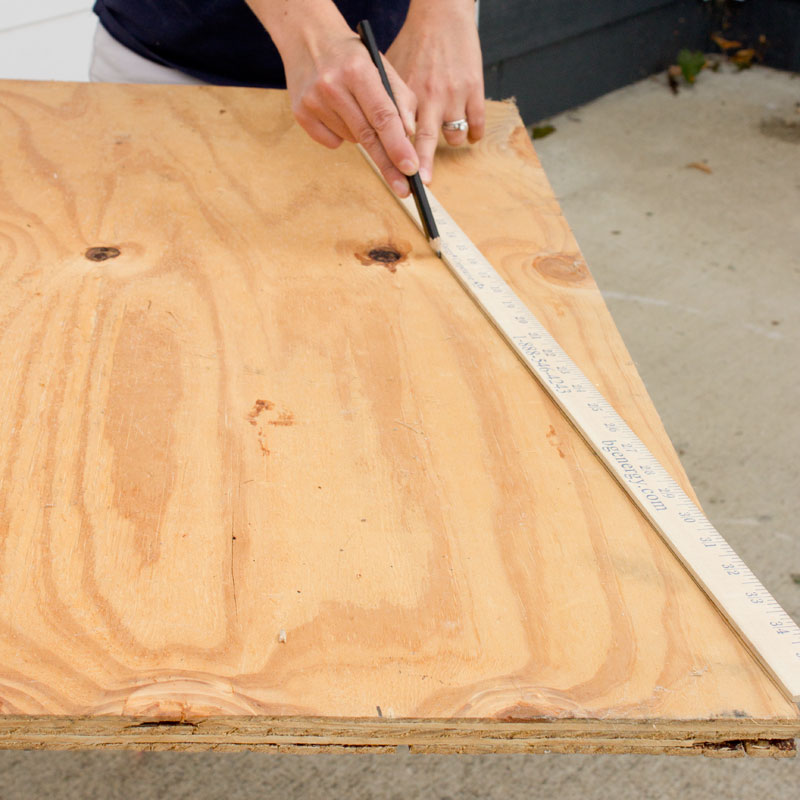
Then I used a straightedge to connect the 7" mark to each of the other corners, and draw a straight line to mark my cuts.
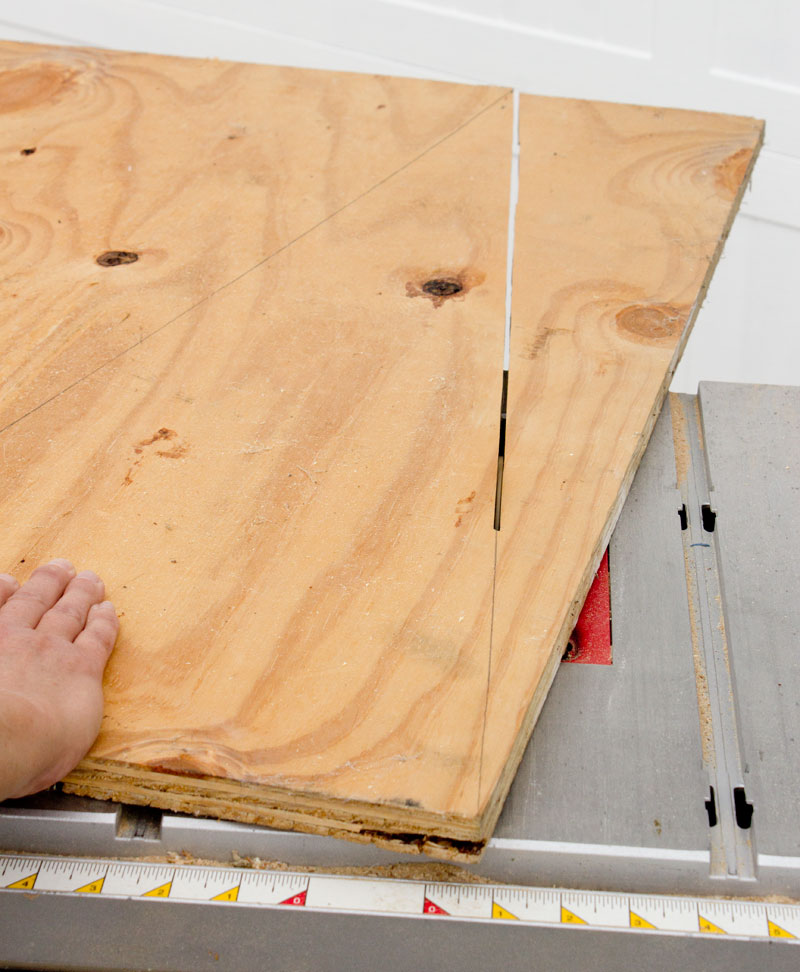
I fed the wood through my table saw and made both cuts.
We then made two more triangles, each about 6" shorter than the last, and with narrower bottoms.
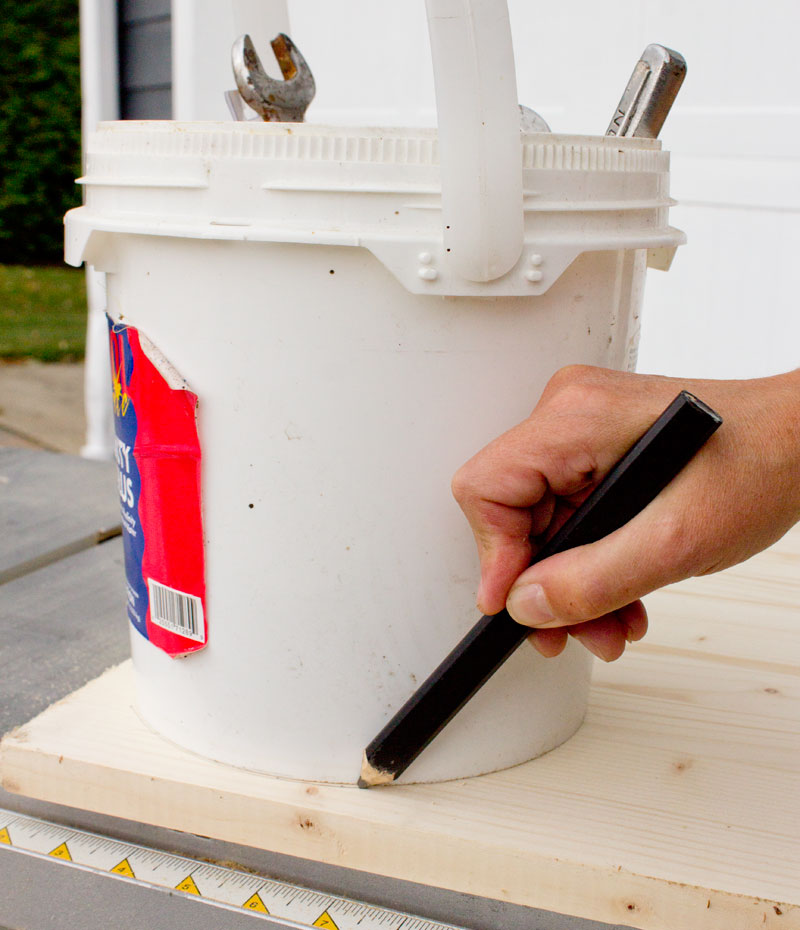
To create the stands for the trees, we started by tracing a circle onto some wood. A bucket full of old tools just happened to be the perfect size!
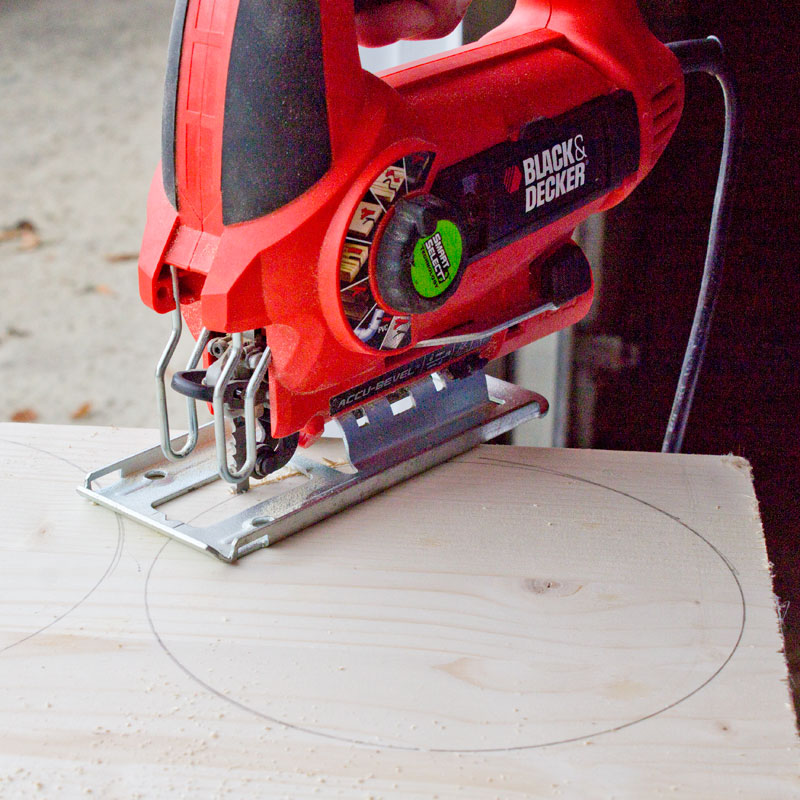
While I cut the circles out with a jigsaw...
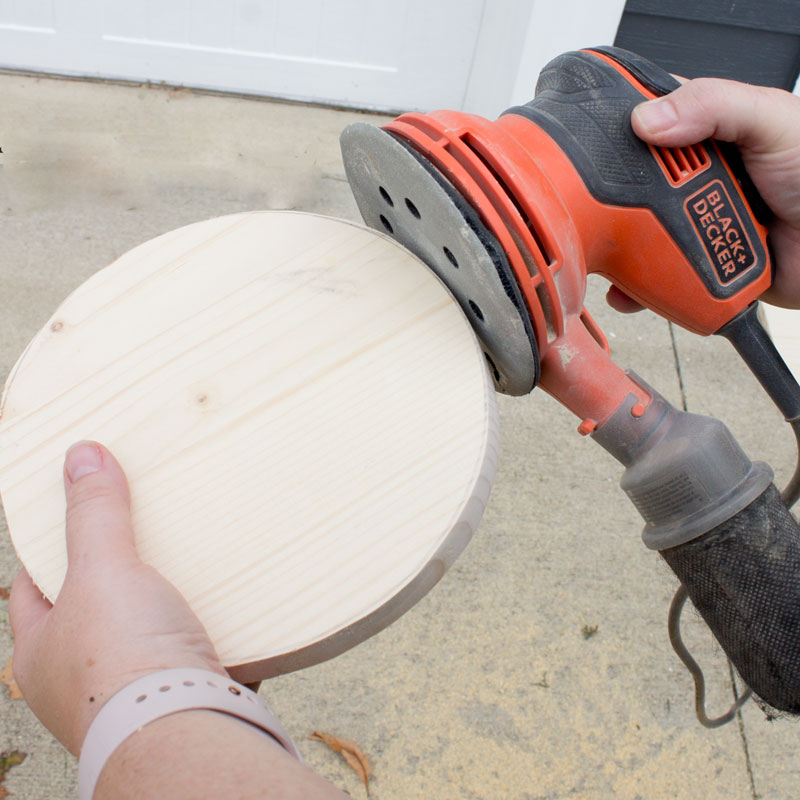
...Jo used an orbital sander to smooth the edges.
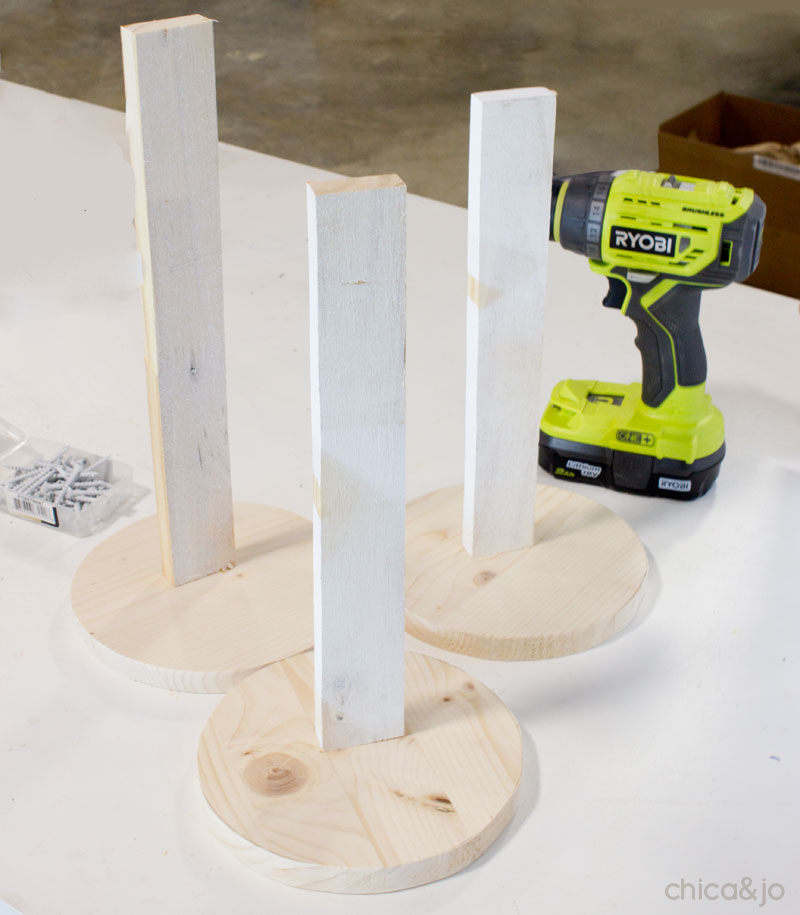
There was just one more thing to cut, and that was a piece for the trunk of the tree. I found a scrap of 1"x2" wood and cut three pieces, each about a foot long.
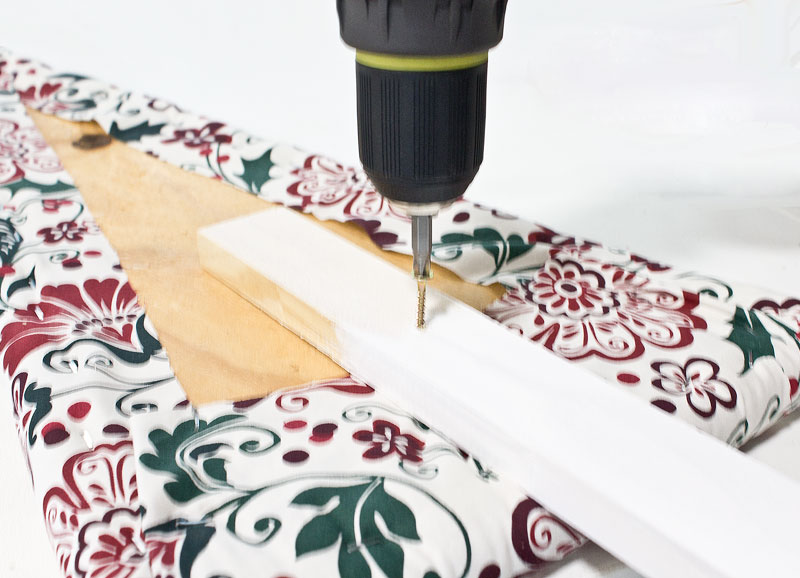
With everything cut, we headed back inside to my craft room to put it all together. I attached the trunks to the circles with a single screw from underneath, making sure to scoot the trunk back about 3/4" from center, so that the tree itself would be in the center of the circle when we attach it later.
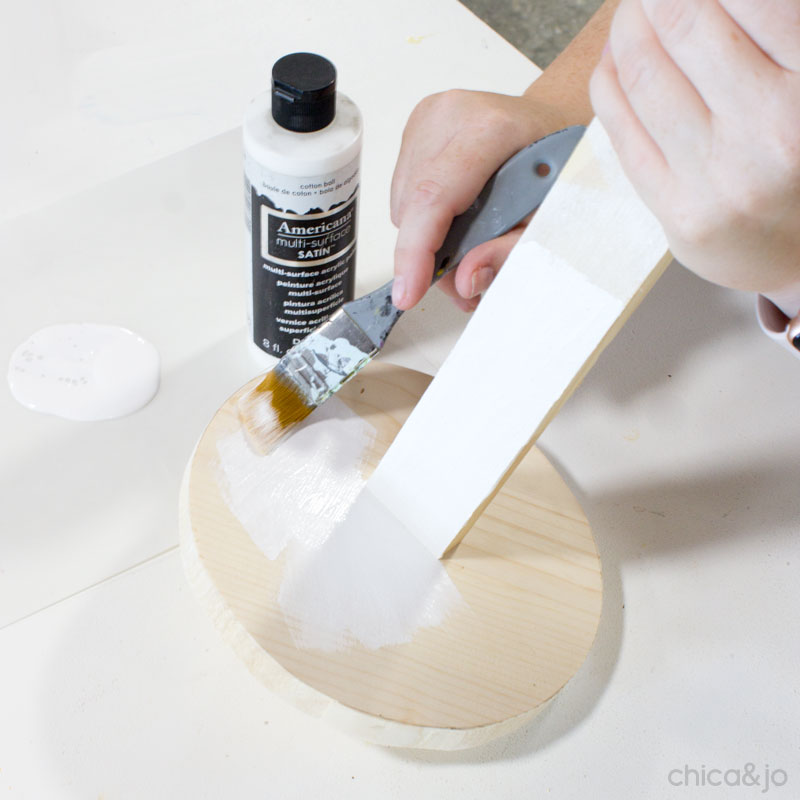
Then Jo painted the bases with a couple coats of white satin acrylic paint.
While the paint dried, we worked on upholstering the trees. We rolled out some 1" thick polyester batting on the table and traced the shape of the triangle, then cut it out.
Then, because I wanted the trees to be super thick and padded, we cut a second piece of batting. This time, though, we cut it about 2" bigger than the triangle, so that there was plenty to wrap around.
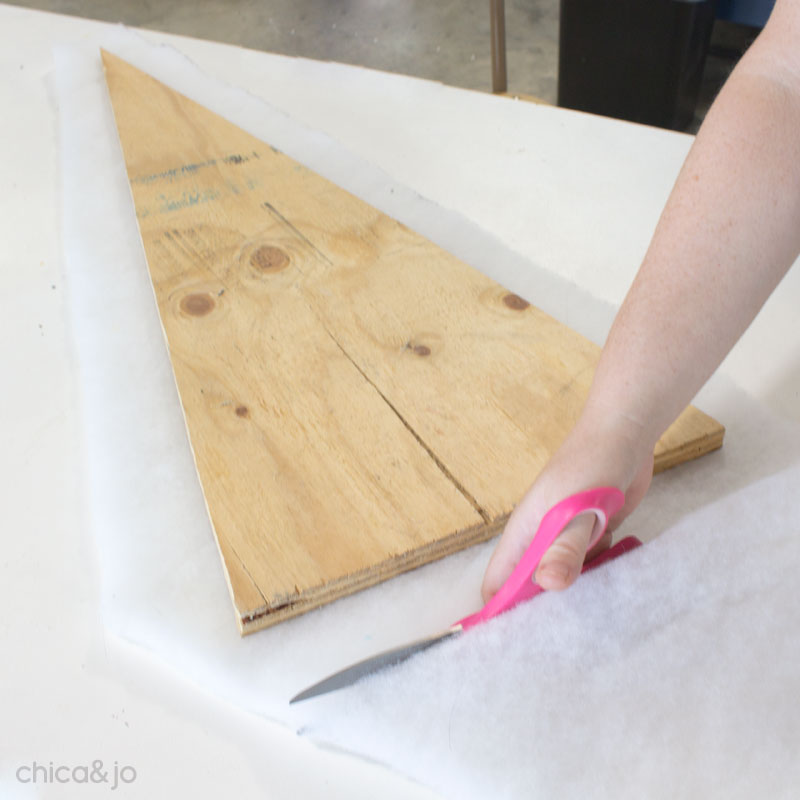
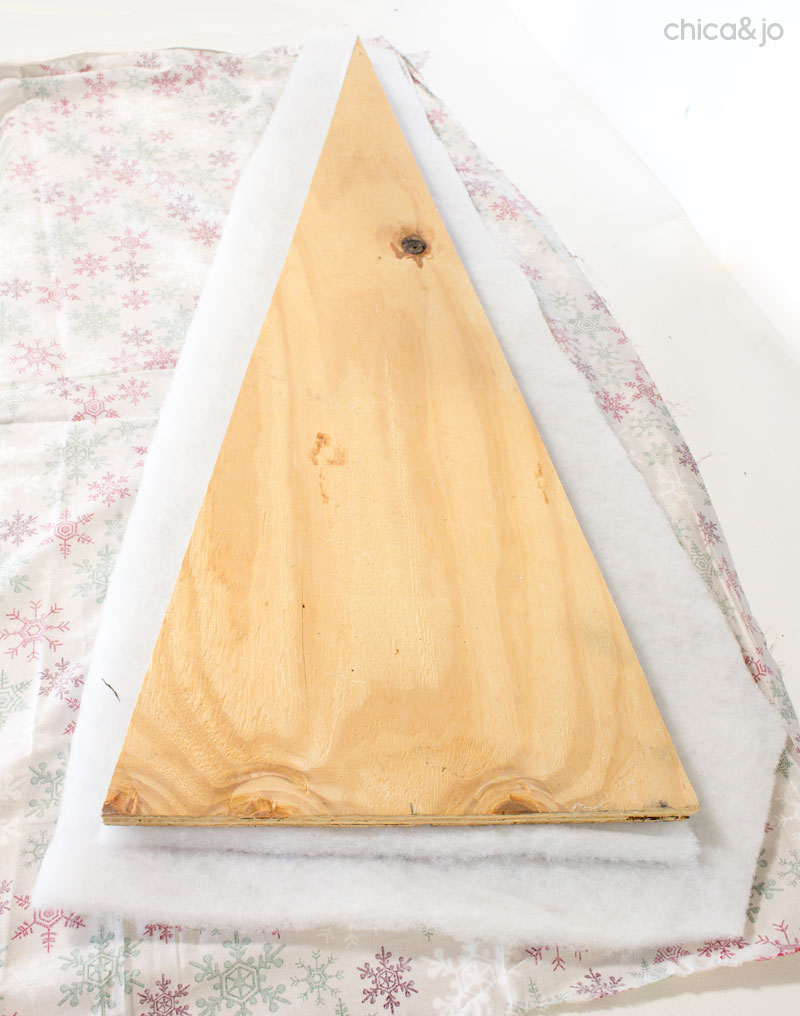
Time to upholster! We laid the fabric down on the table, face down, then put the big piece of batting on top, then the small piece, then the wooden triangle.
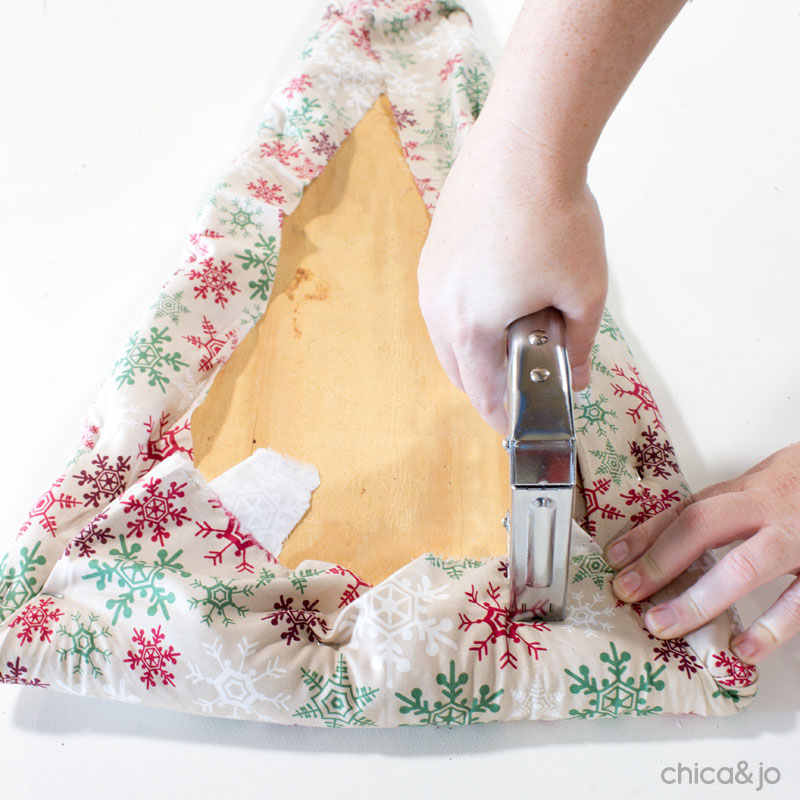
After trimming the fabric to size, we stretched the fabric around the edges and used our Arrow T50 staple gun to secure it in place.
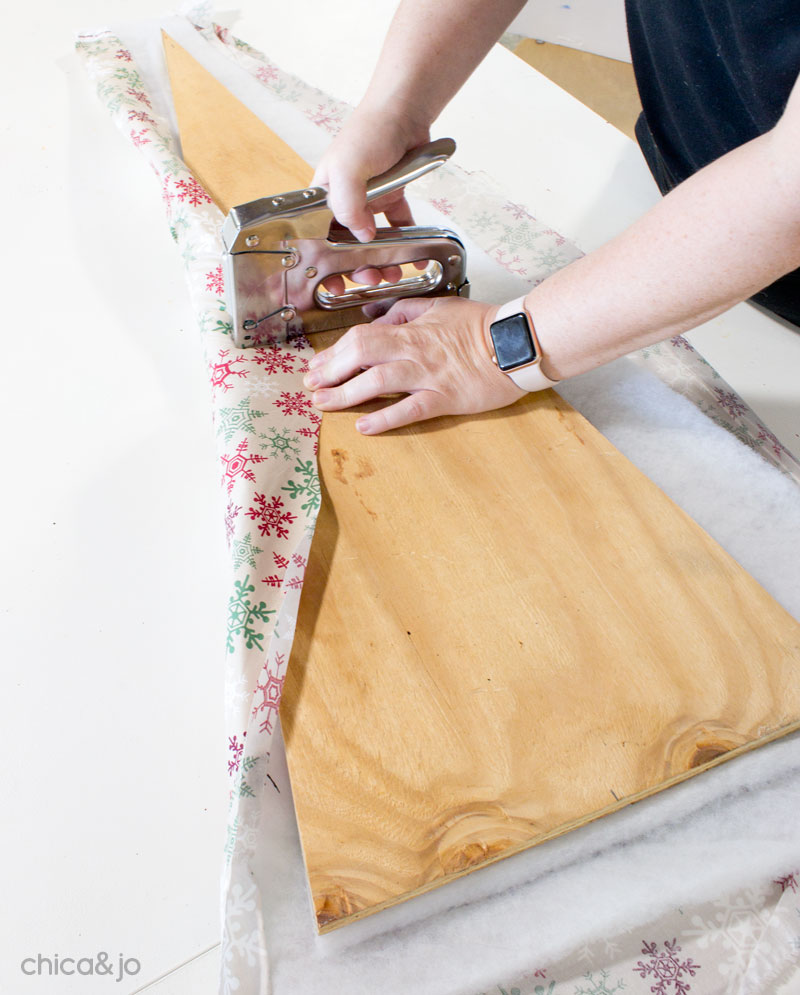
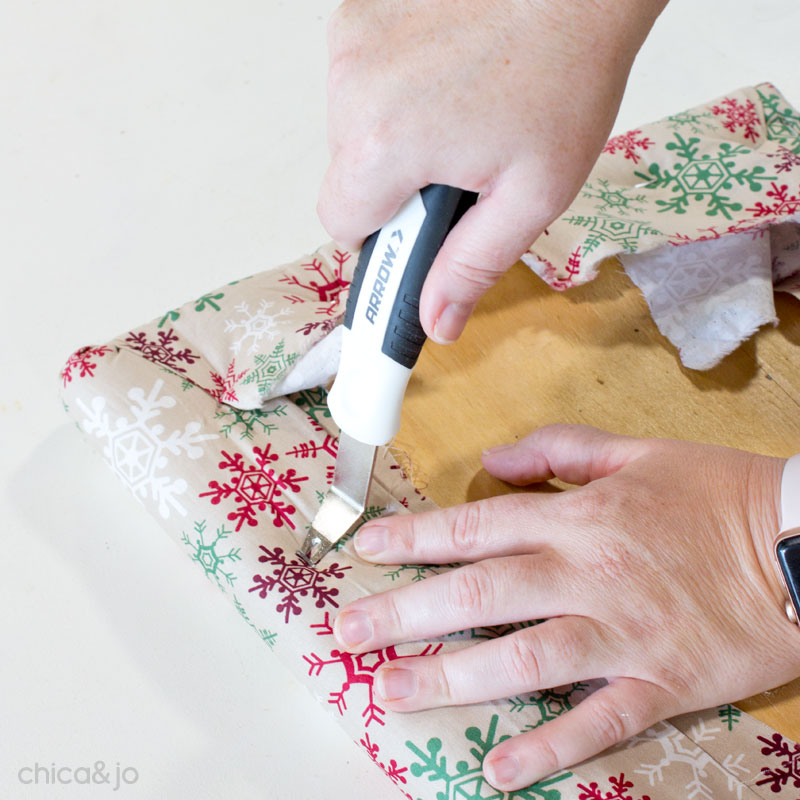
We worked our way around, pulling the fabric so it was snug but not too tight. By the way, a proper staple remover is great to have on hand if you're doing a lot of staple gun work. It's so much easier to remove mistakes!
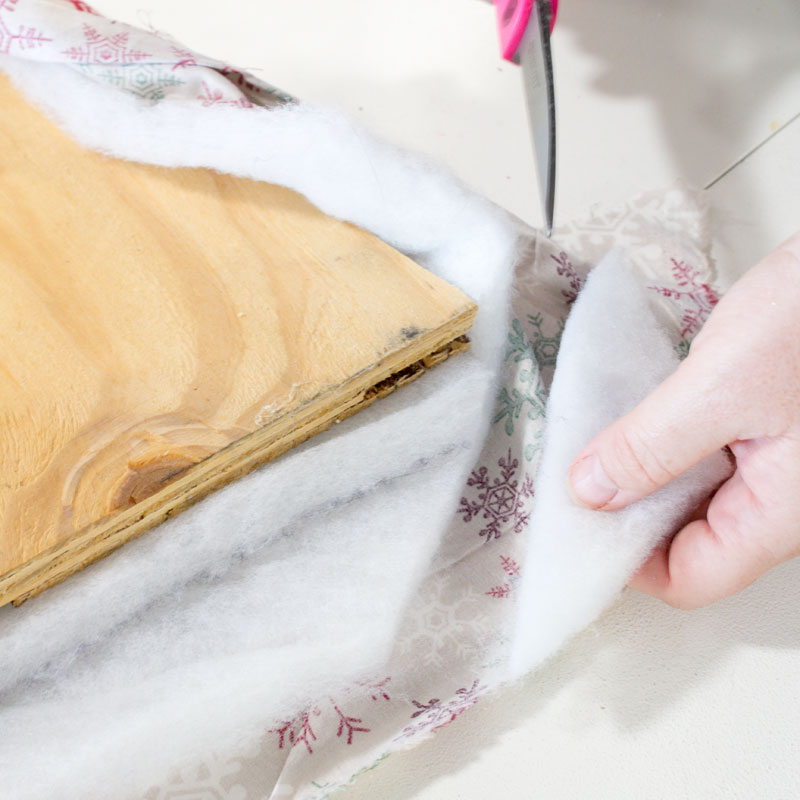
Wrapping the corners is a lot easier if you first remove the excess batting. Otherwise, there's way too much to try to fold in place and still keep a sharp corner.
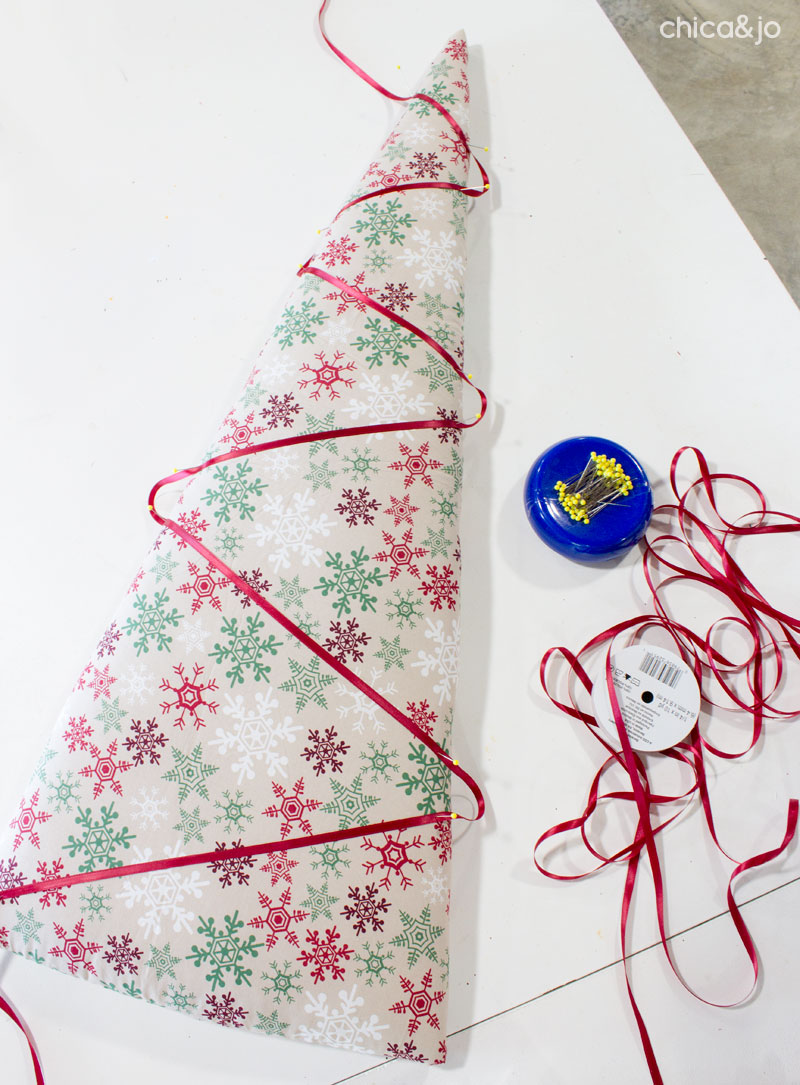
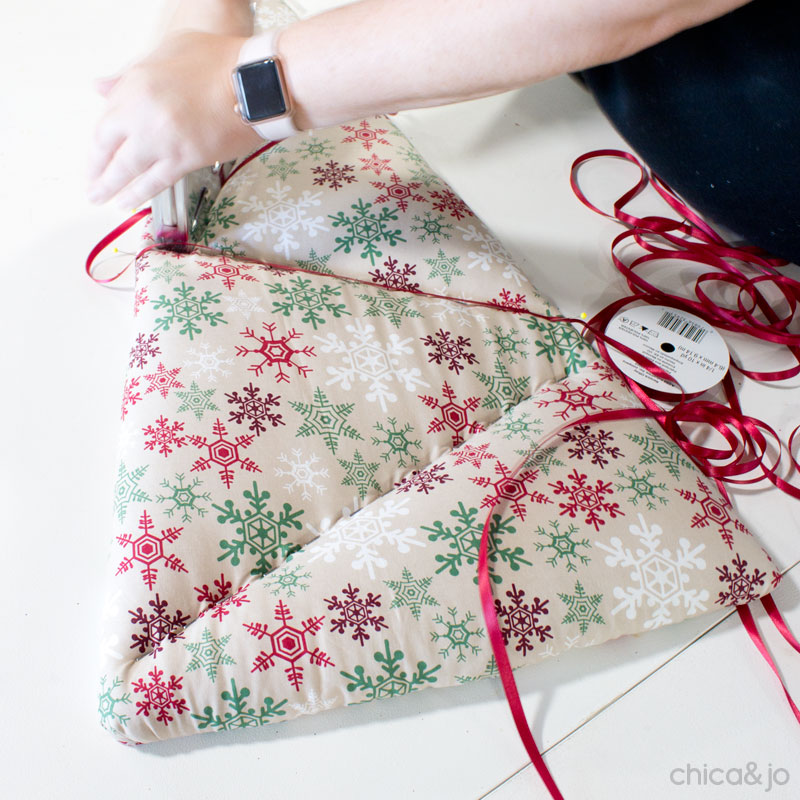
With the tree wrapped, it was now time to create the tufting to really give it some dimension. We started by laying out some thin ribbon to act as garland, and pinning it in place exactly where we liked it.
Then, using the ribbon as a guide, we stapled every inch or so next to but not through the ribbon.
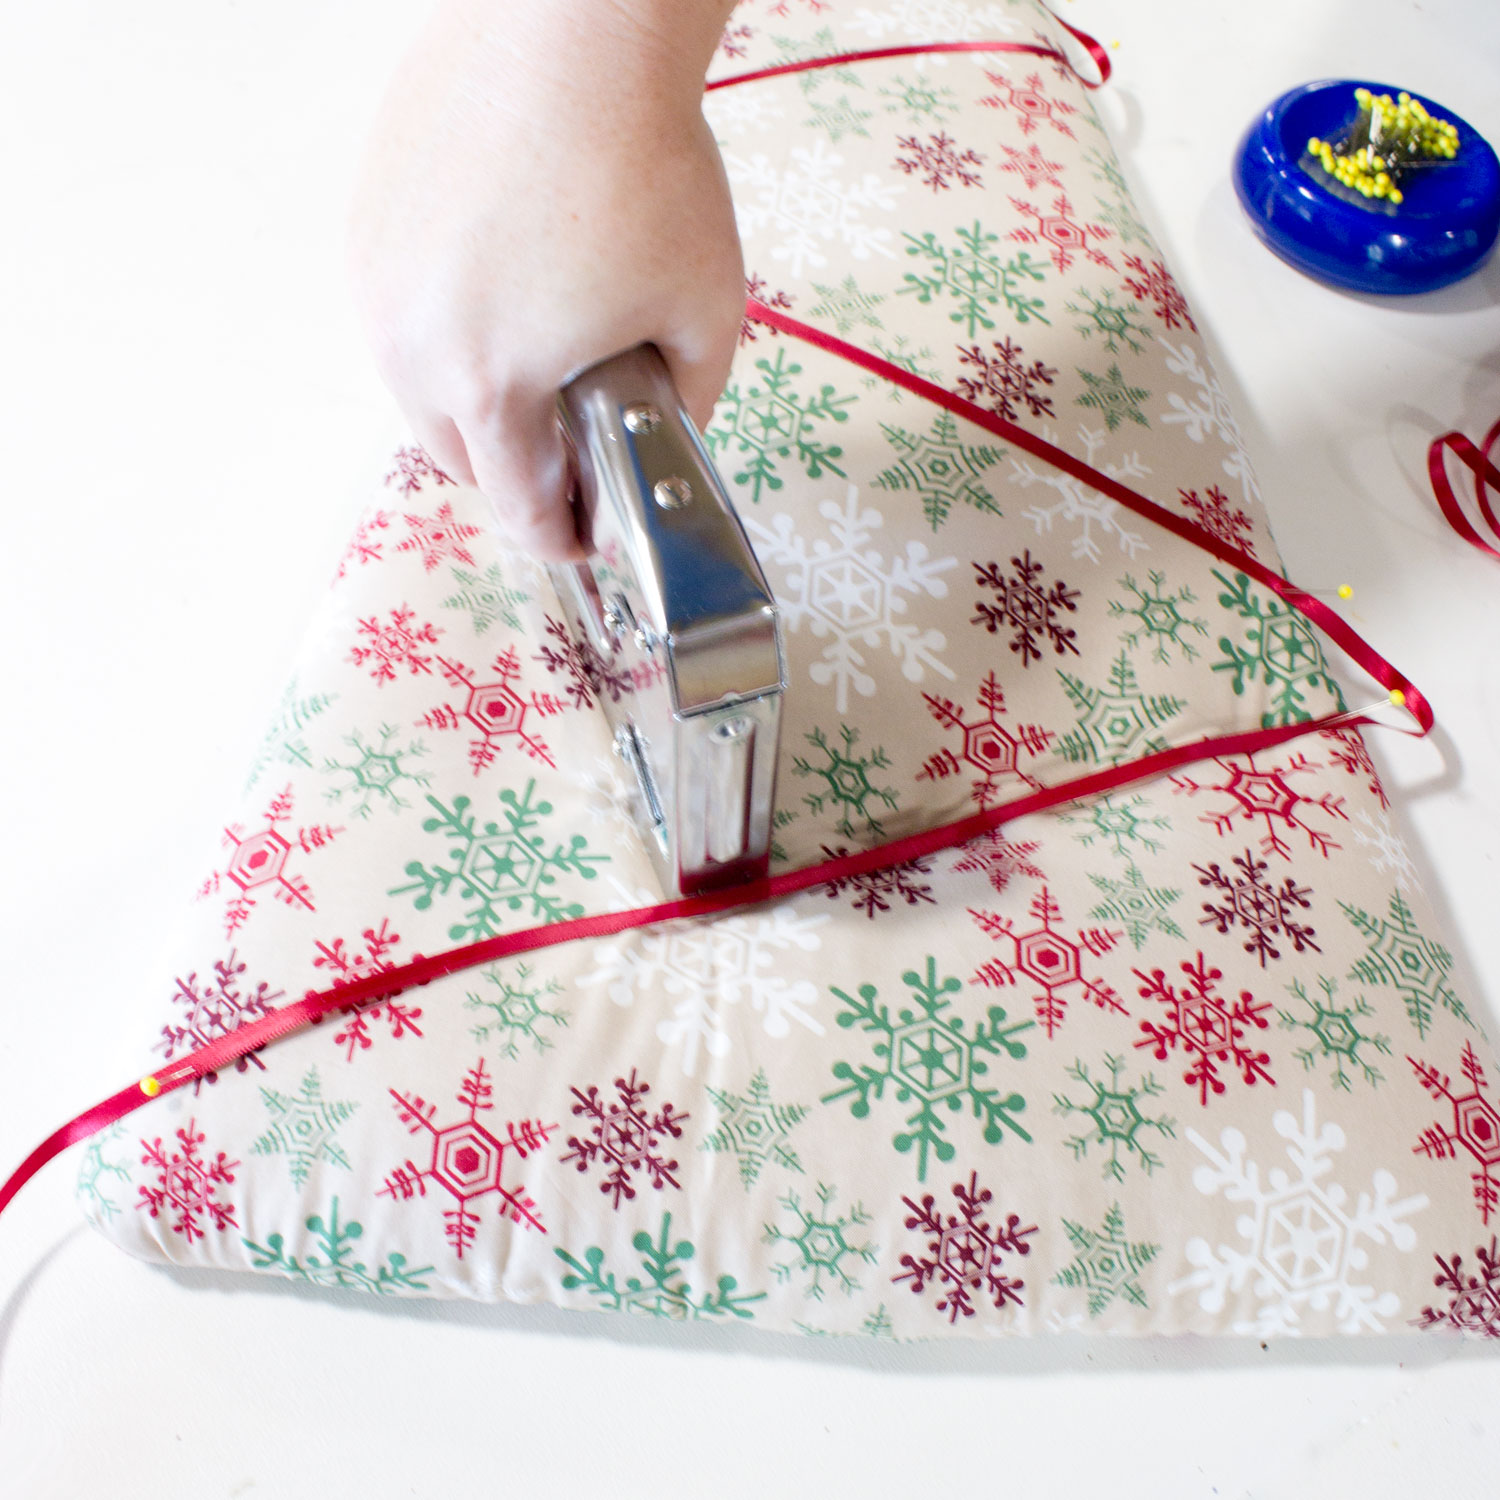
As each row was done, we removed the ribbon and moved on to the next row. The stapling gives the most delicously tufted effect, with way more dimension than we ever would have gotten from just wrapping the ribbon.
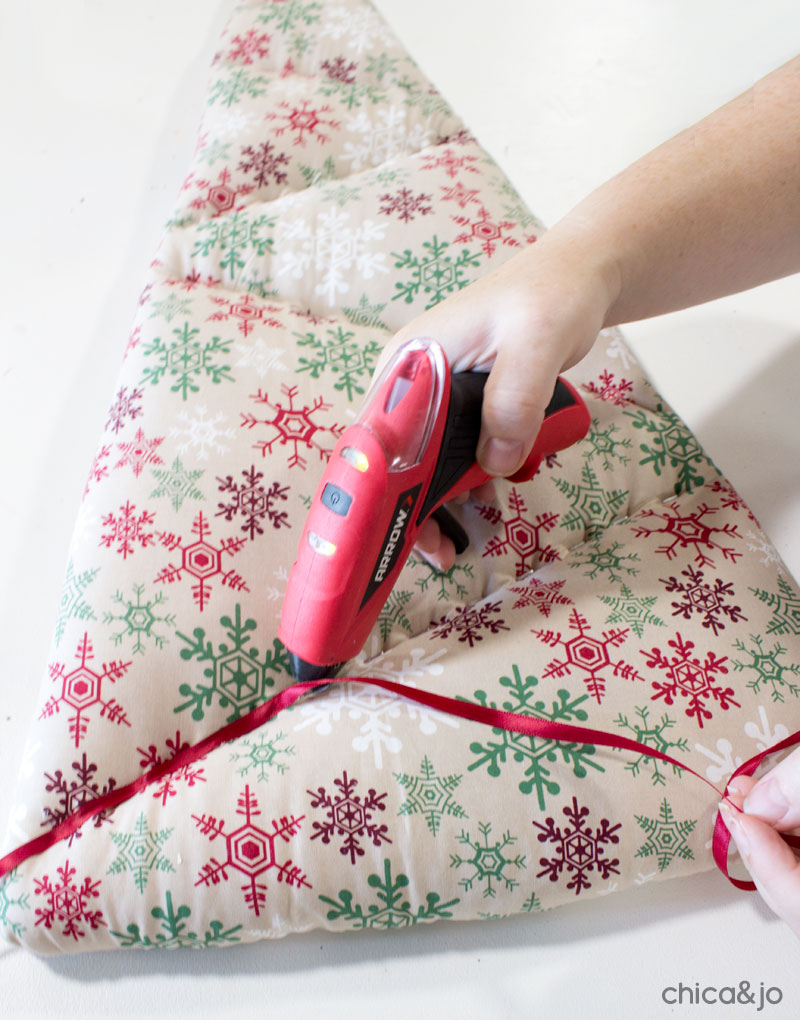
Then to cover the staples and finish off the look, we used an Arrow hot glue gun to glue the ribbon back in place.
We upholstered the two smaller trees in the same way, but opted not to tuft them. Then we screwed the bases into the back, and they were done!
I'm absolutely thrilled with how these came out, and we just love the easy tufting technique we created with a staple gun.
similar projects
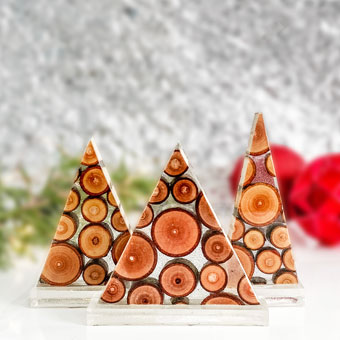
Christmas Trees Made from Resin and Wood Slices
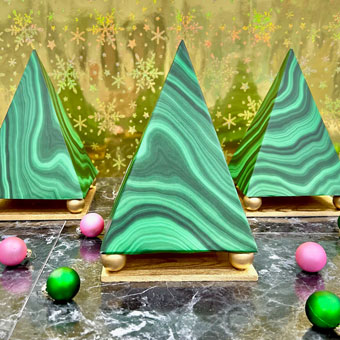
Faux Malachite Christmas Trees

Modern DIY Rainbow Christmas Trees


