


How to Make a Life-Size Barbie Box

When it comes to Barbie-themed parties, one of the most popular pieces of party decor is a life-size Barbie box photo booth that guests can step into for pictures.
We decided to make an adult-sized DIY Barbie box for our upcoming Barbie party. Etsy is full of giant Barbie boxes for your party, but the really authentic looking ones can get quite pricey, so we wanted to make our own.
VIDEO: Make a Barbie box photo booth
If you can't see the video, try viewing it directly on YouTube.
DIY Barbie box photo booth
Ready to make your own giant Barbie box to add to your party decorations and serve as a photo booth for your guests? We've got a full tutorial and printable templates to help you with this fun DIY project.
Supplies needed
To create your life-size Barbie box, you'll need the following supplies:
- Large cardboard box (from a sofa or fridge)
- Water-activated gummed paper tape
- Spray adhesive
- Light blue bulletin board paper
- Pink "Better Than Paper" bulletin board fabric
- Clear glossy Con-Tact paper (optional)
- White vinyl and Cricut or Silhouette cutting machine (optional)
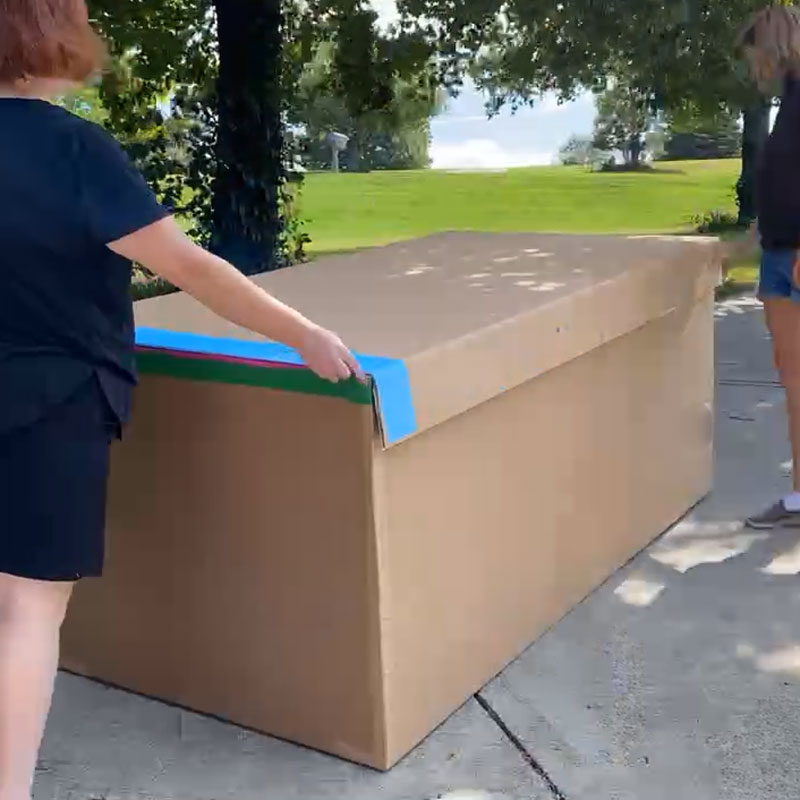
Step 1: Build the cardboard box
Many people make their giant Barbie boxes from foam core, poster board, or even wood, but we found a much easier way — we started with a giant cardboard box that was already almost the right size.
Couch boxes are your best bet, because they are very long and wide. Ours came from a sofa Jo got delivered to her house. It even already had a lip around the edges and a removable back. It was perfect!
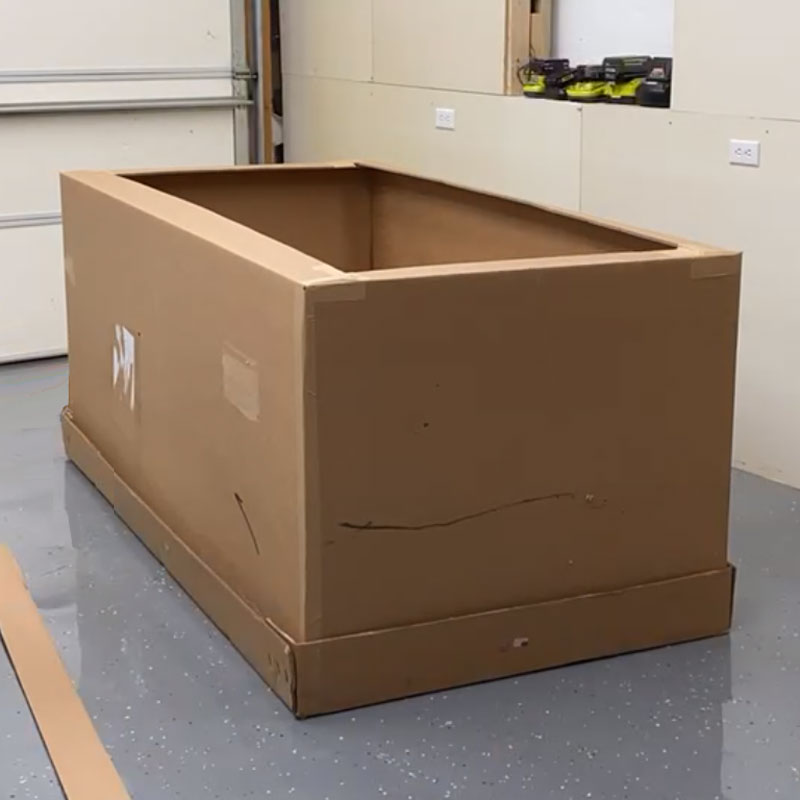
Ask around at local furniture stores to see if they have a sofa box they'll give you. You can also try appliance stores (refrigerator boxes) or HVAC companies (from heating/cooling units). You can also use a large wardrobe moving boxes, especially if you're only wanting a shorter, kid-size Barbie box.
If the box isn't quite the size or dimensions you need, you can trim it down to size. Ours was a bit long (the sofa was 8' long), so we trimmed some off the end to shorten it, making it about 7' long. The width was 40" which was just right for either one or two people to stand inside.
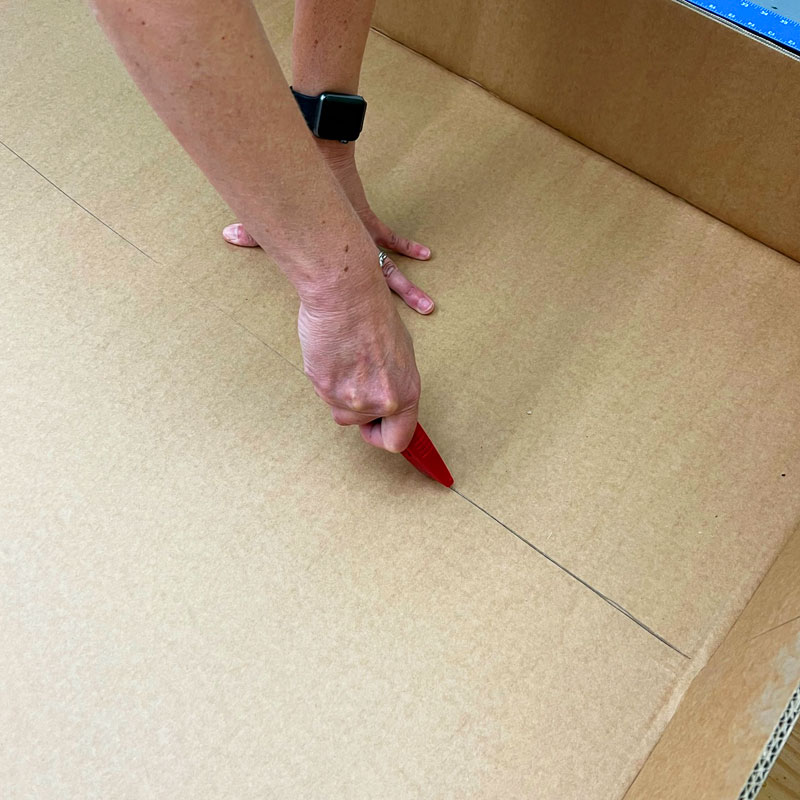
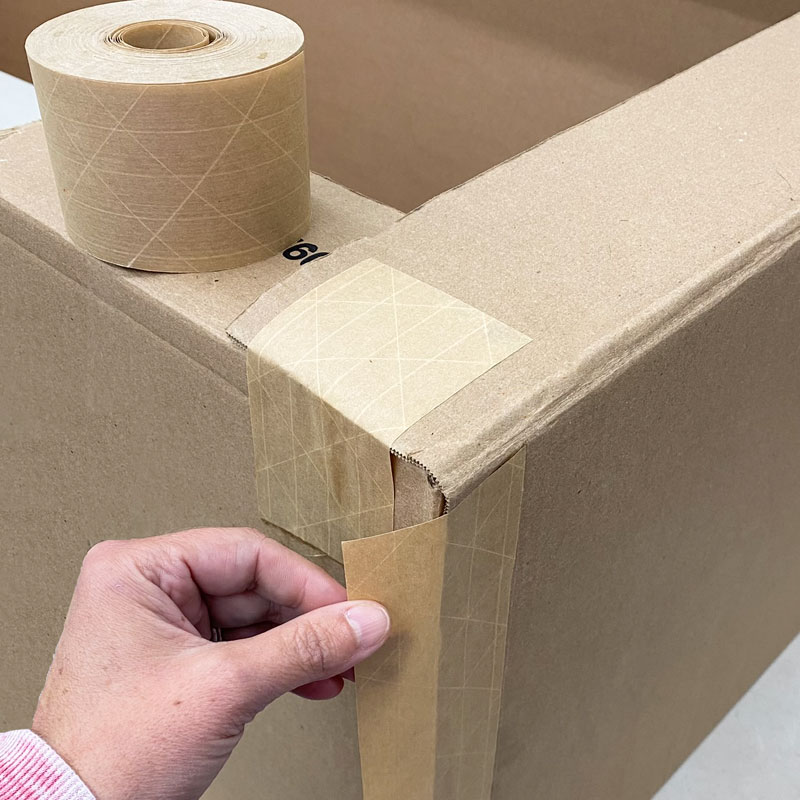
To reattach the cut cardboard pieces after trimming the length, we recommend you use water-activated gummed paper tape on all your seams. Trust me — duct tape or hot glue will not hold long-term on cardboard, but this paper packing tape is so easy and works SO WELL.
Just wipe the tape with a wet sponge to activate the adhesive, then place it over the seams or wherever you need to connect two pieces of cardboard. It will stick almost instantly and holds incredibly well. You'll have smooth edges and reliable adhesion.
If you can't find a large sofa box to build your Barbie photo booth, you can also build your own box from large sheets of cardboard, held together along the seams with the paper tape.
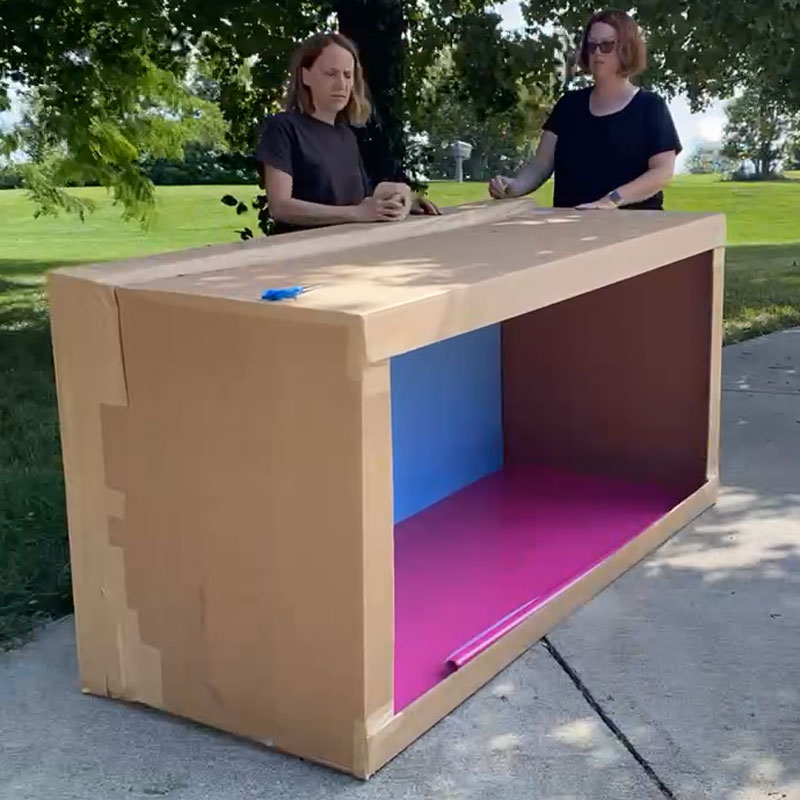
Step 2: Wrap the box in pink and blue
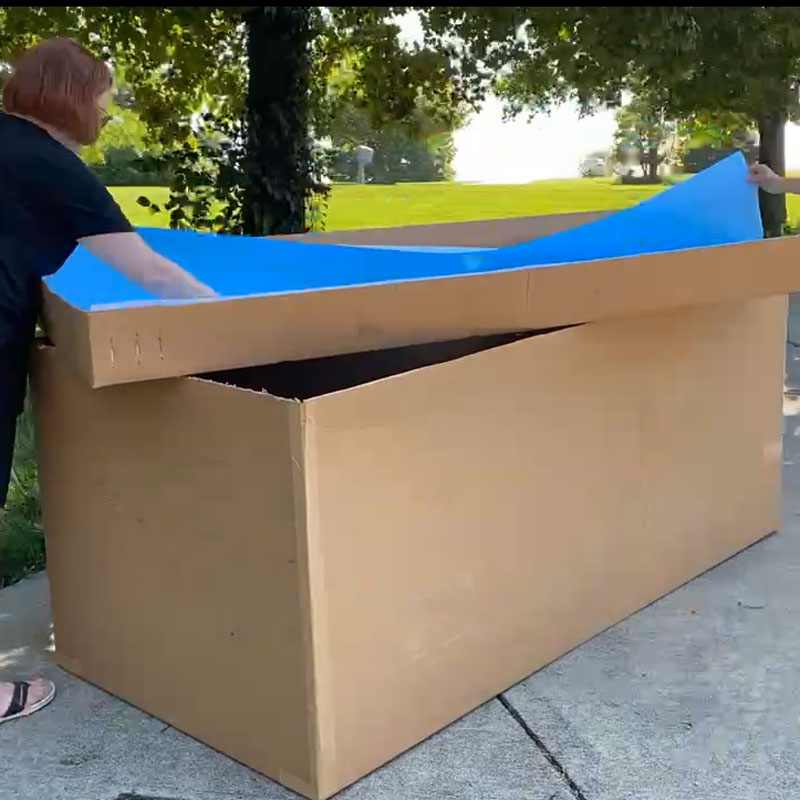
With the box built, it's time to add some color. We started by covering the inside of the back panel of our sofa box with light blue bulletin board paper, which we adhered with spray adhesive.
Then we moved on to the sides of the box, which we covered in pink "Better Than Paper" bulletin board fabric. This plastic-feel fabric material is perfect for creating the glossy, toy look you want for a Barbie box.
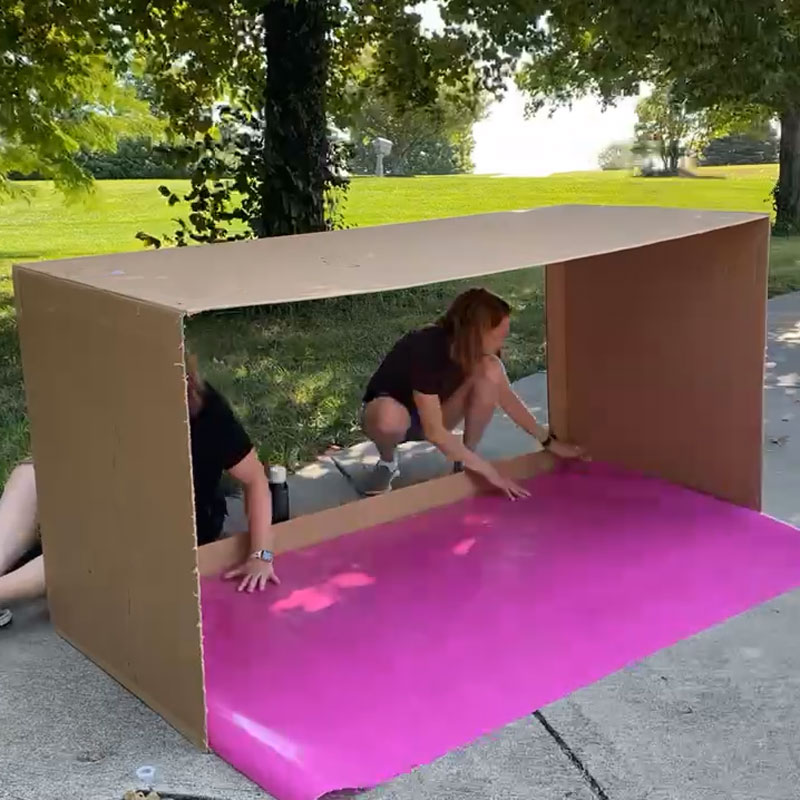
We used spray adhesive to attach the pink material, covering the inside sides and top of the box. We left the bottom unfinished for now (more on that later).
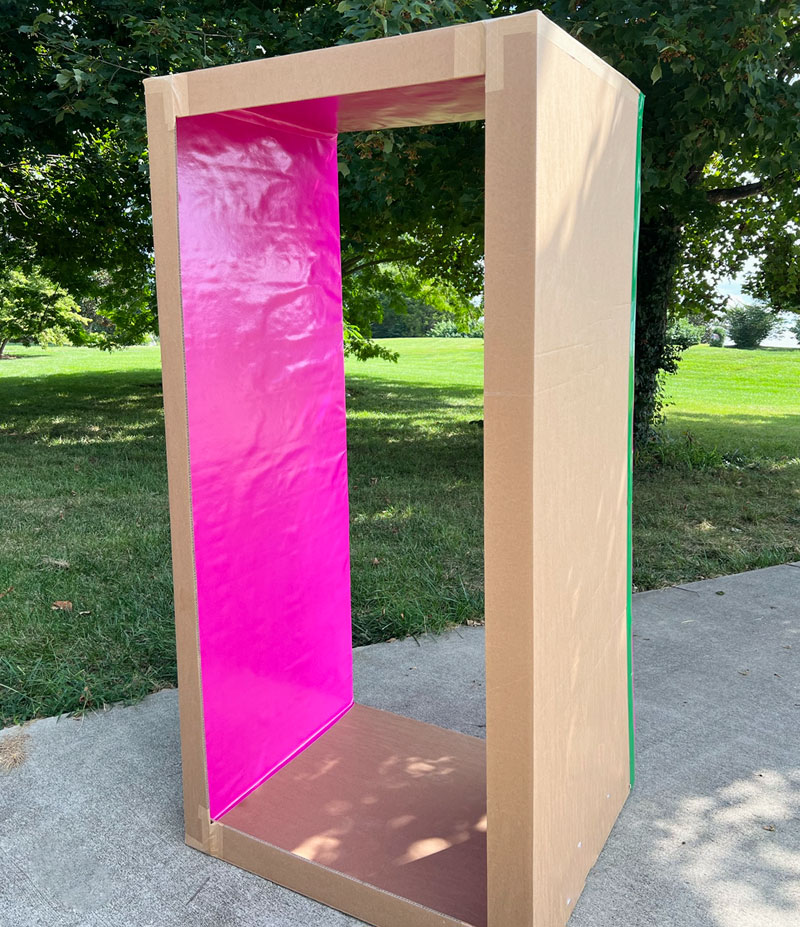
Then we put the blue back panel onto the box. This was an extra step for us because our box had a removable back, but if your box is all once piece then you can skip this step.
We used more water-activated gummed paper tape to seal up the edges of our back. This tape works so well for this, and the embedded fibers make it so strong and sturdy. (If you're ever tried to open an Amazon shipping box without scissors, you know what I mean!)
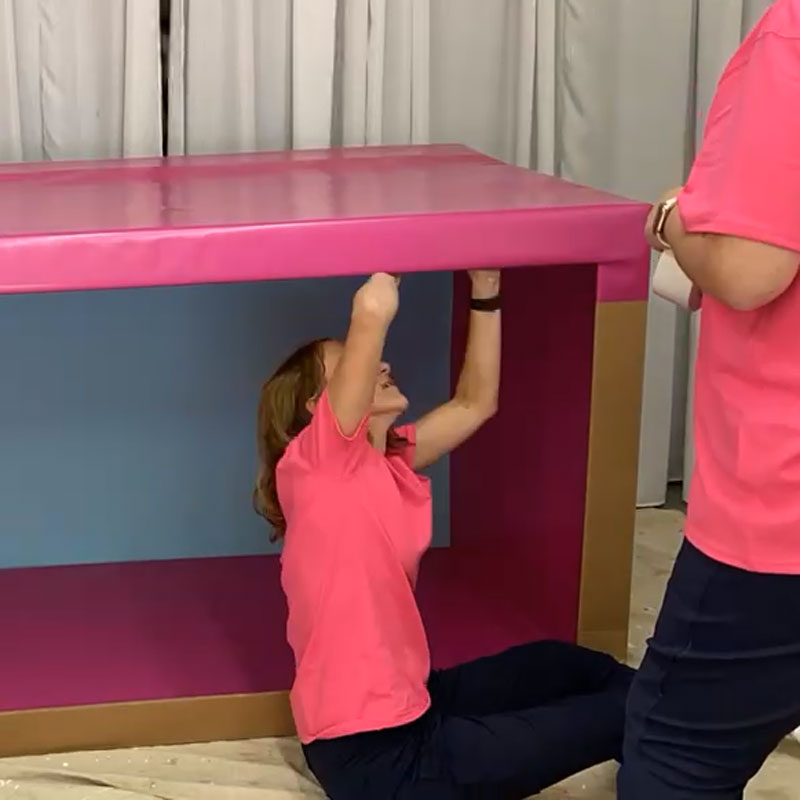
Finally we were ready to cover the outside of the box. We used more pink Better than Paper fabric, wrapping it around the sides of the box.
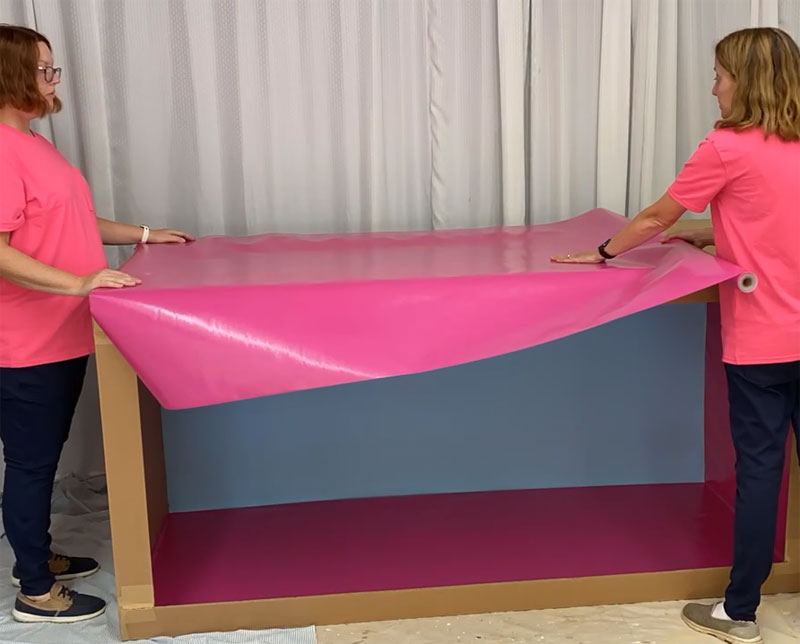
This stuff is so great! It doesn't tear or wrinkle, making it perfect for wrapping around the box edges. It's also super durable and wipes clean, so it will hold up great at a party.
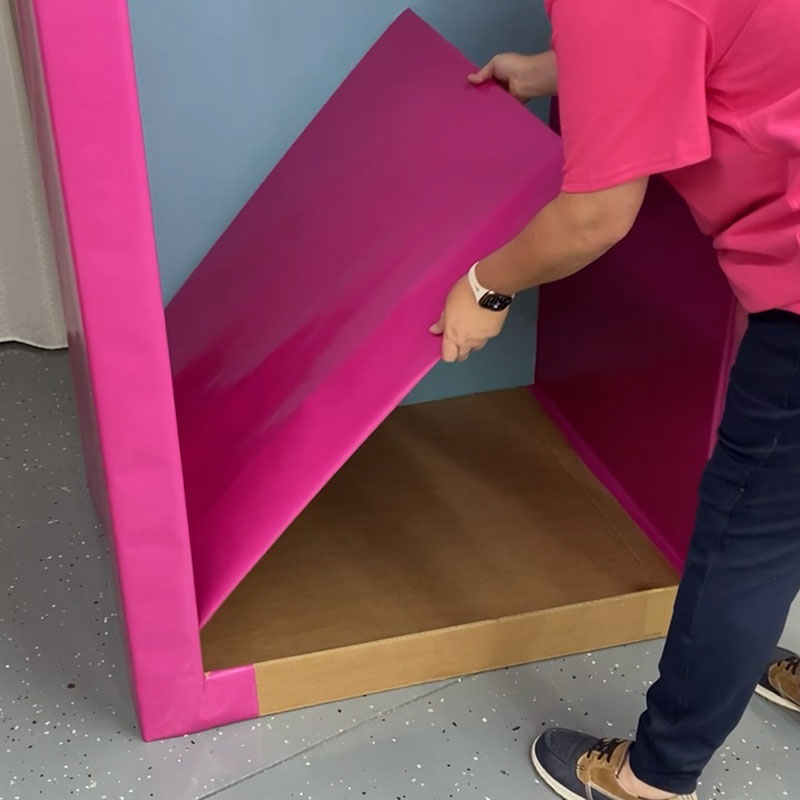
For the bottom of the box, we cut a piece of cardboard to size and covered it with a sheet of the pink material, then plopped it in place. We made this piece removable so that it could be wiped clean if needed, or replaced easily if damaged by people standing on it.
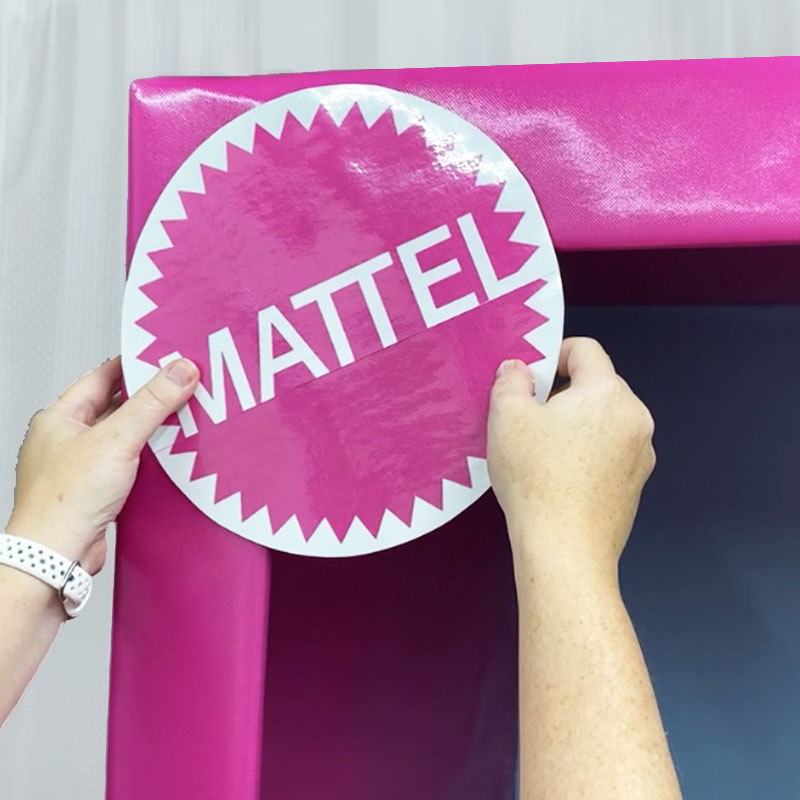
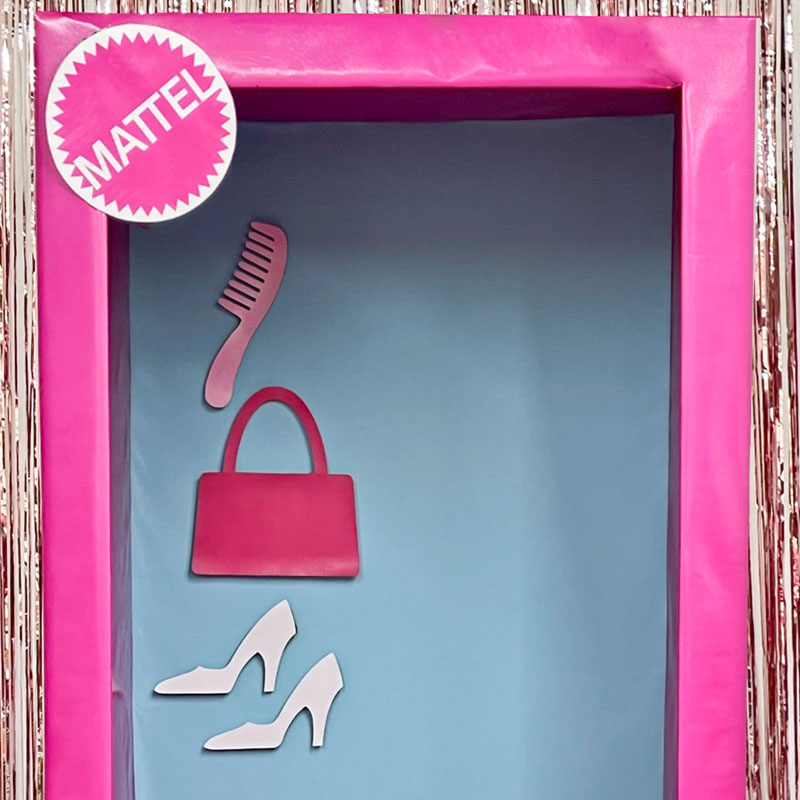
Step 3: Add the Mattel logo
With the base of the box built, it was time to add signage to transform it into a Barbie box.
The first thing we added was the Mattel logo. We created a Mattel Sign Template that you can download and print to make a logo to add to your Barbie box.
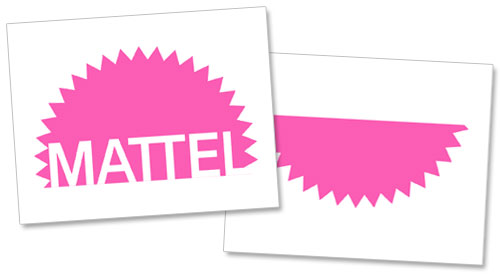
We printed this two-piece logo into paper, taped it together, and cut it into a circle. To make it glossy to match the toy look of the box, we covered it with clear glossy Con-Tact paper.
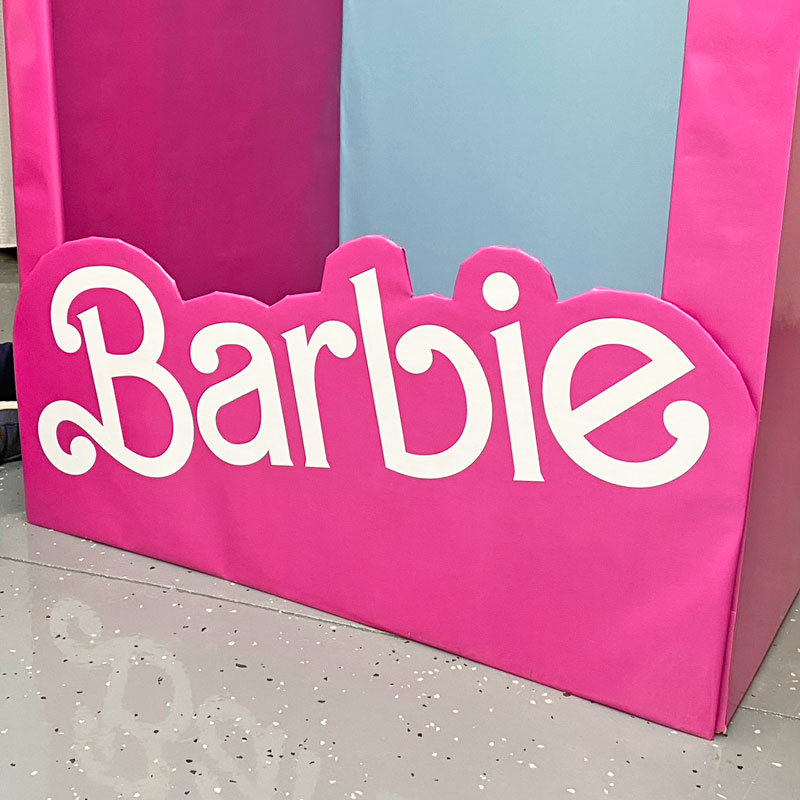
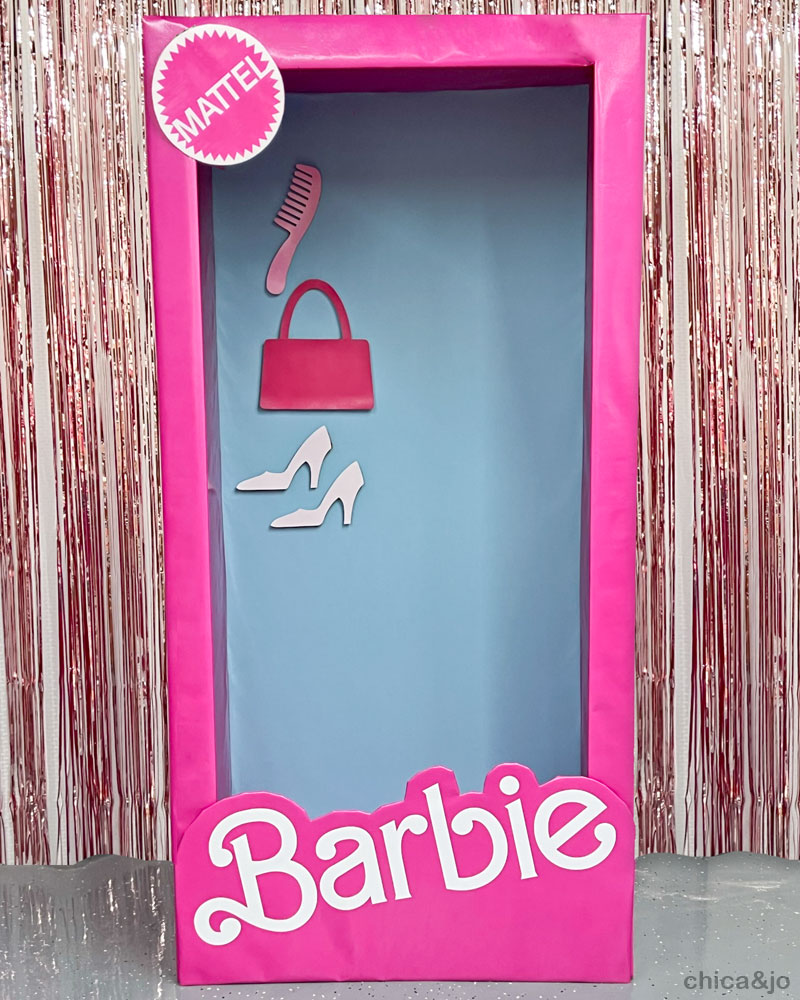
Step 4: Add the Barbie sign
Next, we needed to add a giant "Barbie" across the bottom, in that classic Barbie font. This is the kind of thing that might need to be customized based on the size of the box you create, so we've got two options for you on how to DIY the Barbie sign.
Option A: Print one of our sign templates
To make this as easy as possible for the DIYer, we created a set of printable Barbie signs available for purchase that includes three different files to meet various needs:
PURCHASE NOW!
Barbie Sign Bundle — $4.99
from here immediately after your purchase is complete*.
Have questions? Email us at chicaandjo@chicaandjo.com
* Files may be downloaded a maximum of 5 times.
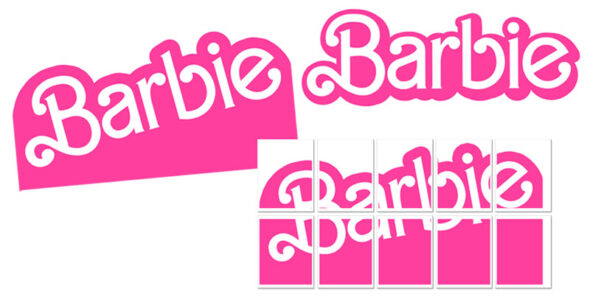
This set of designs includes three files:
- An angled sign with pink background (high-res PNG file that can be printed up to 40" wide)
- A straight sign with no background (high-res PNG file that can be printed up to 40" wide)
- A 10-page sign (in PDF format) that can be printed onto standard 8.5" x 11" stock and taped together to create a 40" wide sign.

NOTE: You are welcome to have the large files printed anywhere you like, but we cannot predict store policies or guarantee whether or not individual print shops will print this design.
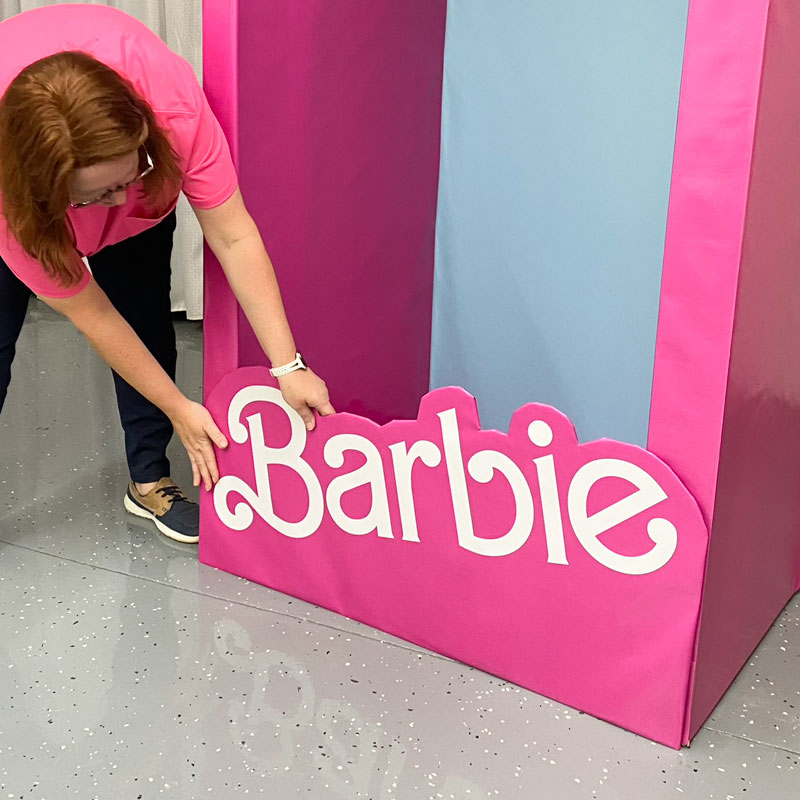
Once you've printed your chosen sign template, attach it to a piece of cardboard for stability, then stick it on the front of your Barbie box.

Option B: Cut the words out of vinyl
Option A will work for anyone, but if you've got access to a Silhouette or Cricut machine and can cut vinyl, you might want to cut the sign out of vinyl for a more high-end look.
I created a giant white vinyl "BARBIE" decal with my Silhouette using the Bartex font and attached it to a piece of cardboard that I had first covered with pink.

We stuck the sign onto the front of the box, on the bottom, and secured it with plenty of hot glue. Oh my goodness, this made such a huge difference!
Step 4: Add Barbie's accessories
The last thing to add to our life-size Barbie box... the thing that really made it look like a real toy box that was larger than life... was a set of Barbie's accessories. She always came with accessories wired to the back of the box, right? We had to have them.
So we designed a set of printable templates to create three classics: Barbie's comb, purse, and iconic high heeled shoes. Just download and print!
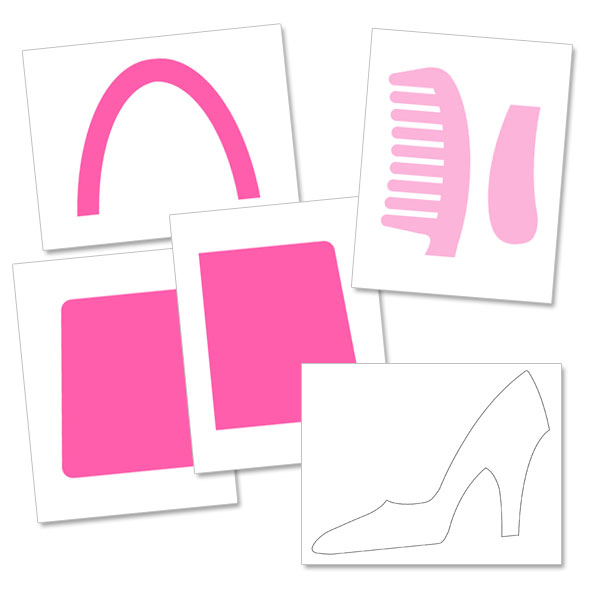
We printed these accessories onto cardstock and then backed them with some scrap cardboard for stability. Then we used double-sided tape to stick them onto the back of the Barbie box.
Enjoy your life-size Barbie box photo booth
And with that, our giant Barbie box was done and ready for the party! I mean... c'mon... this is sheet perfection, right?
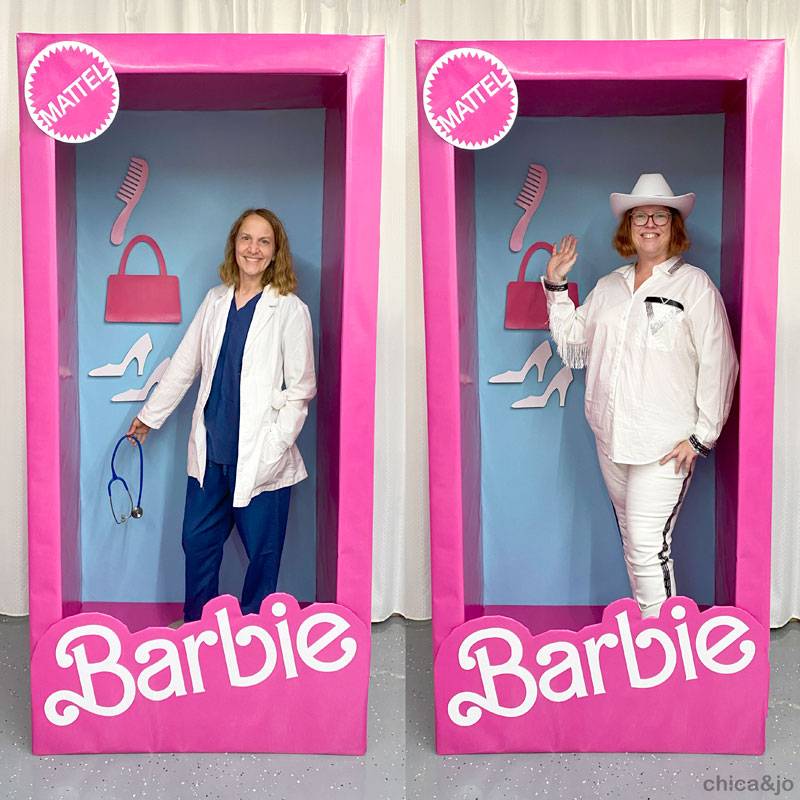
You know Jo and I just HAD to join in on the fun, and dress as some of our favorite Barbie characters. I dressed as Doctor Barbie, and Jo went wild as Western Barbie. Aren't we fab?
Where to buy Barbie box props for parties
If making your own Barbie box still seems like too daunting a task, or if you're just limited on time before your Barbie party, don't worry... there are tons of options available for life size Barbie boxes for sale on Etsy.
For a quick slide show of this project, check out our DIY Barbie Box photo booth web story!
similar projects
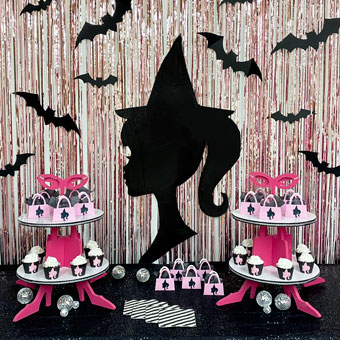
Barbie Halloween Party Decor for Barbieween
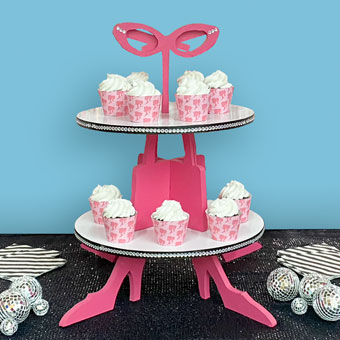
DIY Barbie Cupcake Stand
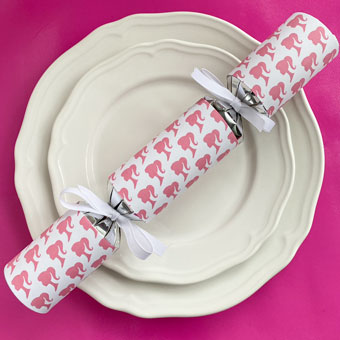
DIY Barbie Party Favors Christmas Crackers


30 comments so far:
Your Barbie box came out great! How many rolls of pink better than fabric did you use? How many rolls of blue? And what size roll of white vinyl? What size roll of tape? Thanks
Debra, thank you so much! We used three rolls of the pink (our box was quite large and we didn't want any seams, so we used a fresh piece on each side) and one roll of blue. The white vinyl was from a 12" wide roll and we used about 40" of it, although you size will vary depending on how wide your box is. The gummed paper tape was something we had on hand already, so I don't recall the size of the roll, but we used less than a quarter of it so even a small size roll should be plenty for you. Hope that helps!
This is so amazing. Thank you for the templates!!!!
Hi girls, thank you so much. This was a perfect tutorial for me. Every Halloween I do my skeletons a different theme and this year I did a Barbie dance party. I’ll try and post a picture but I’m making a large Barbie box exactly like the one you guys made for Halloween night for the kids to take pictures in. I’m having a hard time finding that pink that you guys used there’s a coral pink and there’s a hot pink that fades to orange but I’m having a hard time finding just the hot pink. Any suggestions?
Cindy, we're so glad we could help... a skeleton Barbie prop sounds amazing! If you share pictures online, please tag us @chicaandjo so we can see how it came out!
As for the pink Better Than Paper, it seems we turned the world on to something here because it's selling out everywhere! You definitely want to find the hot pink if you can, not the fading orange one. It's sold out on Amazon, so your best bet is teacher supply stores (either physical or online). We found it available here at Discount School Supply.
Which spray adhesive did you use? I clicked the link that you provided, but it was just a general page with all kinds of spray adhesives
Also, what are the dimensions of your box? I saw that you said it was 7ft tall. What was the width?
Sophia, just about any high-tack spray adhesive should work. We ended up using a couple different cans we had on hand :)
And our box was about 38" wide, but that's because that's how wide our starting sofa box happened to be.
Hi, thank you so much for this information! Could you kindly let me know the dimension of the pink better than paper when rolled? I am asking because I want to figure out if it could fit my luggage or if I could bring as carry on in a flight.
Alex, the roll is 48" long. I don't have a full roll anymore to measure the diameter, but I'd say it's somewhere between 3 and 5 inches.
Your tutorial is fantastic! I am currently making two boxes, one for Barbie and one for Ken.
Hi This is Beautiful. What's the final size of the whole box?
Jenethe, thank you! Our finished box was 7' tall, 40" wide, and 33" deep.
How did you prepare the piece of cardboard that you put the “Barbie” vinyl on at the bottom of the box so that the outline matches the letters. In other words it appears offset. I’m not sure what to use as a guide to cut it. Thanks!
Cheryl, I used the multi-page printable PDF from our bundle as the pattern and cut it out to match.
Incredible! You are both so talented and imaginative ? I hope my mini size one will turn out just as nice for my daughter’s Mermaid Barbie 3rd birthday party!?
Alexandra, thank you so much! If you share your creation on social, be sure to tag us @chicaandjo so we can see!
Whatis the size of the hole of the frame? Also how wide is the frame of the hole from the corner of the box to the opening if that makes sense?
Melisa, I don't the box anymore to take measurements, so hopefully my best guesses will work for you. Our box was 38" wide, and the frame was about 4" wide on each side, so that would make the opening about 30" across. Hope that helps!
How many rolls of the pink paper did you need ?
Christina, we used three rolls of the pink (our box was quite large and we didn't want any seams, so we used a fresh piece on each side). You could possibly get away with two rolls if your box is smaller and you don't mind seams.
Hi I was wondering after printing out the “ barbie” template how would I tape them and cut them out exactly?
Tiara, take a look at the "tiled" example in this photo up in the post. It shows that the sign prints onto 10 pages. You would trim the white off the edges of those pages and then tape them together.
What font did you use to create the Mattel logo, I would like to use vinyl for that since my Barbie box is wood?
Kiona, the font is linked to up in the tutorial :)
I used your instructions and printed out the signs for an upcoming figure skating competition. I used pool noodles on the bottom to keep it waterproof, and it turned out amazing! Thank you so much!
Haley, I'm so glad to hear you enjoyed this project! And that was a brilliant idea to waterproof it with the pool noodles :)
Thank you!! This tutorial was amazing our box came out great!!
Ellie, I'm so glad to hear it! If you share pics online, please tag us @chicaandjo so we can see! :)
I’m wondering how you only used 3 rolls of the pink paper. I’m going off of similar dimensions only a tad smaller in depth and width but still 7’ tall and seem to have only enough from one roll for one side, I feel I missed something either in comments or instructions.
Rachel, are you sure you're using the Better Than Paper material we recommend? The rolls of that are 4' wide and 12' long, but it sounds like whatever you're using is much shorter than that.