


DIY Barbie Cupcake Stand

If you're having a Barbie themed party and want to serve Barbie cupcakes, what better way to display them than on a Barbie themed cupcake stand?
We've got all the details you need to create your own DIY Barbie-themed cupcake holder featuring 3 classic Barbie accessories: her standby heels, a handy purse, and those iconic sunglasses.
VIDEO: Make a Barbie Cupcake Stand
If you can't see the video, try viewing it directly on YouTube.
Make a cupcake stand for a Barbie themed party
We've made it as easy as we can for you to create your own cupcake stand that will fit right in at your Barbie party. I'll show you how to create perfectly pink, oversized, classic Barbie accessories, then we'll assemble them to make a two-tiered serving stand.
Supplies needed:
To create your Barbie-themed cupcake stand, you'll need these supplies:
- About 3 sqft of 1/2" thick wood
- Two wood circles or trays (ours were 13" and 14")
- Carbon transfer paper
- Gloss Berry Pink Rust-Oleum spray paint
- Gloss White Rust-Oleum spray paint
- Adhesive silver rhinestones
- Black craft paint
- Hot glue gun
- Drill and bits
- Small wood screws
- Scroll saw or jigsaw
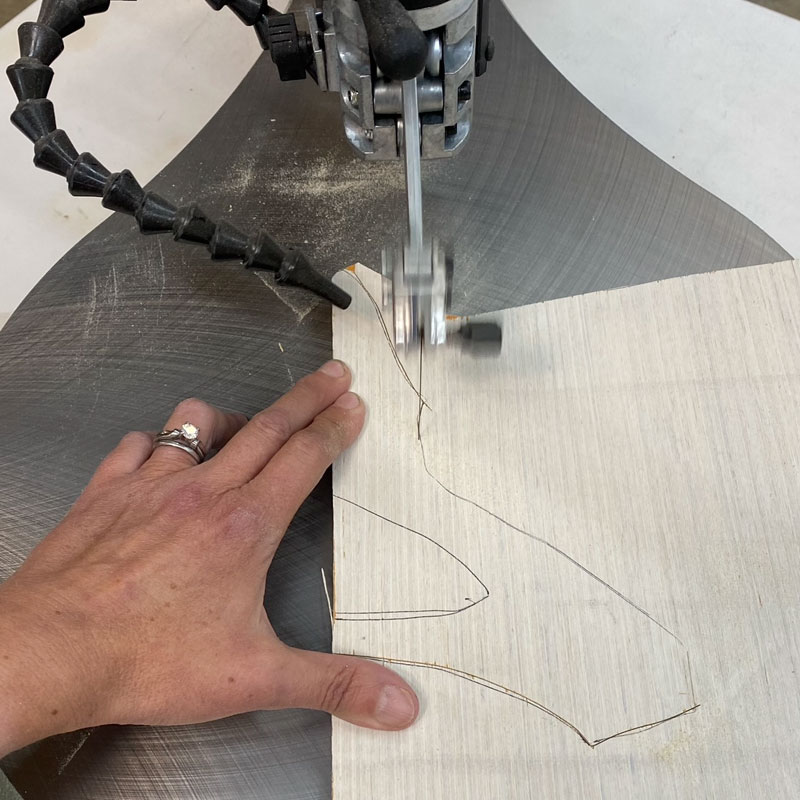
Step 1: Cut out the pieces
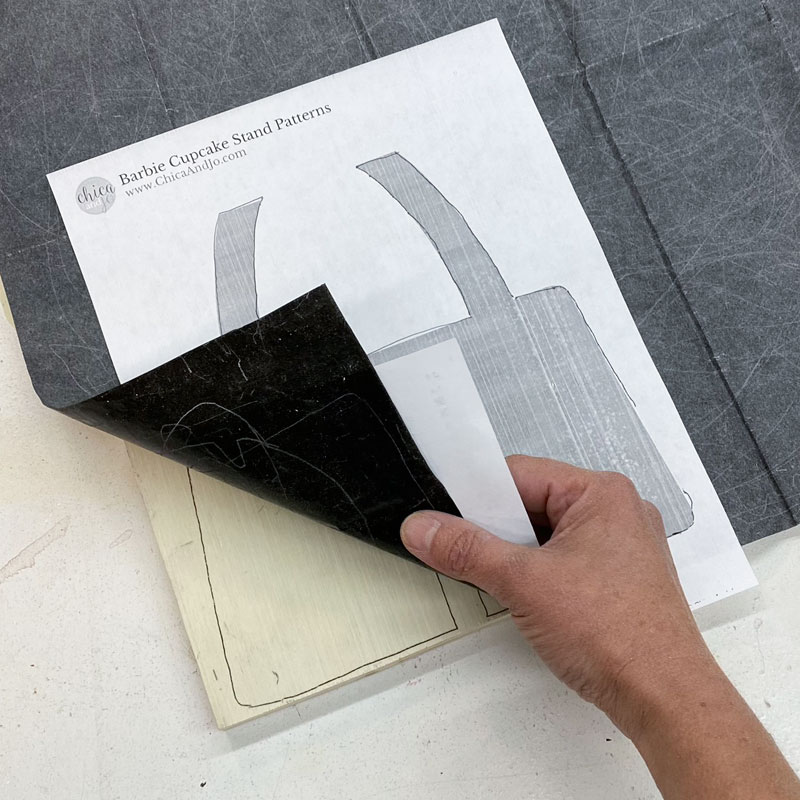
The first thing to do is cut out the wood pieces that will hold up your cupcake stand. We made this super easy for you by creating printable patterns that you can trace and cut.
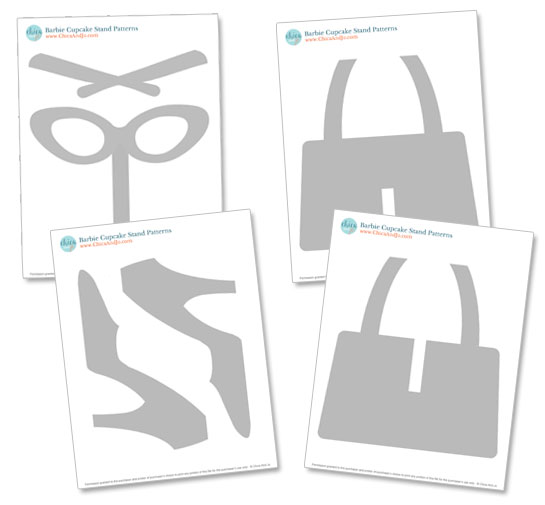
Just download and print the patterns and use the carbon transfer paper to trace the pattern onto your 1/2" thick piece of wood.
Then cut out the pieces using a scroll saw or jigsaw.
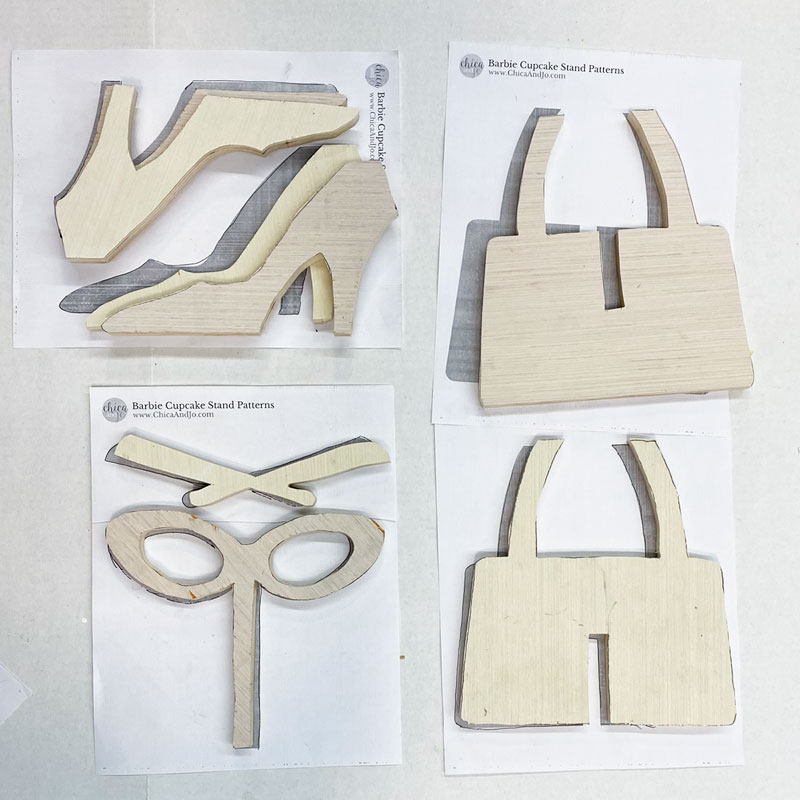
You'll need to cut one copy of each of the pattern pieces included in the printables with one exception — double up on the page that has two shoes on it, and create a total of four shoes.
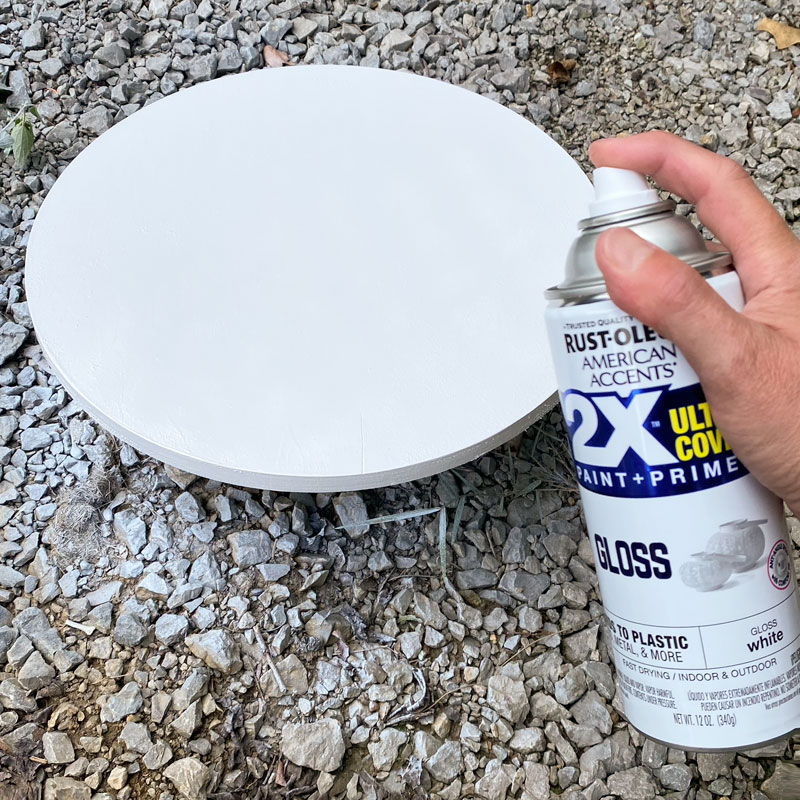
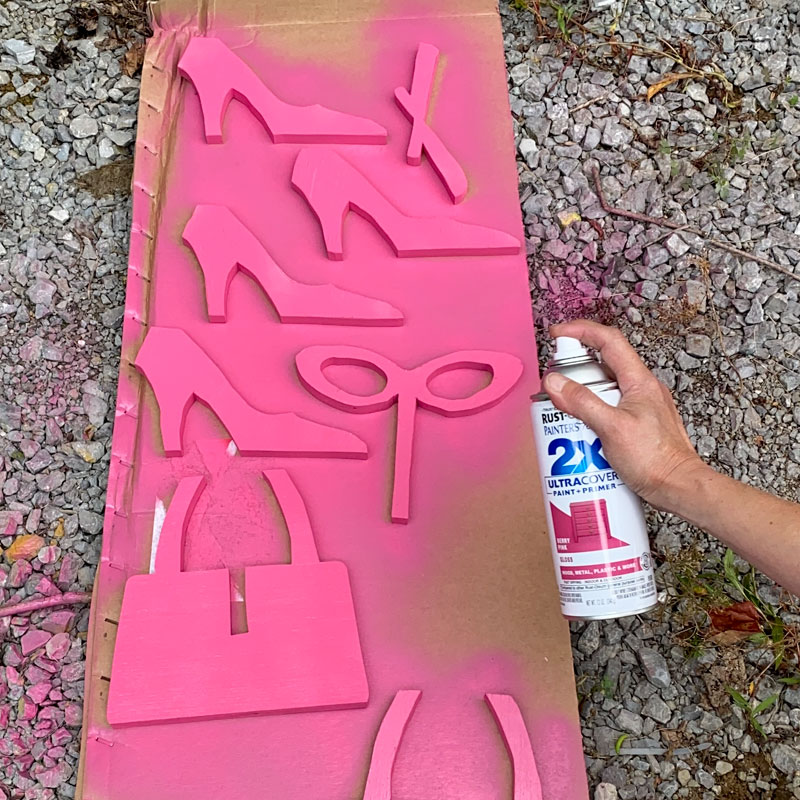
Step 2: Paint the pieces
When your pieces are all cut, it's time to paint them.
Start by painting your two wood circles white with Gloss White spray paint. You don't have to paint the bottom if you don't want to, since it won't show.
Then paint all of the accessories pieces (shoes, purse, sunglasses) with Gloss Berry Pink spray paint. Make sure you paint both sides and all the edges.
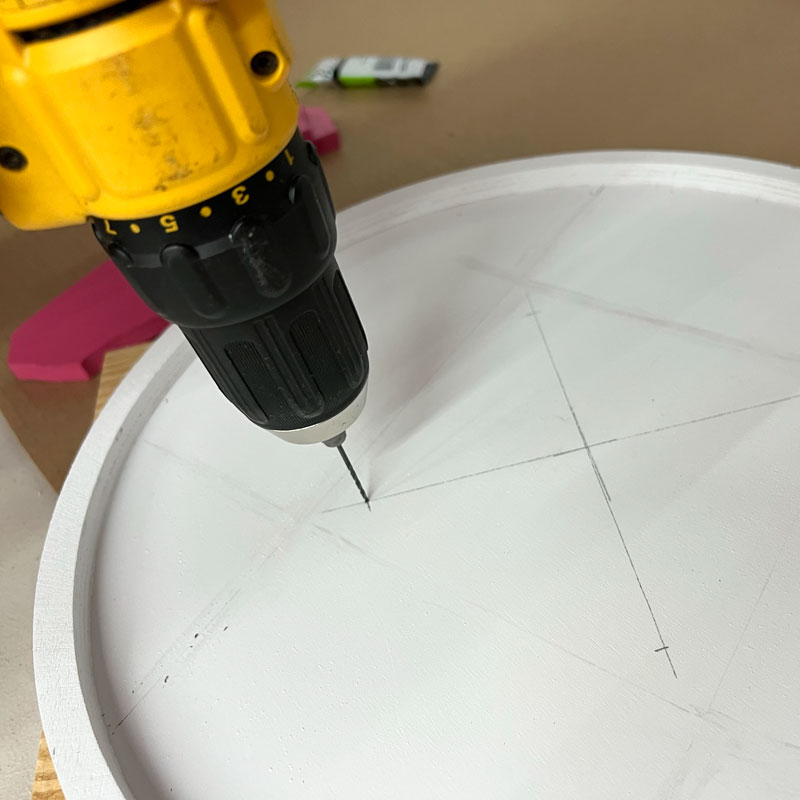
Step 3: Assemble the pieces
To assemble the pieces into a tiered cupcake stand, start by finding the center of both of your circles and marking that point on the bottom.
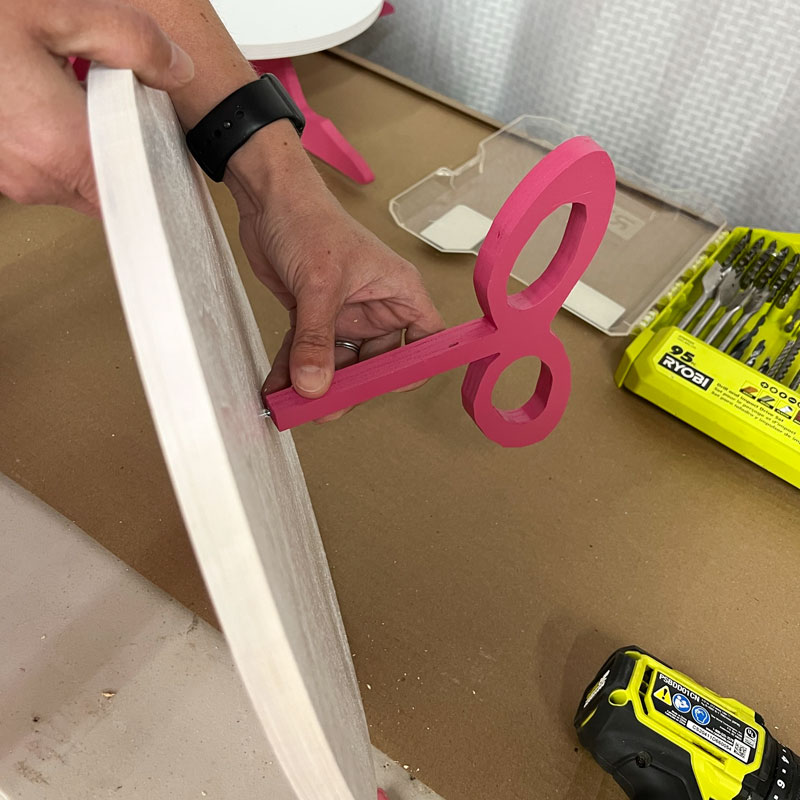
Attaching the shoes to the bottom tray
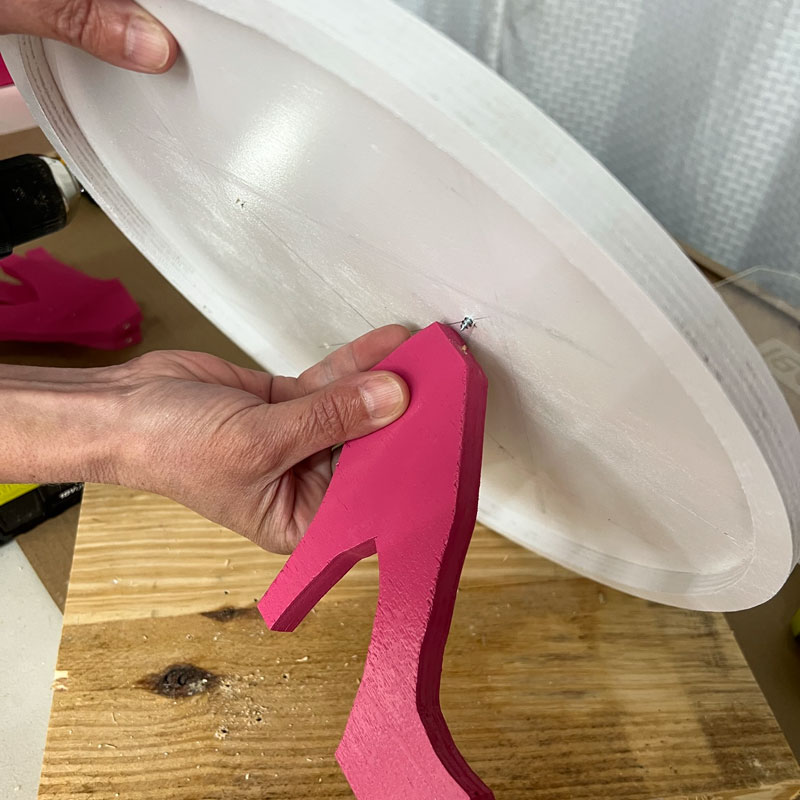
On the larger circle, draw an X through that center point and then mark 3" out from the center on each of those four lines. These will be your attachment points for the shoes.
Drill a small pilot hole through each of these four marks
Drill a corresponding pilot hole into the top of each of the four shoes.

Use the drill to put a small wood screw into the circle, from the top side, just until the point of the screw sticks out from underneat.
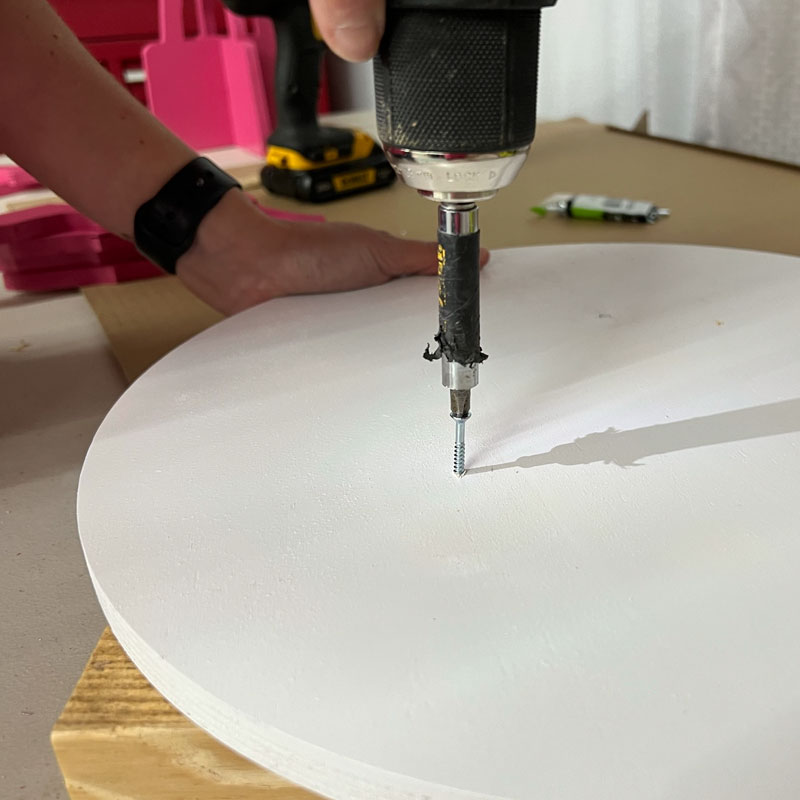
Line the shoe up under the circle so that the point of the screw is going into the pilot hole you drilled in the shoe.
Holding everything in place, finish drilling the screw in so that it goes into the shoe.
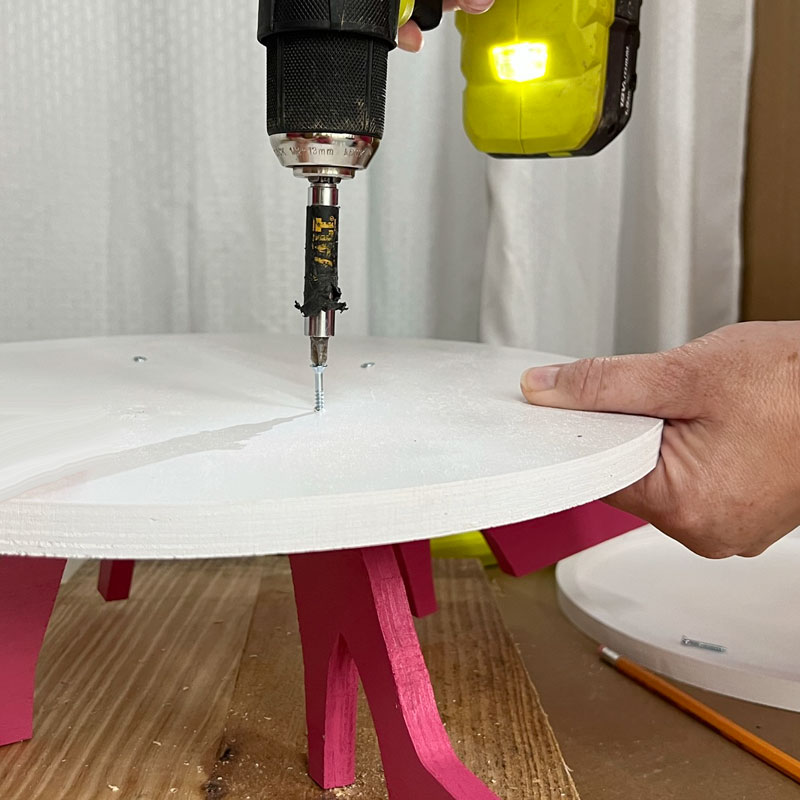
Repeat these steps for the remaining three shoes, then turn/twist them if needed so they are spaced evenly under the tray.
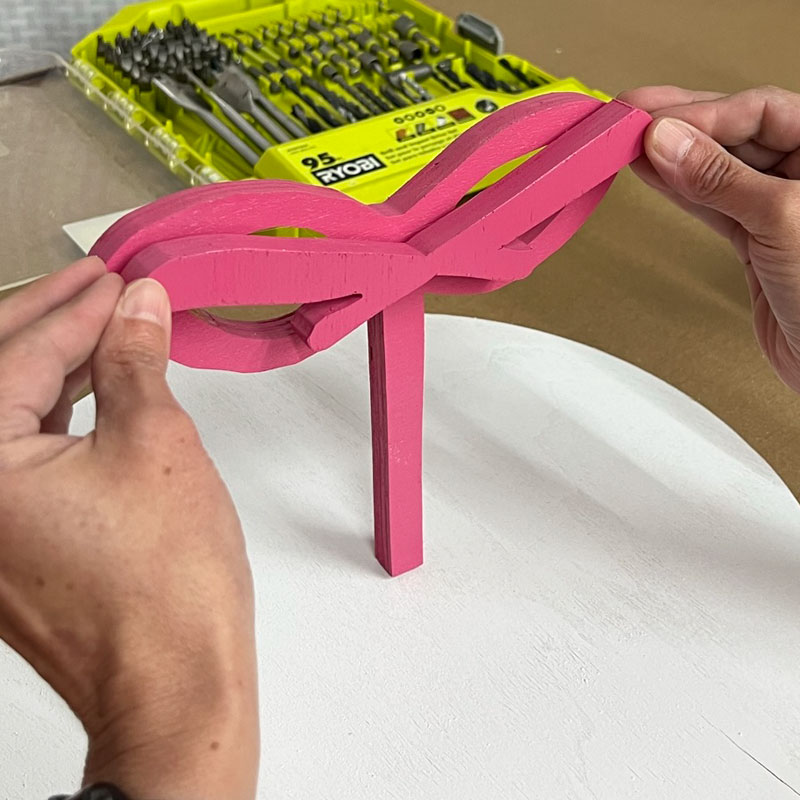
Attaching the sunglasses to the top tray
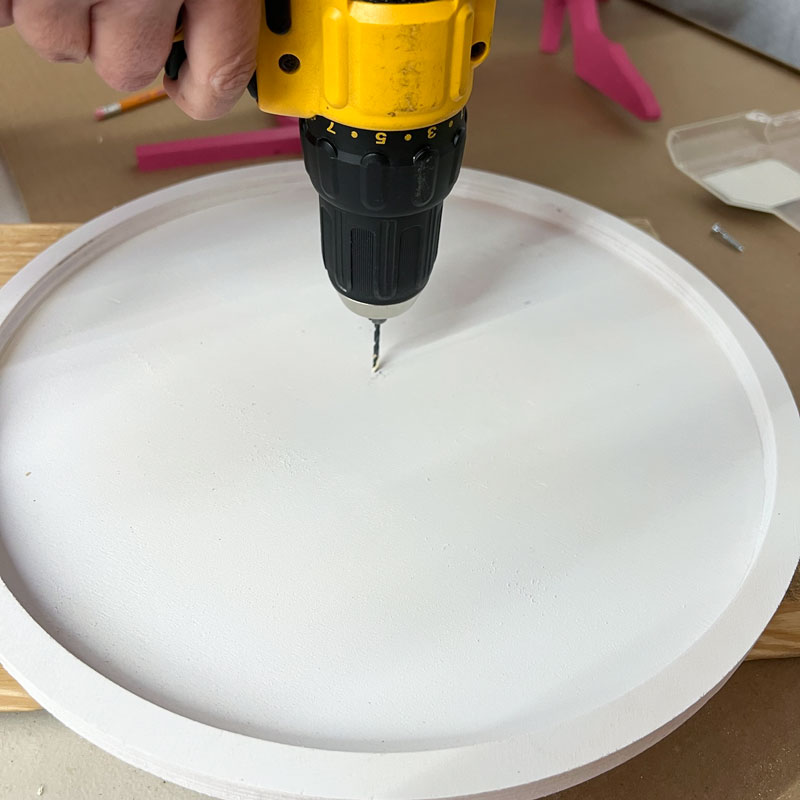
To attach the sunglasses to the top circle, start by drilling a pilot hole through the center mark on your smaller circle.
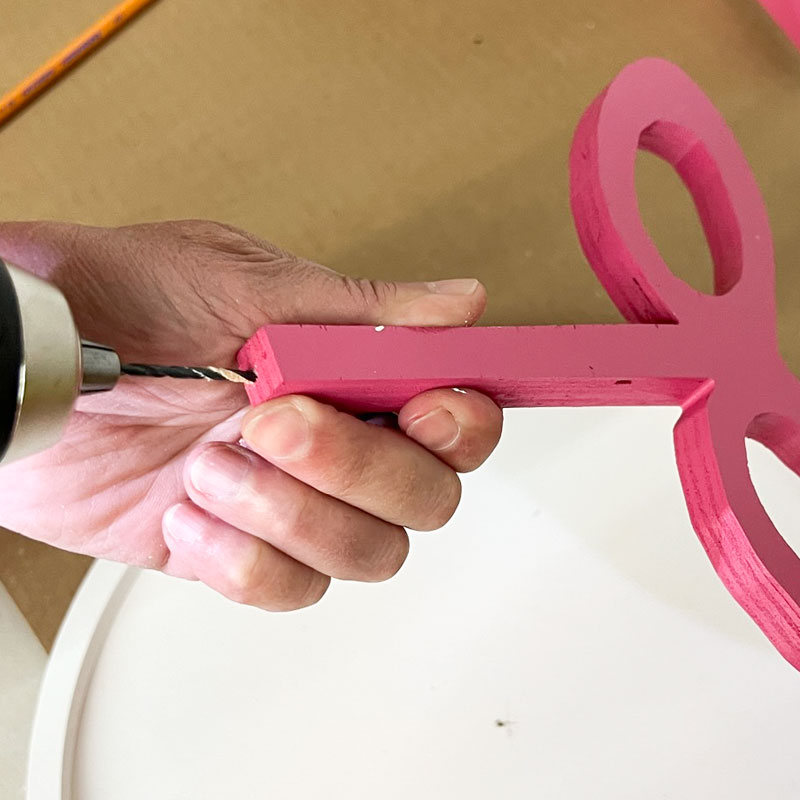
Drill a corresponding pilot hole into the bottom of the sunglasses.
Put a screw into the pilot hole on the circle, starting from the bottom/underneath, just until the point of the screw peeks out from the top.

Similar to how you attached the shoes, line up the hole in the sunglasses with the point of the screw, hold in place, and then finish the screw until tight.
Use hot glue to attach the folded arms piece to the back of the sunglasses to complete the look.
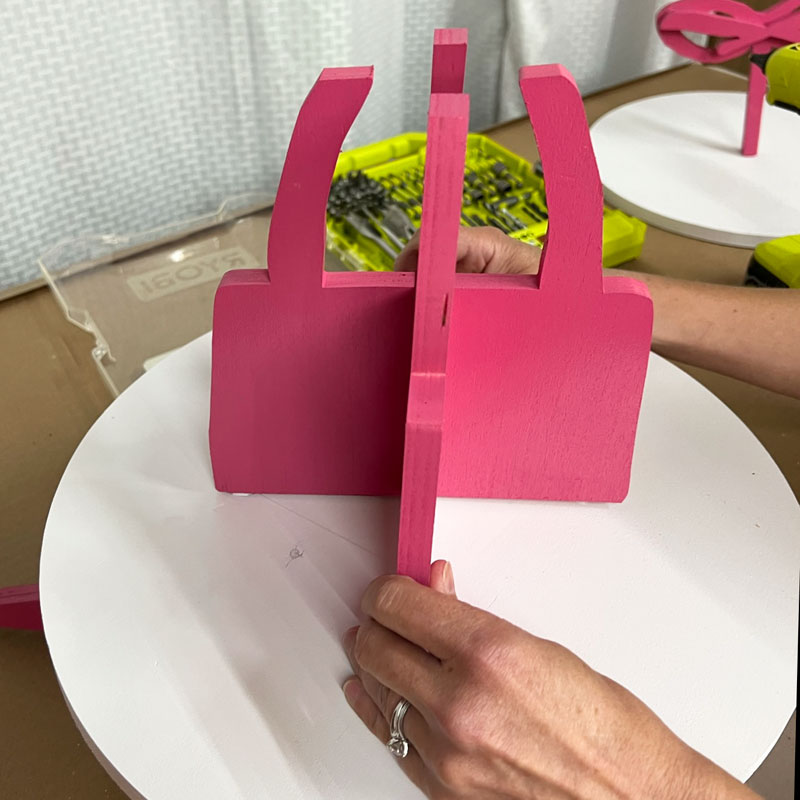
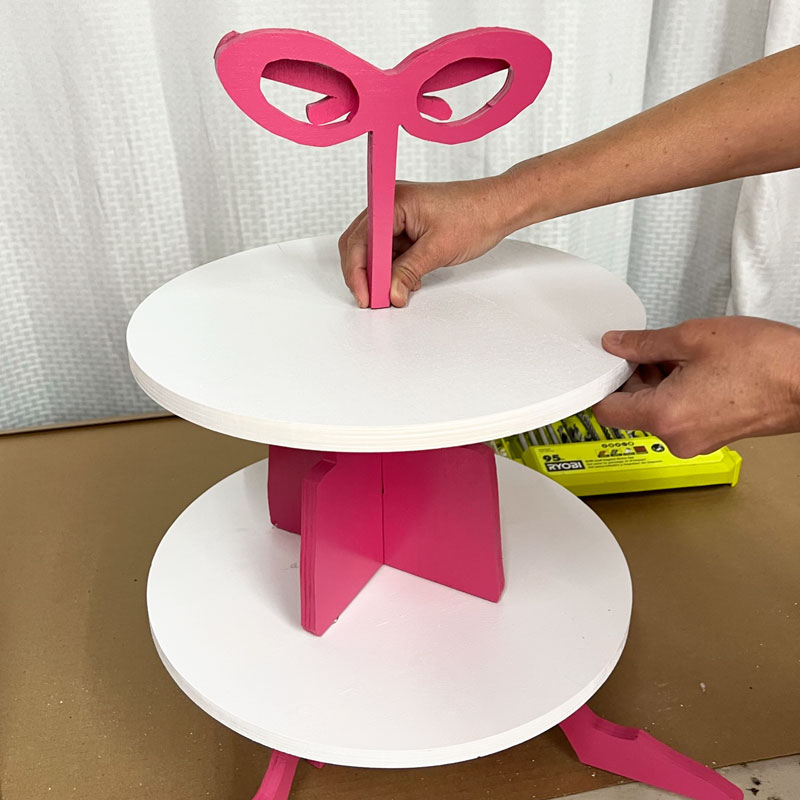
Attaching the purse to the middle
To pull the whole cupcake stand together, you'll attach the purse between the two pieces you've already made.
Slide the two pieces of the purse together along the slots you cut, to form a 3D shape, then adding plenty of hot glue to the bottom.
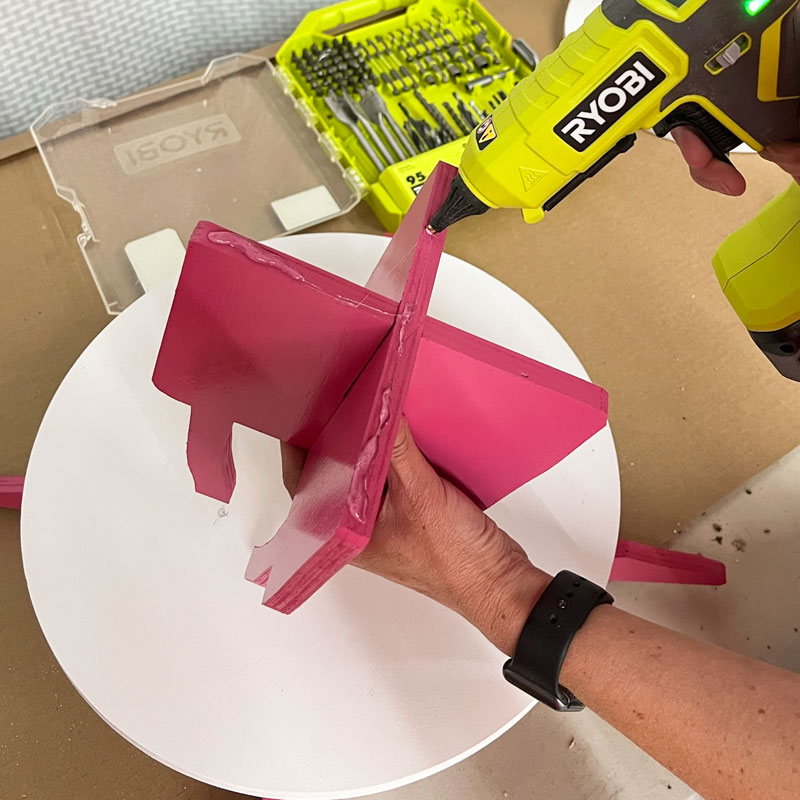
Place the purse on the bottom circle, carefully lining it up so that it covers the screw heads for a clean look.
Add more hot glue to the top of the purse handles.
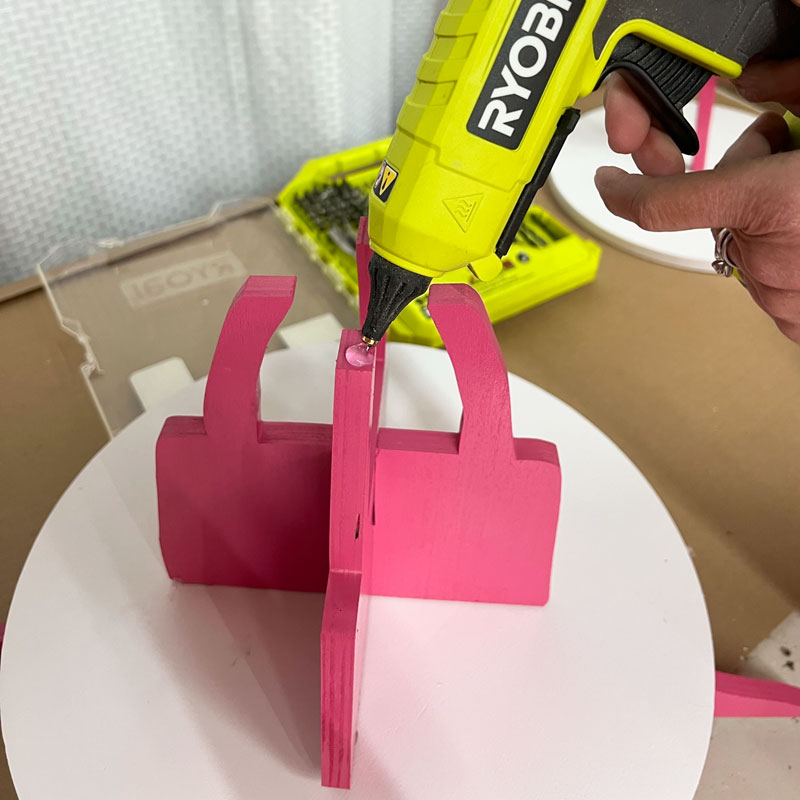
Position the top circle with sunglasses on top, centering it on the purse, and hold until the glue has set.
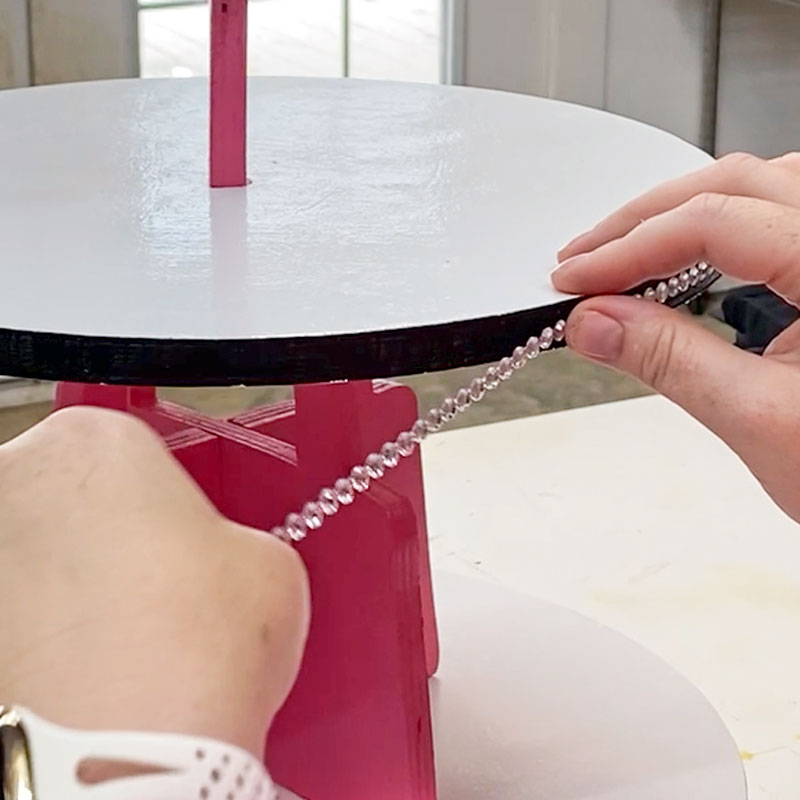
Step 4: Add decorative bling
Why not add some extra fancy touches to your cupcake stand? We painted the edges of the trays with black craft paint then attached a strip of adhesive silver rhinestones for some sparkle.
Step 5: Top with cupcakes and serve
This Barbie-themed tiered tray is perfect for holding cupcakes or even party favors. We used these adorable Barbie cupcake wrappers that we found on Etsy which matched the theme perfectly.
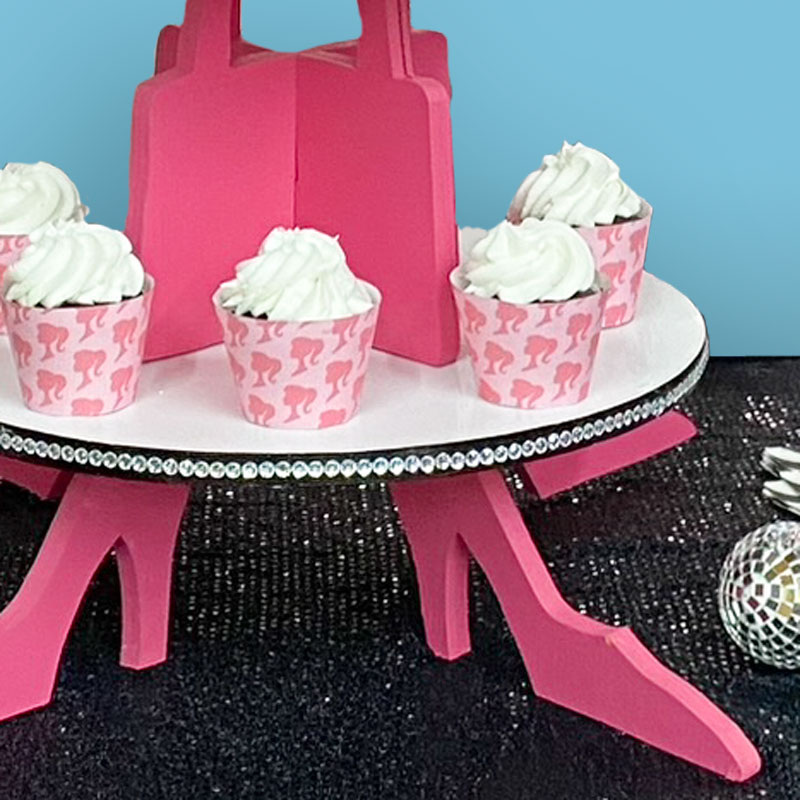
The classic pink combined with Barbie's iconic accessories — and don't forget that sparkly bling — make a display that's the perfect addition to any Barbie party.
similar projects
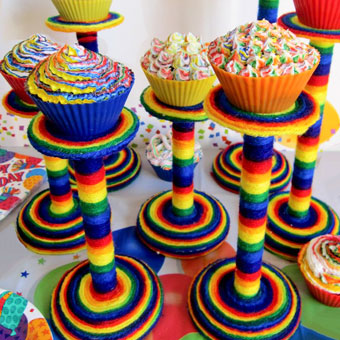
Easy DIY Rainbow Cupcake Display Pedestals
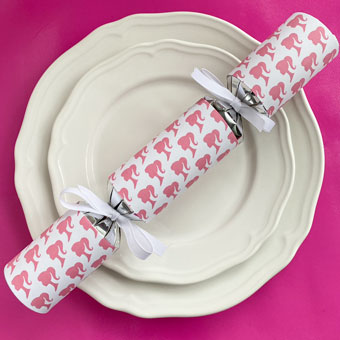
DIY Barbie Party Favors Christmas Crackers
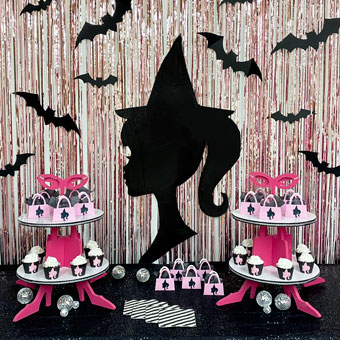
Barbie Halloween Party Decor for Barbieween


