


Tomato Cage Christmas Trees with String and Lights

If you saw my ornament-covered tomato cage trees last year, you know how much I love making tomato cages into Christmas trees. They are just the perfect tree shape and such fun to decorate.
This year I decided to cover a tomato cage with string and add lights to create a sleek, elegant tree to add to my Christmas decor.
I started with a regular metal tomato cage and a skein of simple white yarn from the craft store.
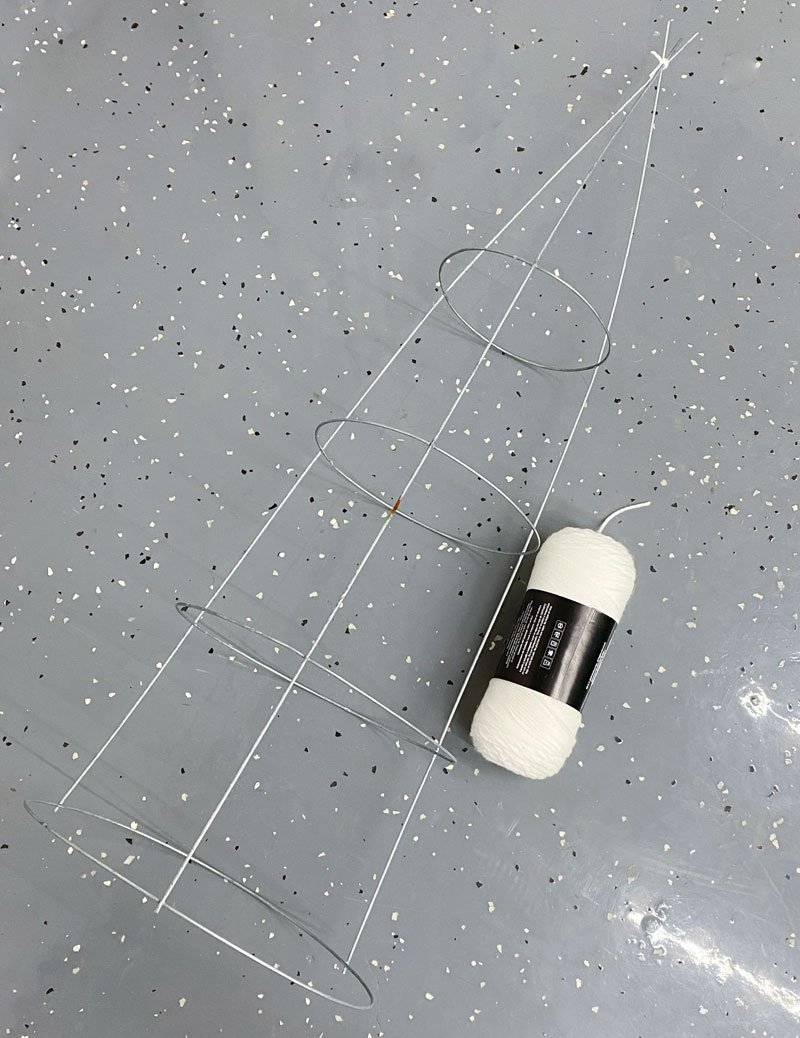
The first step was to tie the top wires together to formalize the tree shape. I used a piece of the yarn and made sure to leave a couple inches of wire poking out. These bits will be critical later for securing the yarn.

To begin wrapping the tomato cage with yarn, I first tied the end of the yarn to the bottom (biggest) ring of the cage.

Then I pulled the yarn up to the pointed end.

I draped the yarn over, hooking it between two of the wires at the top.

Then I pulled the yarn back down the opposite side of the cage, back to the bottom again.

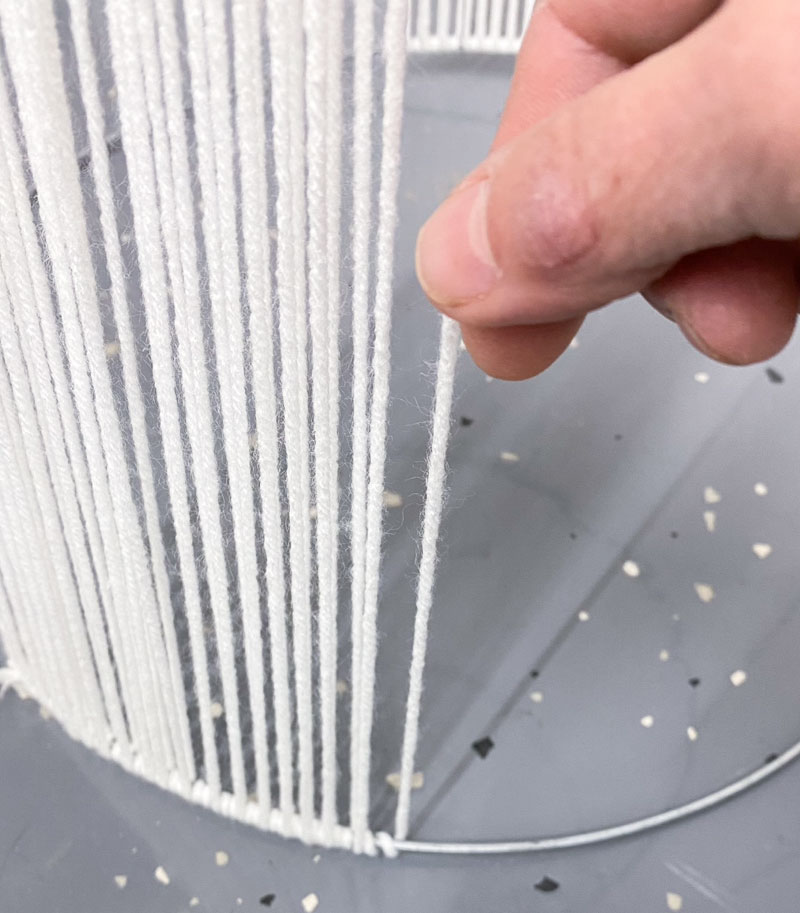
I looped the yarn around the bottom ring three times.

When I pushed the loops together, it left the perfect little spacer between the last long strand and the next. I didn't want the yarn coverage to be solid, or else the lights wouldn't show through as well.

Then it was back up to the top, through the points, and back down the other side. Over and over and over! The triple-loop made the perfect amount of space between each string.
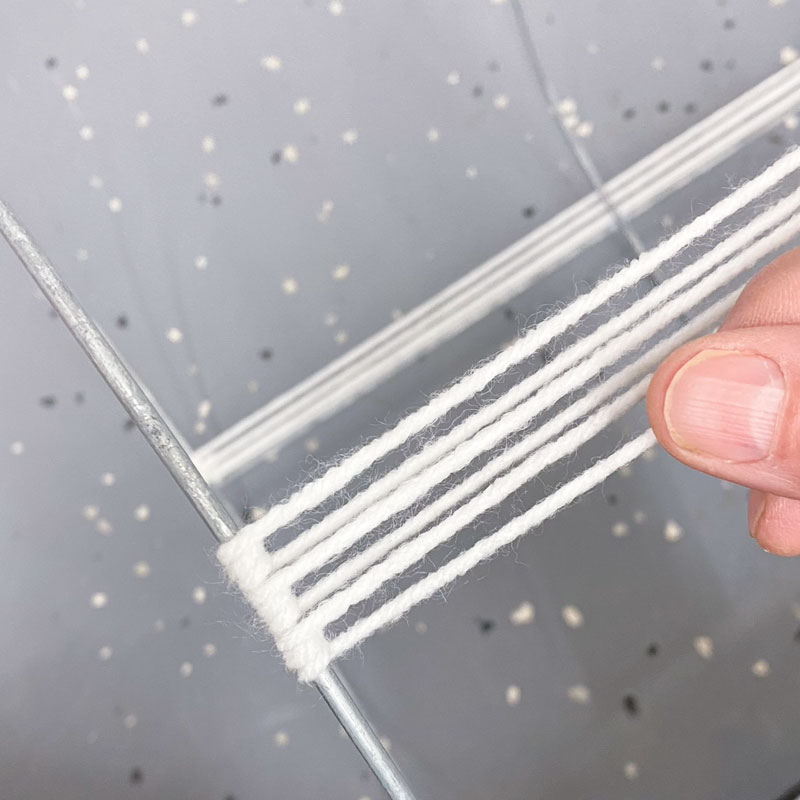
Every time I went up to the pointed top, I hooked the yarn between the wire ends. It's super important to not pull the string too tightly, or else you will distort the shape of the tomato cage. Keep the yarn just barely taut, with no pressure at all, but certainly not loose.

As I worked my way around, I was really happy with the look. It definitely took a while, though! And this large tomato cage took about 2/3 of a skein of yarn to finish.
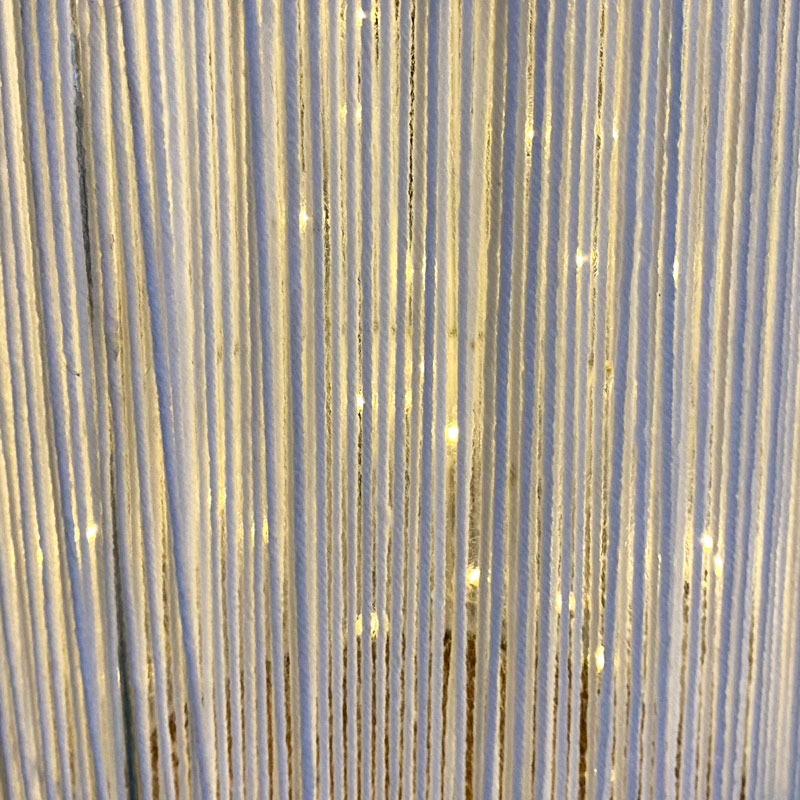
When it was done, I tucked some battery-operated fairy lights inside, looping them around the wire frame of the tomato cage.

And a quick silver star finished off the top and hid those wire points. (You could also try cutting them shorter or bending them into curls with pliers if you wish.)

I just love how the tree looks all lit up on my porch.

The twinkling lights just barely shine through the strings, and it has such a modern look overall.
similar projects

10 DIY Tomato Cage Christmas Tree Ideas

Christmas Trees Made from Tomato Cages and Ornaments

10 DIY Christmas Tree on Wall with Lights Ideas


3 comments so far:
Please explain: Do you cut the yarn in lengths before you start? I noticed at the bottom ring there were several tied ends, or do you just keep wrapping with skein in hand coming through for three loops and back up to the top? It doesn’t show in your hand the entire skein, as you move up and down, or you cut them in workable lengths. Love how it turned out. Thank you in advance for your answer. Vivian
Vivian, I kept the entire skein intact as much as possible, to save time. However, as I got closer to finishing, I couldn't fit the skein through the shrinking hole, so I had to cut some lengths at the end to finish it off.
We actually had a short video that we had previously shared on social media showing this process, so I've just added it to this blog post so you can watch it here. Hope that helps!
Very cool idea. Need to try this one out next year. We have the tomato cages already. Did you know that they come on colors, too? I have a red one that I like to try making the red Christmas red balls with. Also, have grapevines that can be used. I liked what I saw with how many uses you could use.