


Shamrock St. Patrick's Day Wreath with Four Leaf Clover

St. Patrick's Day decorations are always a delight with their bright greens and colorful rainbows, and this four-leaf clover wreath is no exception. Follow this easy tutorial to see how to create your own lucky shamrock wreath.
The inspiration for this giant shamrock wreath came from our horse head wreath tutorial, and we used much the same process to create one for St. Patrick's Day.
VIDEO: How to make a four-leaf clover wreath
As you'll see in our full tutorial video, creating this four-leaf clover wreath for St. Patrick's day is actually pretty easy, and can be done with scrap wood and inexpensive faux greenery garland. (You know that cheap garland that never looks good at Christmas? It's perfect for this!)

If step-by-step instructions are more your style, keep reading to see exactly how we made this DIY giant shamrock wreath that's perfect to hang on your door, or tuck anywhere into your St. Paddy's day decor.
Step 1: Cut a clover shape out of scrap wood
To create the four-leaf clover wreath, you'll need to start by sketching the shape onto a piece of wood.
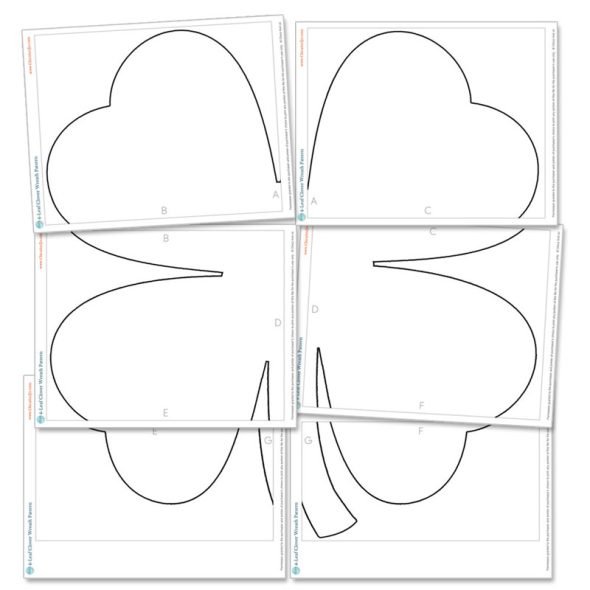
If you're not comfortable drawing the shape by hand, you may want to purchase our easy pattern that's 20" wide and 20" tall, the perfect size for this wreath.
INSTANT DOWNLOAD -
PURCHASE NOW!
Four-Leaf Clover Wreath Pattern – $2.99
from here immediately after your purchase is complete*.
Have questions? Email us at chicaandjo@chicaandjo.com
* File may be downloaded a maximum of 5 times.
Once you print the template, tape the pages together to create a large pattern and cut it out. Then put the template onto a piece of scrap wood and trace it.
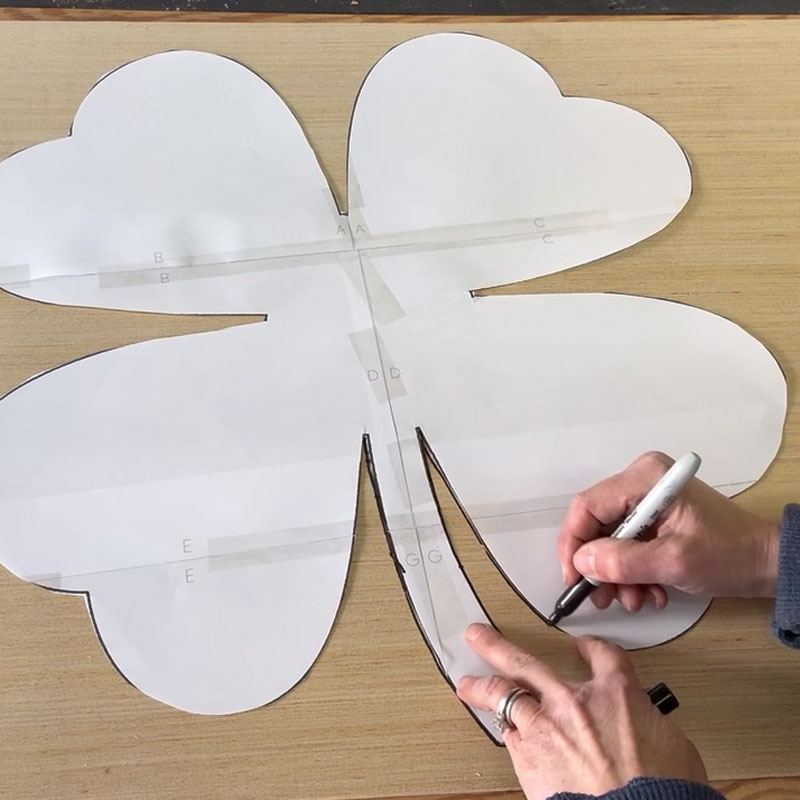
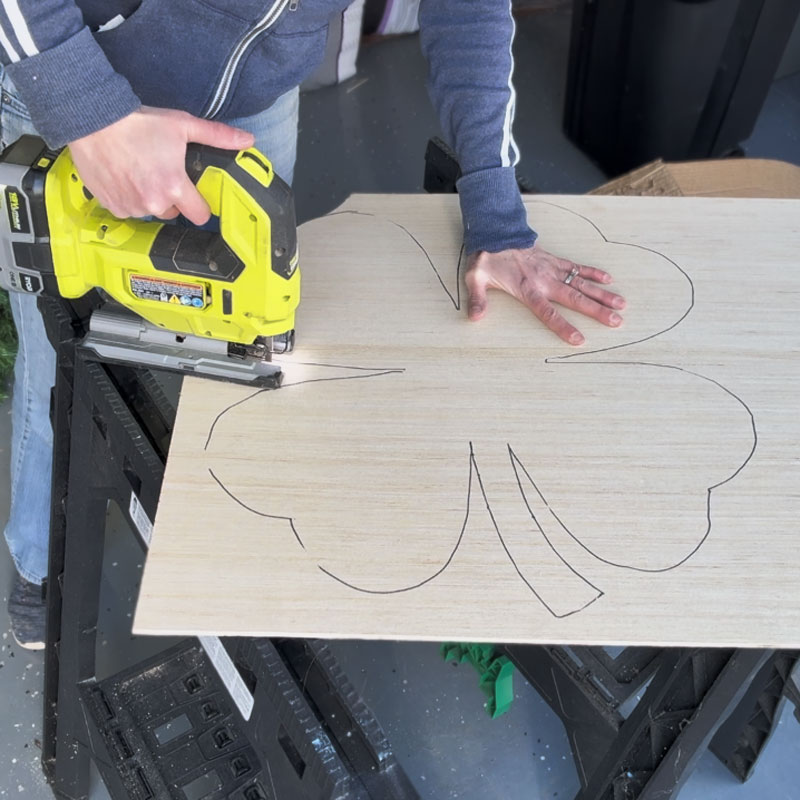
Use a jigsaw (or scroll saw) to cut it out. Don't worry too much about the fine details, because the garland is going to cover up most of it.
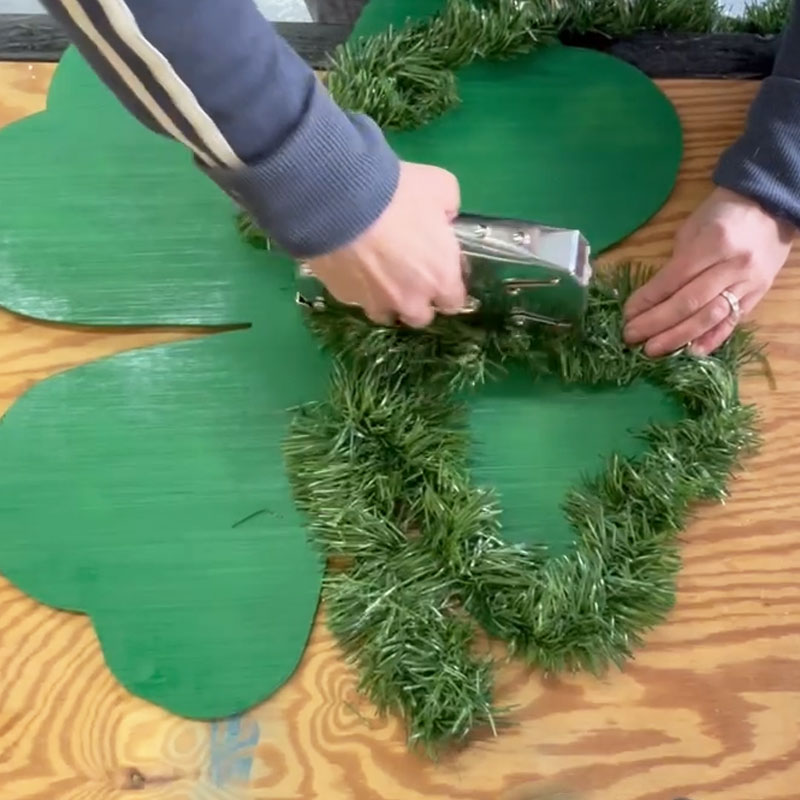
Step 2: Paint the base green to hide gaps
The wood will eventually be covered in greenery, but to make sure that you no bits of unfinished wood peek through, give it a quick coat of green spray paint. This doesn't need to be perfect, just get some color down in case there are gaps in your garland. And make sure you hit the edges!

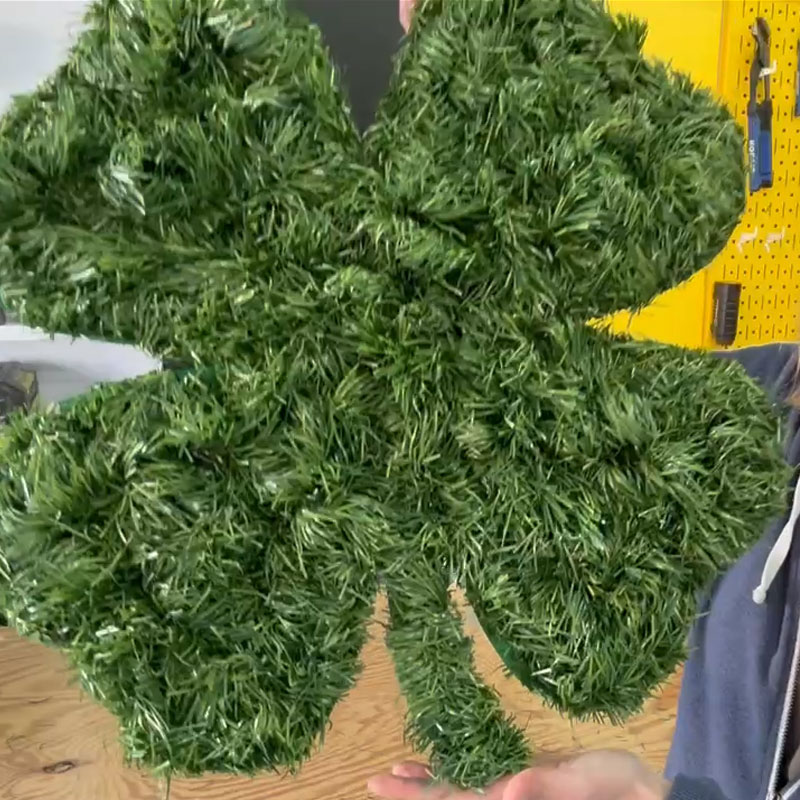
Step 3: Cover the base with garland
Now it's time to cover the clover. Get some low-profile, soft garland — nothing too full or stiff — and use a staple gun to attach it. Go back and forth across the shape until it is covered.
Step 4: Trim the garland
Now that your clover is covered with garland, you may notice that the edges aren't very crisp or defined. That shaggy garland just needs a haircut! Grab some scissors and trim away any needles that extend beyond the edge of your wood base.

This step is especially important on the clover's stem, so that it's defined and separated from the petals.
Step 5: Add a bow
To bring the rainbow design in and give the wreath a little pizzazz, make a bow out of some rainbow-striped ribbon. If you need help, check out our bow-making tutorial video for my super easy technique.

Use the staple gun to attach the bow in the middle of the wreath, and you're done!

The finished clover wreath
With the addition of a sawtooth hanger on the back, your giant clover wreath is ready to hang on the door. I just love how this simple shape and inexpensive materials transformed into a real statement that welcomes guests into your home with a lucky four-leaf clover.

similar projects

Paper Clover Wreath for St. Patrick's Day

St. Patrick's Day Place Cards Made with Real Clover

Horse Head Christmas Wreath - Get the Ralph Lauren Aesthetic


