


Hydro-dipped Faux Marble Countertop

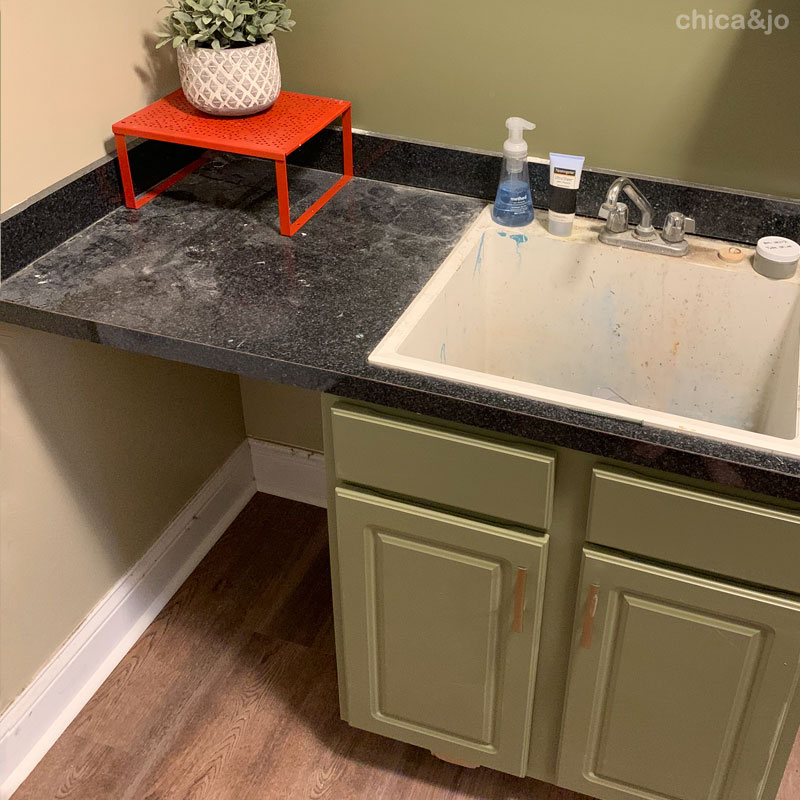
My whole laundry room is a scary, hot mess. It is the first place I see when I walk into my home from the garage so it shouldn't make me sad, it should make me happy! In an effort to fix that, I'm transforming the whole thing. Today I want to share with you one small part of it, which is the sink area. I already updated the cabinet and floor, but just take a look at this train wreck of a counter and sink!
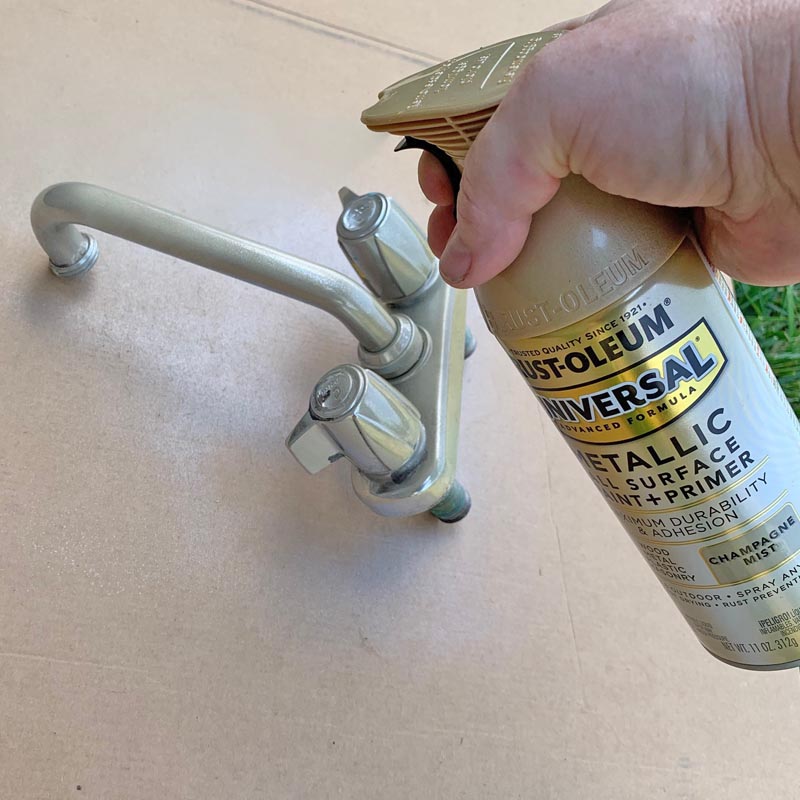
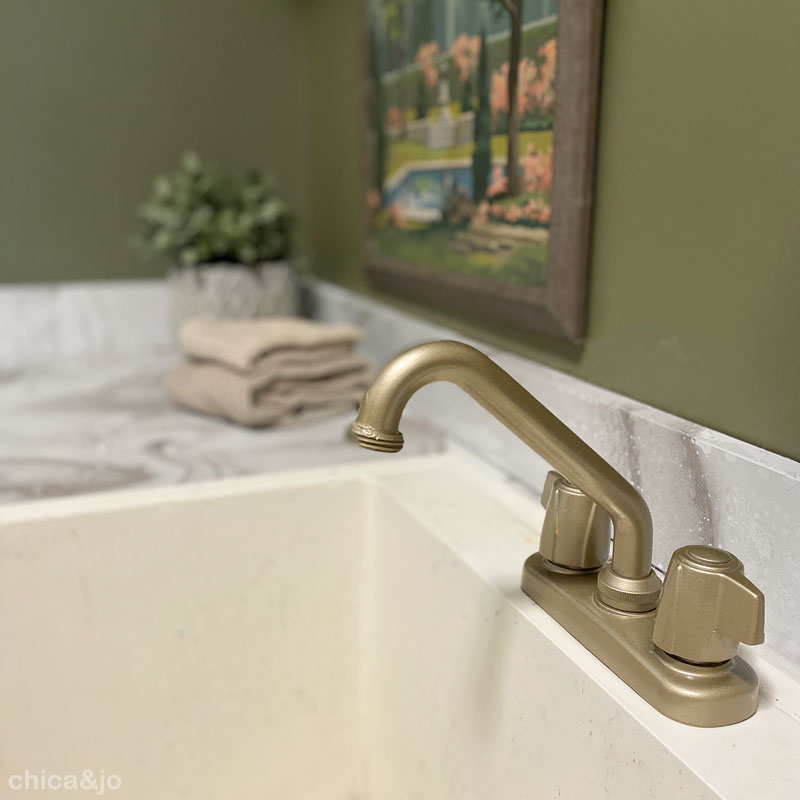
Eventually, I am going to purchase a new faucet but in the meantime, I thought I would give the existing basic one a little bit of glamour.
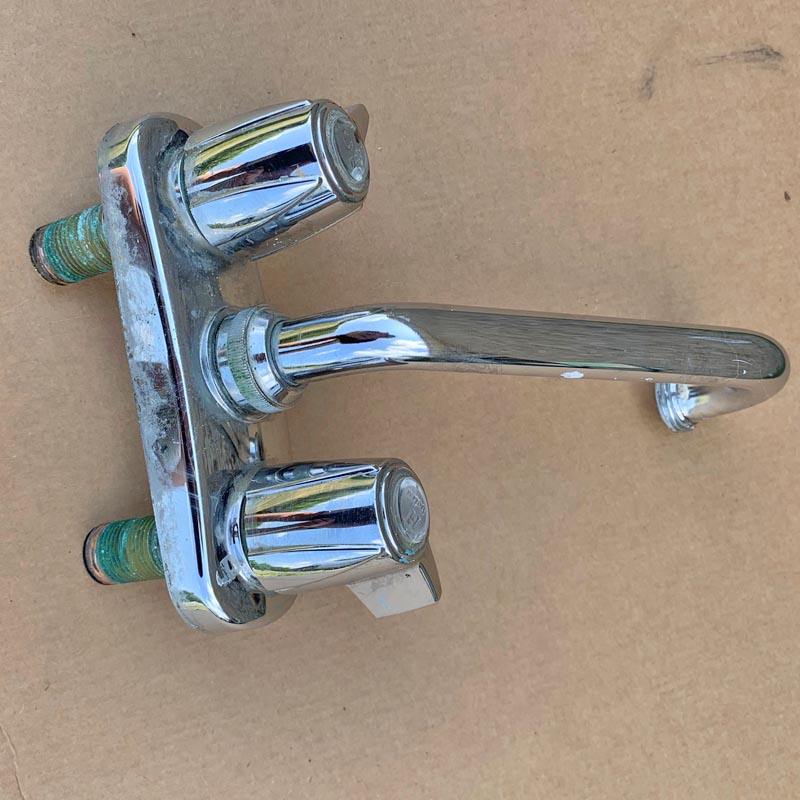
I used Rust-oleum Universal Champagne Mist Metallic to give it a fresh look and cover up all the old paint blotches and water stains.
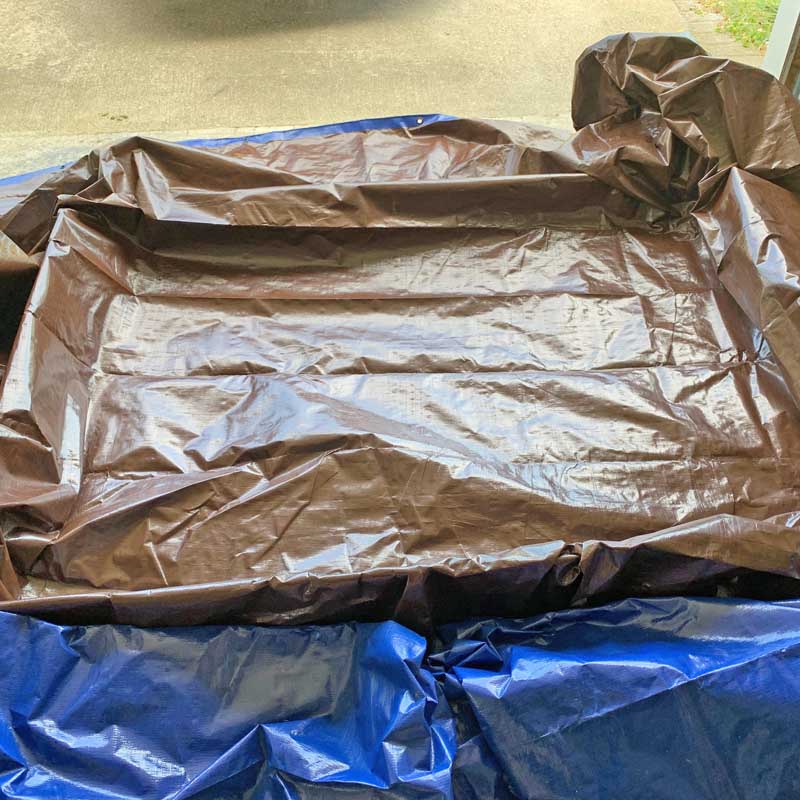
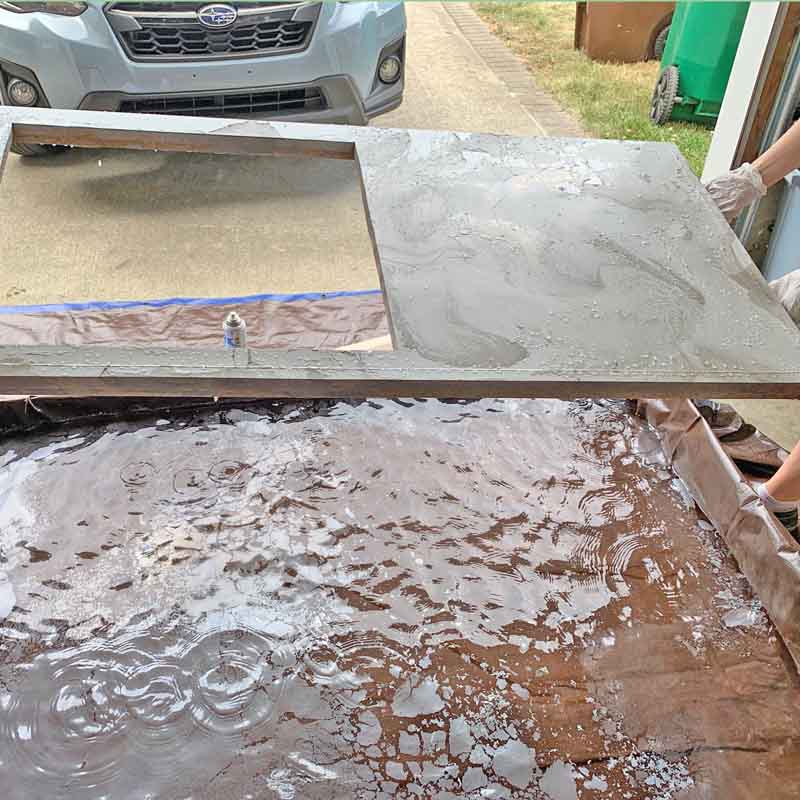
For the counter top, I wanted to create a faux marbled look by hydro-dipping it. For this technique, I needed a "pool" of water large enough to fit the entire counter top, so I had to get creative and construct one. I used a cardboard box my new potion furniture came in...
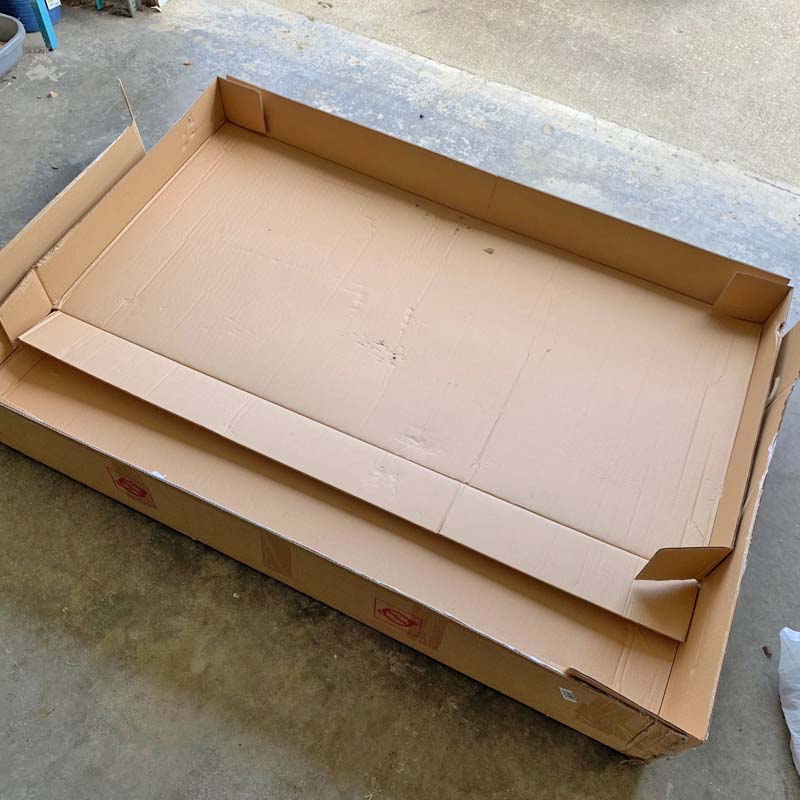
...and a good ol' tarp! The water doesn't have to be very deep (3-4 inches) so the cardboard sides, which I reinforced with additional packing tape, held the weight just fine.
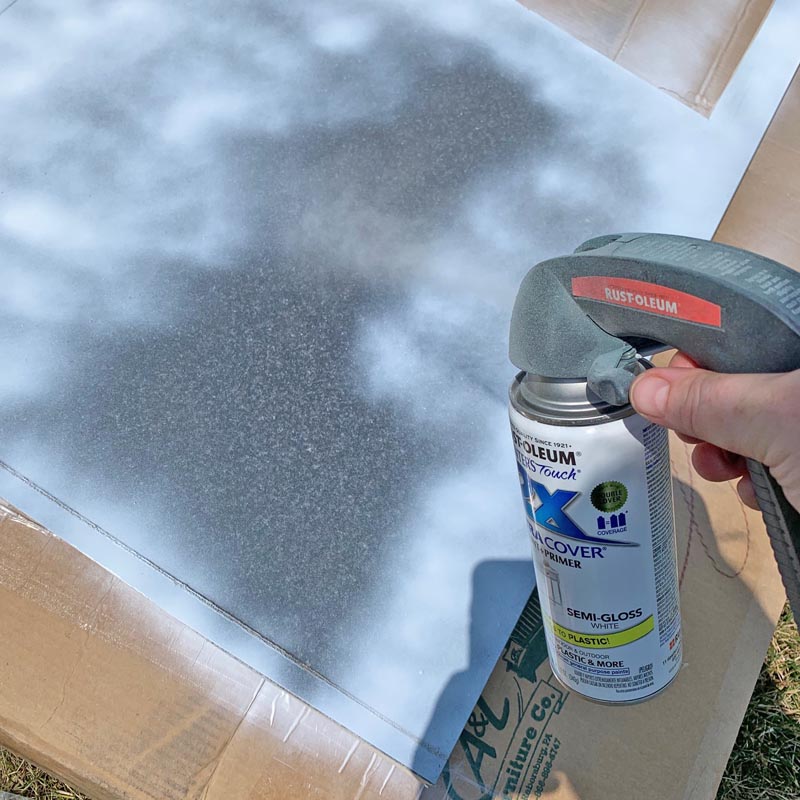
Since my counter started off a "lovely" black laminate, I first base coated everything with Rust-Oleum white spray paint and let it dry thoroughly.
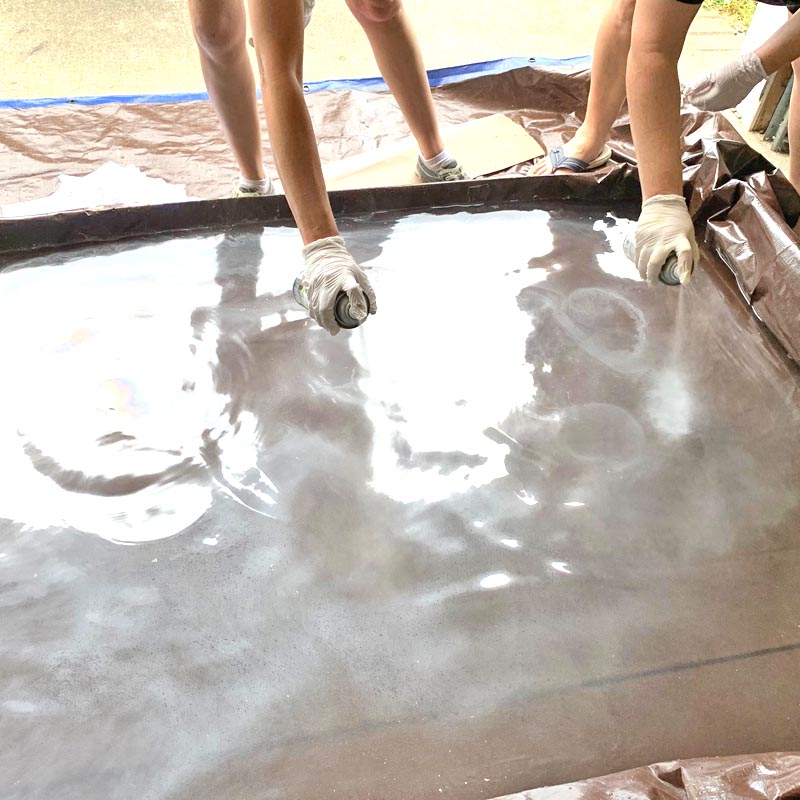
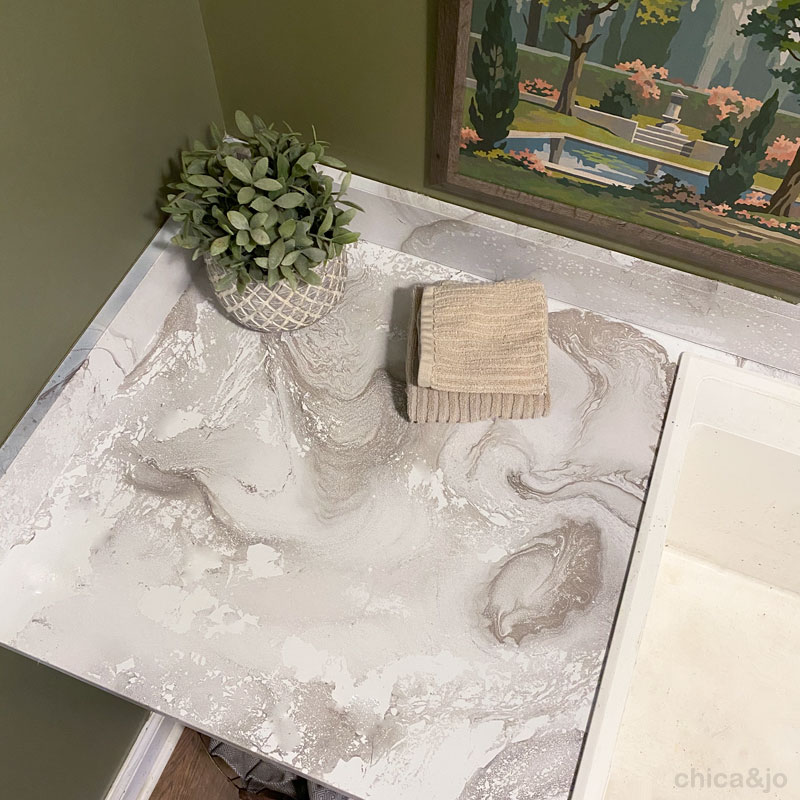
To do the hydro-dipping technique, we sprayed the surface of the water with white and grey spray paint, creating swirls of floating color. Working as quickly as we could, we sprayed large spritzes all over the surface making sure the final film was large enough to cover the surface being dipped. We mostly used grey for this marble look, but alternating with white was important to provide separation between the swirls. Otherwise, it would have been solid grey.
With gloved hands, we carefully dipped the counter straight down onto the paint film floating in the water.
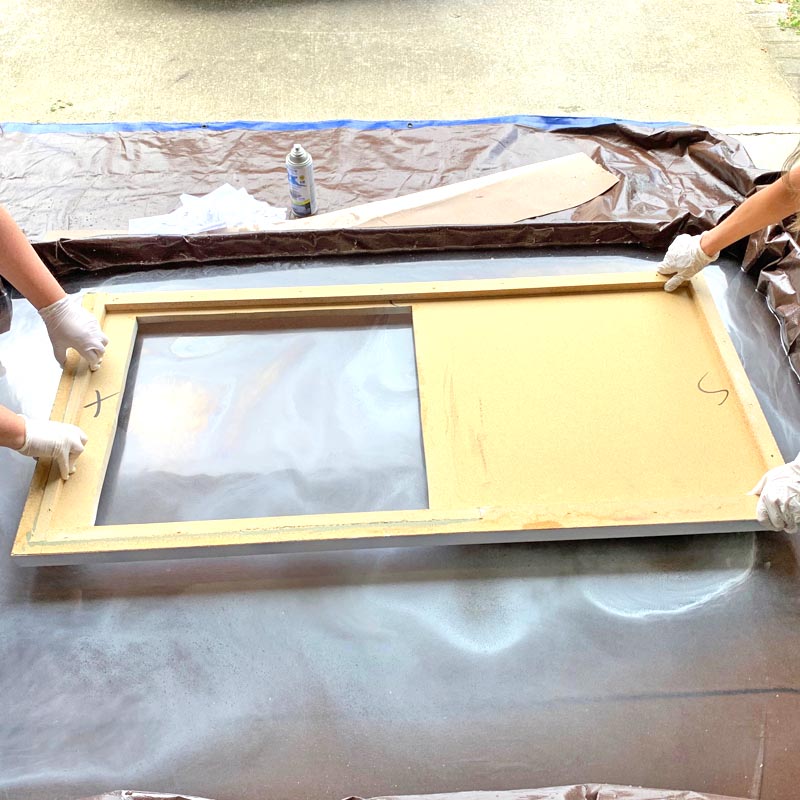
Then we lifted it up at an angle, trying to avoid bringing it back up through any remaining film on the way up so we didn't double-dip any areas. We couldn't believe the results when we flipped it over!
Look at that pattern! I am beyond thrilled with how this turned out. This was originally going to be a temporary solution for this space, but I love it so much that I might just keep it.

The even better thing? This only cost me the price of four cans of spray paint.
You can use any color combos you want to really customize the look, and testing is key before you do the large surface. I tried lots of different options on a smaller scale, using a small plastic tub for the water and white cardstock as my test surface.
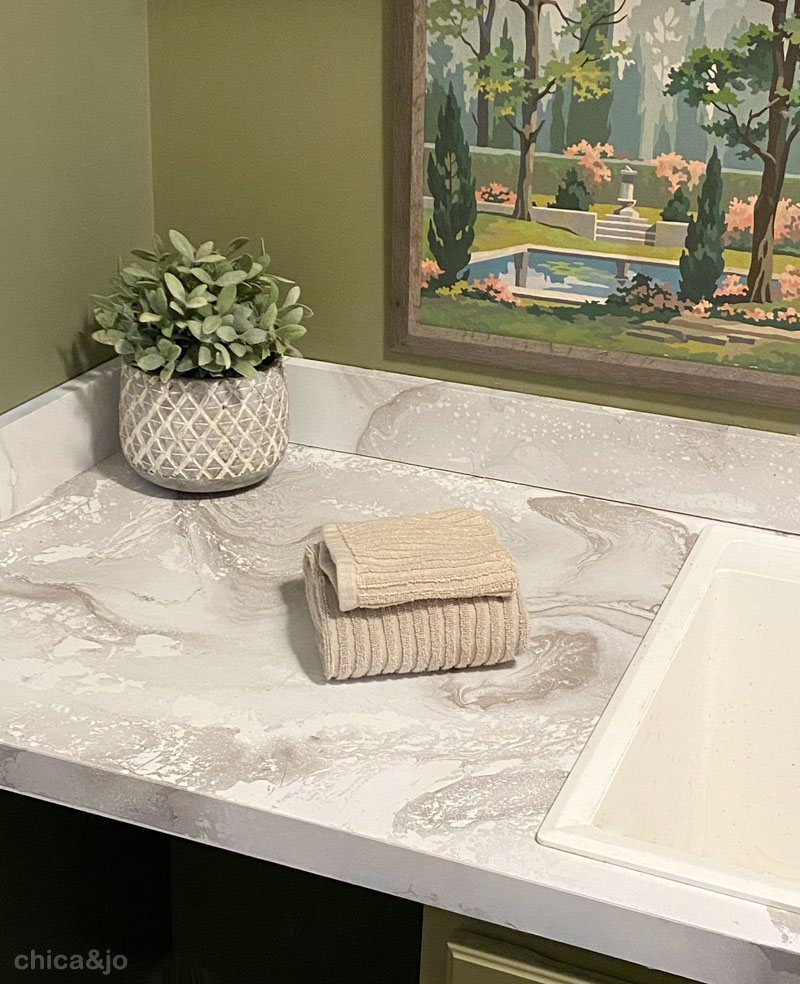
And let's not forget that pretty new faucet, which looks amazing reinstalled!
I'm really looking forward to the remaining updates I have planned for this laundry/entry area. Just this one DIY is already making me smile every time I walk through the door.
similar projects

DIY Faux Marble Pedestals

How to Marble with Nail Polish
Spray Painted Glass Bottles for a Faux Ceramic Look


6 comments so far:
This counter make-over looks great! Did you keep it long term? Has it held up?
Actually, I have ended up keeping it just because I have been too lazy to get a contractor to replace it! It looks just the same as the day we did it. Who knows, I might not ever replace it!
Looks awesome! Did you let it dry as is when you lifted it up? And did you coat it with anything over the paint to protect it?
Koryn, yep I let it dry as-is. I did not use anything on top to protect it since the spray paint is basically a finish.
I just found your site. This looks cool and easy to do! Has it held up over the years? Did you seal it with a top coat of anything?
Jill, so glad you found us! This countertop was only used for about a year before being replaced during a remodel of the room, but it held up just fine during that time. If you want extra durability, a top coat would be an excellent idea.