


Recycle a Phone Book into a Pen Organizer

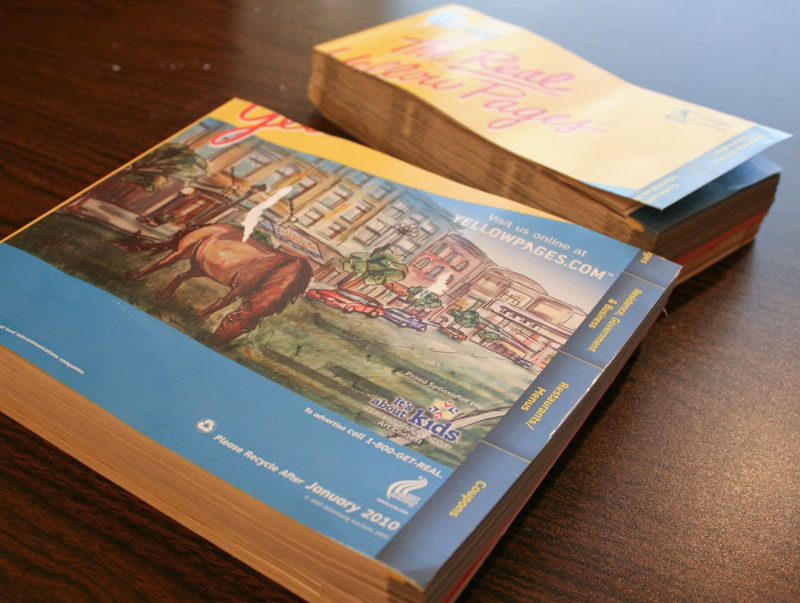
There was a time when every Spring you would hear the familiar thud of a new phone book hitting the front porch. We used to get several each year, certainly more than we could ever use or need. Rather than recycle our unwanted phone books, we thought we would try upcycling them into something new and functional.
With a little creativity and some craft supplies, we managed to come up with a way to turn a phone book into a quirky and unique pen/pencil organizer that's a real conversation piece on my desk!
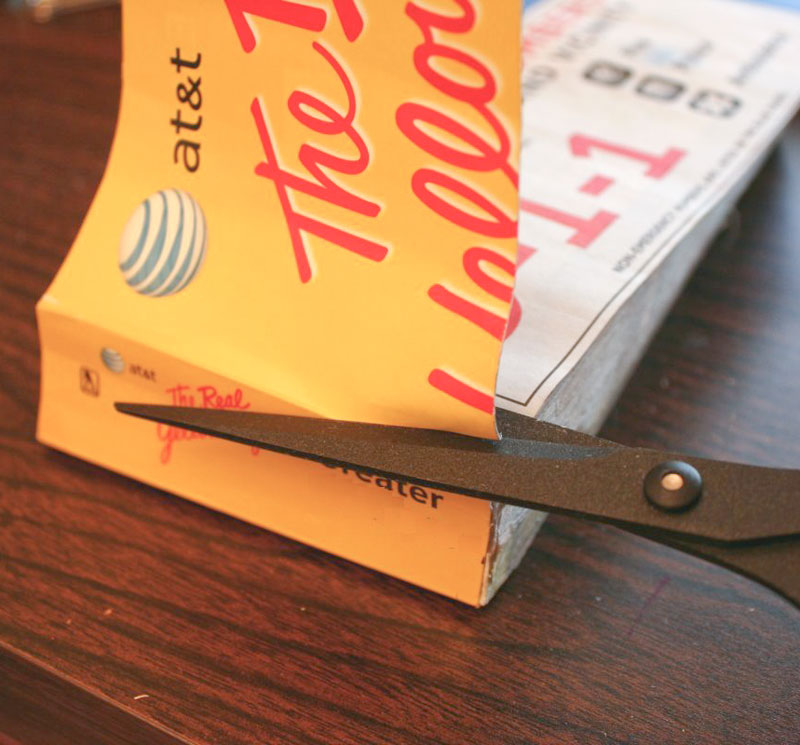
Step 1: Cut the phone book
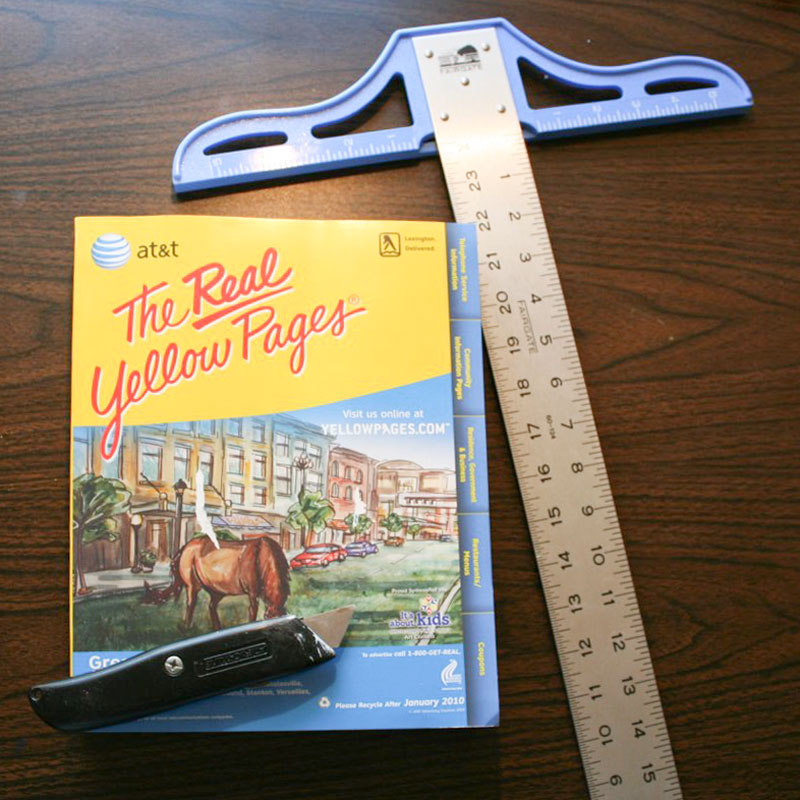
The first step is to cut your phone book down to size. The finished pencil organizer should be between 3 and 4 inches tall, so that's how much you'll want to cut off the book. This is easiest done with very sharp razor blade and an aluminum T-square, which will help keep your cut nice and square.
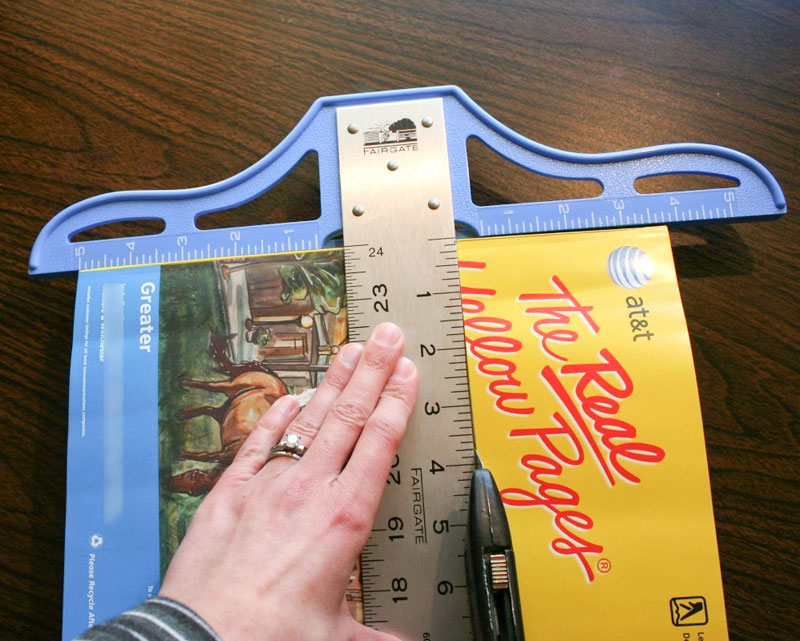
Position the T-square (or a metal ruler) and make several passes with the knife and go as far into the book as the knife will allow.
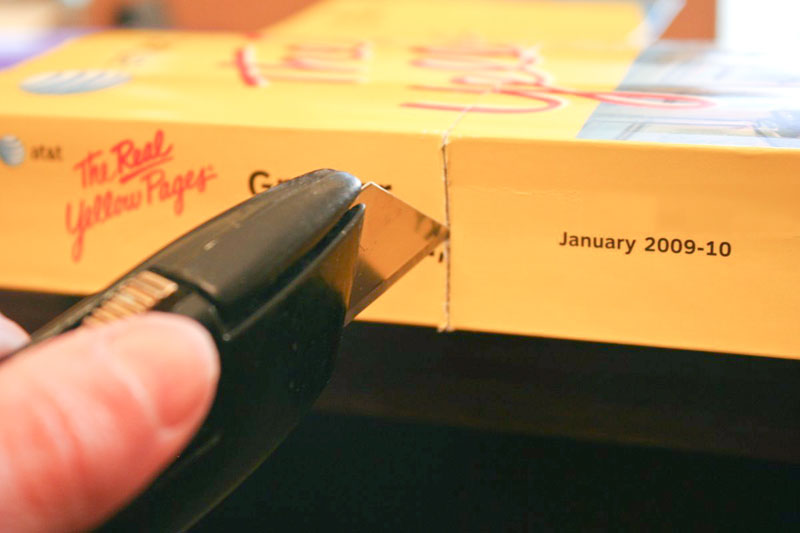
Once you've cut as deep as the blade will go, take a minute to cut the spine of the book in line with your main cut.
Then you will be able to fold back the cut pages and continue cutting through the rest of the book, using the T-square as a guide.
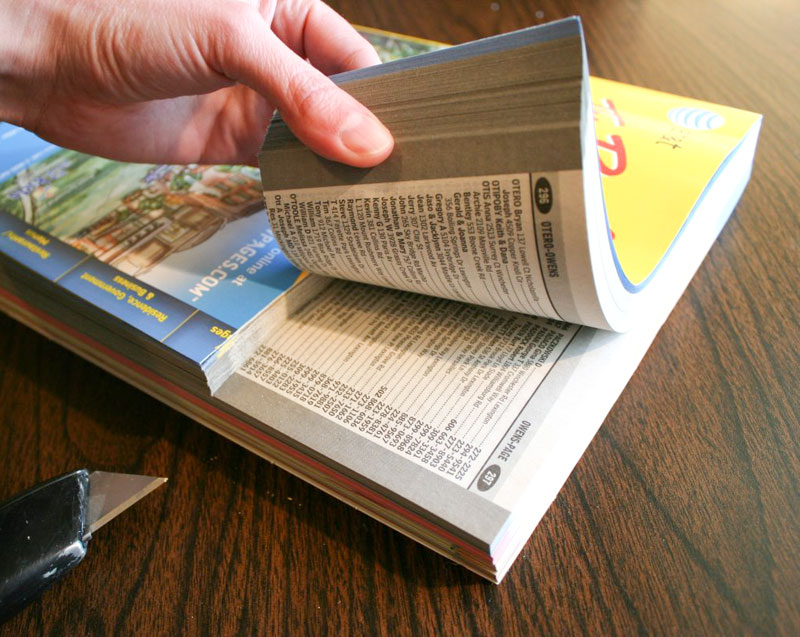
After a few passes with the blade, you'll have your book cut in two.
Use a pair of scissors to cut the front and back cover off, as close to the spine as you can.
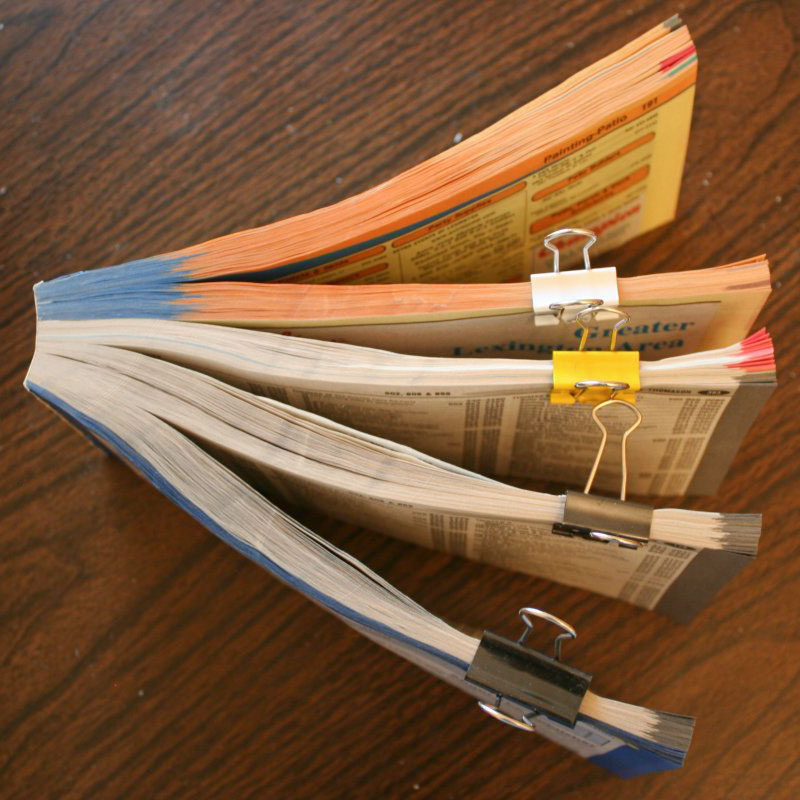
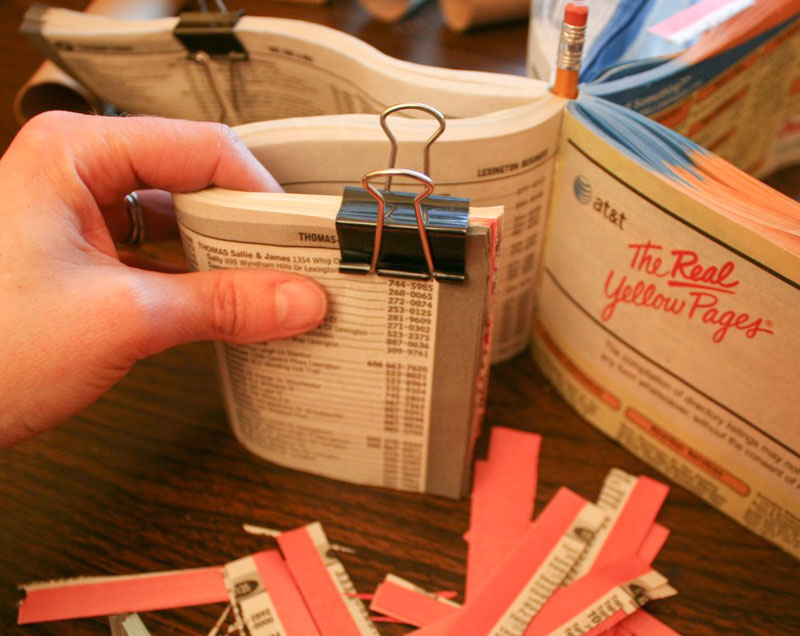
Step 2: Create the sections and core
Separate the pages of the book evenly into 5 sections, and put a binder clip on each section to hold it in place. If you want to get really creative here, you can try to find your own phone number or the number of your favorite pizza place. If you're lucky with where it's positioned in the book, you can split a section on that page, and have that number visible on the outside of the finished loop.
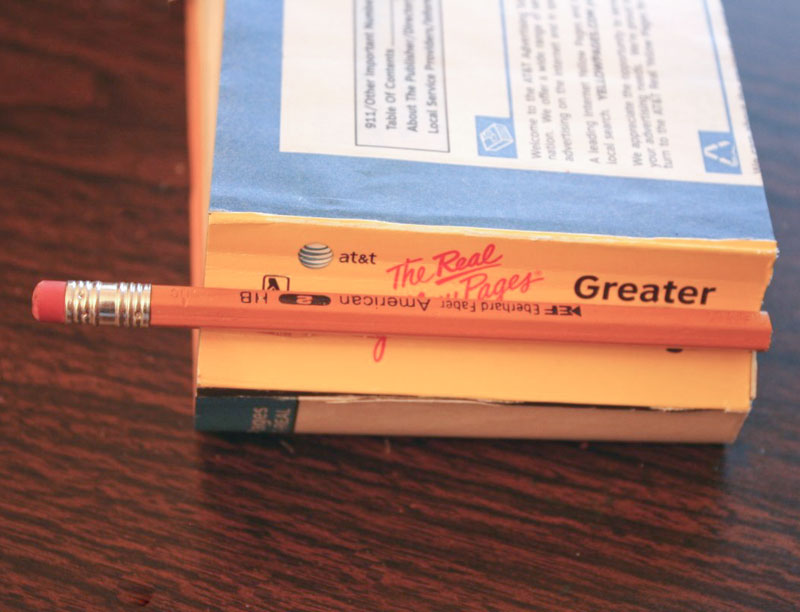
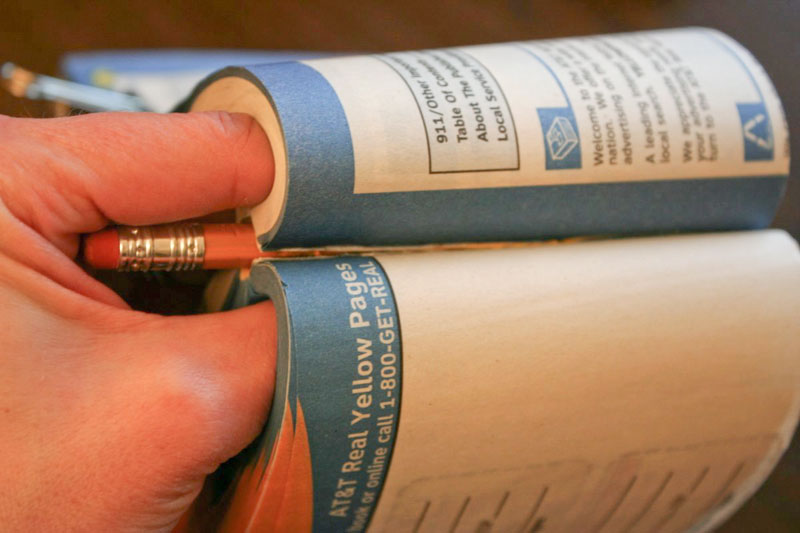
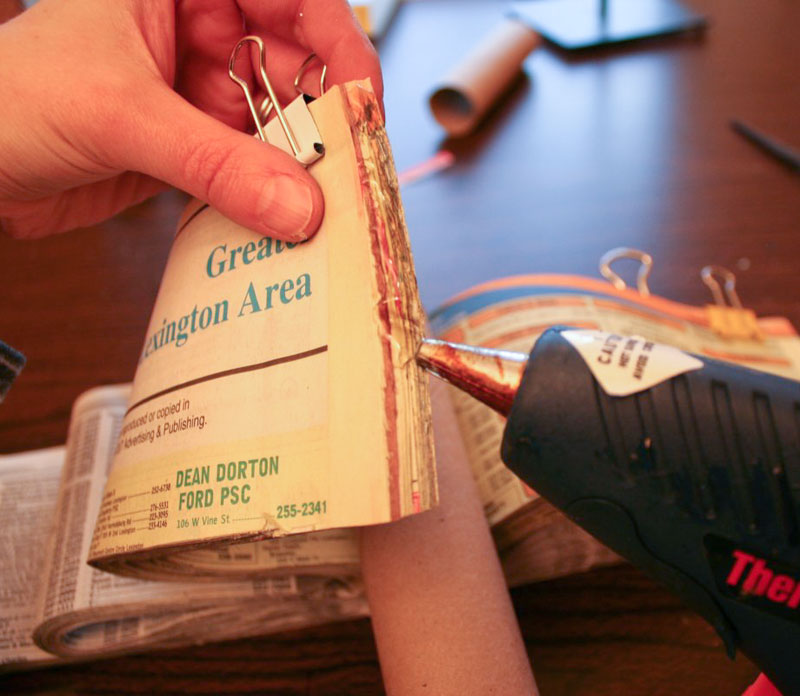
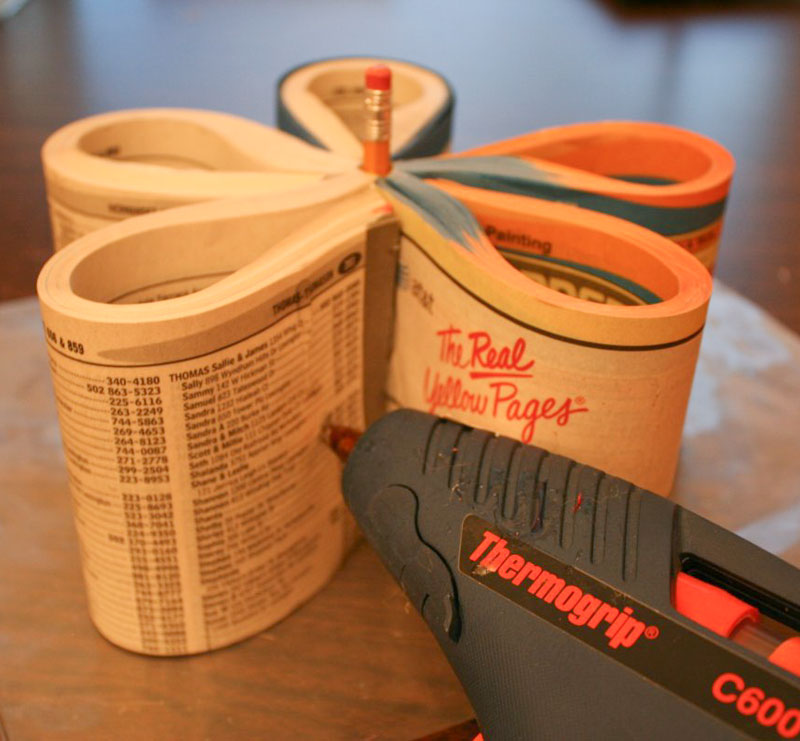
Now we need to roll the spine up tightly in the center to create the core. To do this, you need something to be in the middle for spine to curve around, and we think a pencil works (and looks) great!
Take a brand new pencil and cut it about 1 inch longer than the height of your book (no saw necessary -- regular scissors will work). Using a hot glue gun, glue the pencil to the spine, lining up the bottom of the pencil with the bottom of the book (the part where you cut, which is not as smooth) and letting the eraser end stick up past the top of the book (the part that is nice and smooth).
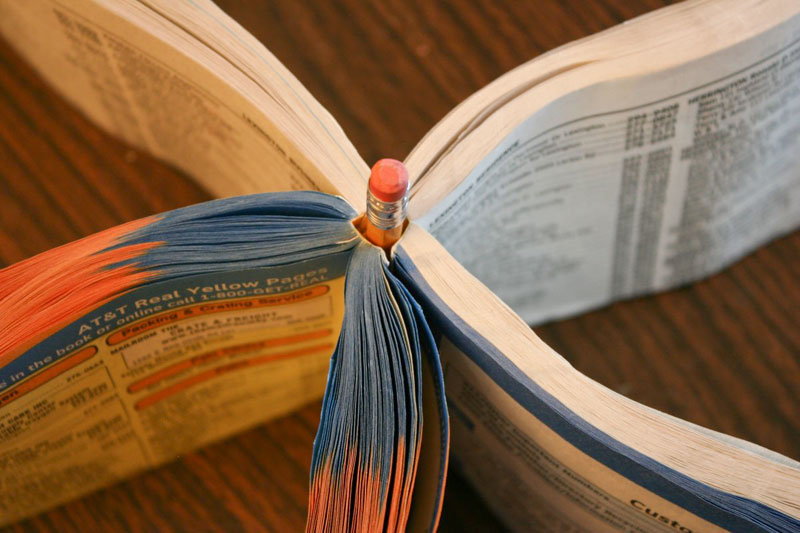
Squirt a bunch of hot glue around the pencil and roll the spine of the book around it, holding it in place until it's set.
Your book should no longer have a front or back, and should wrap around the pencil, which will make a fun handle for picking up the organizer after it's done.
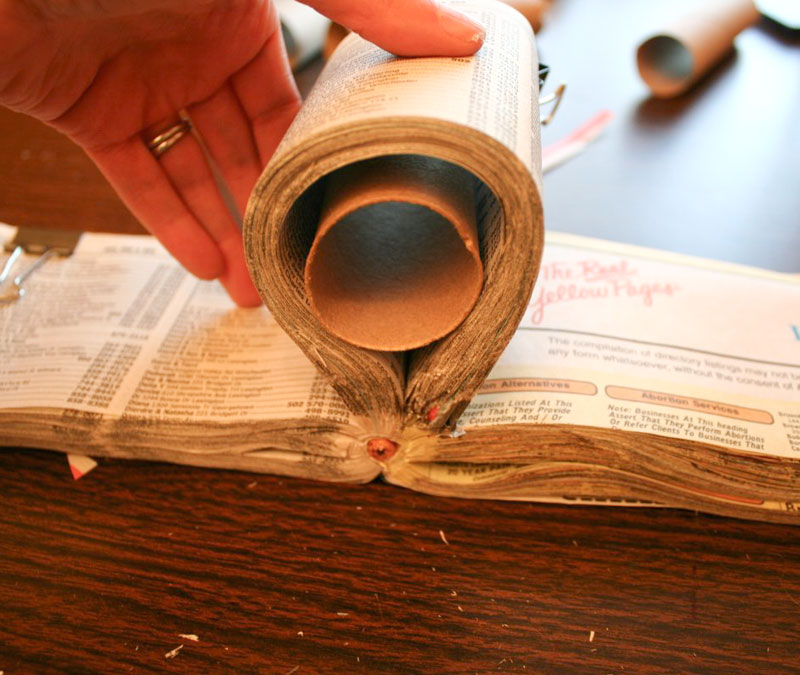
Step 3: Form the loops
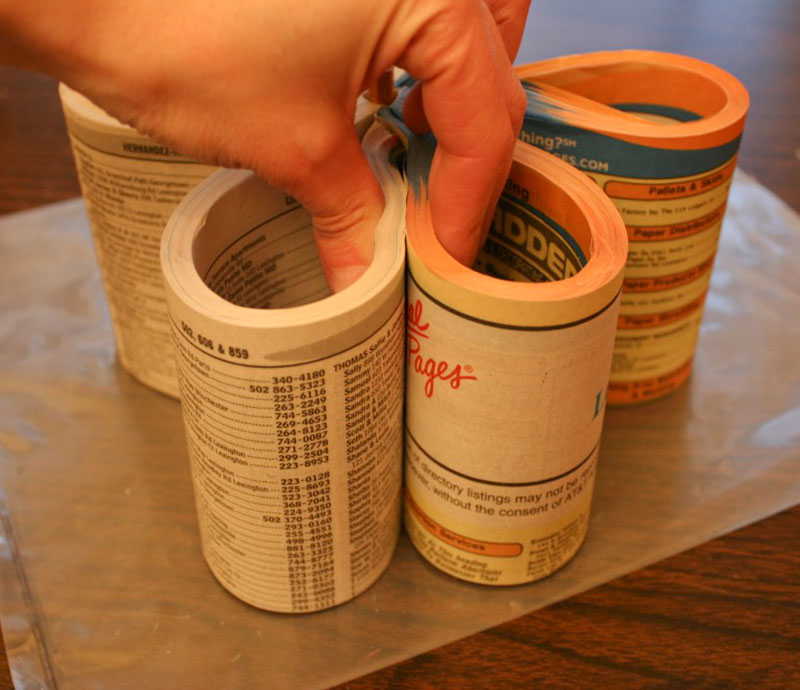
To form the first loop, take one of the sections and remove the binder clip. Curve the entire section around a piece of cardboard tube, making sure that the pages are nice and smooth and forming a nice loop.
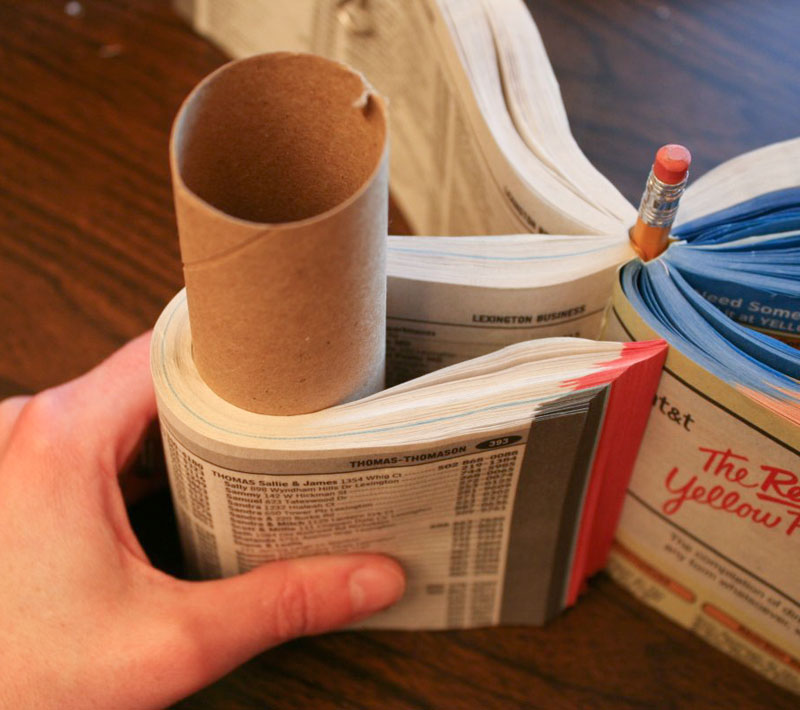
When you have it in a position you like, put the binder clip back on.
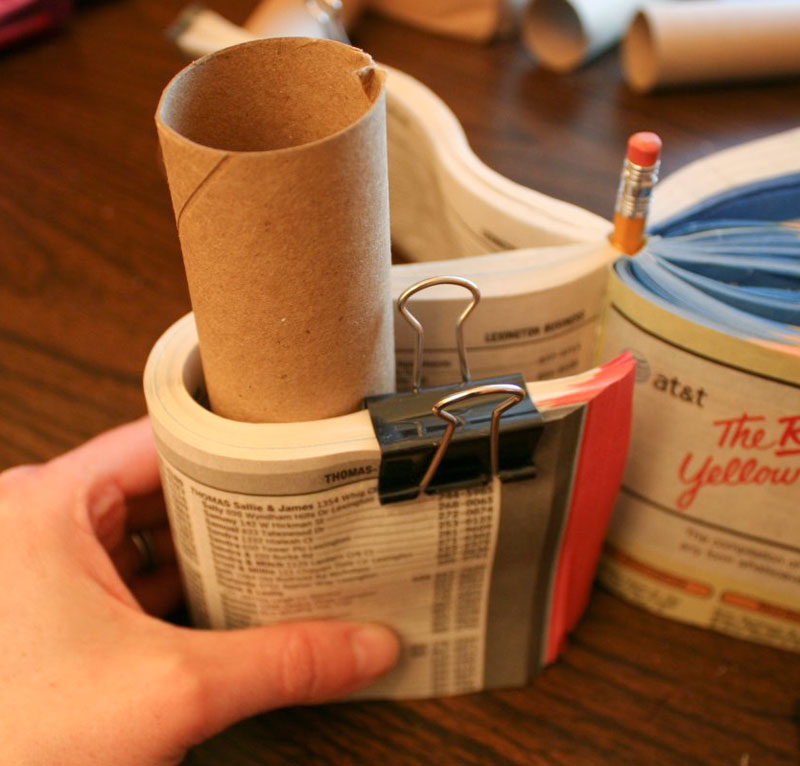
You can see now that by bending the pages around a curve, the ends don't all line up anymore, but we need them to. Using a pair of scissors, cut off the ends of the pages so that they are once again square with each other.

Then test the fit by putting it into the crease along the spine.
If it fits, glob a bunch of hot glue on the edge and push it back into the crease, securing your loop.
Hold in place until the glue is set.
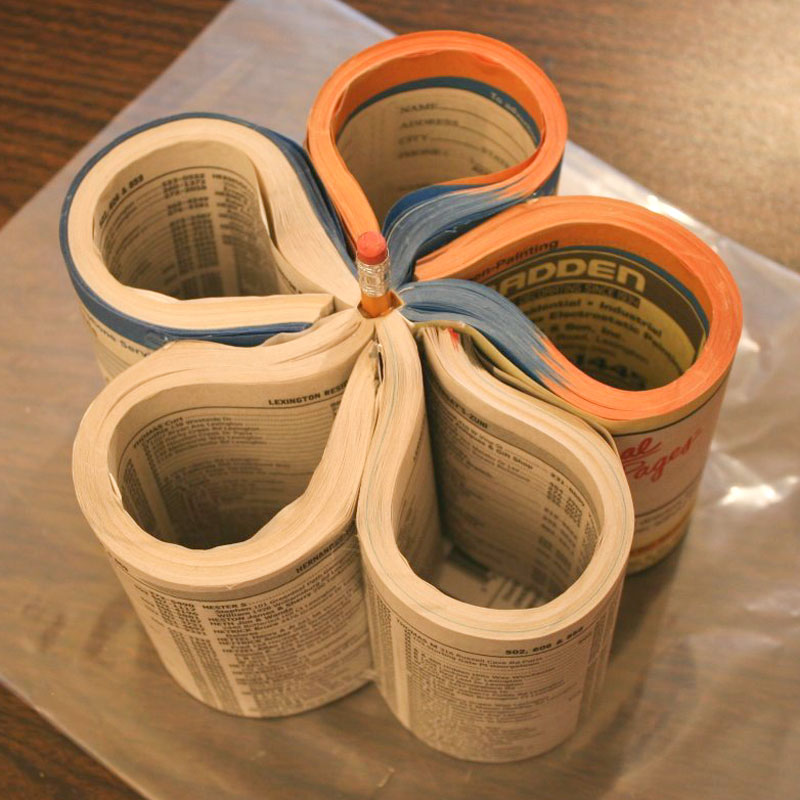
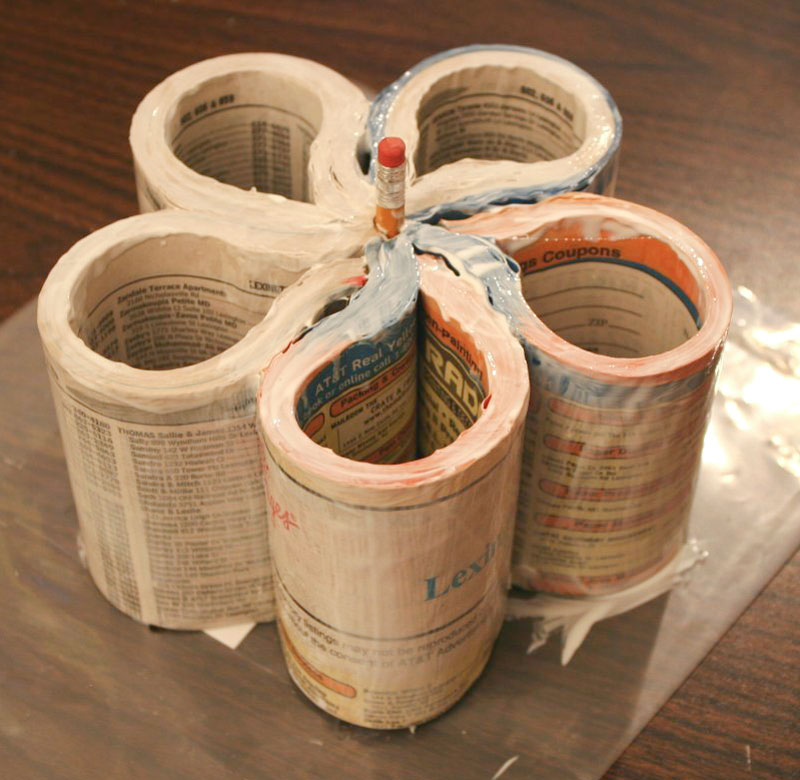
Repeat with the other four loops. You'll be left with five wobbly loops around the center.
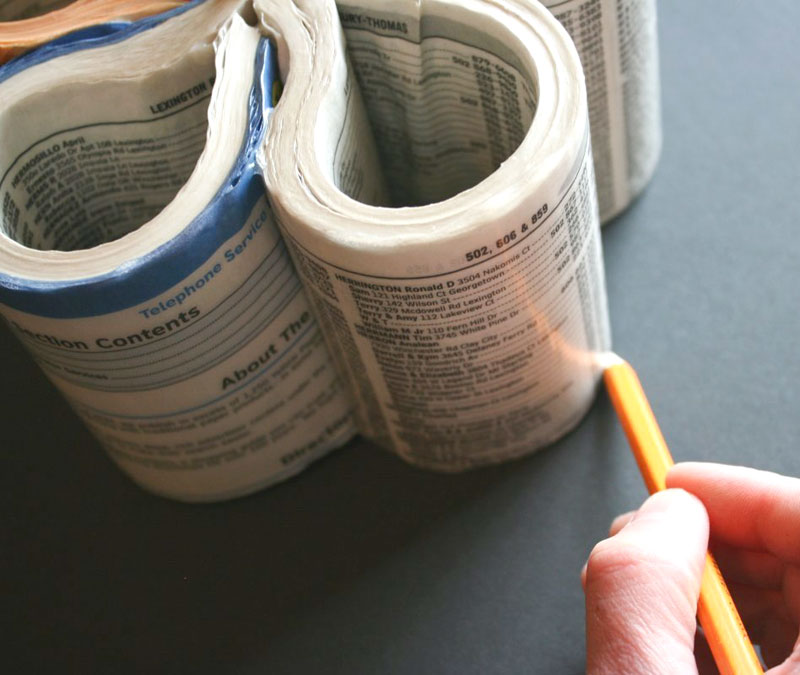
Now we want to open those loops up a little and make the whole thing more secure. To do this, run a bead of hot glue along the side of one loop, about an inch or two away from the spine.
Then press the two loops together along this glue line and hold until set.
Repeat for the other loops, and you'll see that the loops are now full and round.
Step 5: Strengthen the loops
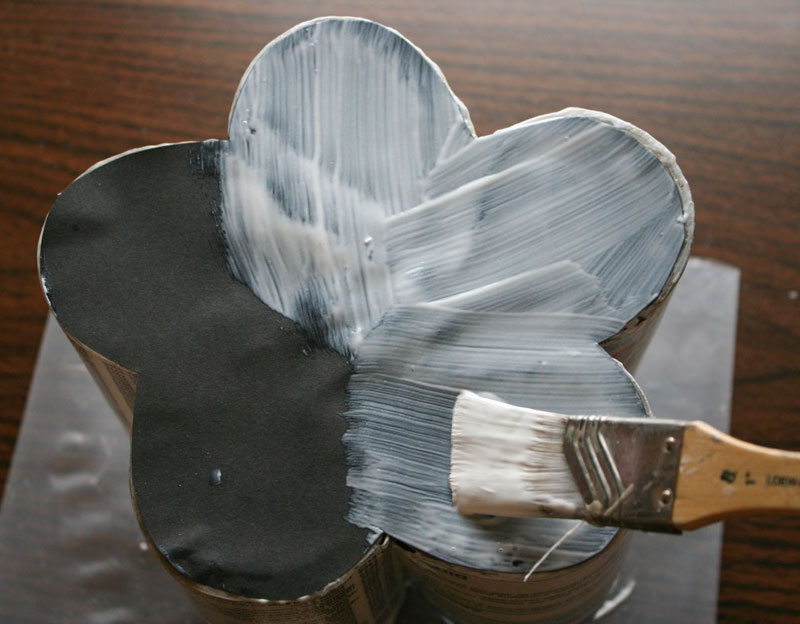
You've got this really neat looking pencil holder now, but it is still weak. The pages aren't stuck to each other and it's all still flexible. We're going to fix that with a few coats of decoupage medium such as Mod Podge.
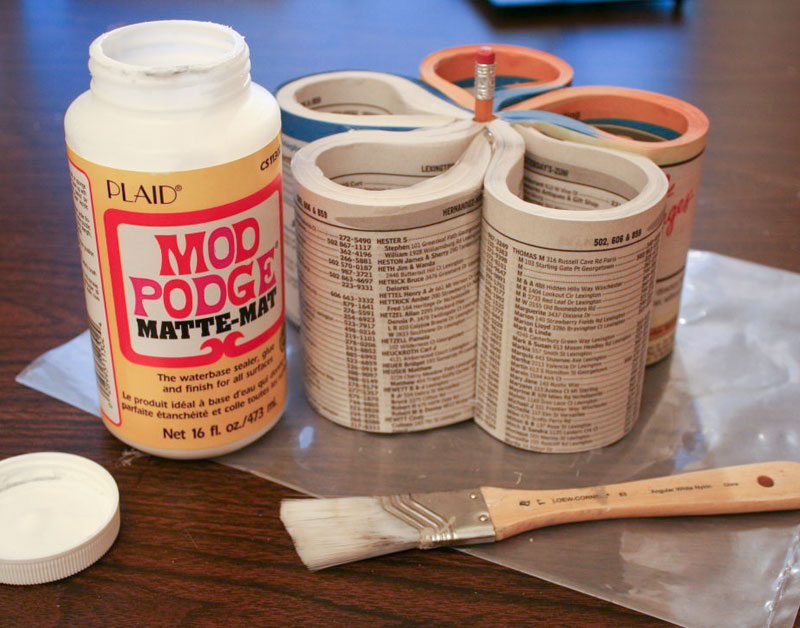
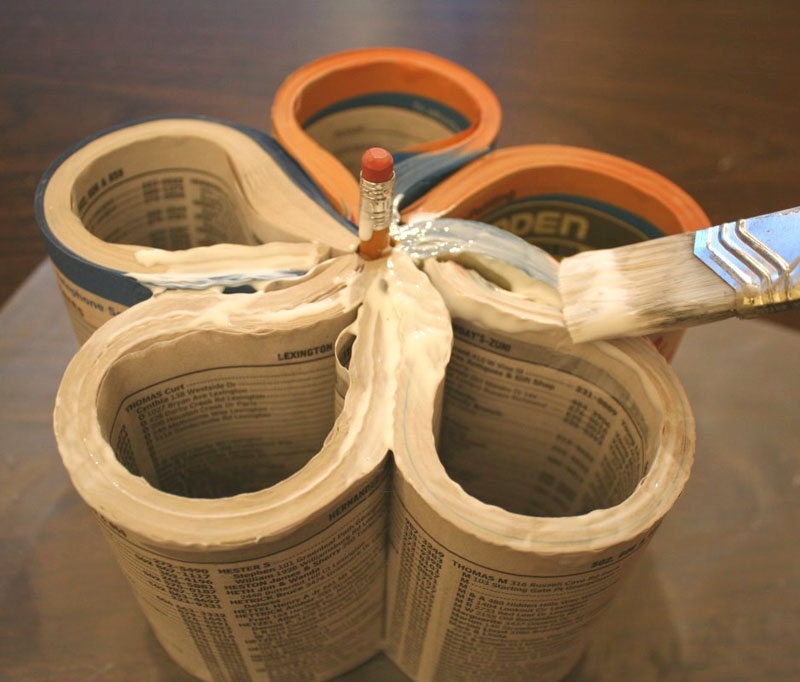
Using a 1" wide, soft-bristled paint brush, glob the Mod Podge onto the top edges of the loops, making the individual pages all stick together. Don't try to coat the inside or outside of the loops yet — just focus on the top edges where all the pages meet.
Let it dry then apply a second heavy coat, but this time go ahead and brush the Mod Podge on the inside and outside of the loops, and again on the top edges. Don't worry if it looks sloppy... it will dry clear.
With two coats on, it's time to flip it over and coat the bottom. Because of your pencil "handle", the piece won't sit flat on the table when it's upside down, so cut a small length of cardboard tube and set the pencil inside that. It will make the perfect stand and keep your project stable. Put two generous coats of glue on the bottom, so that the pages are all firmly stuck together.

Step 6: Adding a bottom
When you're satisfied that you have enough coats of Mod Podge on the entire piece and it's as firm as you want it, and the Mod Podge is fully dry, you can add a bottom to your organizer.
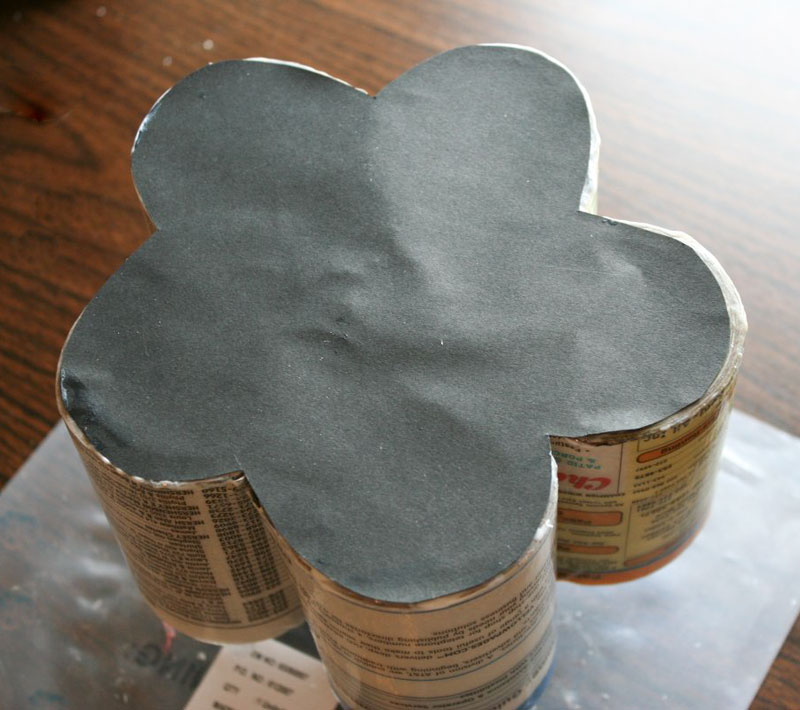
Trace the bottom onto a piece of black card stock and cut it out.
Coat the cardstock with Mod Podge and put it, glue side down, onto the bottom of the pencil holder. This bottom piece will keep your pencils from falling through.
With the card stock bottom in place, apply another liberal coat (or two) of Mod Podge to the exposed surface, to seal it. Having a full coat on both sides of the card stock will make it sturdier and prevent damage from the things you store in the holder later.
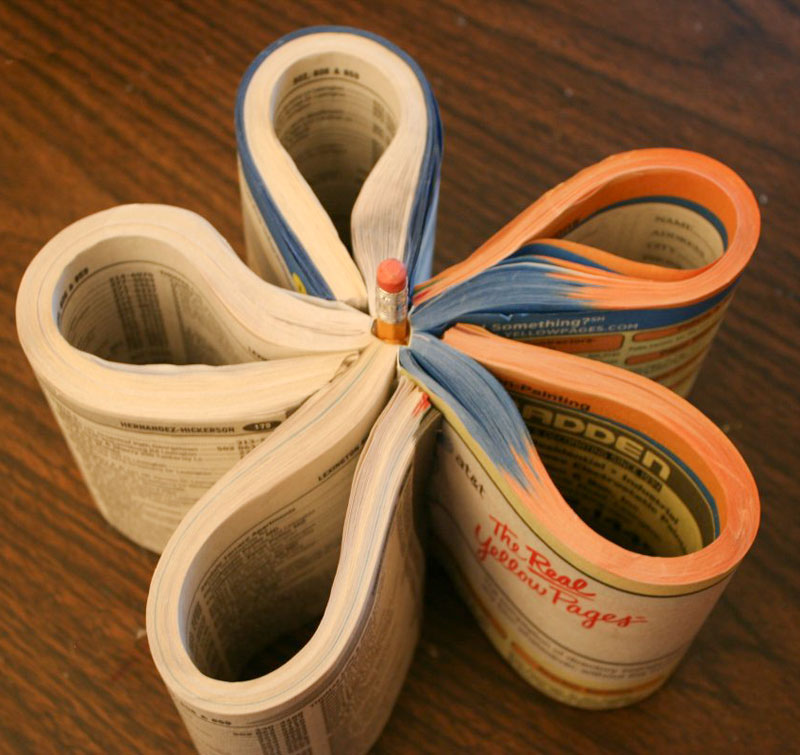
The finished organizer
When everything is dry, you're done! Go ahead and fill your organizer with markers, pens, and pencils and add it to your desk. What a clever way to upcycle an old phone book into something fun.
similar projects
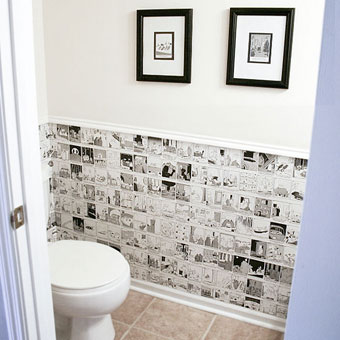
Recycle Daily Calendars to Wallpaper a Small Space
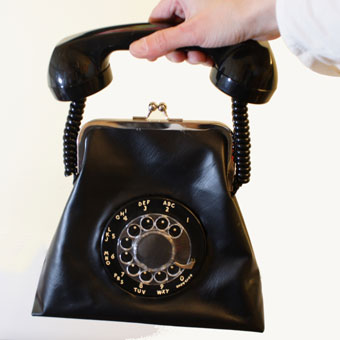
DIY Retro Rotary Phone Purse
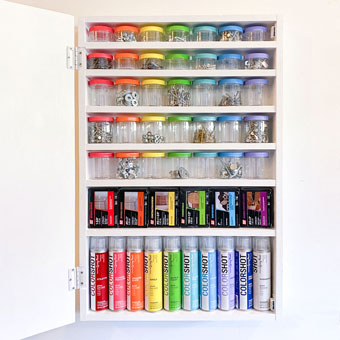
DIY Hardware and Spray Paint Organizer Cabinet


103 comments so far:
You guys are so clever! What a great 'green' statement you can make at your desk! Just the right size to get all sorts of supplies in too!
It would take some planning up front, but it would be cool to make each of the loops a different height. Would probably have to start with the tallest loop and work from there. Just an idea.
Great job as usual with the tute! I know how much work it is to put these together and I really appreciate it! Thanks!
Thanks, Cindy! That's a cool idea with the multiple levels. I've got the other half of my phone book left, so maybe I'll try it out this weekend :)
What DO you do with those old phone books that keep arriving on the doorstep? One of our readers suggested using them under a glue-gun to catch drips, ripping off pages when you need a fresh surface. But this idea is fantastic!
Great upcycle!
Ha! Love it...so clever!
This is such a fantastic idea, I can't wait to get started. But for all those other phone books you keep getting, you can actually remove yourself from the phone book mailing list here https://ss82.shared.server-system.net/~paperlesspetition.org/sign.php
awesome idea to recycle phone book
Thank you all for the kind words. It is a fun project to do.
Missy, thanks for sharing the tip about getting removed from mailing lists. I've tried that a time or two myself, but I don't think the list gets to the people actually delivering the phone books door-to-door (or if it does they don't care.) It's definitely worth a try, though!
Phone Companies Take Notice.... this should be included on a page in their book! Wonderful!
Cindy, I finally made that multi-level organizer you suggested, and I painted it too. Thanks for the great idea! Check out the updated info up in the main post for details :)
Martha Stewart- Eat your heart out!
Very nice, creative tutorial!
Followed a link from iReport on CNN about recycling old phonebooks...this is such an incredible site! Keep it up!
Really creative...very impresive...good idea...!!!!
This is brilliant! Thank you so much. I'll have to coerce my parrents into letting me have the phone books... =]
very very good, thats a great idea !!!!!
This is a great concept and it looks like its fun to make!
So fantastic... im gonna do this for myself...
love this kind of skill...
It is an fantastic Idea... thanks I make it in just an hour.. thax
When I cut the book at the beginning I used a bandsaw. It was a very quick cut and it ended up nice and straight. Try cutting it this way instead of using a knife. It ends up with a very nice cut. Thanks!
Nate, thanks for the tip! Readers, if you have access to a bandsaw, give it a try.
if you painted the outside with watercolours you've be able to have colours and quirky :D
What a fun idea, Steph. I wonder if phone book paper can handle the watercolors without wrinkling up? I might have to do a test run one day.
I just love this idea! I've linked to it on my blog and hope to attempt it soon! Thanks for the inspiration!
-Sarah from Create Studio
http://www.createstudio.blogspot.com
Really excellent creative…very …good idea…!!!!
way cool! thanks for the inspiration :)
Love this idea. I have some old phone books that need to be recycled and could use desk organizer as well!
Thanks for sharing
Carole
sewcuteblog.blogspot.com
after you coat the whole thing and it dries you should be able to paint it with water colors
Hi, I made 2 of these pencil holders and they came out great! The first one I made following your steps exactly but the second one I did a little differently. I didnt cut the ends of the pages to square them again before gluing into the loop position. It came out much better looking. It was more seamless than the 1st one.
We would love to see a picture of your revised version!
SUCH a great idea, just in time for Spring Cleaning! I've added this to my "Get Organized" roundup for today, and you can grab an "I've been featured badge" if you'd like!
Thanks so much for the terrific idea! :)
This is just a brilliant idea. I never know what to do with old phone books but now I do!
Great idea for reusing those old phone books! Thanks for posting, I saw this in Craftzine & wanted to stop by & comment on this awesome idea.
Shelley, thanks so much for saying hello, and welcome! We hope you check out the rest of the site and find some more fun projects ideas :)
This is soooo cool! Thanks for sharing such a brilliant idea! I have a stack of phone books that I use in my paper crafting projects but think I will have to try this out!
I LOVE it and would love to have you post it to one of my parties.I will have new parties up on Sunday Night and Tues Night.
cheri
recycle + reuse ... this looks like so much FUN and a great use for a wasted item...we will try this with scouts - and use for father's day as a desk organizer. Thanks All ! we love the ideas!
Glad you love the idea, Arlene. We would love to see pictures of your scouts working on these organizers!
Hey, I have an idea to make a side table out of like 15 phone books we have at our office. Seriously, we got about 12 new phonebooks this year, it is ridiculous.
My idea is to drill a hole in the center of each phone book (I have several different sizes) and then stack them on a rod (like a cake decorator would do).
I was looking for ideas about how to paint them or to make them stiffer. Do you just recommend the modge podge? That seems like a good idea. Did you put the podge on before you painted that last project?
What a neat idea! I think Mod Podge would be a good idea. We did use it on our books before painting and it really stiffened the paper up. We'd love to see your finished table so please send us a pic when it's done!
What a very neat idea. I'm 72 years young and going to give it a try as I am retired. If I do good with them, will make for Xmas gifts to my friends. Thanks again for the great idea.
amazing, its a great idea. Thanks for sharing
this is too cool!
I made one for the desk in my kitchen using an old recipe book that had lots of pictures. Thanks for the great idea. I work with special ed kids and use phone books to make foot stools as it is sometimes hard to obtain the right chair/desk height. Just cover them with duct tape, and the tape comes in great colors.
Heidi, we would love to see a picture of the holder you made from a recipe book!
did you use acrylic paint?
We used glossy acrylic paint.
i totally love this
I just did today. It didn't come out as neat as yours but I enjoyed it. Thank you!
Awesome, Ruchi. Glad you enjoyed the project and thanks for letting us know!
muito boa ideia vou tentar fazer um desses em casa ehehe, mas o multi nivel multi colorida depois de pintada parece madeira e é de madeira?????? me responda por favor e estou representando o brazil como vcs falam nos eua ta eté mais ta thau adorei teu trabalho.
Hi Spike, and thanks for writing to us from Brazil! According to Google's translation of your Portuguese, I think you're asking if the multi-colored, multi-level organizer is made of wood. It's actually a phone book just like the other one, but we painted each section with glossy craft paint after it was finished.
Oi Spike, e obrigado por escrever para nós do Brasil! De acordo com a tradução do Google para o seu Português, acho que você está perguntando se o multi-coloridas, organizador multi-nÃvel é feita de madeira. É realmente um livro de telefone assim como o outro, mas pintado com tinta de cada seção do ofÃcio brilhante após ter sido concluÃda.
This is a really fun project. I was so happy to find it. For the past few weeks, I've been posting "Once A Book" projects on my blog on Saturdays. This project will fit in perfectly! I'll be posting a link tomorrow. Stop by and say hi, and thanks for sharing this tutorial. ~ Olivia
Great upcycle! Here's another idea for finishing touches -- using Mod Podge, apply a single layer of torn pieces of colored tissue paper. Lighter colors will allow the quirky print to show through.
lovee!=)
I love this! I will be featuring it on somewhatsimple.com next Tuesday! Thanks for the great idea!
maravilhoso,acho que essa ideÃas deveriam ir para as escolas públicas...
I like this idea, I'm thinking I might just have to try it - we have Soooo many old phone-books laying around that I've often wondered why we've never gotten rid of them... maybe I just got my answer.
I did have a thought though - I really love the idea of the multi-layered one, but like you said, it lost some of the charm... I wonder how it would look if you just painted the top (or maybe even an inch or so onto the sides), so the bulk of it still had the phone-book design on it, but it had splashes of colour that hid the messy edges... Hmm, I wonder.
I like the idea of just painting the edges, Cholle. If you do it, we'd love to see how it comes out!
wow SOO CoO0l i love it !
olha sou brasileira e queria pedir a tradução desta explicação......obrigada
Amei a ideia, gosto de tudo que é pratico e reciclável.
Obrigado, Daisy!
I am making one a bit taller for my kitchen utensils, one for an herb planter on my porch or a few linked together lined up on the rail like a flower box. Also cute for a bathroom caddy for Q-tips, cotton balls and make up sponges.
How thick would the phone book need to be? Ours here is not very thick, so I don't know if the sections would be sturdy enough. I guess we could try one with fewer petals.
Thanks for the neat idea. Our phone books rarely get used. It is much faster and easier to look things up online!
Heather, the petals get pretty sturdy once you've coated them with several layers of Mod Podge, so you might be fine with a thinner book. It might be a good idea to go with four petals instead of fine, too. Or maybe you could use two books at once?
creative.....
haha what a creatively :))) first tme i see that idea!
Howdy! I simply want to give a huge thumbs up for the great info you've here on this post. I will be coming back to your weblog for extra soon.
Welcome, sauna! Glad you are going to come visit us again.
You could also do little plant pots with this idea.
This Is AWESOMEEE!!!!!!!!!!!!:) im gunna make it for my intro project:) yayayaya6yayyyy<333333333333333333333
esta bien calidad..lo hare..tengo algunas guias pero son muy gruesas no se si eso afecta en algo?
i just threw away a phone book today...wish i would have seen this a few hours sooner! maybe next year. but i love the site...there are so many creative ideas to try! thanks for all the inspiration!
So great!! creative , like .:)
here's a picture of mine, i made 2 one for me and one for my step daughter...
https://fbcdn-sphotos-a.akamaihd.net/hphotos-ak-snc6/284821_10150317962501823_503901822_9396632_2236076_n.jpg
https://fbcdn-sphotos-a.akamaihd.net/hphotos-ak-ash4/284936_10150317962616823_503901822_9396634_3680484_n.jpg
Wow, Cassandra, you got really fancy! Thanks so much for sharing those photos with us. They look great :)
awesome!!
Absolutely wonderful!!!!!!!!!!
Hi Chica and Jo,
I'm starting a blog about reusing garbage and other materials. I was looking for things to make w/ a phonebook and found this! Can i please use your image? Of course i'ĺl put a link to your site. You can check it out at http://www.klikokunst.com~rolien/wordpress/p=254
ItÅ› in dutch, and the link is at the word "hier", at the bottom of the article.
Thanks!
Rolien
What a super cute and clever project! I never ever would have thought it was made out of any old phone book! Awesome :) You should totally enter this project in Craftbaby's 'Upcycle Challenge'! http://www.craftbaby.com/contests/3/upcycle-it-sweeps
Rolien, you are welcome to use our photo on your blog as long as you credit it to us and link to our site. Thanks for asking!
wow it is just ausome , amazing .
it's so beautiful guys.. woww
So clever - and green too!!I love inventive ideas!
Thank you so much for this tutorial! Me and my husband had a habit of losing our phonebooks. (Which no longer happens, due to planning out a single spot for it to go and keeping it there.) Last Christmas we got a big box from my hubby's brother and his wife. It was a huge stack of phonebooks, haha! So I have been trying to think of what to do with them.
I made one today and it turned out so cute! I made the two different level one in the shape of a butterfly and completely covered it in Mod Podge Sparkle. I will try to post a picture as soon as I locate my camera. Thanks again!
Charity, I love your family's sense of humor! Glad you enjoyed this project, and we can't wait to see a photo. If you have a Flickr account, please upload it to our Flickr group for reader photos.
Will this work if I use PVA glue?? I'm from the UK and they don't sell Mod Podge... So is PVA glue a good replacement??
WOW! How cool is this. You are very creative. Great way to recycle phone books. I know I always have more then I need. Thanks you for sharing.
Linda @ MixedKreations.com/blog
Rose, I haven't worked with PVA glue enough to know if it will dry to a clear, hard finish like Mod Podge or other decoupage mediums would. You could try putting some on a few pages of a phone book and let it dry and see if you like the result.
I REALLY REALLY LOVED IT.
AND I MADE IT IN MY SCHOOL COMPETITION.
Love the idea. I find the unpainted version has more character, but I'm not a fan of the bright "yellow" pages look. I think I'm going to try "antiquing" mine. Maybe with tea? or antiquing gel? Maybe a transparent white wash? or weak bleach solution? Any ideas? Do you think mod podge will work okay over an antiquing gel?
Jena, I love the idea of antiquing the pages. I've never worked with an antiquing gel, but you could try on a scrap first. Please let us know how it goes!
It's cool. I love it! thanks for sharing.
Rubbish! What a good use for rubbish, love it :-)
so cool my bff is going to love it peace
This will be awesome for a project! It will be a great accesorie for my desk!
I made one of these!! It turned out pretty cool...have it on my desk at work!
Now this is a neat idea! Who would have thought it's made out of a phonebook!
awesome most ideas....cnt be neglected
thanks alot for ur inspirational crafts :)
Mind Blowing and Very creative
Great job... Must Try for everyone :D
Great idea my mum thought that using a foreign phone book so you'd have the different letters
Beautiful, creative and mind blowing idea