


xTool D1 Pro Laser Cutter and Engraver Tool Review

We have been using a Cricut and Silhouette electronic cutting machine in our projects for years, and while they are great for cutting thin materials like paper or vinyl, we've been wanting to try a laser engraving cutting tool that could cut and engrave a variety of materials including thicker materials.
We just received a xTool D1 Pro laser cutter/engraver and we can't believe how many things you can do with it. Today I'm going to share my review of the XTool D1 Pro's features and functions, and I cant' wait to share more projects with you in the future as we learn more about creating with a laser cutter.
Disclaimer: we received the laser tool to try out at no cost, but all opinions expressed are our own.
Choosing your xTool bundle
xTool has a lot of different bundles for the D1 Pro frame. I chose the xTool D1 Pro 2-in-1 Kit bundle. This has the 10W blue module, which I chose because I didn't expect to cut really thick material and the size of the laser 'spot' is slightly smaller, which can allow for higher detail. This bundle also has an infrared laser module, which I was excited to try out because infrared works a lot better on some materials, particularly metal.
The xTool D1 Pro dimensions are about 17" by 15" so you can engrave or cut some fairly large projects. They do have an extension kit for only $200 that can take it up to 36" x 17", which is enough for some larger signs and similar crafts, but I just reviewed the base unit. They also have extension legs to raise it up more to work on taller items. I 3D printed four leg stands pretty easily, although the official ones are metal and screw into the bottom, so they'll provide more stability.
As background, before I got the xTool D1 Pro, I had tried a few laser cuts on my husband's smaller, 2.5W output diode laser engraver. It was a lot of fun and I could do quite a few useful things with it, but the xTool is definitely a whole new level.
Assembling the xTool D1 Pro laser cutter and engraver
The machine was packaged very nicely and securely, and the best part is, it was easy to assemble — much easier than my other engraver, because the D1 Pro had fewer steps. (I assume they can't ship it fully assembled because the box would be huge, and because it would probably need adjustment or get bent up during shipping). If you can put together IKEA furniture, this shouldn't give you much trouble.
Only three minor things with the assembly and initial setup gave me pause. First, the step where it says something like, "adjust the belts to the right tension" without giving you any idea what that's supposed to be. At this point, I switched over to the putting-it-together video (and honestly, should have just followed the video from the start instead of the written diagrams) and the person in the video was twanging the belts slightly like a guitar string, so I got it about the same tension as that appeared to be and it has worked perfectly.
The second minor issue was when I hooked it up to the xTool Creative Space software that is bundled with the unit and it asked to update the firmware on the engraver. Part of that involves setting a firmware update switch on the engraver unit, and you need to move a switch on the unit to the left side where it says "upload". If you get it wrong it's a little nerve-wracking as it sits there at 3% forever and tells you that you might damage the unit if you stop it, but I was able to successfully stop it, set the unit correctly into firmware update mode, and restart it, although I might have been in trouble stopping it if it had really been updating. I'd recommend that xTool tell you to look for the tiny "upload" label on the board, and it would be great if the software could tell you that you didn't follow the instructions, but honestly this was mostly just me not paying enough attention.
The third minor issue was when I went to use my Lightburn software with the unit. xTool Creative Space is nice, but I had used the Lightburn software before and I think it's worth the $60. It allows you to construct more inside the application and set lots of different cut and engrave types for different parts of the project. When you set up a new laser, Lightburn asks you where the origin (x=0, y=0) of the unit is; my old unit was in the lower left as you're looking down on it, and the xTool D1 Pro has its origin in the upper left. I thought it was asking where I wanted the origin to be, but in fact it was asking where the unit has its origin, so the first test I did from Lightburn was mirrored because I had given it the wrong information. From reading forum posts, this seems to be a fairly common error, so the Lightburn team should probably make this a little more obvious, but that's not xTool's fault.
Initial test run tips and observations with the xTool
Now that the xTool was all set up, and I used some scrap wood material do some test cuts. I went into xTool Creative Space, told it I had 3mm pine, told it to cut a rectangle, and ... wow! This thing has a LOT more power and is a huge improvement over the smaller laser I had used before.
It not only cut through the wood in one fast pass, but I also cut partway into the table underneath even though the laser was focused an inch higher! And this is the 10W version, so the 20W would be twice as powerful. They even have a 40W module available now, if you need even more power. I learned my lesson that I should have put a piece of plywood underneath. I found some 2'x2' plywood project boards at Home Depot for $7 which fit perfectly underneath, and I always use that now to protect my surface.
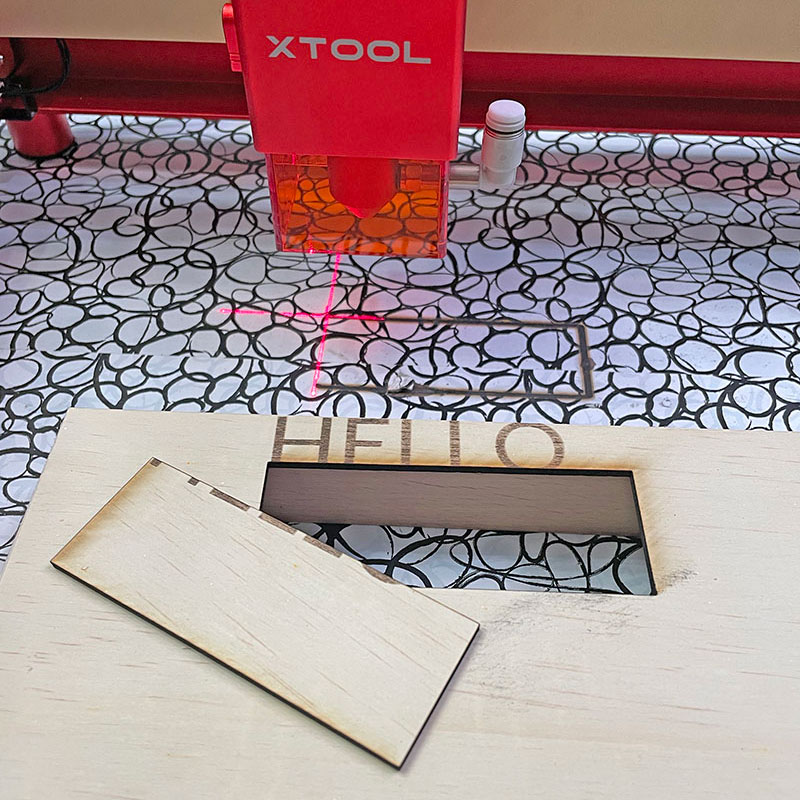
I mentioned focus, and this is another place where xTool has thought this through really well. With my husband's smaller laser, he always had to place a little cylinder in between the material and the laser and then adjust the laser up or down, and we would lose that cylinder a lot. With the xTool, there's a built-in adjustment arm on the laser module — you just loosen the module, slide it up a little, swing the arm down, let the adjustment arm rest on the material, and then tighten the module again. It may seem like a little thing, but it really makes a difference when you're changing between materials a lot. It's also great that the laser can focus all the way down to the surface it's sitting on, so you can engrave a part of a much larger flat object if you want even if it won't fit completely inside of the work area.
I was also really impressed with the laser sights on the xTool. Like a laser level, the module projects crosshairs so you can line up your material precisely and get it squared up. Again, this feature seems like a fairly small thing, but it really helped me with consistency. In the past, I would just keep turning the laser on low power or running the 'frame' command over and over again to see if it looked right.
One other thing that was really nice (although I don't use it) is that when you use xTool Creative Space, you can tell it you're ready and then move over to the unit and press the button to start the engraving. I have a separate old laptop right next to the engraver, so that I don't have to worry about moving the laptop back and forth or having my other computer work disrupt an engrave job, but this will be great for some people.
Engraving with the xTool D1 Pro
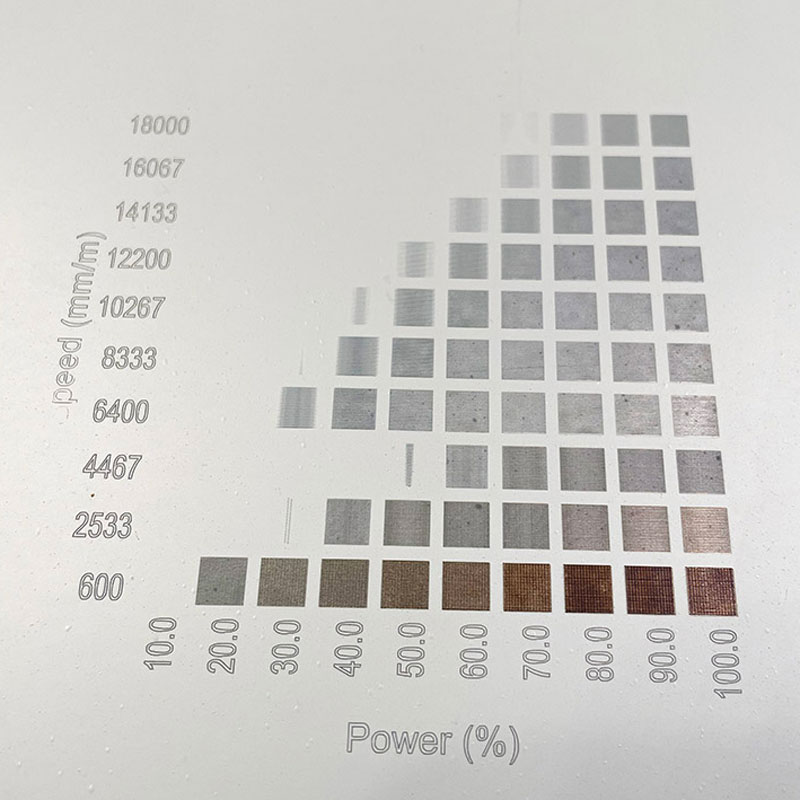
Most laser modules can engrave wood really nicely, but I wanted to see how this module handled slate because I really like the look of engraved slate, you can make some really nice gifts with it. I first ran a materials test on the back of one of the slate coasters I had.
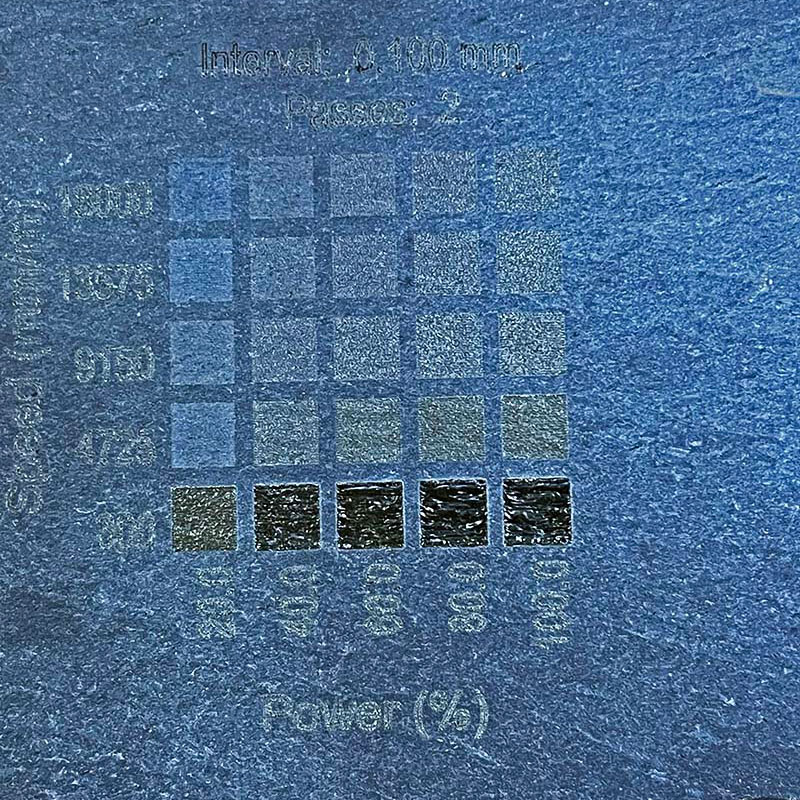
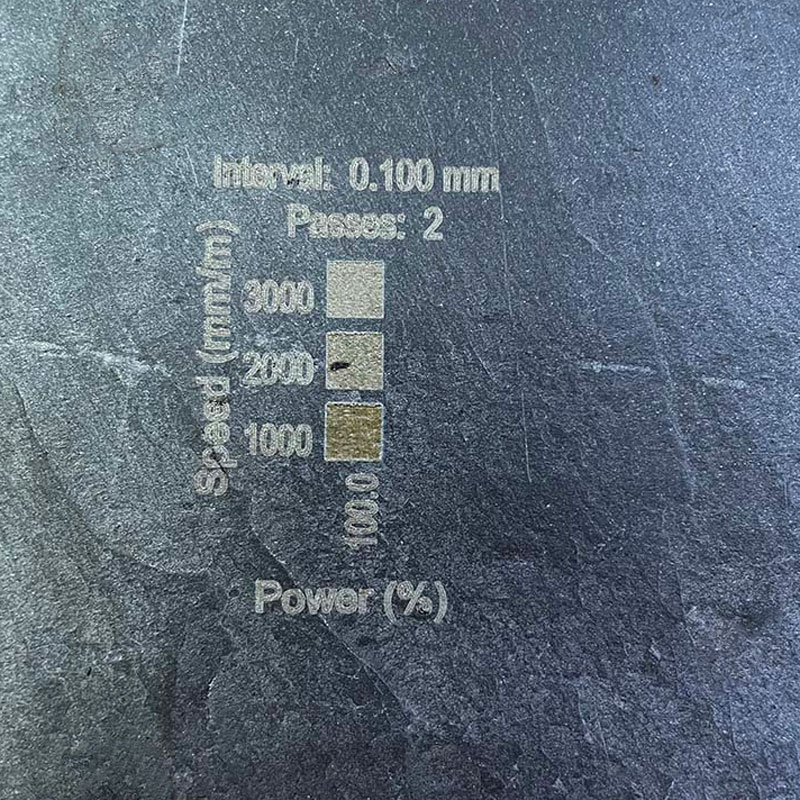
This was a great reminder that sometimes you need to refine your settings a little to get the results you want. I decided that I probably wanted 100% power but with a speed in between the slowest and next, so I changed the settings and ran another test. These settings worked much better. It looks like 1000mm/sec, 100% power is a good choice for these slate coasters.
I went ahead and did a proper design with our logo on a whole coaster. I love how it came out!

Normally you would fill in the shapes to make it more visible, but I like how this outlined approach looks. I may try another one filled in later to compare.
Just imagine the possibilities with engraving logos, photos, and text onto the backs of mirrors, onto white tiles (for tips, look into the "Norton White Tile Method"), and tons of other materials.
Laser cutting with your xTool D1 Pro
After the successful test runs with cutting and engraving, I decided to try an actual cutting project. I wanted a compass rose insert for a resin tray project I'm doing, and so I chose 5mm birch plywood (also cheap at Home Depot) to try. I was a little concerned that the 10W module would have trouble with the thicker 5mm material, but it didn't at all. Using the material library, I got a pretty good cut on a test oval at 180mm/min, 100% power, with 2 passes. Honestly, I should probably have turned the power down a little, or the speed up a little, because I cut into my protective board on the table a bit. (At least I didn't cut into the table again!)
So, I told the xTool to cut the compass rose (which I found with a Google search of Creative Commons line art), and once I was done, it lifted out beautifully.
I've done more engraving than cutting, so I'm still a bit of a novice at cutting, but it worked great on the first real project attempt, and I'm very pleased. You'll note that the bottom of the material has smoke damage from the laser. In this case, it doesn't really matter because I'm planning to paint the wood, but the best ways to avoid smoke damage are to elevate the work piece using something like a honeycomb table or a rack (so that the smoke can escape under it) and to use air assist to blow the smoke out of the way.(This also allows the laser to cut better and keeps the edges from burning as much) The 10W module has a hookup ready to go for an air assist kit. Some people also use an air compressor.
I did have an issue when cutting out a couple of the letters to go with the compass rose. Plywood has glue in it, and there are sometimes different amounts of glue in some places than others. One of the sides of one of the letters didn't cut through. I just cut another letter, although I probably could have made another pass to get through it. You can buy laser-ready plywood (also available on Amazon) to avoid issues like this and get better results.
Using the xTool D1 Pro infrared module
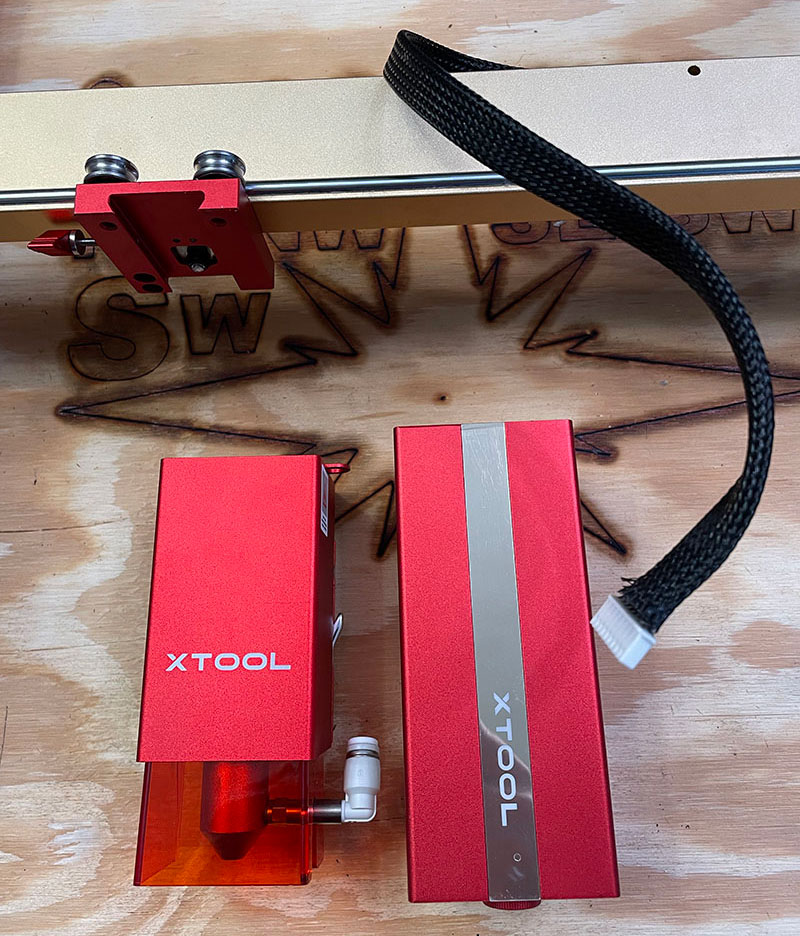
So far, this has been a lot better than the old blue laser unit, but I really wanted to try out the infrared module. It only took about 2 minutes to swap out the modules. The hardest part is unplugging the connector to the module and removing the connector cable from the slot that holds it in place, but a small screwdriver to pry up the sides of the connector helped. You also trade out the power adapter, but that's a one-time thing and you can use the bigger power adapter with either module.
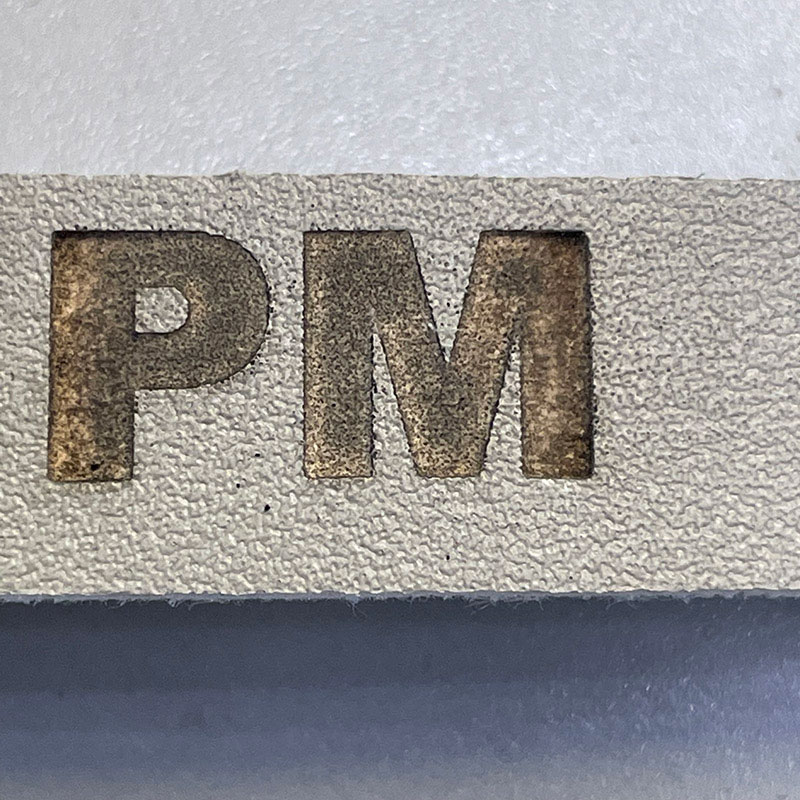
The first thing I tried was leather. Actually it was "vegan leather", which is synthetic material. The infrared laser module is supposed to have far less charring than a blue laser, and it did really well.
Next, I decided to try engraving some metal. I used an old scrap piece with the Lightburn materials test just to see what it would do. Overall the results were very nice, although I did get some odd results on a few of the boxes. I'm not sure if that was an issue with Lightburn or with the laser. The darker ones are visibly sunk into the metal, and you can feel the lip with your fingertip. With most blue lasers, at least at lower powers, you can "etch" metal by taking the paint off the top, but you can't actually engrave the metal.... but this one can!
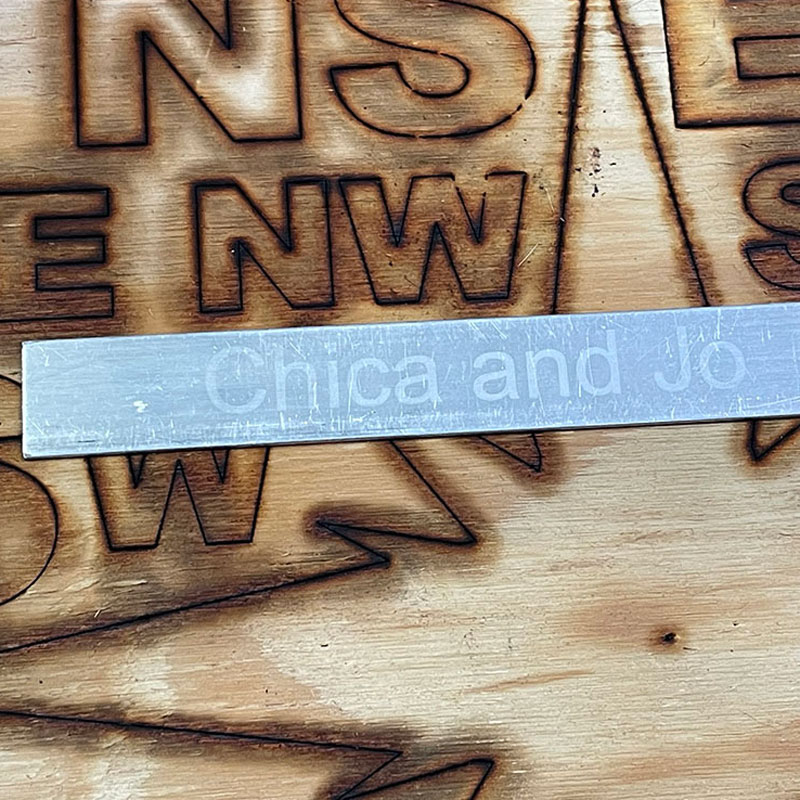
At this point it was fun to just grab other materials to see how it would work. I added some personalized text to my metal ruler and now nobody (other than Chica, I guess) will steal it from me! This was done at 1000mm/min with 100% power, fill mode, one pass and took about 30min. ("Fill mode" means that the laser scans back and forth to fill in the inside of the letters.)
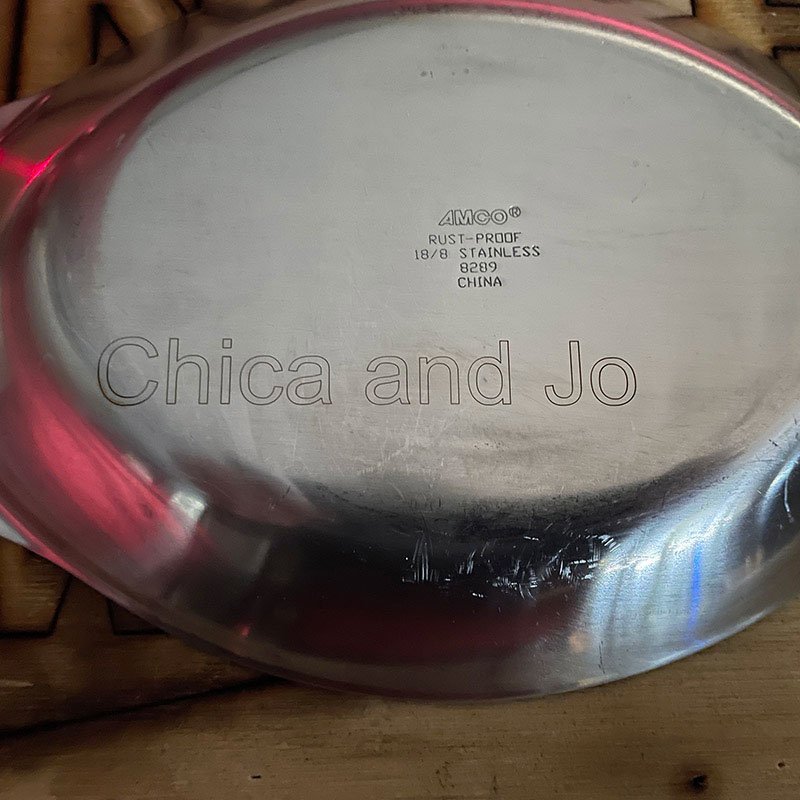
To test another material, I added our names to the bottom of my stainless steel spoon rest. This time, instead of using "fill mode", I used "line mode", which just traces the outside of the letters. This is 300mm/min, 100%, one pass and only took about 3 minutes.
I have read that you can do lots of colors with stainless steel just by varying how long you hit it with the laser, but I haven't tried that yet.
Safety considerations when using a laser cutter and engraver
The xTool uses with a laser beam, so of course I recommend wearing eye protection any time you're going to be looking in the direction of the operating laser. The 10W module does have a guard around it that should protect your eyes, but I'm a little paranoid about such things and always wear goggles. The safety glasses that were sent with the unit appear to be fairly nice, and I wore them when using the blue laser. I did spring for a different set of safety glasses for when I am using the infrared module, because it doesn't look like the glasses included with the blue laser module will block those wavelengths, and since it's infrared you can't see the beam. As an extra safety precaution, I often point a little webcam at the project and monitor progress indirectly on a computer. This lets me keep an eye on it safely without goggles most of the time while I'm busy doing other work.
The other thing to worry about when dealing with lasers is the possibility of fires. Particularly when cutting wood, it's entirely possible that you'll set the material you're cutting on fire, so you should never leave the machine unattended or unwatched. The D1 Pro comes with a flame detector, although I had to disable it due to false positives when running one of these cuts. A better option may have been to increase the speed and number of passes to avoid "nearly" flaming. I don't think the flame detector is defective, it was just a little too sensitive for me. I keep a spray bottle full of water and a fire extinguisher right next to the unit just in case I need to put out any flames, although I've never had to use either yet.
The last thing to note is that you should be conscious of fumes and smoke. Engraving metal doesn't produce an odor, but most wood or leather work will, at a minimum, stink up your room, and the fumes could potentially have some health impacts for some people. You need good ventilation in your workspace, which can be a bit of a challenge in colder months. I did pretty well by temporarily blocking the air intake in my room (to keep the smell from getting into the rest of the house) and pointing a box fan out the window to exhaust the smoke, but you may need an enclosure or even an outdoor space depending on how sensitive you are to smells.
Final thoughts about the xTool D1 Pro laser cutter and engraver
The xTool D1 Pro is a precision instrument with a lot of power and flexibility. I particularly like the ease in swapping out modules and the nice alignment features that it provides. It cut well, engraved multiple materials well, and was much more precise on lines than my husband's older laser engraver.
The unit is built well. At one point during my testing, I had three legs on top of the birch plywood and the fourth one wasn't — it just hung in the air, which is great because it means that the frame is really rigid. If the frame of the unit sags or bends, you'll get less precise lasering. The belts also seem very snug and I had no problem with engraving exact lines even when the laser was moving quickly. My husband's other machine would wobble or distort lines when moved quickly, although it may be that it just wasn't adjusted well enough.
If you'll be cutting large amounts of material, I would definitely get a honeycomb grid (some people seem to get by with a baking rack with square holes, but I haven't tried it) and an air assist module. Apparently the laser lenses do need cleaning and replacement periodically, although I haven't run into that yet. If you're cutting a lot of material or regularly cutting thicker material, you'll be able to do it better and faster with an even higher powered unit, but 10W was enough for the small volumes and the thicknesses I was testing.
All in all, this is a great addition to my tool set, and I can't wait to use it to create more unique projects and personalized gifts.
similar projects
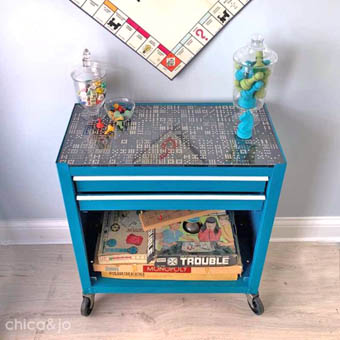
Metal Tool Chest Turned into a Game Cabinet
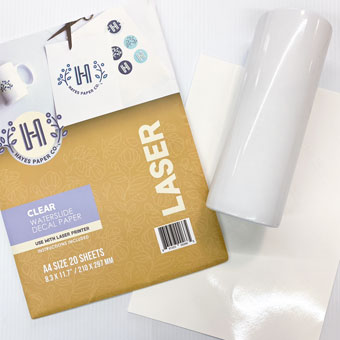
How to Use Laser Waterslide Decals for Tumbler Wraps
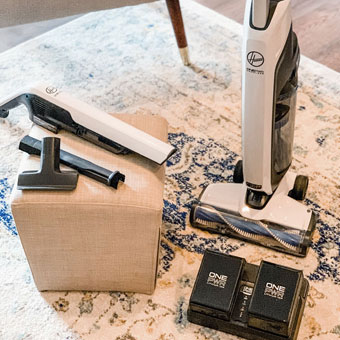
Review of Hoover's ONEPWR Cordless Vacuums


