


White and Blue Modern Kitchen Makeover on a Budget

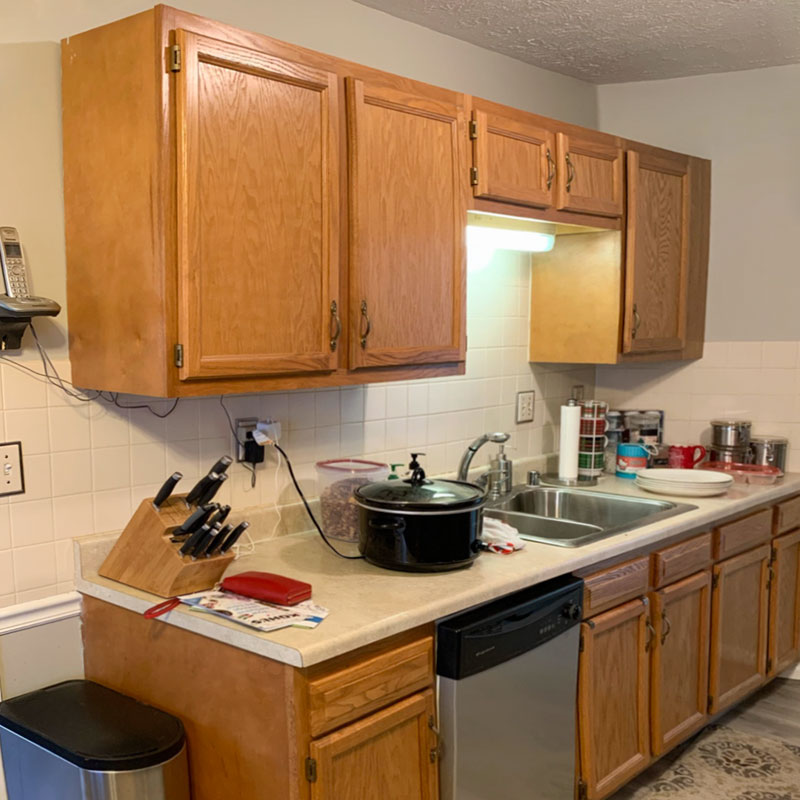
My aunt and uncle recently refreshed all the rooms in their house... all except the kitchen. They were a little stumped as to how to best transform their builder-grade kitchen into something a bit more modern and that would mesh with the rest of the house. They asked if we could help out and we jumped at the chance to tackle this 90s time capsule!
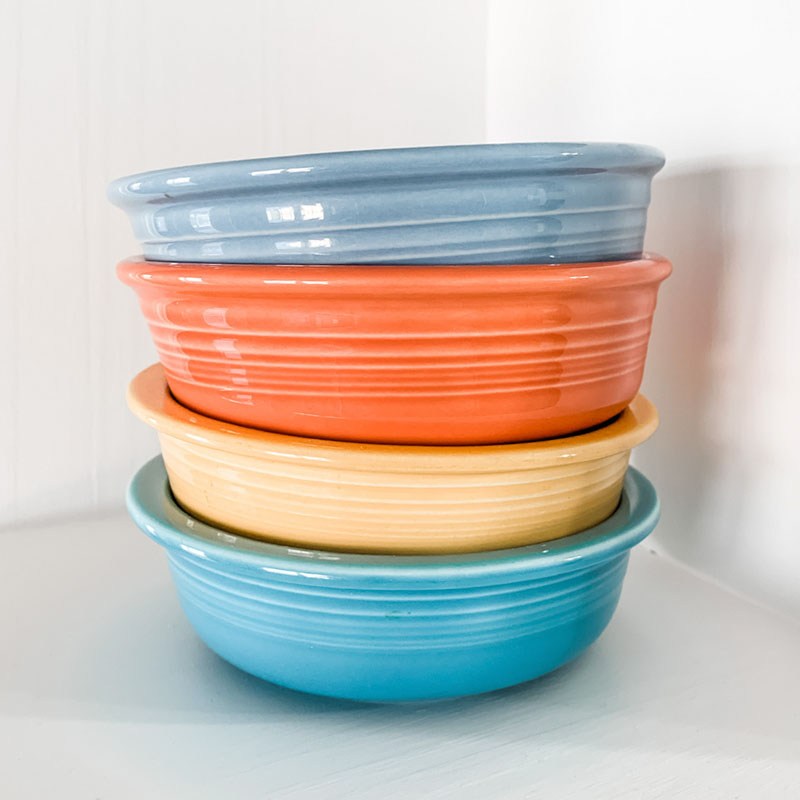
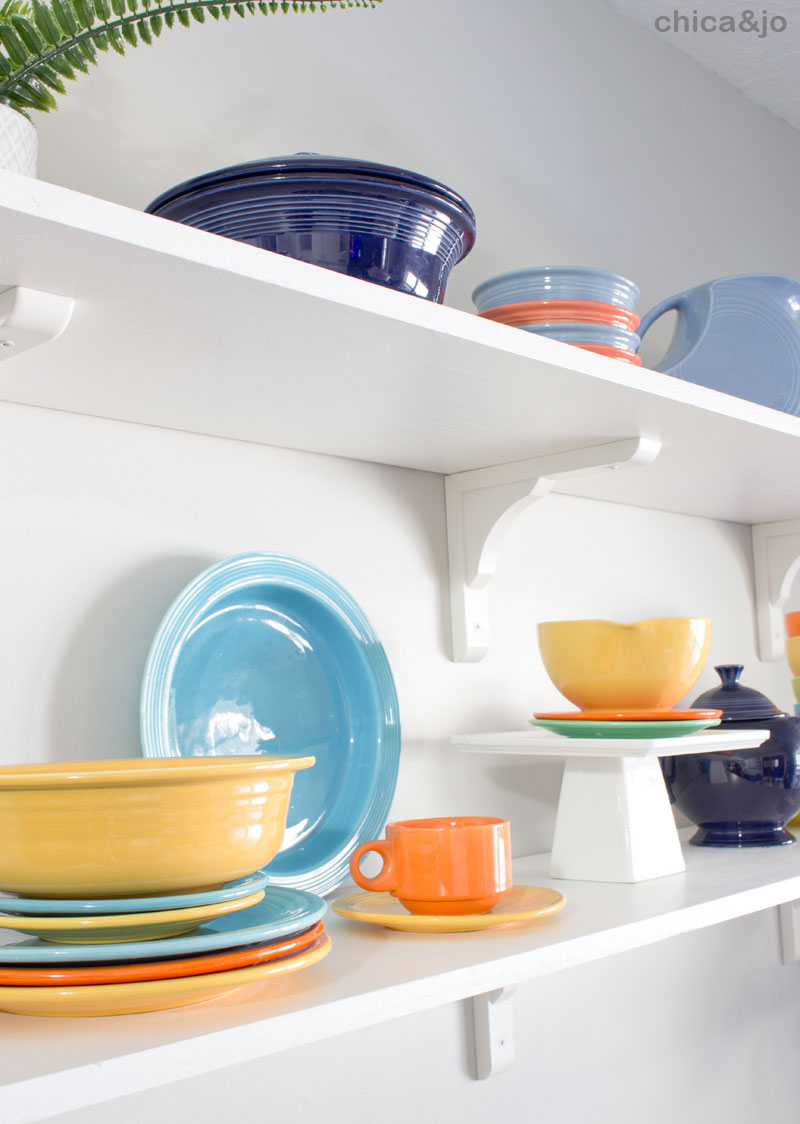
Before beginning our kitchen renovation, we talked with my aunt and uncle to see what was currently working for them and where they might need some help. We also unearthed a collection of vintage Fiestaware hidden in an old cabinet — this instantly became our design inspiration! We knew we had to get these beautiful dishes out and on display and the color palette we pulled from the dishes was so fun and modern.
With our color inspiration set and a good understanding of what needed to stay and go from the kitchen, we started tackling it from both a design and functionality perspective. We found several great kitchen renovation tips that improved the kitchen's look and layout.
Kitchen Reno Tip #1 - Add more function to the sink area
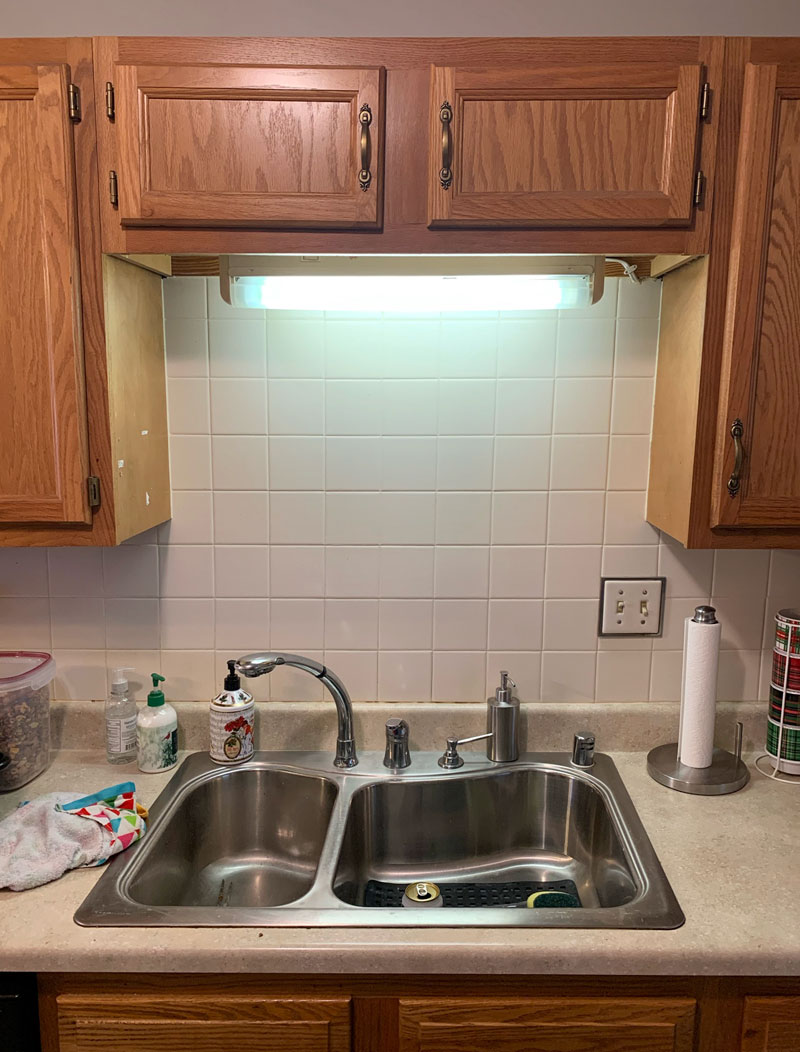
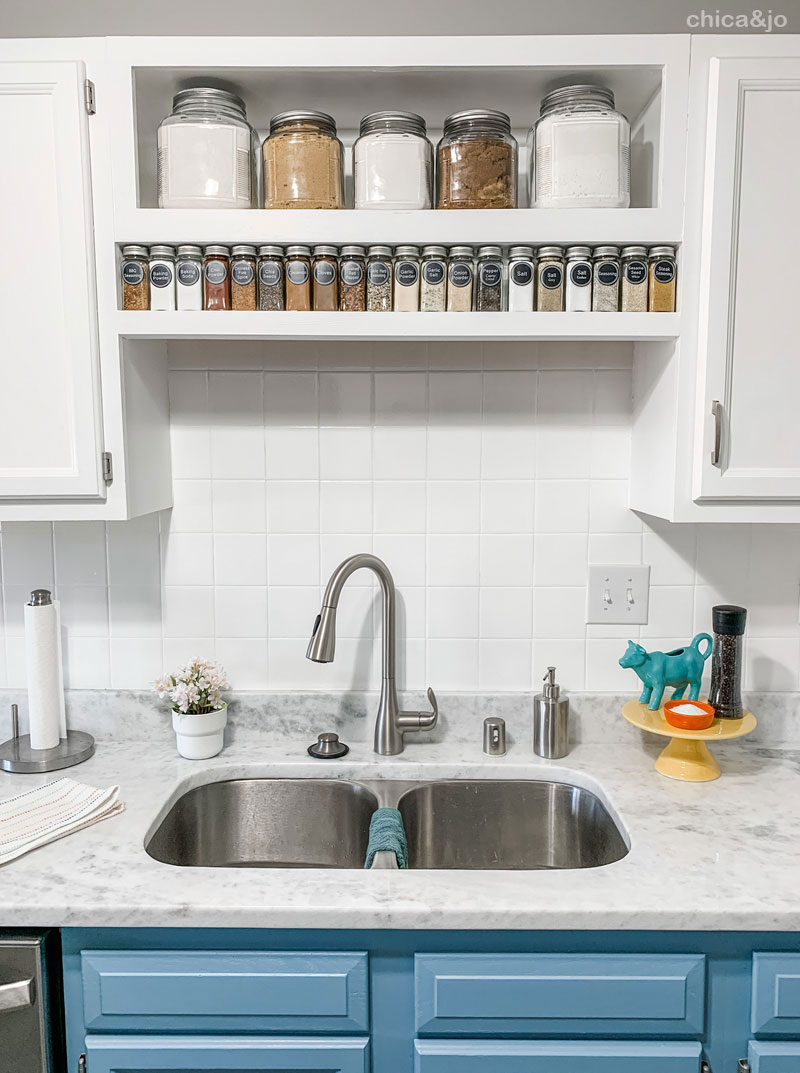
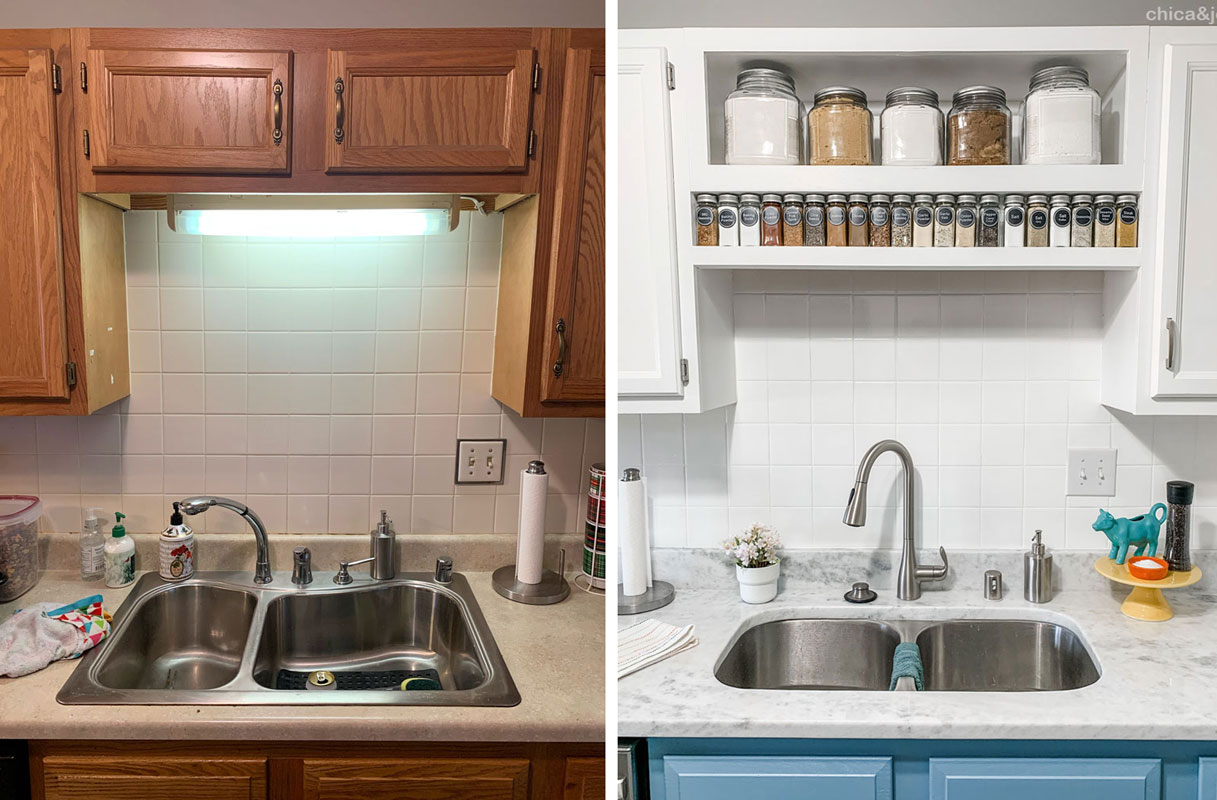
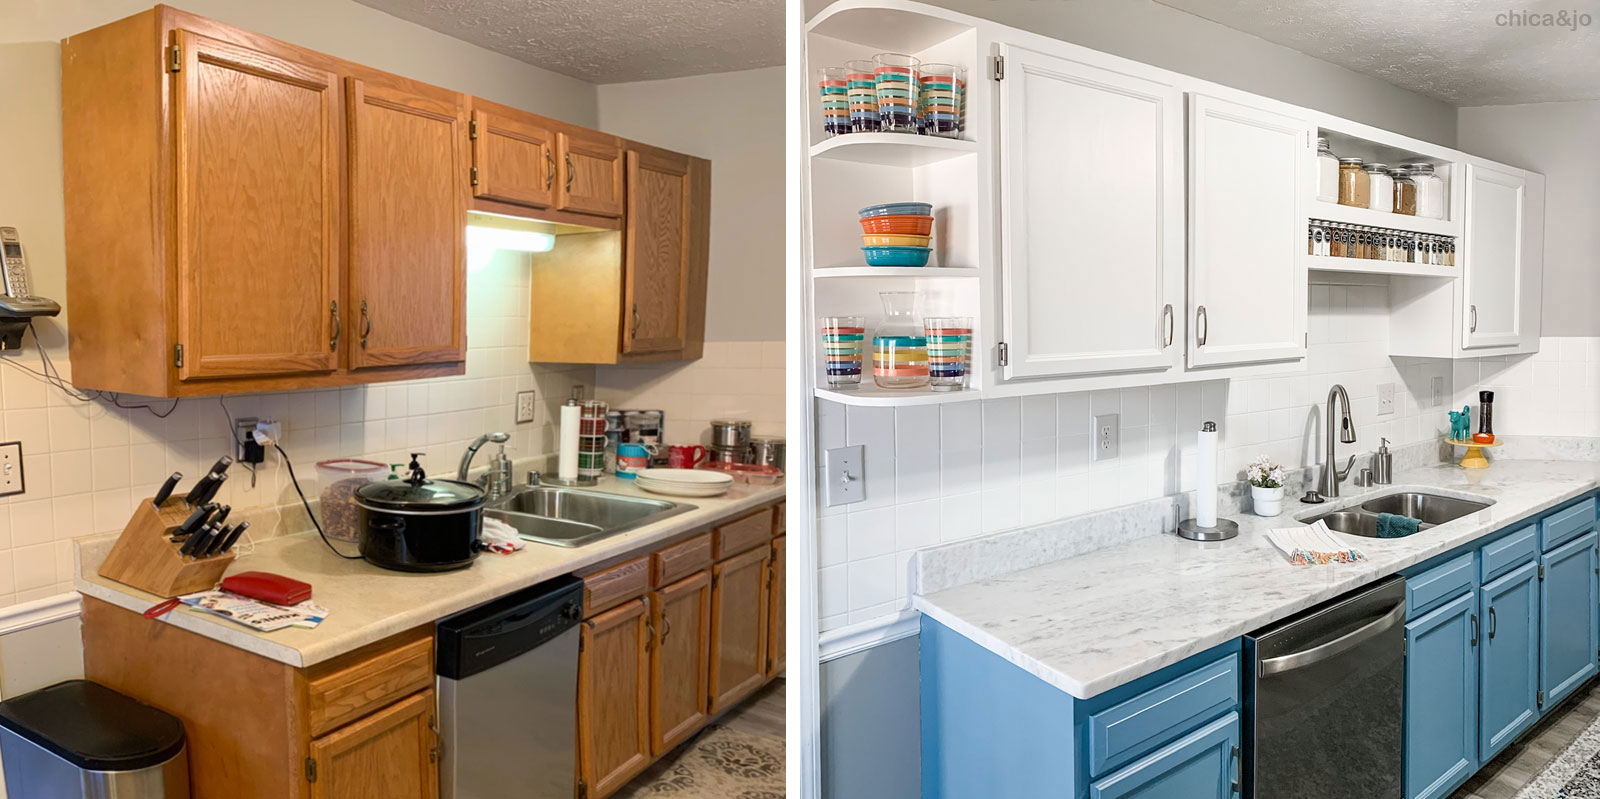
When we discussed how the kitchen currently functioned, we realized they really didn't use the odd little cabinets over the sink or over the refrigerator. The sink area also had a dated, inefficient (and frankly, unattractive) light over it that we had to address.
To transform those little-used cabinets into a real decor element, we removed the cabinet doors and used our reciprocating saw to remove the middle divider. This left us with an open cubby shelf to serve as easy-access storage. Directly underneath that, we built a custom cubby shelf that would serve as a spice rack AND would hide the new LED light fixture that we installed behind it.
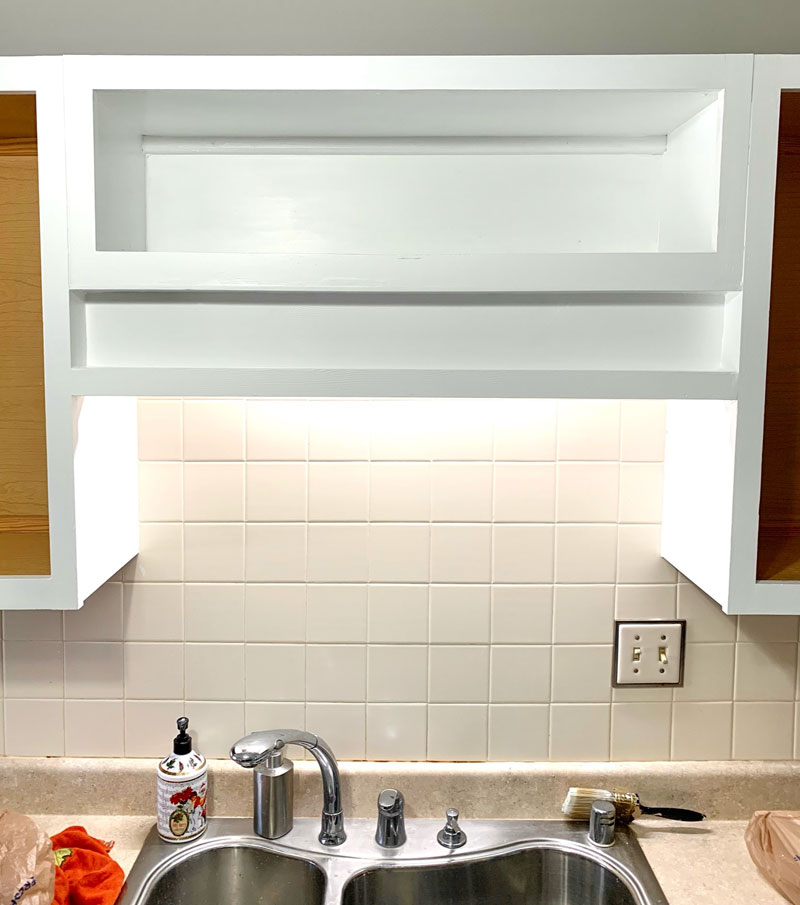
The top shelf became decorative yet functional open storage for dry goods, and the smaller shelf was perfect for spice jars. These changes really transformed the underused area over the sink into a functional and beautiful showstopper element in the kitchen.
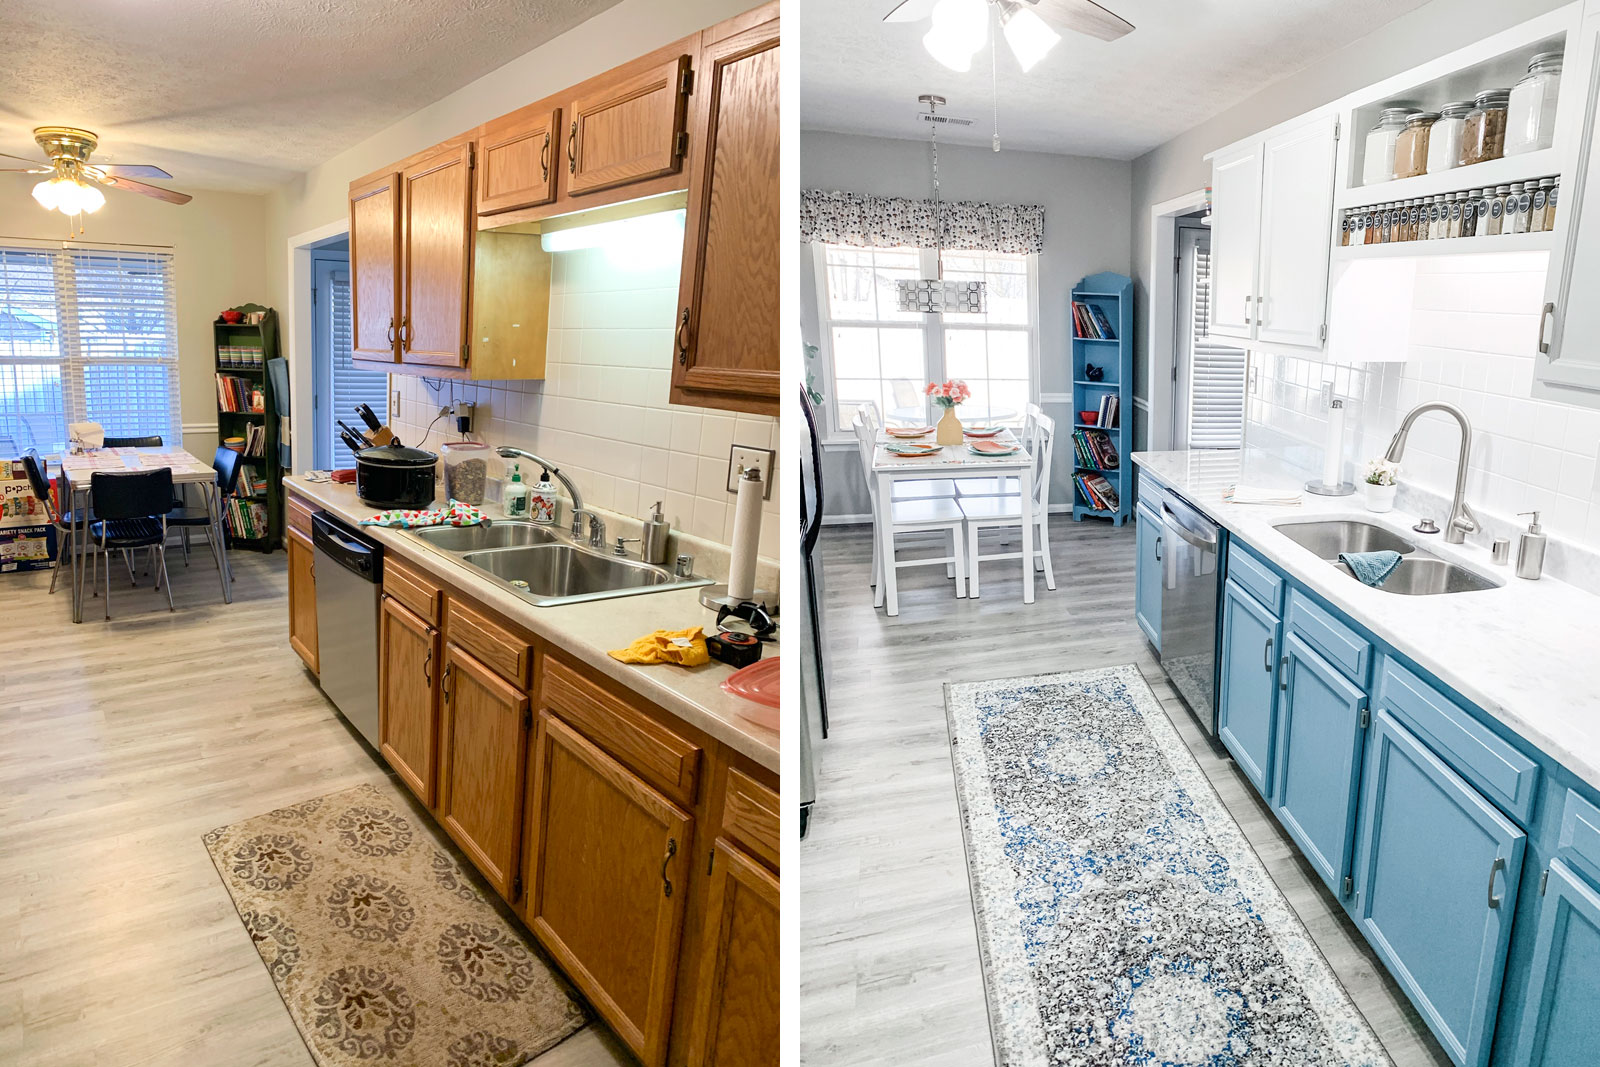
Kitchen Reno Tip #2 - Add an end cabinet shelf for open storage
At the end of the long line of cabinets in this kitchen, there was bit of wall that featured nothing but an unused, cordless landline phone. We took this as an opportunity to add more decorative storage by building a custom curved shelf that fit the space perfectly. The curves not only look great and mimic the circular details used elsewhere in the kitchen, but they also are safer than sharp square corners jutting out into the room!
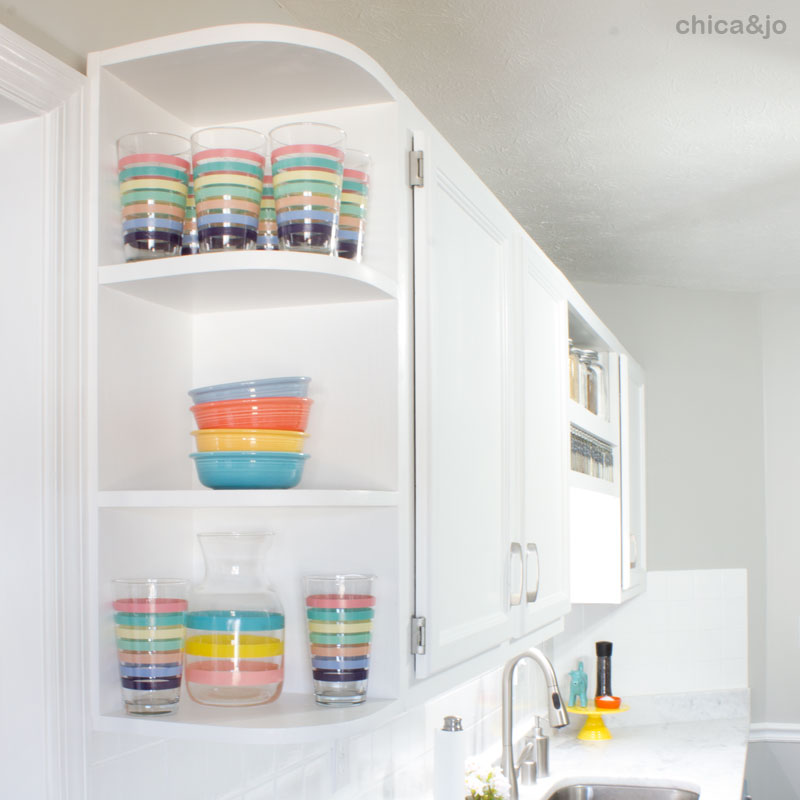
This is a great way to add some additional storage to your kitchen without a lot of cost. It also plays into the trend of open shelving without sacrificing any closed storage options.
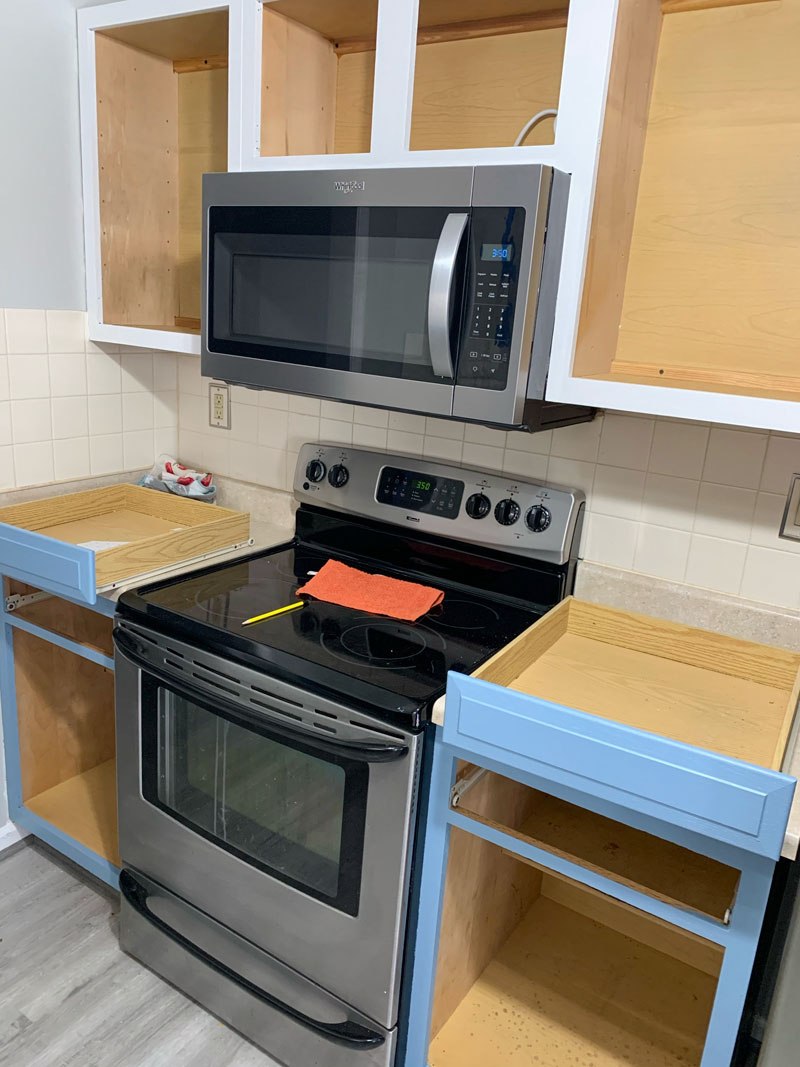
Kitchen Reno Tip #3 - Paint the kitchen cabinets
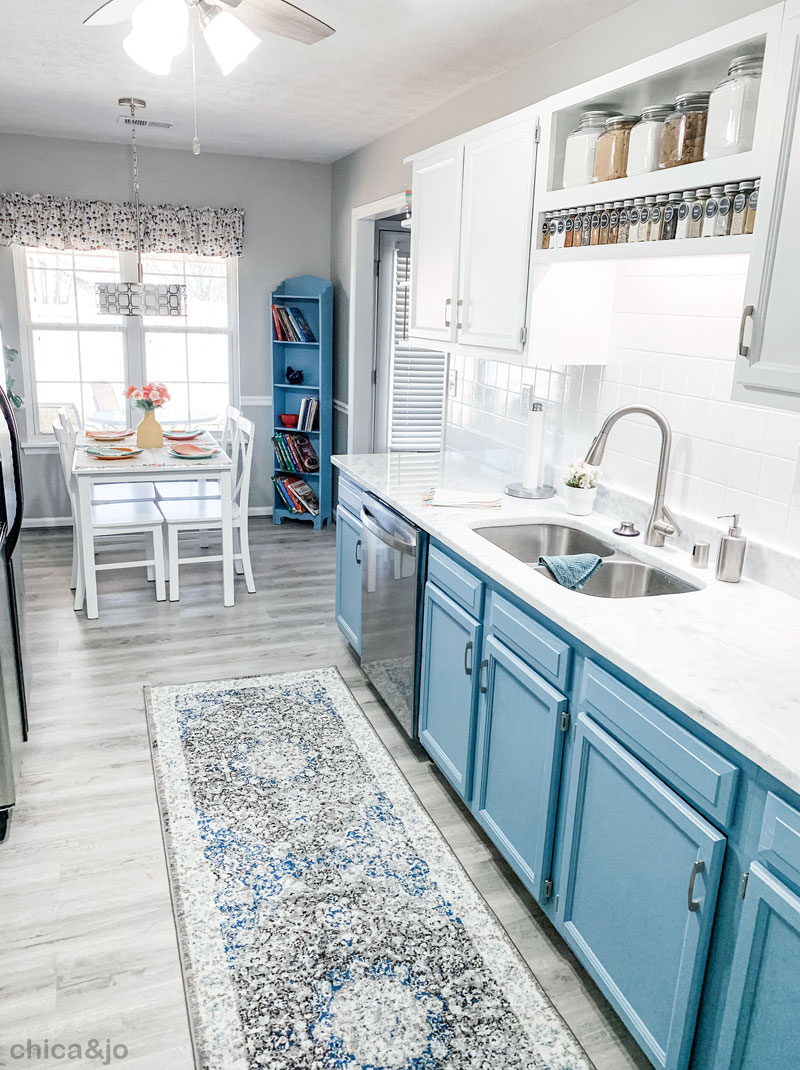
It wasn't within the budget to completely replace the cabinets, so we decided to give them a facelift with a fresh coat of paint. We removed all the doors and drawers and painted the frames first. We painted the upper cabinets white and the bottom cabinets a beautiful light blue called "Peaceful Slumber" by Valspar. We chose this color to match one of the blue bowls in their Fiestaware collection.
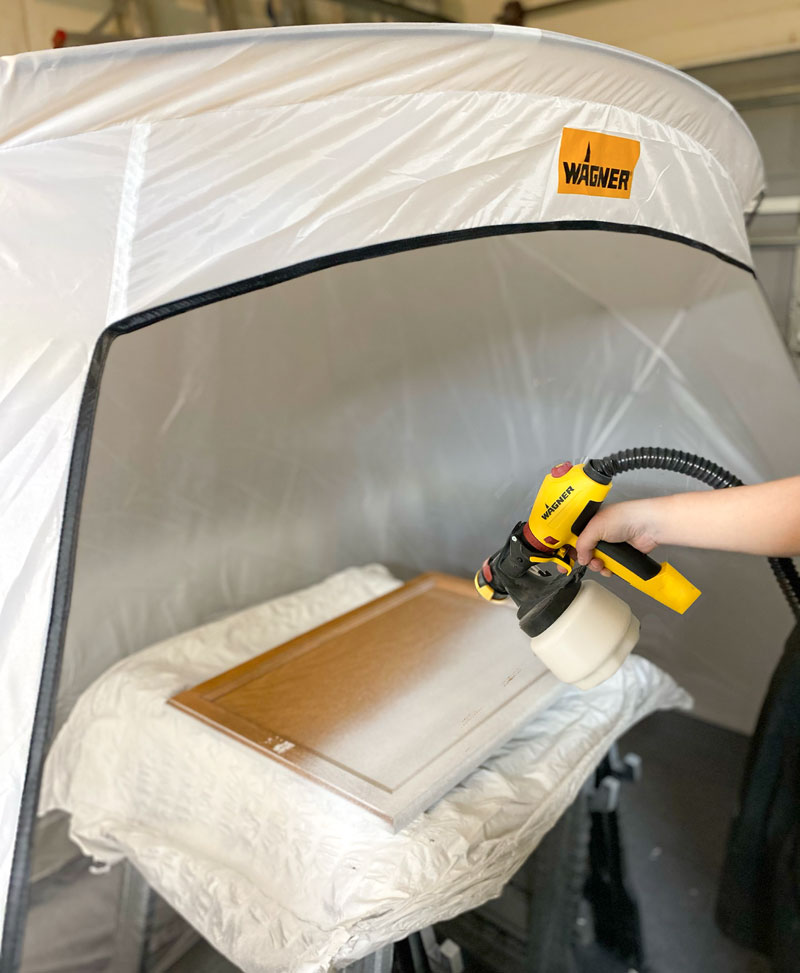
For a smooth and even finish, we used our Wagner sprayer to paint the doors. Using a brush here would have given an uneven finish or brush strokes, so using the paint sprayer allowed us to get a gorgeous, factory-like finish on the doors.
Replacing the hinges would have been costly, not to mention difficult to match the size exactly, but we couldn't leave them the old brass color that they were. So we used metallic spray paint to make them silver. Don't forget to paint the screw heads, too — to make this easy, just poke all the screws through the top of a cardboard box first, then spray them all at once.

We did buy simple new cabinet handles to add a polished, finishing touch. Isn't it amazing how much two gallons of paint can completely transform dated kitchen cabinets?
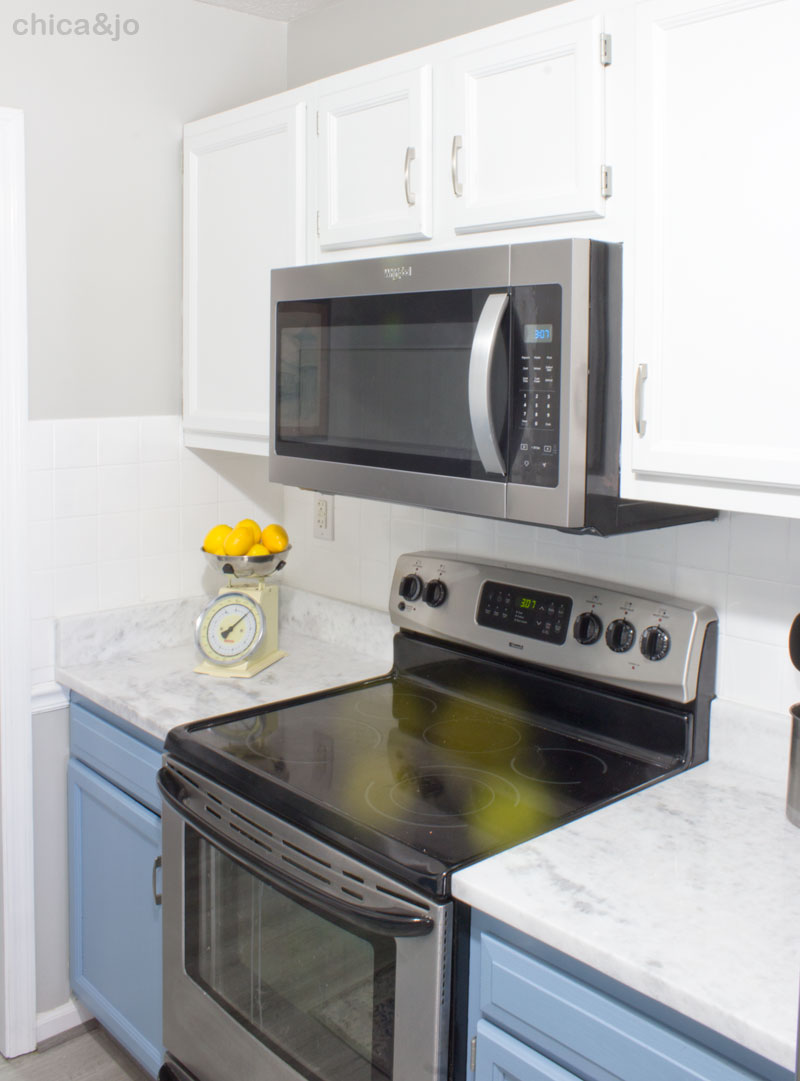
Kitchen Reno Tip #4 - Paint the tile backsplash
Next we tackled the tile. It was actually in great shape but the off-white color didn't match the new white look we were going for. Since the Rust-Oleum Tub & Tile Refinishing Kit worked so great in Chica's guest bathroom makeover, we decided to use it again here in this kitchen.
Make sure you read the instructions thoroughly before starting this project. You also need to make sure the area is well-ventilated. We ended up doing three thin coats on all the tile and still did not use an entire can. Of course, we were starting with an almost-white tile so a darker tile may require more coats and therefore more product.

The cured finish was so perfect that even up close, you can't tell that this wasn't originally white tile with white grout.
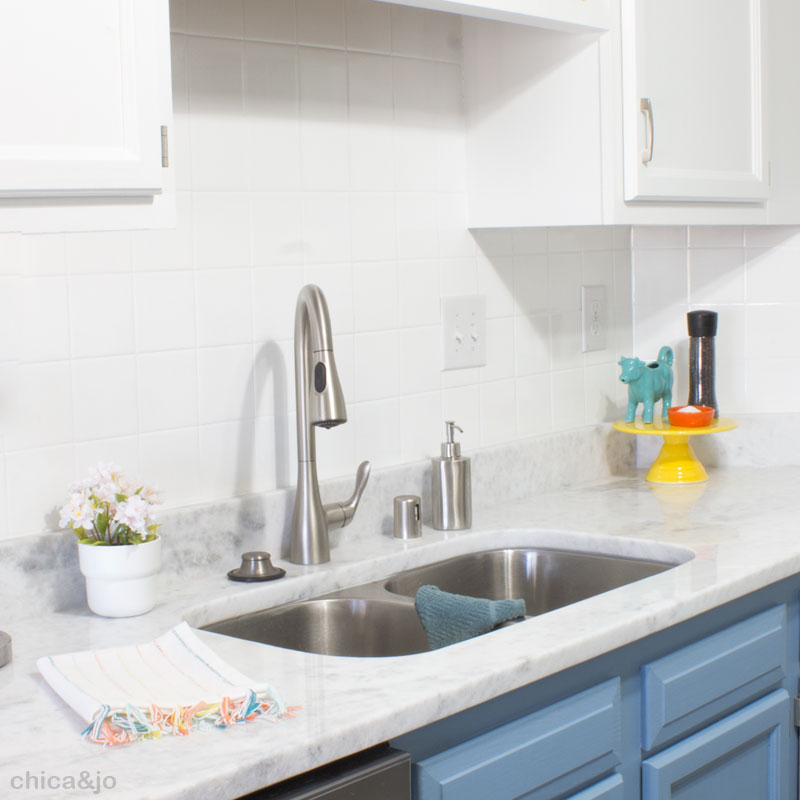
Kitchen Reno Tip #5 - Replace the countertops
The countertops are one area that splurging is really worth it in a kitchen renovation. The bulk of our budget went into replacing the countertops with a lovely white and grey granite. The durable new counters and under-mount sink really brought the room together, so we were glad we spent the money and hired a professional counter company to do this part.
Kitchen Reno Tip #6 - Add decorative elements and color
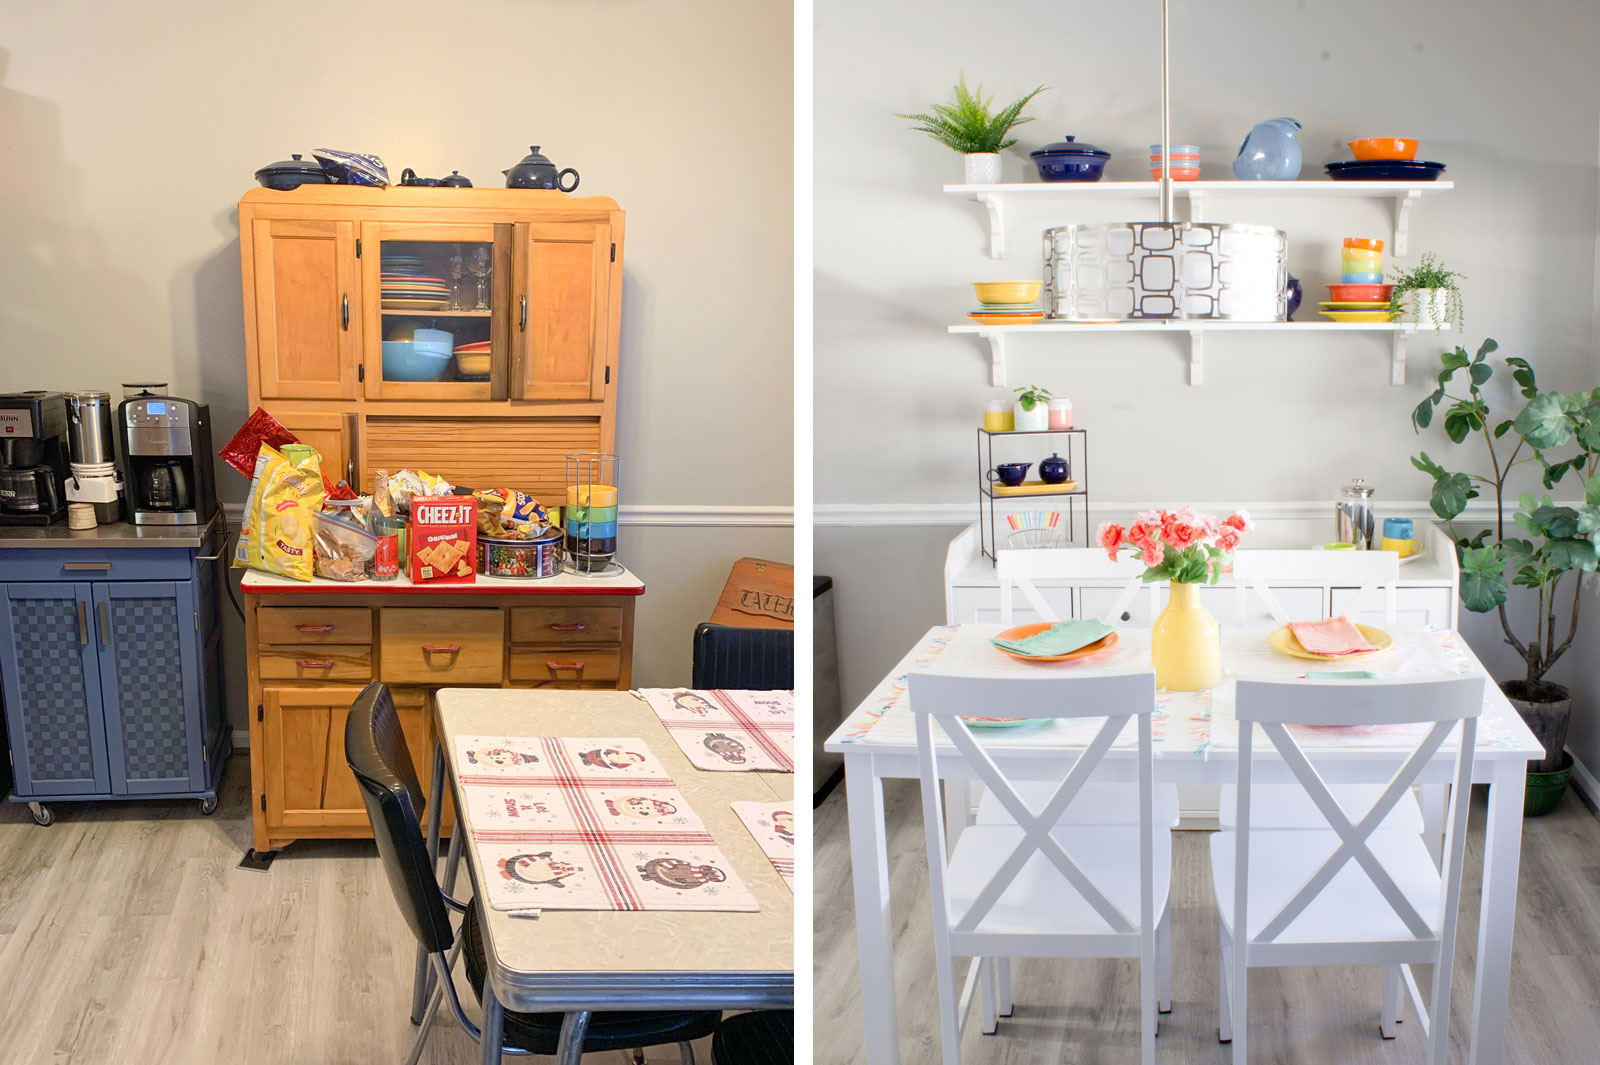
Now it was time to address the eat-in area of the kitchen. Here is where we were going to let that Fiestaware shine! We used IKEA shelf brackets and pine boards painted white to add some open shelves to a large empty wall space, transforming it into functional and decorative storage for their dishes. Now my aunt can display her Fiestaware and make it easily accessible for them to using daily.
Underneath the shelves, we added a Hauga sideboard from IKEA to serve as a coffee station. The extra drawer space was perfect for them to store their plastic storage containers and table linens.
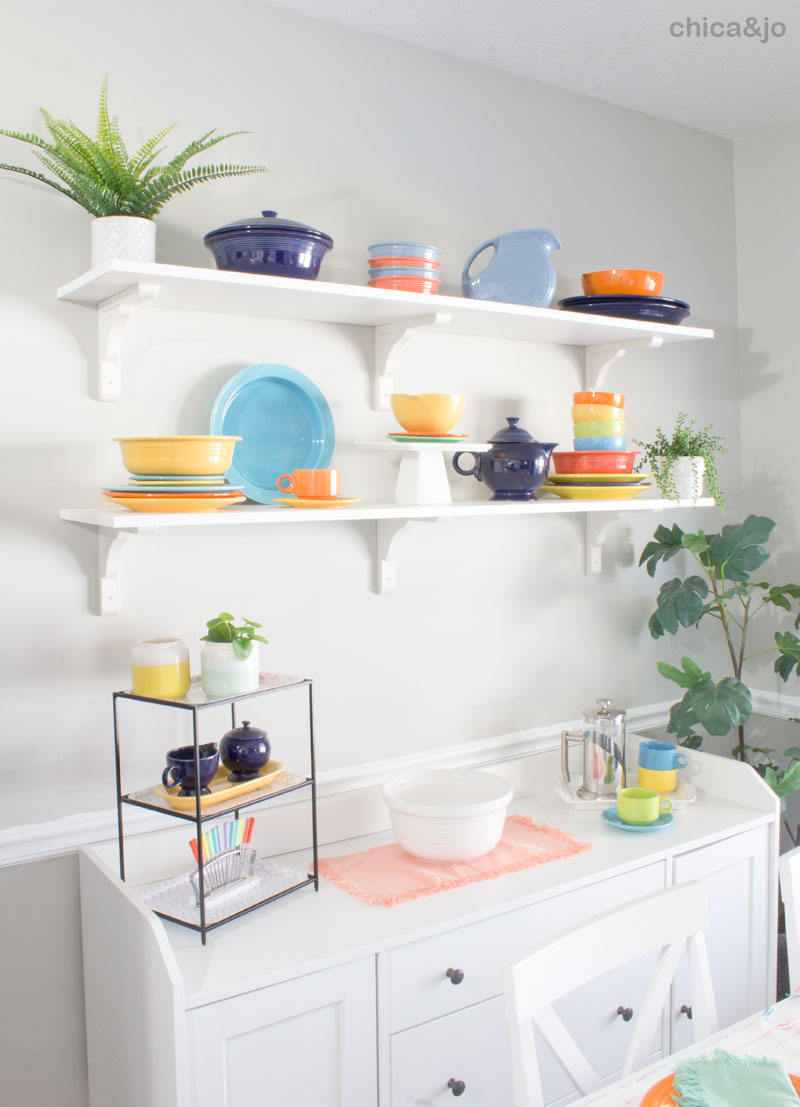
We added some additional decorative elements including plants and replaced the ceiling fan that used to be in this area with a new Kichler chandelier to bring it all together.
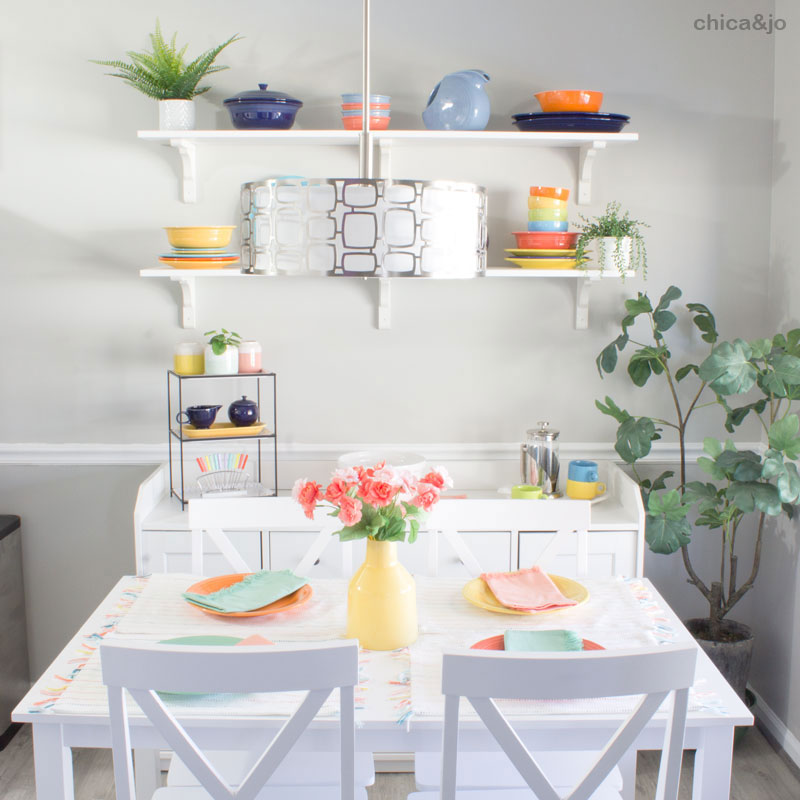
We love how those colors really pop off the cool neutrals used in the rest of the space.
We added a long runner with a pretty pattern to the floor for comfort and additional color.
Kitchen makeover before and after
The before-and-after photos of this kitchen are so astounding we almost can't even believe it was the same kitchen! This just shows how much impact you can get from a few small changes and a limited budget.
We can't decide what our favorite part of this makeover is but I know my aunt and uncle are very happy with all of it, and are ready to start hosting some dinner parties!
similar projects
Buffalo Check Kitchen Cart Makeover

Bathroom Makeover on a Budget

Complete Modern Spa Bathroom Makeover


2 comments so far:
This project came out amazing and makes me want to tackle my outdated kitchen backsplash - unless I can convince you two to come do it! -wink-
Cindy, thank you! Painting your backsplash with this kit is easy... you can do it!