


Faceted Box Trim Moulding Build Plans

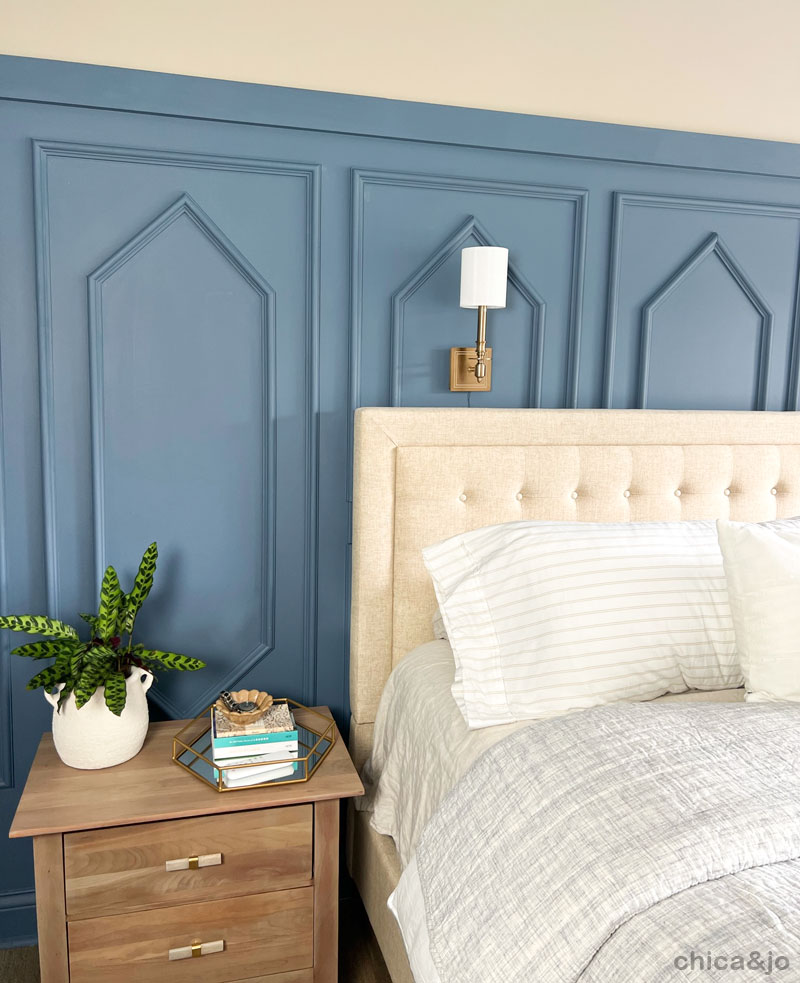
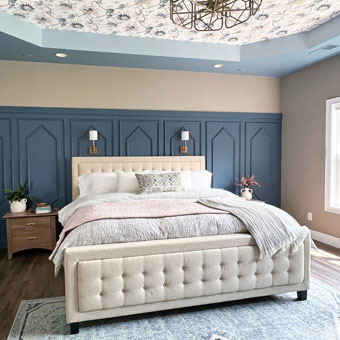
When Jo recently renovated her bedroom, one of the key elements to the design was the unique accent wall we built behind the bed. Adding box trim molding (a.k.a. picture frame molding) is a great way to add dimension to an ordinary wall to create an accent wall with character.
Unique box trim moulding design
Jo wanted something more than just ordinary, rectangular box trim moulding. She wanted something unique and special, with a touch of drama. She came up with a cool double-box design with rectangles on the outside of each panel, but faceted, gem-like shapes on the inner trim piece for a truly one-of-a-kind look.
Installing the box trim to create an accent wall
After hours of calculations, formulas, and measurements, we came up with the perfect layout for our faceted box trim molding.
What's even better -- we figure out a way to make it customizable to fit any wall!
If you'd like to have the same look on your accent wall, we have detailed build plans available that walk you through every step.
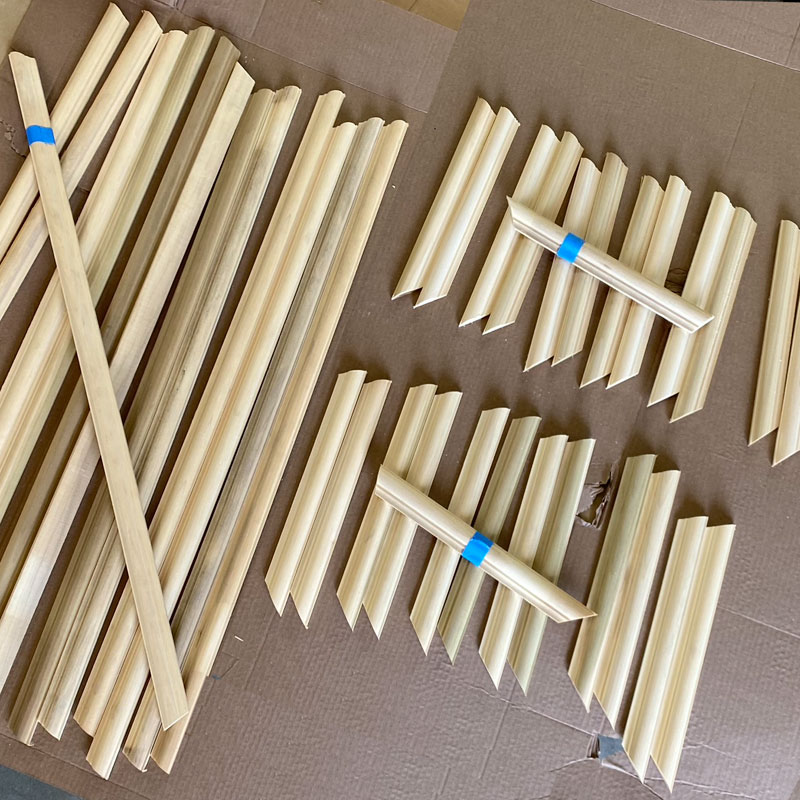
Supplies needed for picture frame molding
Our wall design uses minimal supplies... just some trim boards, a few scraps for spacers, and common tools like a saw, measuring tape, and finish nailer.
Build outline for faceted box trim molding
You'll find all the detailed directions in our build plans below, but to give you an idea of what this involves, here are the basic steps:
STEP 1: Determine your panel width and number of panels
Our plans are customizable to fit your wall. You can decide how many panels you want and how tall and wide you want them to be.
STEP 2: Calculate your trim measurements
Using our calculations and worksheets, you can adjust the measurements accordingly to suit your panel number/size.
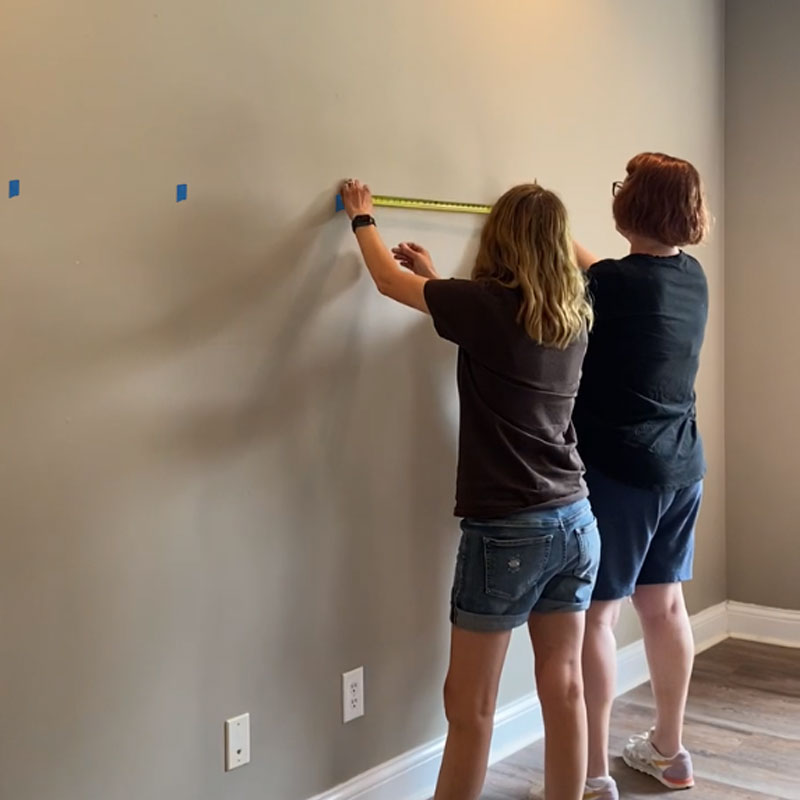
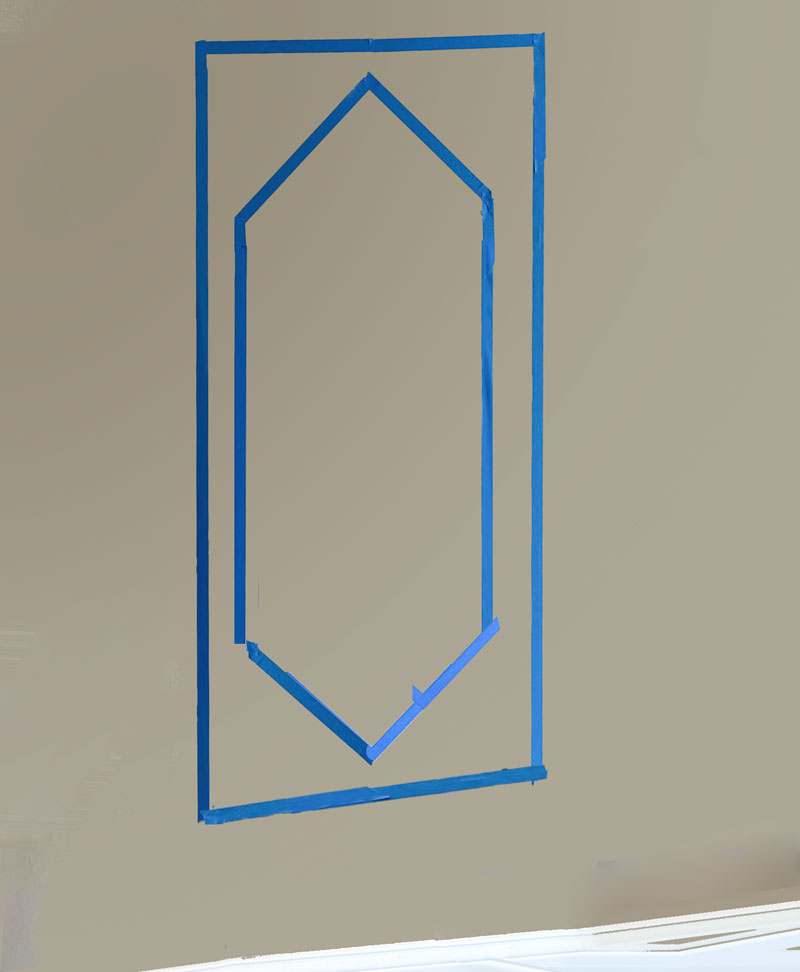
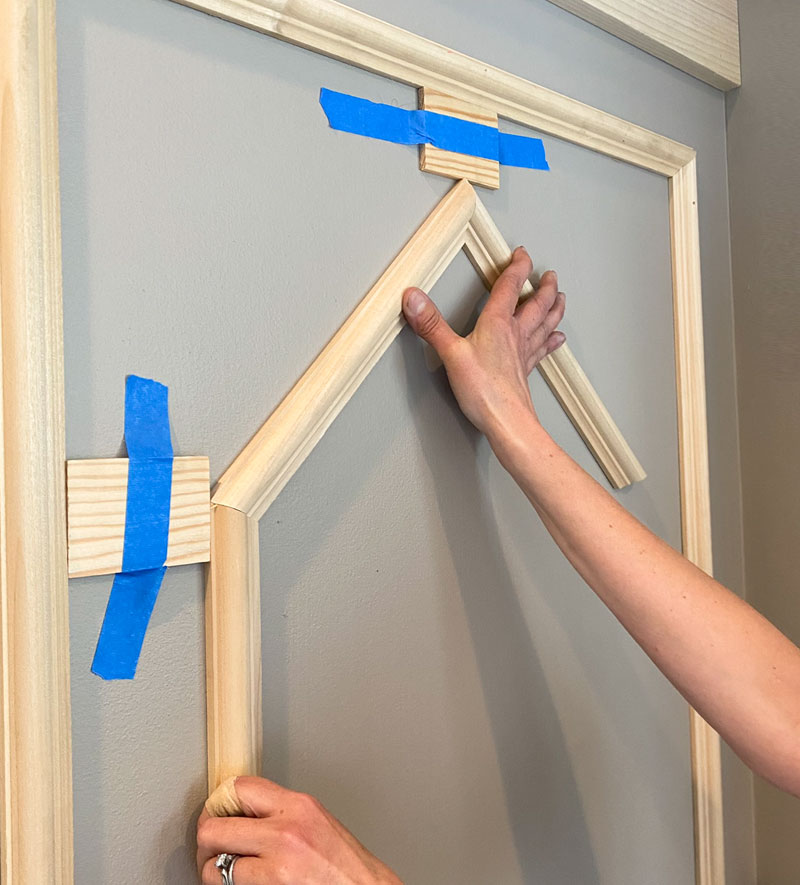
STEP 3: Mark the first panel with tape to test placement
Measure twice, cut once, right? We'll walk you through marking the first panel on the wall with tape so you can be sure you like the size and layout before continuing.
STEP 4: Calculate the length of your trim pieces
Using our worksheets and formulas, you'll calculate the length of all your trim pieces so you can install your panels on the wall.
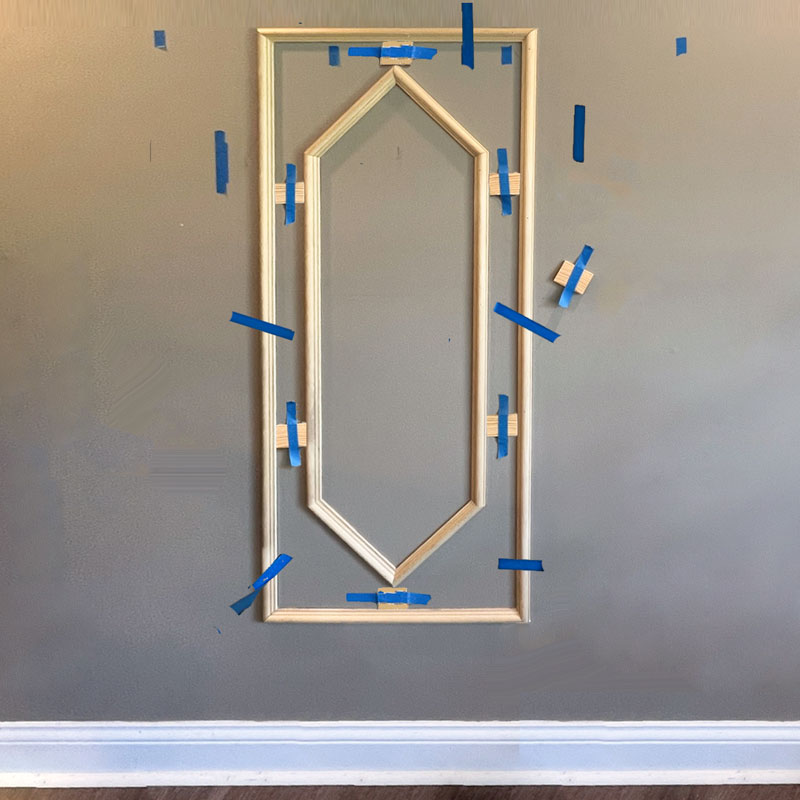
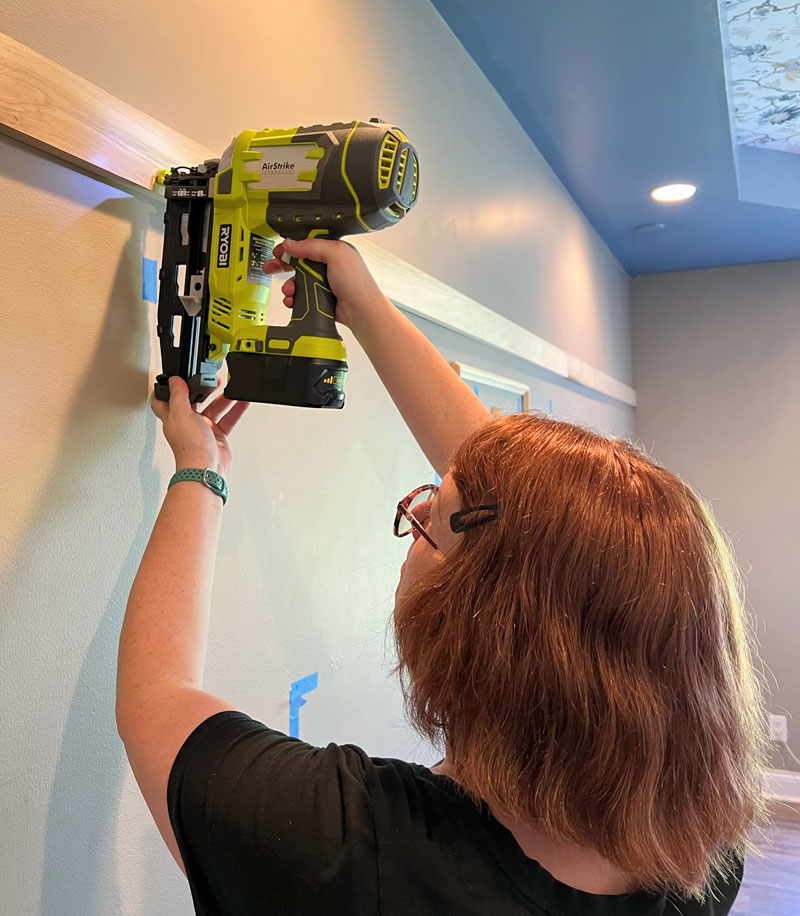
STEP 5: Install your first panel
We'll walk you through the steps to install your first panel, first attaching with tape to ensure alignment, then permanently with construction adhesive and finish nails. With this first panel straight and centered on the wall, you'll have a good starting point for your remaining panels.
STEP 6: Record all your trim piece measurements
With the first panel set, you'll record all your trim piece measurements on our worksheet for reference. Then you can move on to cutting more trim pieces and intalling more panels!
STEP 7: Add top trim board (optional)
If you're adding a wide, horizontal trim board above the entire accent area, now's the time to add it.
STEP 8: Add the remaining panels
With the first panel done, you're ready to add the rest, which will go MUCH more quickly and more easily.
We've got a whole new technique for adding the remaining panels, designed specifically to ensure panels that are straight, level, and evenly spaced.
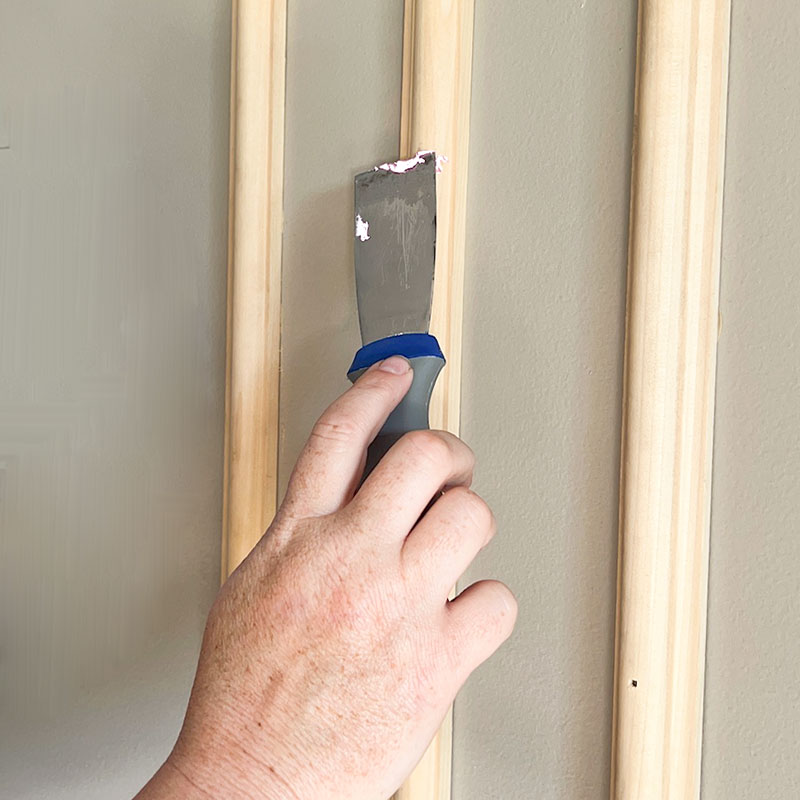
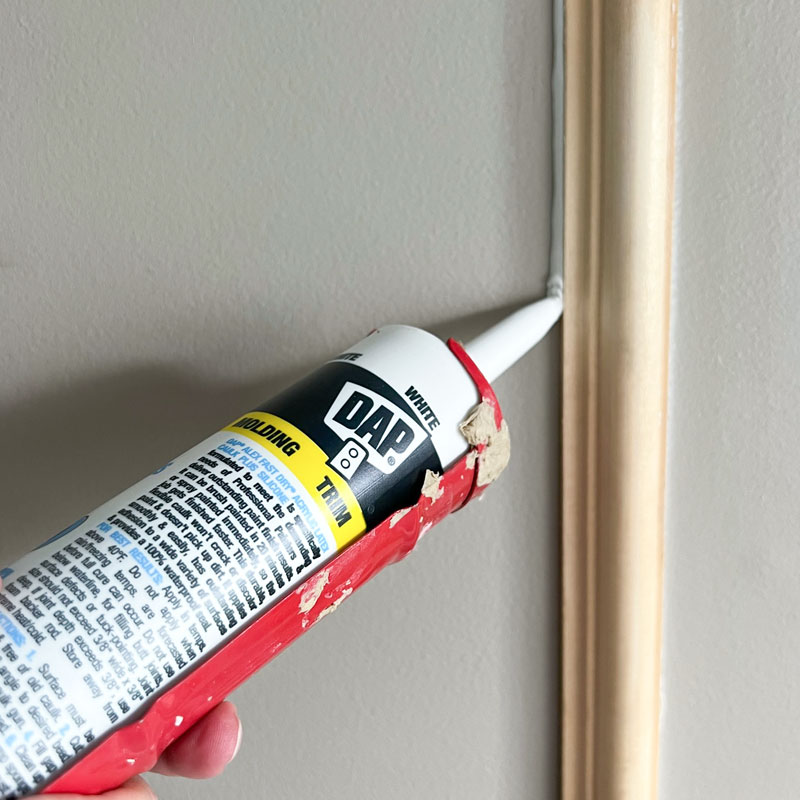
STEP 9: Fill, sand, and caulk the trim
For a professional finish, you'll fill and sand all the holes, then caulk all the edges.
Read the caulk tube carefully and make sure you use paintable caulk. If you get 100% silicone caulk by mistake, paint will never ever stick to it.
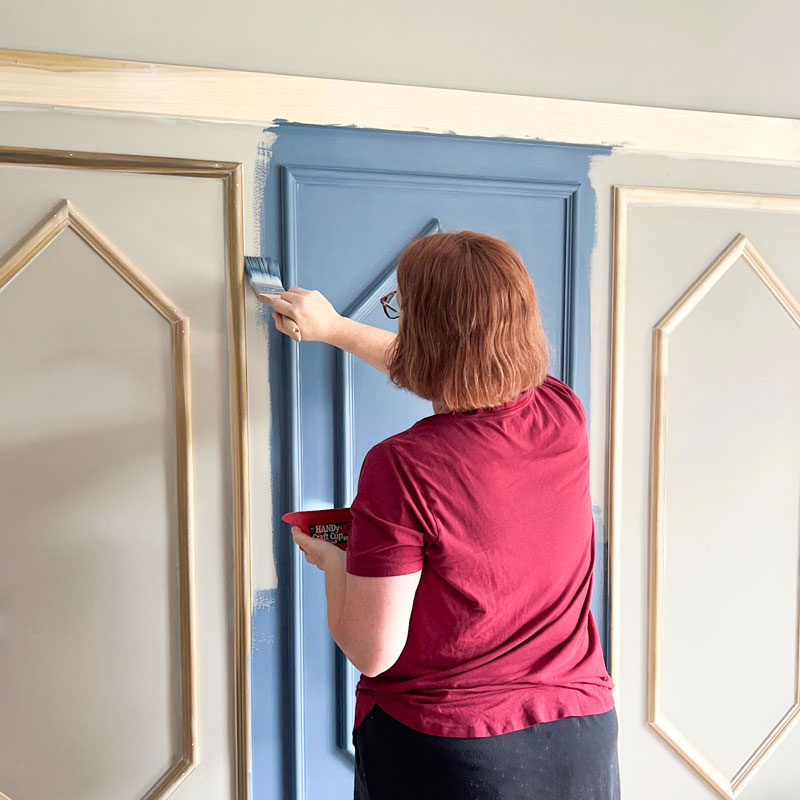
STEP 10: Paint your accent wall
When all the caulk is dry, all that's left is to get out your brush and add your beautiful paint color to the wall. You'll end up needing a brush to get in most of the nooks and crannies, but you might be able to use a roller for the center panels if you want an extra smooth finish. We used the color Bedford Blue 1679 by Benjamin Moore.
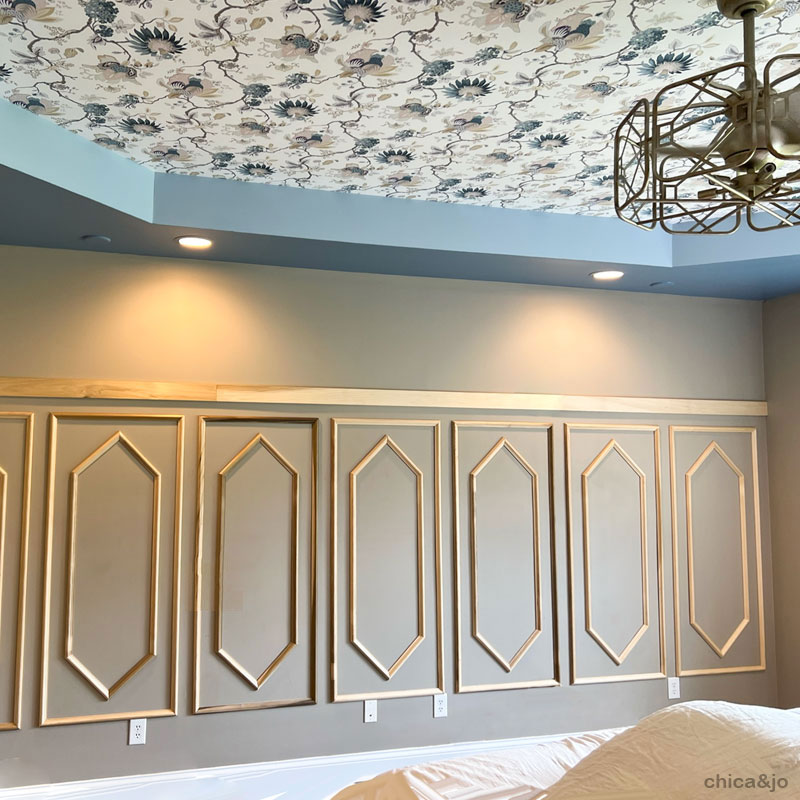
The finished accent wall
We couldn't be more pleased with how this wall came out.
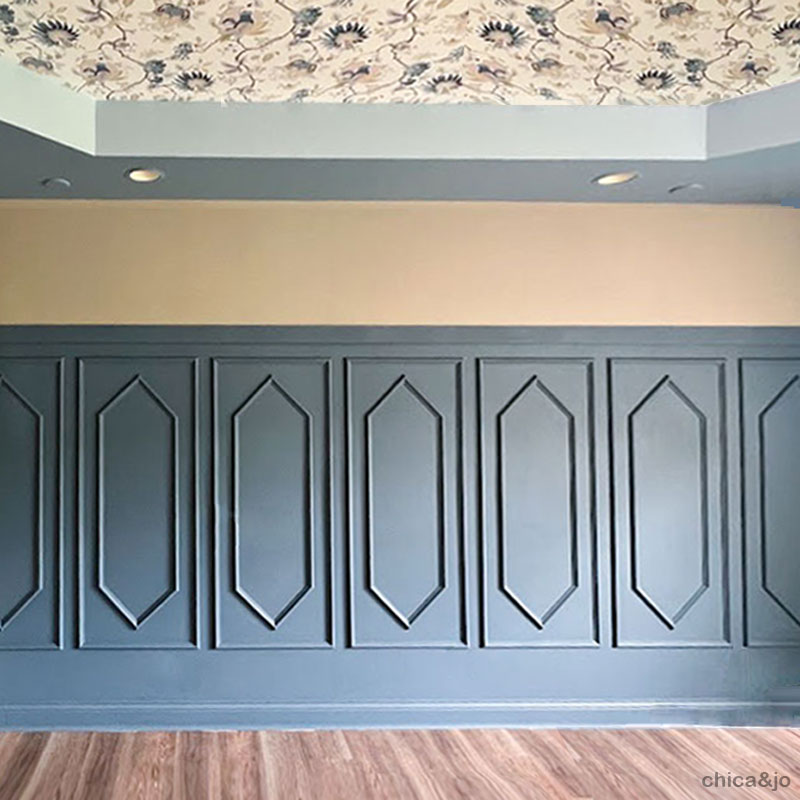
The pretty blue color makes the texture of the trim stand out and the whole wall is just gorgeous.
And once Jo brought all the rest of her bedroom furniture in, her bedroom makeover was complete. Lovely!

Faceted Box Trim Molding Build Plans
Ready to build your own faceted accent wall? All you need now is our detailed build plans! They include all the measurements, formulas, and instructions you need to build your own accent wall. There are 22 pages of detailed instructions with color photos and worksheets.
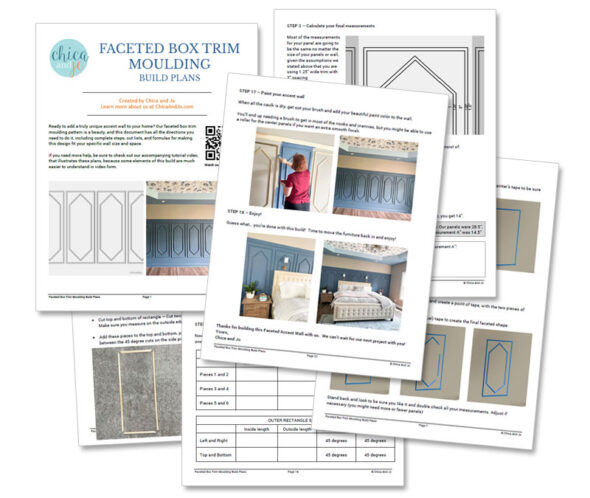
BONUS: The plans also come with a link to our thorough build video that walks you through every step and calculation!
INSTANT DOWNLOAD -
PURCHASE NOW!
Faceted Box Trim Moulding Build Plans – $9.99
from here immediately after your purchase is complete*.
Have questions? Email us at chicaandjo@chicaandjo.com
* File may be downloaded a maximum of 5 times.
similar projects
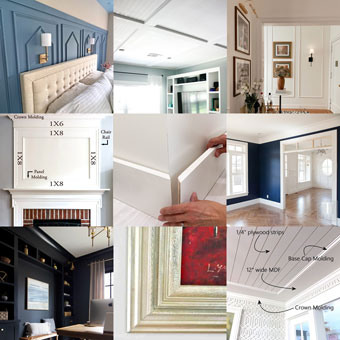
10 Ideas for Using Wood Trim Moulding in Your Home
Bedroom with Accent Wall and Wallpapered Tray Ceiling

How to Make a Life-Size Barbie Box


