


Shiny Brite Vintage Ornament Party Favor Boxes

I love vintage Christmas decorations, especially Shiny Brite ornaments, and have been collecting them over the last couple of years. I wanted to also use Shiny Brites in my holiday gift-giving, so I came up with a fun design for a miniature Shiny Brite box full of candy, that makes a perfect gift or party favor.
VIDEO: Mini Shiny Brite Ornament Favor Boxes
Watch as I turn a mini pizza box into a candy ornament filled party favor.
How to make mini Shiny Brite ornament boxes
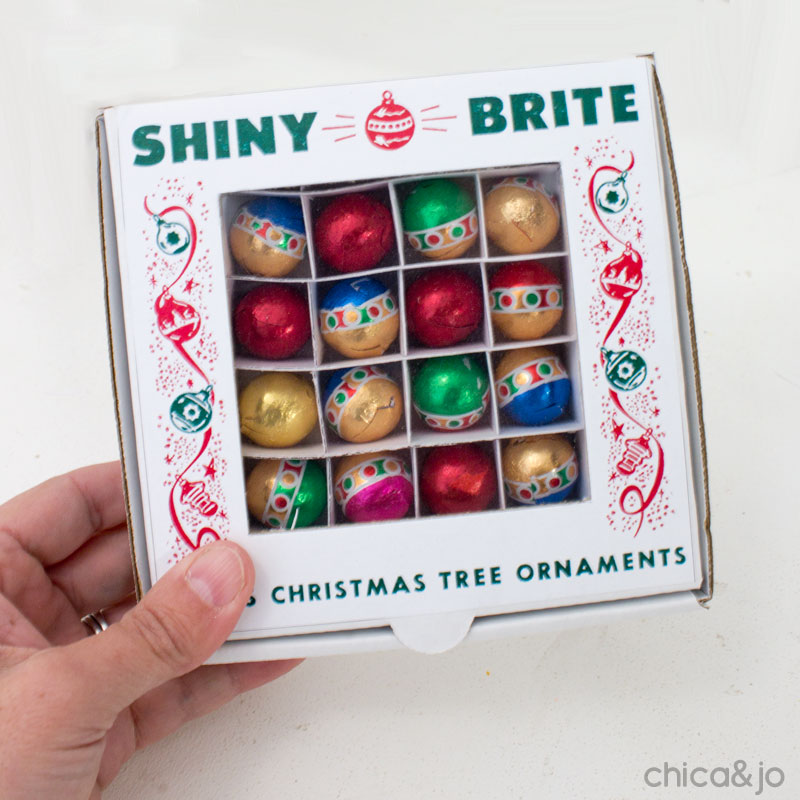
These mini Shiny Brite ornament boxes are modeled after a vintage original, with the classic window on top and retro labels. They take a little time to create from scratch, but with our templates and step=-by-step instructions, it's a fun way to make homemade gifts and favors at Christmas.
Step 1: Make the box
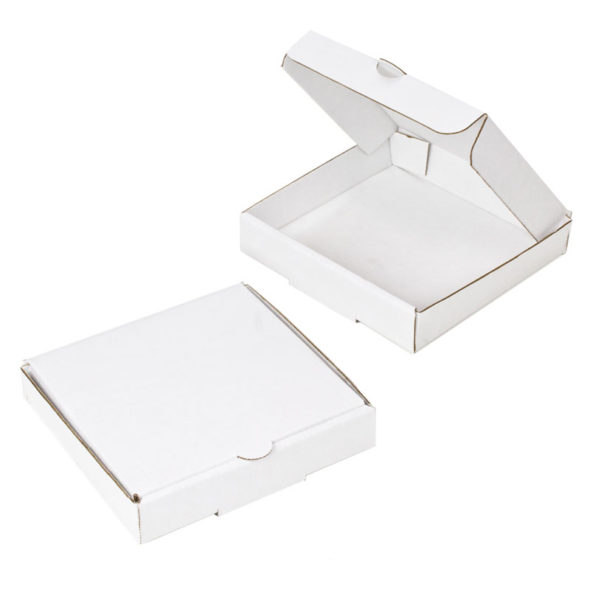
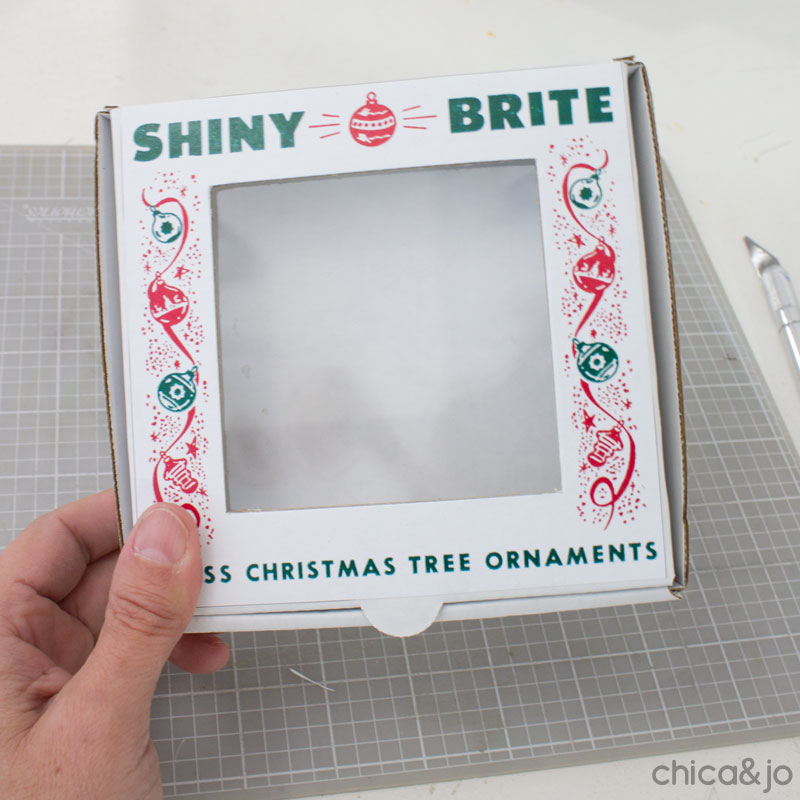
These mini Shiny Brite ornament boxes start with a 5" x 5" mini pizza box, which we're going to transform into a tiny ornament box.
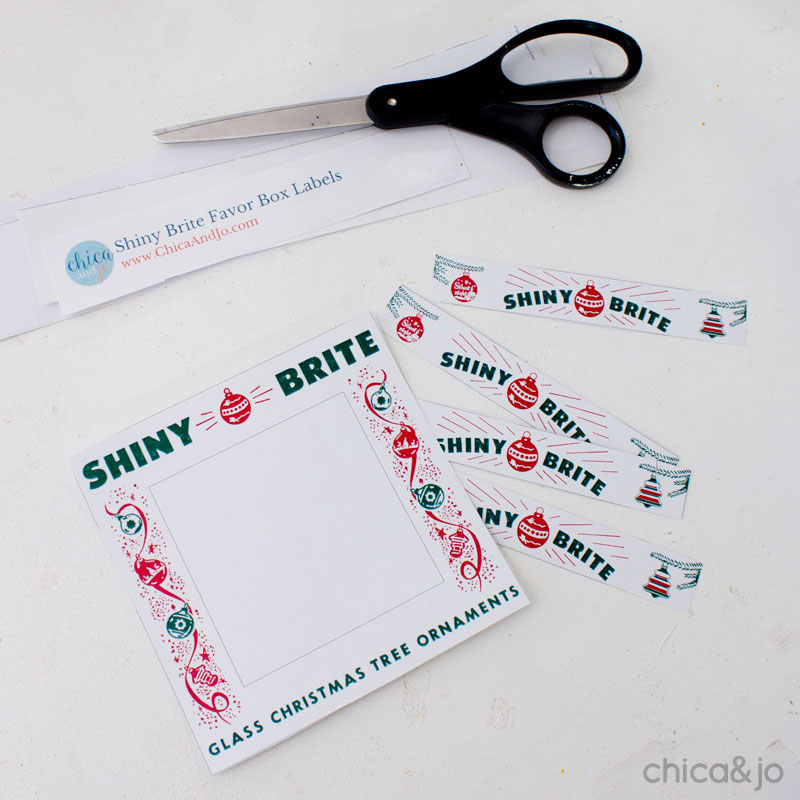
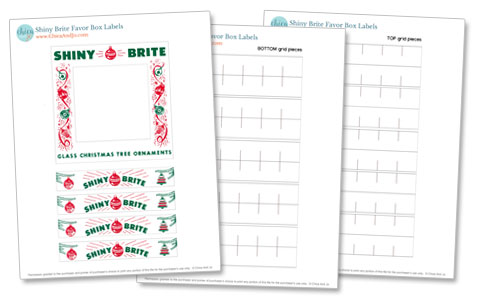
To make the boxes look like vintage Shiny Brites, I designed a printable Shiny Brites label that looks like an original box. (See below for the printable design.) It has a 5" x 5" square label for the top of the box, as well as some strips to add to the side of the box.
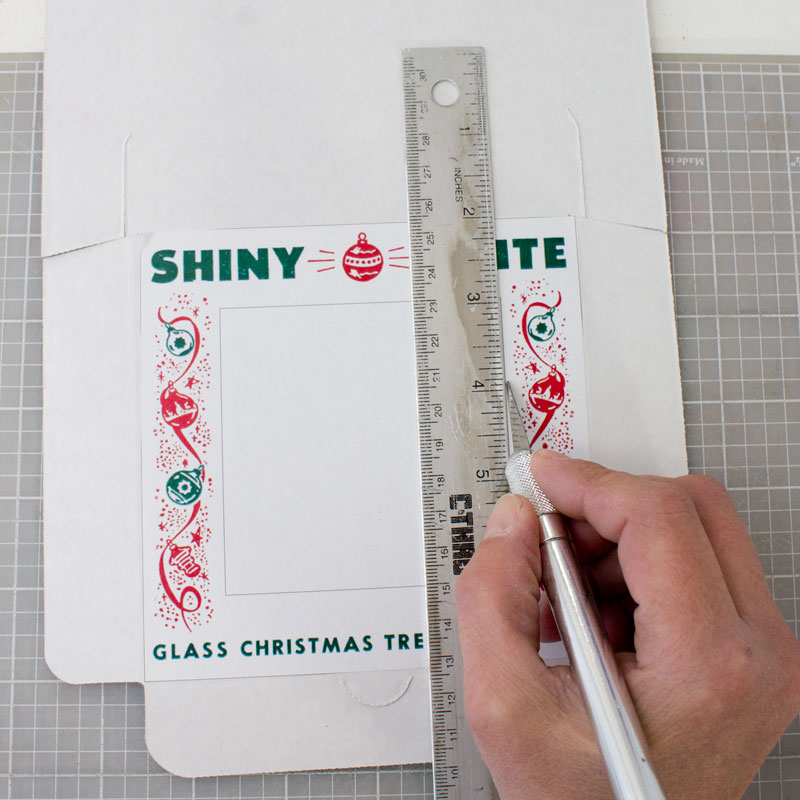
To make it easy to apply to the box, just print the page onto onto a sheet of Avery full-sheet sticker paper, and cut the pieces out. Do NOT cut out the square in the middle of the box top sticker — you'll see why in a minute.
Peel the backing off the box top label and place it in the middle of the lid of your box.
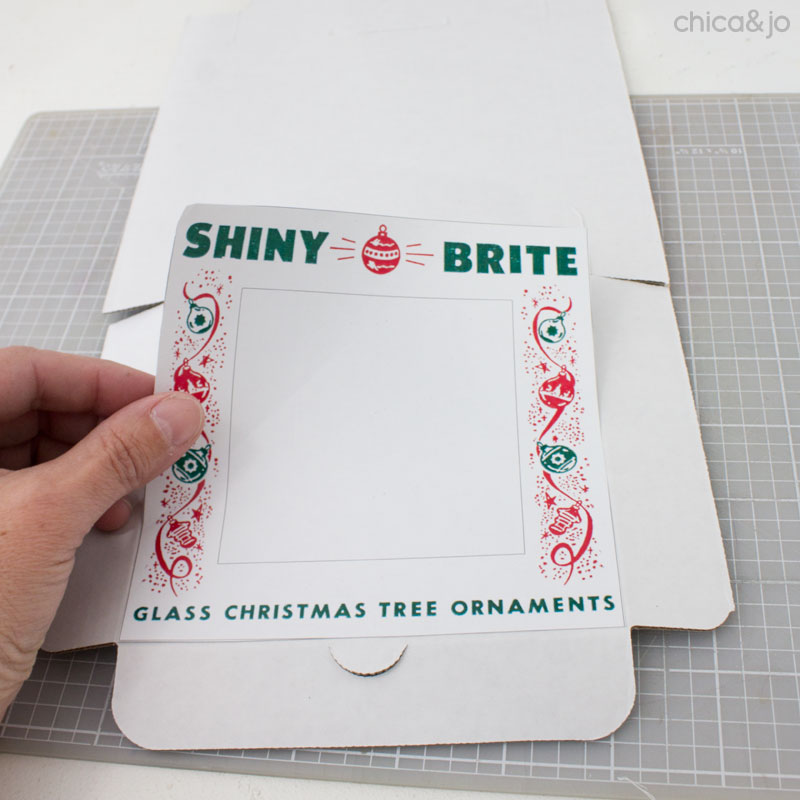
To cut out the middle of the box, use a craft knife and metal ruler to carefully cut along the line for the box square in the middle of the label.
You will have cut through the label and box at once, revealing a square hole.
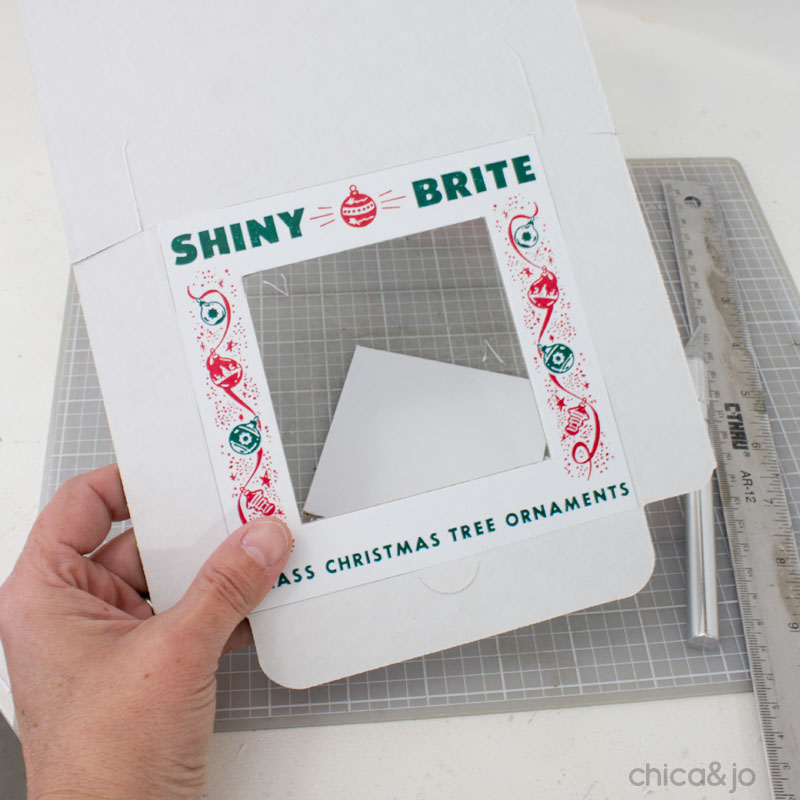
Grab a scrap of acetate or other thin plastic and cut it a little larger than the hole. If you don't have acetate, you can get creative here and look for plastic around the house, and scavenge it from product packaging or plastic bags. Flip the box over and tape the plastic to the inside, over the hole.
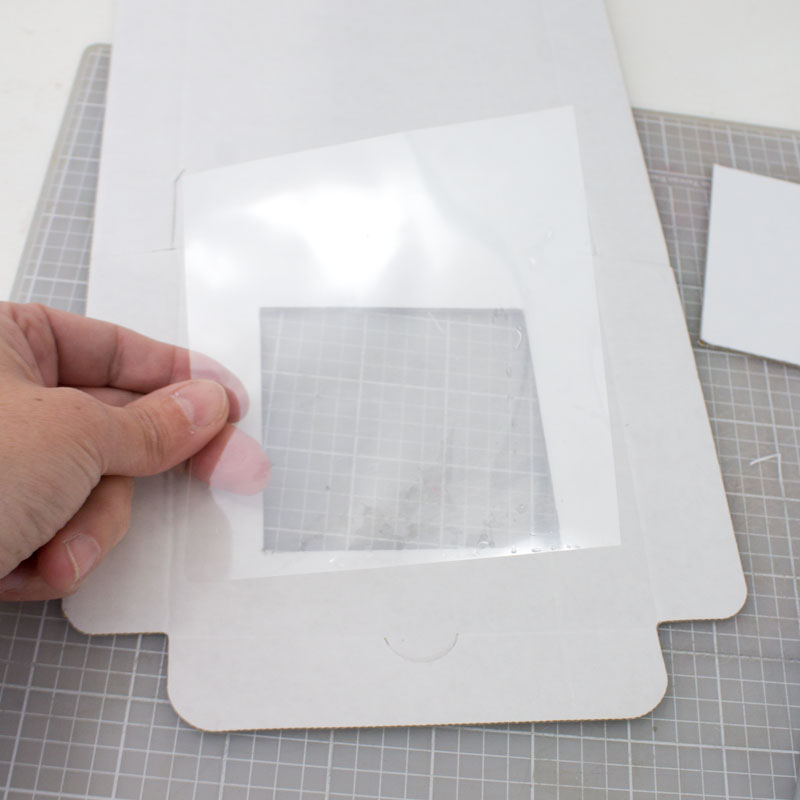
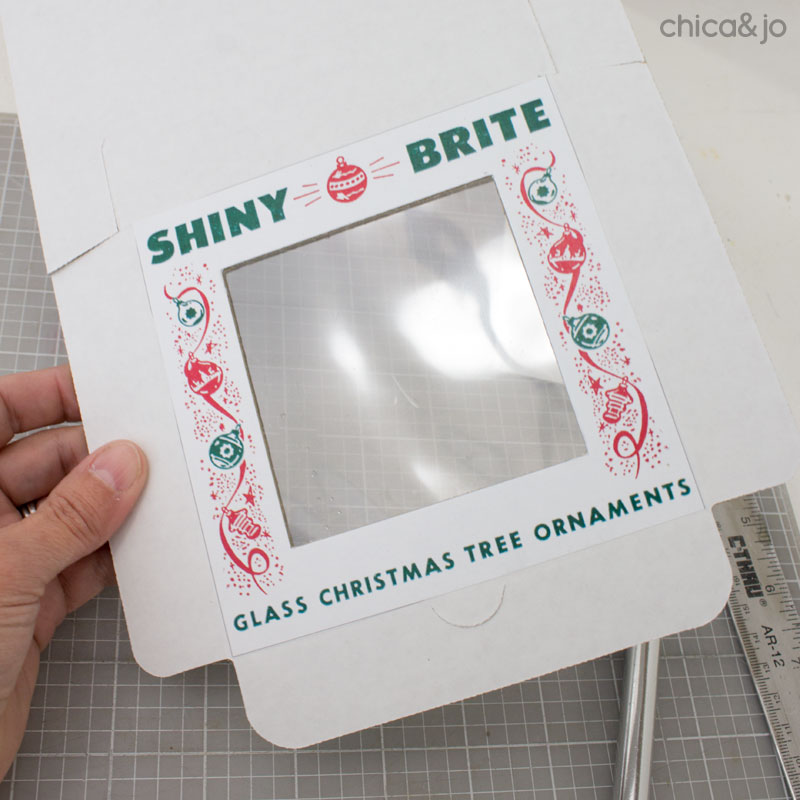
Look at that cute little window!
Now fold the box up, an delight in the mini ornament box you just made.
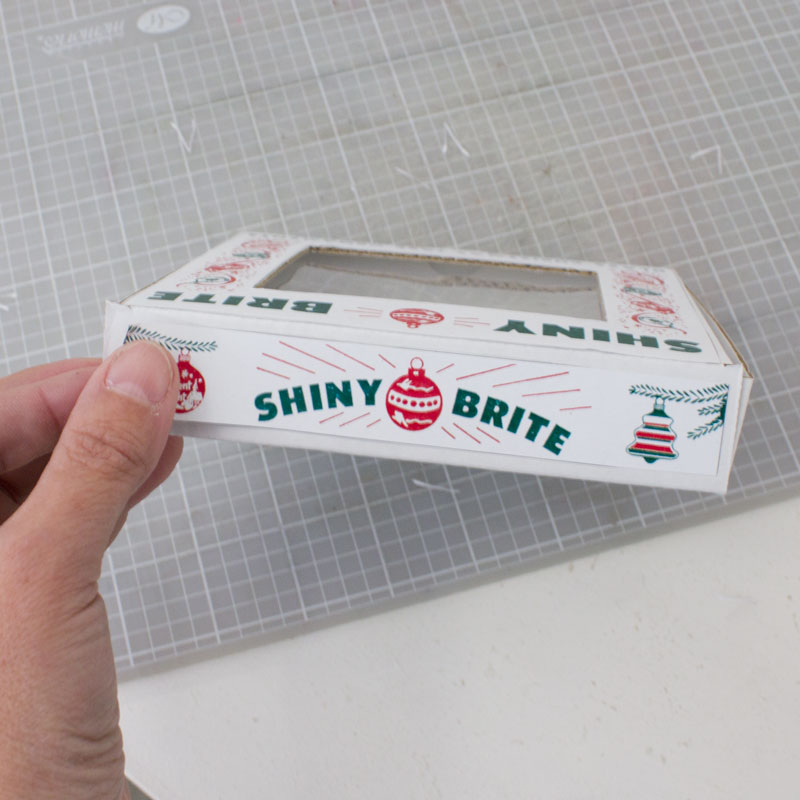
Don't forget to add the remaining stickers to the sides of the box.
Step 2: Make the ornament grid inside the box
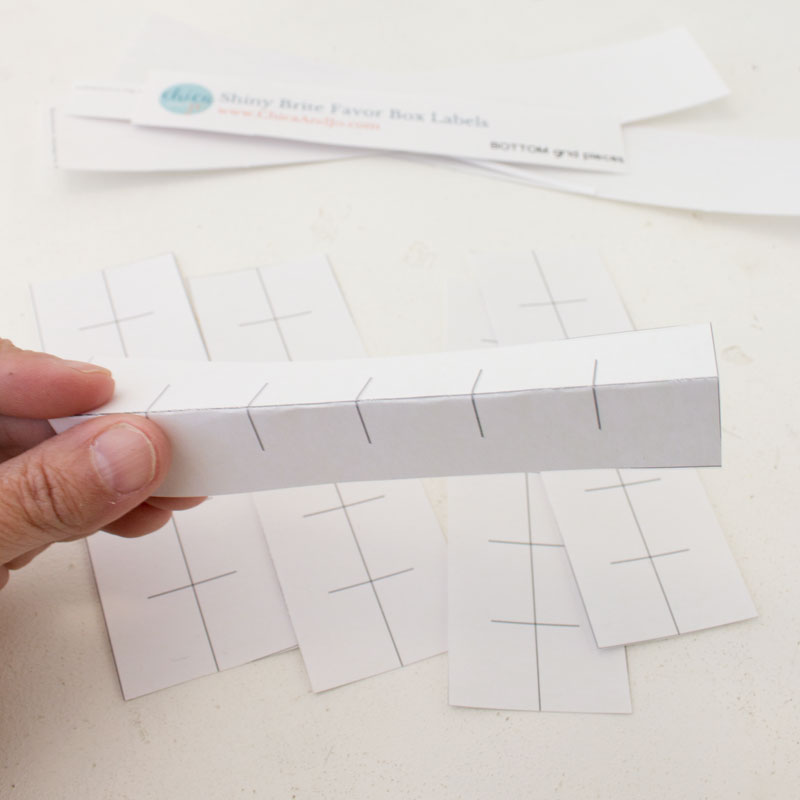
To make this mini ornament box look like the real thing, it needs to have a grid to hold ornaments. I designed an ornament grid template (it's part of the printable set) that does the job, and I printed the pieces onto white cardstock.
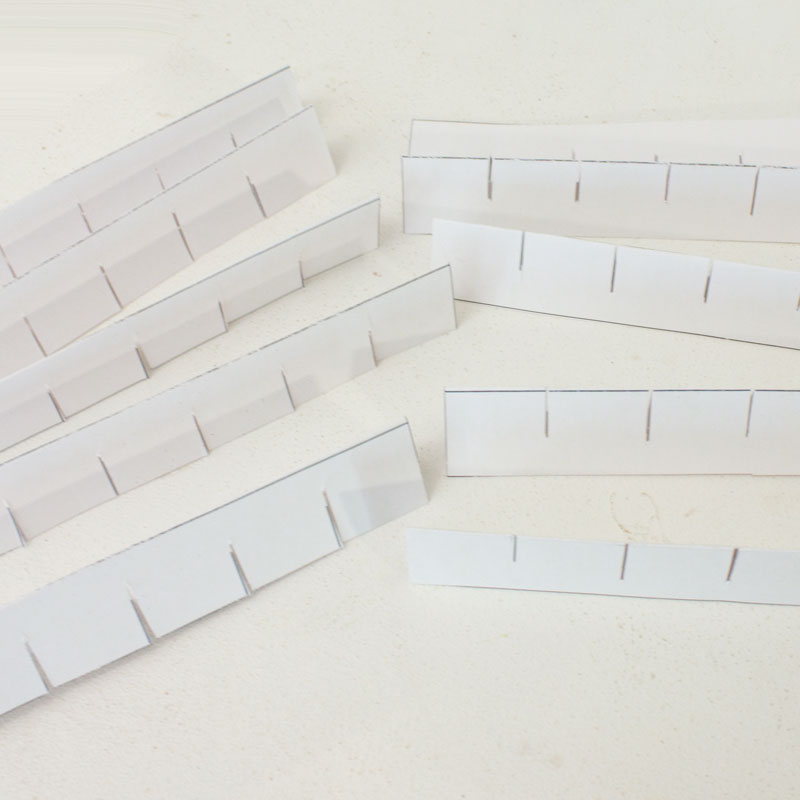
To assemble the grid, you'll start with the page labeled "bottom grid pieces", which has five pieces on it. Fold them in half down the middle, along the line.
Use a bone folder to crease the fold really well.
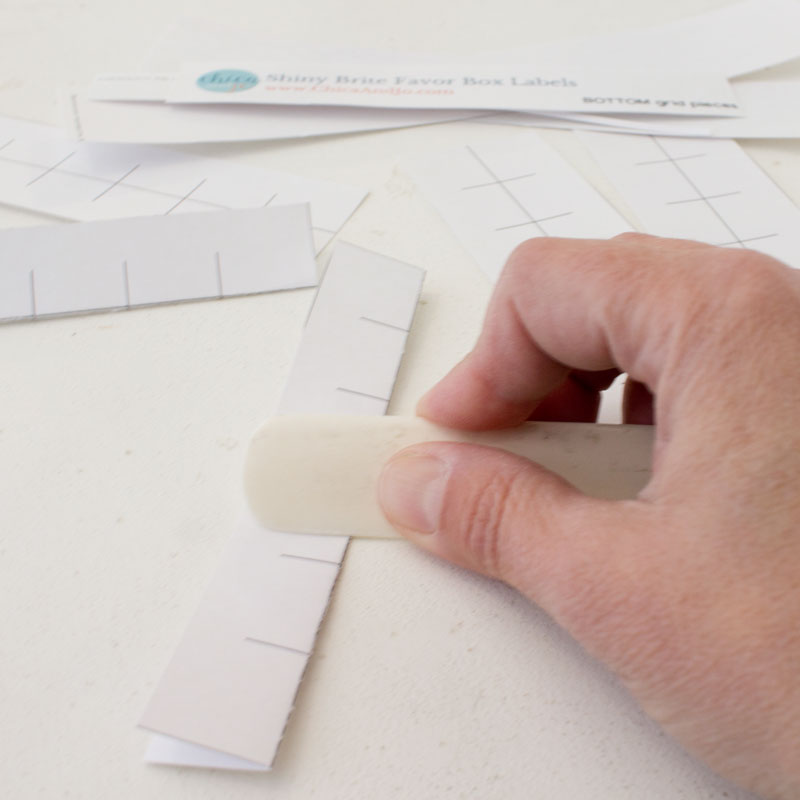
Now cut out notches in the folded strip, along the little lines. You'll want to make two cuts for each line, as close together as you can. You want to remove a tiny, skinny, strip of paper.
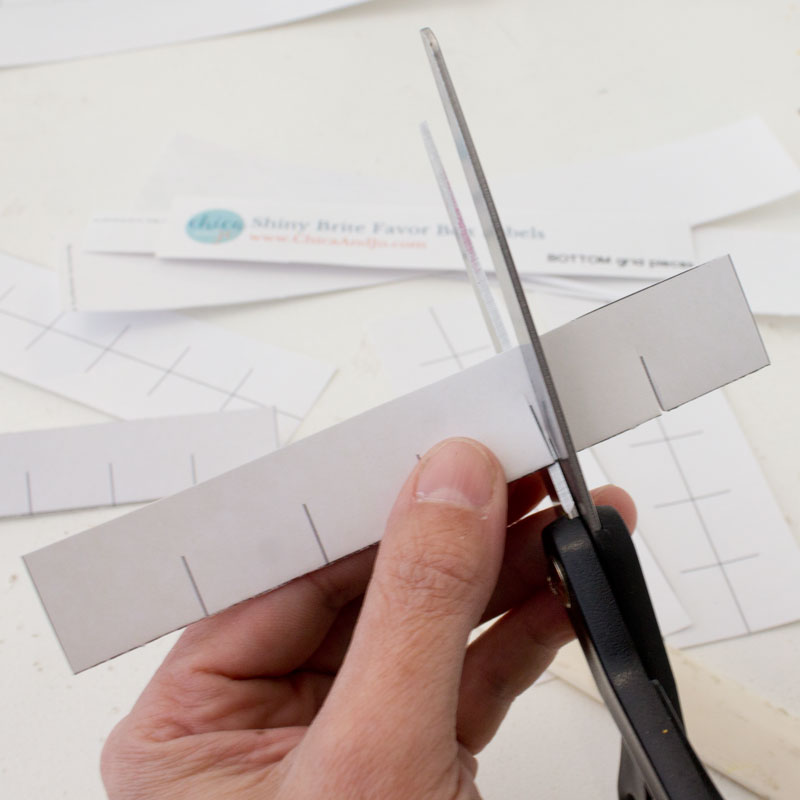
Tug on the tiny bits of paper left in each notch and tear them away.
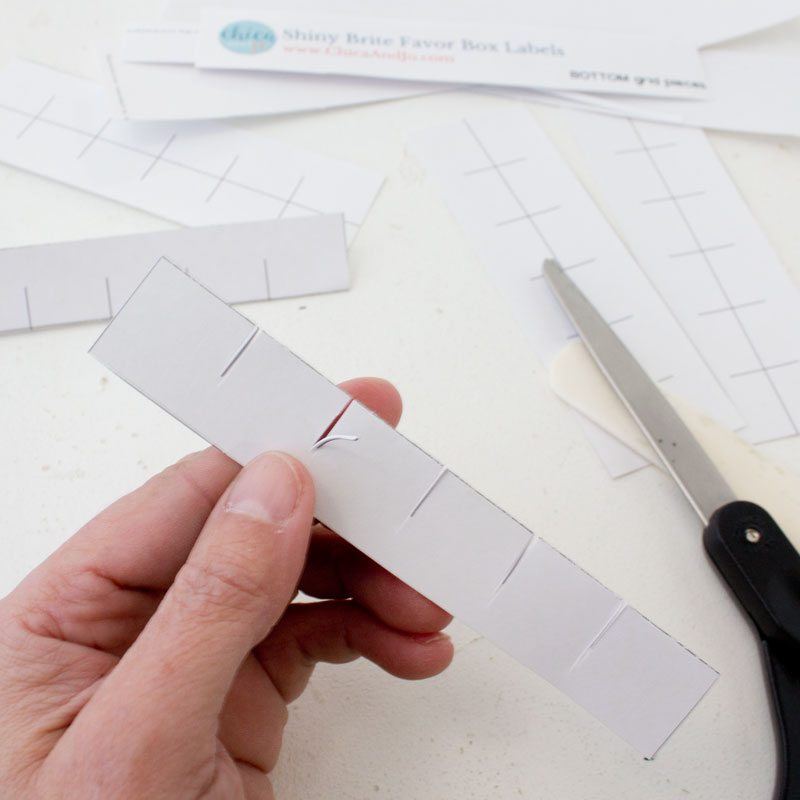
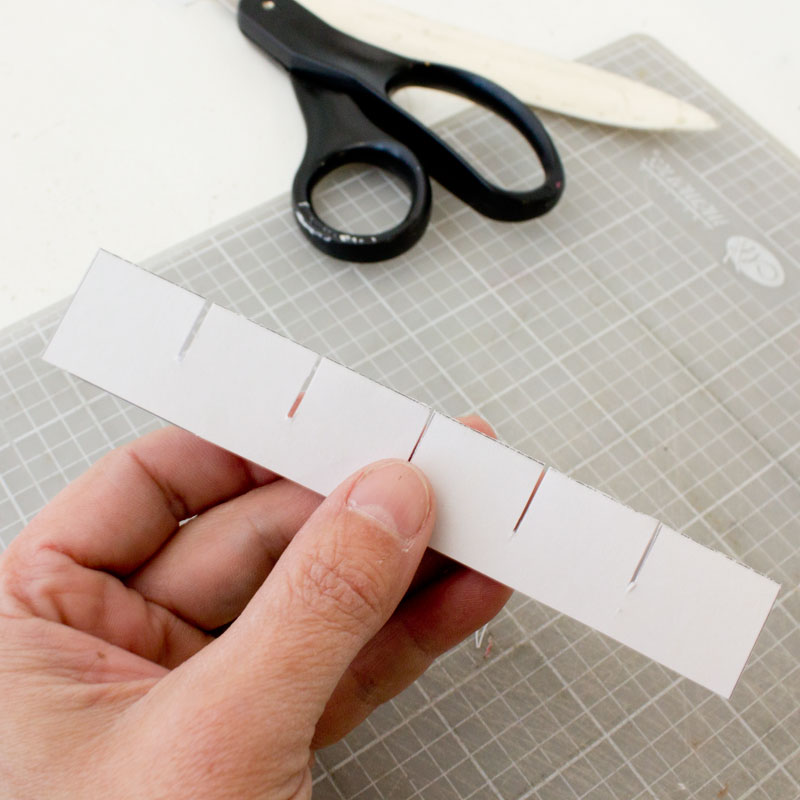
You'll be left with a strip with five notches in it. All the notches for these five pieces should be on the edge with the fold.
Now do the same with the "top grid pieces", folding and notching as before, but notice that this time the notches will be on edges opposite from the fold. As long as you cut wherever the notch lines are, you'll be fine.
You should now have five of each style, notched and ready to go.
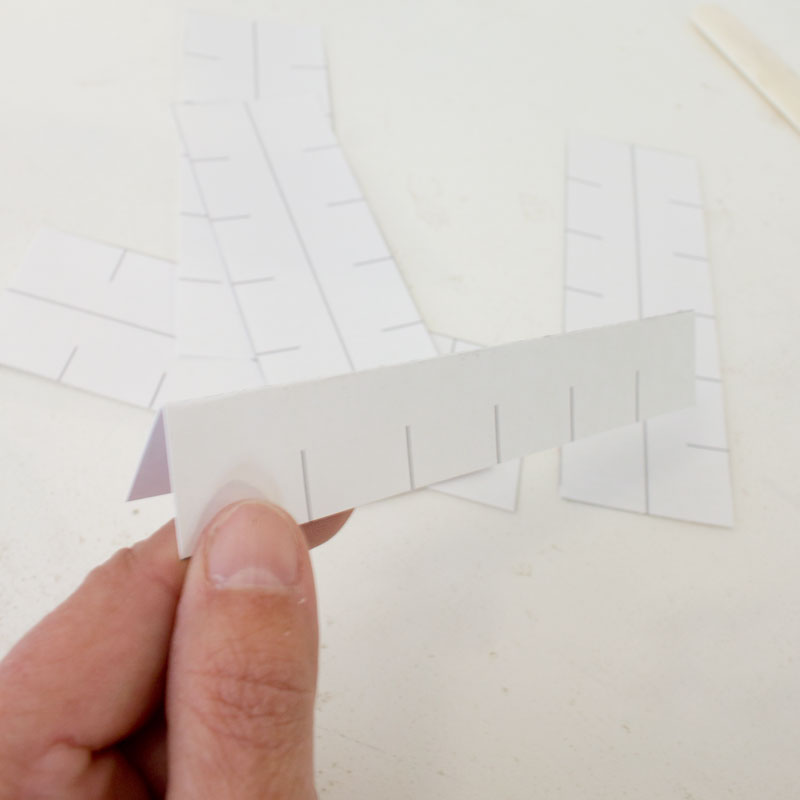
To form the grid, start with one of your original "top" grid pieces, and insert one of the "bottom" grid pieces into it, crossing the notches.

Slide the two pieces together until they fit together perfectly.
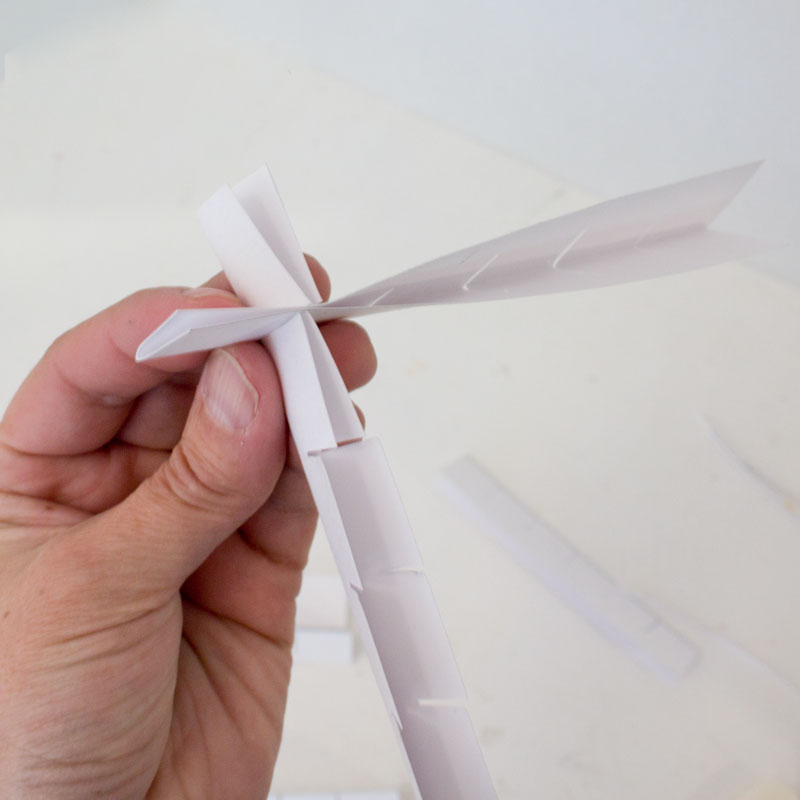
Add four more of the "bottom" grid pieces into the remaining four notches.
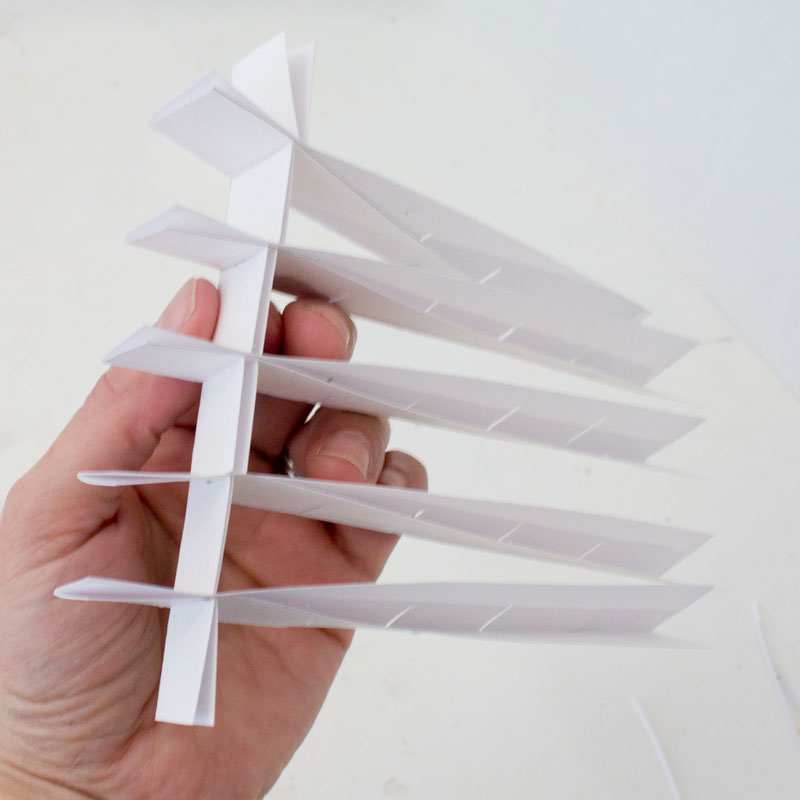
Now lay the whole piece on the table, with the creased edges facing up.
Add another "top" grid piece, sliding it into the notches. This will take some wiggling and finagling, but you'll get it!
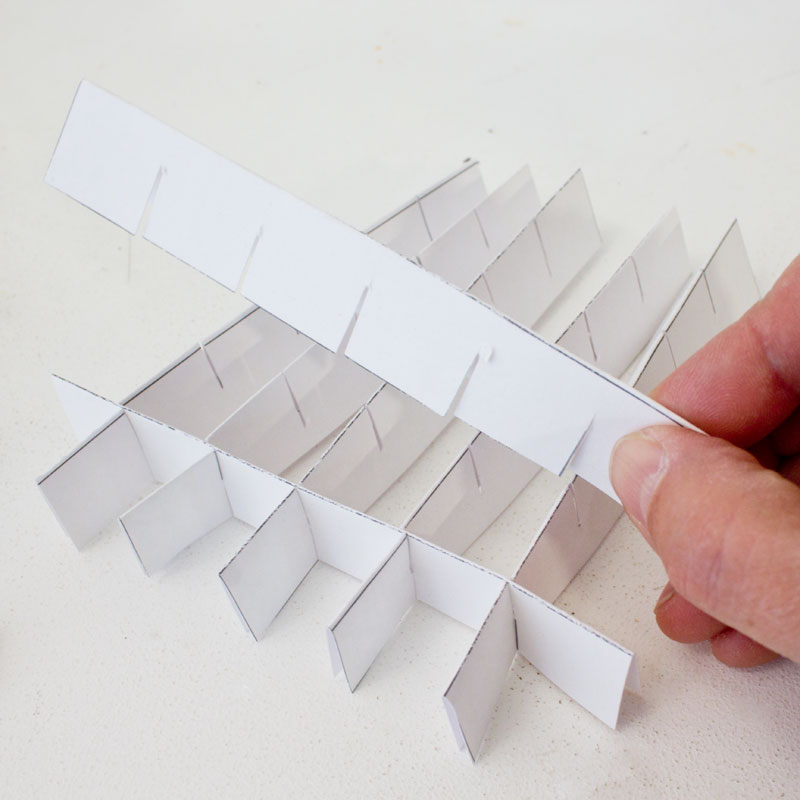
Once you've added all five of the "top" pieces, you'll have a perfect grid for the box.
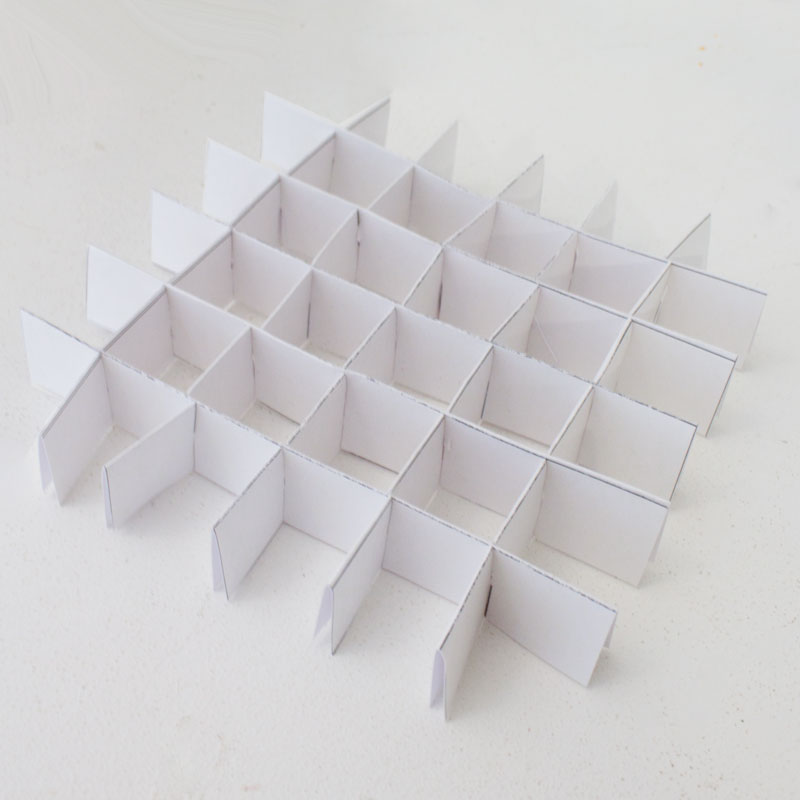
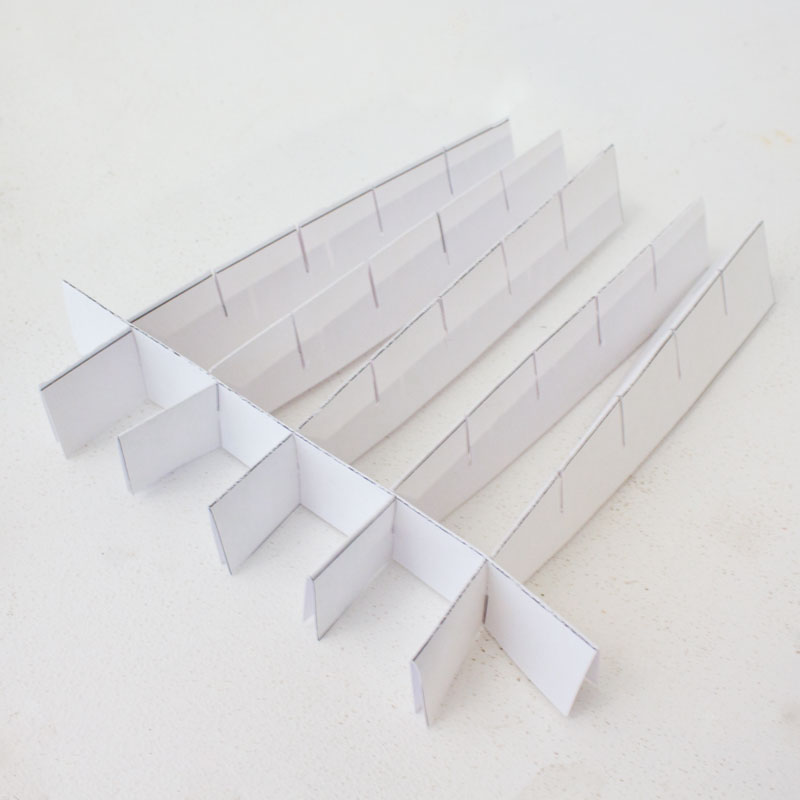
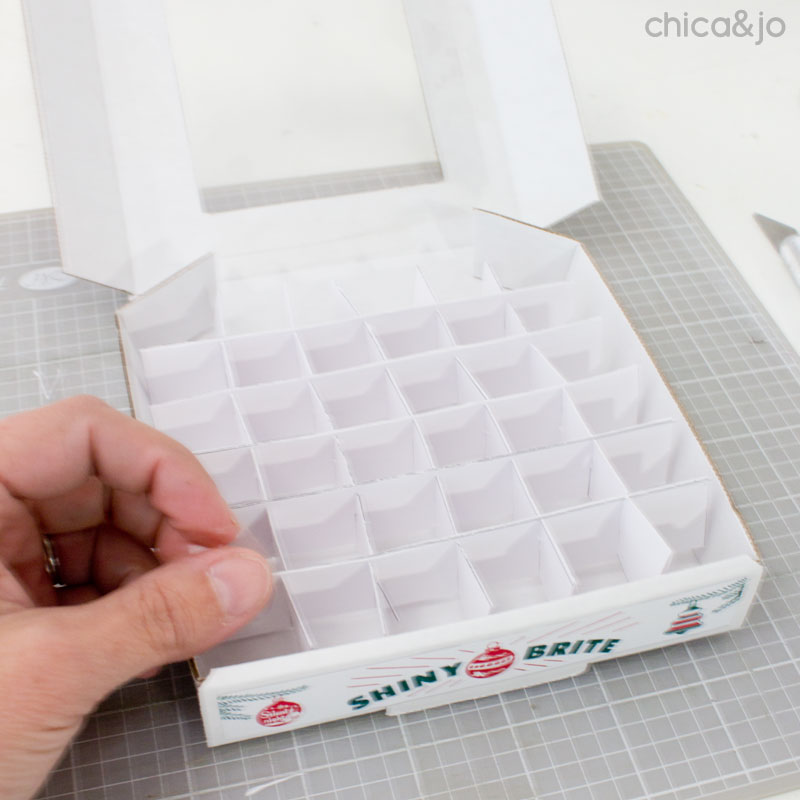
Just pop the grid into the box and test to be sure the lid closes easily. You can trim off the ends of the grid if needed, and optionally secure with small pieces of tape.
Step 3: Fill the box with mini chocolate ornaments
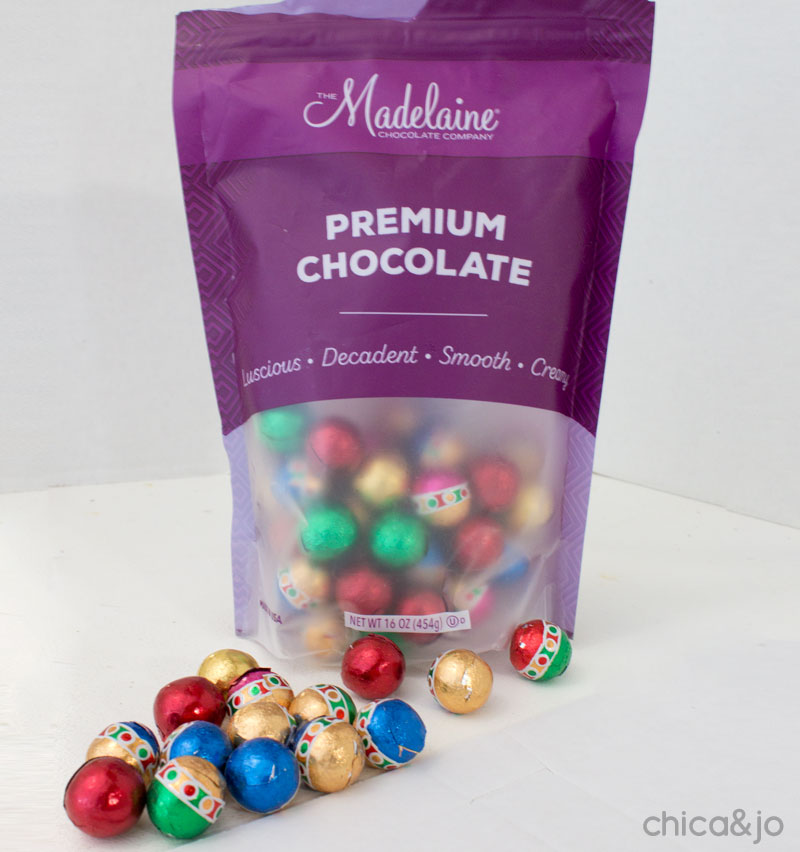
So what do you use to fill this cute ornament box? Well I found the perfect thing — Madelaine chocolate balls that are foil-wrapped and look just like ornaments!
Just put the ornaments into the grid, one in each space. (Note that you can leave the outer edge empty if you want your candy to go farther... it won't show through the window!)
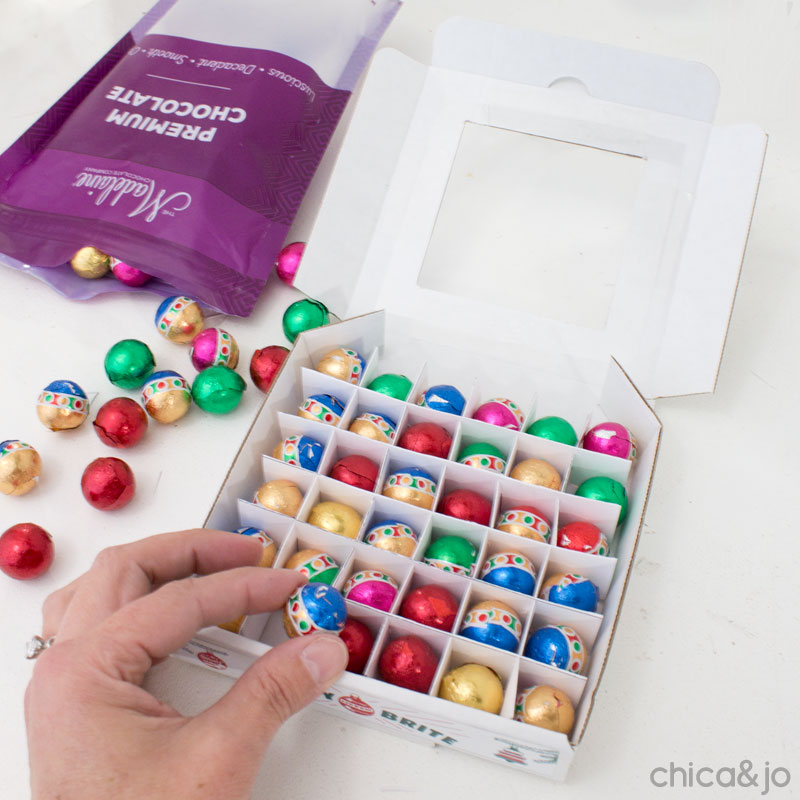
Close the lid and squeal with delight. I mean really... aren't these adorable?
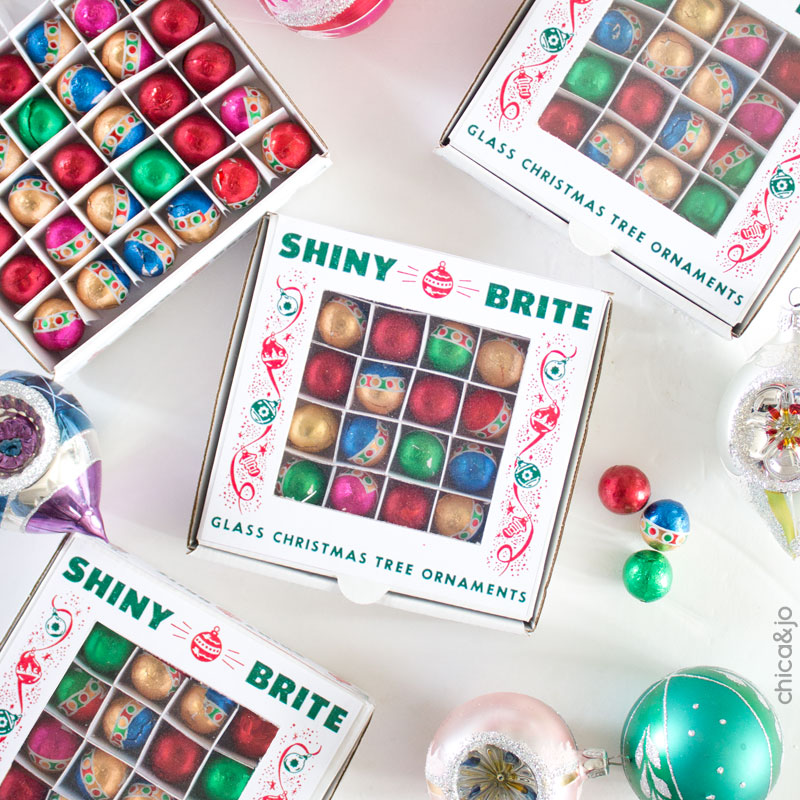
Chocolate-filled mini Shiny Brite ornament boxes
These mini Shiny Brite ornament boxes make the perfect favor for a Christmas party, and work great for quick gifts for neighbors or co-workers as well.
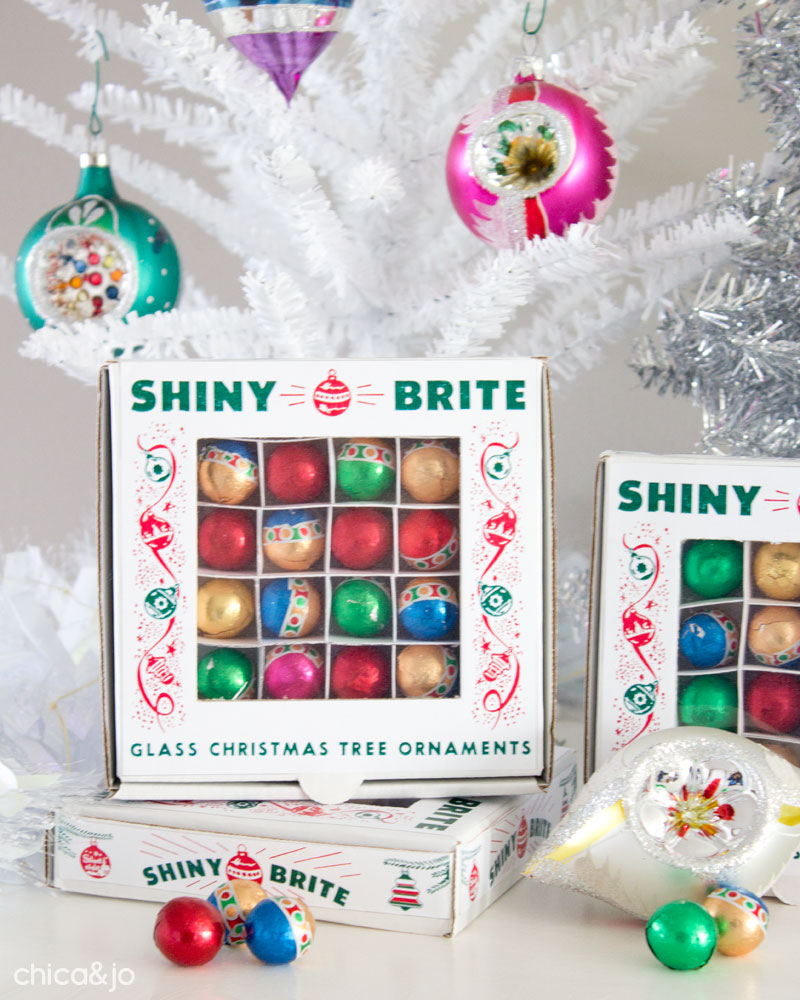
And they look so perfect nestled within my Shiny Brite decorations, too!
INSTANT DOWNLOAD -
PURCHASE NOW!
Shiny Brite Mini Box Labels – $2.99
from here immediately after your purchase is complete*.
Have questions? Email us at chicaandjo@chicaandjo.com
* File may be downloaded a maximum of 5 times.
similar projects

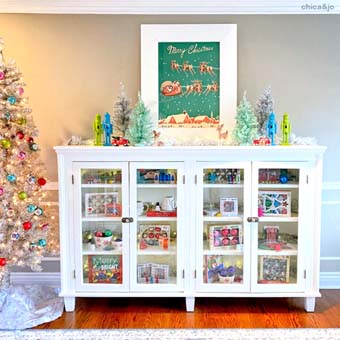
Make a Giant Shiny Brite Christmas Ornament Box
Vintage Retro Christmas Decorations with Shiny Brite Ornaments
Personalized Tombstone Party Favor Boxes for Halloween


