


Restoring an Antique Hutch Cabinet

Last summer during a visit to my father-in-law's house in upstate New York, I went into the basement and found the most remarkable thing. It was a very worn antique cabinet that had been used to hold canned goods for at least three generations. To the family, it was utilitarian and ordinary, but to me, it was a diamond in the rough. Convincing them to give it to me was way easier than convincing them to help me carry it out of the basement, but once I got it back home to Kentucky, I was even more in love with it than before.
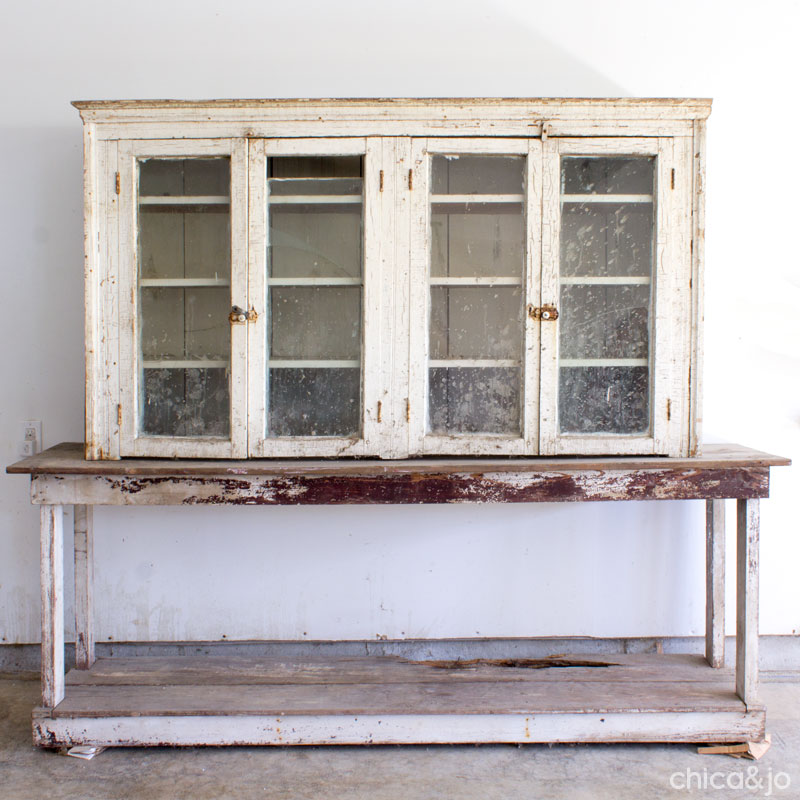
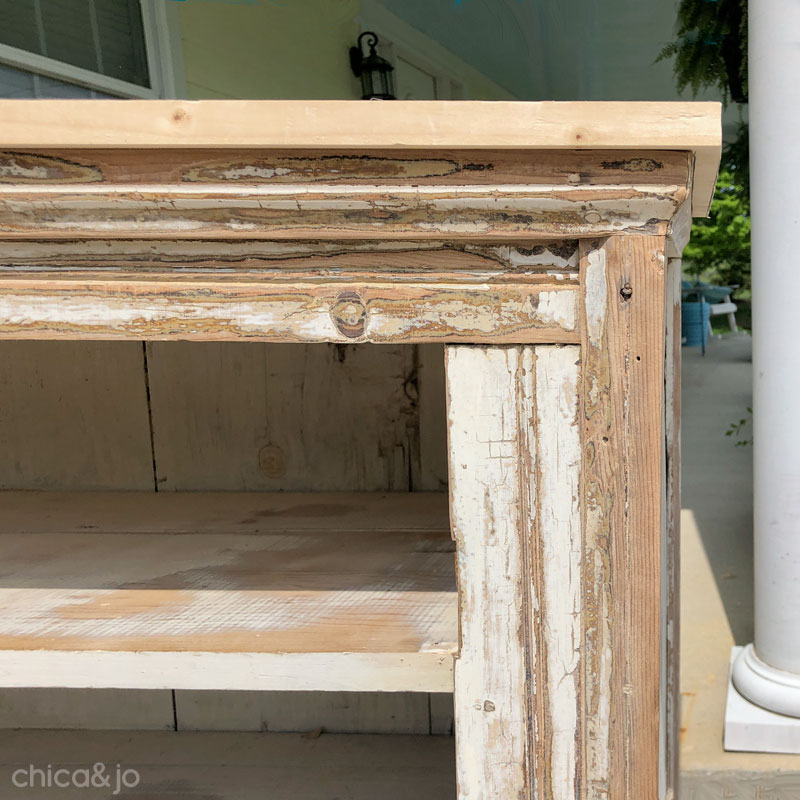
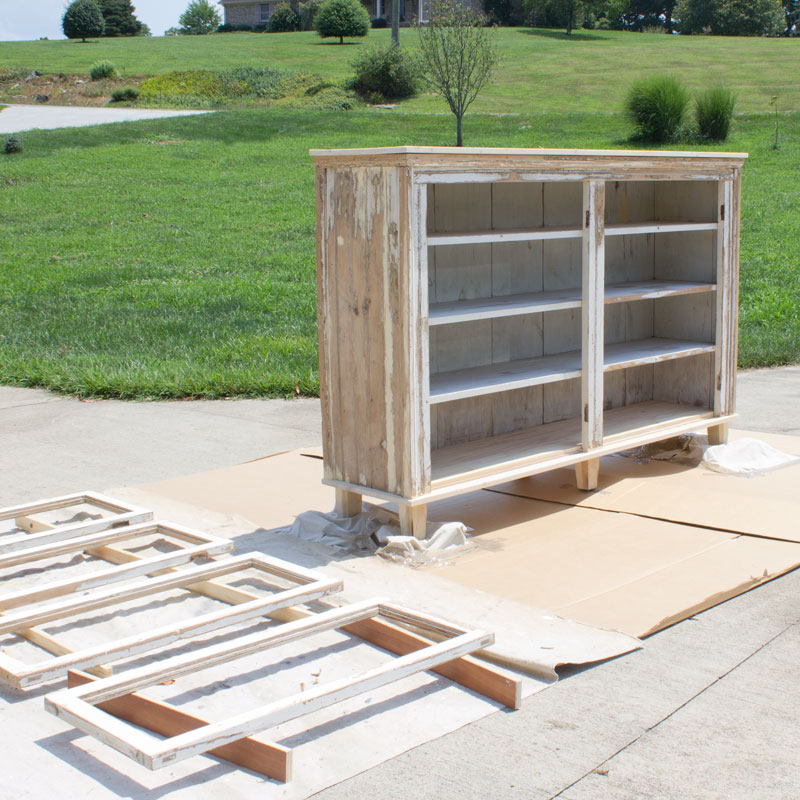
It had great bones. Sure, a few of those bones were broken, but they could be fixed. The base wasn't worth saving, because it was neither attractive nor structurally sound, but that top cabinet was everything.
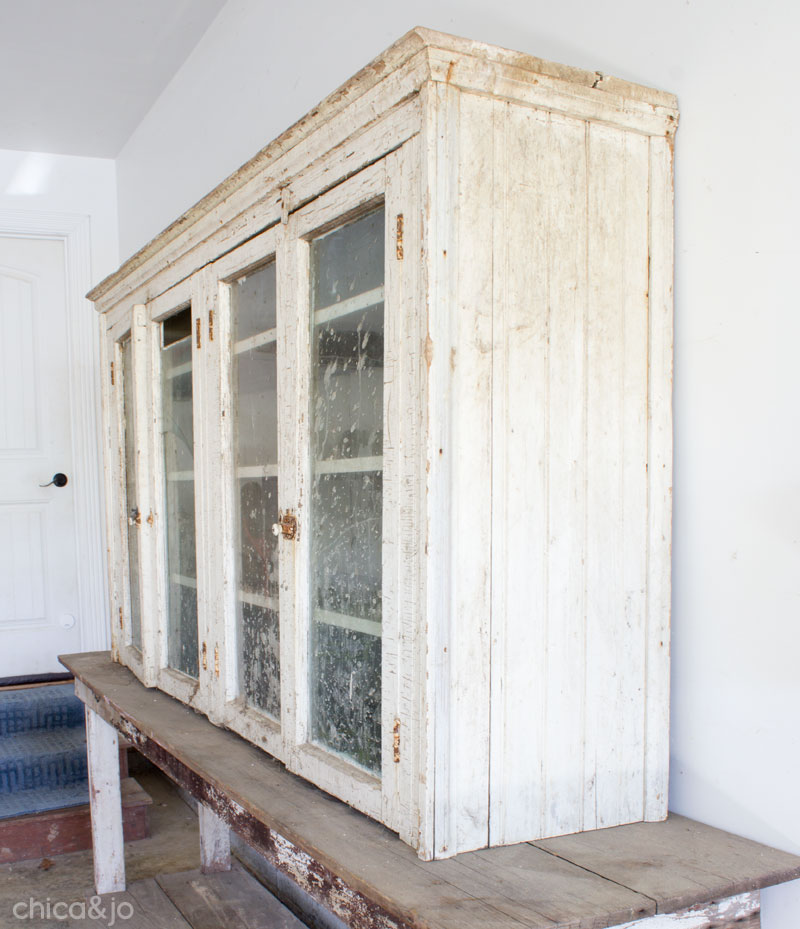
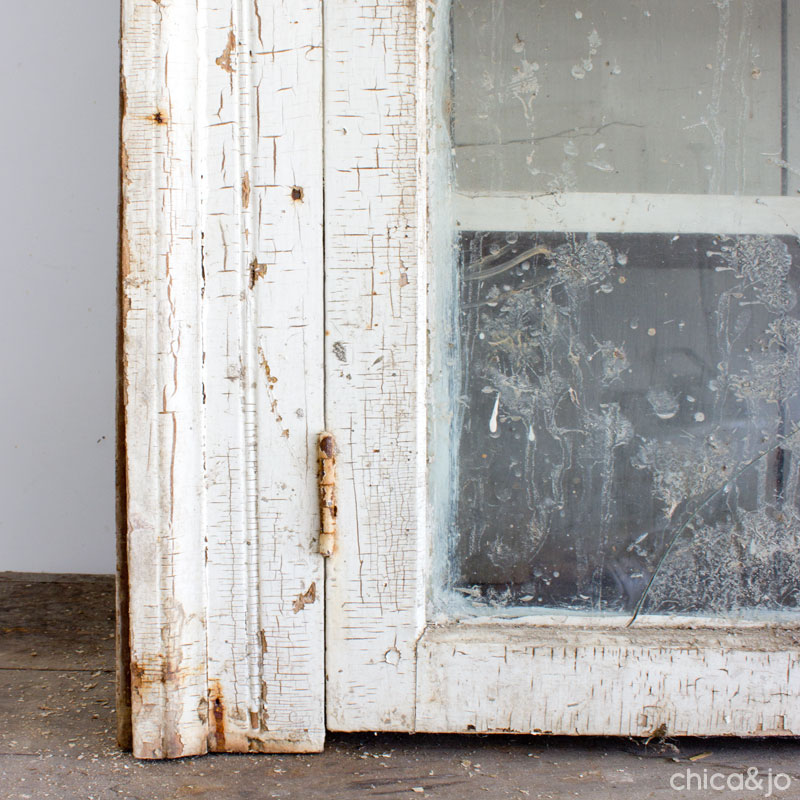
It was filthy, but I loved the history. I even loved the patina on the crackled paint, although it was rusty in spots and flaking off badly in others, so I knew I wouldn't be able to keep it. Everyone doubted that it was even worth trying to save, but I knew Jo and I could save it.
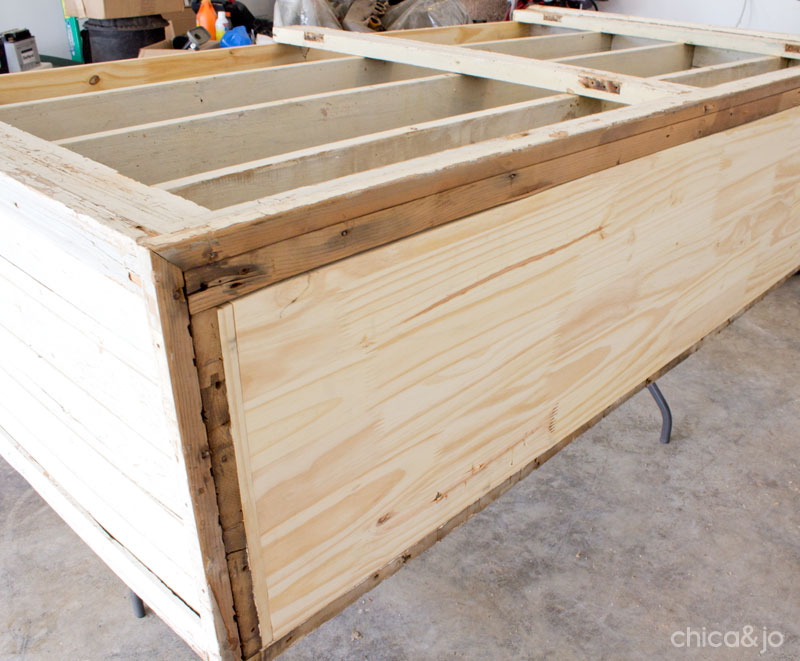
After a quick cleaning, we decided to shore it up structurally first. There was no sense in doing anything decorative if I couldn't get it sturdy and strong first. I clamped everything together, making it as square as possible, and re-glued the boards that needed it. And since the bottom was missing, I cut a piece of plywood to size, inserted it into the gap, and attached it all around.
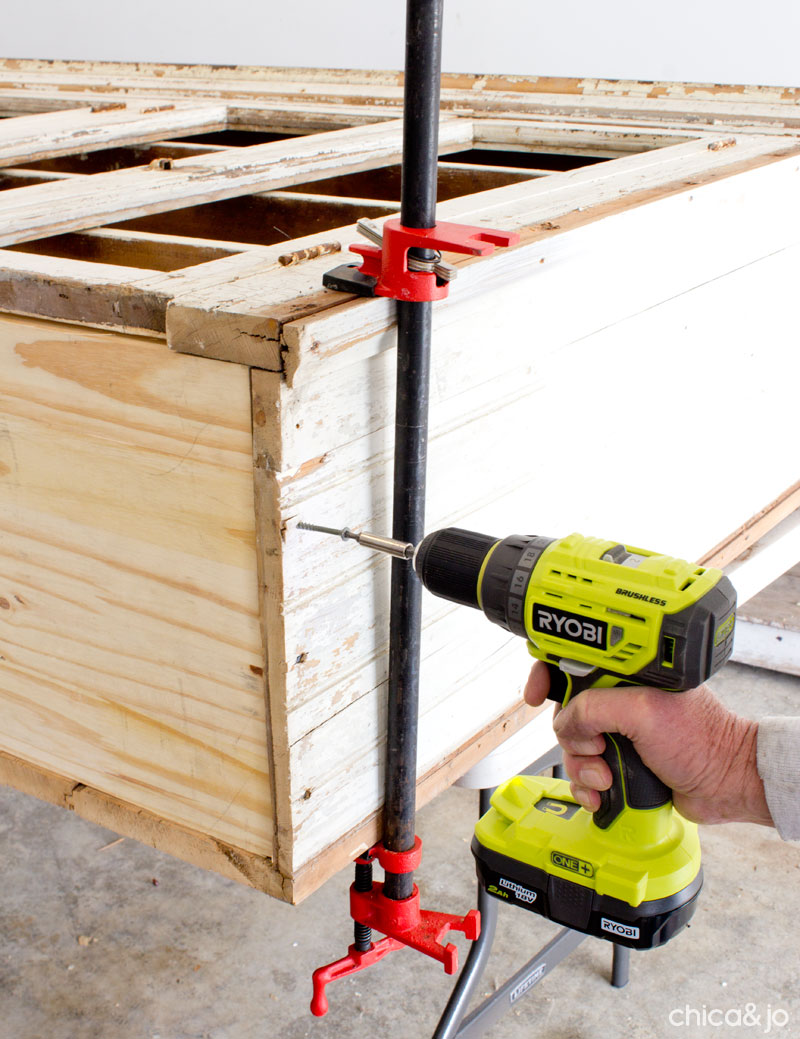
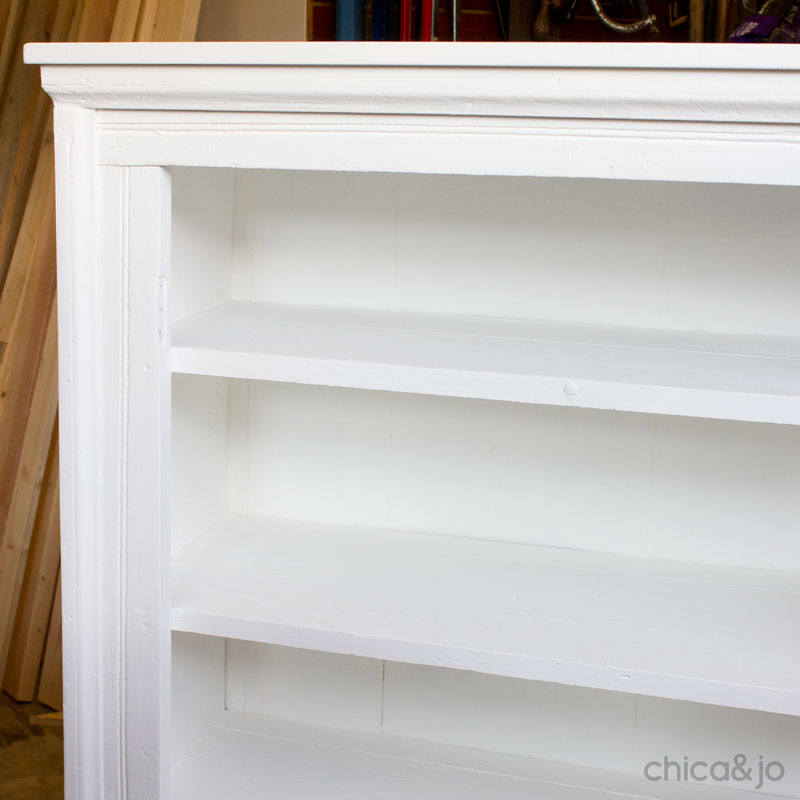
With the bottom shored up, I moved to the top. The top piece and the trim molding were beyond repair, so I removed them and added another new solid piece of wood inside for stability.
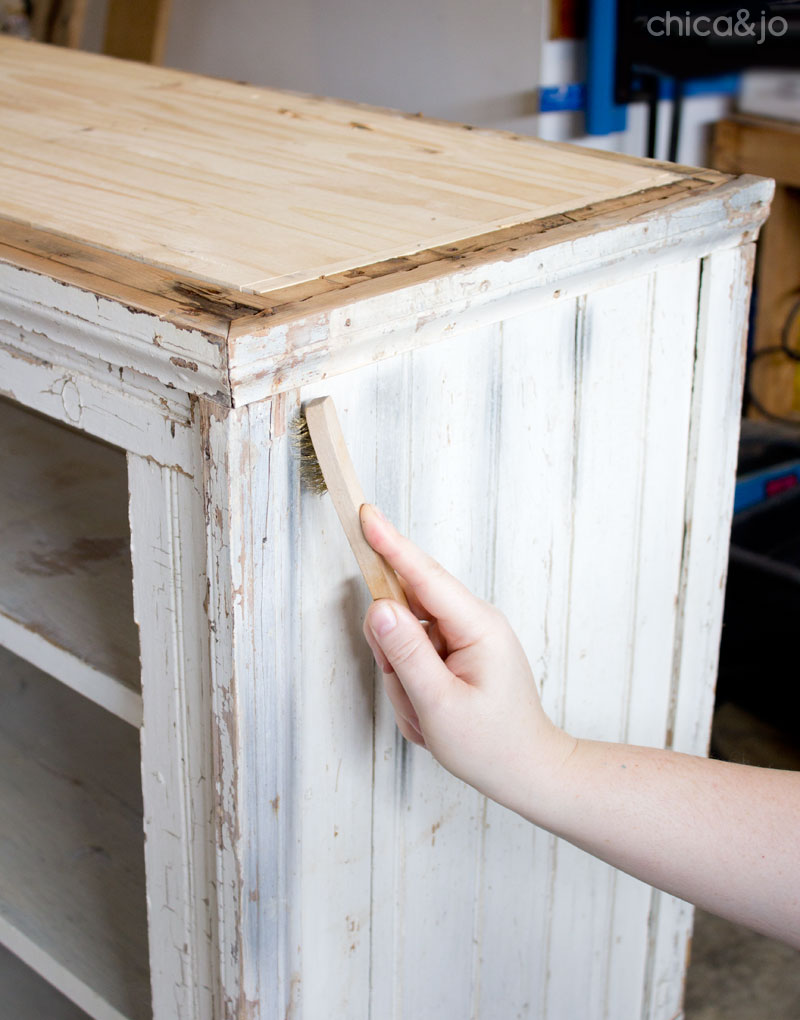
The new top and bottom made such a huge difference, and we were now able to move the cabinet easily without fear of it falling to pieces. So from here, we got to work cleaning. Jo used a brass wire brush to scrub every little nook and cranny, revealing the carved texture of the molding and bead board.
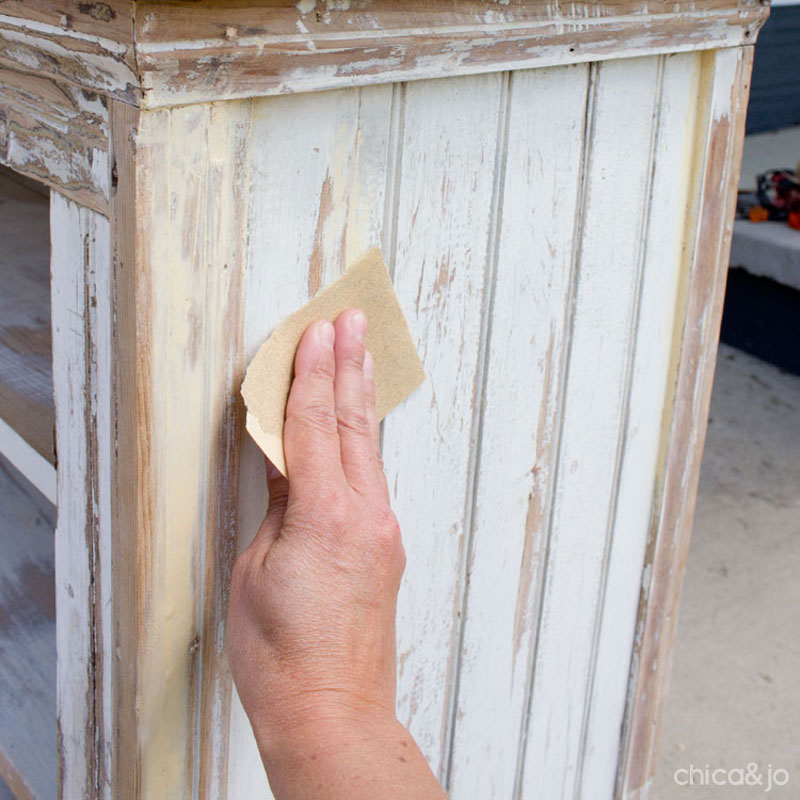
After a couple doses of bleach, the cabinet was clean enough to sand... and boy did we sand! I filled cracks and gaps with wood putty, and we hand-sanded every surface to get the major flaws under control. I did not completely sand everything smooth, though. I wanted to honor the cabinet's age and keep the rustic look just a little, so I purposefully left some areas with a gentle worn texture.
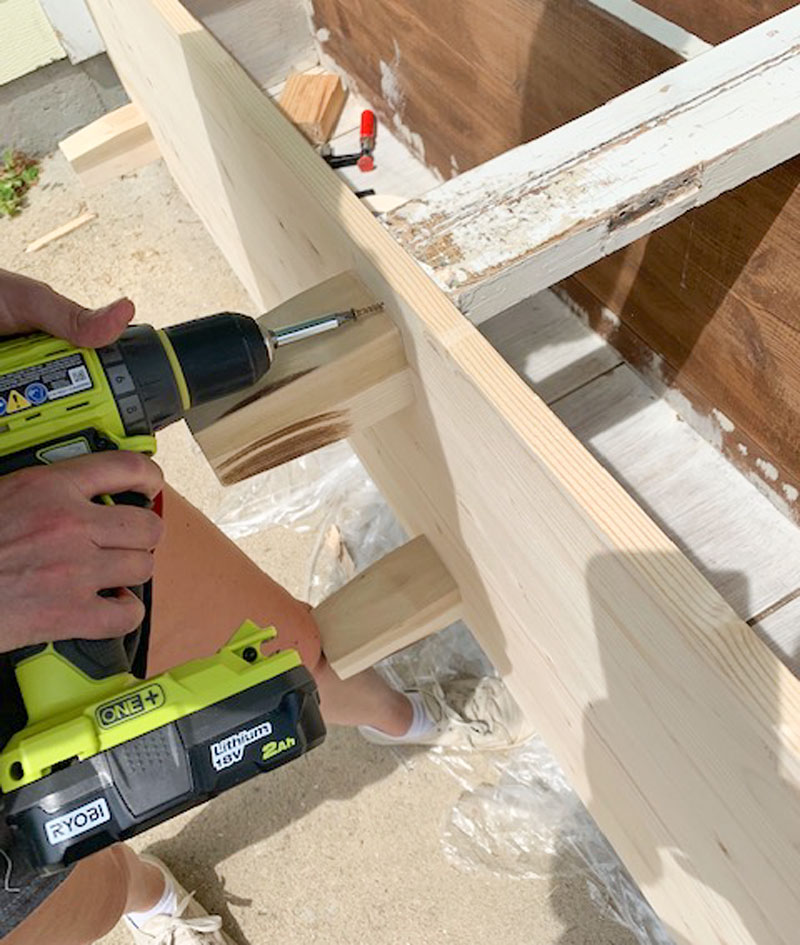
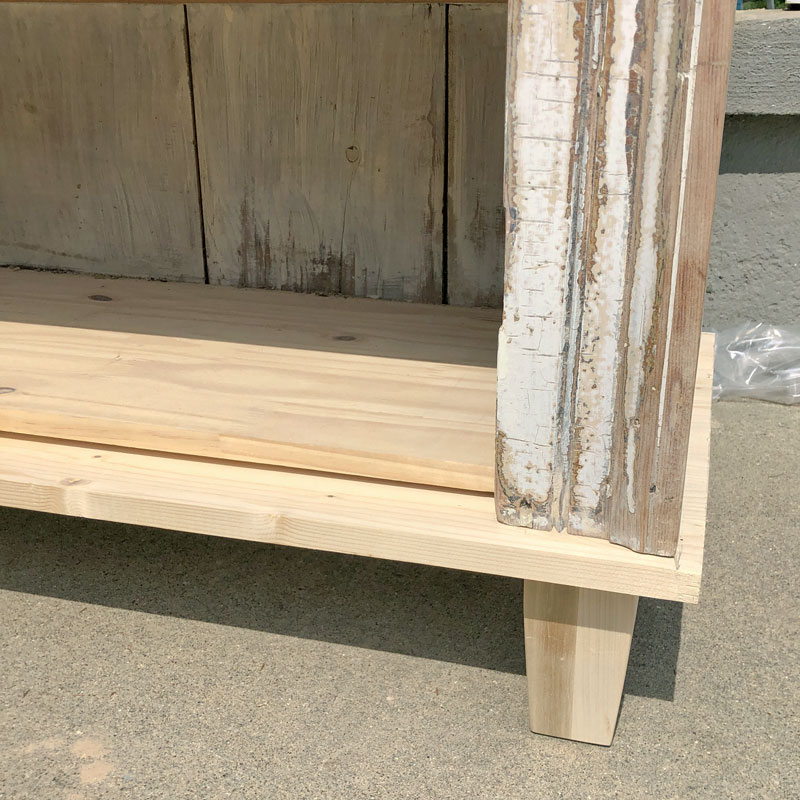
Since the old base was no good, and the cabinet was so large, I decided to just set it on the floor and use it as more of a buffet/sideboard cabinet. That meant it needed some decorative feet as well as a more solid bottom with trim. I cut a new piece of wood a couple inches wider and longer than the base, added six new wooden feet to it, and screwed it to the bottom.
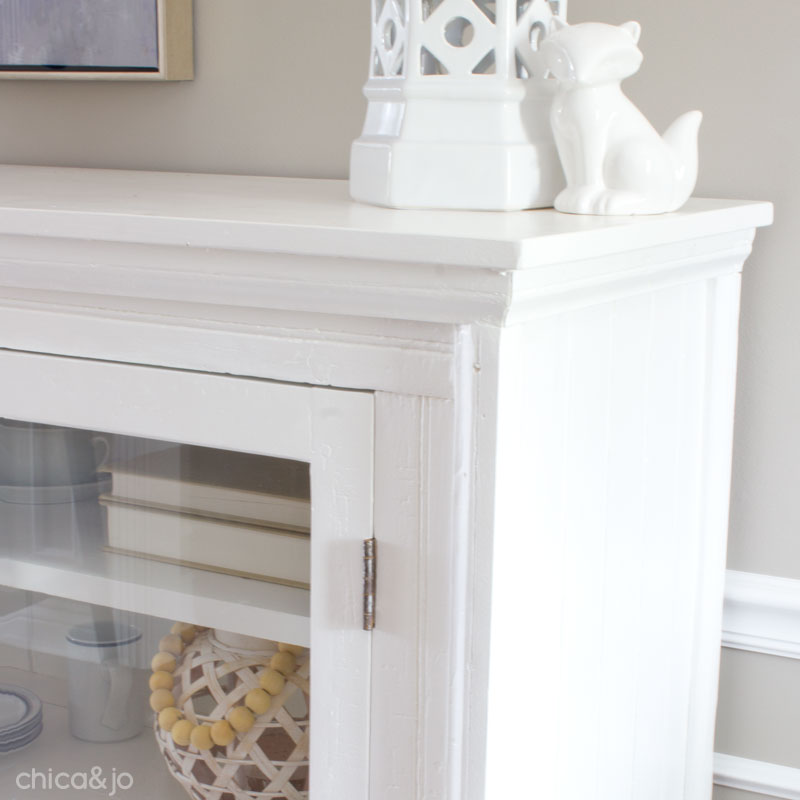
It's amazing the difference just one solid piece of wood can make. Without using molding or trim pieces, I ended up with a great finish and clean lines. Perfect!
The top of the cabinet needed the same treatment, so I cut another piece of wood, again larger than the cabinet, and attached it to the top (by screwing it from underneath). This was exactly the transitional effect I was looking for.
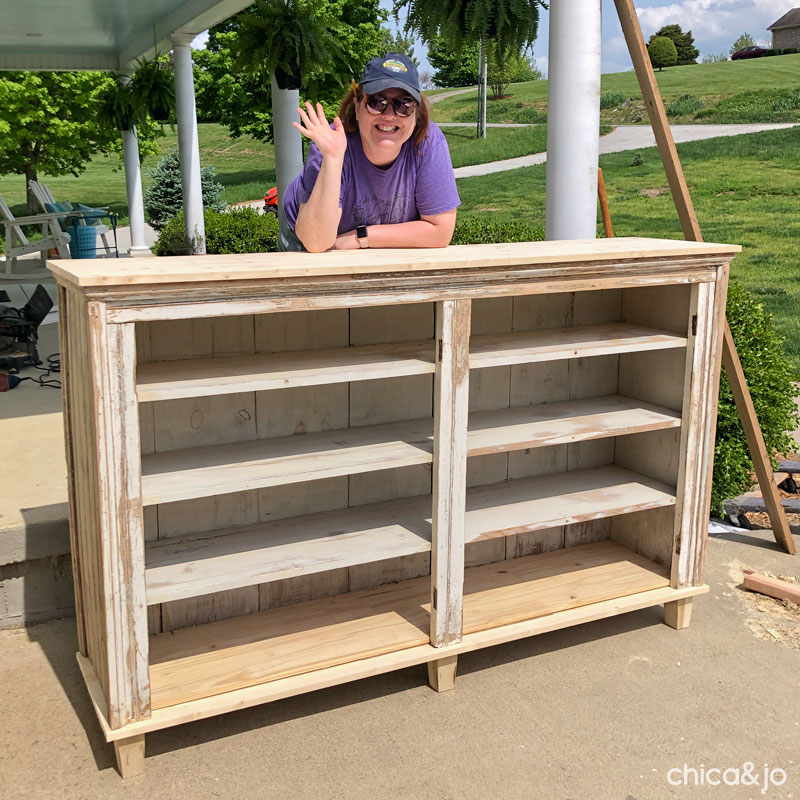
Jo and I were quite happy when finally, the sanding was done and cabinet was ready to paint!
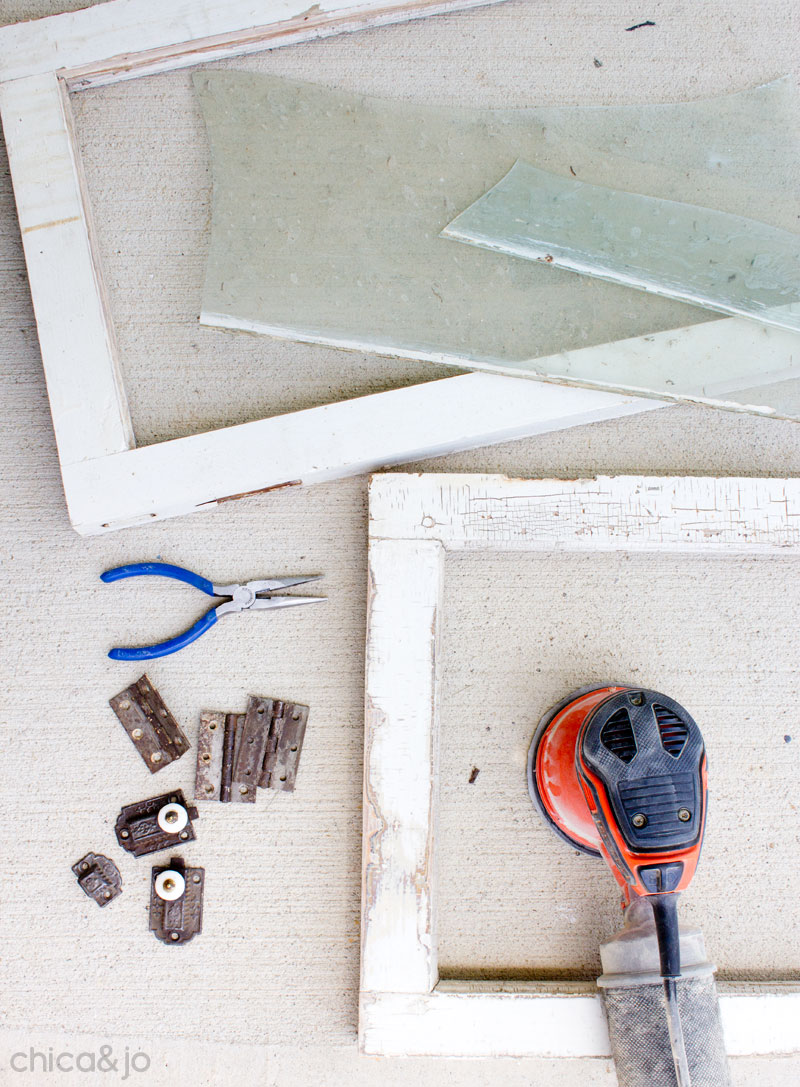
Before I got out the paint, though, I had to clean up the cabinet doors. There were four of them, and all the glass was broken, so I removed it along with the hardware. Then I sanded everything down, grateful that this time the surfaces were flat enough for me to use an orbital sander instead of sanding by hand.
After a final wiping down with a tack cloth to remove the dust, I set everything out and got ready to paint.
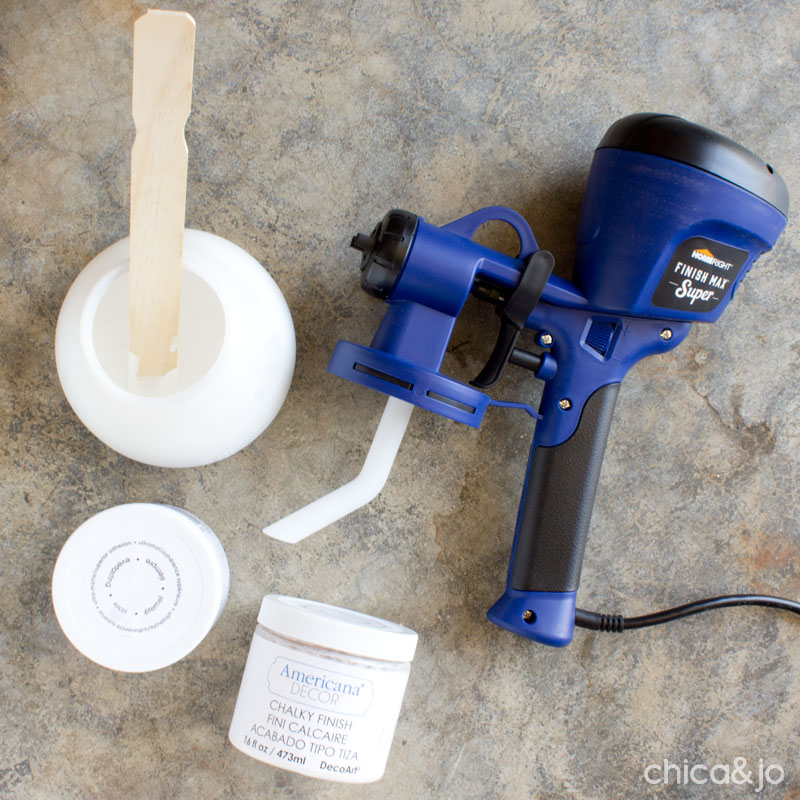
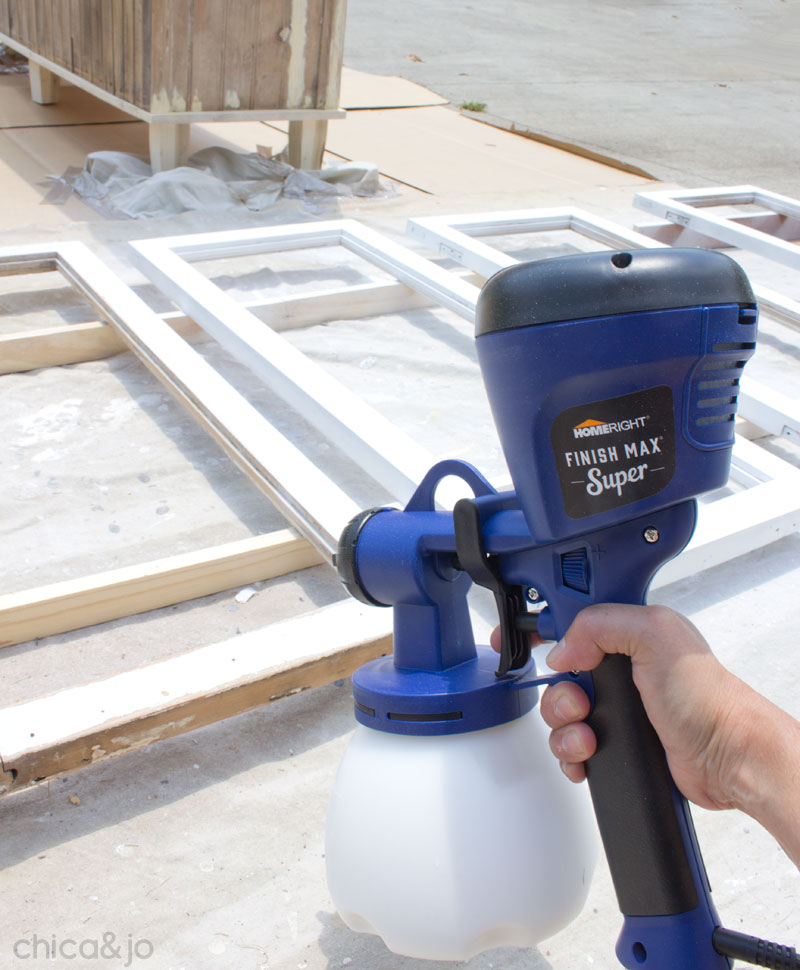
I loaded up my HomeRight Finish Max Sprayer with some Americana Decor Chalky Finish paint in Everlasting White, which I thinned down with a little water.
From here, painting was a breeze. I just sprayed two coats of paint onto everything, and got a great, smooth finish on all the flat surfaces. I used a brush to reach the back corners inside the cabinet.
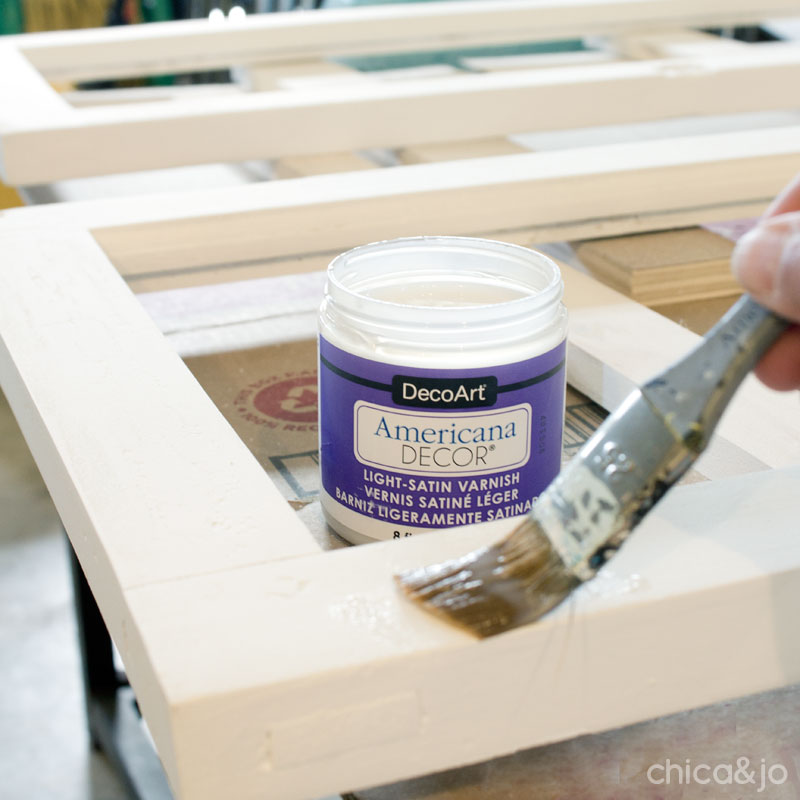
After the chalk paint was dry, I brought the piece inside and sealed it all up with two coats of Americana Decor Light Satin Varnish. I left it in the garage to dry for a couple days to be sure the finish was hardened before I did anything else to it.
I could not be more thrilled with how this chalk paint finish came out. The cabinet is barely recognizable anymore!
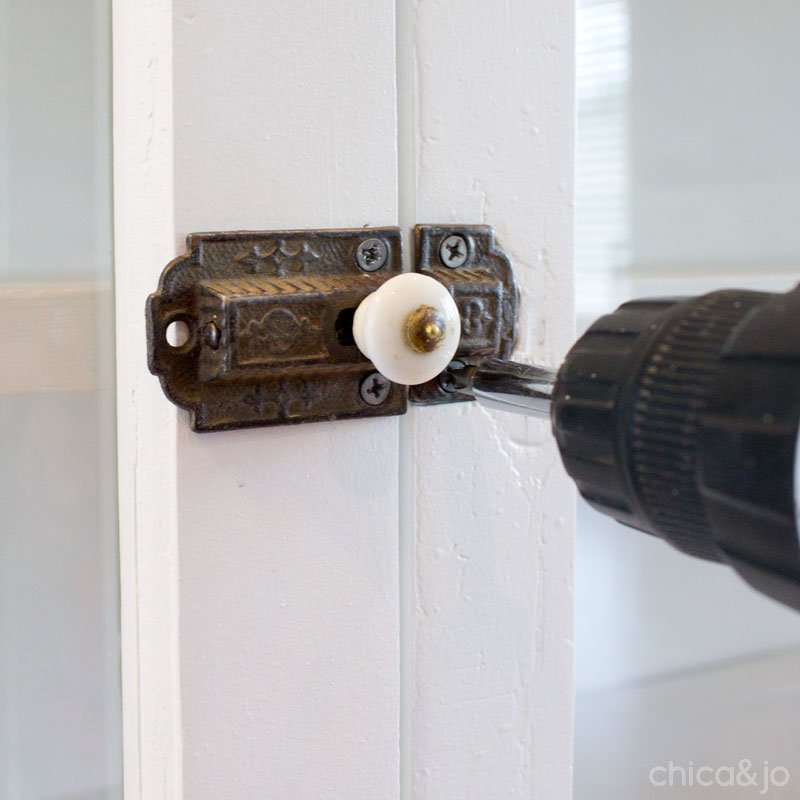
While the varnish dried, I worked on the hardware. I managed to get it to the perfect worn-but-nice condition thanks to a stiff wire brush, a squirt or two of WD-40, and a lot of elbow grease. I polished them up with some wadding polish, which gave them a nice faint shine. The original screws were too damaged to re-use, so I needed new ones.
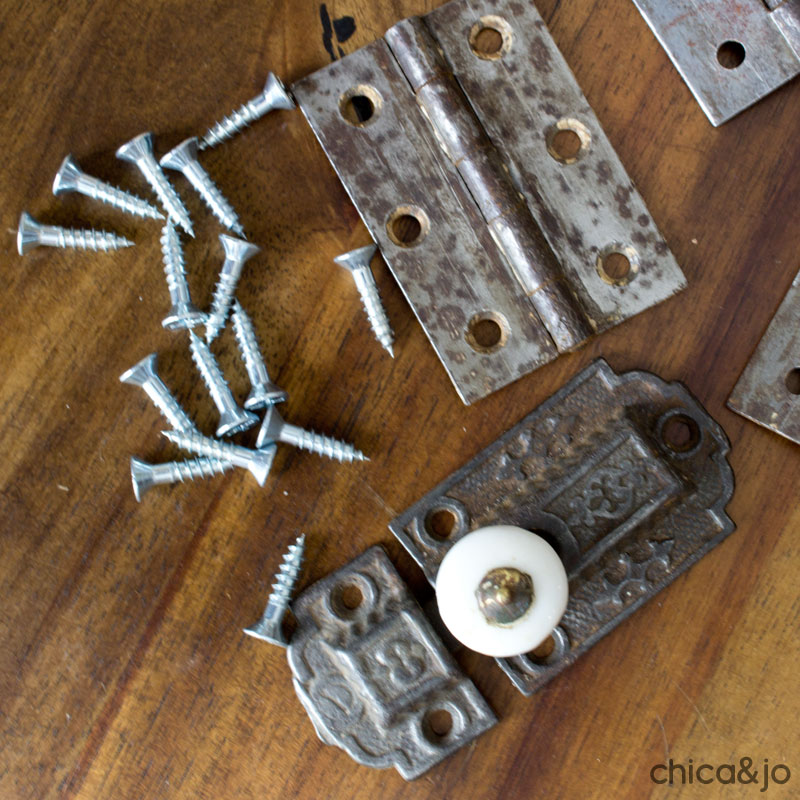
But ugh, the new screws were so shiny! That would look terrible with my aged hardware. To fix that, I used a really simple trick for aging new screws to match old hardware. All you need is a mini torch, a pair of pliers, and a bowl of water. I held the screw in front of the flame of my Bernz-O-Matic micro torch for about 10-15 seconds until it suddenly turned from shiny silver to dull brownish-gray. Then I dropped the hot screw into water to cool it off.
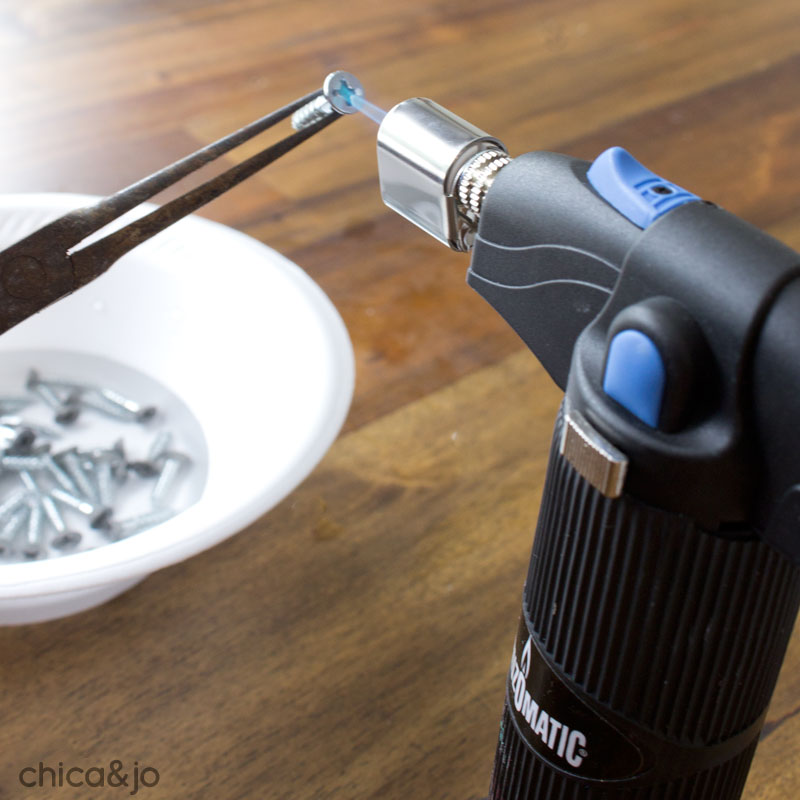
Just look at the difference it made! These screws will be perfect on my cabinet now.

After fitting the doors with new glass, it was finally time for assembly. I re-attached the hinges and hung the doors.
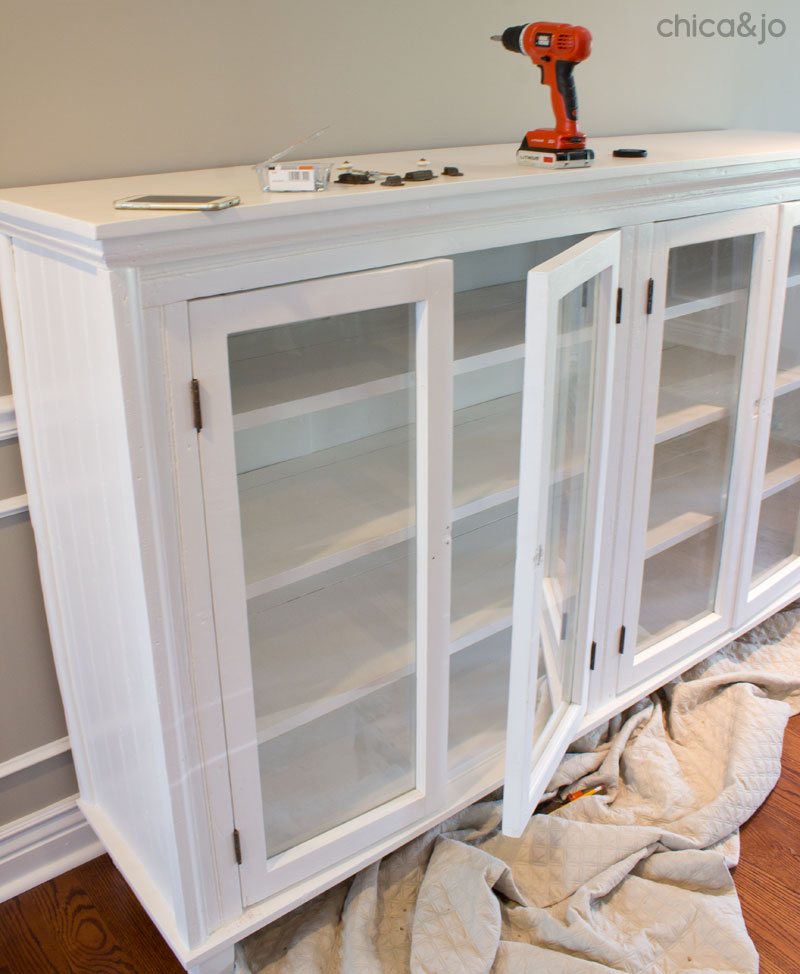
Then I used my newly-aged screws to re-attach the cabinet closures. Even though the clasps are a little long and aren't exactly a perfect fit for these particular doors, I wanted to use them anyway, since they were original to the piece. I wonder how many times My Honey's grandparents opened these very clasps to reach inside for some home-canned goodies?
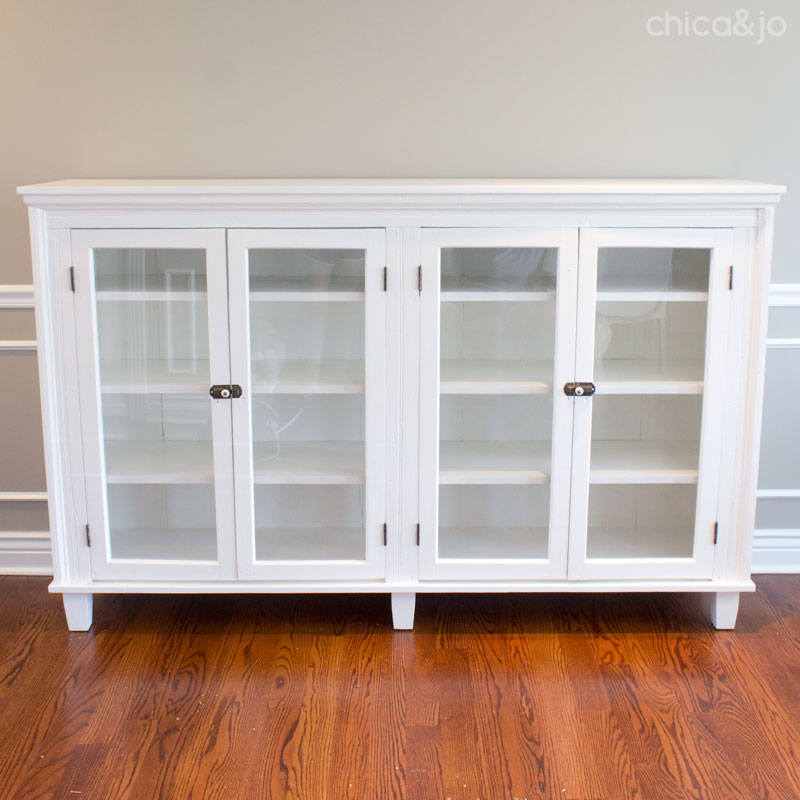
And then, after months of work, it was done. And it was perfect.
Decorating the cabinet was the best part. My foyer really needed a large piece of furniture to ground the long wall, and this cabinet fit the bill.
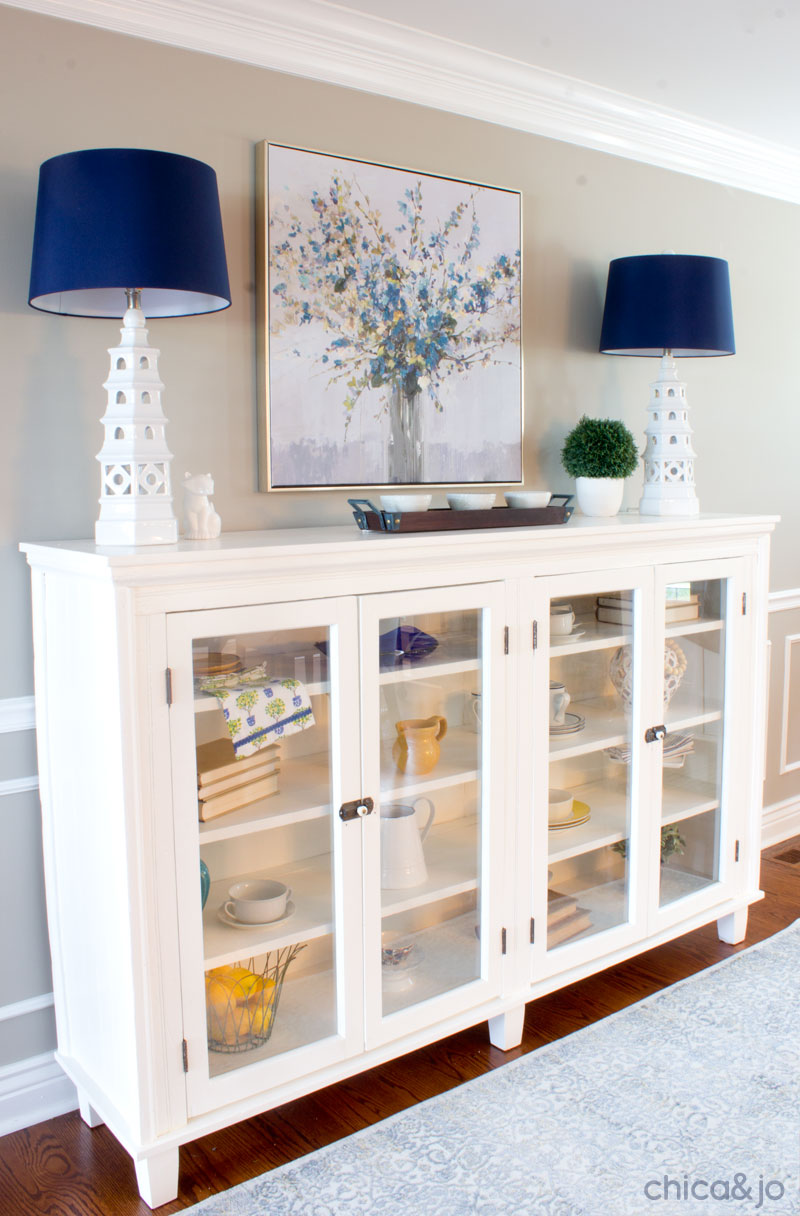
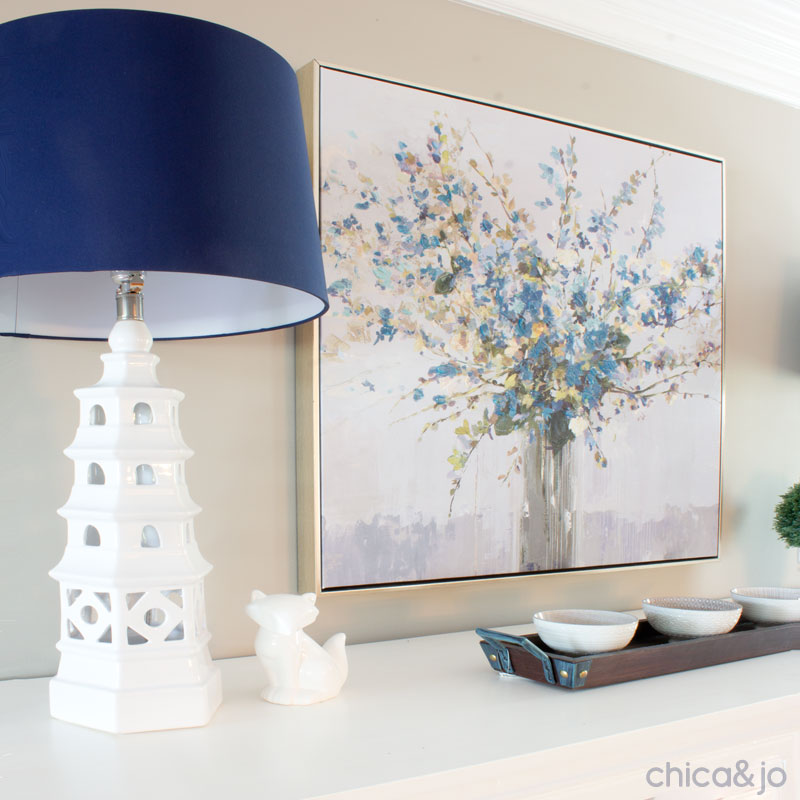
I found the most wonderfully unique lamps at HomeGoods, with navy blue shades that match my dining room on the opposite wall (more on that later!).
The shelves are now home to some of my favorite goodies, which are showcased perfectly behind those glass doors.
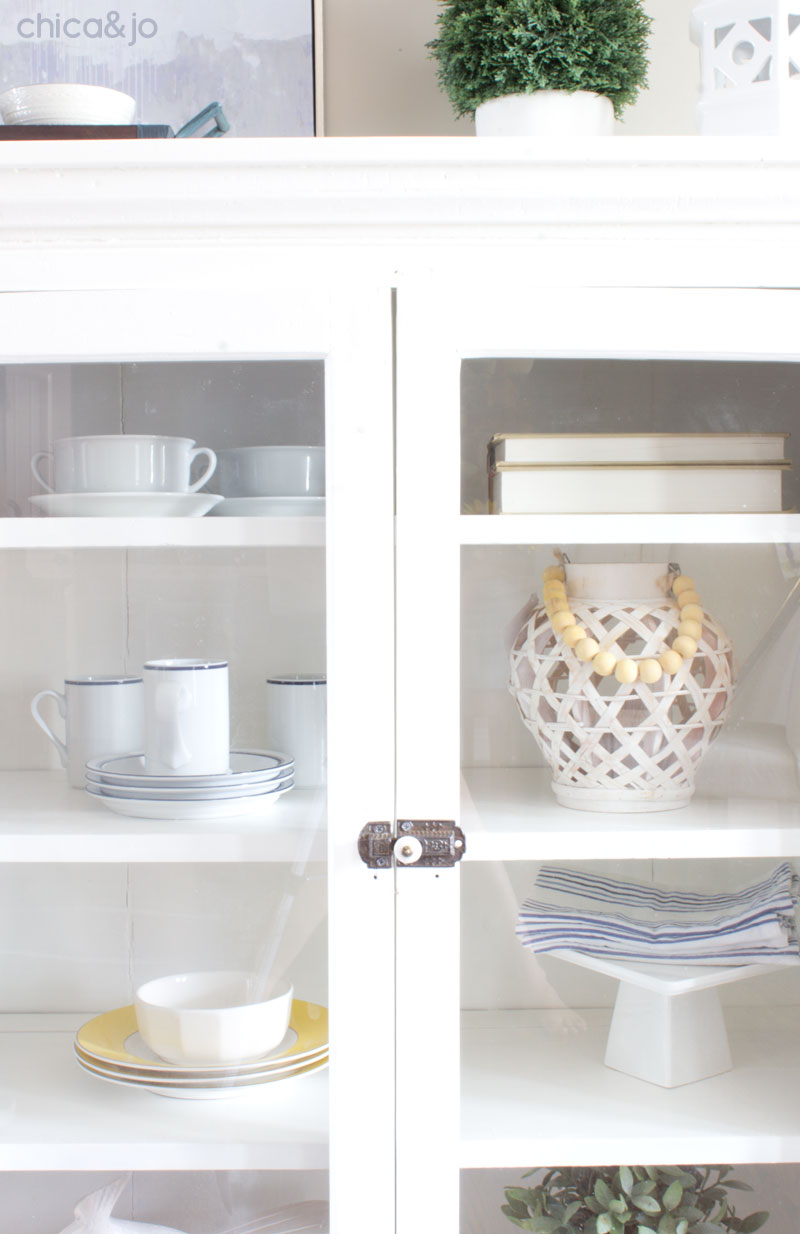
And the texture of the trim, molding, and bead board really shine in white.
I'm thrilled beyond even my own expectations with this cabinet, and cherish it as a piece of my husband's family history. His family can barely believe the transformation.
similar projects
DIY Faux Fireplace Made from an Upcycled Hutch
Refurbished Hutch Turned into a Console Table
DIY Hardware and Spray Paint Organizer Cabinet


2 comments so far:
It is beautiful!
very nice cabinet, I just got a old cupboard from about 1908 the hardware looks similar to yours but it doesn't have the white knobs. This really gave me insperation to do mine. I just have to do it inside my apartment by myself.