


Make a Giant Lite Brite

Jo and I were recently asked to do decorations for a corporate event with an 80s theme, and they really wanted us to go all out. We love to do party decor in a really grand scale, and the guests needed some party entertainment, so we looked to classic 80s toys for inspiration. We instantly fell in love with the idea of creating a giant Lite Brite toy, which would serve as both decoration and entertainment.
Building a giant Lite Brite was quite an undertaking, but we are super pleased with out it came out. The trickiest part was finding affordable giant Lite Brite pegs, but we figured out a clever solution that worked great.
Note that our project measurements are specifically designed to suit the size of our pegs, which are 1-1/4" in diameter, so our holes are 1-3/8" to accommodate them. If you are using a different size of pegs, you will potentially need to adjust every measurement below accordingly.
I'll talk about making the pegs later, but first, let's build the light box!
We started with a sheet of 1/4" plywood and did a ton of math to figure out how to cut our holes. Here's a basic pattern to show the layout, with each step marked in a different color.
The first step (in black) is to cut the plywood to 65-1/2" by 47".
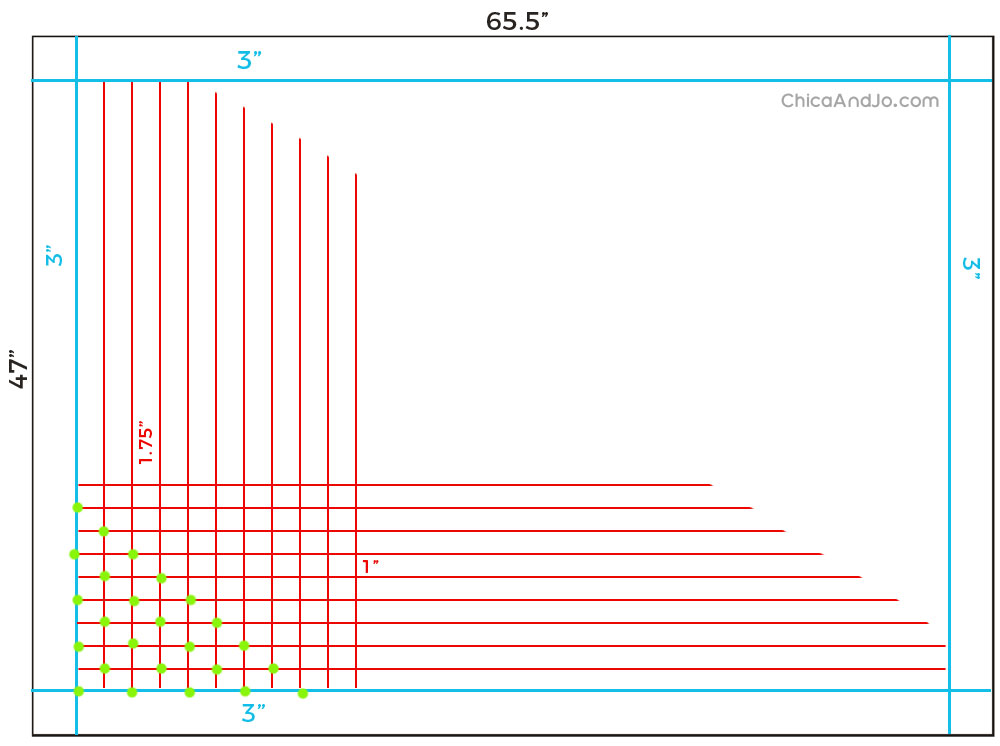
The next step (in blue) is to mark a line 3" in from each edge. This space will accommodate the inner frame later, which will be made of 1-1/2" x 1-1/2" stock. This frame will give the box depth and strengthen up the sides.
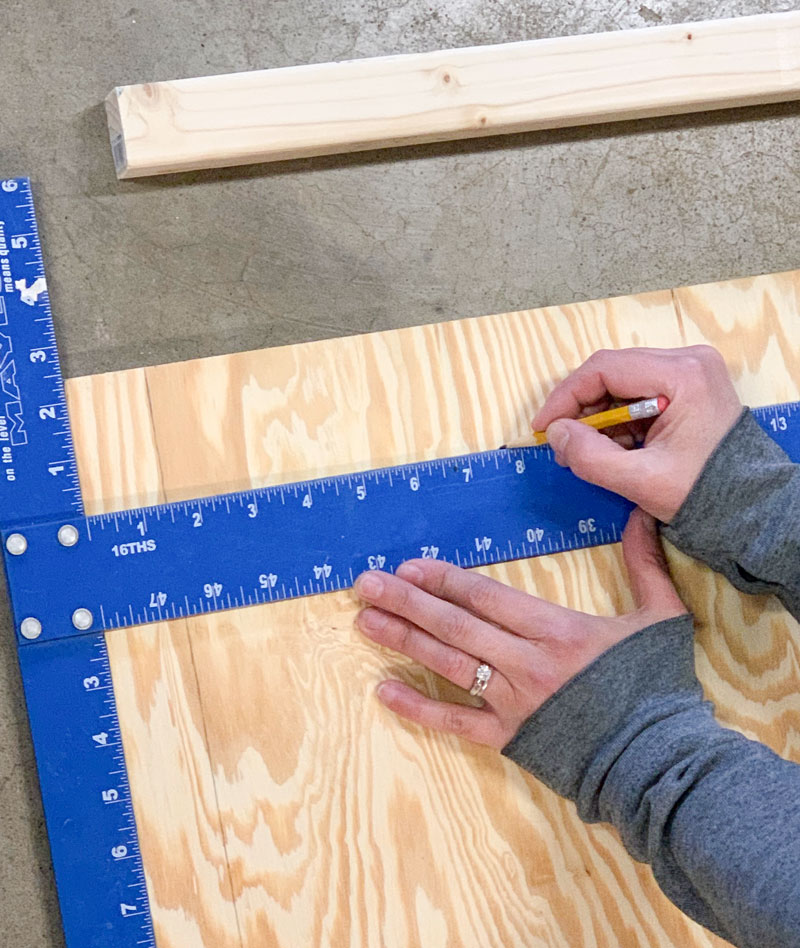
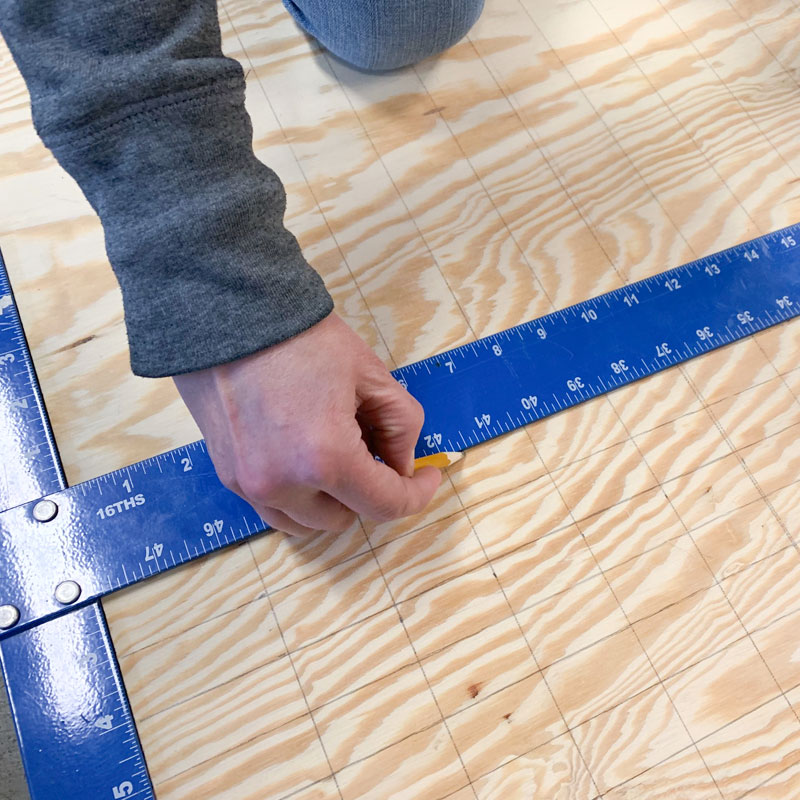
For the next step (in red), you'll use a straight edge (a 48" T-square is ideal for this) to mark a grid on the whole board. The vertical lines should be 1.75" apart and the horizontal lines should be 1" apart.
The final step (in green) is to use a pencil to mark where your holes will be. You don't want to mark every single intersection on your grid. Only every other intersection will get a hole, so marking them ahead of time really helps you to not lose your place.
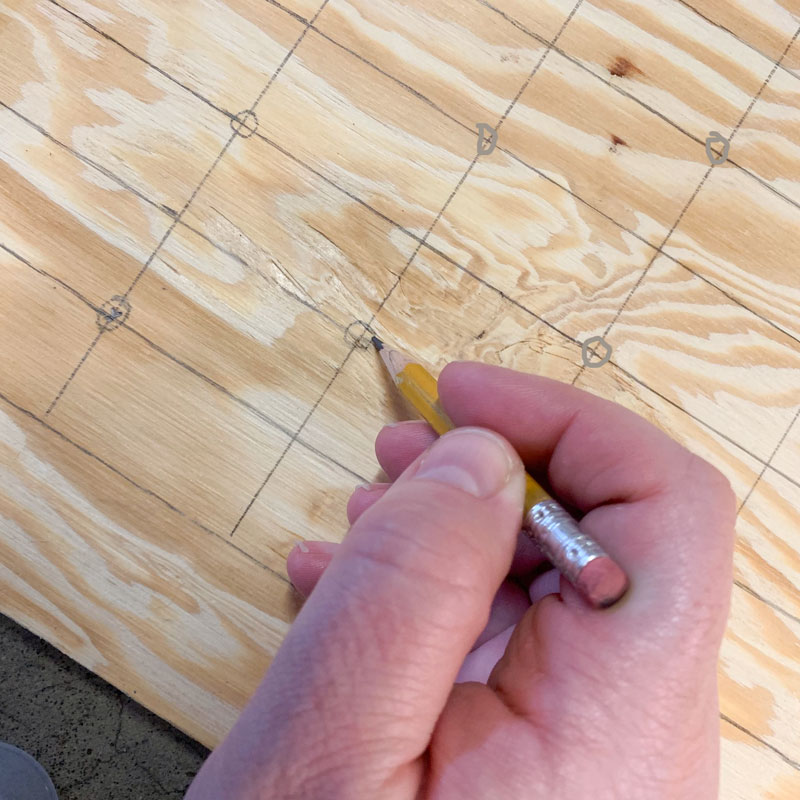
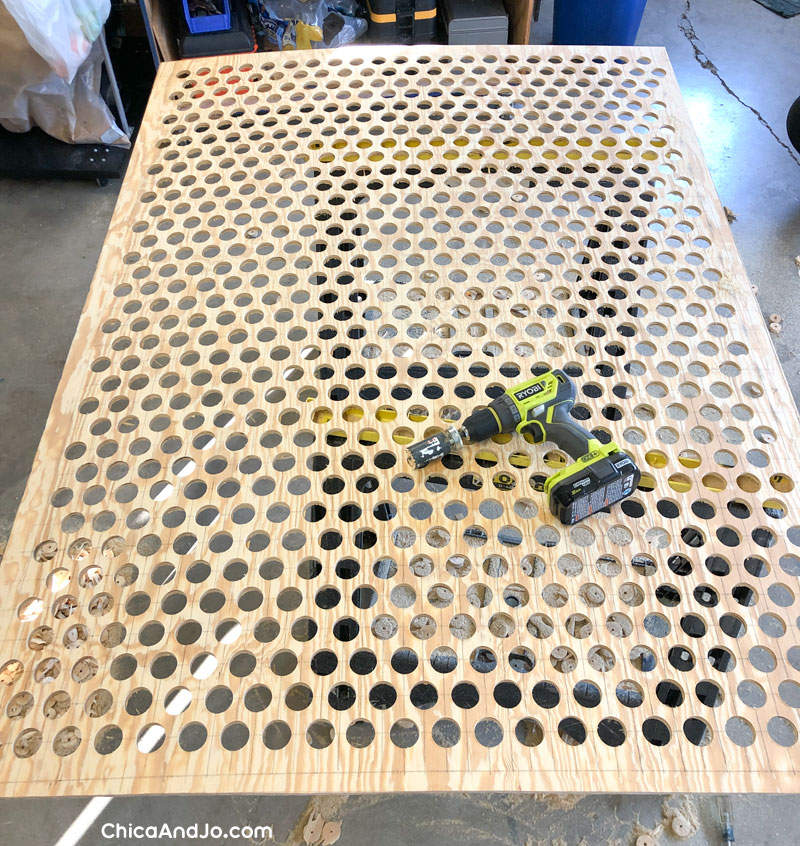
If all the measurements worked out, you should have 35 columns of holes, each one alternating between 21 or 22 holes per column. That's 753 holes in all!
Before you start cutting those big holes, it's a great idea to pre-drill each one with a skinny drill bit. This will make it much easier to center your hole saw.
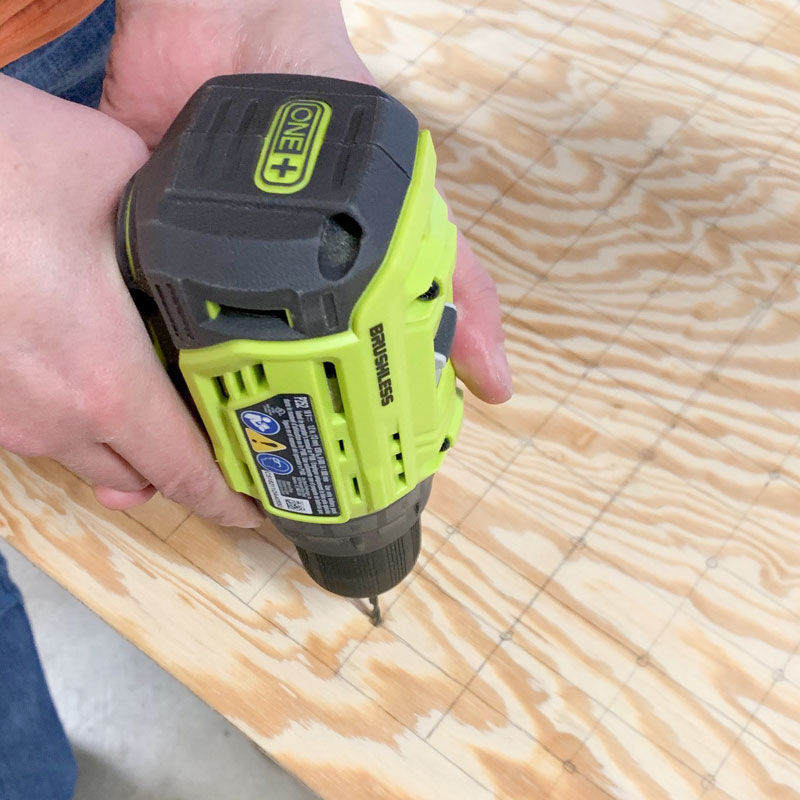
Now get yourself a 1-3/8" deep-cut, arbored hole saw, a good drill, and some backup batteries. Things are about to get really monotonous.
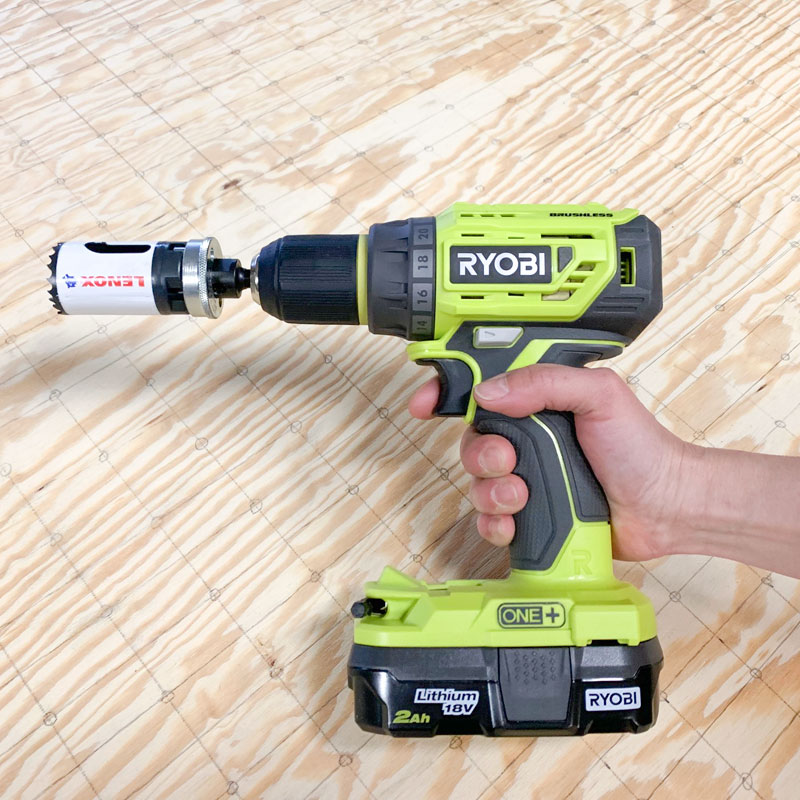
By the way, make sure you get an arbored hole saw with a speed slot on the side. This will make it SO MUCH easier to get those wood circles out of the saw — you just shove a screwdriver into the slot and pry the circle out from behind.
It took me and Jo several hours and to cut these 753 holes, but it was fun and our Ryobi drill handled it like a champ. Having the holes pre-drilled made it SO much easier to center the hole saw.
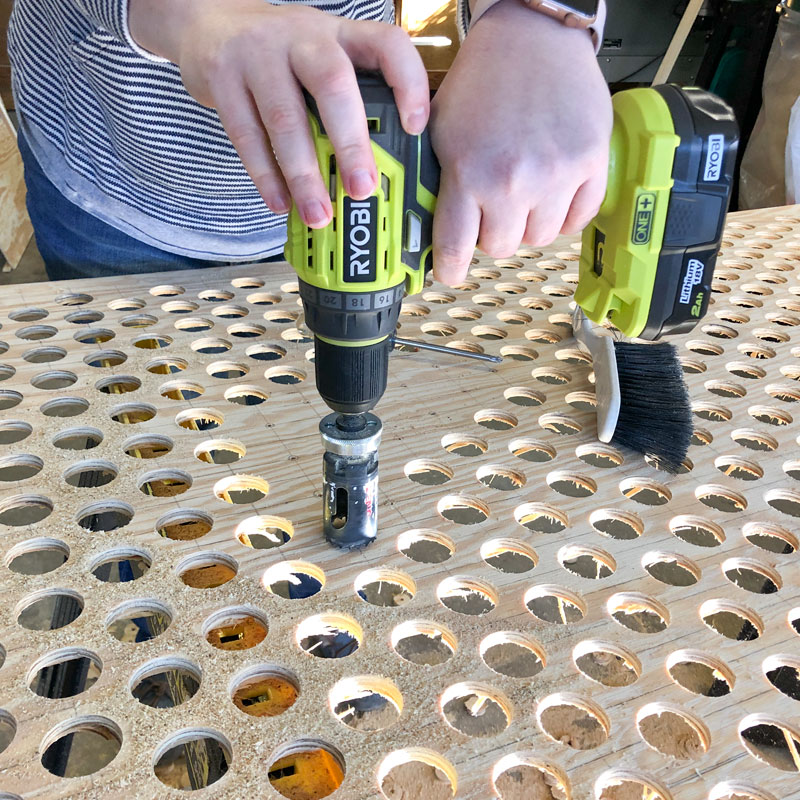
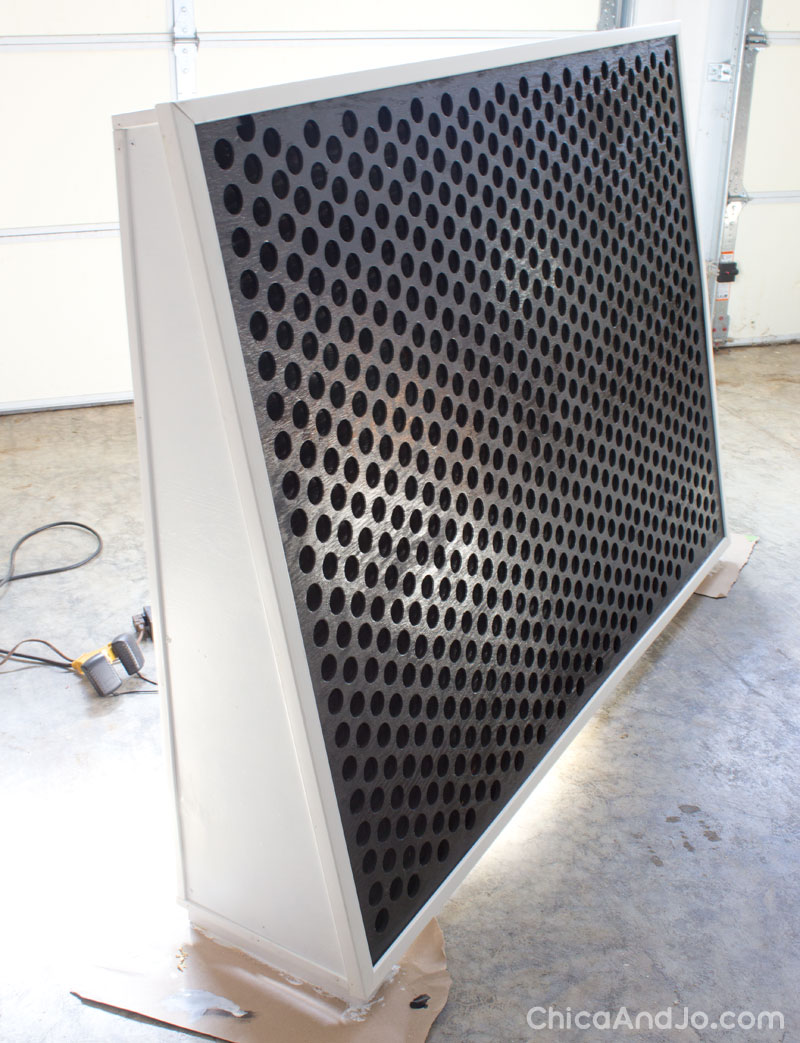
We were so excited when we were done, and the Lite Brite frame started taking shape!
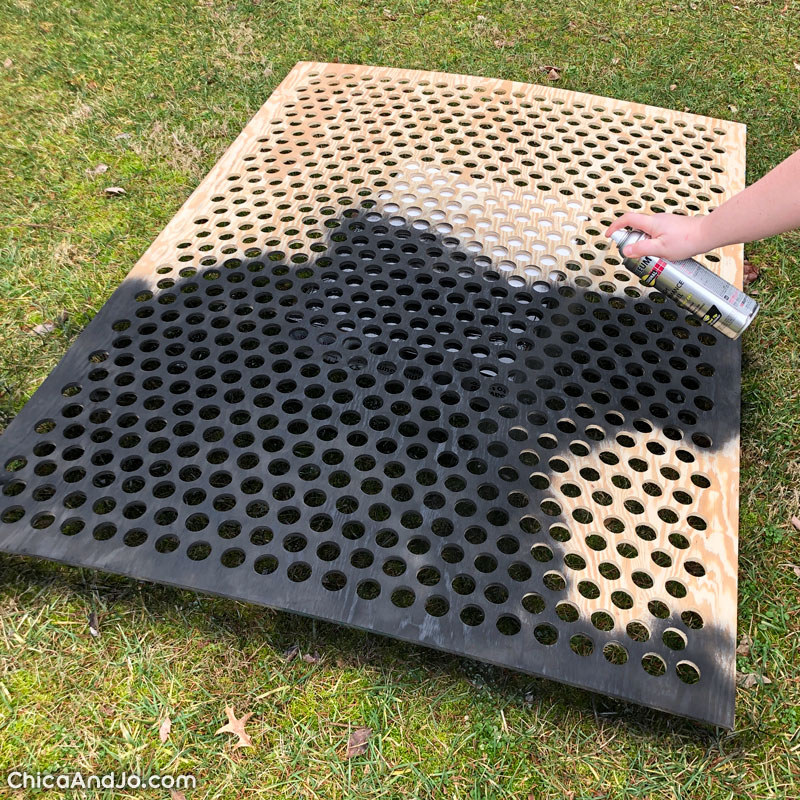
We took the frame outside and gave it a very thorough coat of Rustoleum enamel spray paint in black.
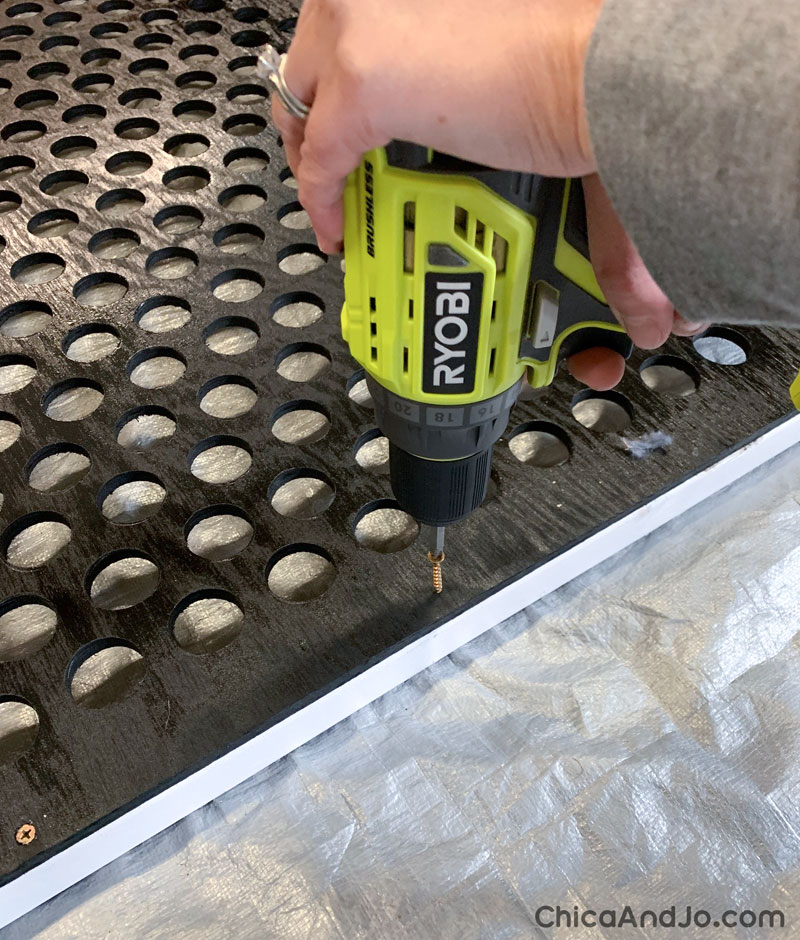
Then we put our 1-1/2" x 1-1/2" wood (cut to length) on the back of the grid and screwed it all together.
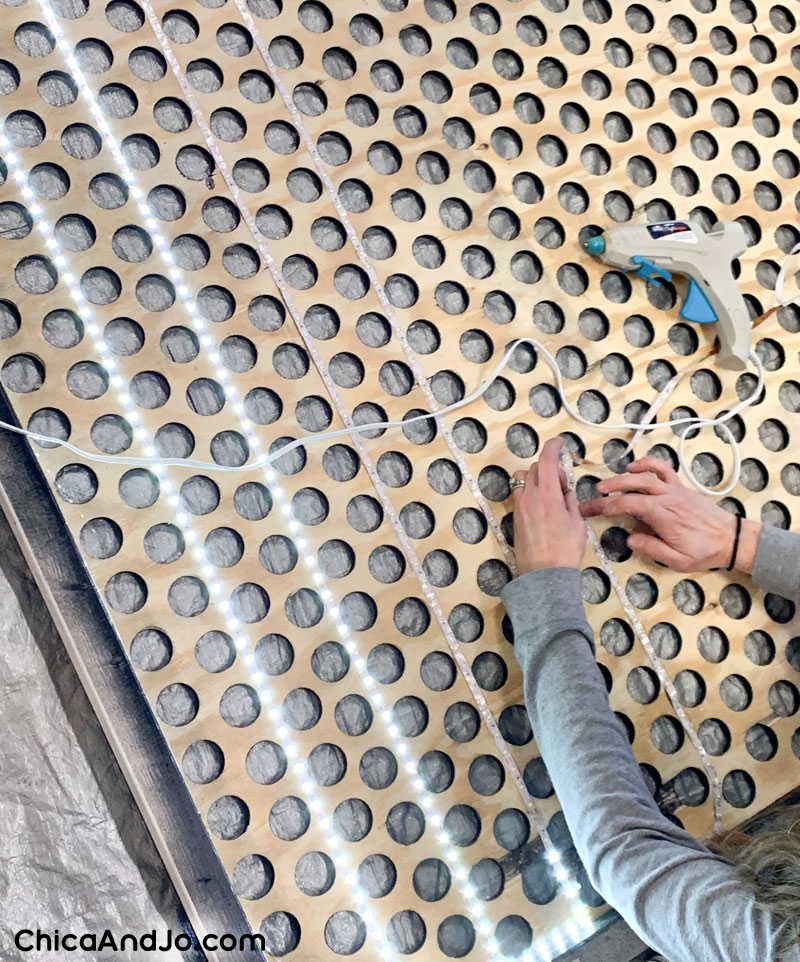
Next up... lights! We flipped the whole thing over and glued on LED light strips. For our particular lights, we found that doing every other column was enough light, but you may need to use more or fewer, depending on how bright your lights are. Make sure you get light strips that are easy to bend, so that you can maneuver around and between the holes easily.
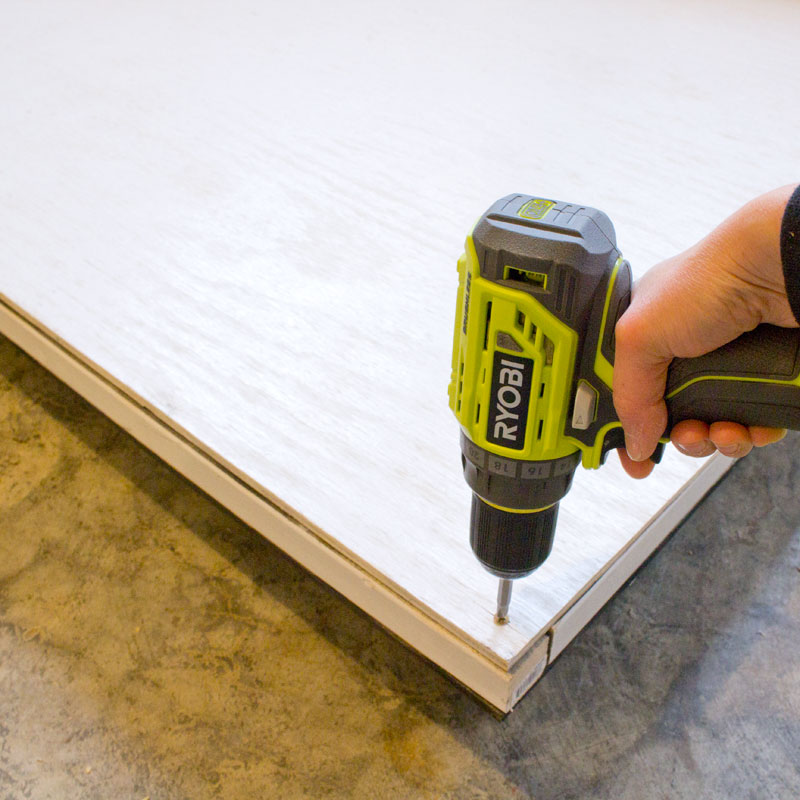
The ends of the light strings fed out a notch we left in the bottom, and after we tested to be sure they worked, we put the back on. This was just another piece of 1/4" plywood, cut to the same 65-1/2" by 47" size, and used more Rust-Oleum spray paint to paint it black on one side and white on the other. We put the black side down, and screwed it in all around.
With the grid frame done, it just needed something to hold it up. We made simple legs with some 2x4 scraps, propping the frame at about a 15" angle.
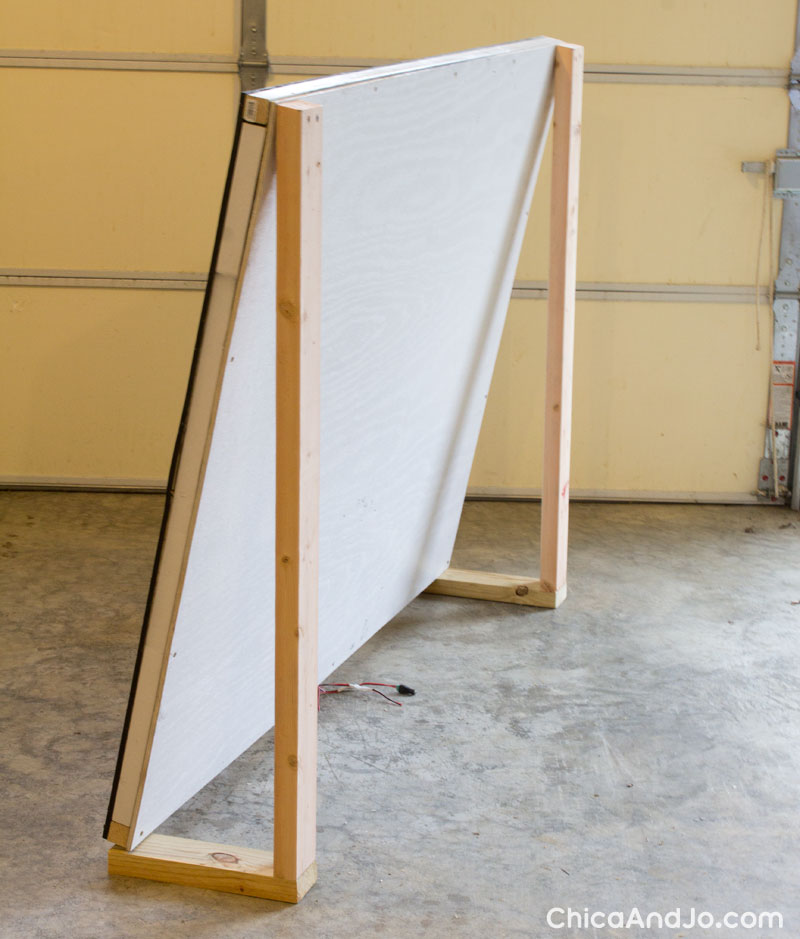
Then I covered the sides with some thin lauan I had and painted them white.
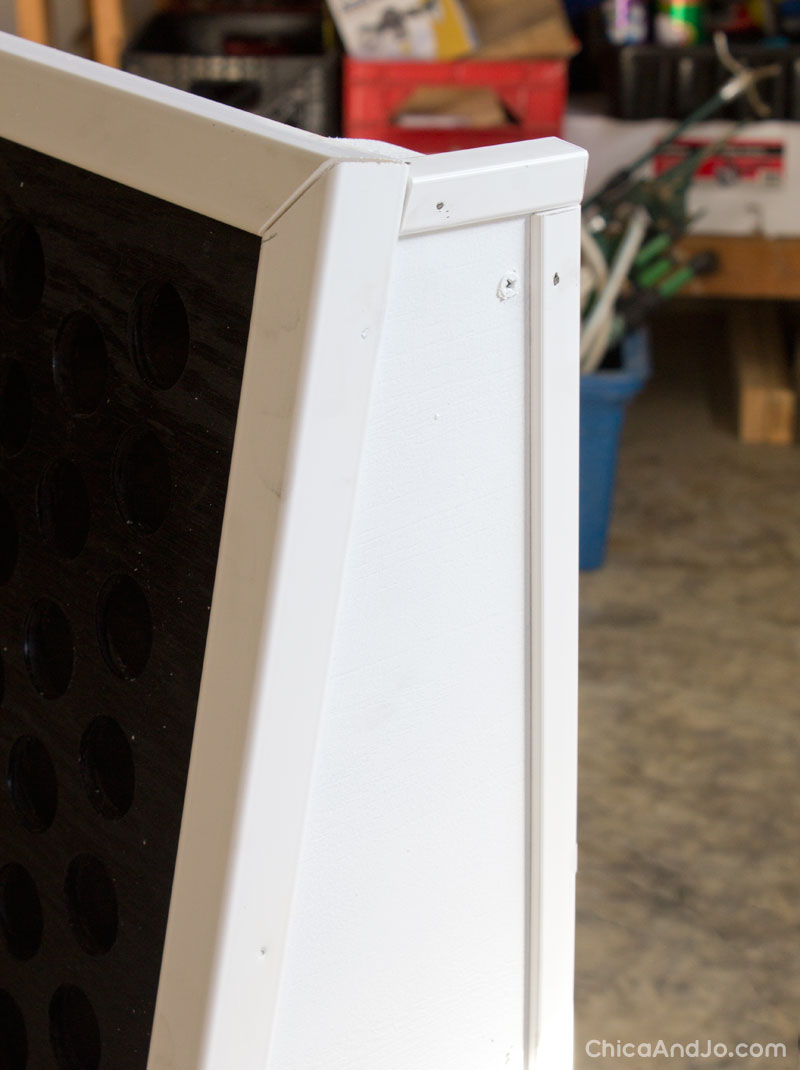
I trimmed all the front edges with some pre-primed corner molding that covered up all the rough edges and screws.
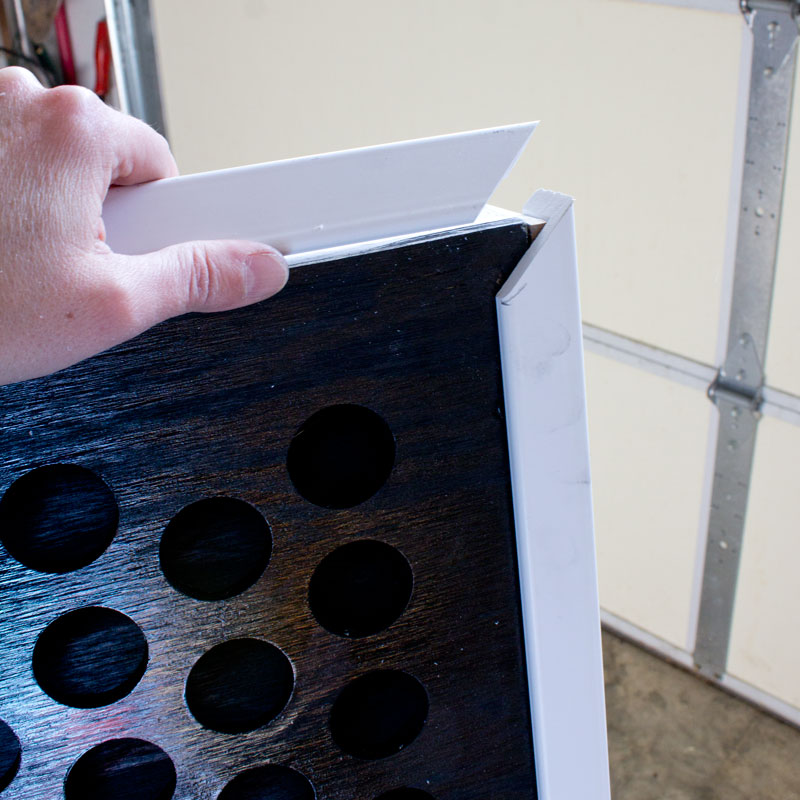
Some smaller trim on the remaining side edges gave it a nice finished look.
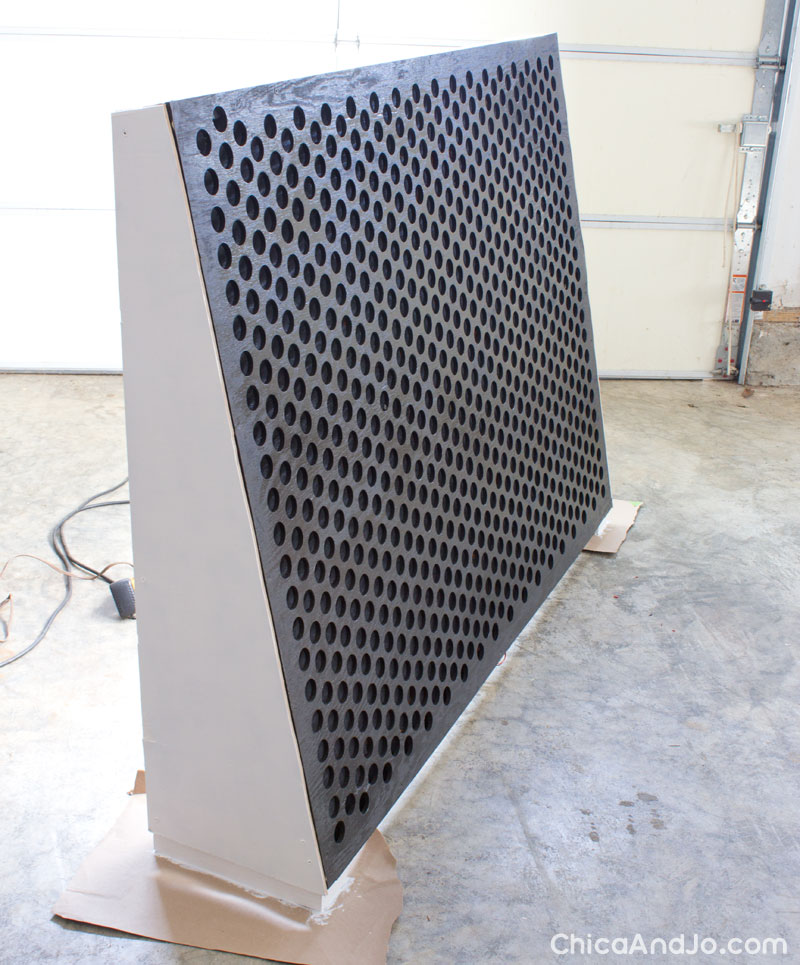
Yay, a completed giant Lite Brite!
As cool as this was, it was useless without pegs. We needed something that would respond to light, came in lots of colors, and was affordable enough to buy nearly 1000 of them. Our solution was to use 2oz clear plastic bottles, which we could easily fill with colored water.
If you're making a giant Lite Brite and need lots of plastic bottles, we sell them in bulk!
PURCHASE NOW!
Save time and money with our bulk cases of empty bottles with screw-on caps, perfect for making pegs for your giant Lite Brite.
500 Bottles with Caps - $275.00
1000 Bottles with Caps - $450.00
International orders will incur additional shipping costs.
Email us so we can provide a custom quote for your country.
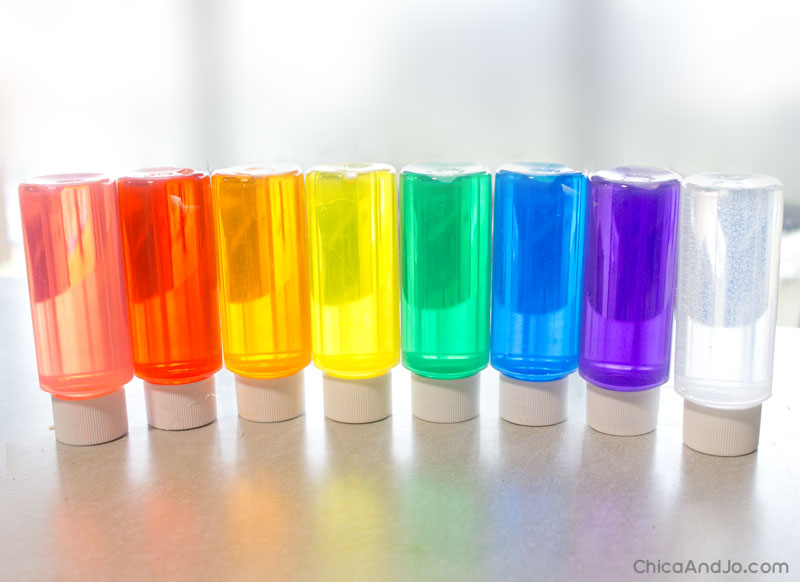
We used ordinary food coloring to mix up pitchers of colored water in the classic Lite Brite peg colors. To keep the water from turning germy, you might want to use distilled water or add a little bit of disinfectant such as vinegar. (TIP: mix your colors ahead of time and let sit a week or two before filling the bottles to be sure the disinfectant doesn't make the color fade.)
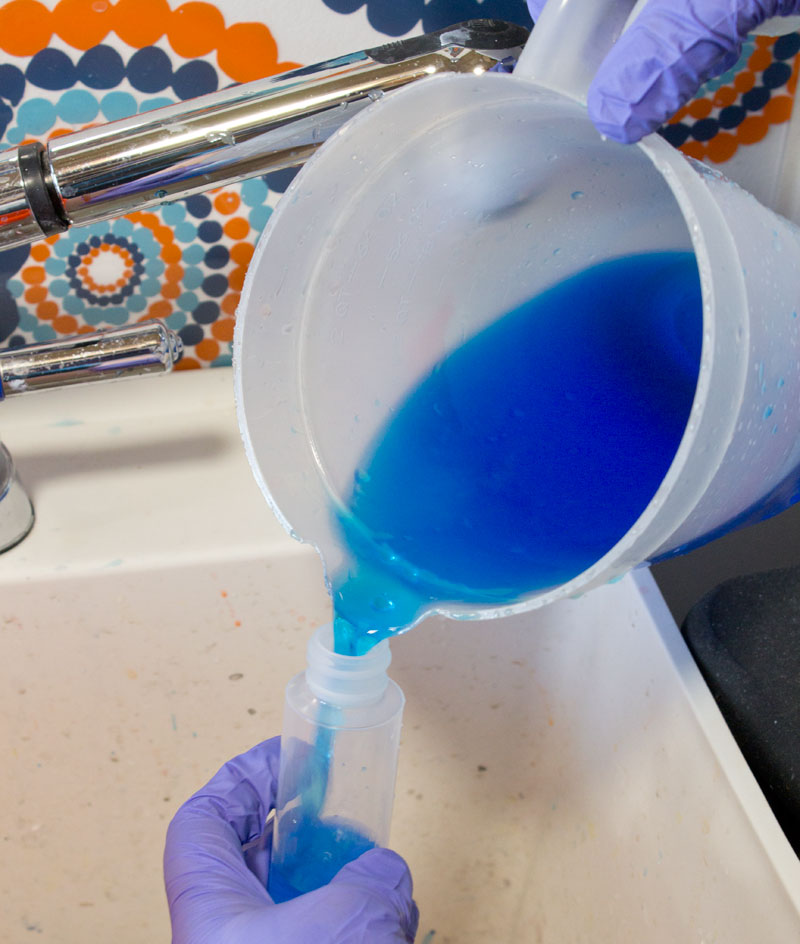
To minimize air bubbles, we filled the bottles up to the tippy-tip-top, even slightly overfilling them.

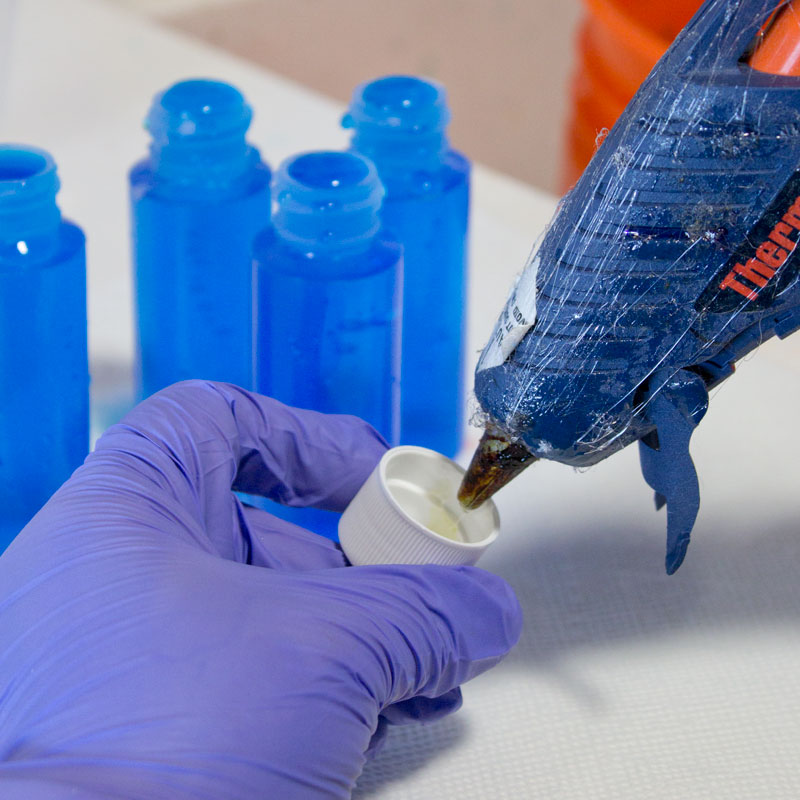
We put a little hot glue in the cap before attaching it, to keep it secure.
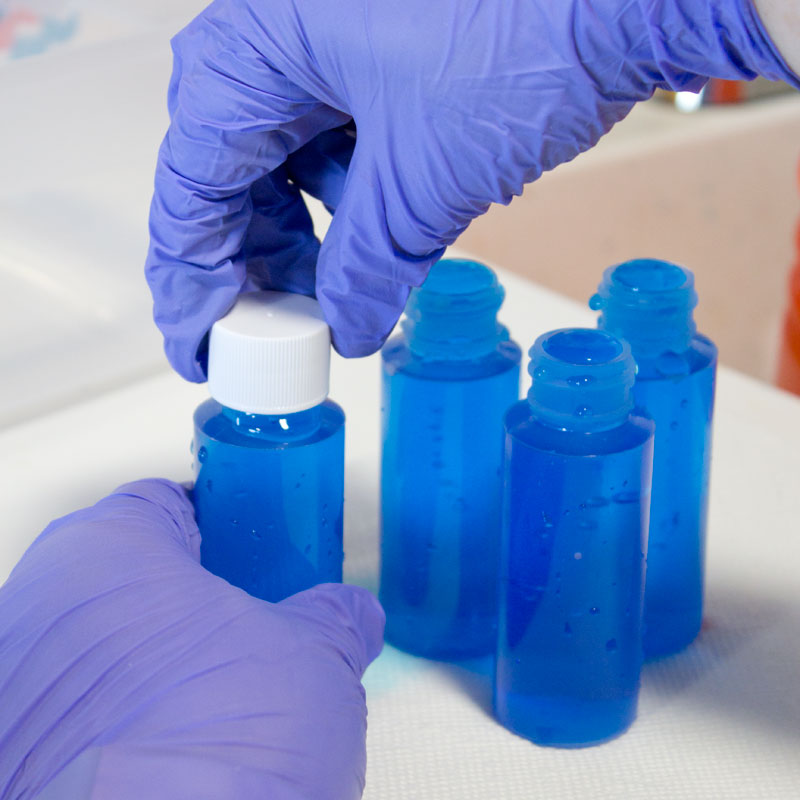
I just love the rainbow array of colorful, water-filled bottles-turned-pegs. Our plastic bottles work so well for this, because they are made of a clarified material that really lets the color shine through, yet they are soft and flexible enough to be shatter resistant.
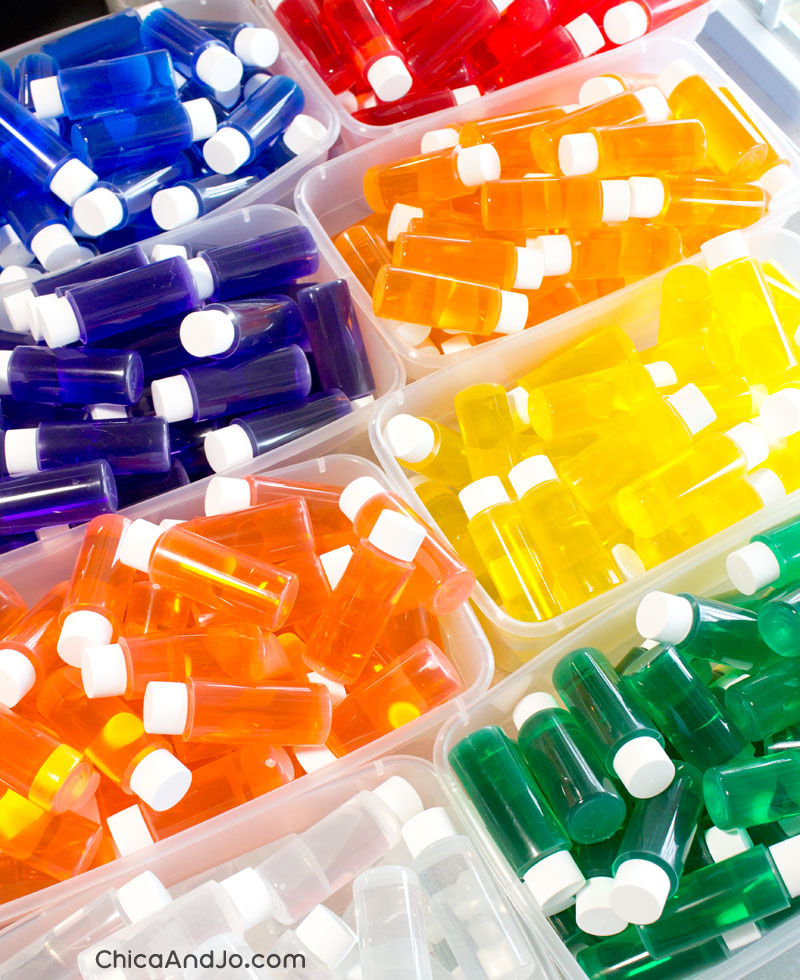
We got some shoebox-sized tubs to store the pegs in, so the would be easy to keep neat and organized.
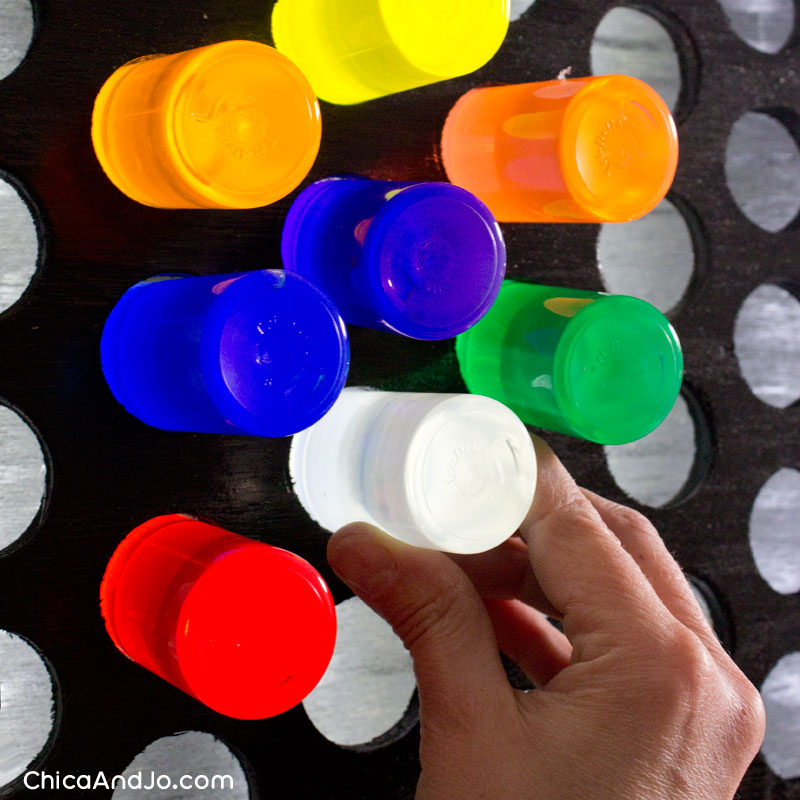
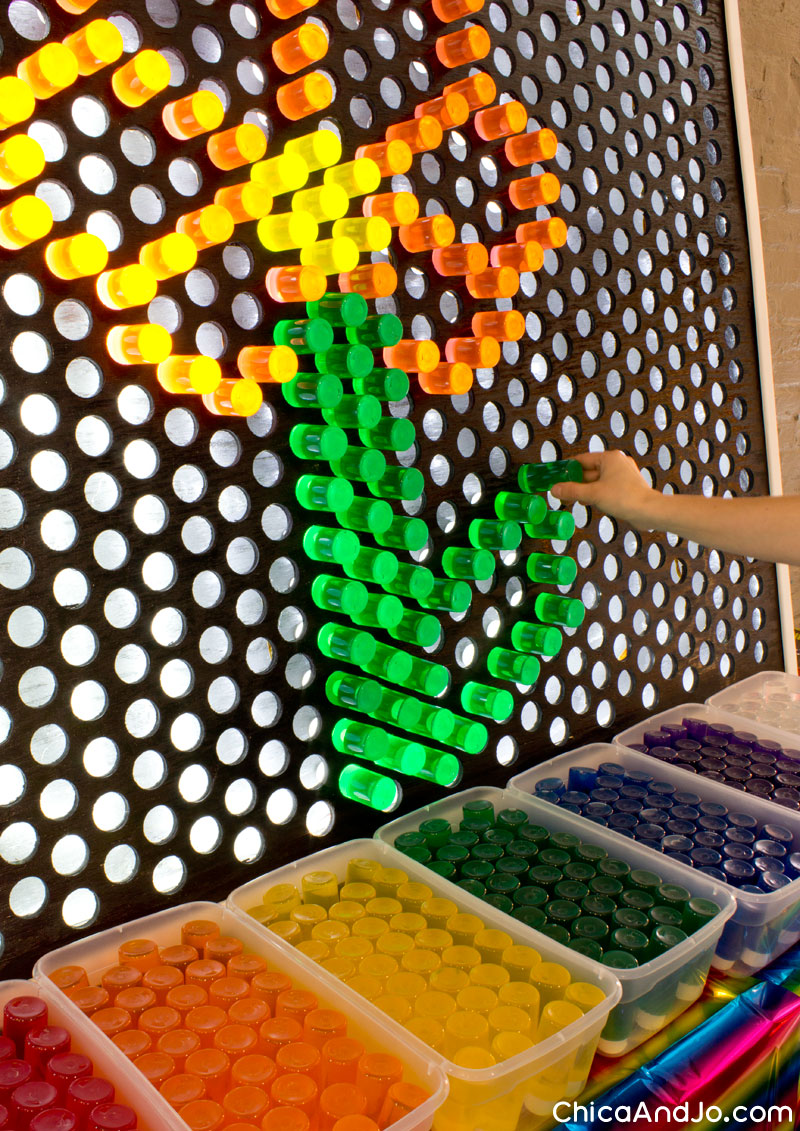
With working pegs, we were finally able to truly play with the Lite Brite. Each peg looked so ordinary before it was put into the hole...
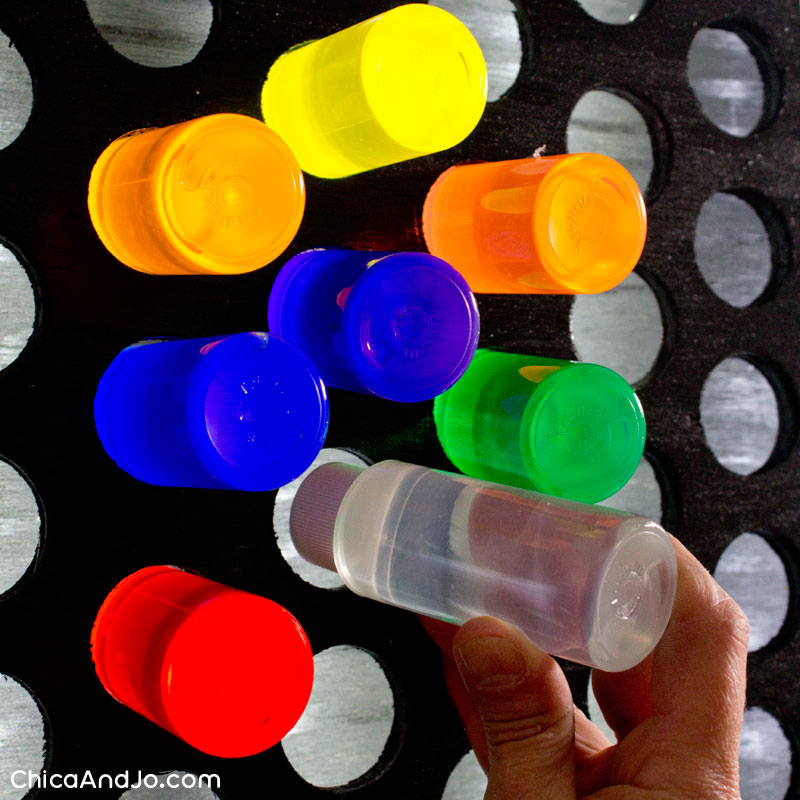
...but the second it fit in place, it lit up as if by magic! It was so satisfying to watch.
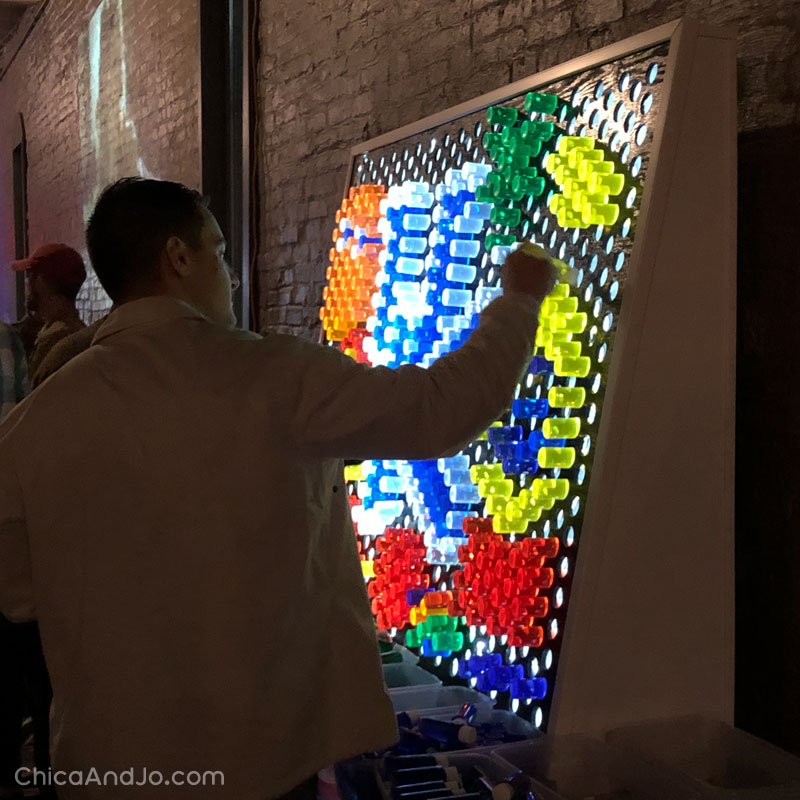
For the party, we set the Lite Brite on a table and added a generic design to get things going. All the pegs were placed on the table in tubs, inviting guests to play.
It didn't take long before party guests were creating their own designs, and reminiscing about the fun they had playing with Lite Brite when they were kids.
similar projects

Make a Giant Shiny Brite Christmas Ornament Box
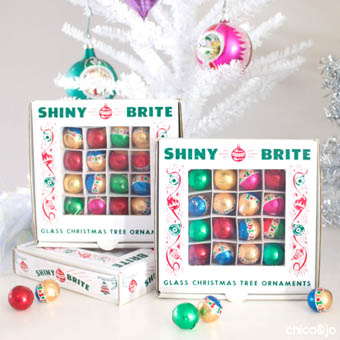
Shiny Brite Vintage Ornament Party Favor Boxes
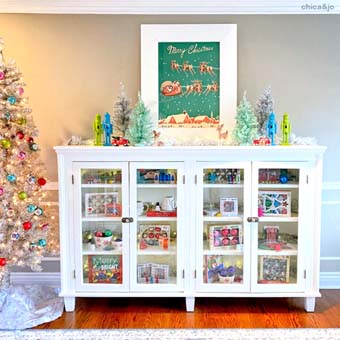
Vintage Retro Christmas Decorations with Shiny Brite Ornaments


71 comments so far:
This is fabulous!!! I can't wait to build
So cool! Just wondering how do you keep the bottles from falling through? Do they just hit the back plywood? Thx!
That's right, Lesley. The back plywood is spaced just the right distance away in order to support the bottles and still allow enough of them to stick out for color.
Wow, such a great job. Would love to create this for our after school program. And the plastic bottle idea is genius! Have been looking into something like this for a while and find that acrylic pegs were cost prohibitive. Thanks for the great tutorial!
This is AMAZING! I can't wait to build one! You guys did just an awesome job! Thank you for sharing!!!
Amanda, thanks! Have fun :)
how long were the light strips that you used?
Sheena, I think the light strips we used were 15 meters long, but you may need more or less in order to get sufficient light in your box. For example, if the lights are far apart or not very bright, you might need more strips.
This is great! About how much did this cost?
Becky, your costs can and will vary greatly depending on materials, but you can probably expect to pay in the neighborhood of $500 for everything.
Great idea. We will add this feature to our indoor playground and therapy gym.
Do the colors in the bottles fade over time? If so, after how much time approximately?
Scott, we've had ours for nearly a year and haven't experienced any fading. The food coloring doesn't fade in the original containers in comes in, so I don't have any reason to think it will fade in the bottles, unless maybe you expose it to extreme sunlight for long periods of time?
You are a freaking genius. I admire your ingenuity and talent. This rocks!
What a great idea.
We are building one now. Any thoughts on why inside of backer board is black vs white? Is more light concentrated to bottles vs a light reflection from back board?
Ray, the inside is black so that holes that aren't filled look solid black, just like the front of the board is. If the back were white, all the holes with no pegs in them would look white, and ruin the overall effect.
This is amazing! My littlest one is obsessed with her light bright and I would love to make her large a large one as a nightlight. I was having a hard time justifying the price of acrylic, but I think you solved that problem. Thank you so much for sharing!
This is a really cool DIY project! Nice work! Thanks for sharing.
Very cool idea. Question though - do you have to put any support between the two pieces of plywood? Seems like the plywood would bow in the middle
Mark, we did not have any issues with the plywood bowing.
Hi and thanks for the ideas and instructions. I plan to make this project for my grandkids and have a couple of questions: 1. What is the general ratio of food coloring to water to get the desired colors? And 2., where is a good source for the light strips? Thanks.
Ted, what a fun idea for the grandkids! The amount of food coloring you need will vary depending on the strength of whatever type of food coloring you use and will even vary from color to color, as some may require more to achieve the look you want. Just experiment and keep adding a little at a time until you get the color you're looking for. You can find LED light strips on Amazon.
I tried making the colored water pegs tonight and after filling and gluing the caps on the water faded back to clear. Even after adding extra dye. Any idea what is causing that? We already cut the board and have the bottles and now they are all turning clear. What can that be happening from? How much bleach did you use? Could it be I used to much?
Angela, it does sound like you might have used too much bleach. You only need a tiny splash to keep germs at bay. I suggest you mix the colored water in pitchers first to be sure that the color holds before filling your bottles with it. Or leave the bleach out entirely to be sure it doesn't affect the color. (I will update the directions above to include this info)
Do the bottles fit tight or is there lots of space? I already have some 2oz bottles, and they seem to be too small of a diameter compared to your picture of the bottles in the holes. I think the diamter on mine are 1.25inches.
Beth, our measurements dictate 1-3/8" holes, a size chosen to suit the bottles we sell, which are 1-1/4" in diameter. There should be just enough room to get the bottles in and out easily, but not too much room or they won't sit straight in the holes.
Love this. My daughter was planning on something like this for her eagle project. We found your post and plan to use your template. We went ahead and bought acrylic pegs as opposed to the bottles due to it going to a pediatric rehab center. Will be sure to send pictures when it is completed. Thank you for sharing your design!
Kelly, that sounds like a great spot for a giant Lite Brite! Acrylic pegs are a great alternative when your budget supports it. Please note that the diagram and measurements we provide are specific to the hole size required for the bottles we used. If your pegs are a different size, you will need to adjust the measurements to suit. Can't wait to see what you create!
Is there a paint product that coats the insides of the bottles with transparency? A lot lighter.
Patti, that's an interesting idea, but you really do need the liquid in the bottle for two reasons: First, you need the bottle/peg to be "solid" so that the light will disburse and look like the peg is glowing. Second, the weight of the water will keep the pegs in place in the holes better. I think if they were empty and lightweight, they would fall out of the holes way too easily.
How many light strips would you suggest we purchase for a light board that is 4’x8’? My concern is that there will be several cords coming out of the product for several different light strips. Would it be possible to see a view of the inside of yours? Also, does the board have to be at an angle? Or could it be hung on a wall?
Casey, to determine how many feet of light strips you need, we recommend using a tape measure to trace along the path you'll put the lights (every other row of holes worked for us), plus some extra for the turns at the top and bottom. Then you can buy enough strings to get the length you need. I do recommend getting extra just in case, because there's nothing worse than having to stop mid-project to go buy more!
We did use several different light strips on ours, and just ran them out a hole in the bottom. We don't have a photo of the inside of our frame, and the back is screwed on so we can't take one for you. However, you can see the ends of the lights coming out the bottom in this picture on our blog post.
The board does have to be at an angle or else the pegs will fall out. Once you've created a sturdy angled frame, if you need to want to hang it on a wall, you could attach braces along the back and hang it from that.
I love the way you built the giant lite brite amazing
Why did you decide on this size as opposed to just splitting on 4x8 sheet of plywood in half? you could stick to the 84% ratio (height to width) of the classic toy and have less waste.
Summer, we based all of our measurements on the size of the pegs, since that was the one thing we couldn't change. Once we had that and determined the pattern for our holes, we expanded on that to reach the final size of the entire piece. Half of a 4x8 sheet would have been way too small for the look we were going for :)
Hi. Thank you for this information. How did you secure the white framing that goes around the front of the board? Wood glue? I can see nails on the smaller framing on the back. Thanks.
Jake, the front framing was attached with screws. The screw holes had already been filled when the closeup photos were taken.
Hi, absolutely love this! I've been trying to work out how to make something similar for my students at school but alike to many the acrylic pegs just made it too expensive. Could you share your sauce for the bottles? Thank you so much.
Naomi, we explain how we filled the bottles and offer a source for purchasing them up in the tutorial. Have a closer look at the details and let us know if you have any questions.
Thank you so much for this idea! I am creating a multi-sensory space for stressed out college students for my thesis. I wanted to do a giant lite brite, but those colored rods are so expensive! This will be perfect!
Lisa, that's such a fun idea! Yes, acrylic rods are crazy expensive. Be sure to tag us @chicaandjo so we can see how it comes out!
Hey there, I might have missed it but what size are the bottles you are using?
Brittanie, these are 2oz bottles and we sell them in bulk quantities within the post.
Where did you purchase the clear bottles?
Nick, we sell the bottles in bulk and you can purchase within the tutorial up above. :)
By chance, was a video made when making this.?
Bonita, we are working on a video version of this, hoping to share it soon!
Hi ? I love this idea and I'm making this for my Xmas display. I'm in the process of making it but I was wondering do you know the length of the 2*4s for the outer frame? I know it says the board tilted at a 15 degree angle but if I knew the length of the 2*4s that would be a lot easier to understand and figure out. Thank you for your time.
Sarah, I just measured and for our legs, the vertical 2x4 is 46" long and the horizontal piece underneath are about 12.5". You may need to adjust depending on how your total Lite Brite comes together, but that should get you started!
I just wanted to say that I read every comment and it’s rare to see a person answer every question, especially when u made this awhile ago. I just thought u shd know it’s awesome that u do that. U did an amazing job.
Jenny, thank you so much! We love to inspire people and to help them re-create our projects. :)
Could you paint the I side back panel black to mimic the black paper sheets the original had to reduce excess light?
William, we did paint the inside back panel black, actually! Looking through the pics, I see we didn't capture that step very well, but you can see it in this close-up picture. We considered alternatives to mimicking the paper you refer to, but nothing worked well and actually... the excess light really isn't bad in person, it just photographs brighter than it really is.
I thought about using bottles too, but wasn't sure if the cap would diffuse the light too much. Aprox. how many bottles did you end up using? I just ordered test tubes so it will be interesting to see how that will turn out. I have about 8 to make. Thanks for the visual.
Cosette, I think we made nearly 1000 bottle pegs so that we would have plenty of each color to work with. I hope your test tubes are plastic, not glass? I would worry about breakage!
Thank you for sharing your great idea. How do I order the bottles from you?
Angela, you can purchase the bottles directly from us here on this page. Look for the yellow box up above with "Purchase now".
Good Day! We run an agritourism destination and we're always looking for "everybody" experiences - things that can be enjoyed by young or old, cognitively or physically differently-abled.... Our challenge is that all of our equipment is outside. Can you anticipated any items that would not be weather-worthy for 8 weeks that I will need to modify for our setting (not asking you to solve these issues - just give me a heads up on what won't work in rain and sun). Thank you so much for your insights from us and the 30,000 people who can enjoy this!
Amy, this sounds like a fun addition to your experience. To make this able to weather the outdoors, the biggest concerns would be the material and the lighting. You could opt for pressure-treated plywood sheeting, or perhaps you can find large sheets of plastic you could work with? And for the lighting, just be sure to get something rated for outdoor use. Hope that helps!
Hello! Not sure if you are still responding on this project. I am trying to replicate it using test tubes with openings that are 16mm in diameter. But I can't figure out the spacing. Any tips for how to figure the layout? I just can't seem to extrapolate from what you did.
Thank you!
Rachel, of course we're still replying to comments :) Unfortunately I'm not sure how to direct you. We did a lot of experimentation with scrap boards and holes to get sizing that looked and felt right. You might need to do the same with your test tubes. :)
Did you ever make a video tutorial for this?!
Jaimie, we haven't gotten around to it yet, but we will, I promise!
This has been super helpful to reference and follow along with! The Spyder Rapid Core Eject hole bits are amazing for making fast less tedious work of all these holes. Anyhow just here to say thank you for this :)
What a great tutorial! I'll be filling bottles next week for a lite brite I will eventually donate to my kid's school. Five years on, have you noticed any degradation in the color of the "pegs"?
Kevin, thanks so much! Our pegs still have great color, although a couple of them did eventually develop icky spots inside from germs so we pitched them. Using distilled water is the best way to avoid this problem.
I have been asked to make a lite brite for a library. How often have the bottles leaked? My concerns are water damage, kids taking off the tops even after they are glued on, and water and electricity. I am going to have a ground fault on it just incase though.
Alan, we have used our Lite Brite for several events and have never experienced any leaking or anyone trying to remove the caps.
This is so inspiring! I’ve been searching for a way to make a giant lite bright for our Childrens ministry at church and yours is the best tutorial I’ve seen! Thank you! I have one question…is it easy to remove the back to replace light strips that burn out? I’m so excited about surprising all my kiddos with this!!
Jan, so glad we inspired you to create something fun for the kids! The order in which I happened to put this together has the legs going on after the back, so they would have to be removed before the back could be. It's a bit inconvenient, but if you use screws for everything it would be possible.