


Giant Easter Peeps Decorations

Our favorite Easter candy is the iconic Peep, especially in the bunny shapes. This year, we decided to go big and bold with our Easter decorations, and we create some giant, oversized Easter Peeps that are perfectly adorable and bring some extra fun and charm to the season.
VIDEO: Make Giant Easter Peep Decor
Watch our video to see the complete tutorial for how we created our giant Easter Peeps decorations.
If you can't see the video, try viewing it directly on YouTube.
How to make a box of giant Easter Peeps
The video shows every step in detail, but if you prefer written instructions, here is a quick rundown of how we created our giant Easter Peeps decorations.
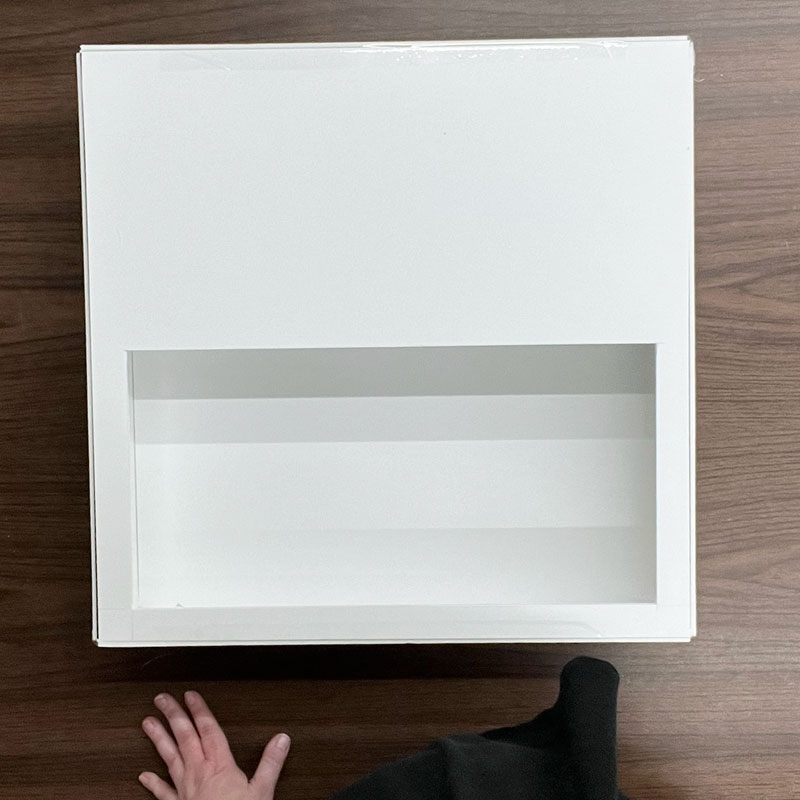
Step 1: Make the Peeps box
To make the Peep box, you'll need two 20" x 30" foam core boards. You'll score and fold them to create two halves of the box. This would be difficult to show in photos, so please watch the video for the step-by-step technique.
You'll then cut a window in one of the boards, nest the two boards, and tape all the edges together to form a cute box that's ready to fill with Peeps.
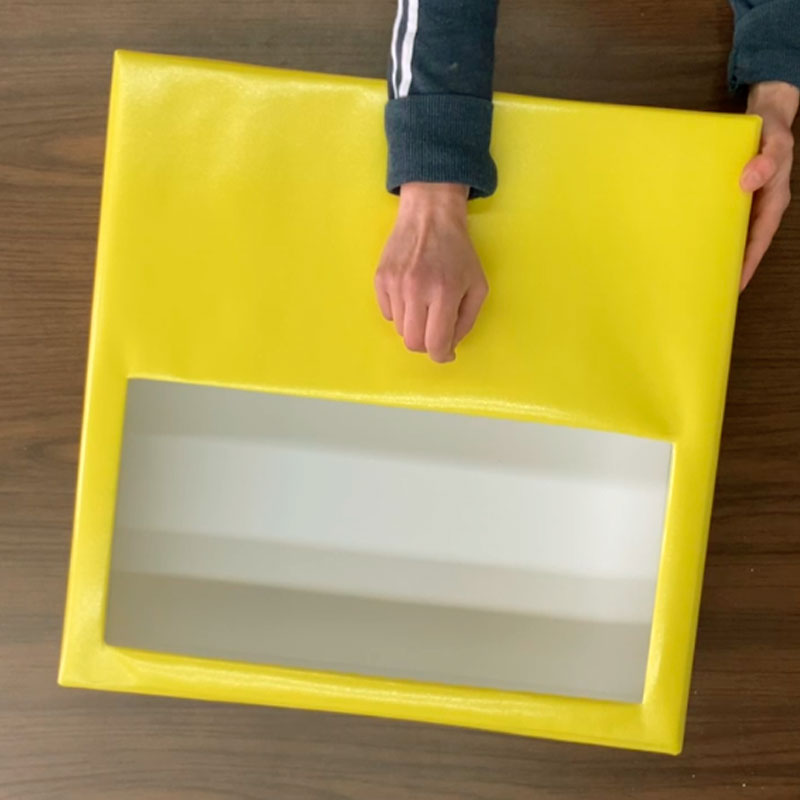
Step 2: Decorate the Peeps box
Once the box is formed, use some "Better than Paper" bulletin board material to wrap the box like a present. After it's wrapped, cut an X in the window and tuck the four points inside the box, taping them in place to finish the edges.
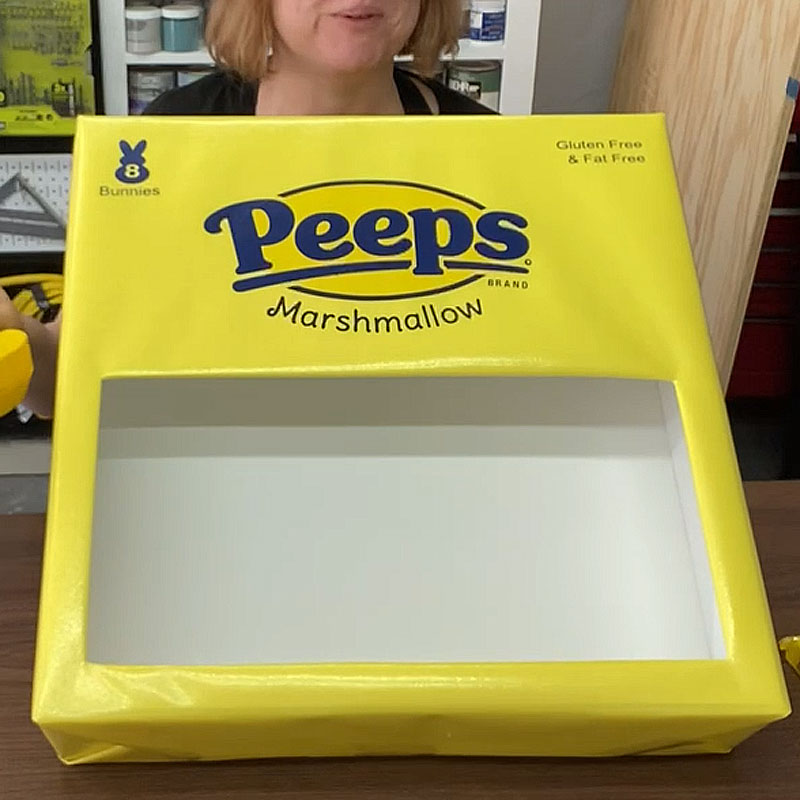
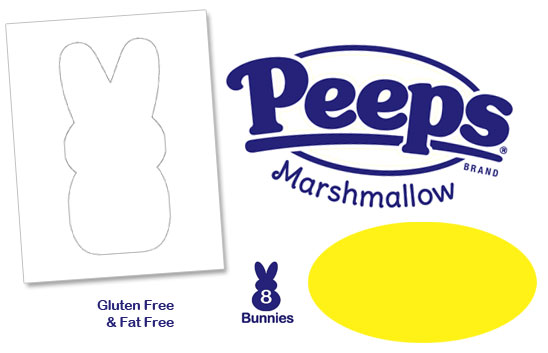
To make the box look like a genuine Peeps package, you'll add some vinyl cutouts, which you can create using our cut files (in SVG and STUDIO3 format). We have a set that includes the Peeps logo, the yellow oval, the "8 bunnies" image, and the nutritional info verbiage.
Cut the images to these sizes to fit the box:
- The big "Peeps" logo should be 11" wide
- The "8 Bunnies" image should be 2" wide
- The "Gluten-free..." wording should be 3" wide
Use transfer paper to apply these vinyl cutouts to the box, making it look just like a real Peeps package.
INSTANT DOWNLOAD -
PURCHASE NOW!
Giant Easter Peeps Templates - $2.99
from here immediately after your purchase is complete*.
Have questions? Email us at chicaandjo@chicaandjo.com
* Files may be downloaded a maximum of 5 times.
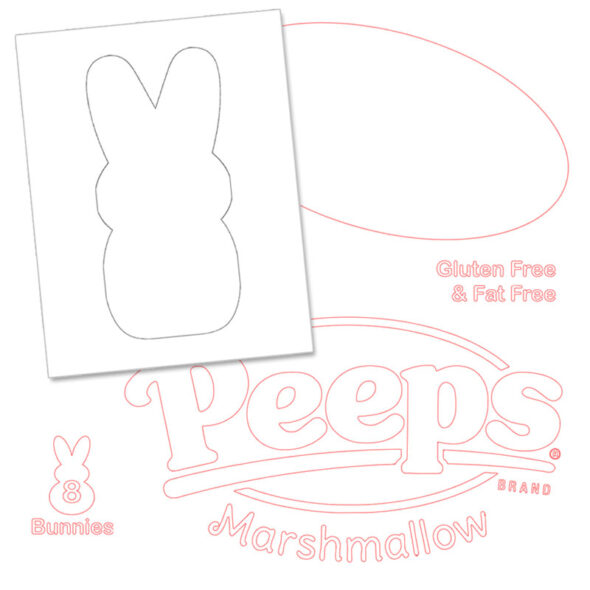
This set of designs includes three files:
- A .studio3 file (for use with Silhouette Studio software) for cutting the blue design elements: Peeps logo, 8-bunnies icon, and nutritional text
- A .studio3 file (for use with Silhouette Studio software) for cutting the yellow design elements: oval
- A SVG file (for importing into other software) for cutting the blue design elements: Peeps logo, 8-bunnies icon, and nutritional text
- A SVG file (for importing into other software) for cutting the yellow design elements: oval
- A PDF with a bunny pattern for tracing to create the Peeps that go inside the box
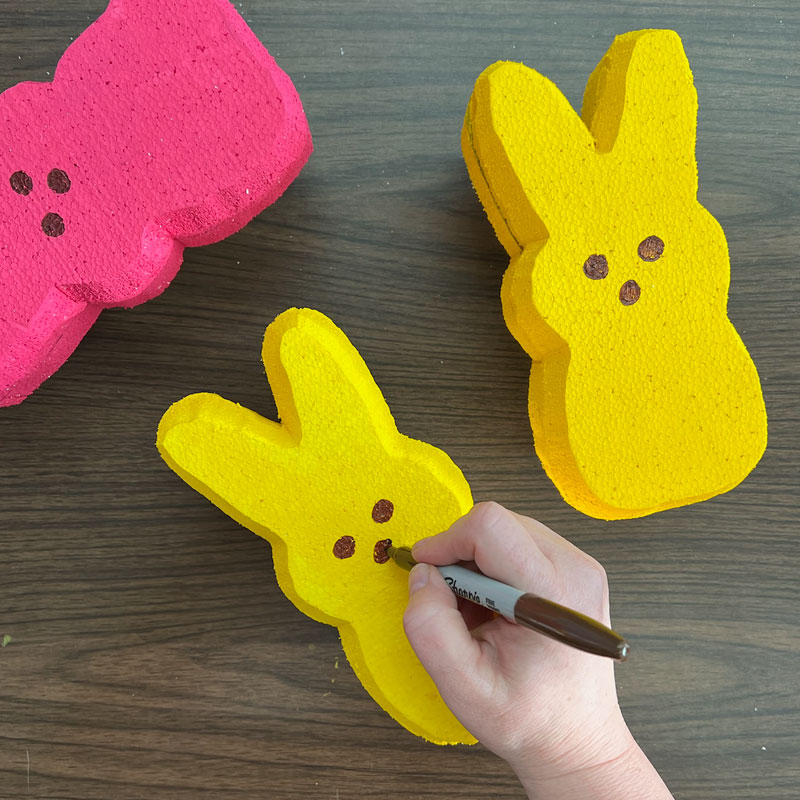
Step 3: Make the Bunny Peeps
With the box complete, you're ready to move on to creating the oversized Peeps themselves.
Using the bunny pattern in our template set (see above), trace 8 bunnies onto some 1" thick polystyrene foam boards.
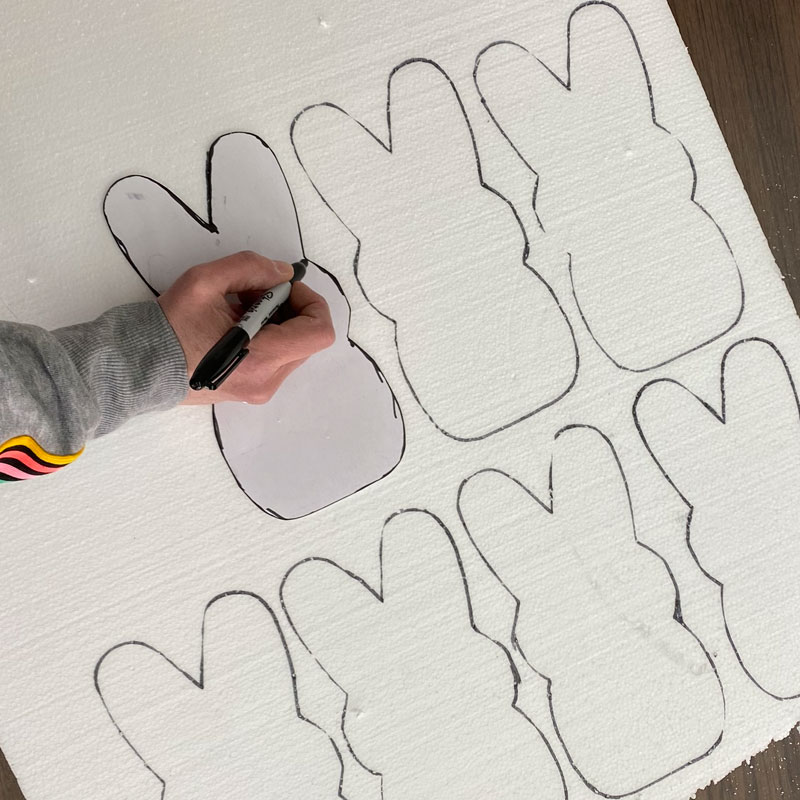
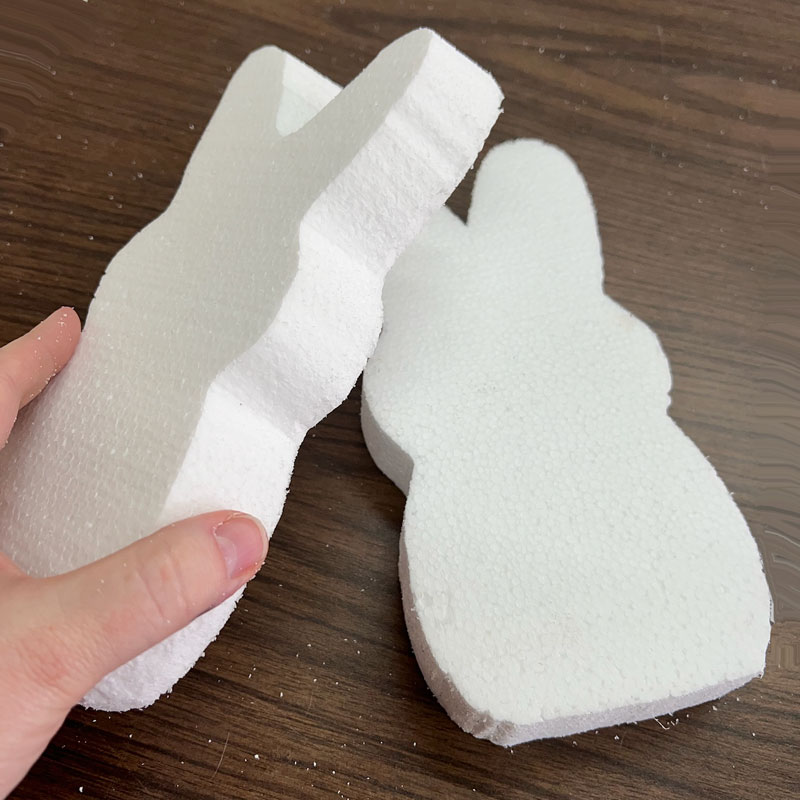
Cut the bunnies out using a hot wire foam cutter or, as we did in the video, with a scroll saw.
Each bunny will require two cutouts, which you can glue together with hot glue. For the most authentic look, bevel the edges of the top bunny so that it's slightly rounded.
Paint the bunnies with acrylic paint. (Do not try to use spray paint, as it will disintegrate the foam.)
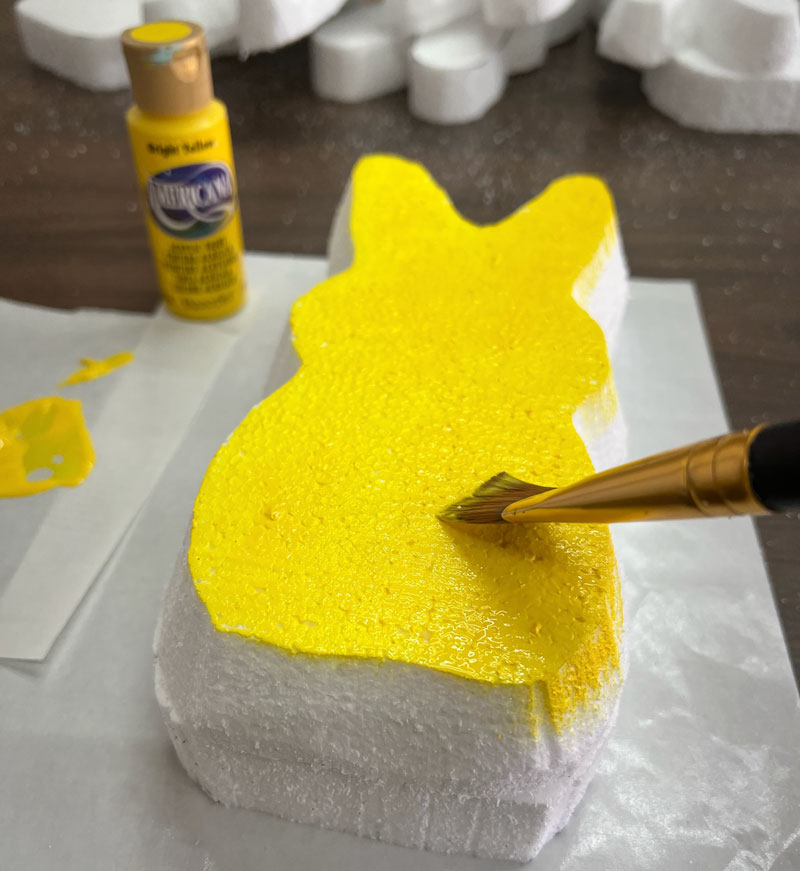
Finally, use a brown permanent marker to draw on eyes and a nose.
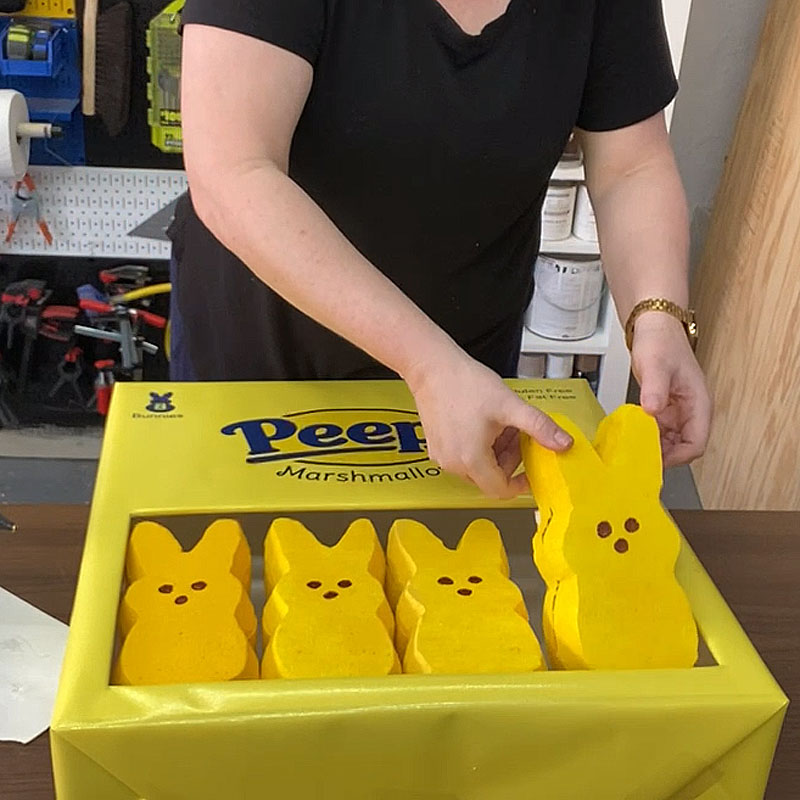
Step 4: Add the Peeps to the box
When the paint is dry, stick the Peeps into the window in the box, space them evenly, and secure with hot glue.
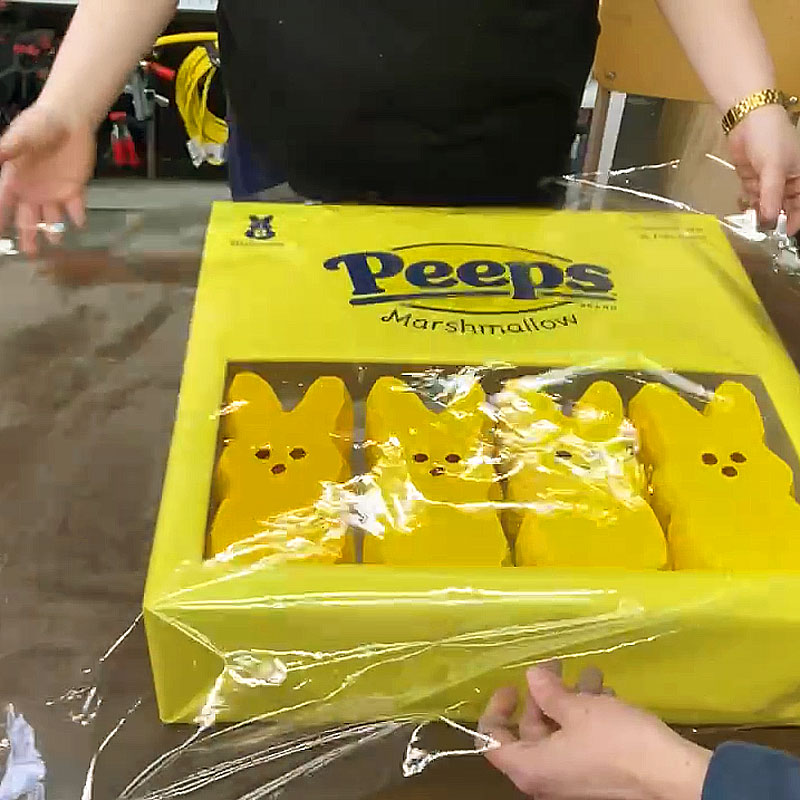
Step 5: Wrap the box in plastic
For the final touch, and to make the piece look like an actual shrink-wrapped package of candy, wrap the entire box with a yard of thin vinyl sheeting "material", and secure on the back with tape.
Decorate with your giant Easter Peeps!
Your giant Peeps are done and ready to add to your decorations!
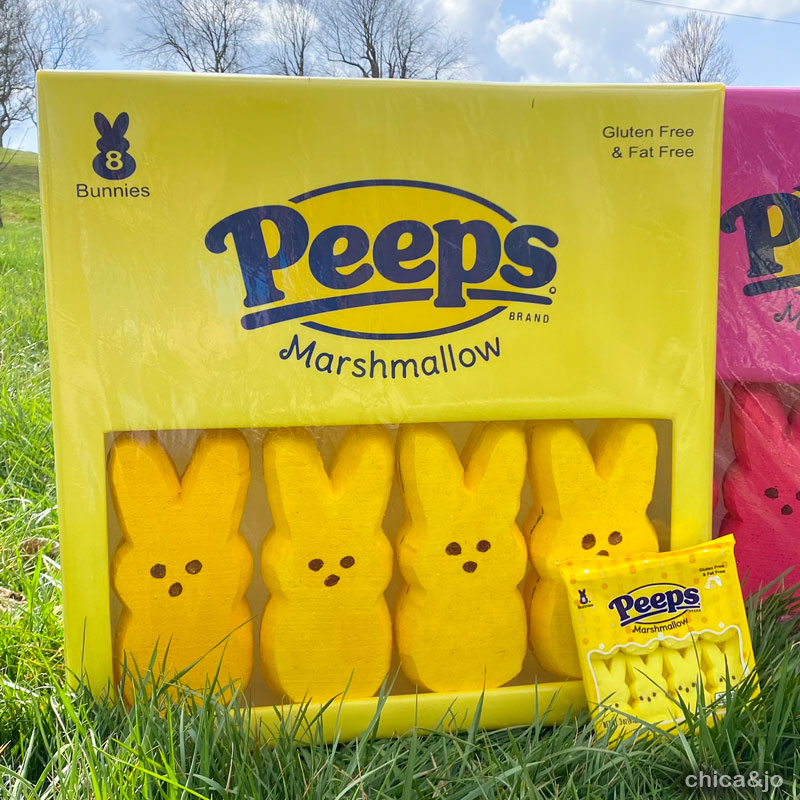
We created oversized Peeps boxes in yellow and pink, but you could make them in any color you like.
similar projects
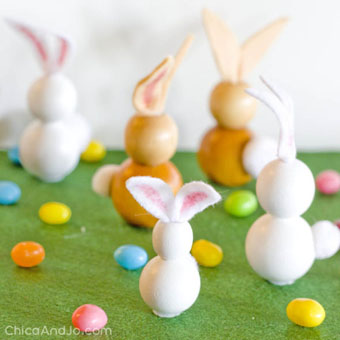
Wooden Bead Easter Bunny Kid Craft
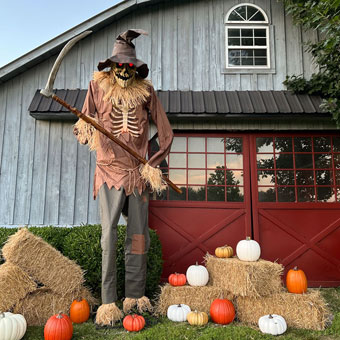
30 Giant Halloween Decorations (2025)

Easter Peep Cookie Cream Tart for Spring


