


Galaxy Print Paint Pour on a Glass Table

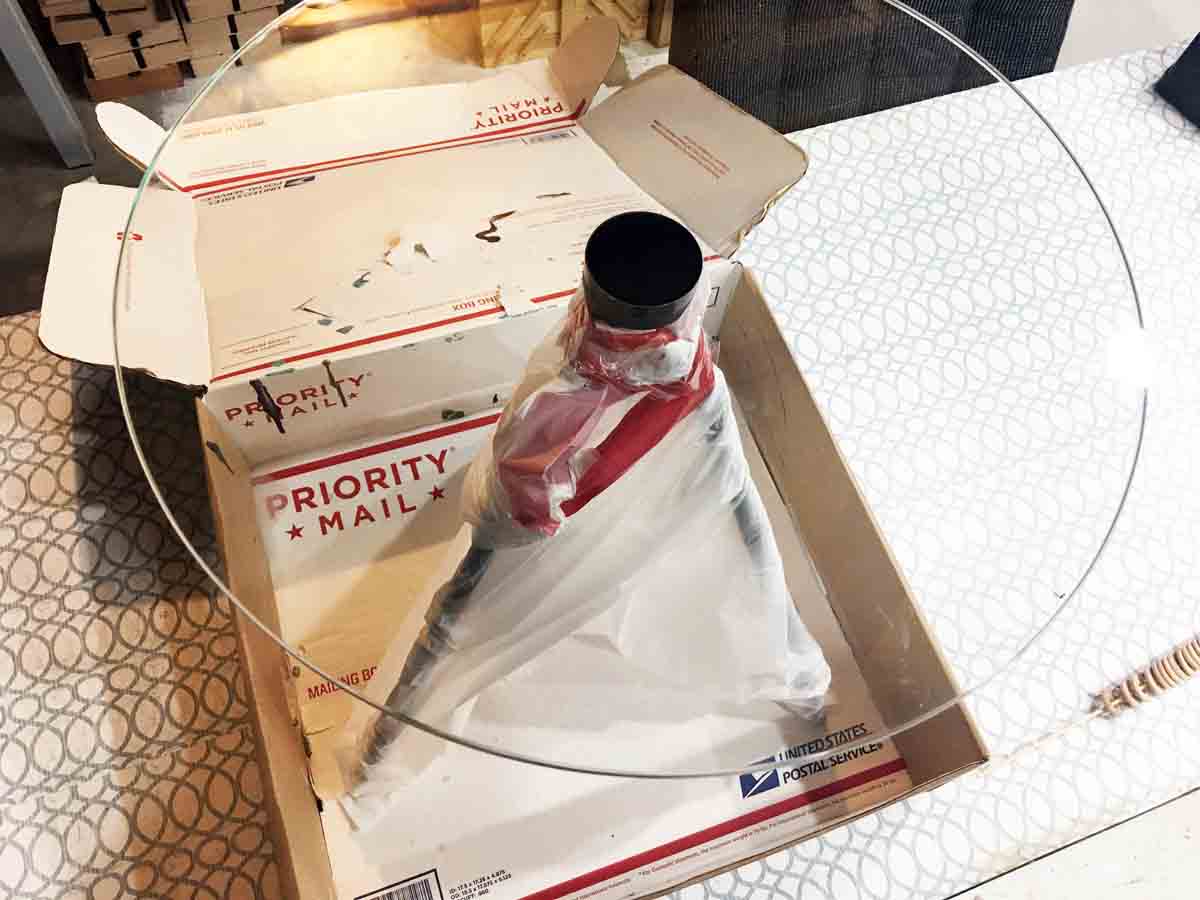
We must admit, we have fallen in love with paint pouring! I wanted to see if I could come up with a galaxy print look on a glass end table. I prepared one of the tables I had by wrapping the legs in a plastic bag.
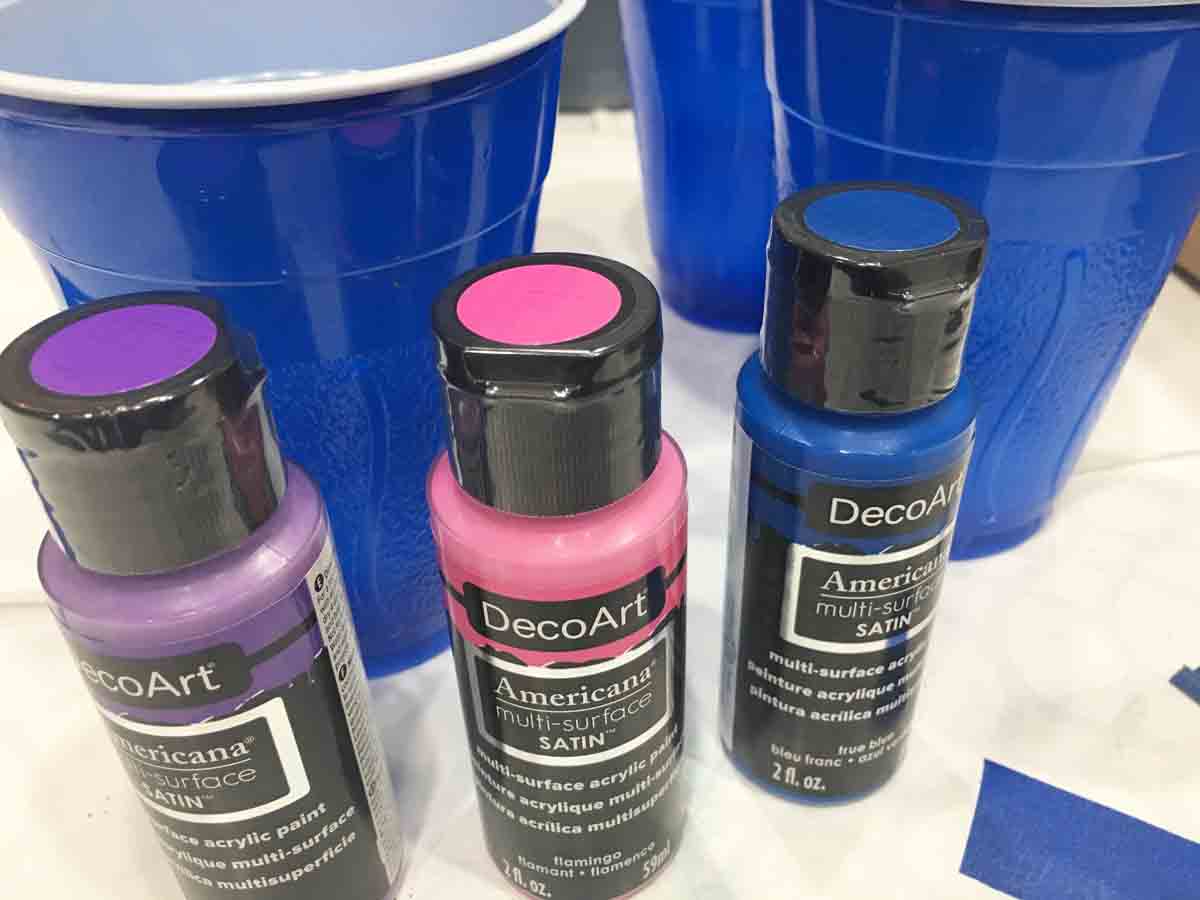
Usually you can use just about any type of acrylic paint for pouring projects, but since this was a glass surface, the paint type I used was very important. I needed a paint that would cure and stick on glass, so I went with Americana Multi-Surface.
I added some Floetrol Flood medium to thin the paint down and make it flow much more easily. If your paint is really thick, you can also add a bit of water. These paints did well with just the medium but I have had to add water to some thicker acrylics in the past. The water helps cut down on the amount of Floetrol you have to use.
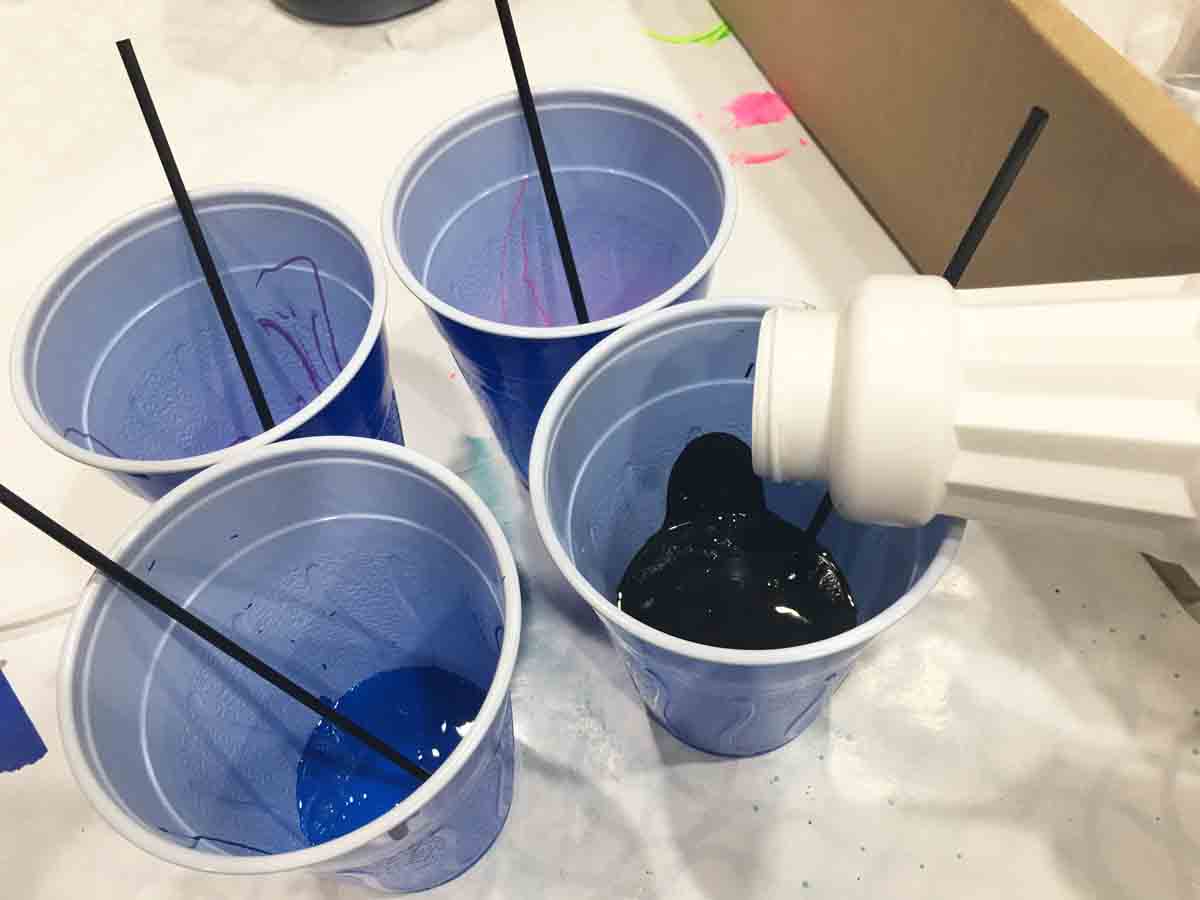
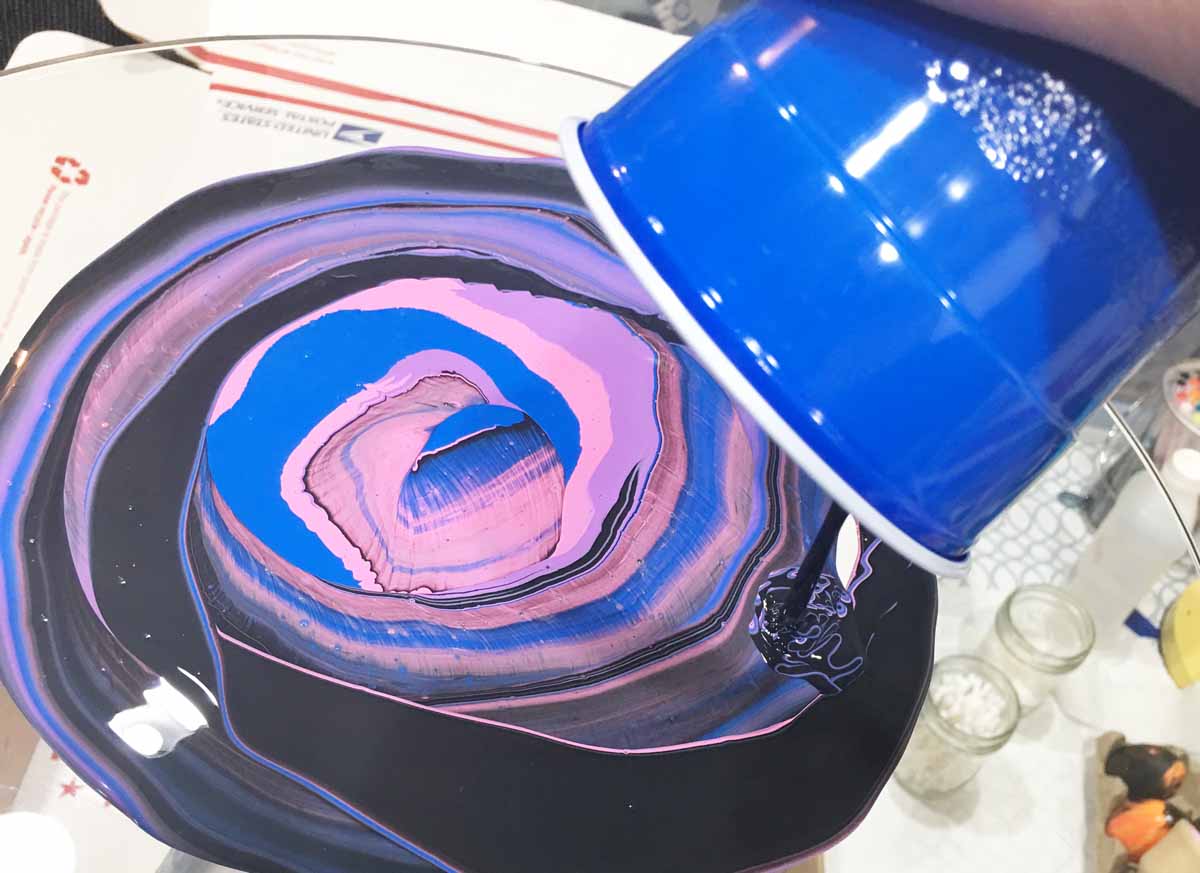
I then poured the paint, one color at a time, into a clean cup. I repeated the colors several times, but I used much more black than any other color.

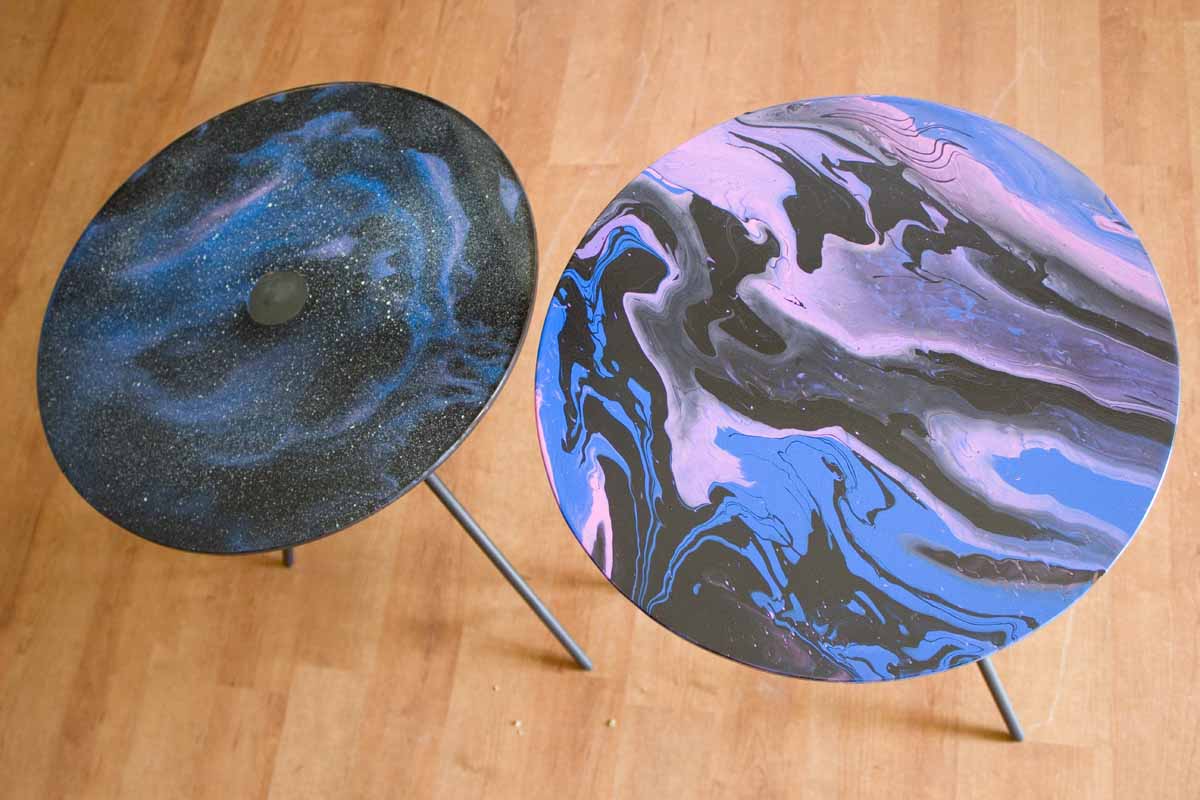
At this point, I should tell you I did this project twice, on two tables. For the first table, I poured the paint on the top of the glass, which allowed a lot of flowing swirls, but I didn't get the galaxy look I was after. However, when I looked at the bottom of that table, it looked exactly how I wanted it to! So for the second table, which is the one I'm showing you in this tutorial, I poured the paint on the bottom of the glass, so that the top would look the best. (I will show you both tables in a comparison photo at the end.)
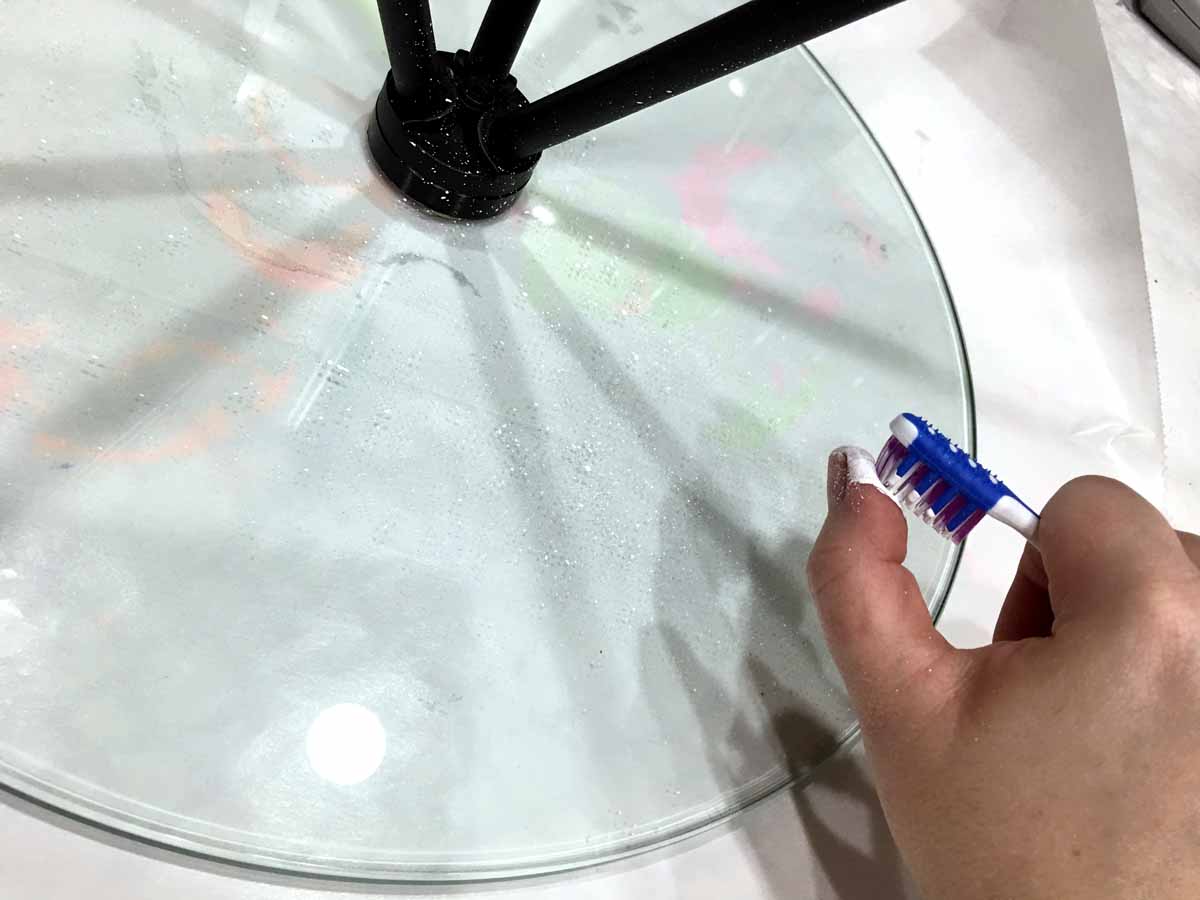
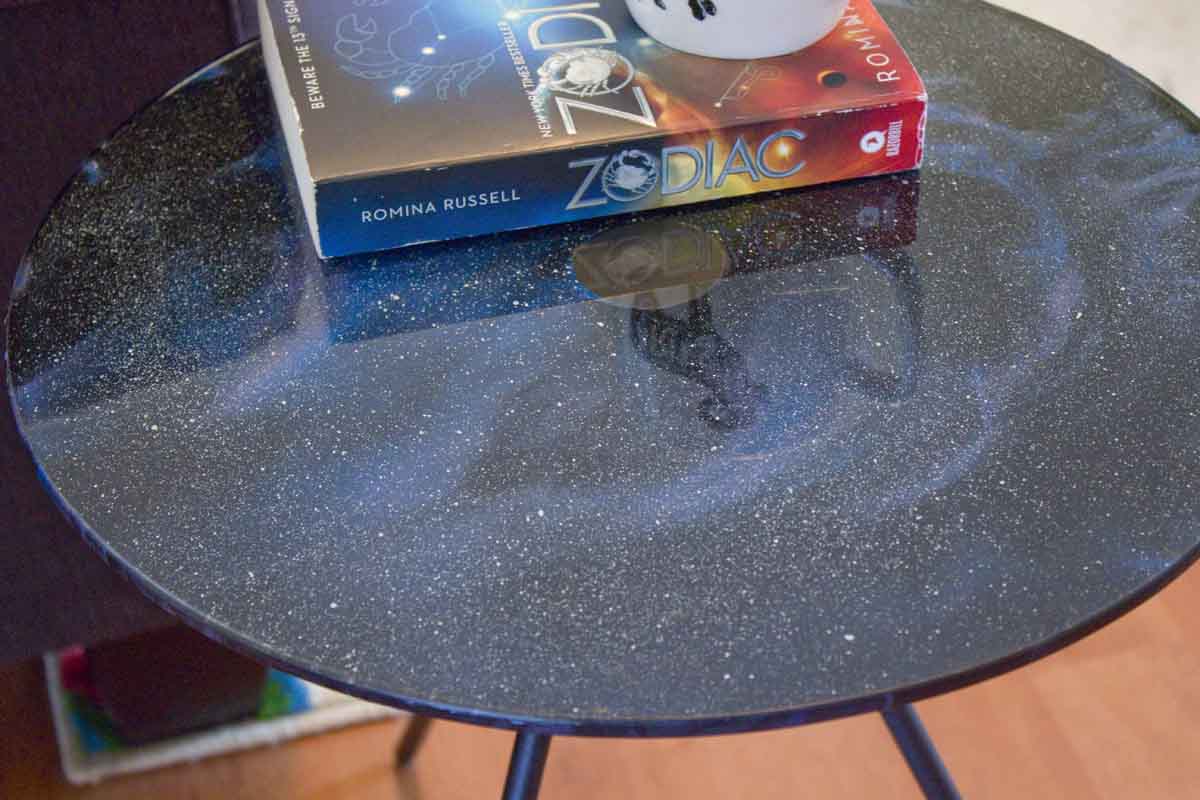
Before I added the paint to the bottom of the glass, I first had to add the stars. I used a toothbrush to flick some white paint on the glass and let it dry.
Then I poured the paint out onto the glass. I did it in a circular motion, starting in the middle and working my way outward.
Once it was completely dry (which took a day or two) I flipped it over and voila - a perfect galaxy! And with the paint being on the bottom of the glass, I have a super shiny and protective top.
As promised, here are pictures of the two tables next to each other. I used the exact same colors, paint, and pouring technique, but got TOTALLY different looks! The one on the left was poured on the bottom of the glass, and the one on the right was poured on top. As Chica pointed out, when you pour on the bottom of the glass, you are going to see what comes into contact with the glass first, and flowing paint will not make any difference. But when you pour on top, it's the flowing paint that you see. I hope that makes sense but you can clearly see the two different types of looks you will get. The bottom of the right-hand table looks exactly like the top of the left-hand table!
This galaxy print table is perfect for Little Jo, who is very interested in the constellations right now. It looks great in her room.
similar projects
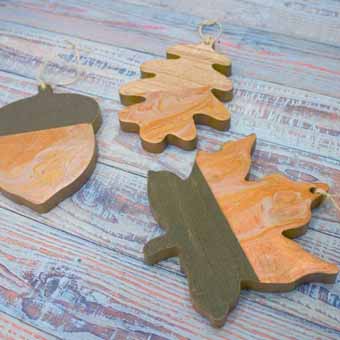
Metallic Paint Pour Fall Leaves

Acrylic Paint Poured Easter Eggs
DIY Colored Glass from Dollar Store Containers


24 comments so far:
I actually love both results the same! One one the left is A perfect textbook example of galaxy painting and the second table is more of a marbled galaxy painting look! Love them both! Great tutorial
Like them both,but the one on the left is definitely my favorite....
Awesome!!
Love both. Did you use any type of sealer to keep it from possibly chipping or flaking?
Thank You
Lillian, I did not need to seal the table on which I painted the bottom of the glass, since the glass remained the top surface. I did spray a sealer on the other one, though.
Did you use any kind of clear primer PRIOR to your paint pour? I’m just curious on your feeling about how well you think the paint on top will remain “stuck” to the slick glass surface. Paint on the bottom side, I would not worry about this, but if it is a table used daily, if the paint is on the top, and gets say... wiped down... I wonder if the painted would get umm, “durability challenged” I guess is how I’d put it! LOVE BOTH looks! :) Thx!
PamK, the multi-surface paint I used adheres very well to glass, so I did not need to use any primer beforehand. I did spray the finished table with a clear sealer after the paint dried. I have had no trouble with it so far!
I would love to try this out. But did you have to move the table around at all? Or did you just let it flow naturally?
Christina, it takes a little moving around and a little natural flow. It will depend on how your paint behaves and how much you use.
I loved the look of these glass tables.
They both look great! I have an outside glass table that I would like to paint the top of. Do you think, with a sealer, this would stand being outside? I live in Portugal so it would have to cope with the sun!!! Thank you
Jo, it really all depends on what type of sealer and paint you use. You'll have the best luck with something that's waterproof and resistant to fading.
What was the consistency of your paint?
Awesome.
Fred, that's a very hard question to answer, because it varies with type of paint. You will need to experiment with your paint by adding Floetrol and/or water to get a consistency that works for you. It's a good idea to practice before committing to a large tabletop project. The best description I've seen for proper paint pouring consistency is that of melted ice cream.
I’m looking for a transparent paint to pour on a glas lamp shade. Would this work?
Jan, the paint we used for this project is not transparent. Unfortunately we are not able to recommend any transparent paint that would be safe near a heat source like a lamp's lightbulb. You might try asking at your local home improvement store to see if they have any advice.
Is there a transparent paint I can use on a round piece of thick glass ? I want to put it upright on a stand outside..,
Wendy, we're not aware of a paint that will work for your idea, but there might be something out there! Perhaps visit your local craft store and ask if they have any recommendations.
I LOVE the galaxy look! I bought a piece of round glass from the dollar store so I can try it. Just have to figure out what to do with the glass afterward lol
When you flicked the white paint, how long did you let it dry?
Tracy, that may depend on the type of paint you use, but an hour should suffice!
Hello, I love both tables. I have a 40 inch thick glass kitchen table! I want to paint it with this process except I would be using yellow, peach, black and pink. Can it be done to look right! I want the painted side underneath! Thank you.
AnneMarie, your best best is to practice and see if you like the results. Every paint pour comes out differently!
Thank you for your above response! I changed my mind, I'm going to use your colors for the galaxy look. My other question is how much of each color do my husband and I need to complete the table? We love the galaxy look. Thank you so much. Wish you had a video of this great process!
Anne Marie, I wish I could tell you how much paint to use (or offer a video on this, as you suggested), but unfortunately we did this project so long ago I don't remember how much paint we used! And it will vary depending on the size of your table and how thick your paint is (how easily it flows). The good thing about working with glass is at least if you don't like how it comes out, you can always scrape it off and try again. Let us know how it goes!