


Building a Custom Kitchen Banquette and Table

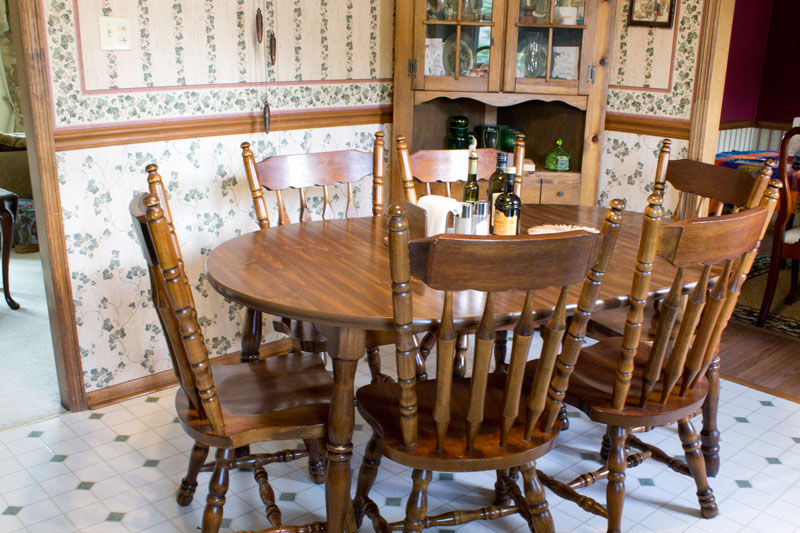
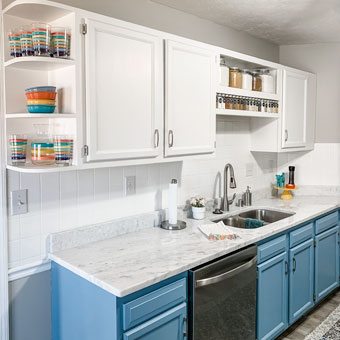
Jo and I recently completed an amazing kitchen renovation for her parents, and as part of it, we built them new custom banquette seating and a variation on a farmhouse table. The transformation from their old eating area to the new was astounding!
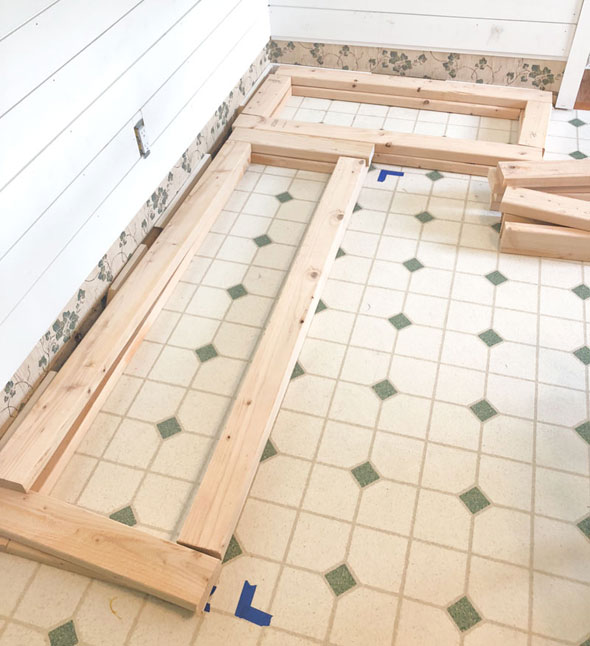
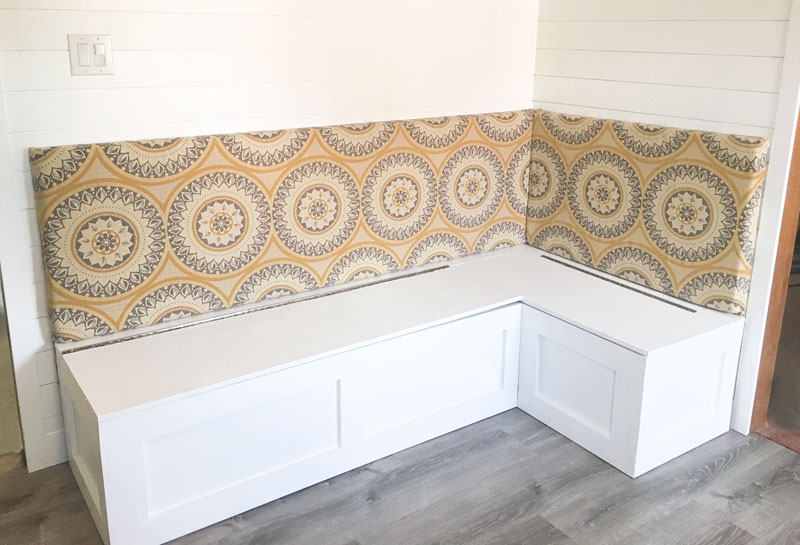
Building the banquette was a custom job all the way. Because every space is different, and every family has different seating needs, I'm not going to be able to give you complete step-by-step banquette building plans. However, I can give you a broad overview of what we did for guidance, and a big piece of advice — measure, measure, measure!
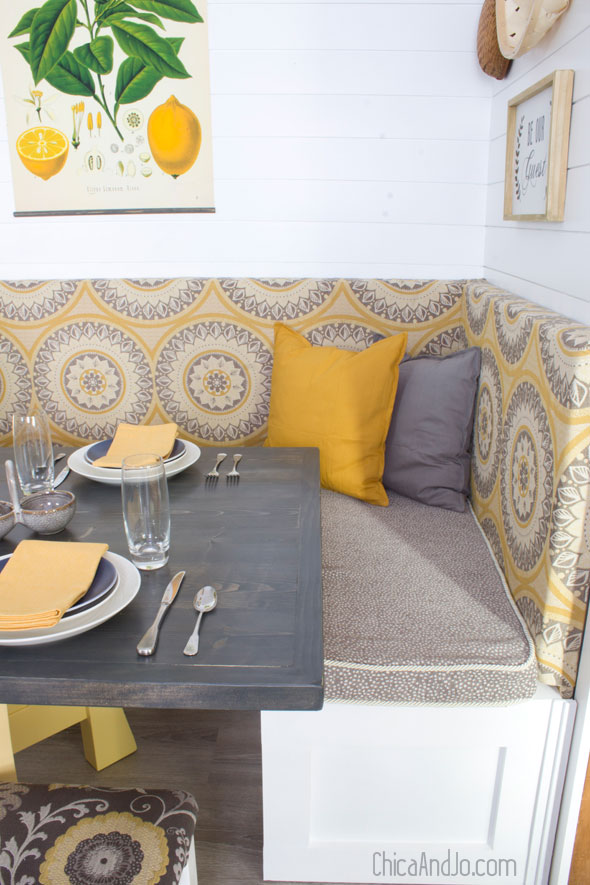
We knew that the banquette would be L-shaped and fit along the two walls. Jo and I calculated the overall height (17") and depth (20") that we wanted for the seat area, based on the available room and the chairs that would go with it. Then I cut some 2x4s and laid them out to be sure the size would work.
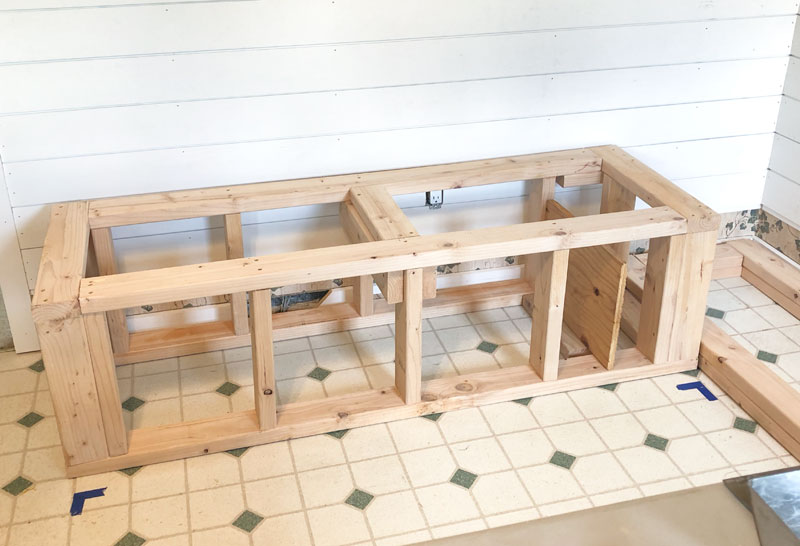
Then I built up a frame from there, making sure to have plenty of support, while keeping the top as open as possible, so it would be easy to access for storage later.
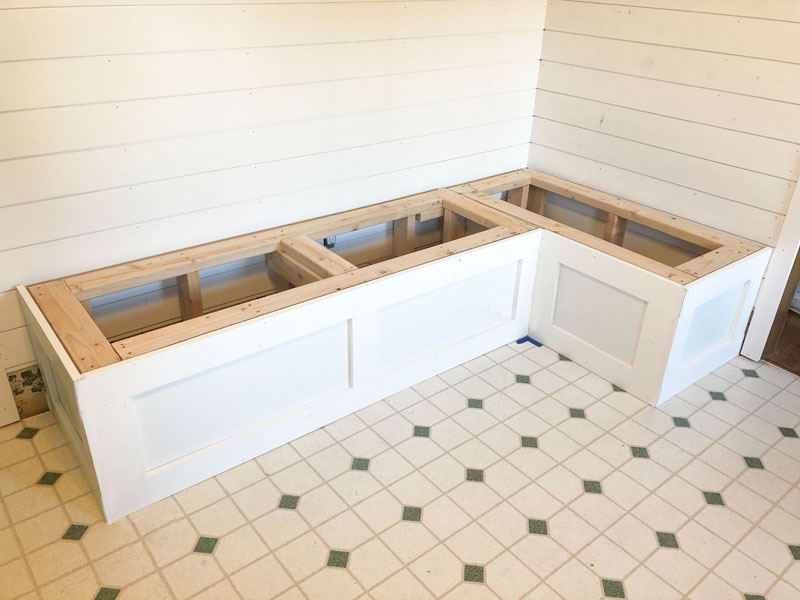
Then we skinned the whole thing with wood and added decorative trim.
We added wooden seats to the top, attaching them with piano hinges for easy access to the storage area inside. Then we upholstered large sheets of plywood and attached them to the back.
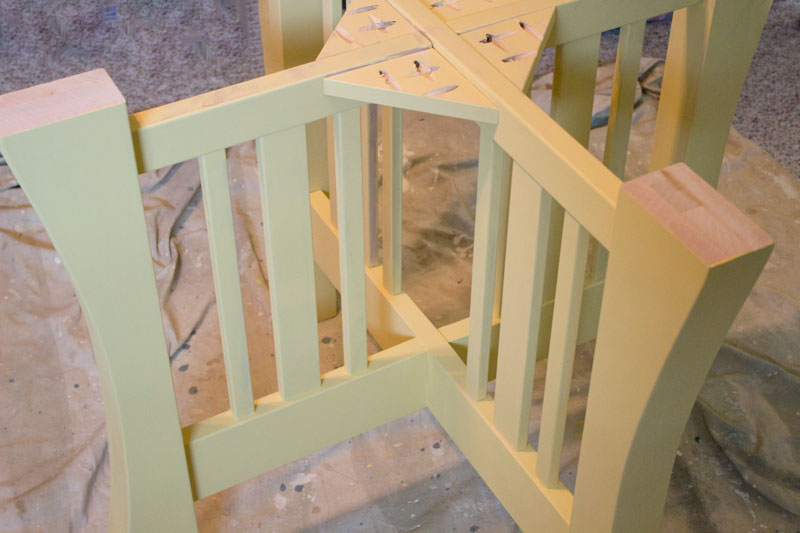
With the banquette done, it was time to move on to the table. We knew we wanted a table that was close to the farmhouse style, but with a few style tweaks that made it better suit the room and Jo's mom's taste. I also knew from prior experience that making the table top is way easier than the base, so any shortcuts we could get with a base or legs would make this project SO much easier for us.
Enter Osborne Wood Products! We picked out the Shaker Table Base, which came practically ready to go, and saved us hours of work. The table arrived in two pieces, which we just fit together and then secured with screws. A quick coat of paint in a buttery soft yellow from DecoArt's Satin Enamels line (or buy online at DecoArt.com for 15% off with promo code CHICA15) and it was ready and waiting for its tabletop.
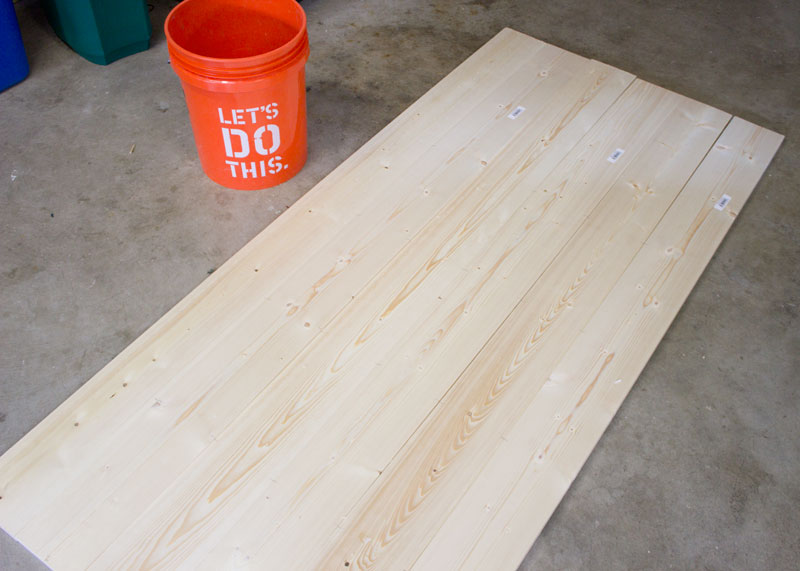
To build the tabletop, we started with — you guessed it — measurements! Of course we had already thought about this before building the banquette, but we re-measured again to be sure we had it right. We wanted to be sure it was wide enough for someone to sit at the end, and long enough to fill the space properly.
Since we knew we would be staining it, we didn't need anything too fancy for the wood. We purchased some basic 1" x 6" pine boards at The Home Depot and laid them out with the grain the way we liked it.
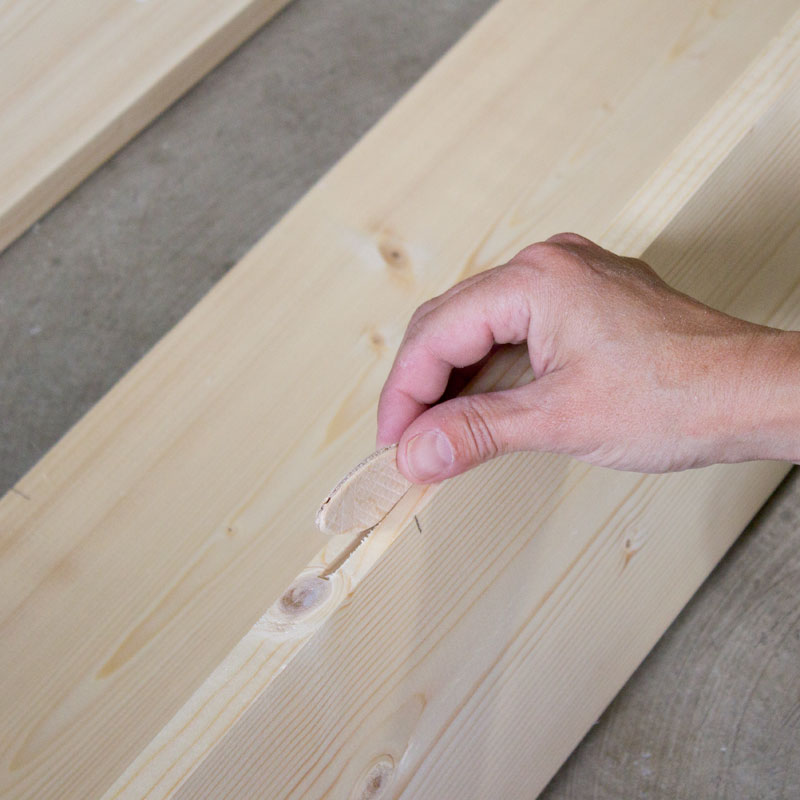
I decided to use wooden biscuits to join the boards together, for extra strength. That meant we needed to cut some slots for the biscuits to go in! I used a 4" biscuit plate joiner to cut a slot in each side of each board, about every two feet or so.
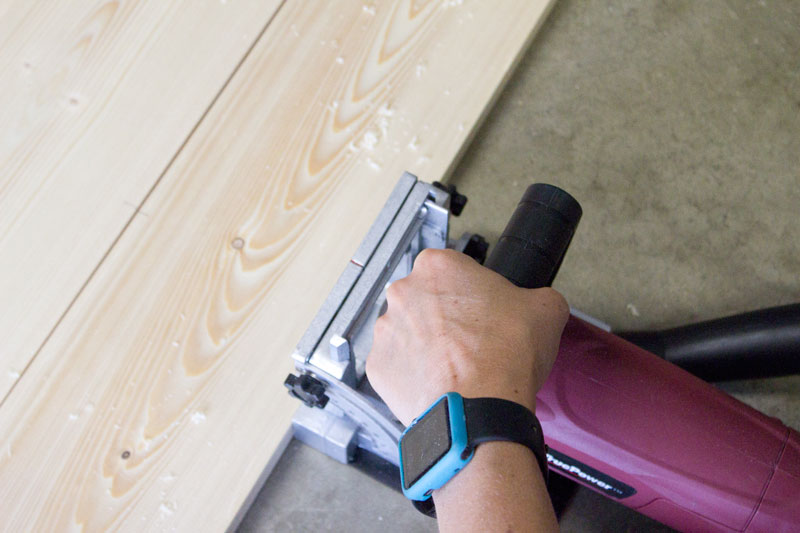
I dry-fitted the biscuits into the slots to be sure they fit, then removed them.
I put plenty of wood glue on both sides of each board, and on each biscuit.
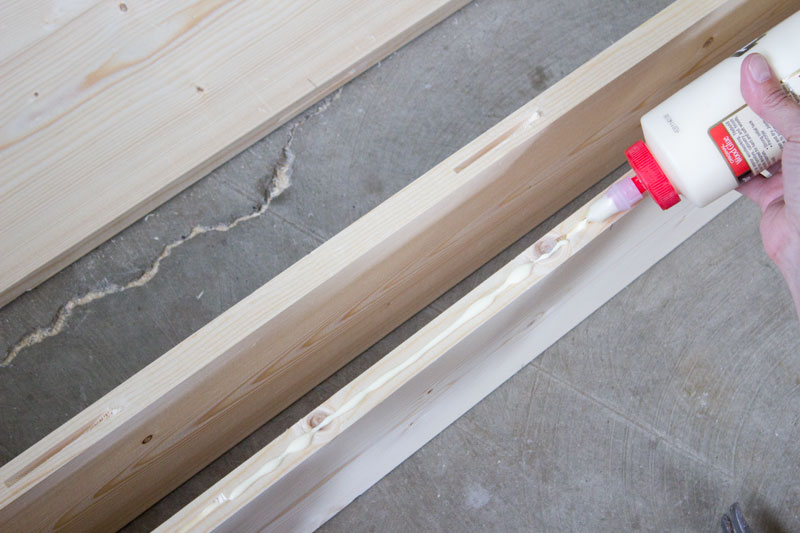
With the biscuits back in the glued-up slots, I pushed the boards together. The biscuits go halfway into each board, forming a strong bond between them. Neat, huh?
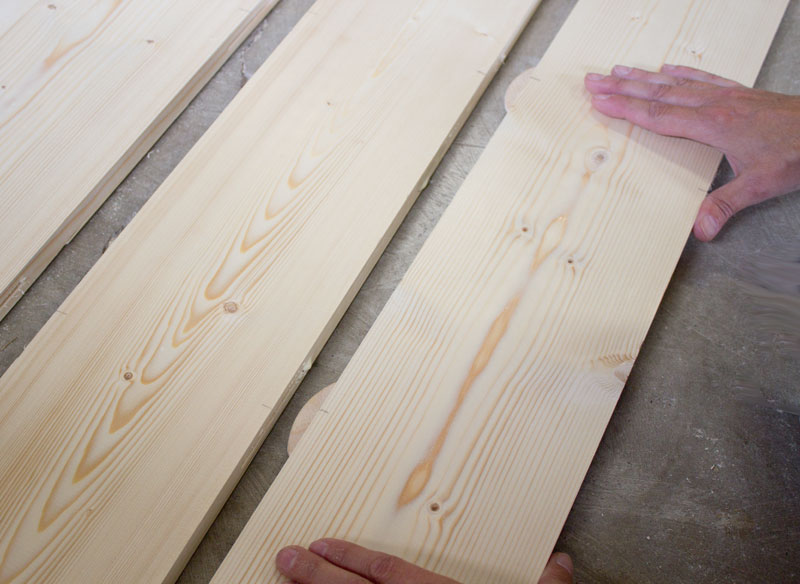
When they were all glued, we squeezed the boards together snugly with some extra-long pipe clamps, wiped away any glue that seeped out, and left it to dry overnight.

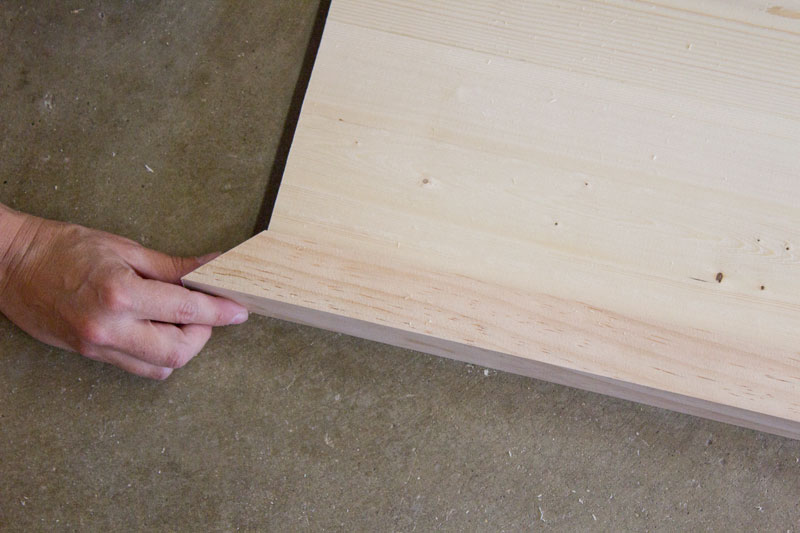
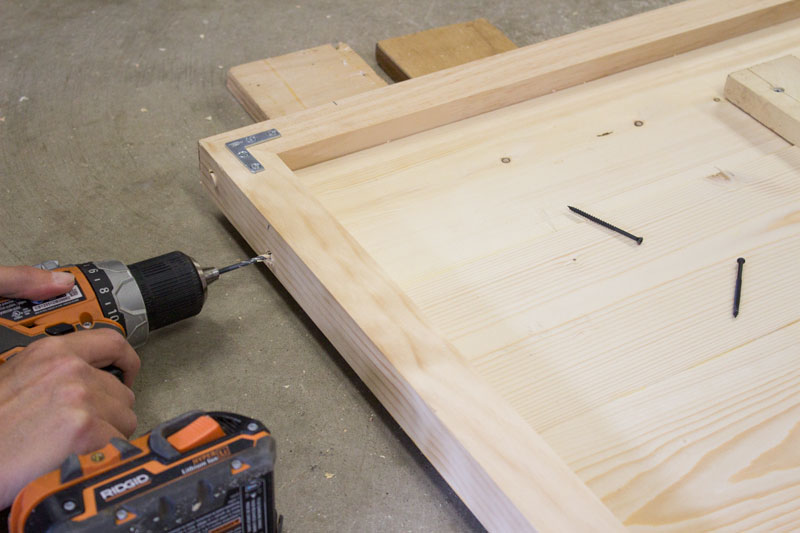
The next day, we cut the ends off the whole piece, to get nice straight edges and get it to the desired length of 62". Then we added some trim. Remember that the boards were only 1" thick, and that's nowhere near substantial enough to look good as a tabletop. So we framed the whole table with 2" x 2" pieces, mitering the corners. This was a great cost-saving way to get a chunky table edge without having to make the whole table out of thick wood.
We worked with the tabletop face down, so that the top of the trim would stay flush with the top of the table. When the trim was all in place, we secured the mitered corners with angle brackets, and then screwed the trim to the table. We made sure to pre-drill the holes so that they wouldn't split. After adding the screws, we filled the remaining holes with wooden plugs that we glued in place, to hide the screws.
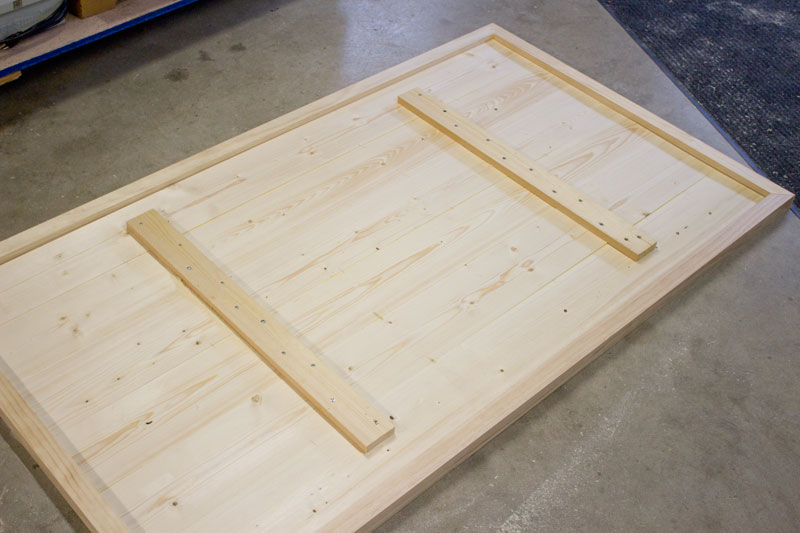
When the trim was done, we added a couple of supports to the bottom, to be sure that all our boards stayed together for good and to provide extra strength to the tabletop overall.
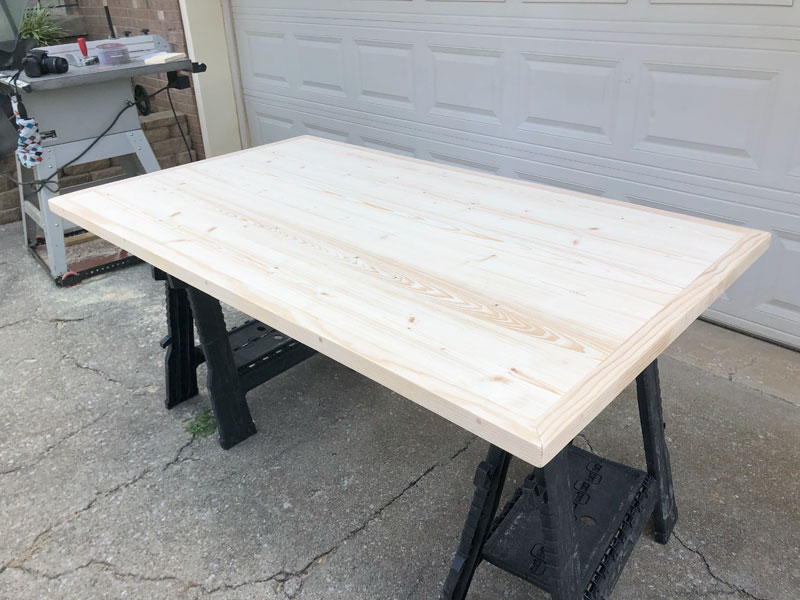
Now it was finally time to flip it over and see what we had! The table went up on sawhorses, so we could start sanding.
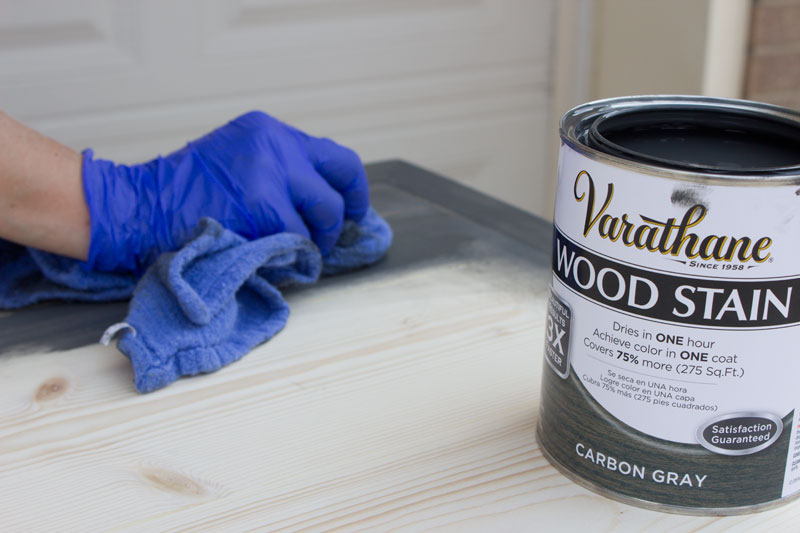
Boy, did we sand this thing! We made sure to sand down the wooden plugs that were sticking out, and smoothed out all the seams between boards. We also sanded the edges so they would look more worn and not so brand new.
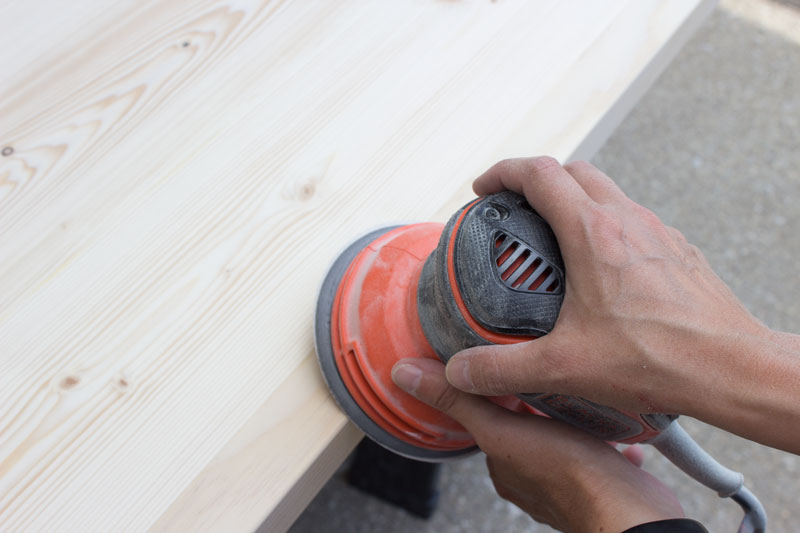
After wiping the sawdust off well with tack cloths, we sanded it with a gorgeous shade of Varathane Wood Stain in Carbon Gray.
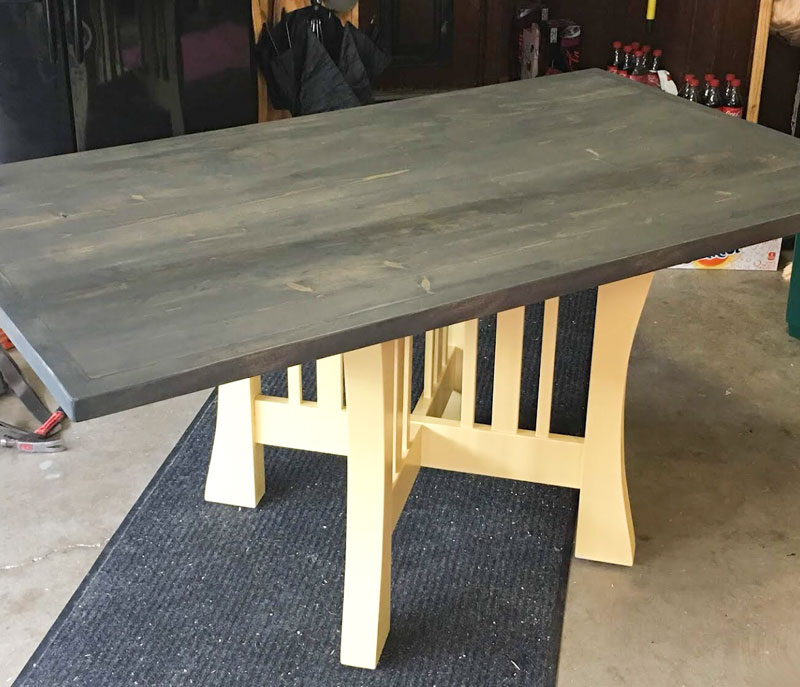
We could hardly wait to put the table on the base, and were so pleased with how it looked.
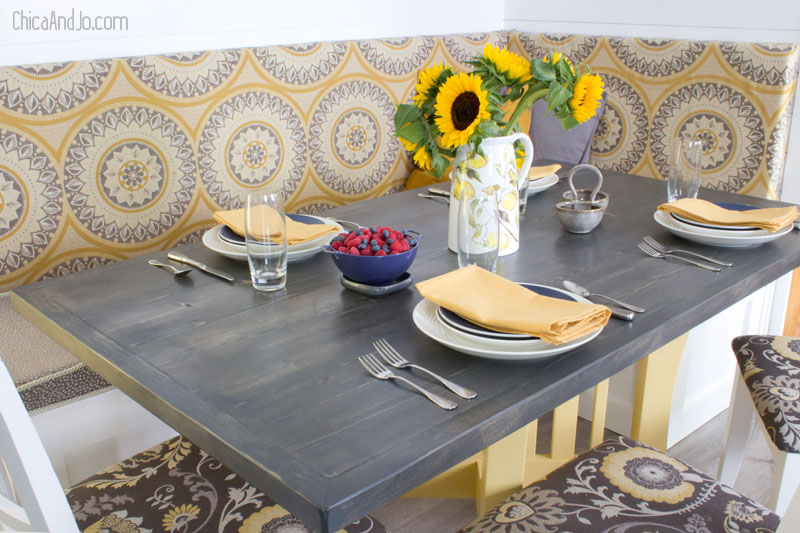
Alas, there was still some work to do before we could put it in the kitchen. We applied three coats of varnish, sanding with steel wool between each, and letting each coat dry overnight. It was torture, but the patience paid off because the finish we ended up with was perfect. We were so happy to finally put the table in the kitchen!
Just look how gorgeous that sharp yellow base looks with the worn gray tabletop. We could never have built such an intricate base design ourselves, and it was such a timesaver.
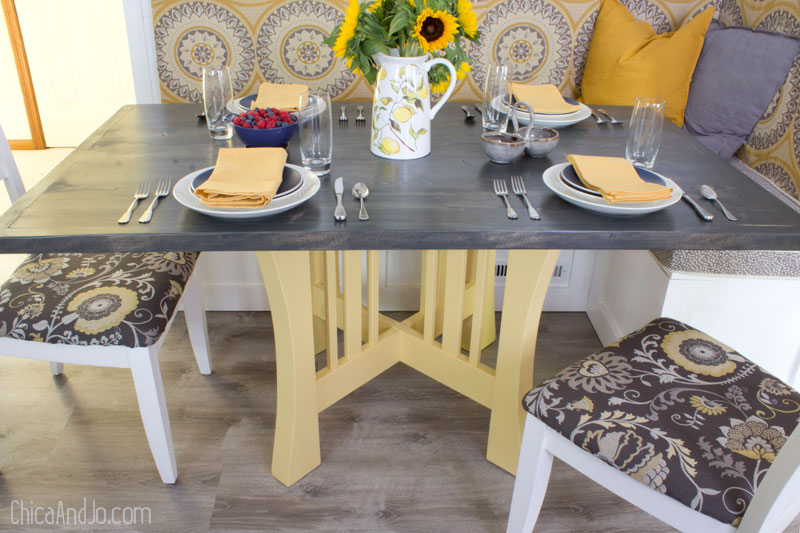
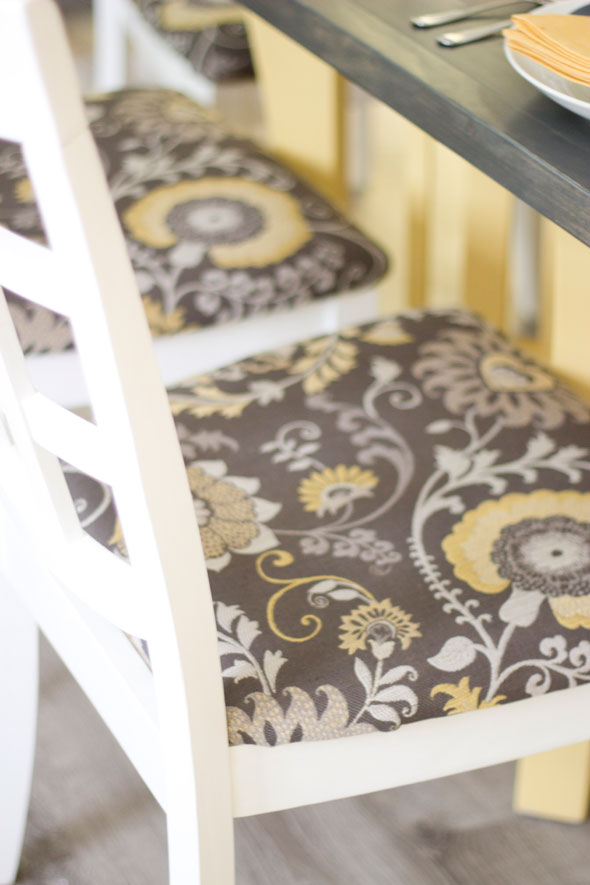
To round out the dining area, Jo painted some salvaged dining chairs white and re-covered the seats with coordinating fabric from Hobby Lobby.
Then we added some seat cushions and squishy pillows to make the bench seating more comfortable.
We couldn't be more pleased with how the whole table came out, and are so proud of ourselves for tackling this big project.
similar projects
DIY Farmhouse Kitchen Renovation Before and After
Custom Fire Table Cover
White and Blue Modern Kitchen Makeover on a Budget


