


Upcycled Entryway Organization Center

I've got the ultimate upcycled furniture project to share with you today. I turned an old cabinet and picnic basket into an entryway organization center that's as functional as it is adorable. With a removable basket, chalkboard, and charging area, this new piece is the perfect catch-all by the front door. And those retro-vibe stripes down the middle are the icing on top of the cake.
Being inspired by upcyclable pieces at yard sales
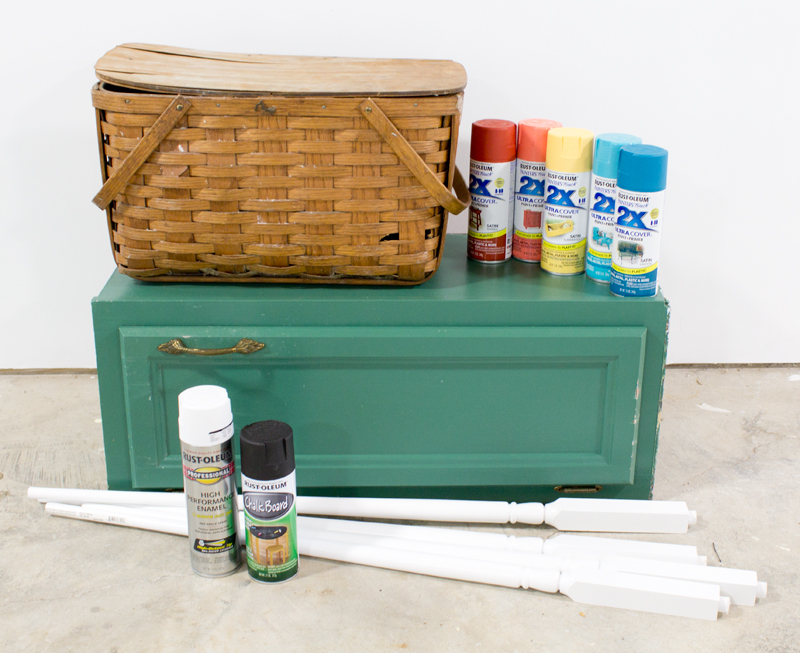
At our recent neighborhood yard sale, I picked up a vintage picnic basket for just a few bucks. It was filthy and had a cracked lid, but it had great style and potential, and I knew I could transform it into something new.
As I continued to visit the sales in the neighborhood, I came up with an idea to turn it into an errand basket to keep by the door. I decided to place it on an entry table that also serves as an organization center, with the errand basket and to-do list built right in. What a super useful entry table this would be!
With picnic basket in hand, I continued along my neighborhood yard sale to find the rest of the supplies I would need. I hit the jackpot next door where I found a small kitchen cabinet that I could convert into the table, and four stairway balusters that would work for legs.
When I got home, I picked out some Rust-Oleum Painter's Touch spray paint in a fun array of colors and I was ready to get started.
Prepping and cleaning
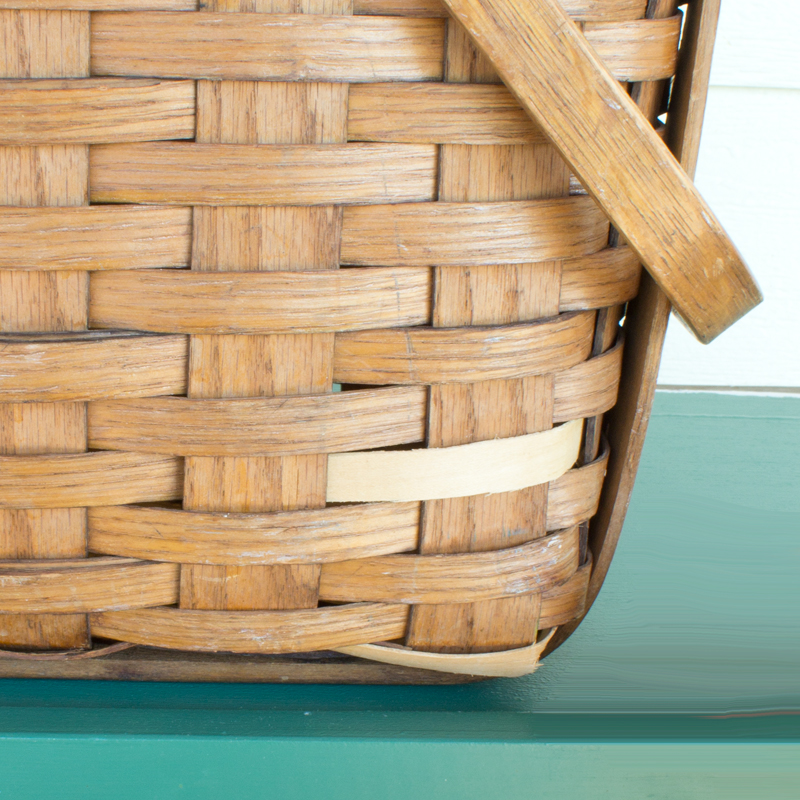
First I had to clean up that basket! I scrubbed it clean, then removed the cracked lid and cut a new one out of a piece of finish plywood.

There was a piece of the basketweave missing, making a hole down in the corner. I noticed that the old lid's veneer was peeling off, so I cut a strip of it and tucked it into the gap, fixing the hole. Since I would be painting it soon, the finish didn't need to match.
Cutting the cabinet to fit the basket
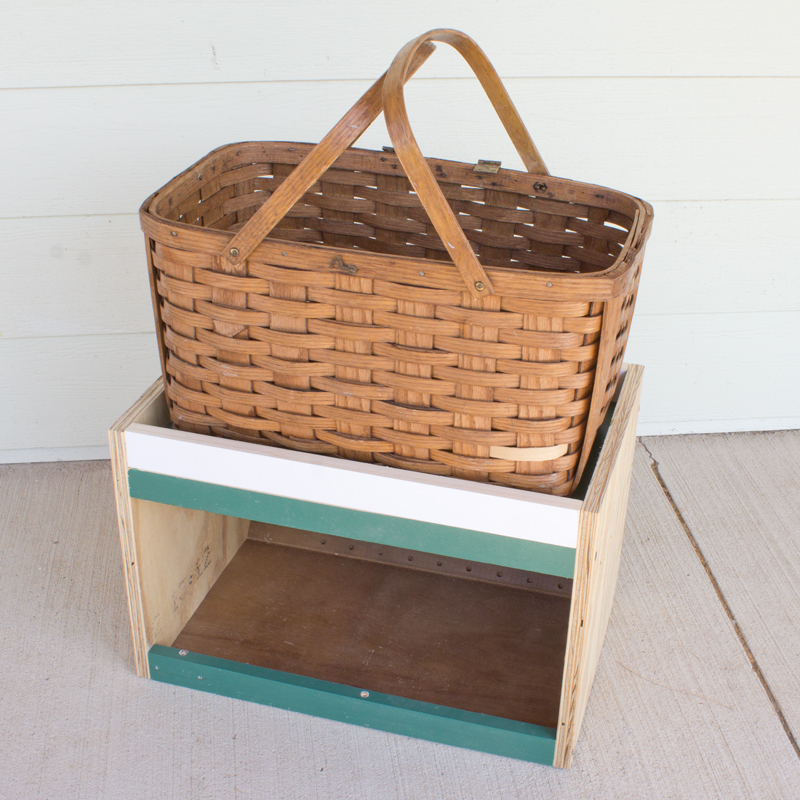
I removed the cabinet door and all its hardware, laid the cabinet on its side, and set the basket on top.
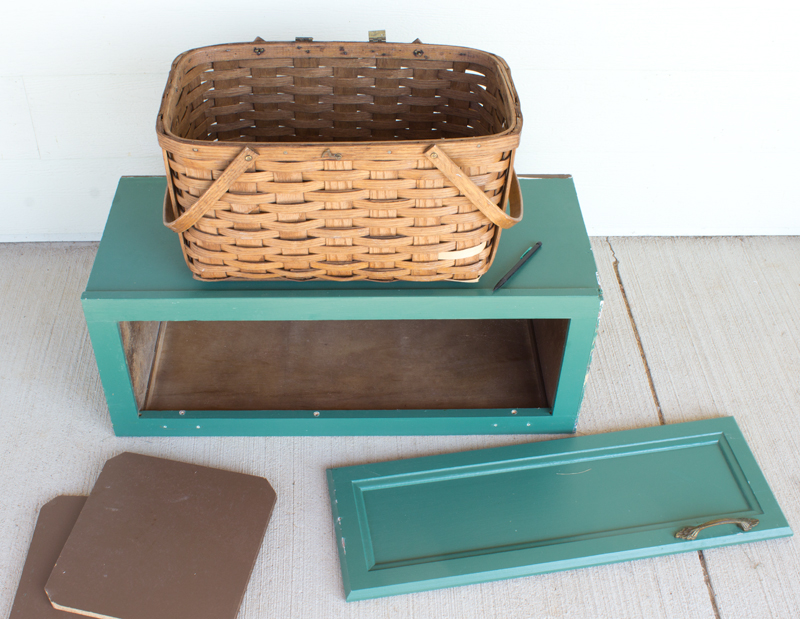
I wanted the table to be just the right size for the basket to fit perfectly, so I marked the width of the basket and added an inch.

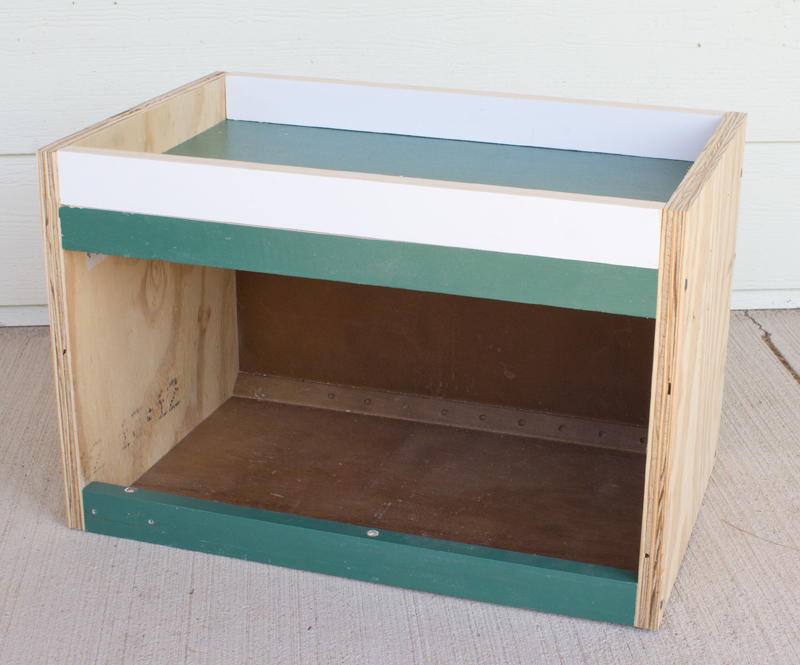
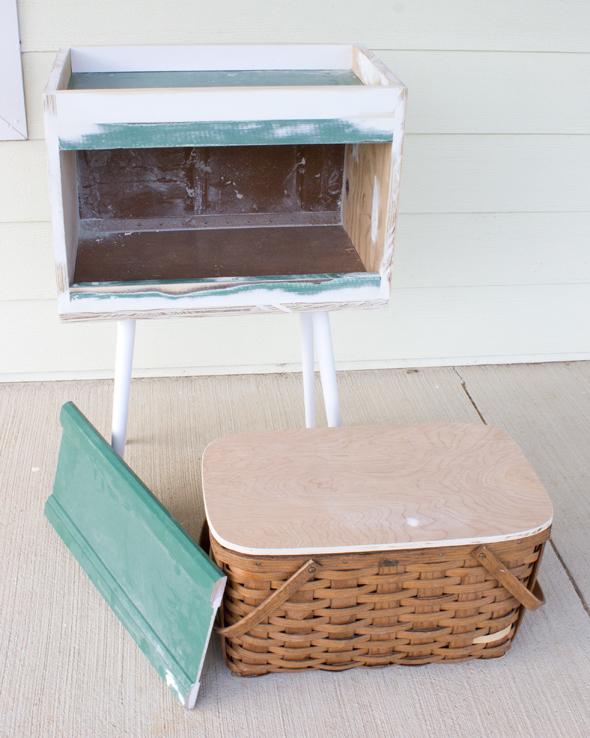
I then cut the cabinet down to size with the table saw and attached new wooden sides to it. To keep the basket from falling off the table, I added a 1.5" tall wooden rail around the top.
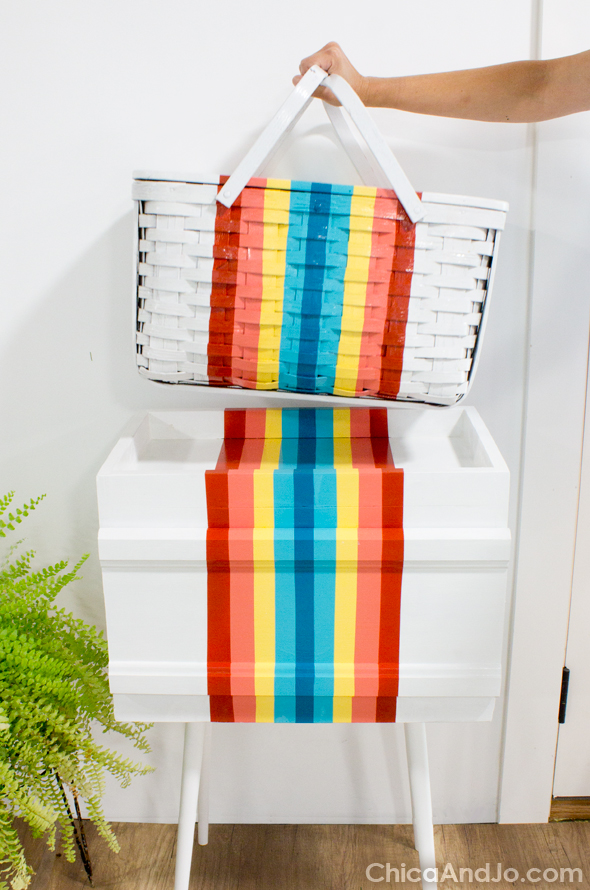
Look how perfectly the basket fits! I really think the frame makes the basket look more like an intentional part of the table, and gives the table some character.
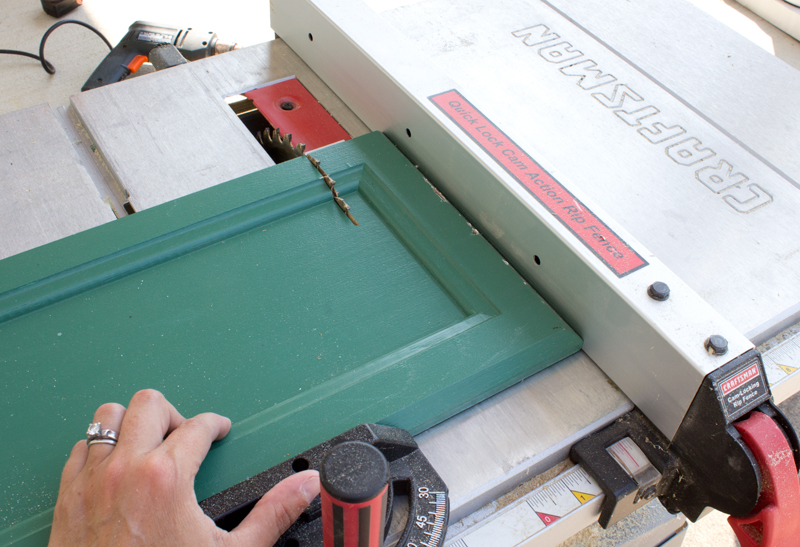
Fitting the cabinet door
I used the table saw to trim the cabinet door down to the same width as the cabinet, cutting some off of both of the ends, so that the trim looked the same on each side.
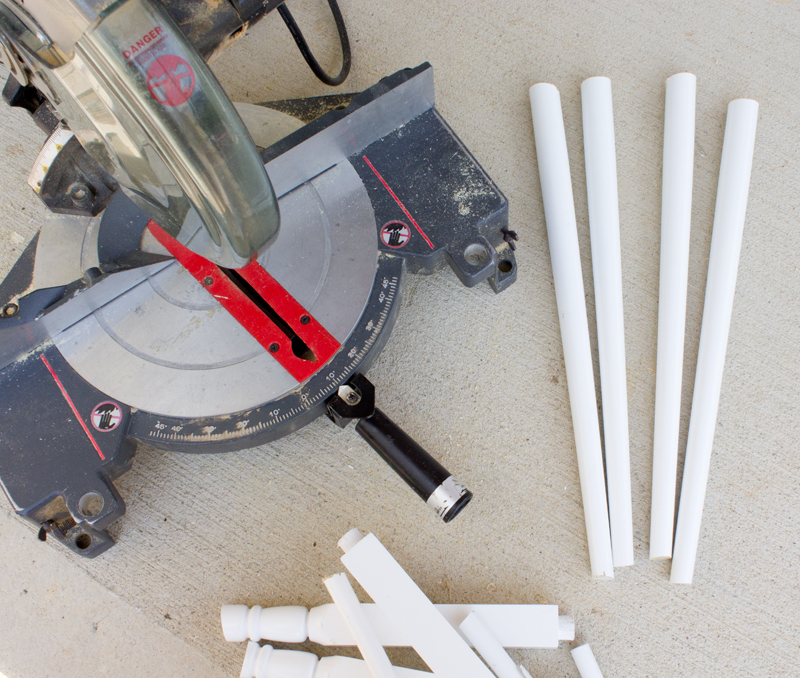
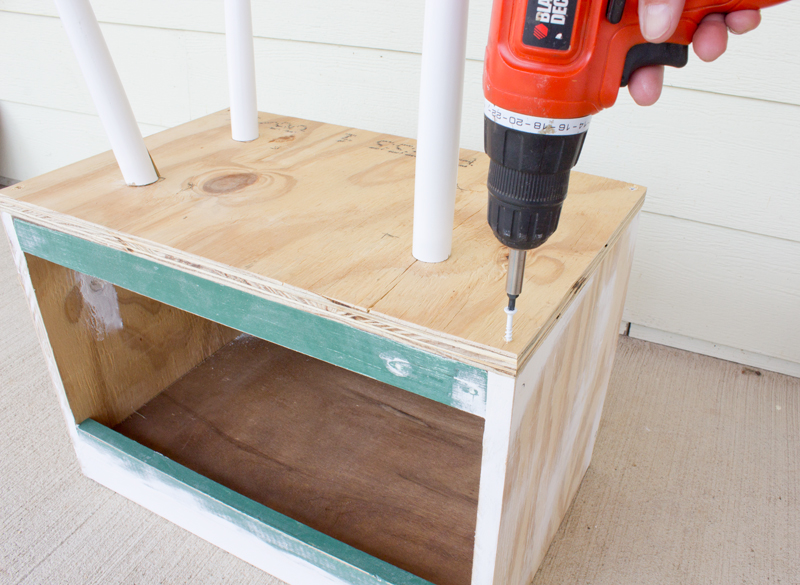
Creating table legs from balusters
To create the legs, I cut the balusters to length (at a 10 degree angle), keeping the tapered part and getting rid of the decorative end.
I struggled with figuring out how to attach them because I couldn't fit a drill inside the small cabinet. So I screwed the legs into a piece of plywood that was the same size as the cabinet.
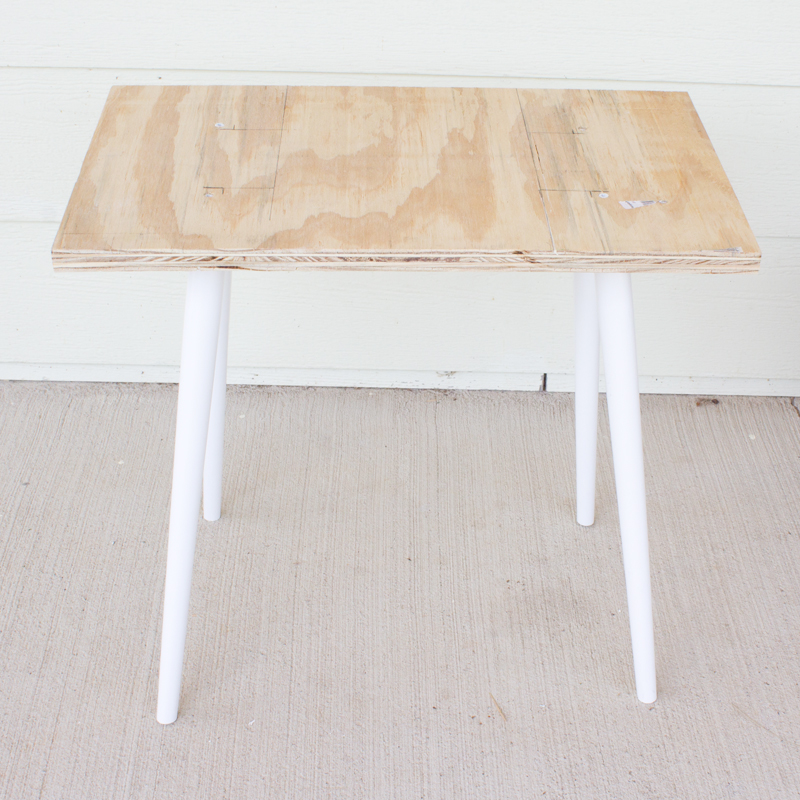
Then I screwed that into the base of the cabinet, transforming it into a table.
Filling holes and sanding to prep for paint
Next I filled all the gaps and holes with wood filler, let it dry, sanded it smooth, and wiped off all the dust. Yay, it's ready to start painting!
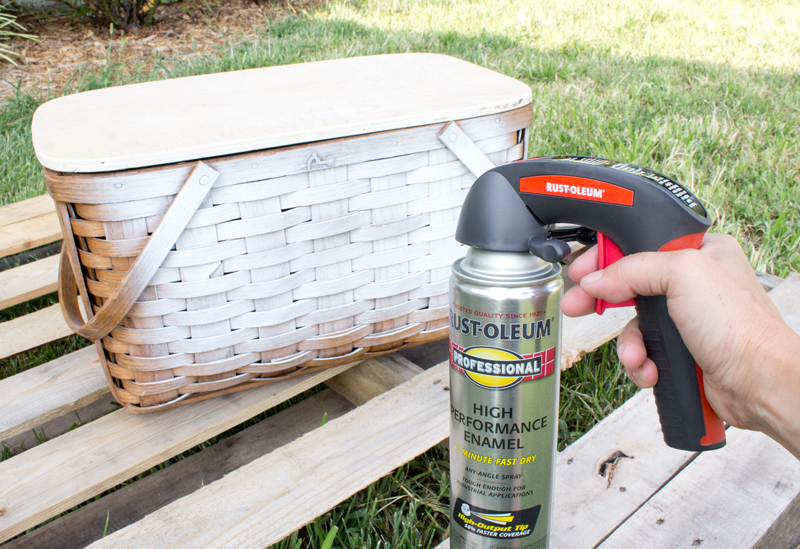
Basecoating everything white
I turned to spray paint because I knew it would be the easiest way to get good coverage on the basket. I went ahead and spray painted everything with a good solid coat of white using Rust-Oleum High Performance Enamel Spray Paint. Thank goodness for my Rust-Oleum Spray Can Comfort Grip, which made it a lot easier to spray so much without my hands cramping!

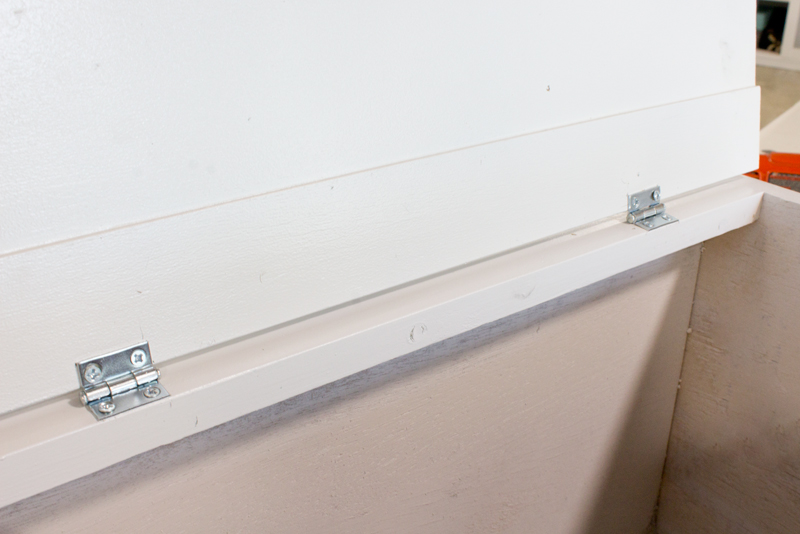
Attaching the cabinet door
Once that was dry, I attached the door to the front with some small hinges.
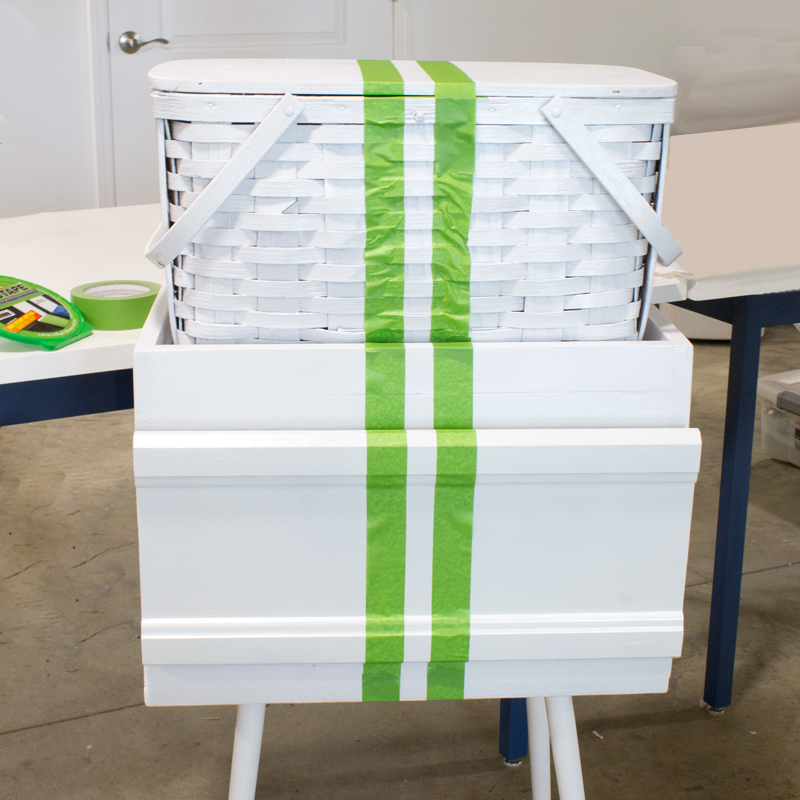
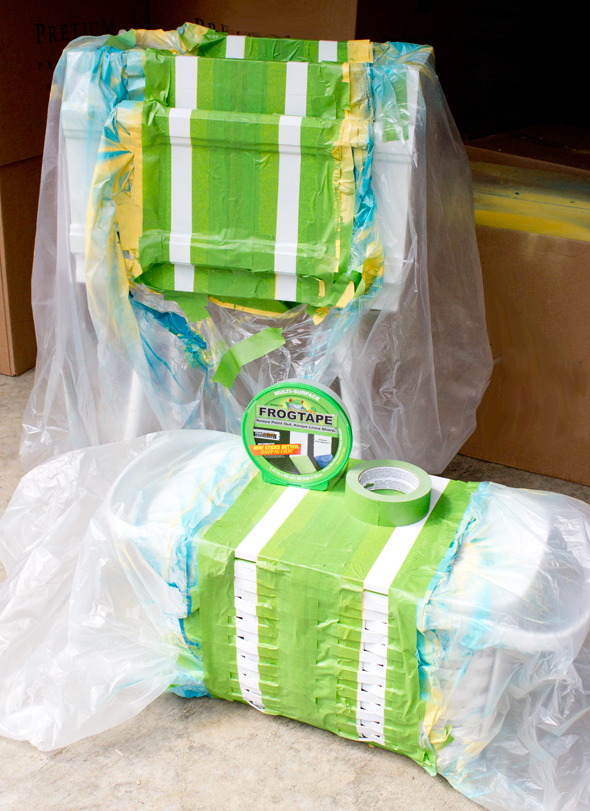
Painting the retro stripes
Then I started painting my stripes. I used Frog-Tape Painters Tape to mask off a 1-inch stripe down the middle of the basket, keeping the tape as straight as I could and pressing it firmly into every nook and cranny.
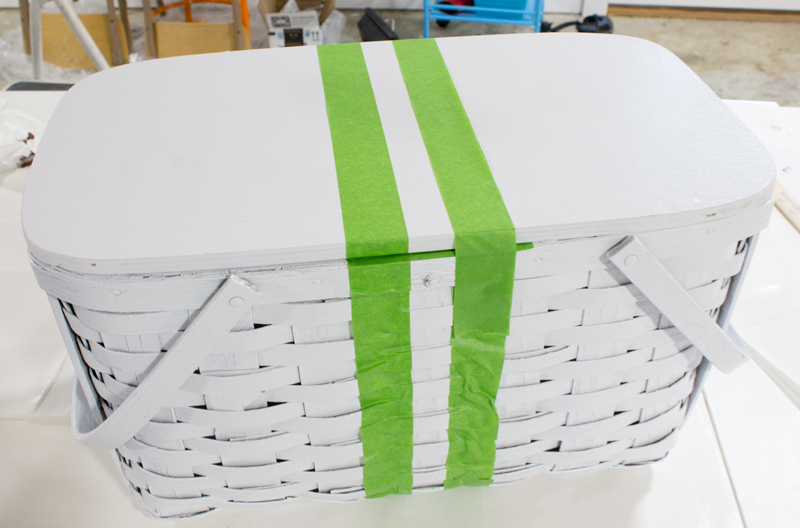
Then I set the basket on the table and taped off a stripe on the table, making sure it matched the basket perfectly. I continued the line all around both pieces.
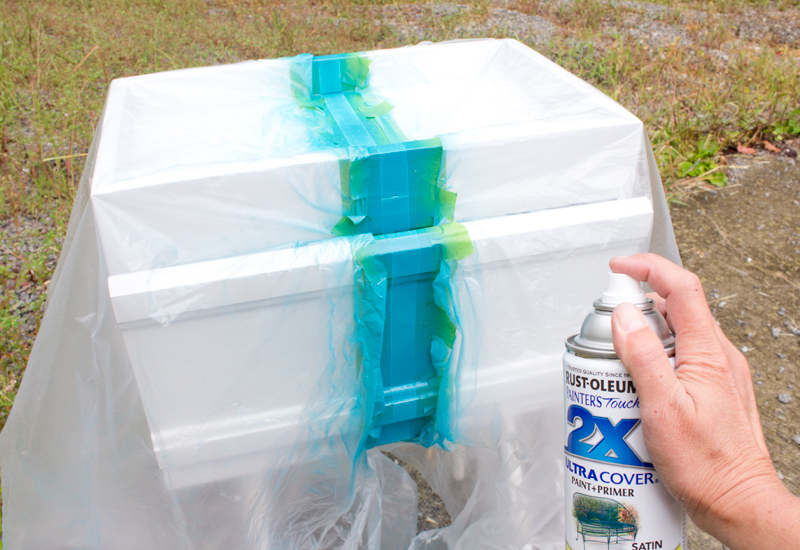
I used plastic bags to cover everything except that stripe, and then spray painted it with Rust-Oleum Painter's Touch spray paint in Lagoon blue.
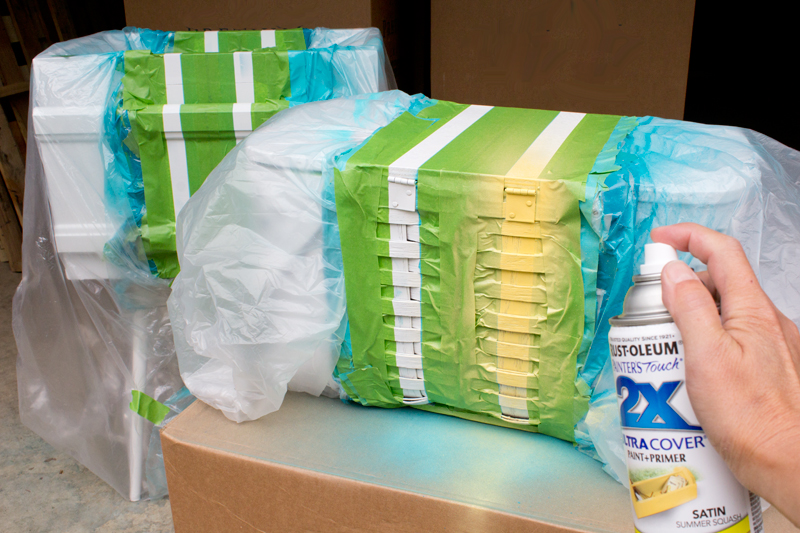
When that stripe was completely dry, I peeled off the tape and taped the next set of stripes (one on each side of the blue), and painted them in Seaside blue. I continued with this process adding stripes of Summer Squash yellow, Coral, and Paprika red.
I can't express enough how critical the careful application of Frog-Tape Painters Tape was to the success of this project. I've never been much of a fan of that classic blue painter's tape in the past, because the paint always bled underneath, but this green Frog-Tape is amazing! It stuck perfectly, created great seams, and came off without removing any of the paint underneath.
For each new color I added, I carefully taped off everything I didn't want painted, and used plastic bags to protect all the white surfaces.
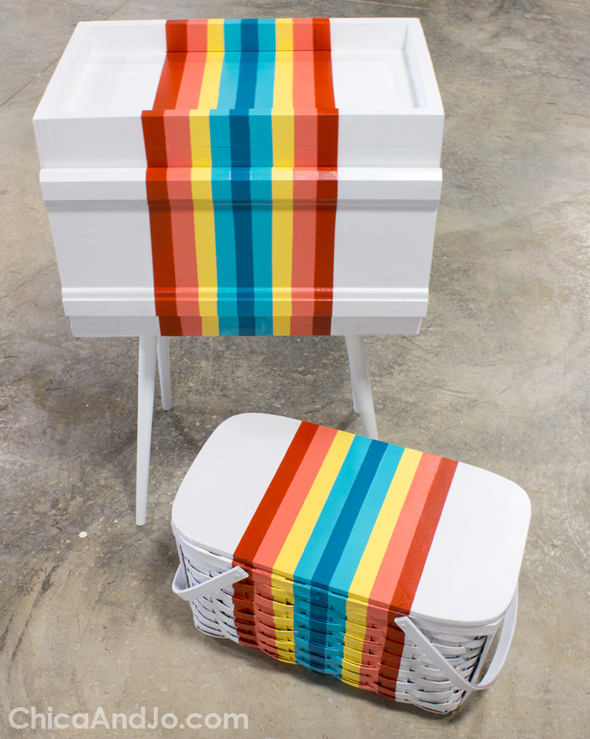
The finished retro rainbow
When the last stripe was done and I pulled away all the tape, I was thrilled beyond words with how this retro color scheme came out! Big thanks to Jo for convincing me to use these colors.
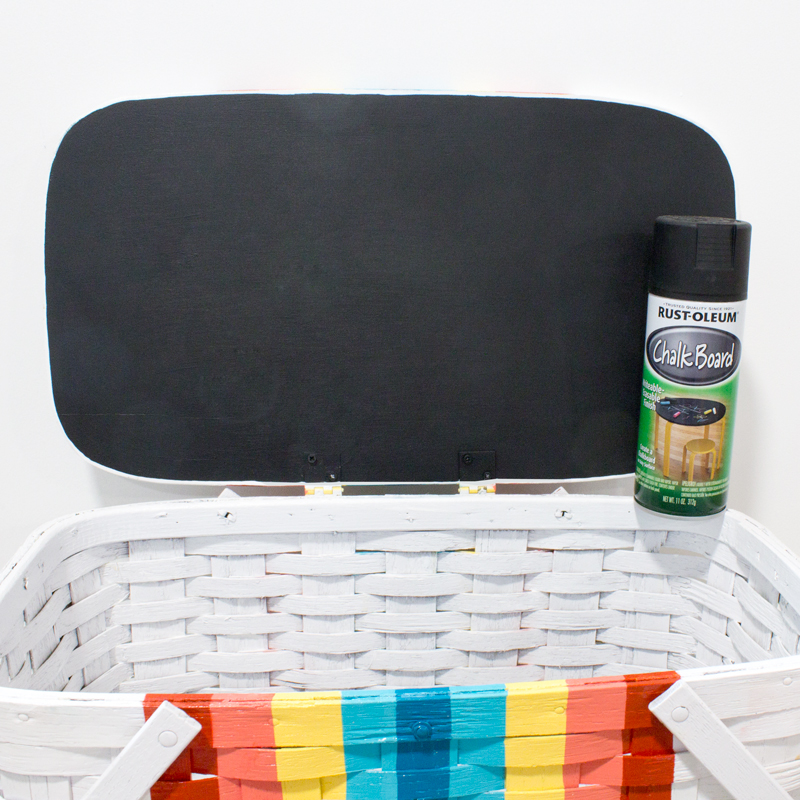
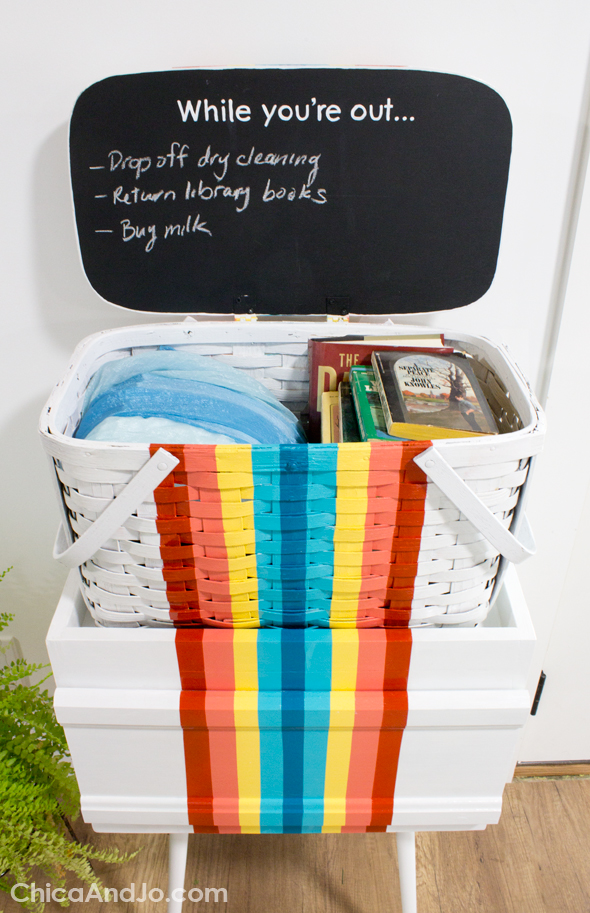
Adding a chalkboard to the basket lid
Stripes aside, there was still one more thing to paint. I wanted to turn the inside of the basket lid into a chalkboard, so I masked it off and sprayed it with black Rust-Oleum Chalkboard Spray Paint.
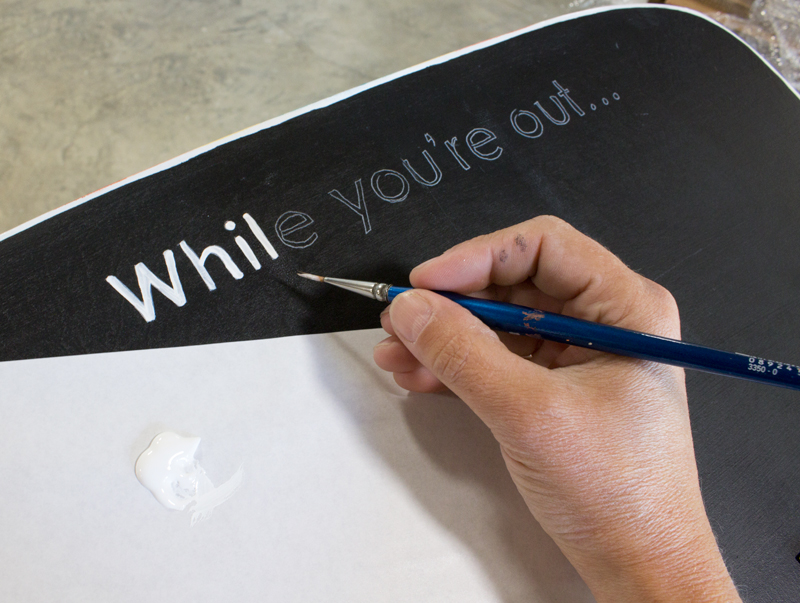
I wanted the to-do list to be reusable chalkboard, but I wanted a permanent title for it, so I decided to paint one on. To be sure it came out as good as possible, I printed the phrase "While you're out" on my computer and used white transfer paper to trace it onto the surface.
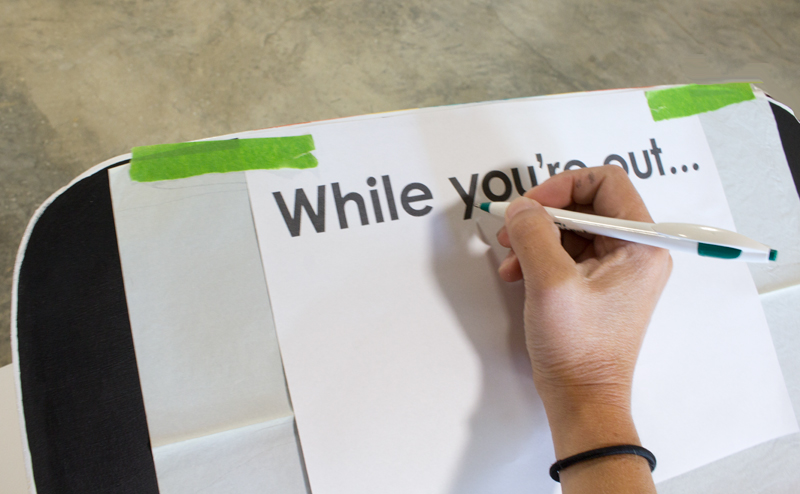
Then I hand-painted the letters with white acrylic paint and a fine liner brush.
Final touches on the cabinet door
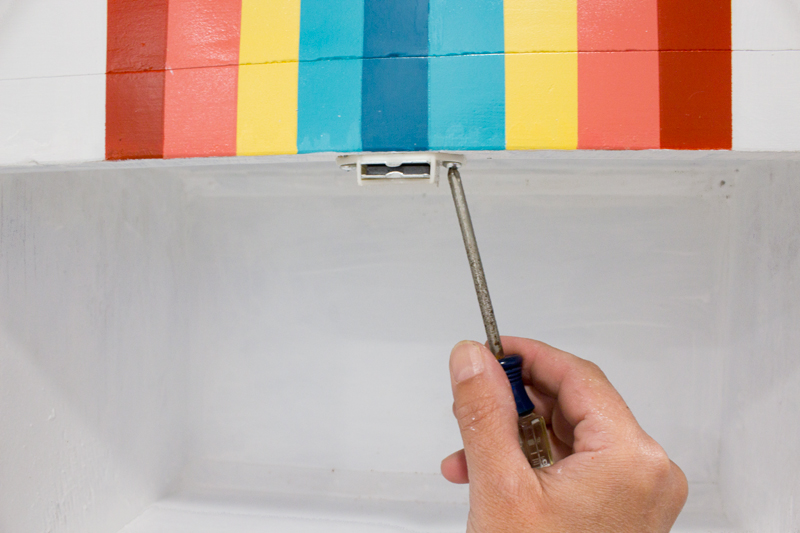
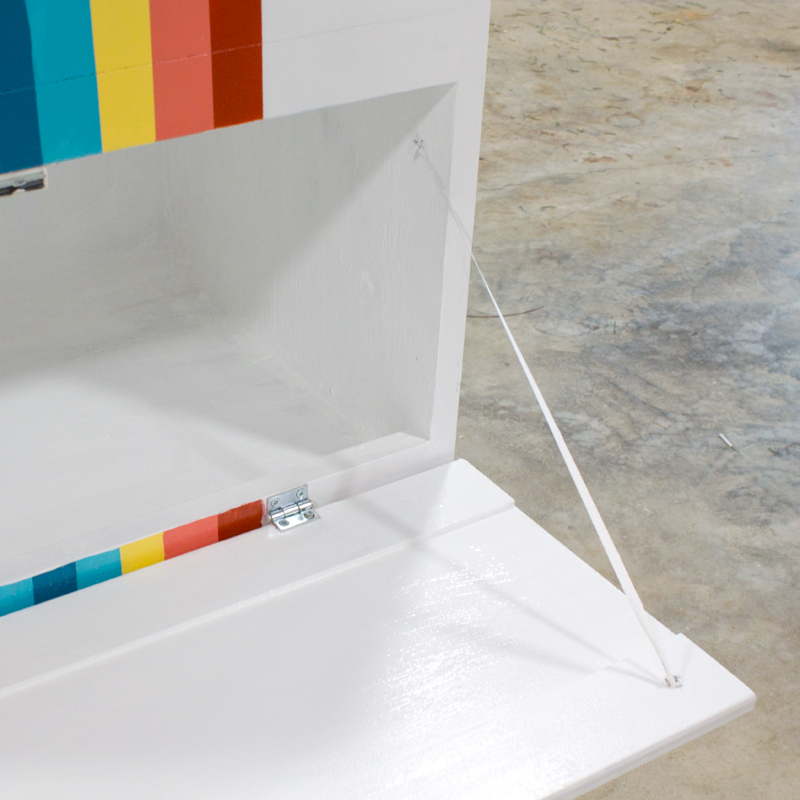
Finally, I added a magnetic clasp to hold the door closed and a strip of ribbon to keep the door from opening too far.
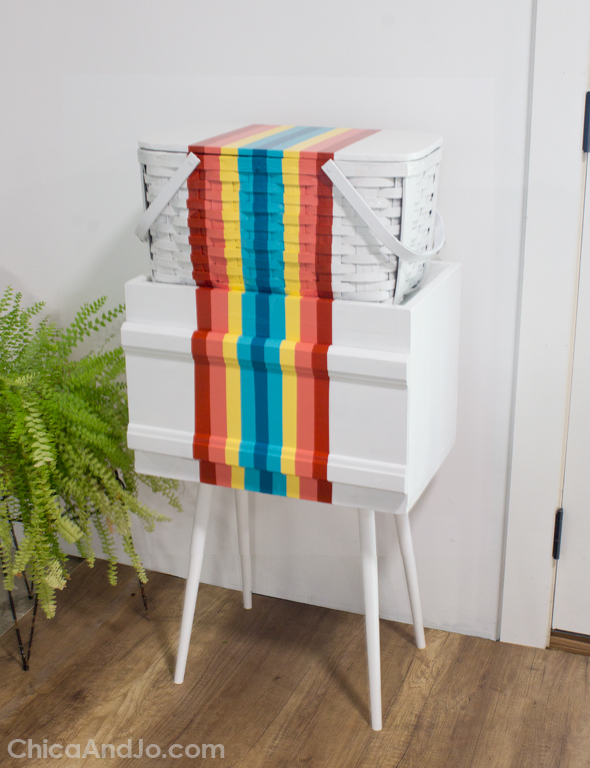
The finished entryway organization center
The fun, retro stripes on this table make it a unique and modern piece of furniture, and I love the striking color.
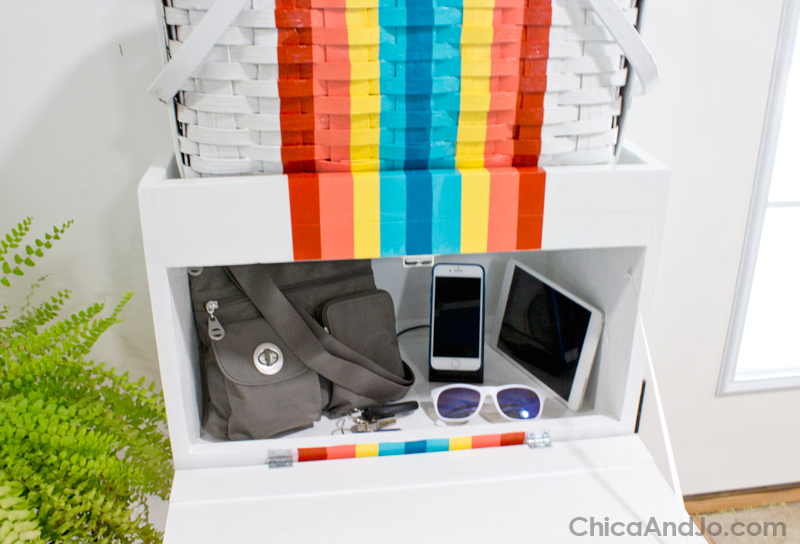
But the magic happens when you start opening things up and see that it's a complete organization center!

The inside compartment is great for holding my purse, keys, and device chargers — everything I need to head out the door.
The basket on top is so useful as a drop-off point for things I need to take with me the next time I leave the house. I can toss things in the basket and jot tasks on the chalkboard.
The best part is that I can easily just grab the whole basket on my way out the door, and I've got everything I need for my errands!


2 comments so far:
Thanks for sharing. I'm getting ready to redo a picnic basket, and I love this idea.
Holly, so glad we could inspire you!