


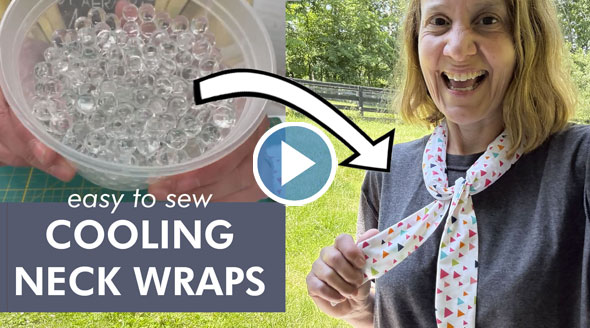
Make Your Own Cooling Neck Wraps

Summers here in Kentucky get really hot and humid, and keeping cool while outside is imperative. I spend a lot of time outside in the summer, tending to my vegetable garden or working on projects.
When my hands are full, it's difficult to keep cool, so I thought I would make some cooling neck wraps for hands-free cooling. They came out so great that Jo snatched a few for her family's upcoming amusement park trip to help everyone stay cool outside all day.
VIDEO: DIY Cooling Neck Scarf
I created a complete video tutorial that shows you how to create these DIY cooling neck wraps, so take a look here on our YouTube channel.
If you prefer written instructions, keep reading... I've got a written tutorial too!
The secret inside a cooling neck wrap
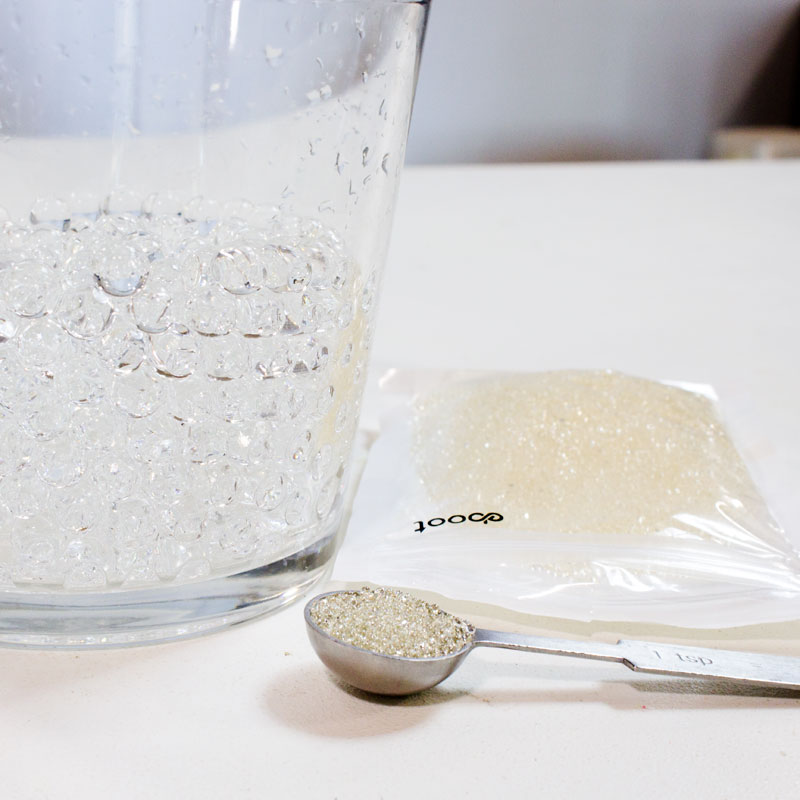
What makes a neck cooling scarf a success is its ability to stay wet for hours, thus cooling you for a long time. And the key to accomplishing this is something called water-absorbing polymer beads that absorb a ton of water, then release it slowly. That gentle moisture against your skin keeps you cool.
There are lots of varieties available, so be sure you get round water gel "beads" rather than the jagged "crystals". The round ones will be more comfortable and easier to work with.
Read the sizing carefully and be sure you choose beads that grow to a size somewhere around 10-12mm or so when fully absorbed.
And you don't need to get a big package, either. These teeny little beads turn gigantic when soaked in water. One teaspoon turns into 3-4 cups once soaked!
How to make a cooling neck scarf
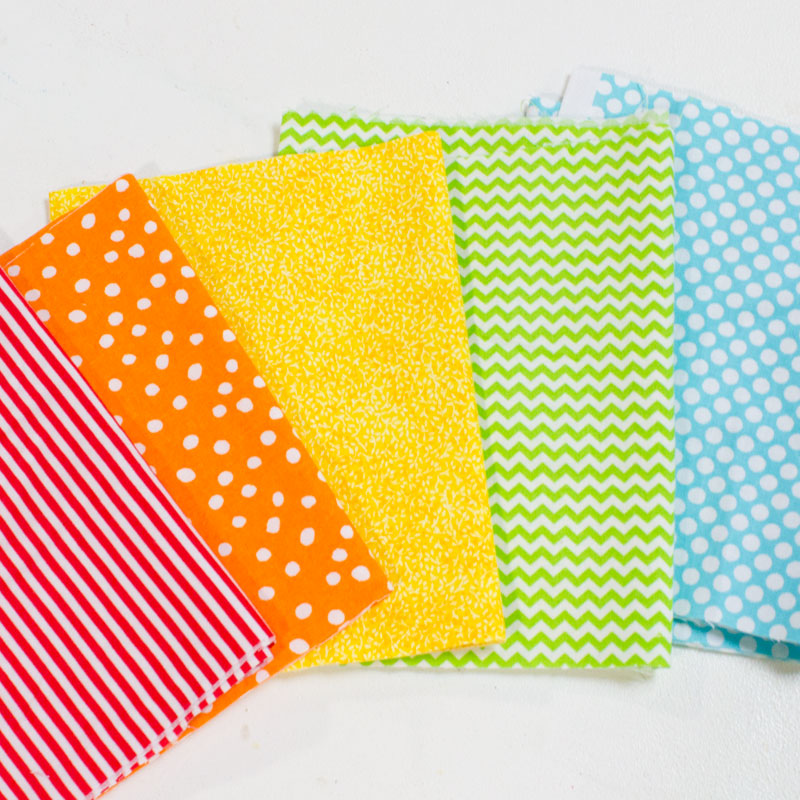
Besides the water beads and some basic sewing supplies, the only other thing you need to make your own neck cooling wraps is some fabric. I chose an assortment of pretty quilting fabric so I could make several different patterns.
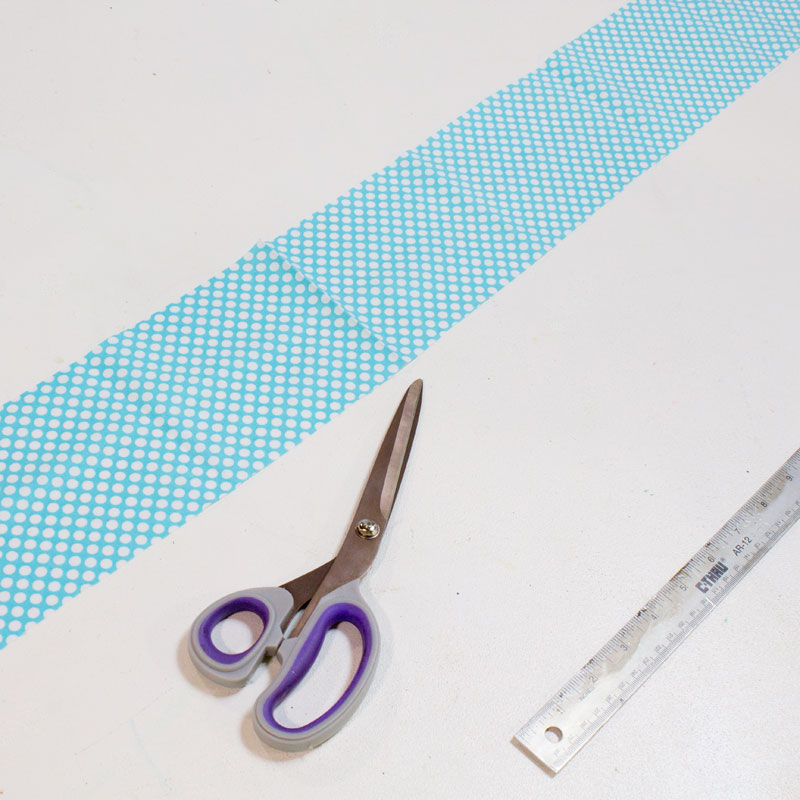
Working with one color at a time, cut the fabric into strips 4.5" wide and 42" long.
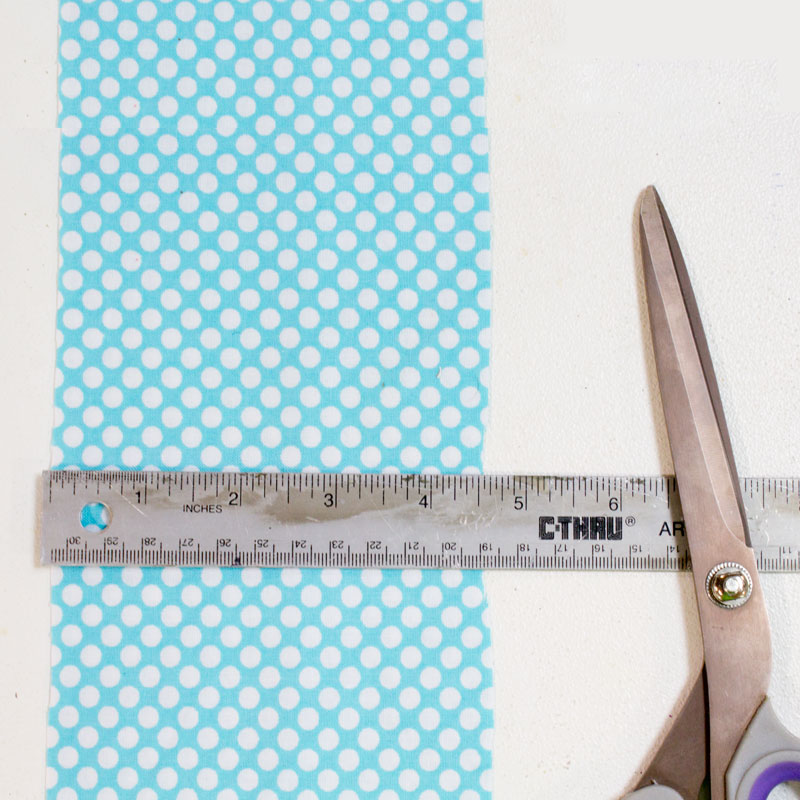
Most fabric is 42-44" wide on the bolt, so just use the full width from selvedge to selvedge.
Fold the fabric in half lengthwise, with right sides touching.
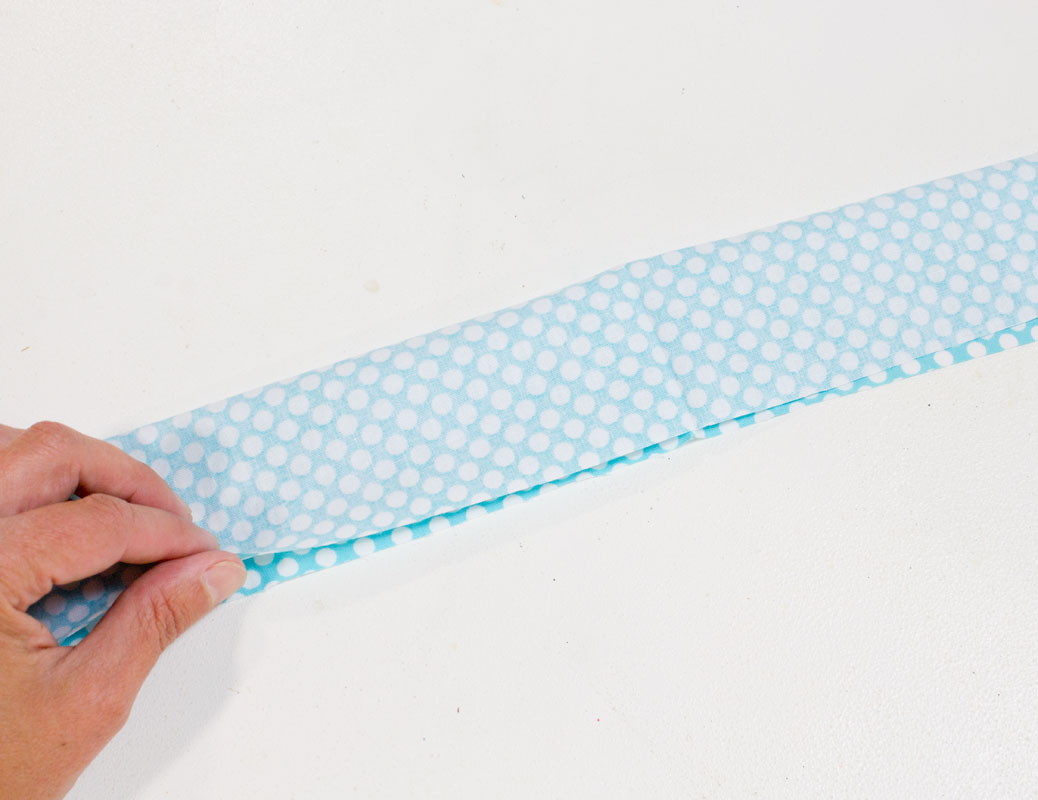
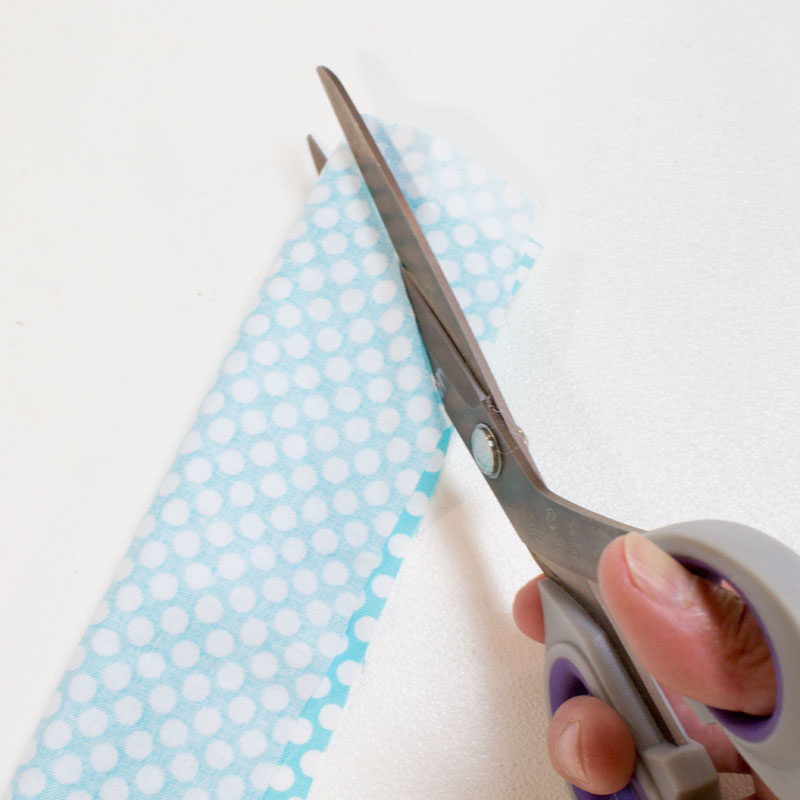
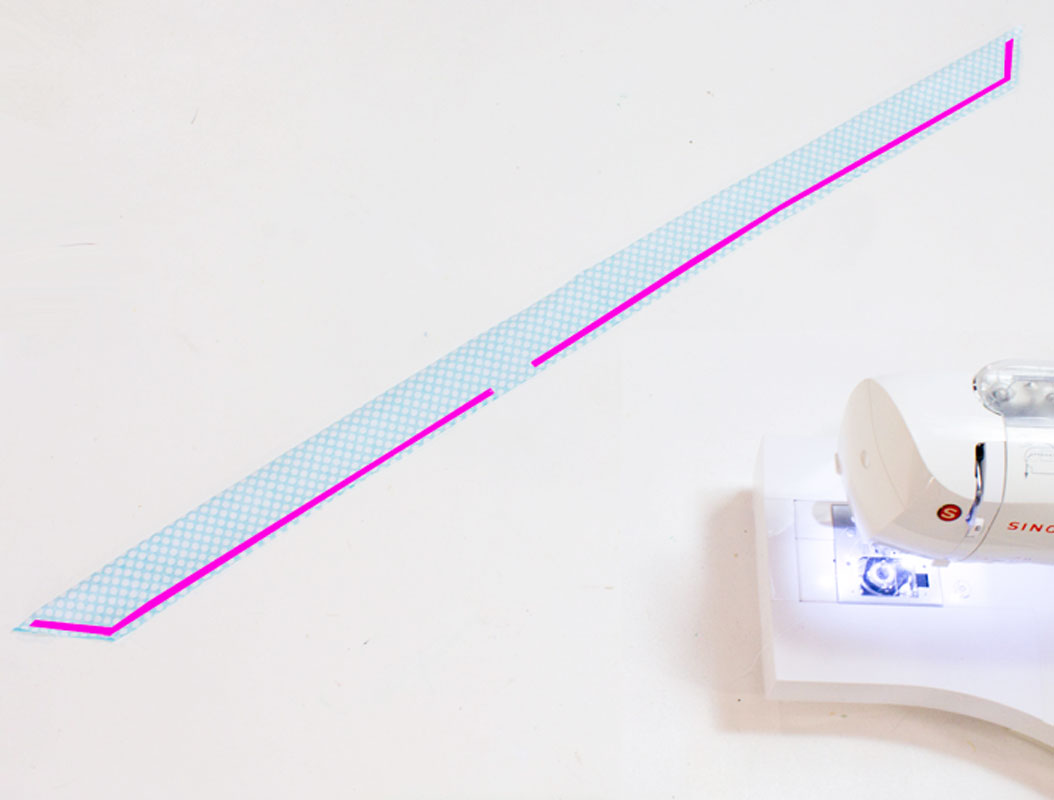
Then use scissors to cut each end at an angle. This will make nice pointed ends on the finished neck wrap.
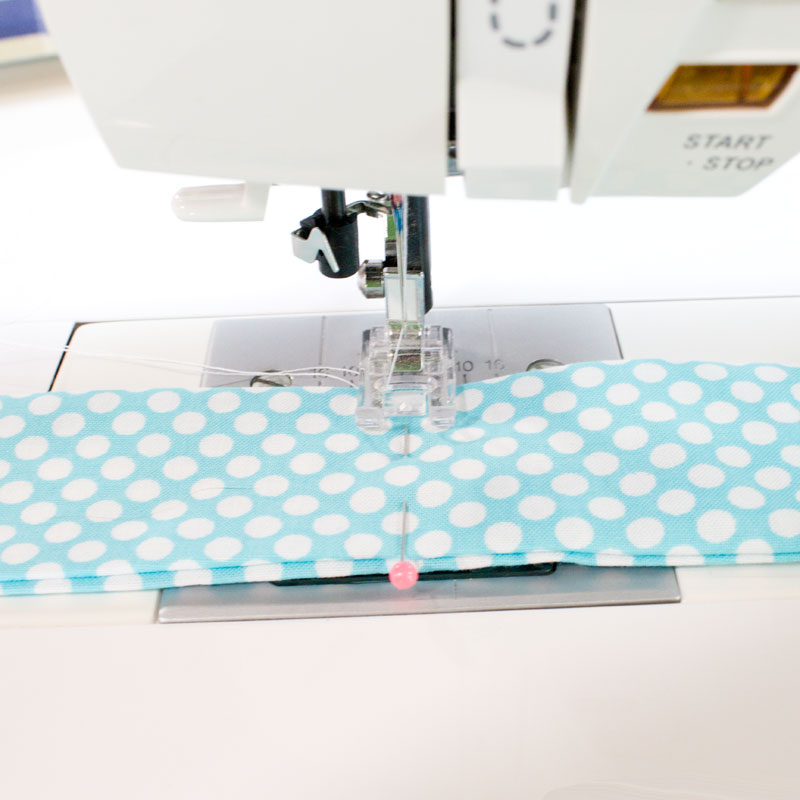
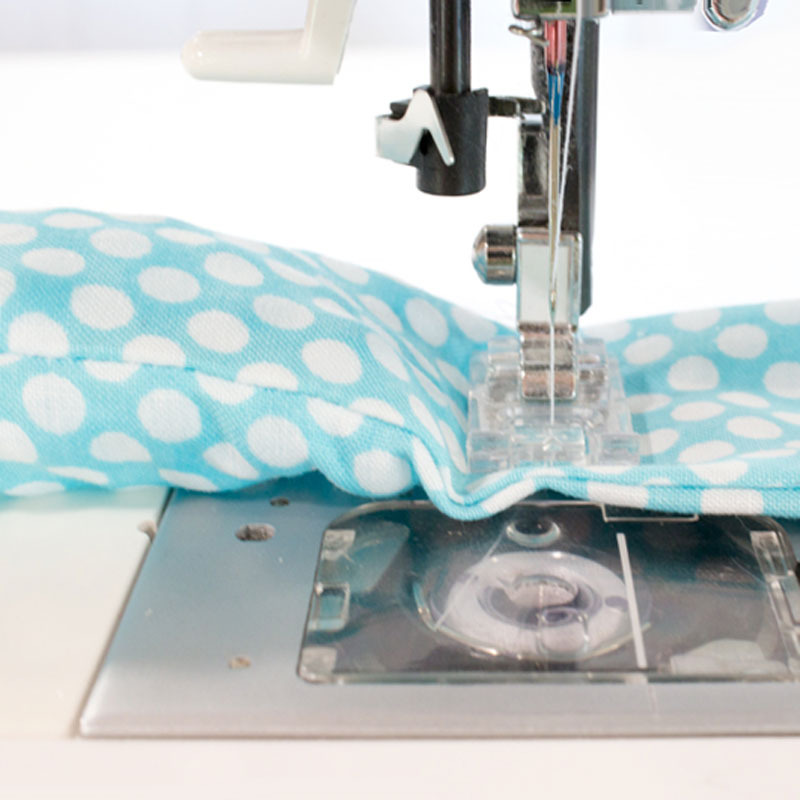
Now sew all along the ends and the open edge, except leave a 2" opening somewhere near the middle.
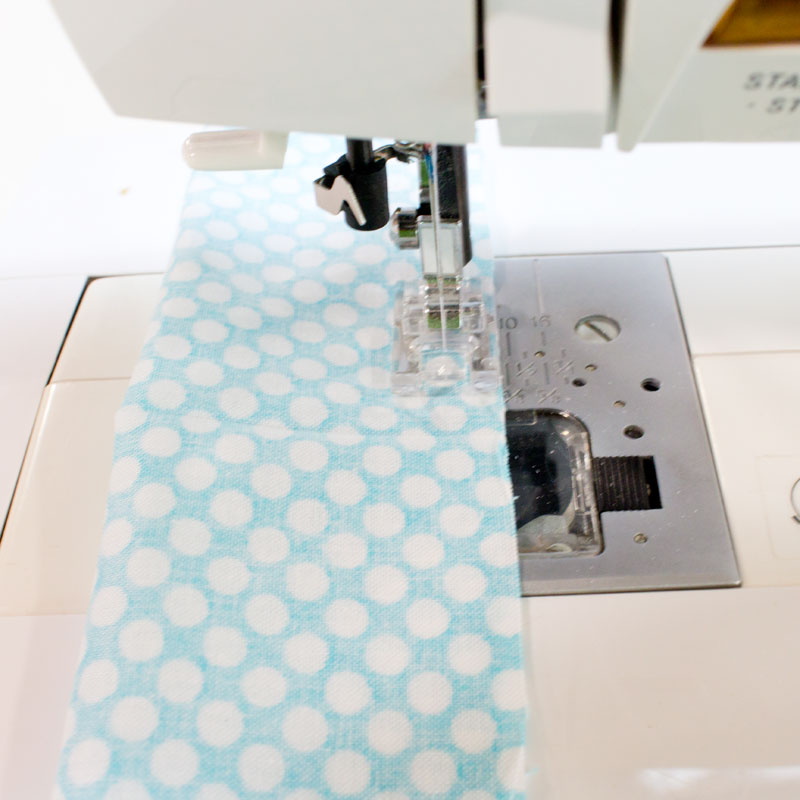

Here's a diagram with pink lines showing you where to sew. Don't forget to leave that opening!
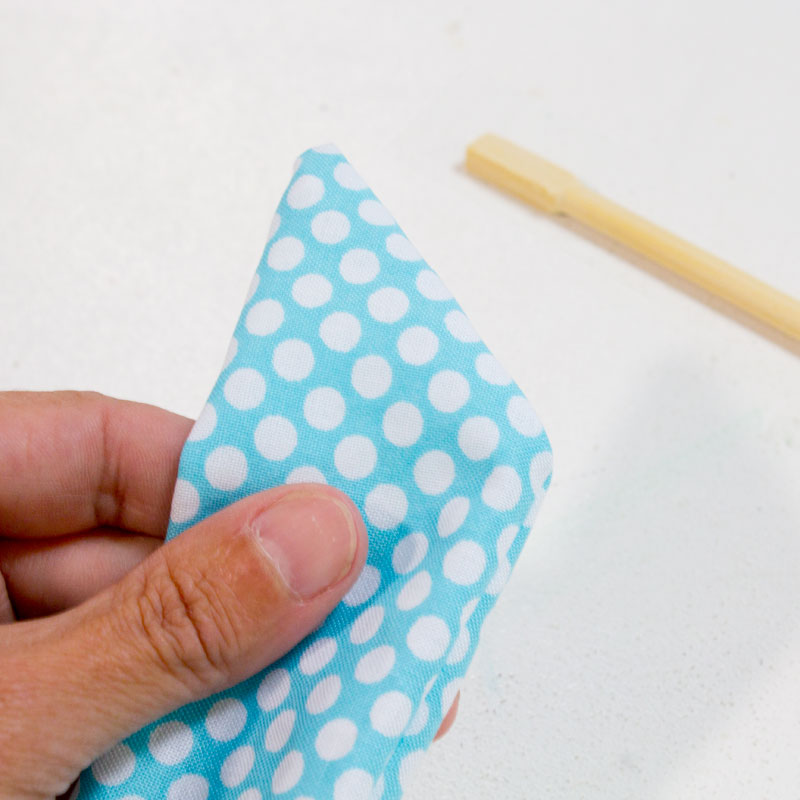
Now turn the fabric tube inside out (good thing you left that opening!) and use a chopstick or pencil to push out the corners to crisp points.
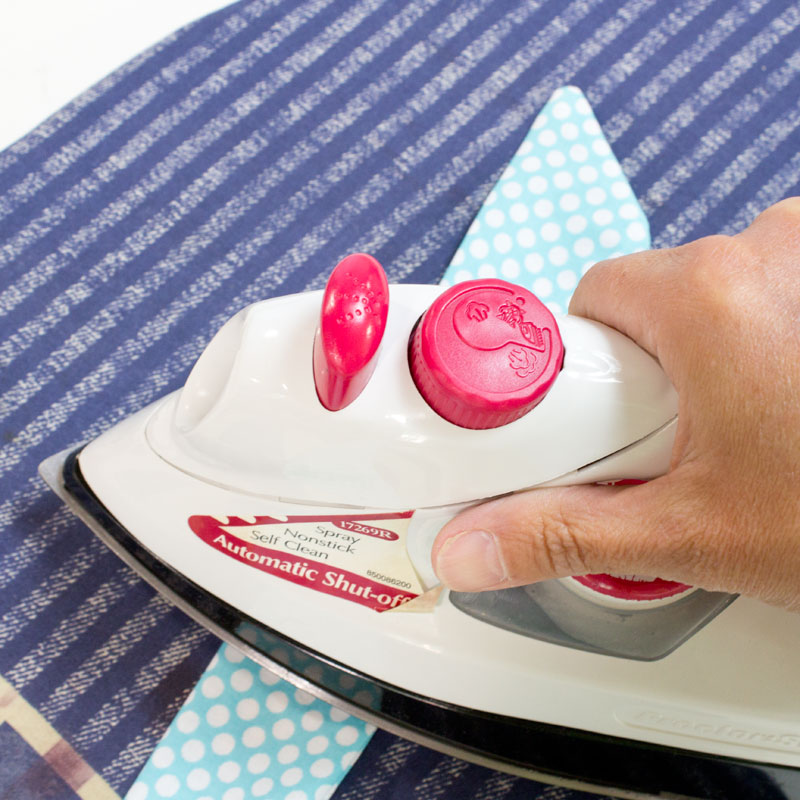
Now as much as I hate to ever recommend ironing, this is a good time to grab the iron and press the fabric flat. This will help a lot when it comes time to fill and sew, so it's worth the effort.
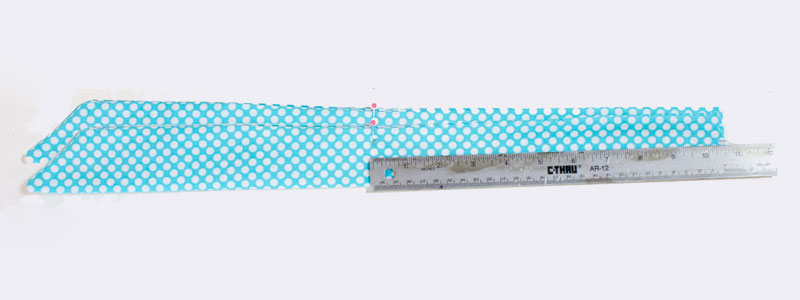
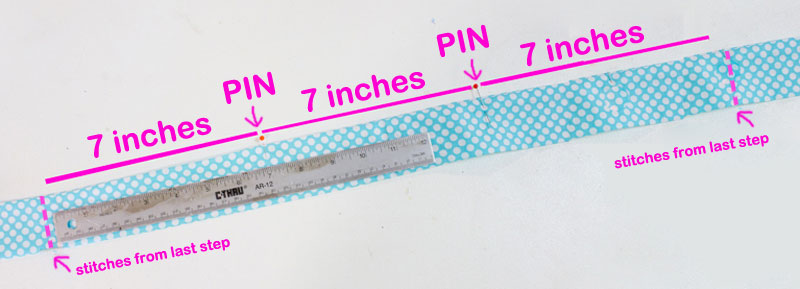
Now fold the fabric in half crosswise, and measure 10.5" from the fold. Put a pin in both halves. This measurement ensures that we have 21" of cooling area on the scarf that will go around your neck, which is plenty for an adult. If you are making these for kids, you might want to reduce this measurement.
Sew the tube shut at each of the two pinned spots. This will keep the beads from falling down into the ties at the end of the wrap.
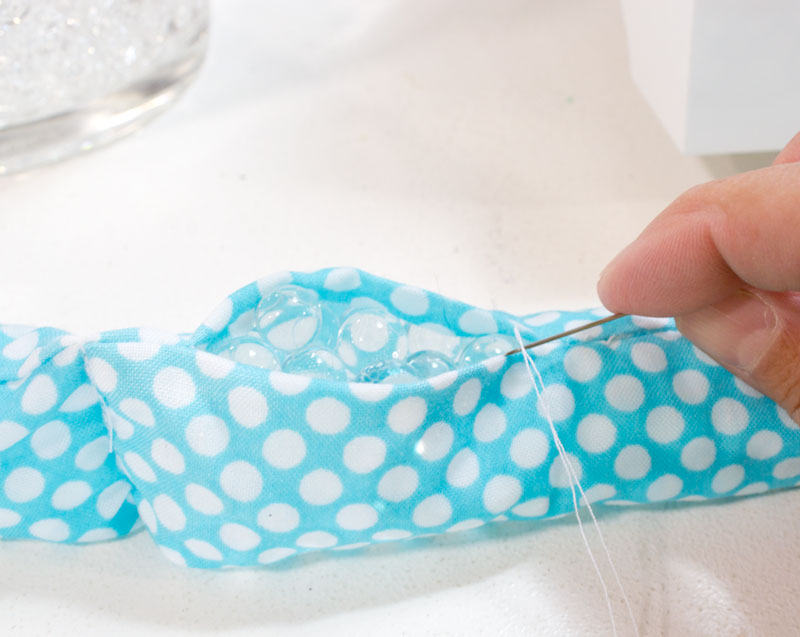
Now you have a 21" long tube between your two rows of stitches, but we want to break that up into three different compartments. Measure three 7" widths and mark them with pins or tape. Do not put the pins all the way through, and do NOT sew them up — you need to put the beads in first!
How many beads should you use?
Before you start filing the tube with your water-absorbing beads, let's talk about quantity. Lots of folks will tell you to only use a tiny bit, or else they will expand so much that they overfill the tube and burst. But how do you know how much is too much?
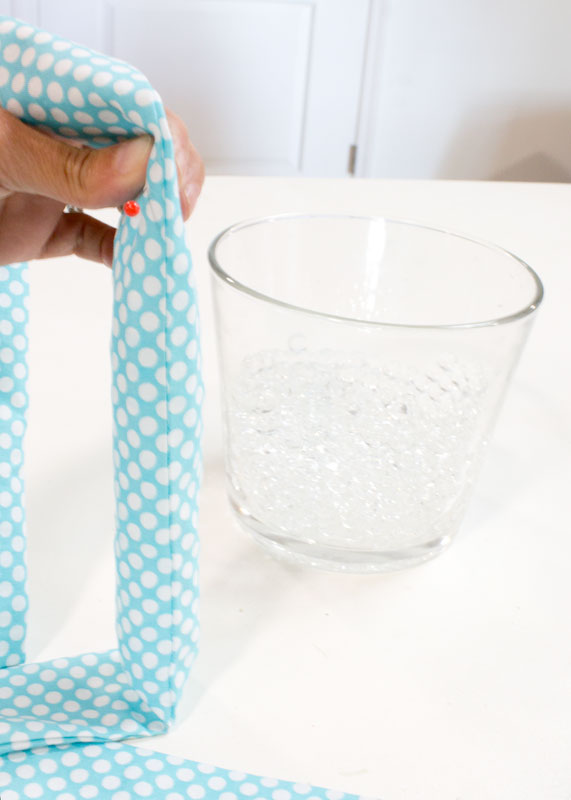
Easy! Just pre-soak your beads for several hours so they are at their maximum size. Then fill the tube with fully soaked beads. That way, you KNOW it will fit perfectly. Just slip the beads into the opening and let them fall down to the end.
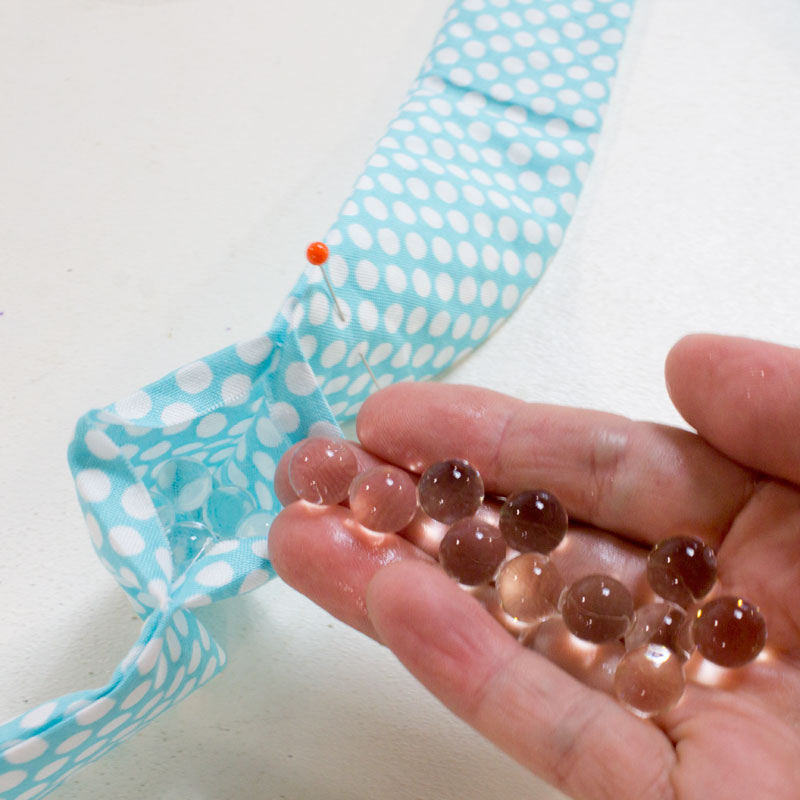
Keep adding beads until the compartment is filled up to the first pin, which marks one third of the tube.
Then sew that spot, fully enclosing that one-third compartment full of beads.
Do the same for the compartment on the other end, then again for the one in the middle. When all three compartments are full, use a slip stitch to sew up the opening.
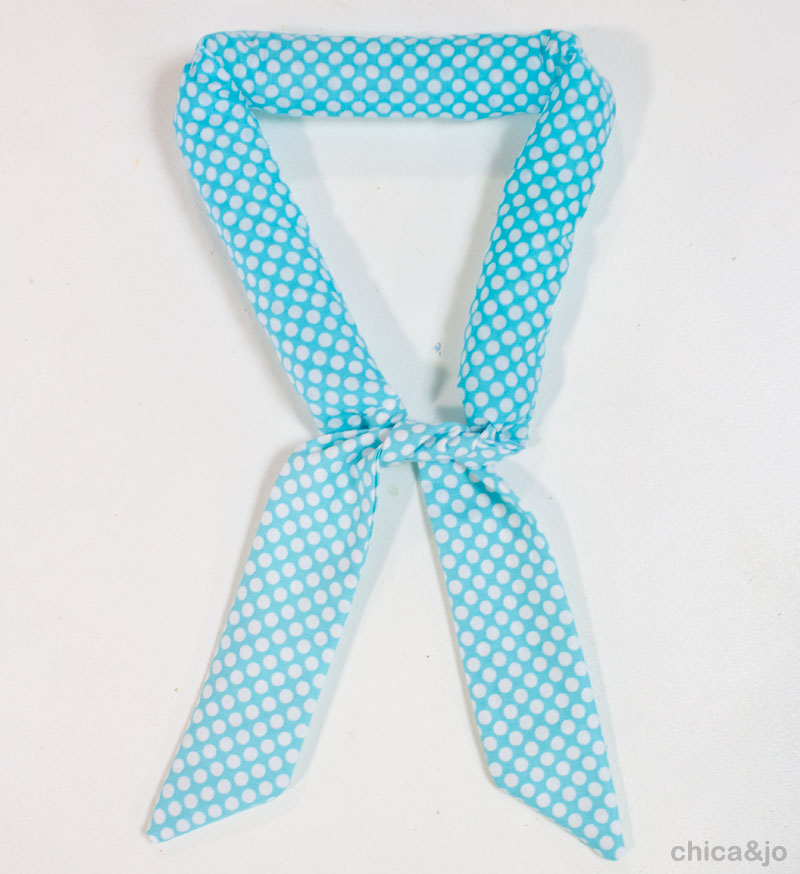
Your cooling neck wrap is all done and ready to use! The three compartments will keep the beads distributed, rather than gathering up on one side, and the ties at the end make it easy to secure around your neck.
Frequently Asked Questions
Where do I get these beads?
There are lots of available options online for round water gel beads. Choose some that grow to a size in the 10-12mm range if possible. And you don't need to buy a large package, as a little goes a very long way!
How does this keep me cool?
This cooling wrap will keep your neck cool for several hours as the beads slowly release water. When your skin is damp, it helps keep you cool.
Can it be reused?
Eventually the beads will dry out, but you can easily re-activate it by soaking the entire thing in water again for a couple hours.
How do I dry it out?
If you want to dry it out for storage, just leave it in the sun. The beads will shrivel up to almost nothing, allowing you to store the wrap flat until the next time you need it.
How do I clean it?
If you want to clean your wrap, just swish it around in some soapy water and rinse well. Do not put in the washing machine. Do not allow it to sit in soapy water for too long, or the beads might absorb the soap.
Can I change the size for kids?
The measurements in this tutorial are geared for a one-size-fits-all wrap, but you can easily adapt it to be larger or smaller if needed. Just measure around the neck and determine the size you want, and adjust from there.
Can I eliminate the ties?
If you're an outdoor worker who cares more about comfort than fashion, or if the decorative ties just don't suit you, you can easily shorten them or remove them completely and use a sew-on snap instead.
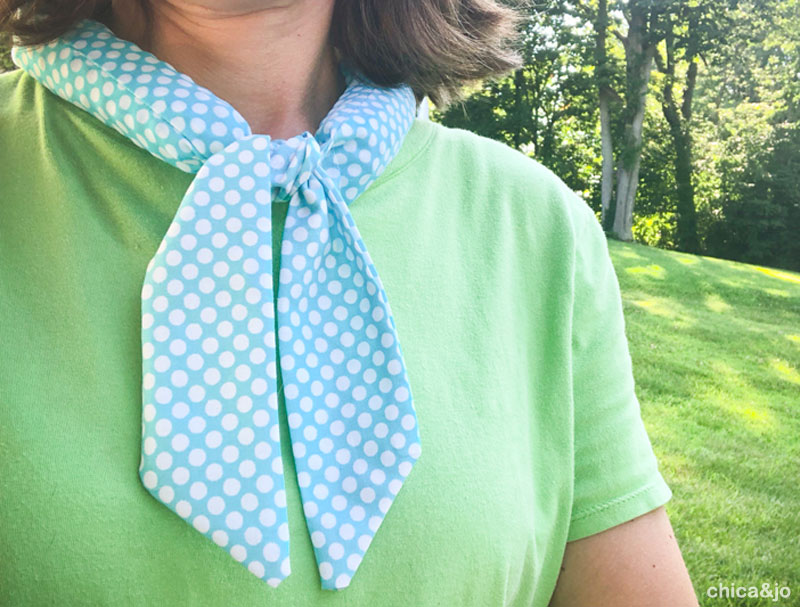
What a fun and colorful way to keep cool!
similar projects
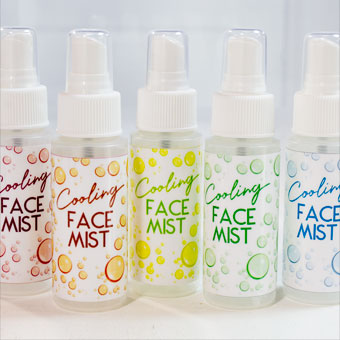
DIY Cooling Face Mist Spray Bottles with Printable Labels
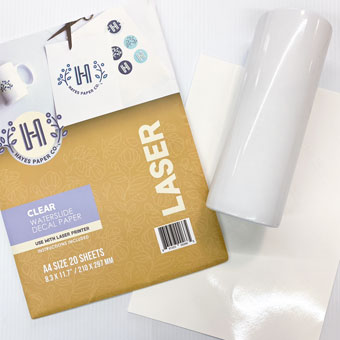
How to Use Laser Waterslide Decals for Tumbler Wraps
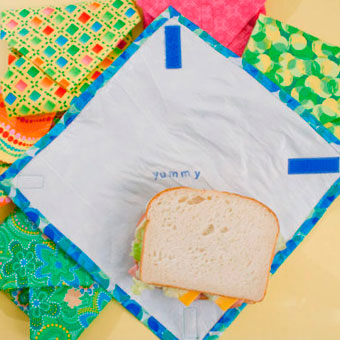
Fused Plastic Sandwich Wraps


81 comments so far:
Girls, beautifully done tute! Love the bright colours and extra tip about adding already swollen beads so as not to court a splitting disaster. I live in Tasmania, at the bottom of the world, but it is getting hotter here each year and these coolers are the answer. Thank you.
Jill, thank you! We have never talked to anyone from Tasmania before. How fun!
What size bag of the beads would I need? How far will a one pound bag go? Love you tutorial.
Donnell, these beads go REALLY far -- one teaspoon dry will turn into 3-4 cups once soaked! I can't even imagine how much one pound would create! You can just get a very small bag.
Thank you, excited to make with my granddaughter. They will be gifts for her to give out For her family.
do you know how they could be cleaned i was thinking about making some for a man who does construction but i know they are going to get sweaty and smell more then likely. thanks
Debbie, to clean the ties, I first recommend you let them dry out in the sun, so the beads are tiny and dried out. Then wash by hand in soapy water in the sink, working sort of quickly so that the beads don't absorb too much water or the soap as you go.
Once mine has been soaked in water and used, I rinse it off put it in a freezer bag and return to the refrigerator. It’s ready the next time I need it. So far it’s lasted 6 months and still going strong.
Susan, that's a great tip. The plastic bag should keep it from drying out, and ready to go!
What is the name of these water absorbing beads and where can I buy them? Love this idea, seems to me I had one years ago but it has long since disappeared thanks for the great tute!
Cindie, there are lots of different ones available, and they're often called water gel beads.
Yes I had one last year. I would like to know where to get those beads to make some for my husband and I
Gloria, here is a link to a variety of beads that would work well.
Nice tutorial! Thank you! How would I adjust the size of a neck cooler for a 5-7 year old child!
Patricia, your best bet is to measure your child's neck and aim for a length that will fit.
Can you tell me approximately how much of the crystals in teaspoon measurements that I need to soak to fill the three compartments so that I don't end up soaking too much?
Patricia, you might get different results with the exact crystals you use, but for mine, one teaspoon dry turned into about 3-4 cups when soaked. Don't worry about soaking too many... just let them dry out and use them another time. :)
Does the wrap get really drippy as it dries out, just concerned about how wet the girl's uniforms might get. Thanks
Theresa, the water comes out of the beads so slowly that it just keeps the fabric wet and cool, but it should not ever get drippy.
These are so perfect for what we are looking for. I am making a bunch of these to donate to our school playground aids. Out here in Southern California where it feels like the desert they need something to help them out while out on that blacktop. They deserve it too. So what I am wondering is, how long do these beads hold up with daily use and stay good? Does mold ever become a problem? Do they completely dissolve after time? I'd like to see these last them at least through the school year. Is that a possibility?
Tiffany, sounds like a great gift for your playground aids, and they will surely enjoy some relief from the heat. The beads can absorb water and dry out repeatedly, and do not dissolve or disappear. It is possible to break them into pieces when they are fully absorbed, but you would have to really try hard to do it on purpose... they are quite resilient and I see no reason why they would not hold up well over a year or beyond. I have not seen mold be an issue, but that's really entirely up to how you treat them. If you ever want to really dry them out well, just put them in a sunny windowsill or out on the hot concrete.
Finished 30 wraps for our cheerleaders and they loved them. Thanks for your pattern and advice.
I have some already made and those have lasted a few years . I was looking for these to make for next year's Relay for Life event as each booth has to have some item for a fundraiser . Thank you for the tutorial.
I scoured the internet and finally found you! My son is a plumber and battling / melting in roofs under our African sun! Thank you!
Curious.... Why do you make 3 compartments and not 1 big one?
Rebecca, I made three compartments so that the beads would stay evenly distributed, and not bunch up all in one area. If it were just one compartment, then as the beads dry and shrink, they would all fall to the ends and there would be none on the back of your neck.
I was able to make one in about 20 mins. I forgot to leave a hole to add beads. So far my family has said its great. I will be trying it a work tomorrow.
Made some for me and my friends training to do a marathon in the HOT Utah heat! These will sure be helpful!
Hi, I'm wondering how best to store a neck cooler once it is fall/winter. Won't it get moldy if moist and stored in refrigerator in plastic bag? Not sure what to do...thank you! susan
Susan, the best way to store this long-term is to dry the beads out completely first. Then you can store them in a drawer or box, no need to refrigerate.
Thanks so much for the clear instructions. Made several last Summer and they worked great. I just finished making 8 for friends out of the same fabric I used to make masks for them. Now they each have coolers that match their face masks!
Lois, that's a lovely idea! We're glad you've enjoyed this project.
Hi! Thank you so much for the super detailed walkthrough. I was wondering what type of fabric composition should be used. Cotton? Polyester? I'm hoping to make these in bulk and give them out to those experiencing homelessness and stuck without an indoor shelter for the hot summers. I just want to make sure they last a while.
Janie, you could probably use just about any fabric, but I would recommend something thin and lightweight. The colorful array of quilting fabrics you'll see lining the walls of most fabric stores would be a great affordable option.
I'm so excited to make these for my nephew's preschool teachers, family fishermen, and my premenopausal self! Am curious if anyone has altered the ties to have a shorter closure without ties hanging down, maybe a snap or velcro? Thanks!
Natalie, we haven't seen anyone alter the ties, but we love your idea. If you try it out, let us know @chicaandjo
I’m a bit confused as to why when fabric is folded in and sewn and all the way except 2 inches for beads but then you have measured 7 inches for 3 pockets and other have already sewn up. Have I missed a step? Otherwise l have use seam ripper to make opening the other 2 pockets?
Diane, the first two long pockets that you sew up (one at each end) are for the ties, and no beads will go down into those two. With the remaining 21" of long open pocket, divide that into three 7" sections. Fill one of those sections, then sew it shut. Repeat for the other two. Hope that helps!
Oh thank you very much for getting back to me. Now that look back at the photos l see where it says 21 inches, but l got ahead of myself. Now I understand.
Diane, I'm glad we were able to work it out together!
My aunt made similar for my boys 20 years ago to take hiking. We still have them stored dry no mold. Still working
My question is probably dumb. I fully understand the directions for sewing these(thank you) but I don’t understand how to use them. Do you run them under water or soak them each time you use them? Or, do they stay damp and you just refrigerate them. I’ve read multiple blogs and no one ever goes there ????? That’s why I said my question must be dumb. I’m sure I’m missing something.
Lorraine, thank you for reaching out... I'm happy to give more detail on how to use the wraps. You will need to soak the entire wrap in water for a few hours before you plan to wear it. This will allow the beads to absorb water and grow to their full size. You can refrigerate them if you like, but really just having them wet will keep you plenty cool. When you're ready to wear them, just take them out of the water and gently wring out any excess water from the fabric, then tie on your neck. Over a few hours, the water will slowly release from the beads, thus cooling your neck. Eventually they will dry out and shrivel back down to nothing, in which case you can just soak them again to reuse them. If you plan to store them (for example, over the winter) I suggest first letting them fully dry in the sun so the beads shrink down all the way.
What a great tutorial- I have been looking for something like this so I can make for my husband. He uses these type of bands to wrap around his forehead to absorb the sweat when he out working in 100 degree weather. Keeps sweat out of his eyes. Thanks again! Teri
Hi from Hamilton, New Zealand. I am so excited to find out what my refreshing neck band from Cambodia is made up of. My daughter bought it a number of years ago as a gift. THE BEST GIFT EVER! Marvelous for those menopausal days! But wonderful for hot/humidity stuffy days. My friends were envious of my neck cooler so now I have your 'how to do' I am going to surprise them. There is much more fun in making one yourself. I am sure I will have queries as I make these and will get back to you if necessary. In the meantime, I have purchased little 2mm and 4mm water beads packets from a florist. Yes ... I have promised I will give her one to try out and the lady at the Spotlight fabric shop and my daughters and my neighbours and friends and ........ Thanks so much for your simple instructive site. Brilliant!!
Leonie, we're happy to see you're so excited about this project! Tag us @chicaandjo on social if you'd like to share your results!
I've seen multiple tutorials but this is the first to suggest soaking the beads before inserting in the tube so you know for sure how much to use. That way it will fit perfectly. Thank you Chica and Jo! Great tutorial.
How can I make this cooling wrap with snaps instead of a tie?
Andrea, you can just make your band of fabric shorter and sew snaps on by hand.
How much shorter should I make the length? How many yards of fabric do I need to make one?
Anndrea, you can make the length whatever you like to fit your neck and to your comfort level. I recommend experimenting with a scrap of fabric or a measuring tape to determine what size you would like your wrap to be. As for the amount of fabric, my recommendation in the tutorial is to cut the strip of fabric 4.5" wide. That's 1/8 of a yard.
Can I use a fat quarter piece of fabric to make one cooling neck wrap? The fabric fat quarter measures 18 Length x 22 Width?
Anndrea, 22" won't be long enough unless you sew two strips together.
Thank you for the detailed instructions, tips and bead link. I'm going to try it. I may also try the snap idea, so I appreciate the comment section also.
Susanne, we're happy to hear it! Good luck with your wraps, and if you share on social media, don't forget to tag @chicaandjo so we can see your work.
I may try a few of these with dry beads, but I did find that cutting the bottom off of a water bottle and using it as a funnel helped tremendously in filling the pouches with the wet beads. Can't wait to try them at a concert this weekend with 100+ temps predicted.
mtn_mama, your DIY funnel is a great idea. Thanks for sharing!
Thank you so much for the comprehensive directions on sewing coolies ladies. Your directions are clear and easy to follow; the photos take away any guess work. I just ordered my beads - they arrive in two days, during which I'll be madly sewing the neck casing in preparation.
I am so very glad I found your post.
Thanks again.
Tian, thank YOU so much for the kind words! We strive to make our projects doable and approachable, and it sounds like we hit the nail on the head with this one. Best of luck with your wraps. If you share them on social, be sure to tag @chicaandjo so we can see!
Hi my question is: If l don't want to soak water beads then leave them dry to make neck wraps how do l figure how much to put in each pocket and sew up? I'm mailing them to my daughter in Grand Prairie
Diane, that's a question I can't answer, because each type of bead might grow to different sizes, and each wrap might be sewn slightly differently, so it's very difficult to know how many will fit. That's why we suggest soaking them first. If you want to mail them after they are done, just let them dry out again fully (place in the sun or on warm concrete) and they'll be flat enough to mail easily.
This is the best tutorial I have seen for these cooling wraps! I will be making them with my 14 year old Grandson and his friends to wear on our church's pioneer trek this summer. It's going to be hot, and these will keep them cool! Thank you for the step by step and pictures, as I am a visual learner.
Pam, we're so happy we could help with this tutorial! Hope your grandson and his friends keep cool on their trek :)
Exceptional, thanks for your posting. My husband is a contractor and wears the cooling bead scarf every day it’s hot up on ladders. We use a large yogurt container and soak the beads overnight in the fridge. No freezing, wrecks them. You are truly both a blessing and we will make more and take them to the winery field workers in our area once completed. Thanks again!
I suggest making a test wrap, using hand-stitching to separate the three pockets (but not the end seams which keep the beads out of the tie-ends. Fill all the pockets with expanded beads, and then make the final stitching on the middle pocket.
Then, open each pocket up, pour the beads out and let them fully dry. Measure the amount of dry beads from each pocket, and that would be the amount of dry beads to use for each pocket.
Then make a few test neck wraps and test them to see if the pockets are too full when they are fully hydrated. You might have to decrease a bit the amount of beads if the seams are stretched too tight.
James, that's a clever approach, but please remember that those dehydrated beads are SO TINY that mis-measuring them by even 2 or 3 beads can result in too much or not enough when they are hydrated and full-size. I know it's messy to work with them wet, but it really is a more foolproof option.
My Girl Scouts will be making 100 of these for their Silver Award. Do you know how much fabric they will need?
Luanne, each wrap uses one piece of fabric cut 4.5" wide and 42" long. Assuming your fabric on the bolt is at least 45" wide (most are), you can do the match and figure out how many 4.5" strips you can get per yard and work from there. It would actually be a good math exercise for them to figure out together!
I am making a few for some flea markets that I vend at. The 10.5 measurement, is that from the point or the shorter end of the point.
Jan, the 10.5" measurement is from the fold, not the point. Take a closer look at the photo above that includes the ruler. Also not that you can make this measurement any size you like if you want to accommodate larger or smaller necks (like for kids)
Got it. I tend to read and only glance at the pictures. Thanks.
Hi,I’m a little confused on this because when I read the info on the beads it says do not get them in the sun. Doesn’t this defeat the purpose of wearing these outside or at theme parks?
Joyce, The water beads will dry out eventually, and that is sped up by warmth, which the sun certainly helps with. If you leave the wrap sitting out in the sun, it will dry out faster than normal, but you will be fine wearing them for an afternoon or a day outdoors :)
Thanks for the great tutorial. And, for all of the helpful comments - I think I actually learned more from those than the lesson! Would knowing that three to four cups of fully expanded beads fills the scarf, is it worth trying the measuring cup method you've recommended and then letting that quantity dry to avoid that wet fabric vs. dry machine issue?
Terri, we love the helpful feedback we get from everyone's comments! Your idea to fill then let the beads dry out would certainly work if you've got plenty of time to wait in between each step :) Those beads may take a day or more to shrink down.
So you have to plan ahead if you are going to use this and be soaking it ahead of time? Doesn't soaking the whole thing leave the fabric and the ties dripping wet?
Nelda, you will need to soak the wrap for a couple of hours before use to be sure the beads have absorbed enough water to keep you cool for a long time. The fabric should not be dripping for long, but it staying wet is the goal, and it's what will keep you cool :)
Will wearing these cause your shirt to be all wet? Will we be walking around with wet collars or wet backs as the day progresses?
Ladyskill, these wraps won't be dripping wet, but they will be damp... this is what makes them effective at keeping you cool. It's the same concept as when you were a kid and your mom would put a damp washcloth on your forehead to help with a fever. :) If the wrap is touching your collar, your collar will also likely become damp, but your back should not.
Hi and thank you for the tutorial. All the links to beads from Amazon don't work for me do you have Brand name I can search for? TY in advance.
Jody, thanks so much for letting me know! I had updated some of the links earlier this week but I guess I missed some. I've just gone through and updated them all. You can find a selection of round water gel beads here (choose something in the 10-22mm range)