


Make a Bread Cornucopia for Thanksgiving

The cornucopia (or "horn o' plenty") is one of the most iconic images that comes to mind for Thanksgiving (second to the turkey, of course). It is a symbol of abundance and food, which makes it perfect for a gut-stuffing holiday like Thanksgiving! You can find cornucopia centerpieces just about anywhere, but this year I challenge you to join in the Chica family tradition and make your own out of bread dough. I admit this is not one of my easier projects, but the results are so awesome that it's worth it.
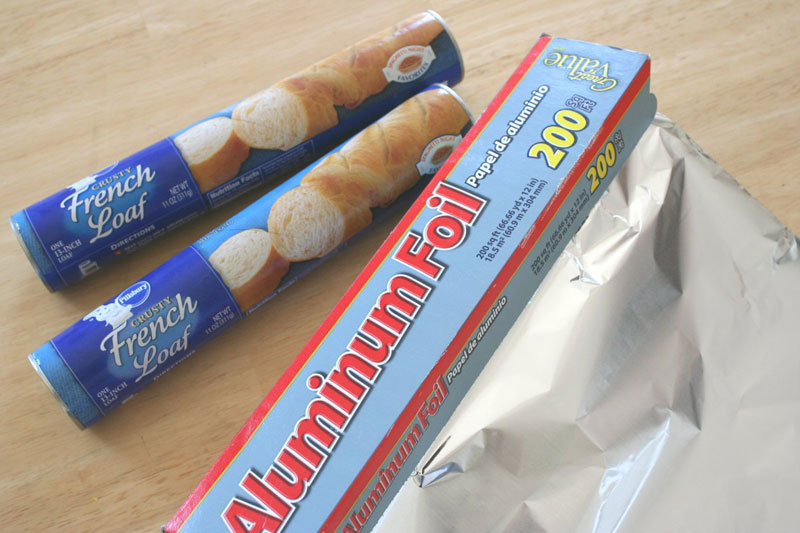
The main ingredient for this masterpiece is simple refrigerated bread dough. Get two (or maybe three) cans of "french loaf" dough, which you can find in the biscuit section at your grocery store. You'll also need a bunch of aluminum foil.
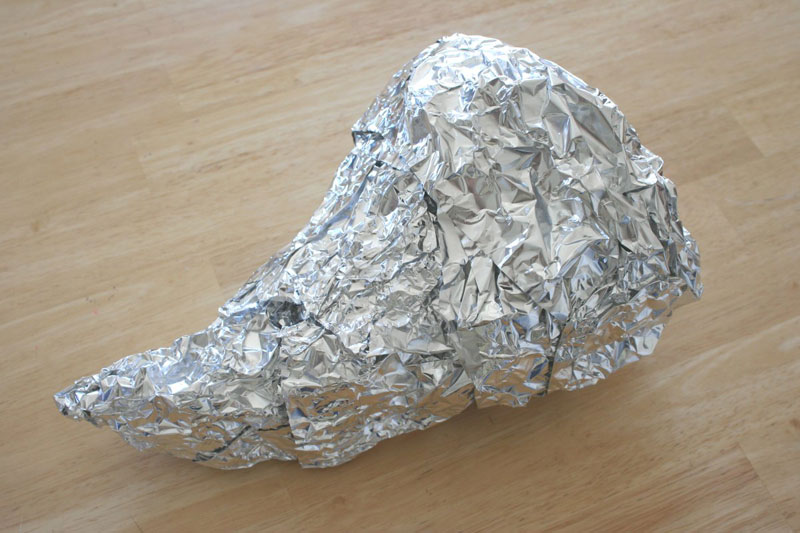
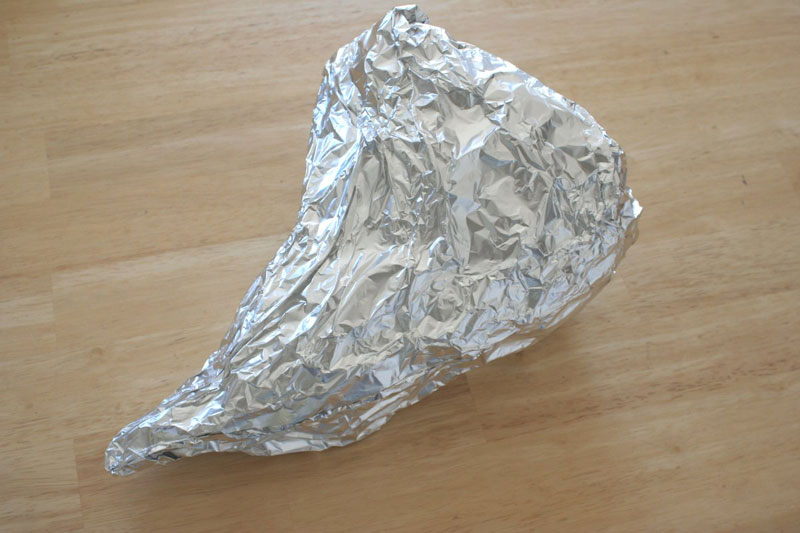
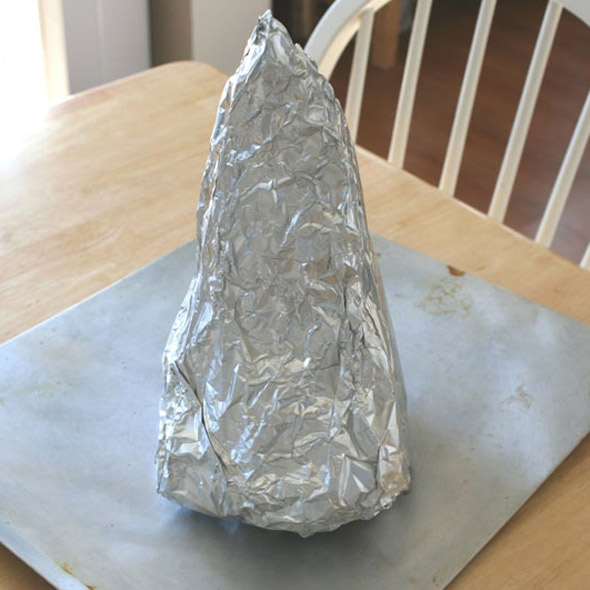
Start by crumpling the foil up until you get a nice cornucopia shape. It should curve a little and come to a point at one end, and be flat on the other.
When you've got the shape the way you want it, you want to make the surface as smooth as possible, so pull out three long sheets of foil, layer them together, and wrap them around the cone shape.
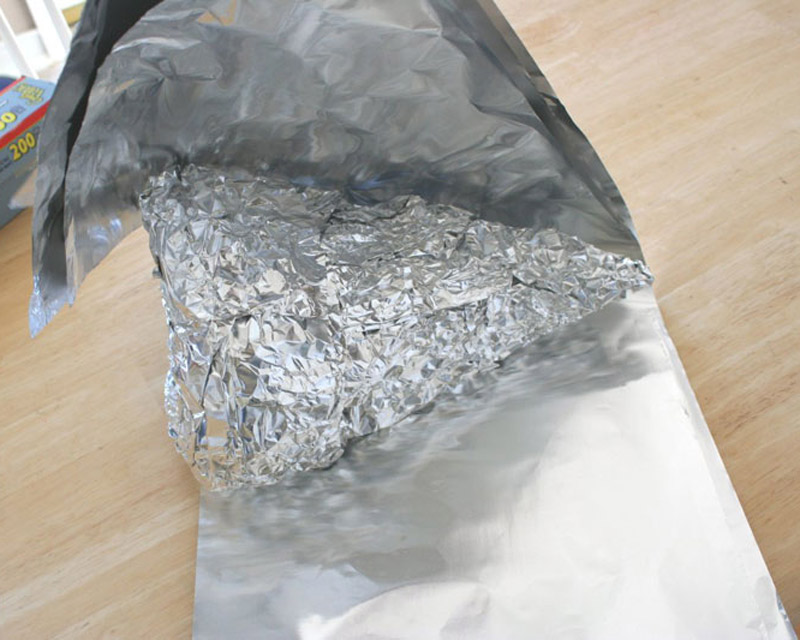
Smooth the foil around the shape to cover up all those wrinkled and jagged edges.
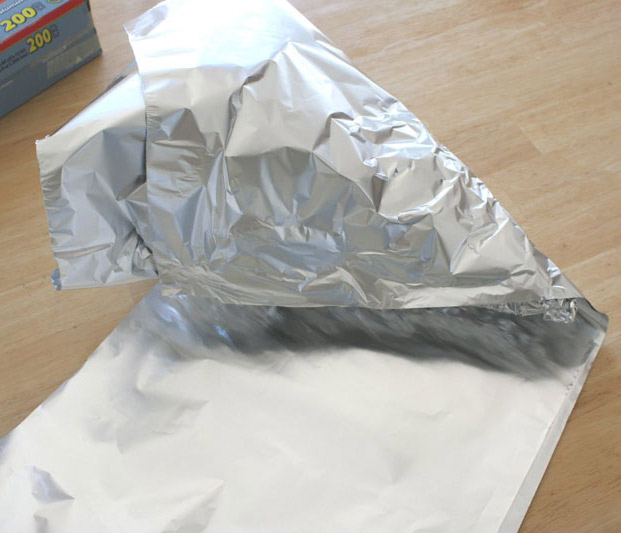
This smoother form will help later when removing the bread. Go ahead and squish it down a little bit so that the bottom of it is flat against the table. This will keep it steady and prevent it from rolling around on you as you work.
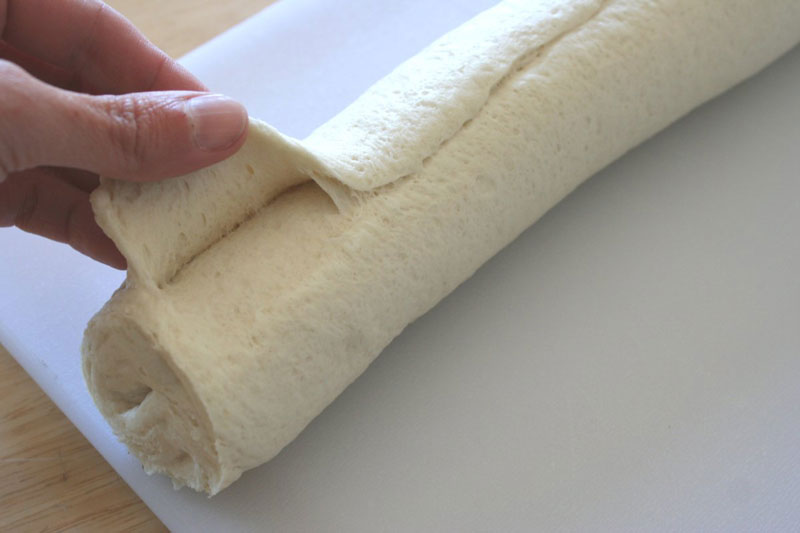
Now open a can of bread dough and plop it onto a large cutting board. Find the seam that will surely be there. Use your fingers to gently pull back at the seam, and begin to unroll the dough.
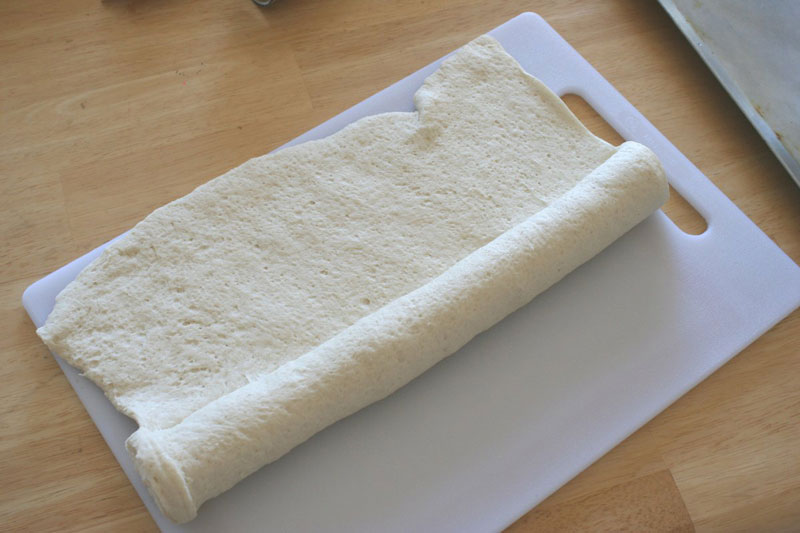
Unroll the dough all the way, and flatten it on your cutting board.
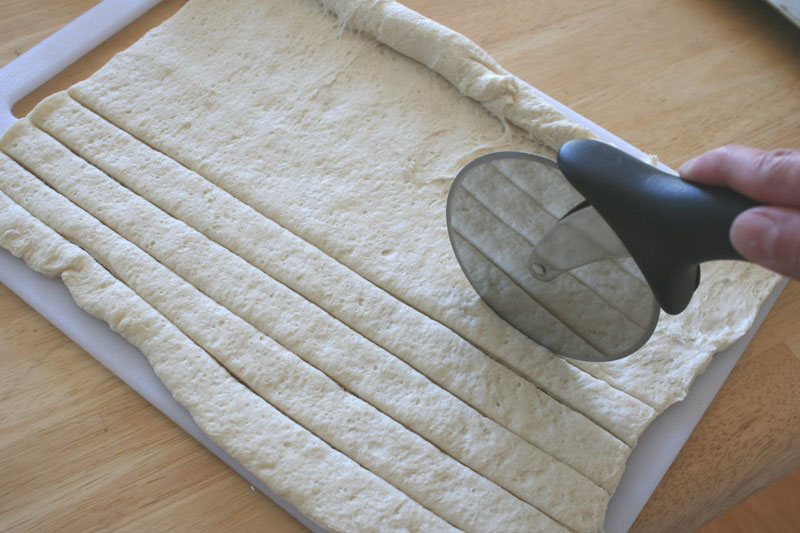
Use a sharp knife or a pizza wheel cutter to cut the dough into strips about 1 inch wide.
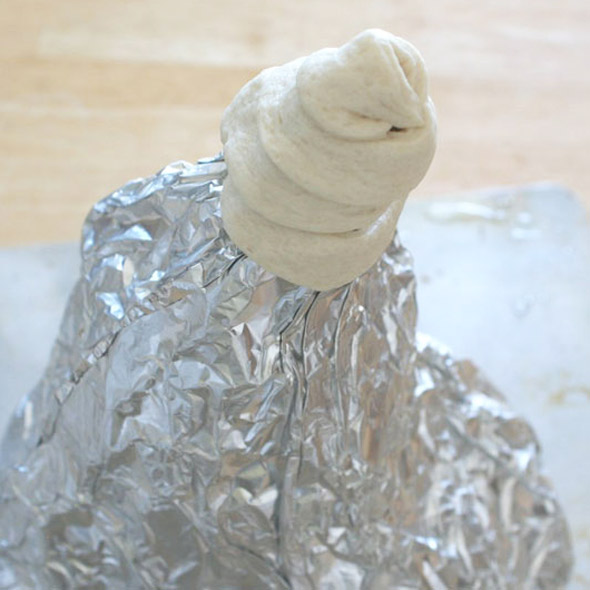
Now put your foil mold on a cookie sheet and stand it up on its fat end for a minute. Smear it with vegetable oil or spray it with cooking spray, which will help immensely with removal of the bread later.
Take a strip of bread and wrap it around the pointy end of the mold, to create a nice dough base to start from.
Take two more dough strips and attach them on either side, and overlap them in a V in the center. Then add two more, and cross them again.
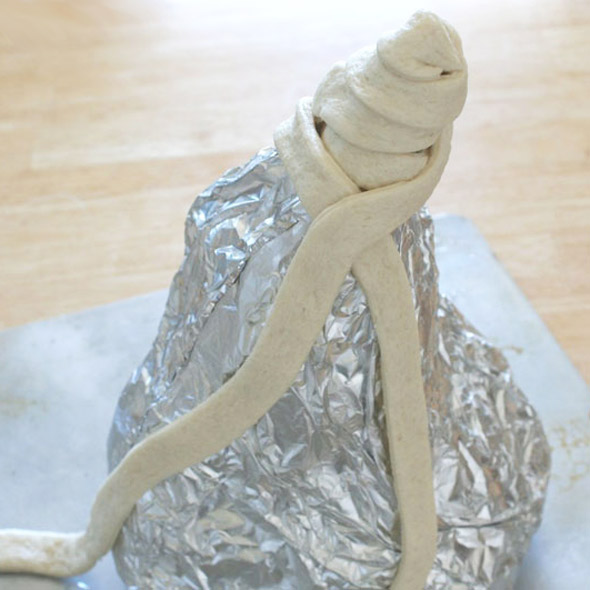
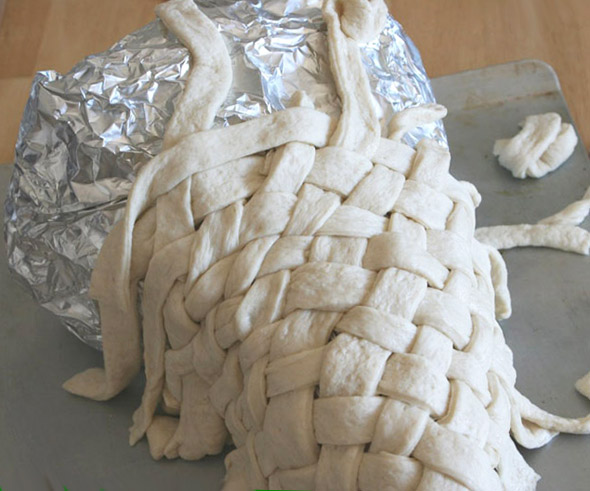
Then lay the mold down on its flat side, so that it is in its finished position, which will make it easier to work with. Carefully lift the strips you've added so far and weave the last two underneath. Add two more strips and continue with the weaving.
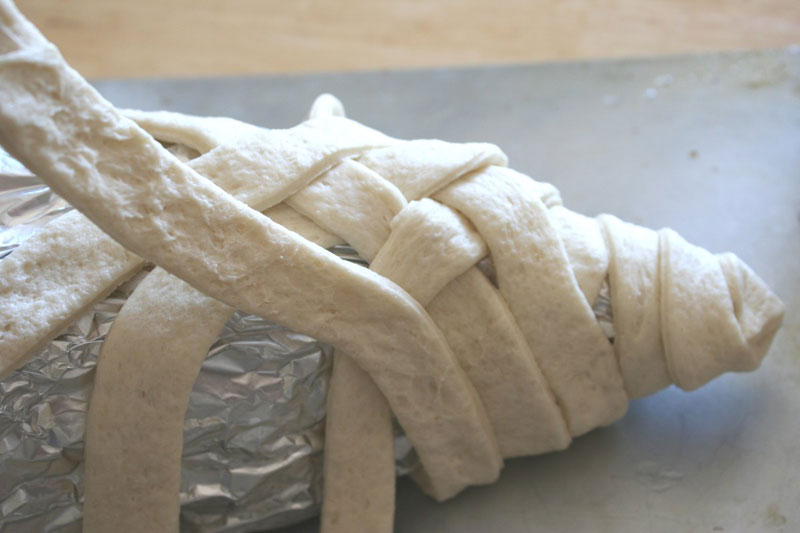
At this point things are going to get a little trickier, but keep on adding strips of dough, lifting and tucking them as needed to weave them among the other strips. If a strip tears, don't worry about it — just add another one.
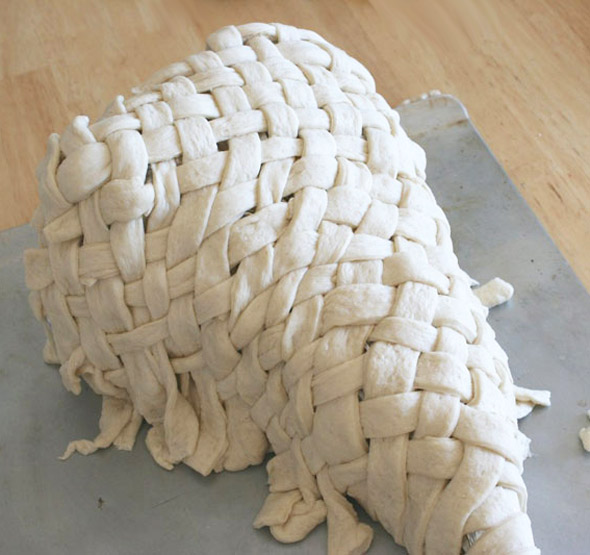
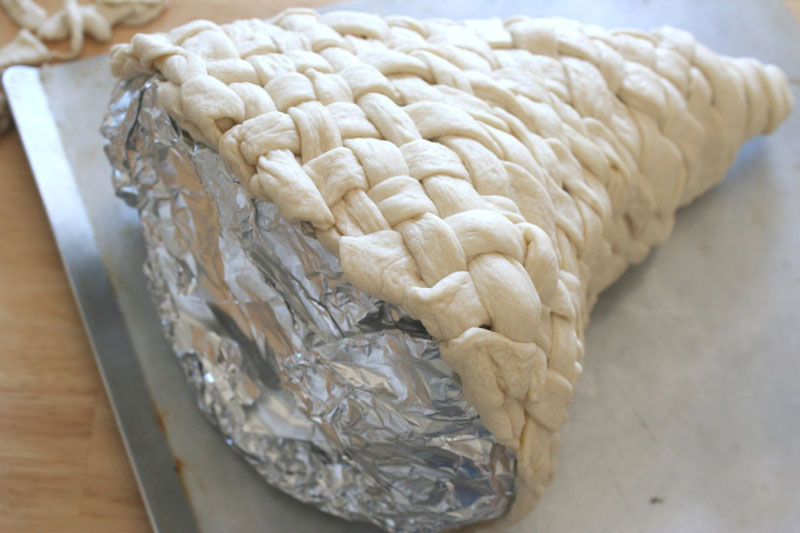
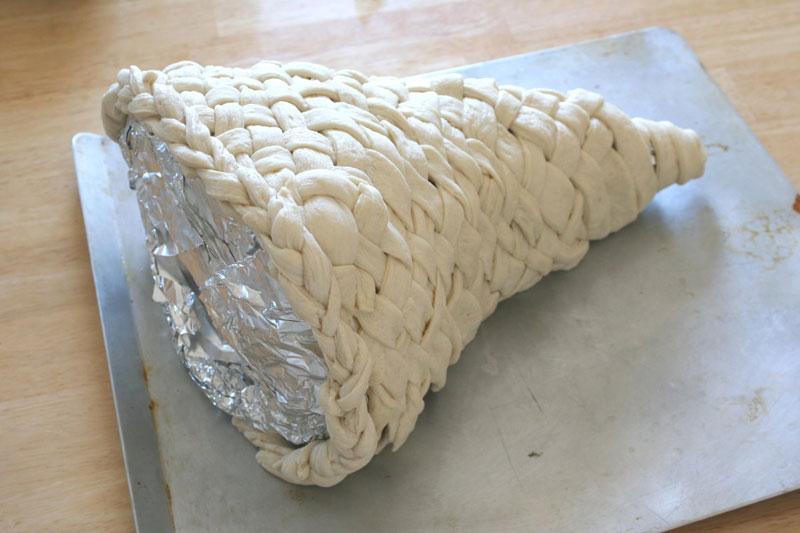
Try to keep them pretty close together, but remember that the dough will rise a little as it bakes, so small gaps will get filled automatically. Just be patient here and keep weaving until the top of the foil mold is completely covered in dough.
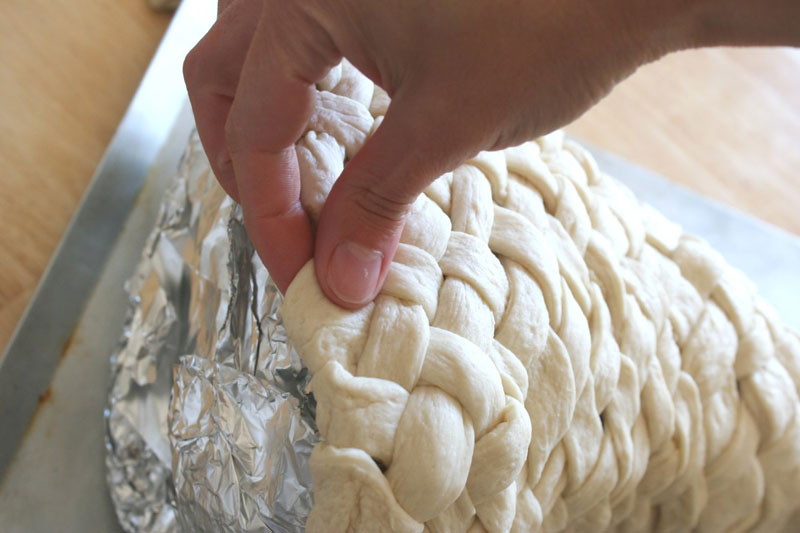
Now to take care of the dangling dough bits all around, use your hand to tuck them under the foil mold and out of sight.
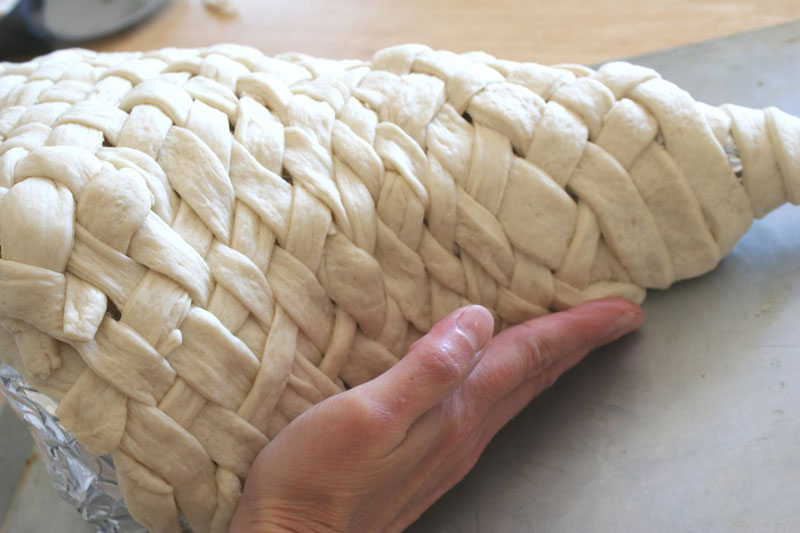
Your cornucopia doesn't need to have a full bottom (and you'd never get it off the mold if it did, anyway) but it should at least LOOK complete, and tucking the ends under will accomplish that.
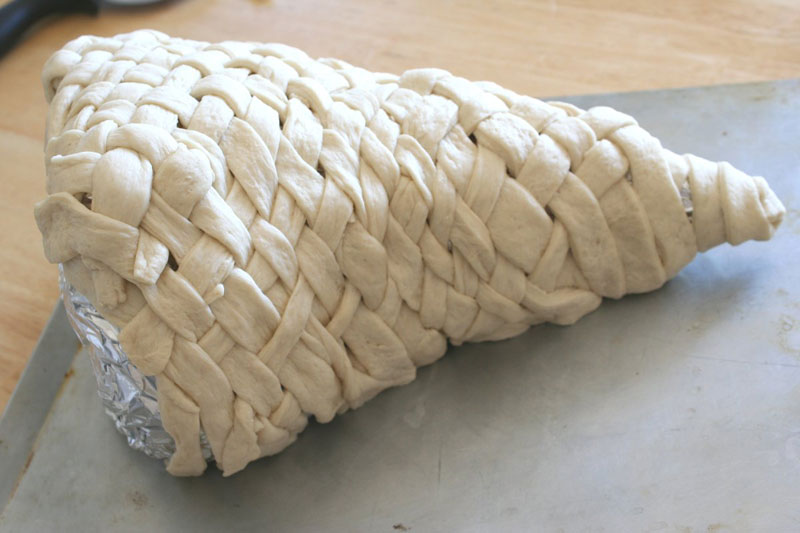
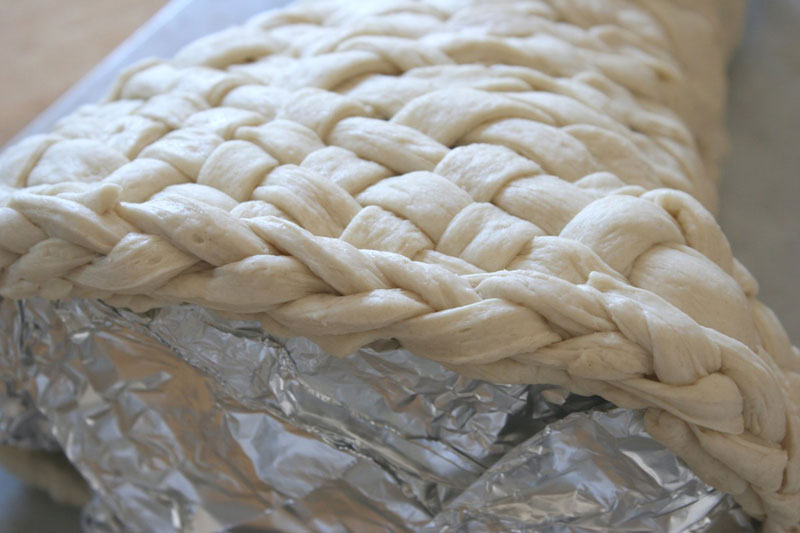
Now go to the big round end of the mold and use your fingers to pinch and tuck the ends of the dough strips, to make a clean edge.
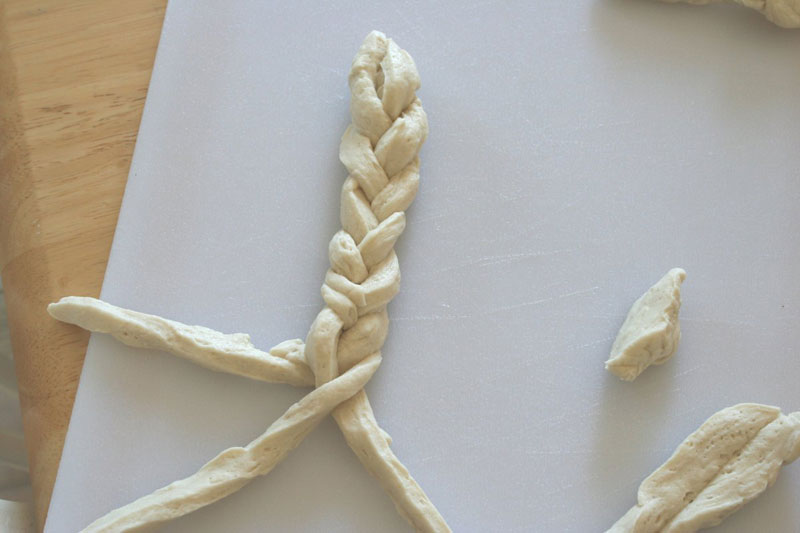
For a finishing touch, use any dough scraps you have left to make a long braid.
Attach the braid along the edge of the big, round end of the cornucopia. If it doesn't want to stick, use a tiny bit of water as "glue".
The braid on the edge covers up a lot of mess and really makes the whole thing come together.
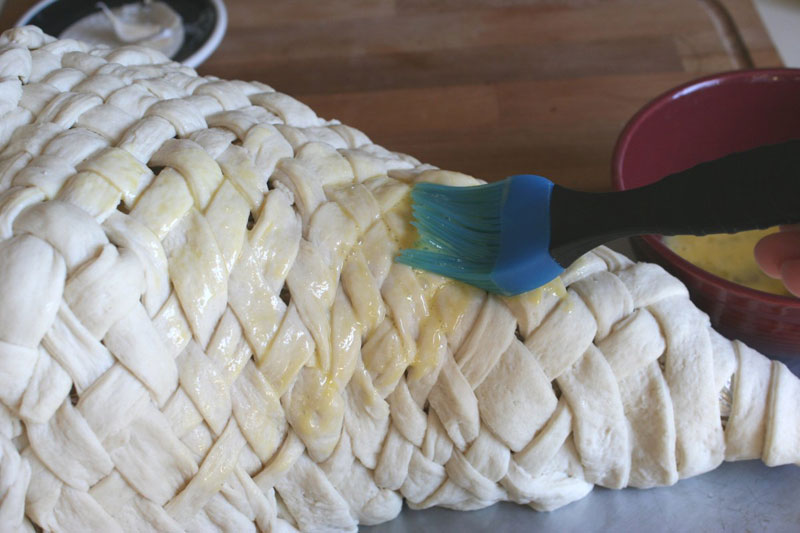
There's just one more thing to do before it's ready to bake, and that's to coat it in an egg wash. Just beat an egg in a bowl with a fork, then use a brush to apply it liberally all over the surface of the dough. This egg wash will make the baked bread shiny and lustrous.
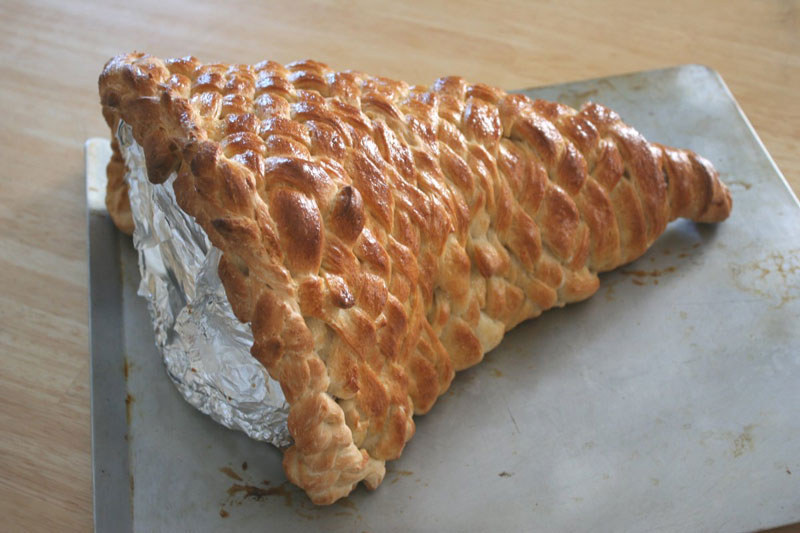
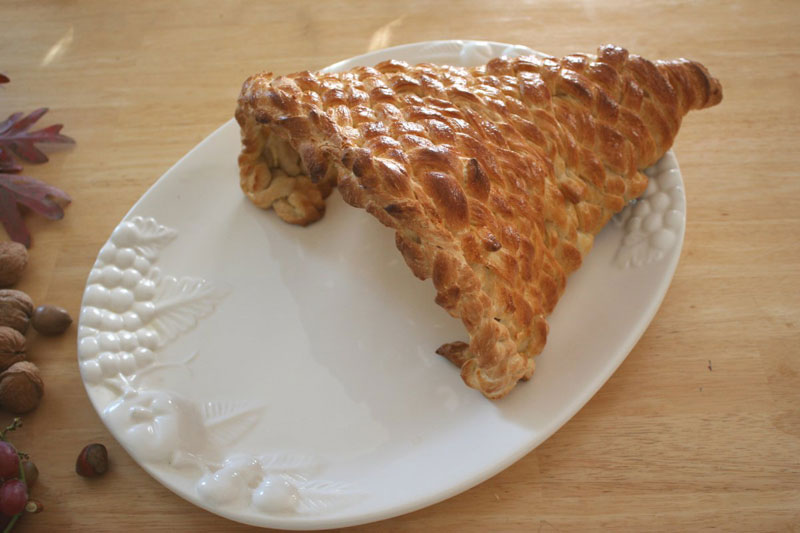
Now put the whole thing in a 350° F oven and bake it until it's a deep golden brown, checking on it every 5 minutes so that it doesn't burn. Just look how pretty it is!
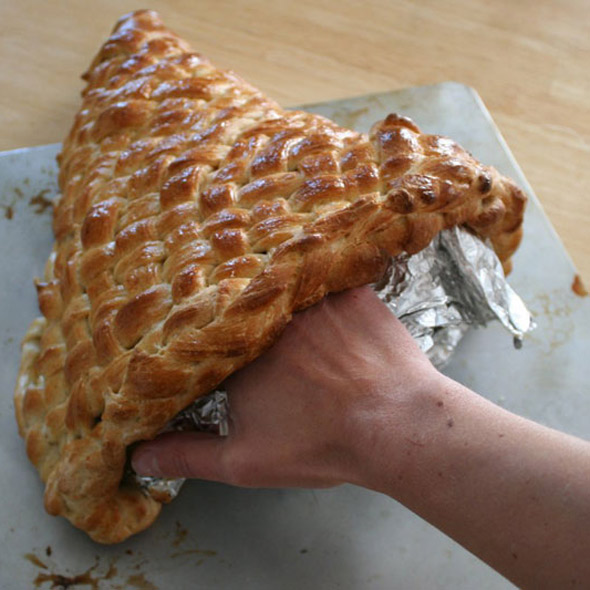
Let the bread cool for about 10-15 minutes, then CAREFULLY remove it from the foil mold. Start by loosening the bottom edges (see that dough we tucked under?).
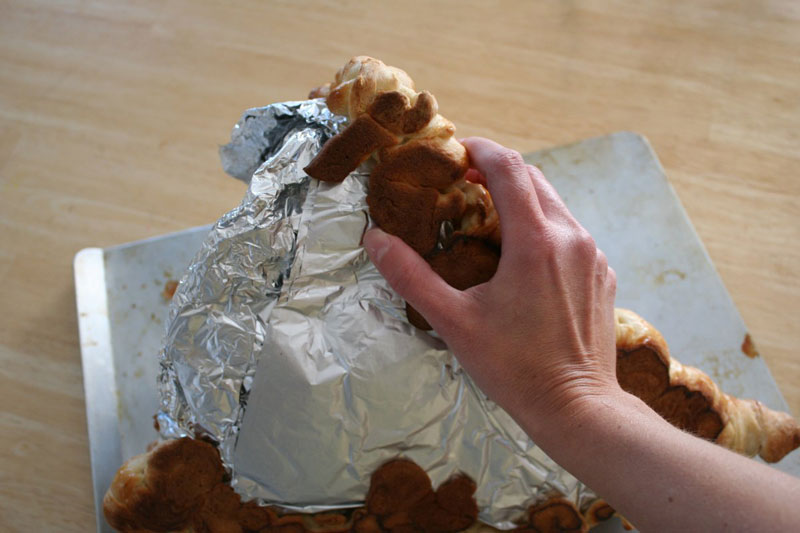
Then slide your hand in the top, between the bread and foil, and work it gently until it's free.
Getting the bread off the foil while still warm was an important step, and it should stand on it's own pretty well...
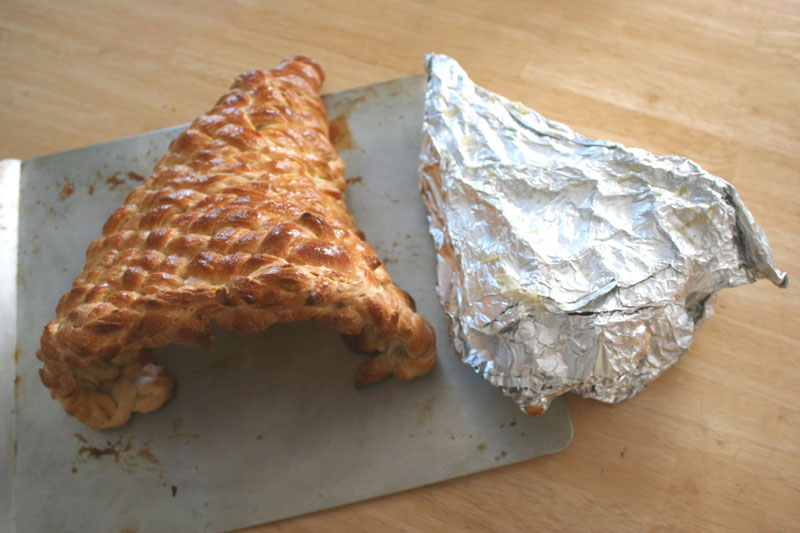
... but while it's warm it's still susceptible to bending or breaking, so place it back on the foil form just to support it while cooling, and let it cool completely.
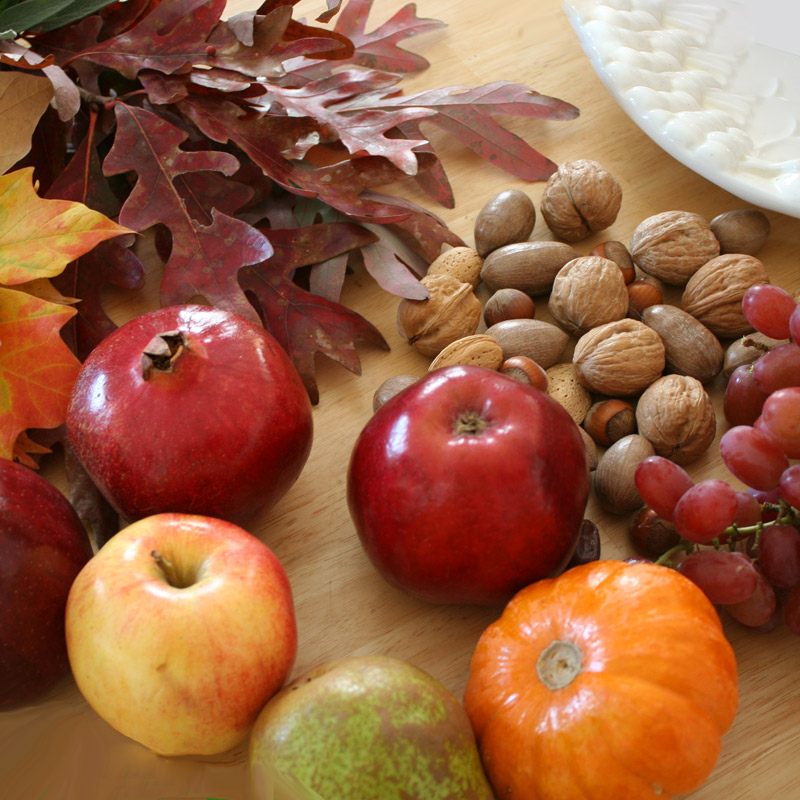
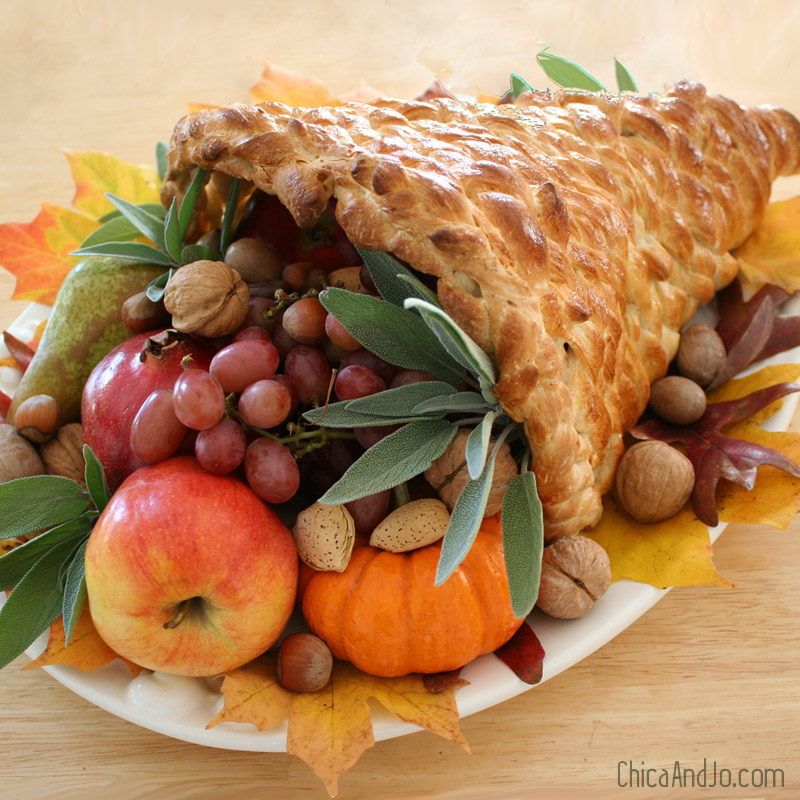
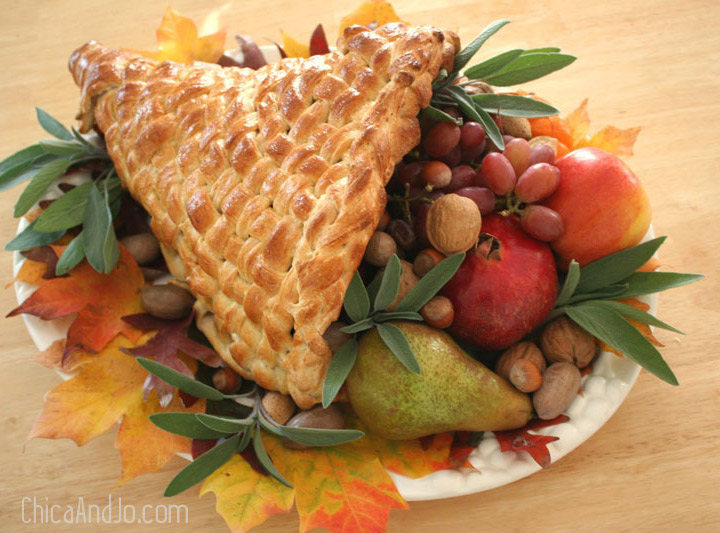
Now it's time for the most fun part — decorating it! Gather a bunch of appropriate fall goodies, like apples, pomegranates, mini pumpkins, grapes, and whole nuts. Then raid your yard for some pretty fall leaves, and if you've got fresh herbs (I still have sage growing), grab some of that too.
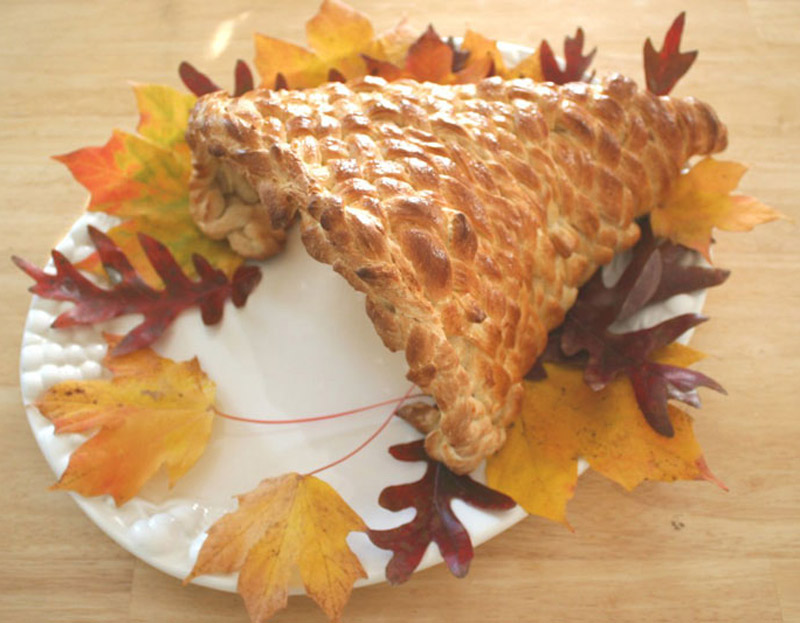
Put the bread cornucopia on a large platter.
Start by tucking the leaves under the cornucopia, all around the platter.
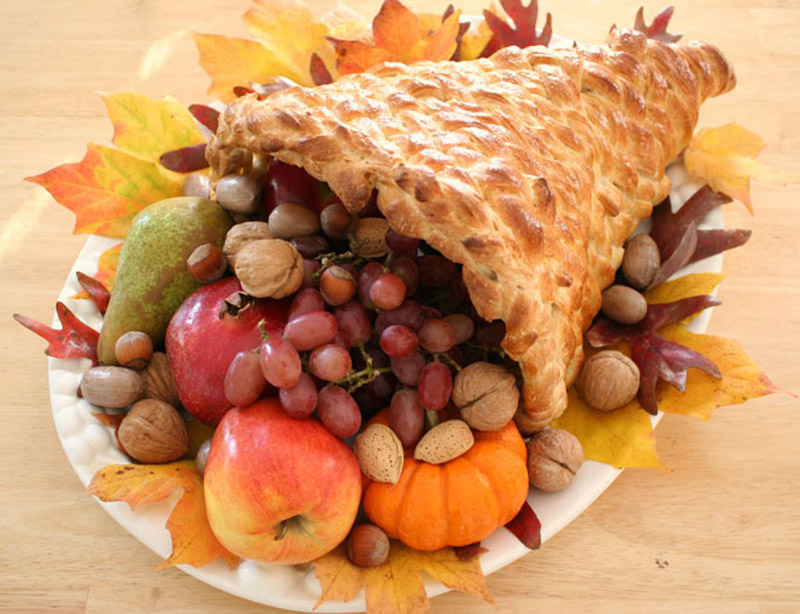
Then add the fruits inside, and sprinkle the nuts all around.
Finally, tuck in some sprigs of herbs, and then stand back and marvel at the beauty!
I make one of these every year for my family, and while it makes the perfect centerpiece for the kitchen table during Thanksgiving Day, the reason my family loves it so much is that we get to eat it that evening!

After a full day of gorging on heavy foods like turkey and potatoes, we love to satisfy our nighttime hungries with something light, and bread and fruit are just the ticket. We tear into the bread and add a little butter, then snack on the fresh fruit. What a perfect way to finish off the day!
P.S. The bread will be tastiest if you make it the day you want to serve it, but if you are afraid you won't have time Thanksgiving morning, you can make it the night before, and wrap it with plastic wrap to keep it fresh.


36 comments so far:
Wow, that's gorgeous! Amazing job. Thanks so much for the how-to, I'll be linking.
Thanks Rachel :)
What can I say, THAT'S COOL!
What can I say, THANKS! :)
I love it when you make these. Can't wait for this year's!
Thanks, sis!
That is SO GREAT! Thank you for the tutorial!
I am enthralled by this lovely creation, I can't wait to try it. I also linked to your post and shared on my blog. Thank you for the inspiration.
Thanks for the nice post on your blog, Audra. I've added you to my RSS reader. Have a great Thanksgiving :)
Your cornucopia is wonderful-you did an amazing job. Hope I can do as well when I make 2 of them for my neighbor and me. Love your blog-and it linked me to some other great blogs too! Have a great holiday!
Thanks so much Dolly! Good luck, and if you have a hard time with the weaving, just improvise and come up with any design you like :)
WOW! That's amazing. I'm not sure I would be patient enough to do it but yours turned out fabulous. Hope you're having a great weekend!
Thank you, pk!
Hi!
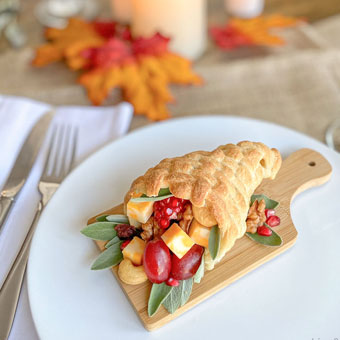
This is such a clever idea! I really think I will try this and was thinking little ones for each place setting would be kinda neat. We only have 8 for dinner this year so that wouldn't be too many to make. Might be interesting...
Thanks for sharing the great tutorial. Very clear and easy to follow, I appreciate that!
Hope you can stop by sometime.
XO
Heidi - Heart and Home
Thanks for the incredible idea, ladies! I just tried this for my son’s Preschool Thanksgiving Dinner tomorrow, and I have a couple of notes for those who, like me, are completely kitchen impaired. (And I’m talking about a serious impairment here. I have made dinner for my family ONCE in six months. I can do cold cuts and Pop Tarts… that’s about it.)
- Your dough should be cold. My first can of dough was in the fridge, but in the door, so it wasn’t cold enough and didn’t unroll well. I ended up making “snakes†out of the dough, and it was much thicker than the strips of dough that I opened later; it didn’t cook uniformly. While working with the first can, I put the second in the freezer, and it worked much better.
- Unless you’re a very fast bread dough braider, the room should be cold too. It keeps the dough from getting too stretchy.
- The weakest link WILL collapse in the oven. I had one piece of the dough that was stretched pretty thin. About 2 minutes in the oven was enough to break a big section of my cornucopia. A few toothpicks will hopefully cover the mess.
Thankfully, my first audience is two-year-olds, and I can use it as a dress rehearsal for Thursday’s dinner with the family. Chick and Jo, thanks again for your website and for this idea. I tune in every day!
Have a wonderful Thanksgiving,
Emily Vandall
Hi Heidi! I love the idea of individual cornucopias. Working on a smaller scale would definitely make it easier for a first-timer, but I wonder what fruits you would put inside? You'd have to focus on small things like grapes and nuts, I think. It would look darling, though. If you make them, please share your results with us! In the meantime, we'll be sure to check out your site.
Emily, I'm glad you tried this project, and thanks so much for sharing your results and tips with us. I hadn't thought much about the dough being cold, but anything that helps keep it under control is definitely worth trying! If my dough strips get stretched too thin while working with them, I just cut them off and start with a new piece. Just tuck the cut ends under one of the overlapping strips from the other direction, and you'll never notice. You can patch thin spots this way before you put it in the oven, too. And if it comes out of the oven and still has gaps... well, that's when you start sticking in bunches of fresh herbs to hide them :) Thanks for your kind words about our site, and we hope you continue to stick around!
I was planning to have plain rolls for our Thanksgiving dinner this year (first year to have everyone over to our house!), but after seeing your cornucopia and having the idea of individual ones, I just have to make these! We normally put out olives, nuts, and apple and orange slices for everyone to snack on before dinner - this would be a great way to do this! Thanks so much for the idea and the easy to follow How To!
Love it! Can't wait for Thanksgiving day.
the way I have always done it is to sprial the bread sticks (like you did at the point of the horn) all the way up and only braiding the open end, which might be a little easier for firsttime cornucopia makers. But i really like your idea of weaving the cornucopia, i think ill try that on my next cornucopia! Also Pillsbury makes breadsticks that are precut for cornucopia makers on the fly!
Great point, cornucopialover. Spiral strips would be a great alternative for first-timers. The canned breadsticks would work, too, and are nicely pre-cut, but I've found they are more expensive for the amount of dough you get, so I like using the loaves. Good luck with the weaving!
This is such a great idea! Love the presentation!!
Oh, i would like to add as an addendum to my previous post, should you decide to start off with the spiral cornucopia, because you are wrapping breadsticks all the way around the aluminum foil there will now be a bottom to your cornucopia and thusly a smaller opening to it. This is a good thing mind when you decide what to put inside your cornucopia, because the delicious fruit assortment used for the woven cornucopia may not fit. I like to use raw baby carrots, broccoli, cauliflower, and cherry tomatoes. Just incase you decide to go route, would want you being suprised if the fruits are too big!!
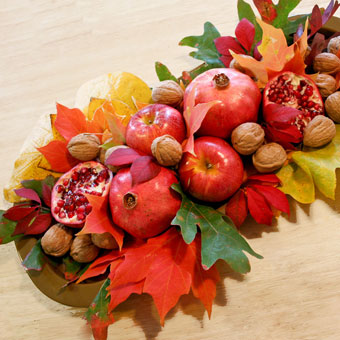
After we saw "Meet Your Meat" on YouTube, we decided we won't be having turkey this year. So this make the perfect for vegetarian Thanksgiving centerpiece!
Great idea, Aleine. Have a wonderful holiday!
This is beautiful. I will be making one for my Big 50 Party in November. I will be filling it with fresh vegetables and dip in a cut off green pepper. I saw someone else make this by using a disposable pizza pan bent into a cone shape and then turned up a little bit on the end. I hope mine works out.
What a clever idea, Jackie! Please let us know how it comes out :)
So the only place that has the dough is underneath the small end? Where do you stop that part?
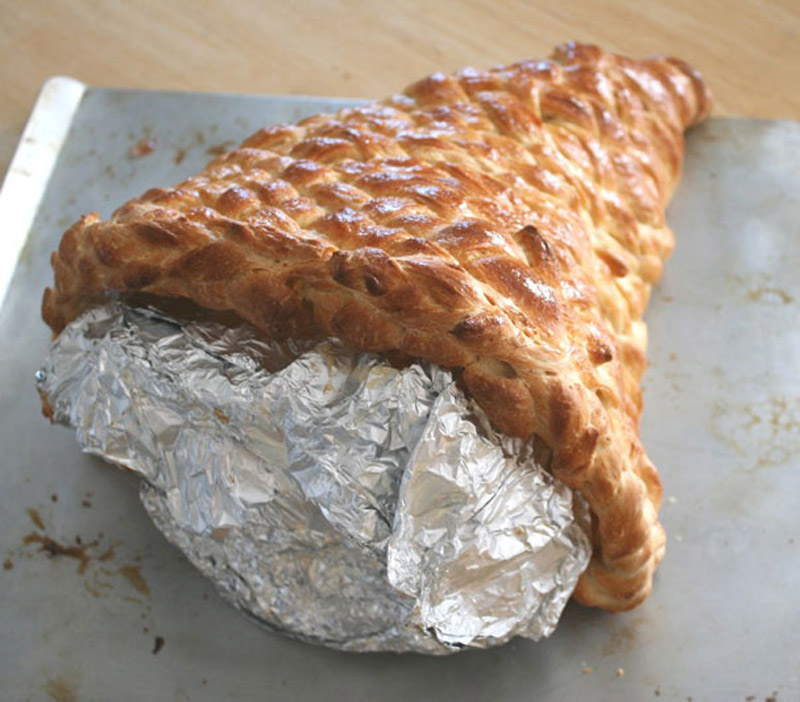
Doc, the dough does wrap all the way around the form on the small end because the bottom of the form is visible at that point (since it bends up a little). You can stop going all the way around as soon as you get to the part of the form that touches the tray. Then, for the rest of the form, just leave a couple inches of dough and tuck them under the form to make the edges rounded. Look at this picture which shows the bottom of the cornucopia after being cooked. You can see how the dough just covers the bottom a little bit.
If you wanted, you could put dough all the way around the form on the whole thing, but that makes it a lot harder to get the cooked bread off the form, and since the bottom doesn't show anyway, it just uses more dough without much benefit.
Ok, this is georgeous and I tried it this year. #1 - good
#2 - better
#3 - best
I will be making these every year from now on!!! Thank you Chica and Jo for all your great ideas!
That's great to hear, Susan! Hope you had a wonderful Thanksgiving :)
Thank you so very much for sharing this. I will definitely be doing this with my family and hope to make it a new Thanksgiving tradition.
I'm thinking if I try this and I use Reynolds Release Wrap foil on the outside of the cornucopia form that might make it easier to slide the whole thing off after it bakes! : )
That's a great idea, Sheri. Let us know how it goes, and I'll start doing that too!
I love the project and I did mine but I found out that lower temperature (250)for longer time will help much better to get the gold brown color without burn it.
Great tip, Bell. Thanks for sharing!
BEAUTIFUL and Inspirational !!!
thankyou !