


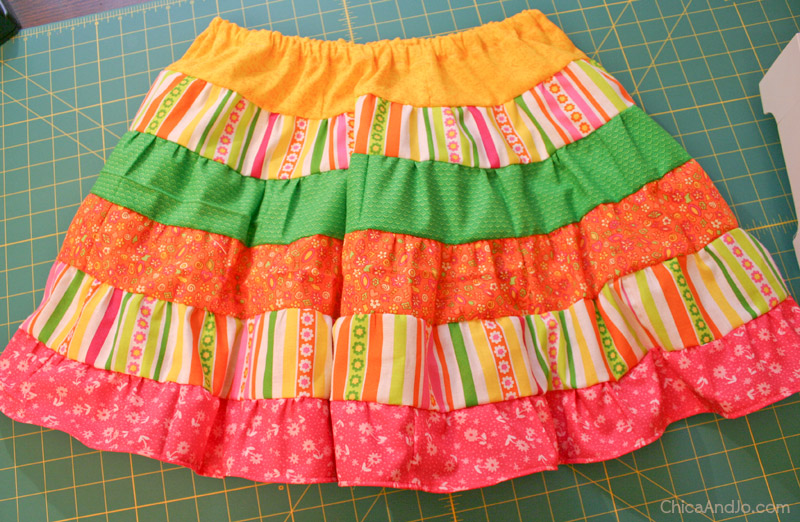
How to Sew a Tiered, Ruffled Skirt

Moms and girls everywhere seem to be eating up the popular style of tiered skirts made from strips of different, but coordinating, fabrics. My niece is no exception, so I wanted to make her a skirt in fun, bright colors.
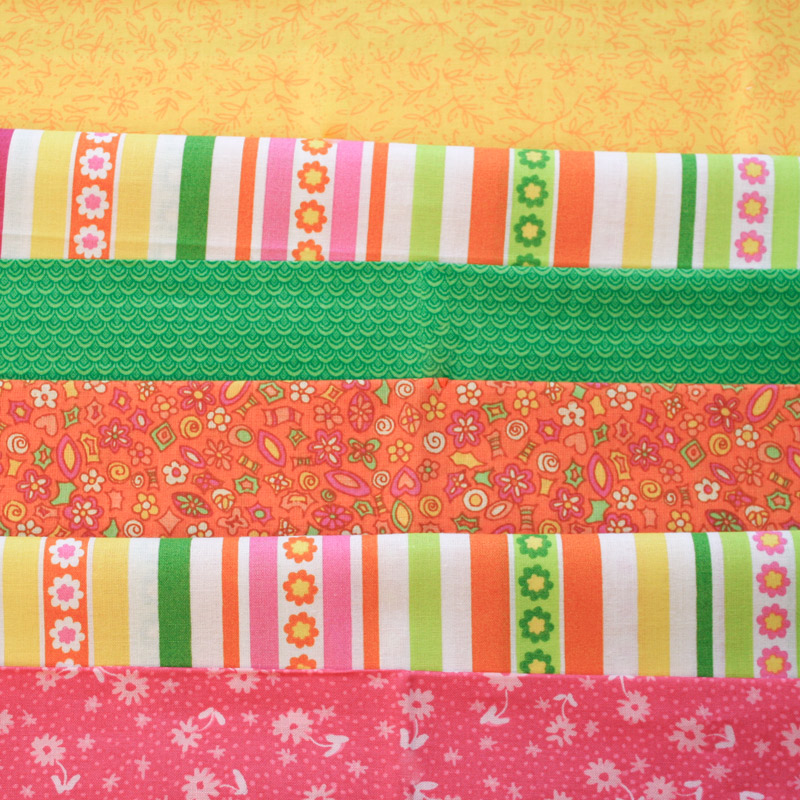
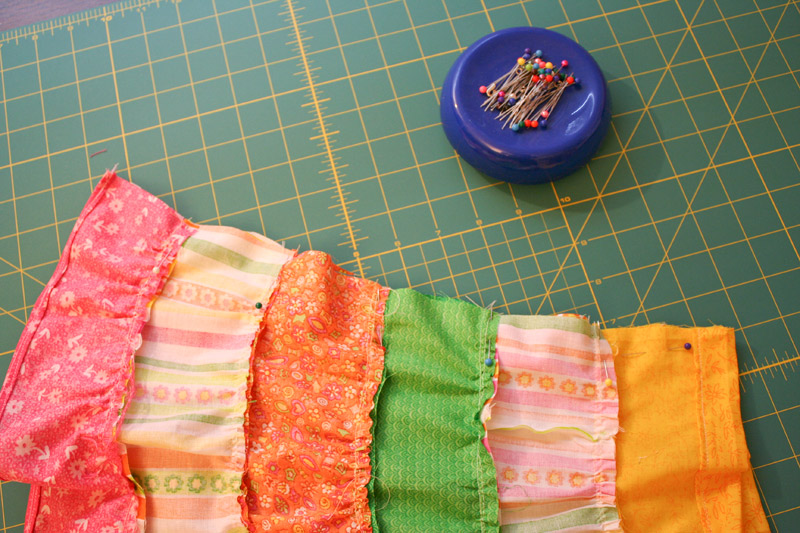
I actually let her pick out the fabrics herself, which she really enjoyed. I found it was easiest to do this by letting her pick fat quarters, which are easy to hold and carry. For the 6-tier skirt, I used one fat quarter for each tier except the last, which took two. Once you have your fabric, try laying it out on the table, overlapping the pieces, and rearranging them as needed until you get the stripe pattern you like. Then write it down so you won't forget!
These skirts are easy to make once you get the measurements figured out. First, measure your child's waist in inches. Then measure how long you want the skirt to be from the waist to the bottom hem. Finally, determine how many tiers you want to have on the skirt. You can use any number up to 6, and as you'll see in my finished pictures later, the more tiers you use, the fuller the skirt will be.
So how that you have the numbers, how big do you cut each piece of fabric for each tier? Well, I made this easy (and saved you a bunch of math!) by creating a handy calculation tool that figures it all out for you.
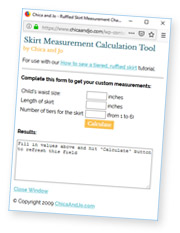
Just enter your measurements into this tool and hit the "Calculate" button, and it will determine for you the width and length of each tier of fabric. Feel free to round each resulting calculation a bit to make the measurements easier to deal with (ex: 5.125 inches can be rounded to just 5), but keep in mind that too much rounding will affect your total skirt length.
Go ahead and cut all your pieces now, sewing strips together as needed for the last couple of tiers, which can end up quite long. As you'll see in the calculations, each tier is going to be longer that the one above it.
Note that the chart's calculations assume that you'll be using a 3/8" seam allowance for all of your seams.
Prepare the top tier
For the top tier (yellow in my case), start by folding over 1/4" on one long side of the fabric. Sew this in place with the machine.
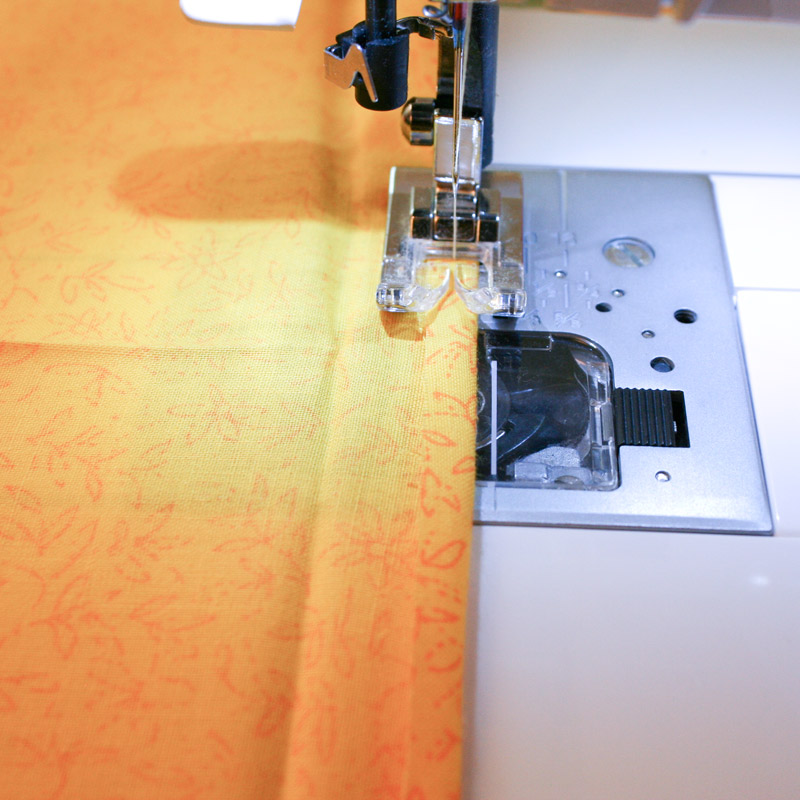
Now fold that sewn edge over again, creating a 1" pocket, and sew again. This is your waistband, where you'll be inserting the elastic later.
Add the second tier
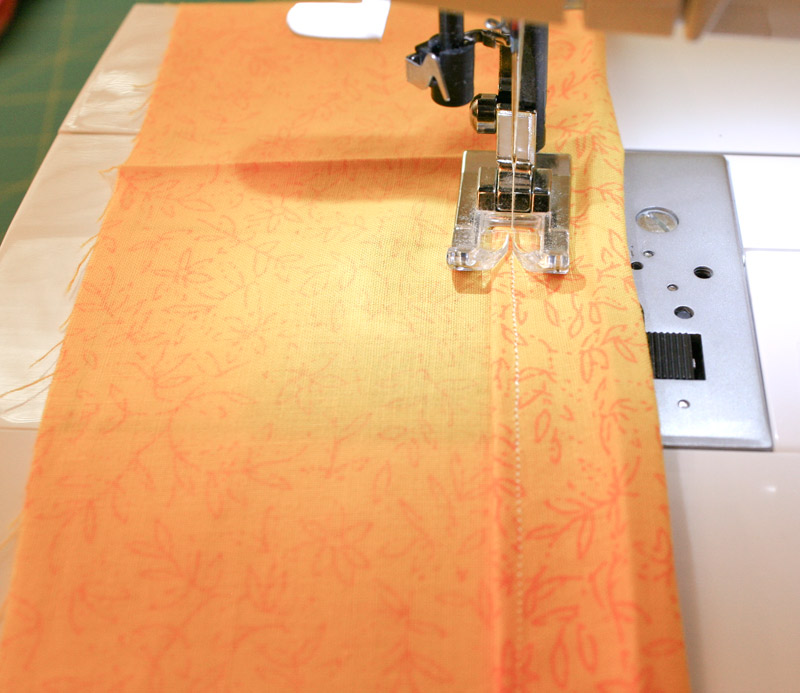
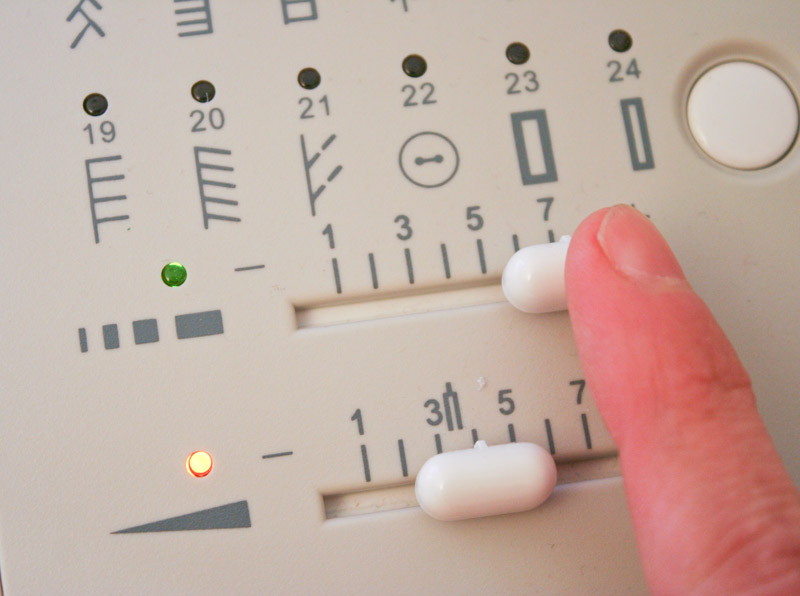
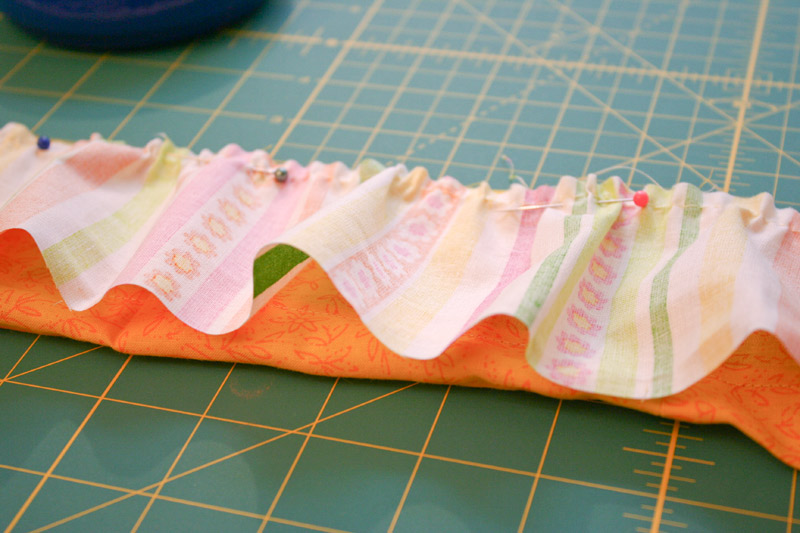
The second tier (striped in my case) on the skirt will need to be gathered on one long edge, so that it is ruffled. To do this, start by adjusting your sewing machine so that the stitch is as long as possible.
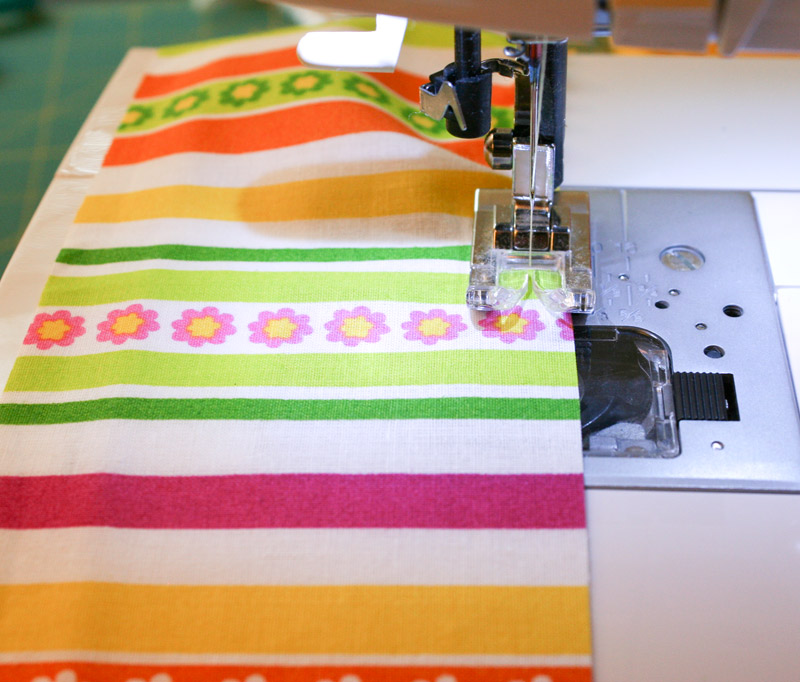
Then sew right down one long side of the fabric.
When you're done, pull the bobbin thread to gather the fabric up into a ruffle.
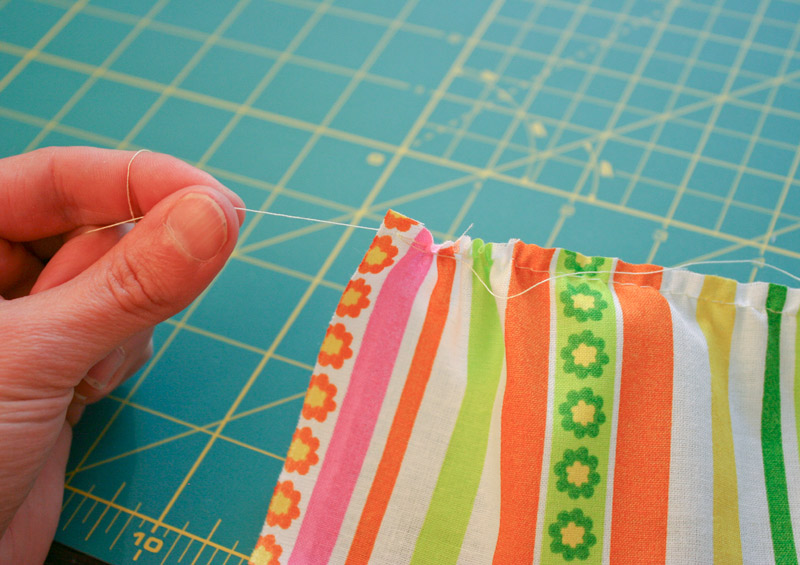
Keep pulling as needed until the finished width of this tier is the same as the finished width of the tier above it. Now line up the first (yellow) and second (striped) tier, and make sure that they are the same width. If not, adjust the ruffling on the second tier as needed.
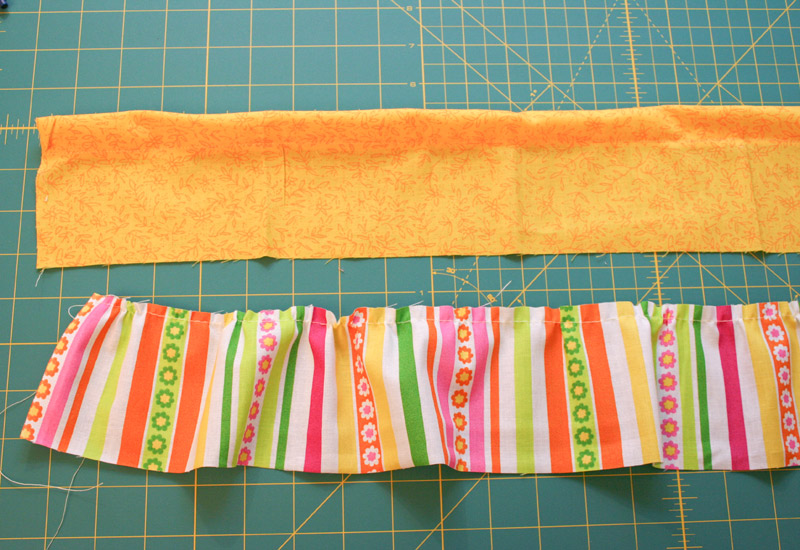
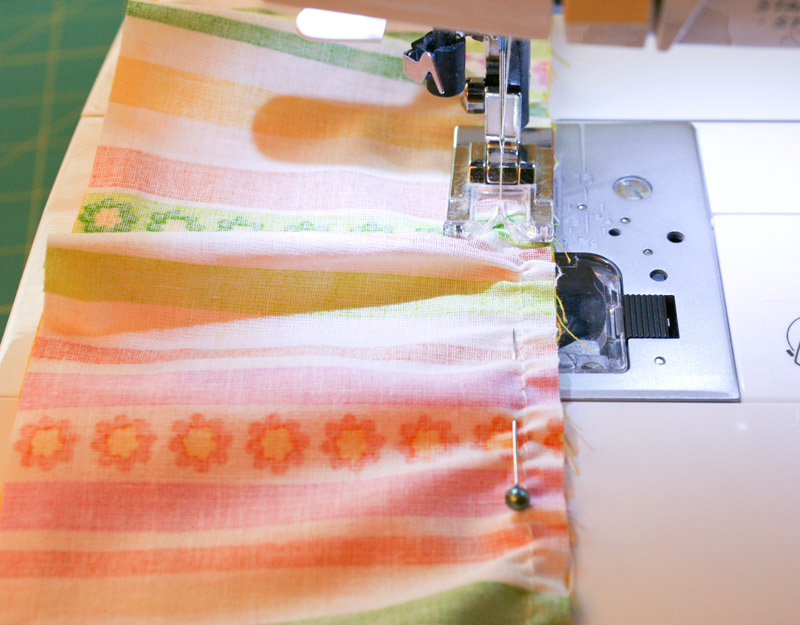
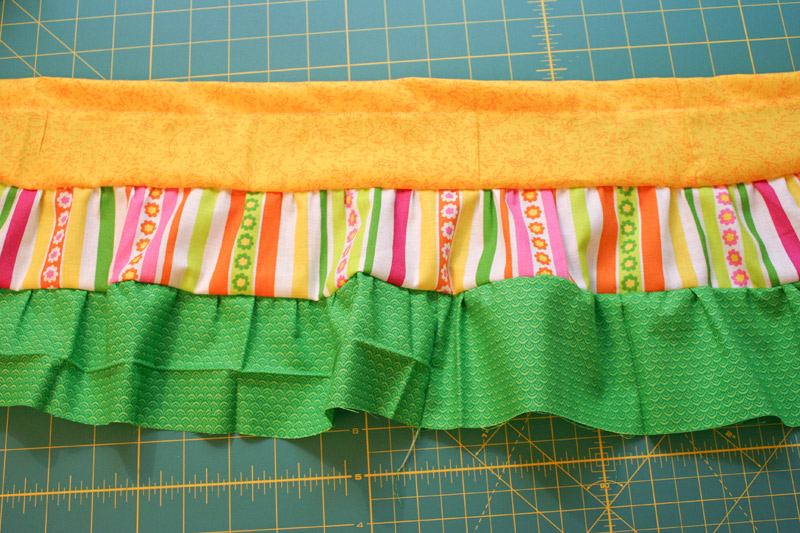
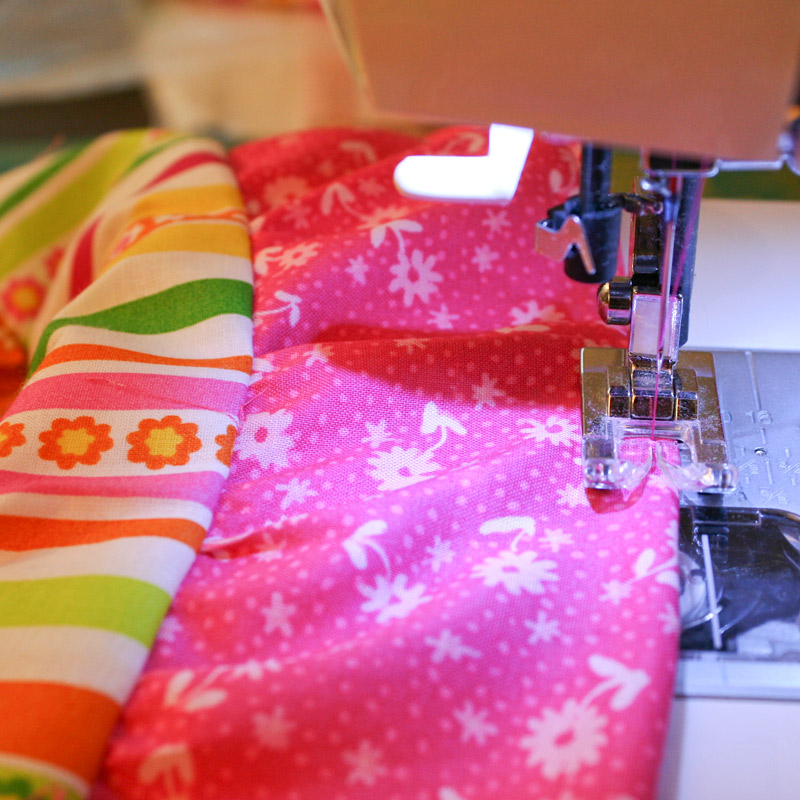
Lay the second tier on top of the first, right sides together, and match up the top (ruffled) edge of the second tier with the bottom (unsewn) edge of the first tier. Pin in place.
Sew along the pinned lines, making sure that you sew inside the previous ruffle stitch, so that it doesn't show through on the finished skirt.
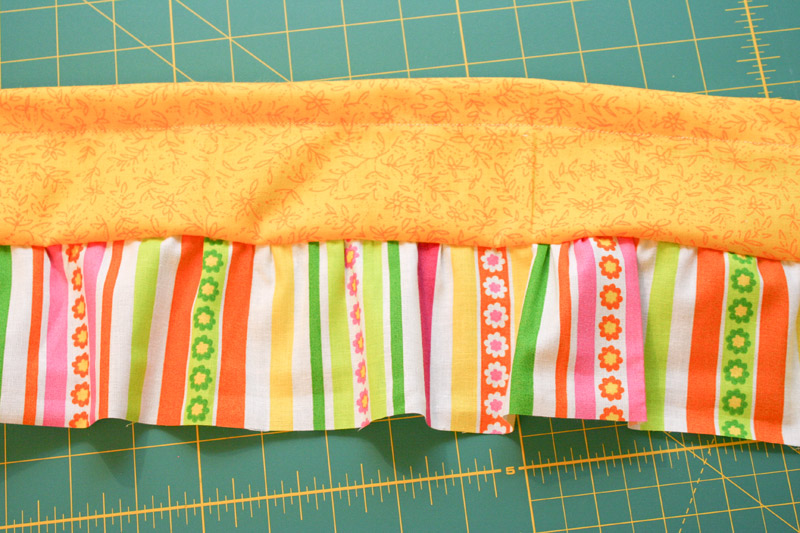
Unfold it and see that you've got the start of a skirt, with the waistband on top and a ruffled tier on the bottom.
Add the third tier
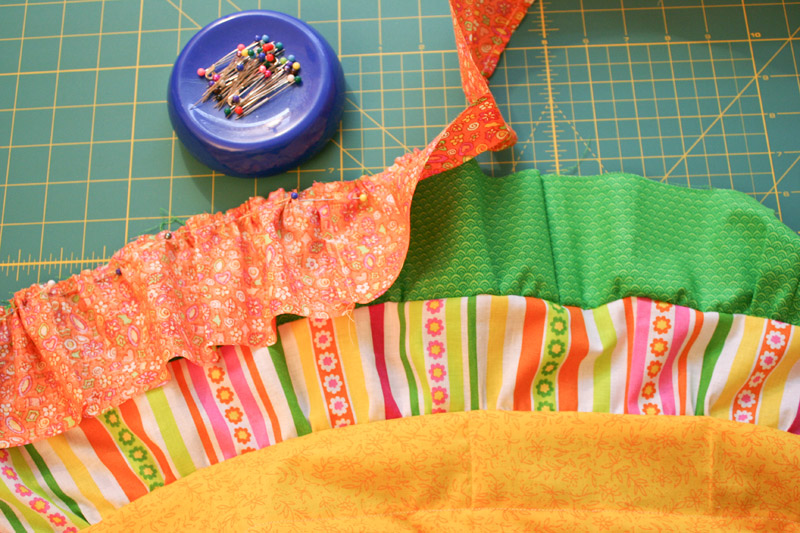
Take the third piece of fabric (green in my case) and sew along one edge as before, then pulling the bobbin thread to make a ruffle. This time, the final width of the fabric should match the final width of the second (striped) tier above it. Just keep adjusting the ruffling until you get the widths the same.
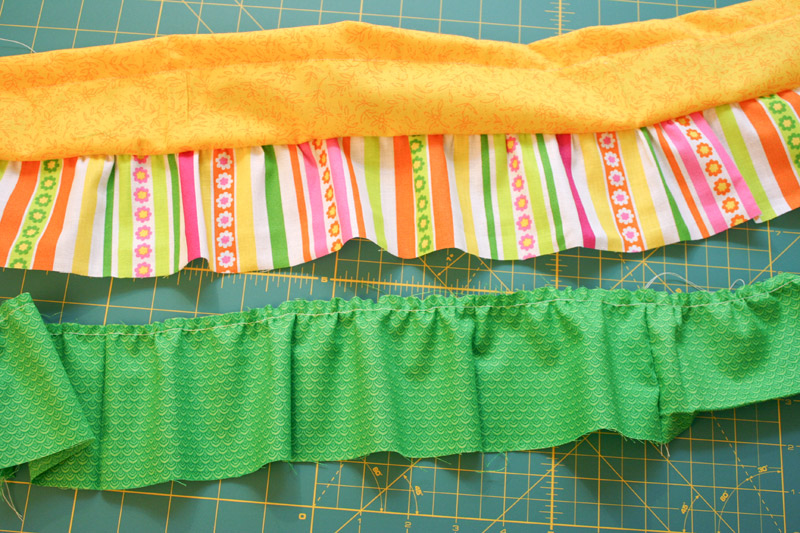
Then lay the third tier (green) on top of the second (striped), right sides together, with the ruffled edge of the third tier (green) lined up with the unsewn edge of the second tier (striped). Pin in place.

Now sew along the pinned line, again being sure to enclose the previous row of stitches so that it won't show. When you're done, unfold it and admire your progress.
Add the remaining tiers
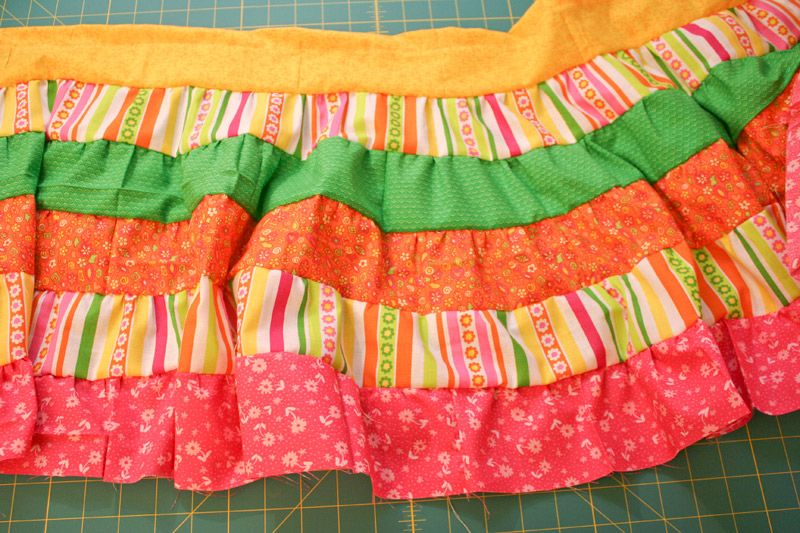
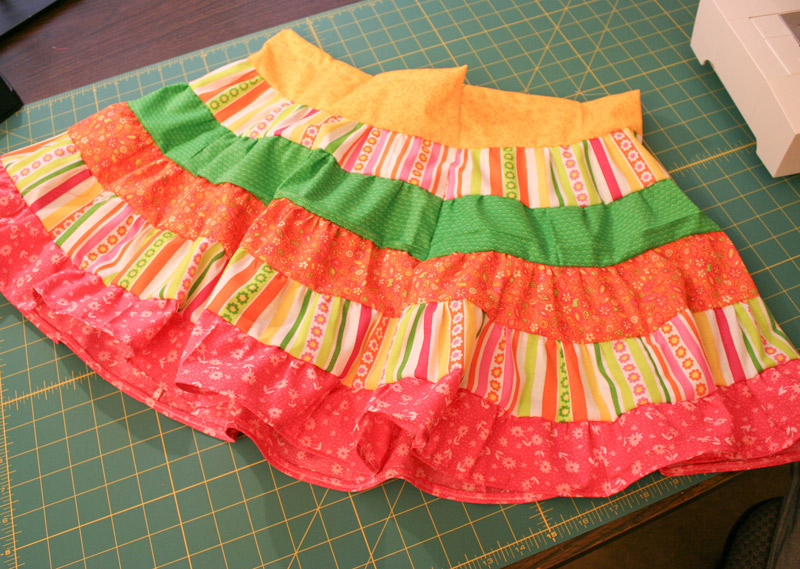
If you've still got more tiers to add (this part is up to you!), go ahead and do them now, following the same method as before.
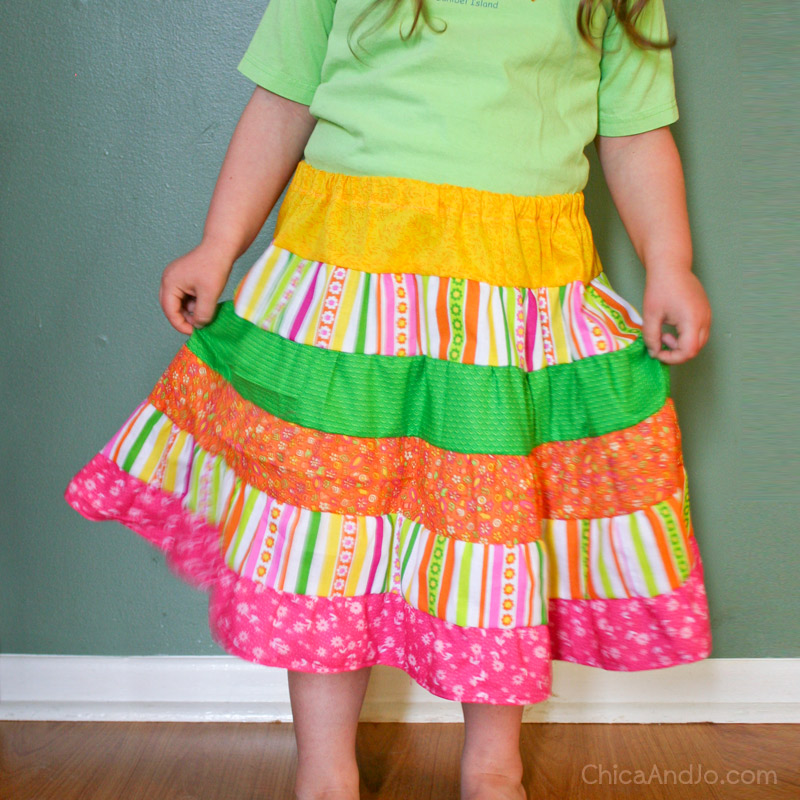
My skirt had 6 tiers, so I had quite a bit to add, and the skirt got nice and full by the time I was done!
Finish the hem
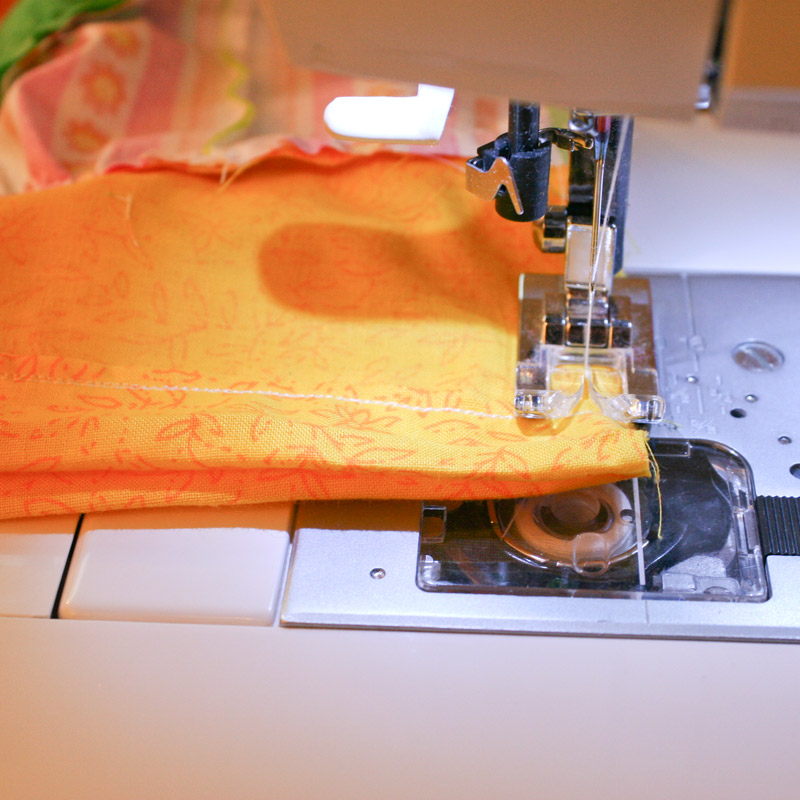
For the hem, flip the fabric so that the reverse side is facing up, then fold 1/4" of the bottom tier in and sew in place.
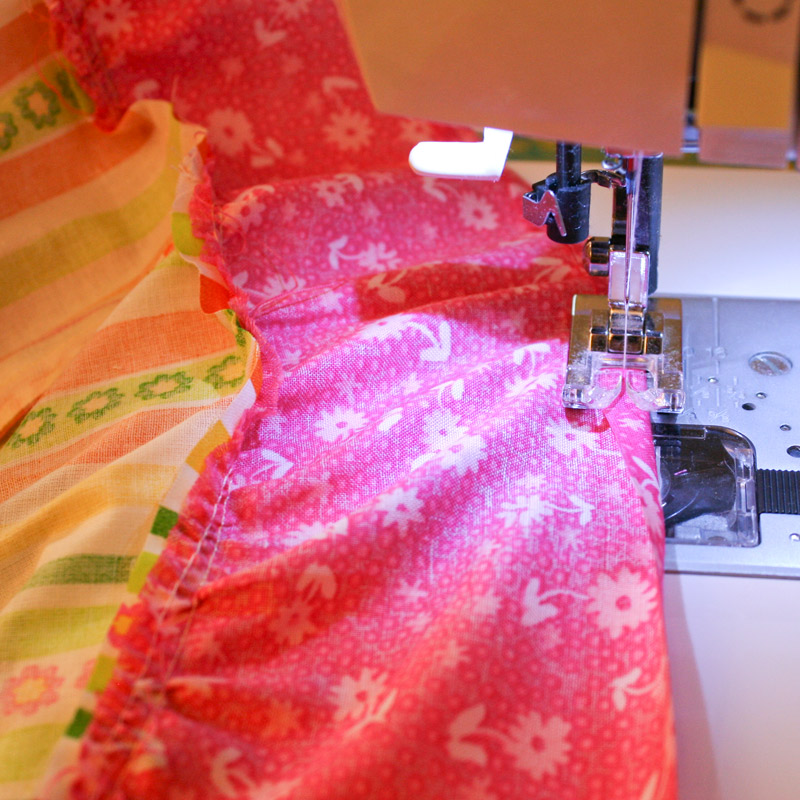
Then flip the fabric to right side up and fold that sewn edge under. Sew it again with a straight stitch, to secure the hem and hiding the rough edge. Be sure to use a matching thread on this second seam, because it will show on the finished piece.
At this point it's also a good idea to top-stitch each of the tiers. Just flatten it out as much as you can and run a row of stitches (in a matching thread) along the edge of each tier to secure the ruffle. This little touch makes a big difference. Unfortunately I didn't realize this until after I made this skirt, so I didn't do it, but I sure wish I had!
Sew up the side
You've got this pretty ruffled piece of fabric, but it's not a skirt unless we sew the ends together to make a loop! Line up the two ends of your fabric, right sides together, and pin in place.
Sew the seam where pinned. Be sure that you do NOT sew the waistband pocket closed, or else you won't be able to get the elastic in!
Hey look, it's suddenly a skirt!
Add the elastic to the waistband
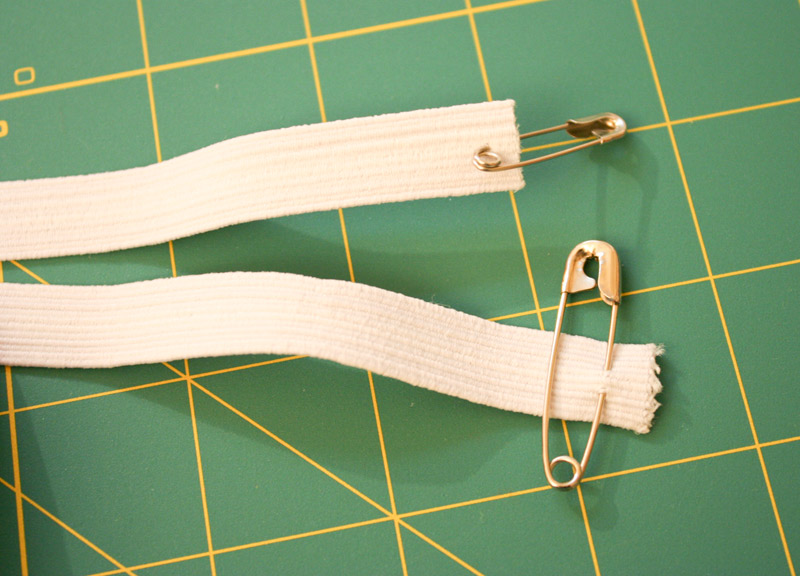
Measure a piece of elastic to that is the right length to fit comfortably around your child's waist, with one extra inch to spare. Add a small safety pin to one end (this will help with feeding the elastic through the pocket) and a large safety pin to the other end (this will keep it from coming all the way through the other end!)
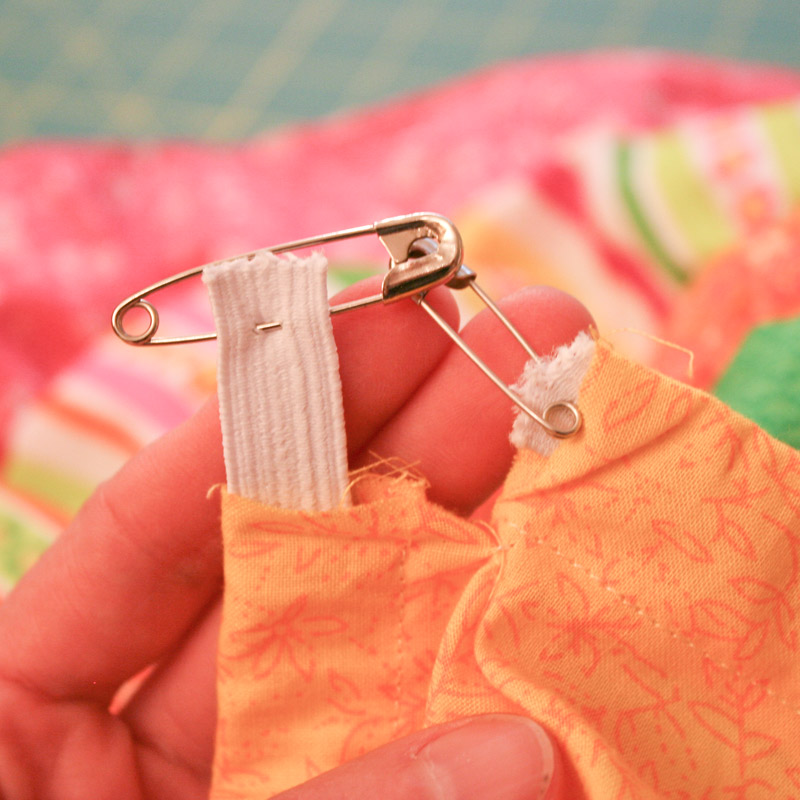
Then, using my technique for threading a drawstring, feed the smaller safety pin through one of the openings in the waistband and keep wiggling it through the pocket until it comes out the other side.
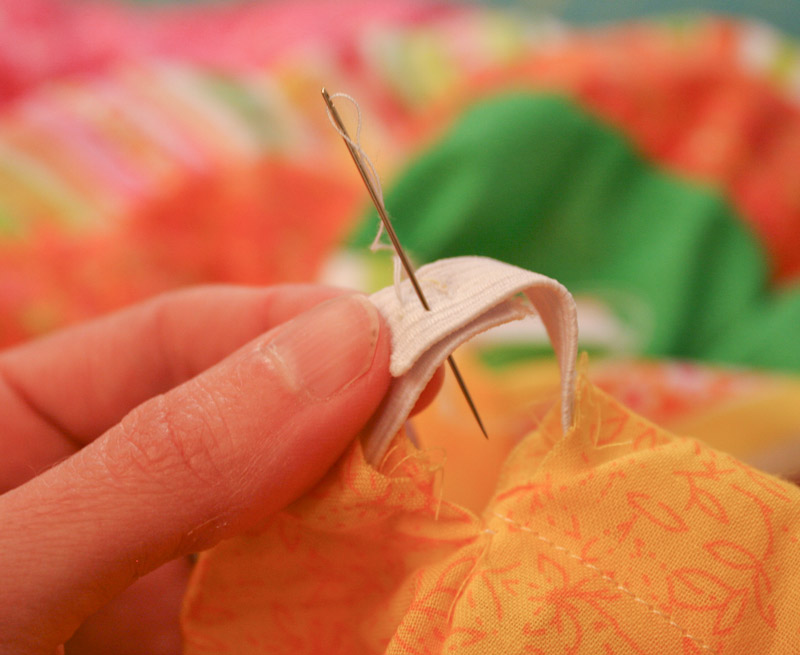
Make sure the elastic is flat throughout the pocket (and not twisted), remove the safety pins, overlap the ends by 1/2" each, and sew them together with a needle and thread.
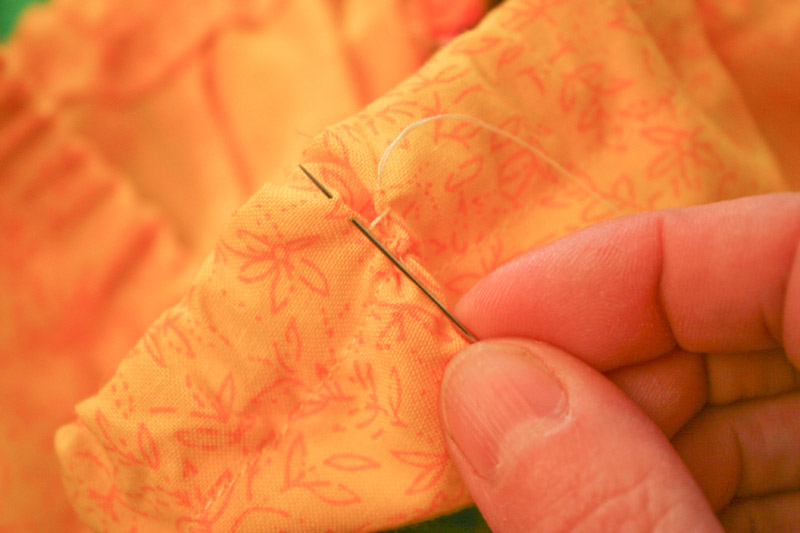
Then use a blind/slip stitch to sew the waistband pocket.
The finished skirt
Hey look! You're done!
My niece absolutely loves her skirt, especially the full ruffles and bright colors!
similar projects
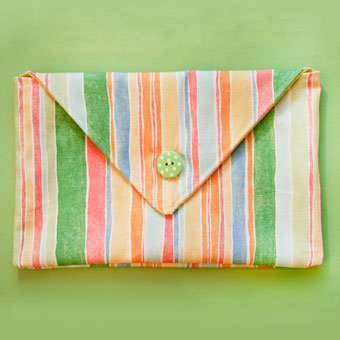
How to Sew a Button Closure Pouch
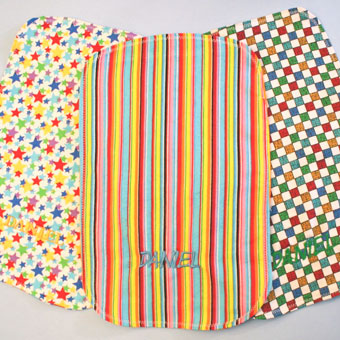
DIY Easy-Sew Baby Burp Cloths
Easy-sew Pumpkin Treat Covers for Caramel Apples


70 comments so far:
This is so adorable! I may even attempt to overcome my fear of sewing for something like this. My daughter would be in heaven!
These are so cute, Chica!!! :) Love them! I just found out I am having boy #3, so I'll have to make them for my nieces.
Darling! Those colors pop!!! I linked to this!
Thanks so much! I have done a few of these without a calculator, just winging it. One thing that really helps the look is to top stitch each ruffle layer. I press/smooth each seam allowance up and then on the right side I top stitch along the sam, about a scant 1/8 inch, basically, ring along the seam line. It adds a finished look and really makes the transition from ruffle to ruffle. It looks like you did that on the pink one and not the 6 ruffle colorful one. It really makes a difference.
Meredith, you are so right about the top-stitching. I did that on the pink skirt and it really did make a difference. I forgot to mention it in my post, though! I'll go back and add it now :)
I just bought a gathering foot over the weekend. Can I use this, or should I hand gather the layers?
Kate, I have not used a gathering foot before, but based on the little I know about them, I think it would still work. Depending on how much the foot gathers the fabric, you might need to adjust the width of the strip of fabric you use for each tier so that it matches the width of the tier above it. (Erm, does that make sense?)
I'm a beginner sewer and this tutorial is incredibly easy to follow. The calculation tool was very helpful. Thank you so much. I was spending so much money buying these skirts for my daughter and now I can make them :)
Thank you for the great tute!Also, for the Calculator...I hate trying to fig. something like that out!~so helpful!
Is it cheaper to coordinate fabric on your own...and up to what size do you think the fat quarters would accommodate? My (little!)girl needs enough for a 32" waist & about 22" long...I didn't know how much fat quarters came in or how much material you had left over.
Thanks a bunch!!!
Hi Lisa. I'm glad you find our calculator helpful!
When it comes to purchasing enough fabric, you might find it helpful to use our tool to figure out how much you'll need BEFORE going shopping. That way you can be sure to get enough for each layer at the store.
A fat quarter is a half-width of a half-yard of fabric, so it usually measures 18" x 22" (since most fabric is 44" wide). It may be cheaper to just buy fabric off the bolt, and you can get more exact measurements that way, but I was letting my 4-year-old niece pick out the fabric for her skirt, and fat quarters were much easier for her to pick through and hold in her hands than large bolts of fabric :)
You didn't mention how many tiers you want to make, and that will have a big impact on how much fabric you need. Try plugging your numbers in to the calculator and see what you come up with. Let me know if you need help!
If I'm going to use this format for a skirt for me....how do I measure so the skirt fits over my bum properly? Because I have a 21 inch waist, but my bum measures at 35 inches...???
Hillari, go ahead and put the elastic comfortably around your waist so that it is as tight as you would want it to be when the skirt is finished. Put a safety pin in the elastic to hold it in a loop. Then try stretching the loop and see if you can get it around your bum easily or not. That will tell you if it will work in the finished skirt. If the elastic won't stretch enough, try a "higher stretch" variety of elastic. Some of them will stretch farther than others. I suggest asking the ladies in the fabric store to help you pick the right one -- that's what I always do in situations like that! :) Good luck and we'd love to see what you come up with.
I have looked through several sites for instruction on how to make a tiered skirt for myself. I appreciate all of the step-by-step pics you've put up. You make it seem very easy! Thank you so much :)
Amazing tutorial, every little question I had along the way was answered by either the photos or text that you included.
Michelle, thank you so much. That's exactly what we strive for in our tutorials!
Super easy to follow! Thanks so much:) I made 2 adorable corduroy skirts for the fall so far, and am going to make more!!!
I made several skirts for my 4 yr old grandaughter last summer (here in Queensland Australia) which she loved. Her little friend also loved hers, so I am underway again for this summer. Thanks so much for such helpful instructions and ideas. After raising 2 boys I didn't sew for them when they were little, so this is great fun.
Thank you so much for this and the calculator. My sister-in-law and I have made many of these. Fantastic!
Do you not need to finish the edges within the tiers? I know the hem's raw edge is hidden and the top's raw edge is inside the elastic casing...but where the tiers meet? They don't need to be zig-zag'd or something? I'm new to sewing! Thanks!
Kristin, I understand your concern, but for ordinary wear, the seams should be fine with a regular stitch. However, a zig-zag would be a nice extra touch if you have the inclination. Also, if you have access to a serger, you could use that to really secure the seams. Hope that helps, and congratulations on starting a sewing hobby :)
This skirt is very cute and easy to make thanks to your tutorial. People who are interested in making a skirt should refer to this post for instructions. Thanks for sharing.
Thank you for this tutorial, I have been searching how to make these all day and your is PERFECT!
It takes me forever to get started and then finish *any* project, but I am thrilled that although I purchased the fabric for this skirt a month ago, I got the pieces cut yesterday and sewn today...YAY! It looks super-cute, and my 2 year old loves to twirl in it. If I ever get to it, I will post a pic on your FB page. Thanks for the tute!!
Thank you for this easy to follow tutorial. I am on my third skirt!
Thanks for the pattern. I have been looking for a tiered ruffle skirt for a while and finally found yours today. I love the calculator because this skirt is for me! I will probably make one for my sister also. We travel together and this year we are doing Mexico again. Tell me this skirt won't fit right in! thanks.
Maurala, what a great skirt for a trip to Mexico! I'd love to hear how your adult-sized skirt comes out with the calculator. I've only heard back from folks who used it for kids so far. :)
All I can say is wow!! Have been looking for a pattern like this for 3 yr. old grandaughter. thank you cannot wait to try it.
This tutorial gives me an idea. My five year old granddaughter wants an ice skating dress to match her American Girl doll's outfit. I'm new to sewing. I bought a long sleeve black tee shirt. I'll attach ruffled layers of fabric for the skirt part to attach to the tee shirt. I'll embroider silver polka dots onto the fabric before I layer it. For religious reasons we all dress modestly, so she doesn't wear anything sleeveless, unless it's a style with which she can wear a shell underneath. Her finished dress will not be an exact copy of the doll's dress, but one she can wear and still look nice. Thanks for the tutorial. I'm a beginner sewer.
Doris, that's a wonderful idea! Jo's daughters are huge American Girl fans, and we'd all love to see a photo of your granddaughter's dress!
Hi there,
I just finished making this skirt for my four-year-old, and I wanted to thank you for the great instructions! However, I have a question for the next time I make one. Hopefully, I can put my question into words! :) Okay, when you sewed the third {green} tier onto the second {striped} tier, did you flatten out the bottom of the second tier when sewing the third tier onto it, or do you keep it semi-bunched up in the ruffle that it's become and sew it on that way? Does this make sense? I kept the bottom of the second tier kind of gathered together in the ruffles and sewed the third tier onto it, but I'm thinking I should have smoothed out the ruffles? Also, the same instance happened again with the hem. Is the hem supposed to be semi-gathered or just sewed flat? Many thanks!!
Hi Chelle! So glad you liked this project and our tutorial. To answer your question, when you sew a new tier on, you should flatten out the previous one. When you are lining up the two edges to sew them together, the new one should be ruffled and the previous one should be flat. That allows the skirt to get fuller and bigger the more tiers you add. The hem should also be sewn flat. Hope that helps, and happy sewing!
Hey! I was wondering if this might be able to be done using a serger? If so, what would I have to do differently, since I am so new to sewing? Thanks for your time and assistance in this.....Love the skirt, can't wait to make some of them...
Teri, I have not had the pleasure of using a serger before, so it's hard for me to say exactly what impact that would have on this project. My understanding is that it basically allows you to avoid hems, so I think you would just need to adjust the measurements of your fabric pieces so that you don't account for hems.
Perhaps one of our other readers with some serger experience can answer your question better?
Thank you for such clear directions and pictures! I looked all over for a pattern to do this, but this tutorial was even better. I was able to sew up a great skirt for my 4 y.o. daughter in just half a day (I'm pretty new to sewing). I love how it turned out. (And that I didn't have to cut out a pattern beforehand!) She's in love with it - I'm sure I'll be making several more since she's REALLY into skirts (especially full twirly ones). Thanks again!
Does the skirt come below the knees when finished? The calculator asks for measurement to knees. Just wondering. Thanks! I cannot wait to sew this for my 3 granddaughters!
Debbie, the calculator asks you for the length of the finished skirt you want to make, and you can determine yourself whether that goes above, at, or below the knees :)
Do you wash your fat quarters first? Just wondered...
Tracy, I probably should pre-wash my fabric, but I never do. I'm usually too anxious to get started!
Just completed the skirt using your instructions and am pretty pleased with the outcome. For a novice to sewing like me, its a great site.thank you. Love and peace
I have used your skirt calculator and tutorial for a couple of skirts for my grandaughter, and am planning to make one for her out of Halloween fabric this weekend. Love love love it. So far my favorite is one made of pink pirate fabrics and black polka dots...trimmed it up with black rick rack and pink ribbon with black dots....it was great for a pirate cruise on vacation, so many options for fabrics and trim variations! Thanks for the tutorial!
Pammi, that pirate skirt sounds adorable! So glad you have been having fun with this project. :)
Love, love, love this site!!! I'm a novice at sewing and your site has me looking like a pro lol!! I bought a pattern to make my daughter a tier skirt, I don't know what the pattern makers were thinking, it was so frustrating. That's when I found your site and thanks so much for clear instructions, i've made my daughter many of these skirts she now wears to school :) Awesome!!
Thanks again :)
LisaP
I would love to do the skirt and just anything in here to make my dear little girl happy. I am so in love at looking at do it yourself things for my daughter but not been able to try it yet. Except for a question I have in mind if you please kindly answer. I do not own a sewing machine yet but from your point of view what kind will be very effective for me and will be easy for me to handle? I would love to hear from you.
Mitch, if you are just starting out sewing, I would start with a very basic machine. You can pick one up at a box store like Walmart for under $100. Give that a try and after using it a while, you'll know exactly what features you're looking for in a better machine!
Serger: Teri - The serger could only be used to finish the edges. You would still need to have a straight stitch machine to do the gathering - but then it could be sewn together using the serger -- but I wouldn't attempt this unless you are more than a beginner - because it is a pain to rip out if you somehow mess up.
The gathering foot - would work and saves time - if you can calculate how many inches of fabric are used to gather - say 6 inches (2' to 1' finished, 3-1, etc)..... and then calculate from there. If you have more $ than time- this gathering step would be a time saver.. but until you know how much fabric is required with the individual setting - it's going to be a guess. (example.- some gather 3 foot of fabric into 1 foot of ruffle.) My experience with the gathering foot is that generally it is a tighter gather than what is shown in this project... but it should be adjustable.
Mitch- check out used machines at a sewing store... It will probably have more quality than a $100 machine at Wal-mart..... Machines that are too lightweight- you may spend more time fighting the machine - than the project.
My adult son- has sewn curtains and other tent-cover projects on his used machine from an auction.
Hello...I am a new square dancer and have spent time on youtube looking for a video that shows how to make a tiered skirt. I also do not know how to sew but this looks like a good start. Thanks for the pictures. Wish you could post a video, (I am more of a watch and lean kind of person), but beggers cannot be choosers. Wish me luck. Also the calculator is AWESOME!!!! ~P
This is great. My girls are girly girls but some of the stuff they make for their ages (7, 8) are not very modest. Kids grow up fast enough. This way we can make something together that are appropriate. Once I get my ancient sewing machine to stop sewing backwards. Thank you so much.
Mira, a backwards-sewing machine sounds like a real challenge :) Glad you like this tutorial and we hope your girls like the skirts you make together!
Made 4 of these with the same pattern (different sizes for each of my girls. Cutting the fabric was the toughest part. After that it was done in no time. My girls LOVE their skirts.
When I add up the inches I need for one of the tiers it adds up to 12"W (three 4" layers) 200"L. How do I figure out how many yards I will need as I will be stitching together lengths toward the end of the skirt?
Ella, some math is called for! If your fabric is 48" wide, you can get four 12" wide strips out of it, if you run them lengthwise. That means each of those strips will have to be 50" long in order to get your 200" total. 50" is a little over four feet, so I would suggest you get a yard and a half of fabric, or two yards if you want to be safe.
Thanks, I figured as much after I posted :) It took me a few minutes, but I figured it out. Thank you! Can't wait to make this!
Glad we came up with the same figures, Ella!
Hi, Thanks so much for your pattern - the calculator is a lifesaver! I teach rural ladies in Zululand, South Africa,to sew. We are using donated offcuts to make skirts and this has made it so easy!
Hi, I think your calculator is brilliant. Thank you. As a sewing teacher I would urge you to get into the habit of pressing as you sew. Otherwise well done on a brilliant tutorial.
Sew Classy, thanks for the compliment and for the tip. Pressing would make a big difference, I agree, but I hate to drag that iron out! Maybe one day I'll get into the habit. :)
Thank you, the calculator made it easy, I made a mini corduroy skirt for my 10 yo daughter with 4 tiers, it came up lovely, not too gathered so it suited the heavier weight of the cord. Excellent tutorial, thank you.
this has got to be the best pattern I have ever read! Thank you so much for going into detail, but in simple terms. Can not wait to get started with dd on it today!
Donna, thanks for the compliment! Let us know how it goes.
I've just looked at making one for my daughter and I've put her measurements into the calculator and I think that you width and length may be the wrong way round? For example the first tier say I need length 4.67 and width 33. Surely it's meant to be the other way round? Just want to check before I start cutting out my fabric
Hannah, length and width really just depend on whether the fabric is laying horizontally or vertically on your table. Just cut a strip that is 4.67" in one direction and 33" in the other and you're good to go :)
Chica, thank you for replying :) I'll give it ago sometime when I've finished all the projects I have in the go!
Thanks so much for your site. I have to make several tiered skirts in different sizes and I am so happy for your calculation tool!!
I bought a skirt like this in Key West. For $75.! Now I’ll be using your great pattern to make my own. Thanks
I Love this my granddaughters would love this,You could use a jelly roll too!
Mistie, that's a great idea to use a jelly roll!
I loved your calculation tool . I think it will be perfect for me a 69 yr old grandma , for myself. I would like to make my 3 layers to have a scalloped effect. The bottom hem would stay not scalloped. Any suggestions how to figure that out In Cutting my fabric? I could send you a picture of a skirt like that if you give me instructions on how to send the picture to you. Thank you!
Dori, we're glad you like this tutorial and want to try it out! We don't have any experience with making scalloped edges, but maybe one of your fellow readers can offer some advice!
Thank you for the wonderful pattern and calculator.
Cherryn