


Quilled Paper Easter Eggs

I usually try to do something a little different each year when I decorate my Easter eggs, so Jo and I were brainstorming recently about traditional crafts that we could morph into unique Easter egg decorating techniques. We decided to give paper quilling a try, and it turned out to be so fun and I couldn't believe how adorable my paper quilled Easter eggs turned out to be.
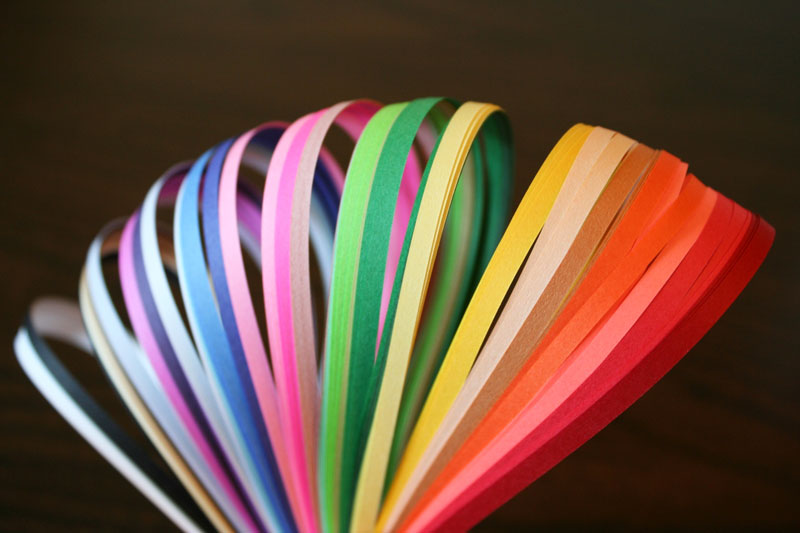
Paper quilling supplies
Paper quilling is something I've been wanting to try my hand at for a while. It's appealing not only because of the fun things you can create, but also because it takes minimal supplies to get started. You just need some ordinary white glue, a toothpick, and a pack of quilling paper. Quilling paper is basically long strips of paper that are super thin and come in any color imaginable. I love just looking at it!
There are lots of great paper quilling books that can teach you some amazing techniques and patterns, but for these quilled Easter eggs, I'm going to show you some quick basics that will enable you to make a bunny, duck, and flower design.
The basics of paper quilling
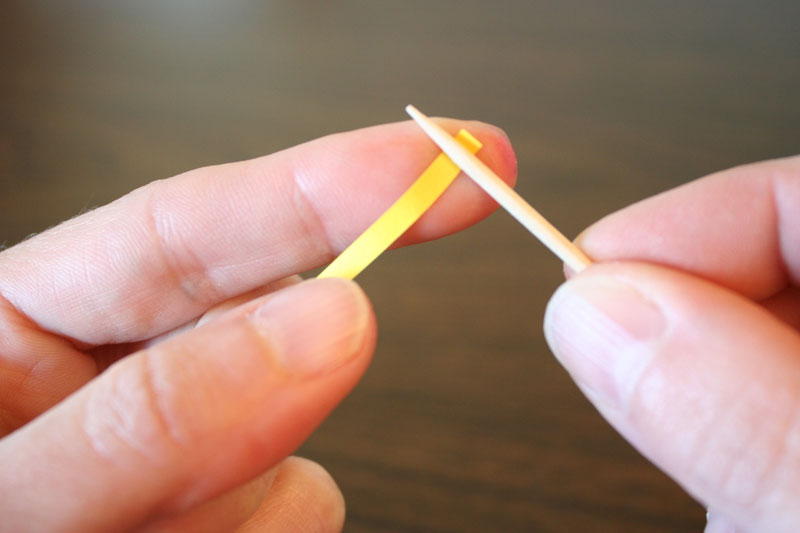
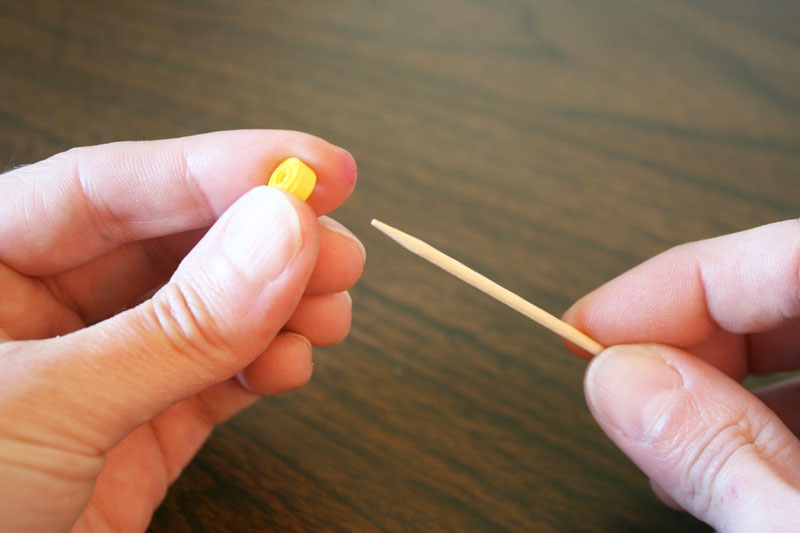
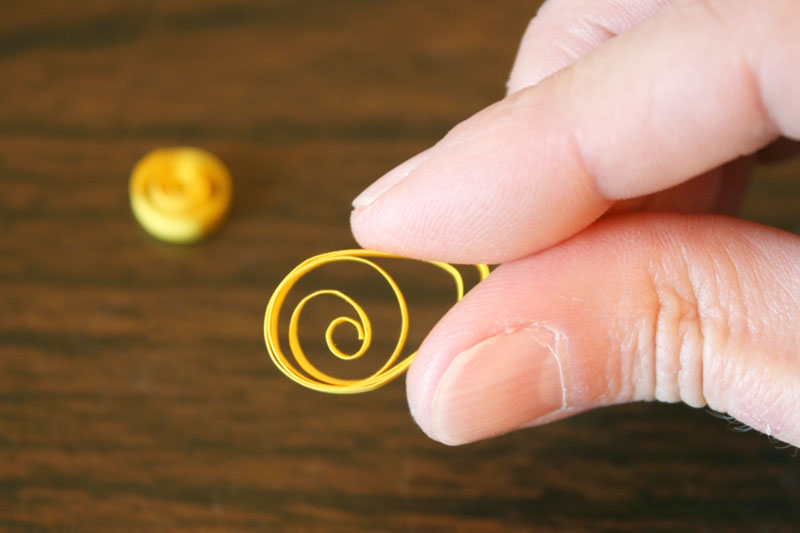
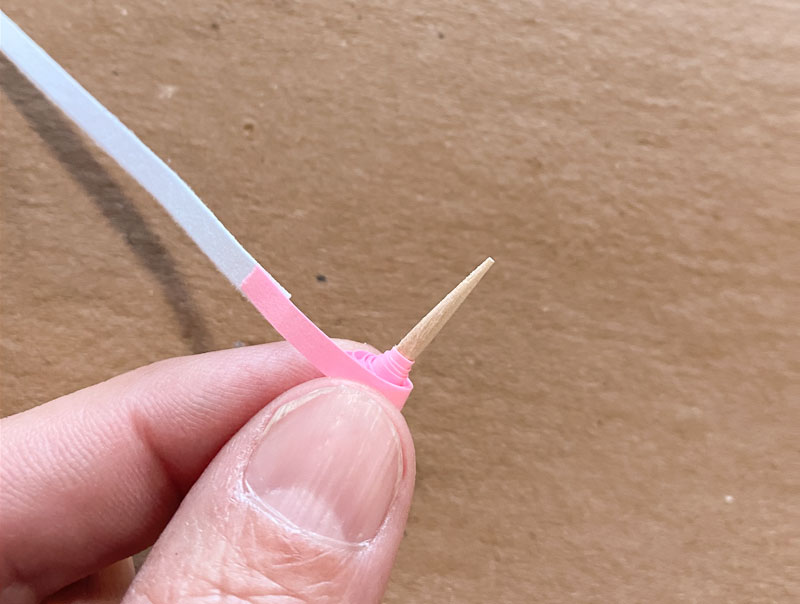
All paper quilling starts with rolling the strips of paper into a spiral. I like to do this by wrapping it around a toothpick. Just put the paper against your finger and lay the toothpick on top.
Then use your finger and thumb to curl the the end of the paper tightly around the toothpick.
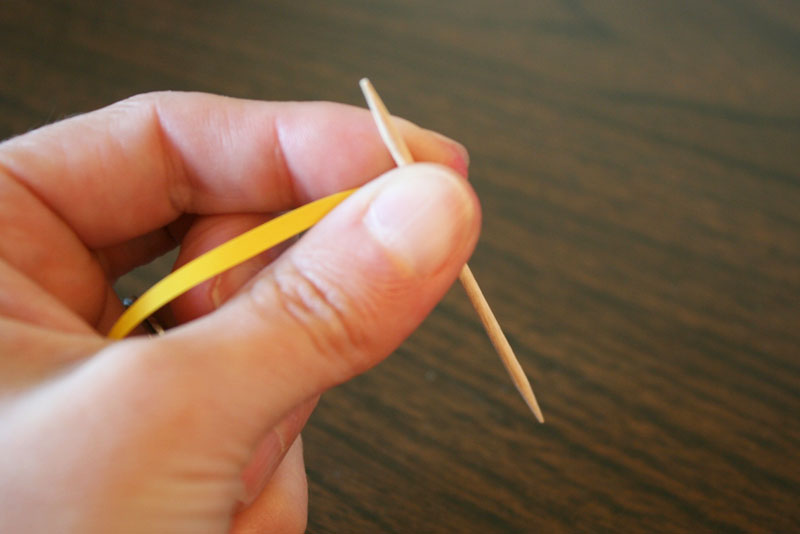
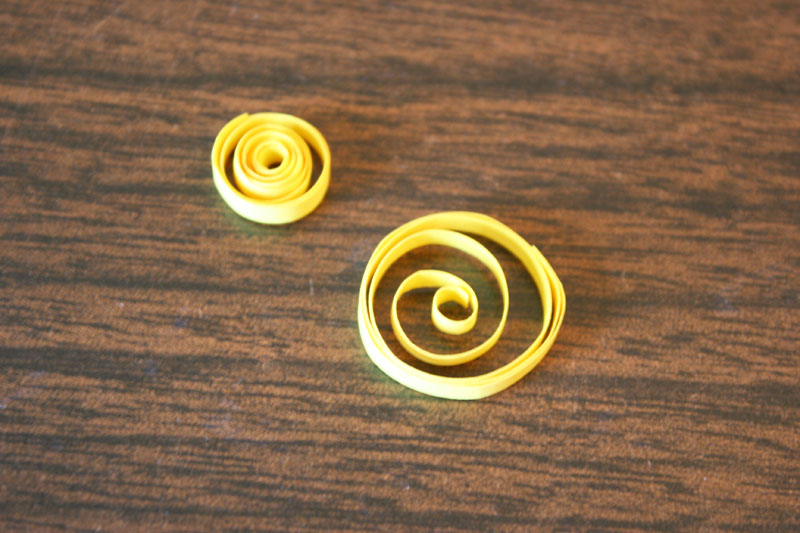
Keep on going, wrapping tightly, until the whole strip is wrapped. The length of paper you'll use will depend on how big of a circle you want. For my Easter designs, I used 8" strips of paper for the larger coils and 4" for the smaller ones.
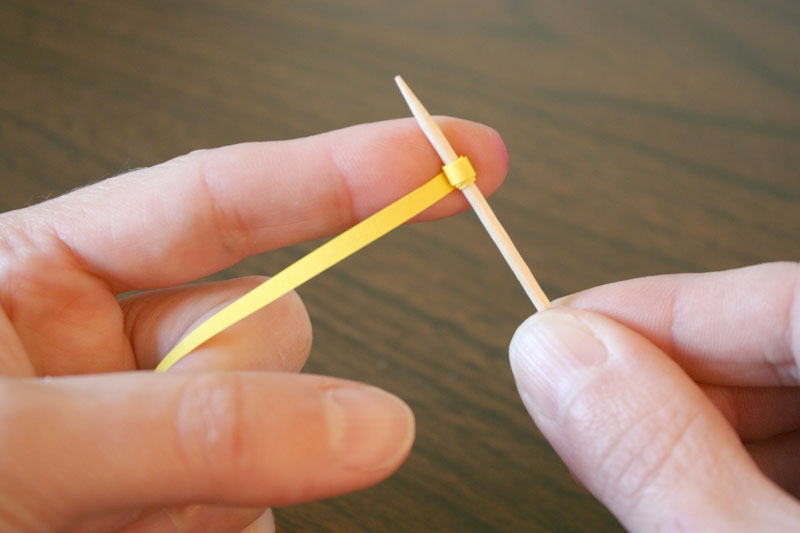
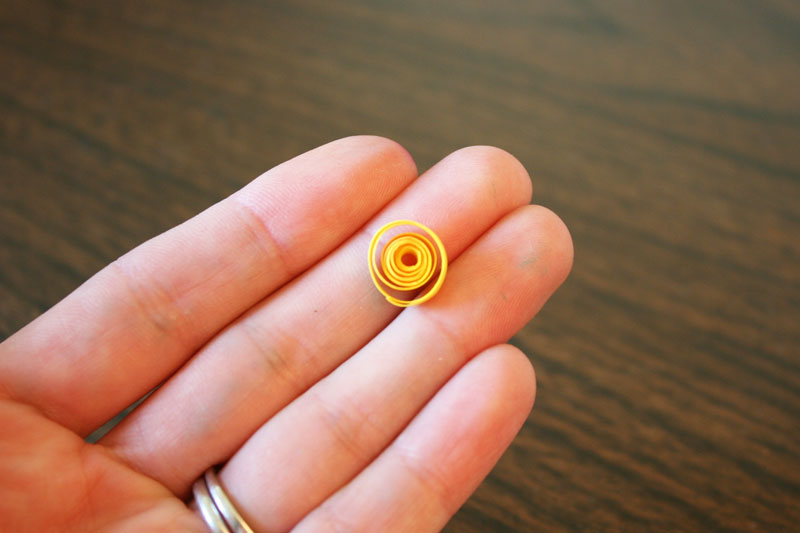
When you're done, just slide the spiral off the toothpick. If the center pulls out of your coil while you're pulling it off the toothpick, just use your thumb and finger to press the inner parts of the coil back in, so it's flat again.
Then just let go of the coil and let it relax. It will unwind slightly, which is exactly what you want it to do.
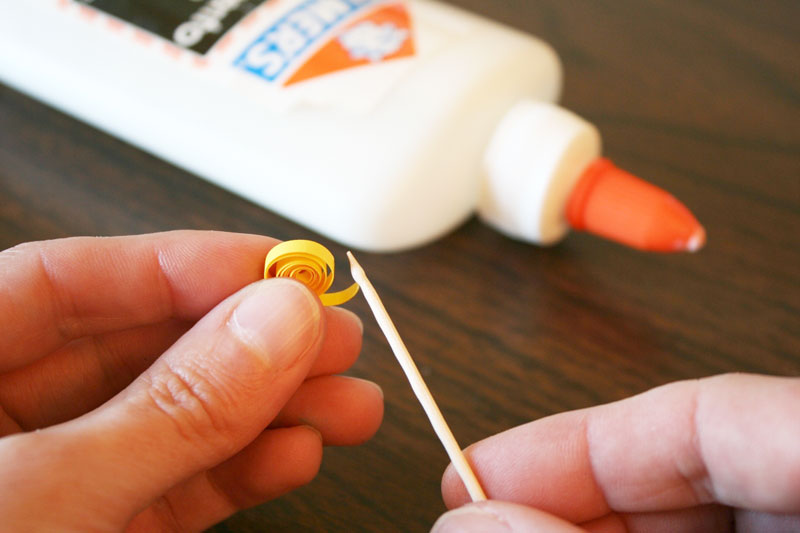
If you're aiming for an exact size, you may need to tighten or loosen the coil a little to get it just right. Then use a toothpick to apply a little dot of ordinary white glue to the end of the paper. Use your finger to hold it in place for a few seconds until it dries.
Most designs (and certainly the ones I'll show you here) are made with this basic spiral, just in different sizes, and sometimes you'll pinch that spiral to form points or shapes. Pretty easy, right? Let's get to it!
Quilled paper duck
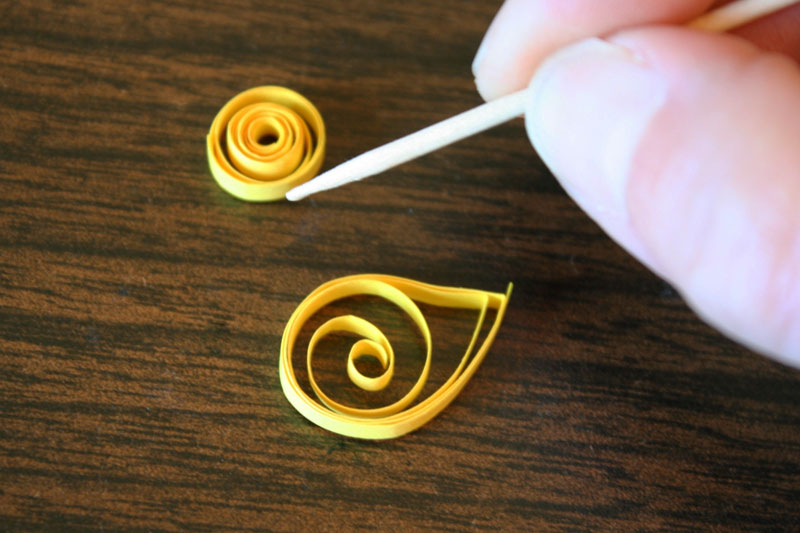
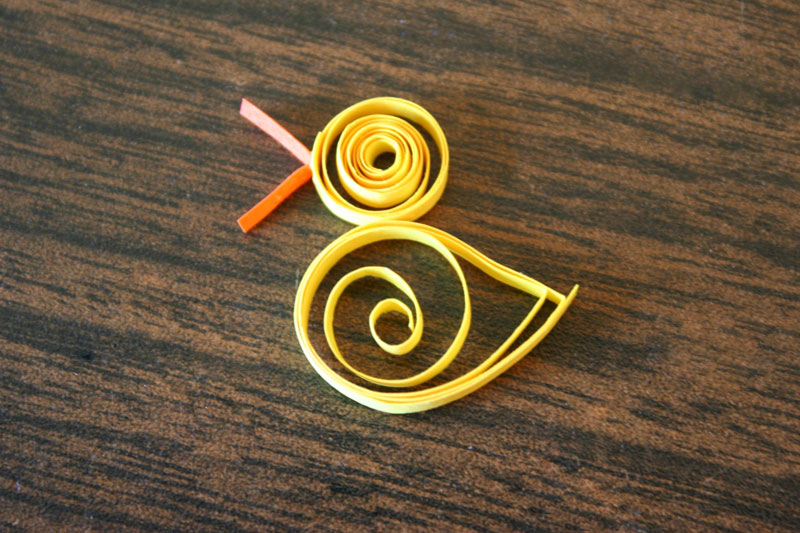
To create the quilled paper duck, you'll need two yellow spirals, one larger than the other. Since my paper was only 8" long, I had to uncoil the larger one quite a bit to get it to be big enough. If I had used longer paper, it would've been a bit easier, but I rather like the open look I ended up with.
One of the most popular techniques with quilling that will let you create tons of different effects is a simple pinch. To do it, just put your fingers on each side of the coil and bring them together, pinching the edge into a point. And just like that, you've made the duck's body.
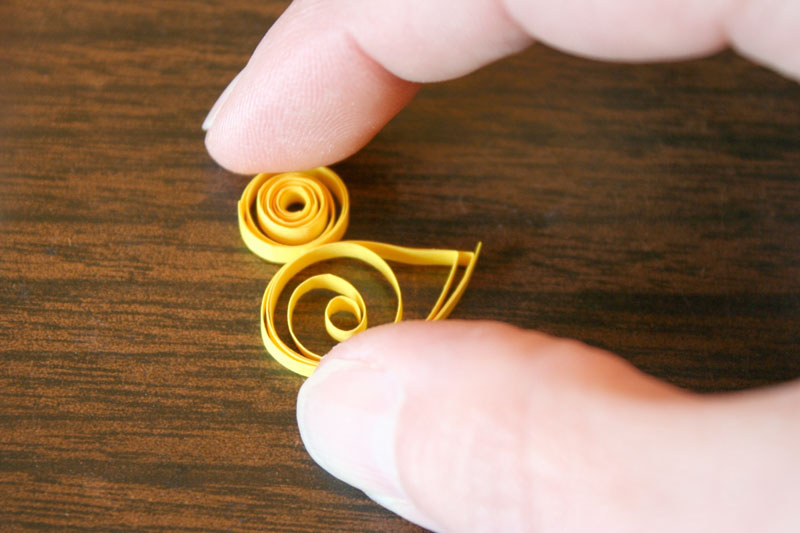
Use a dab of glue to attach the smaller coil to the larger, pinched one.
Gently hold the pieces together until the glue dries.
To add the beak, just cut a tiny piece of orange quilling paper, fold it into a V shape, and glue it to the duck's head.
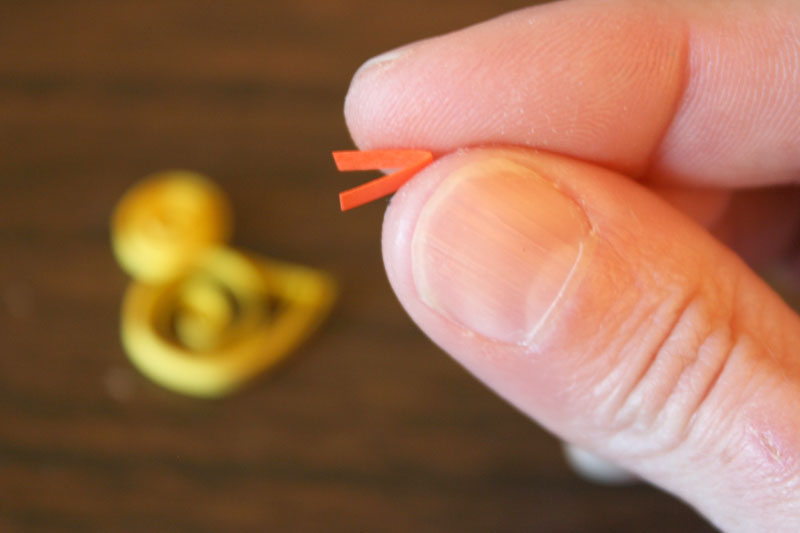
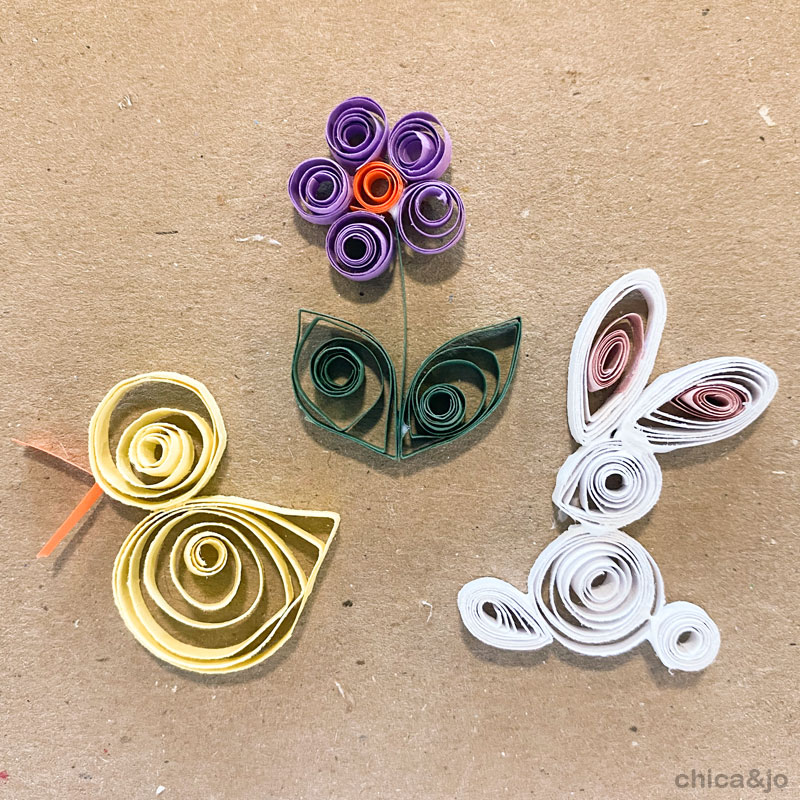
Just look at how cute this little guy is!
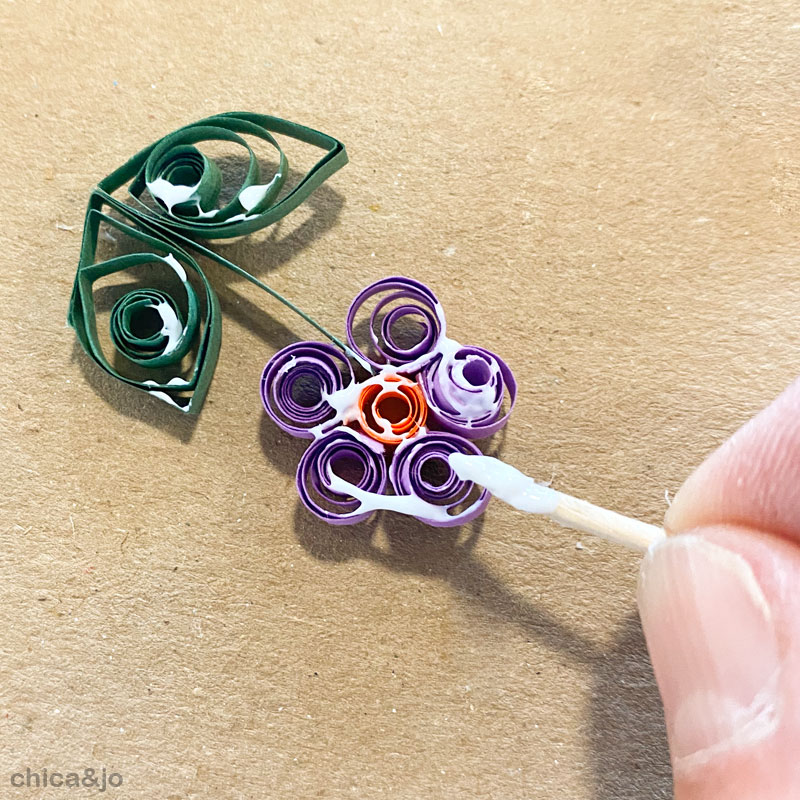
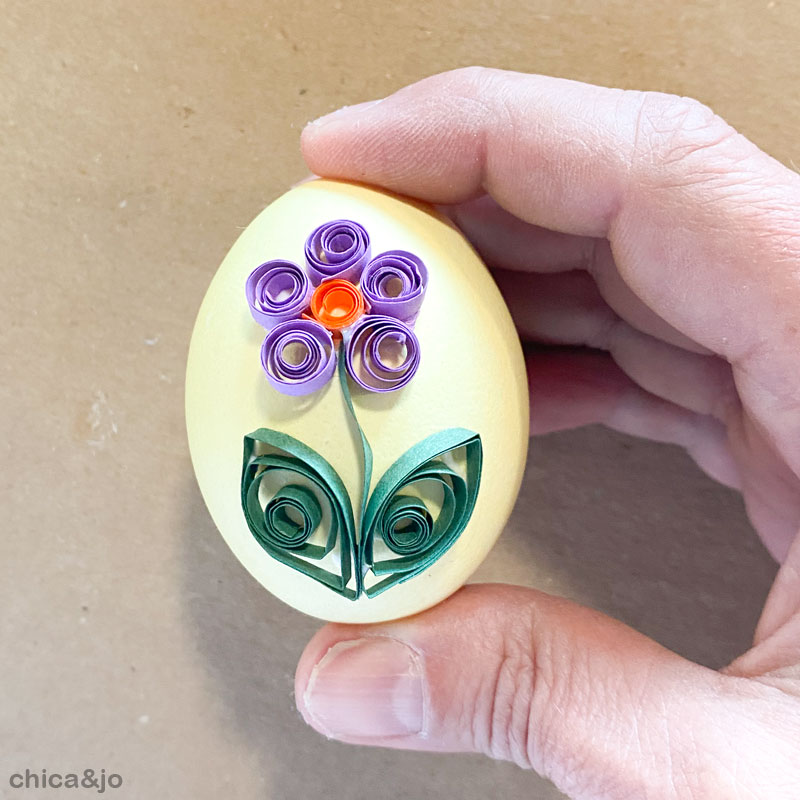
Quilled paper flower
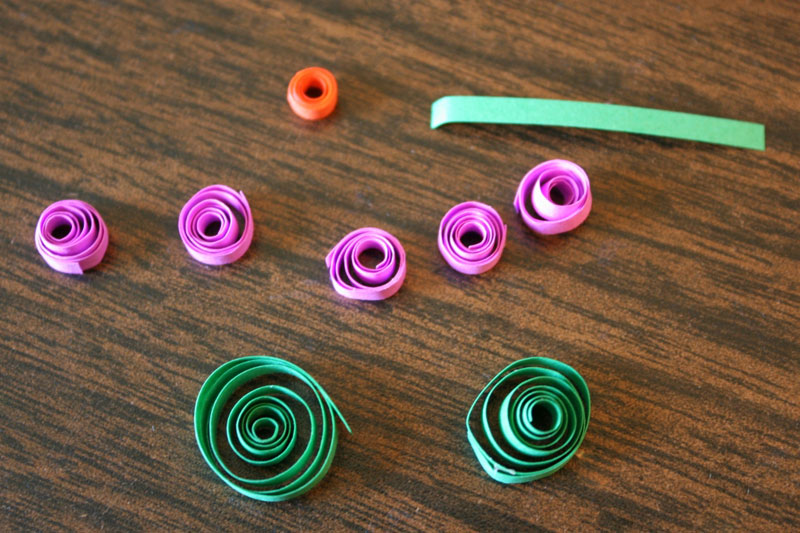
Next, let's try making a simple flower with leaves. You'll need one tiny orange coil, five small purple ones, two medium green ones, and a small strip of green paper.
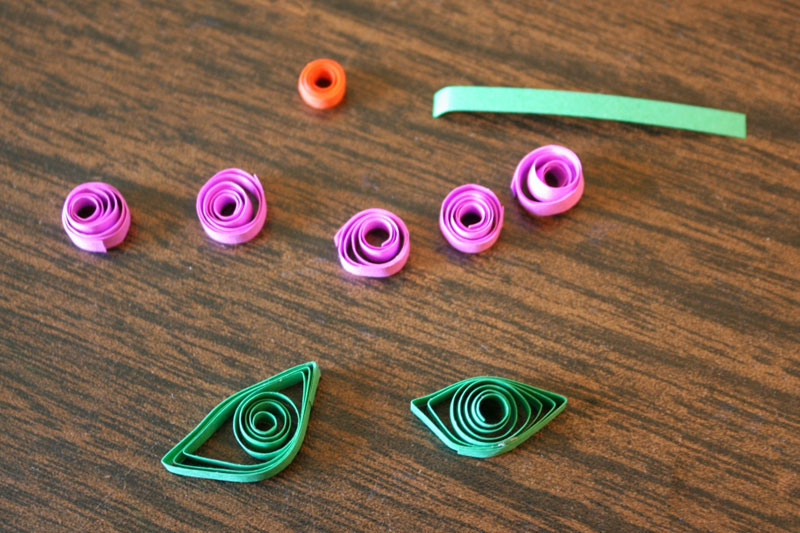
To form the leaves, pinch the two medium green coils twice each so that they have two points.
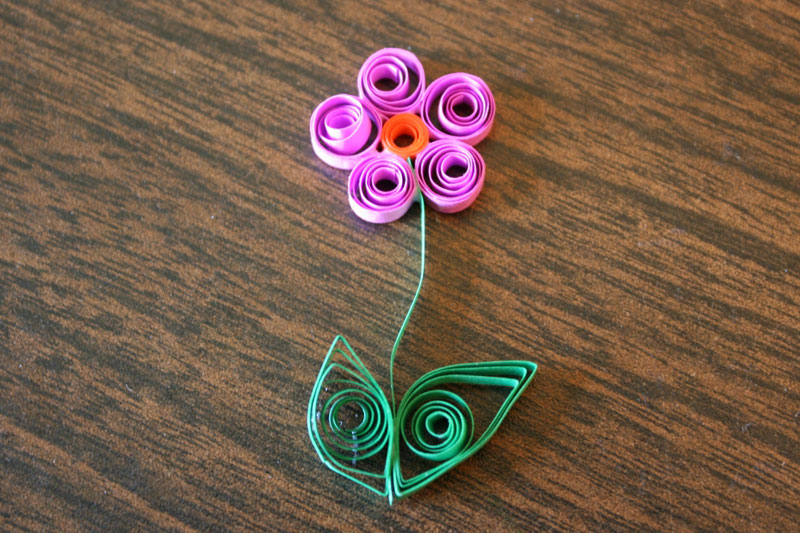
Glue the pieces together and you've got a pretty flower. Of course, you can easily swap the purple for other colors if you'd like.
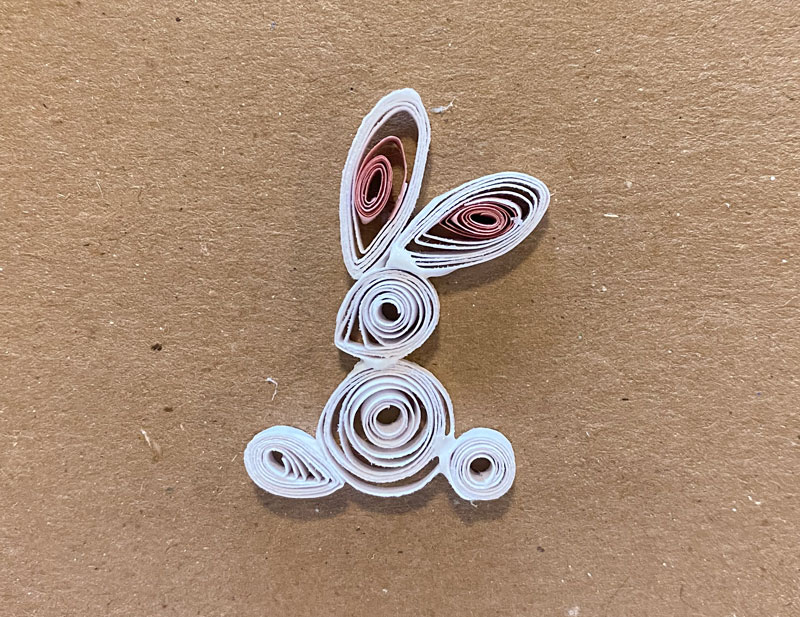
Quilled paper bunny rabbit
Your skills are building, so now it's time to do a character that's a bit more complicated... a bunny rabbit. Don't worry, he's still pretty easy, and totally worth it for that sweet bunny face.
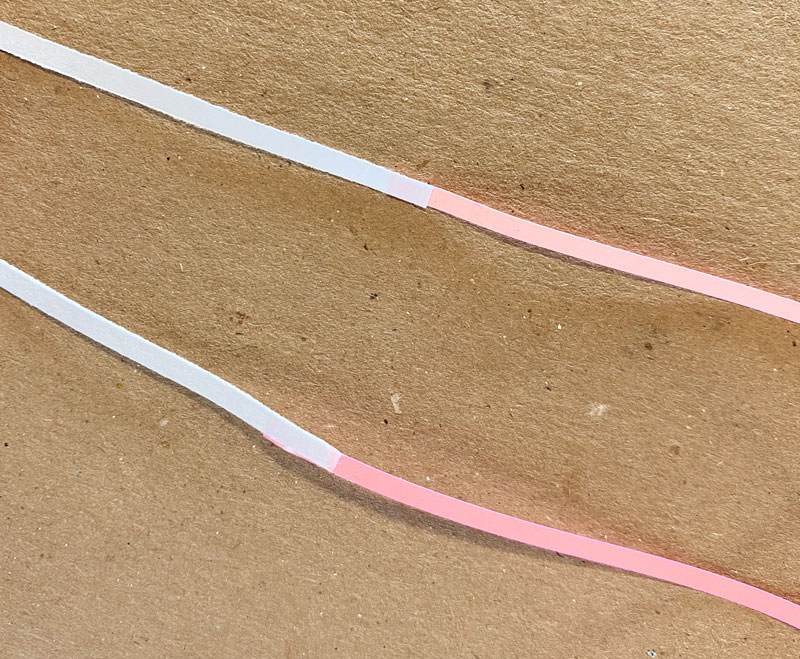
To make the ears pink in the middle and white on the outside, start by gluing white and pink quilling strips together, end to end.
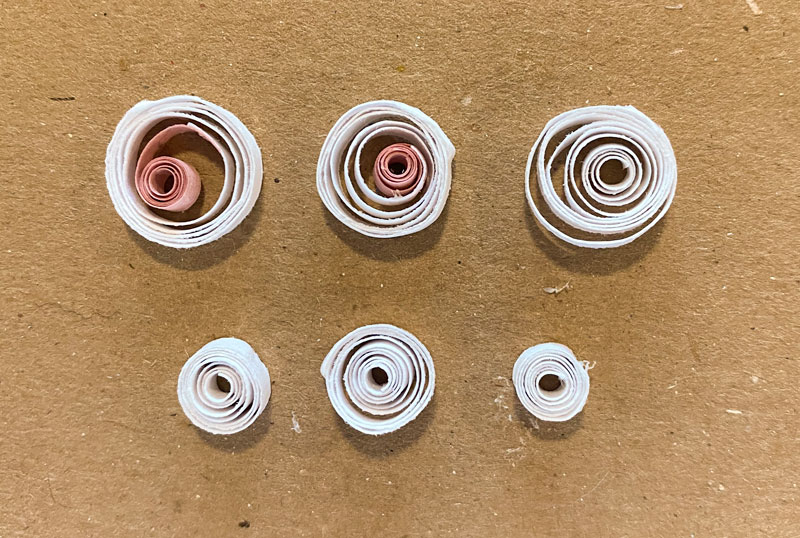
Then form two medium-sized coils (one for each ear) using the usual technique, and starting with the pink end. Keep going so that you have a coil that's pink in the middle and white on the outside.
In addition to the two ears, you'll need another medium-sized white coil, two small white coils, and one tiny coil. There are a lot of pieces here, so make sure you don't make them too large or else the finished bunny won't fit on an egg!
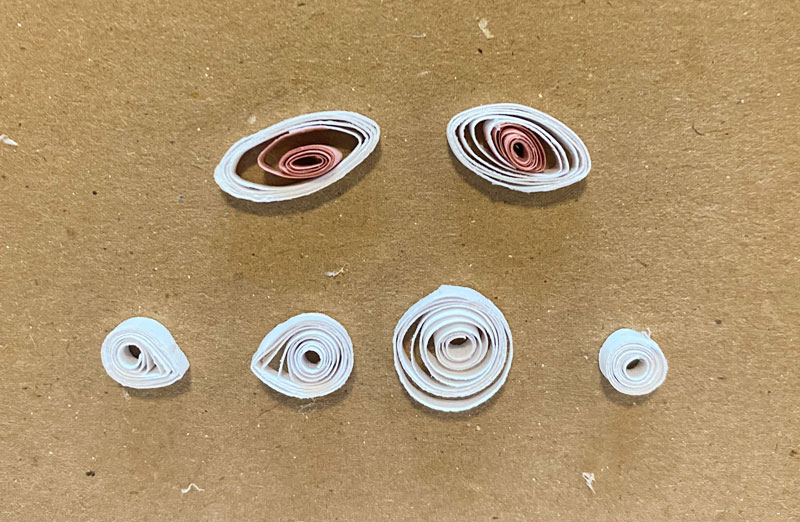
Flatten the ears into long ovals, and pinch points into the two small coils.
Then arrange the pieces into a body, head, ears, foot, and tail, and you'll have a bunny before you know it!
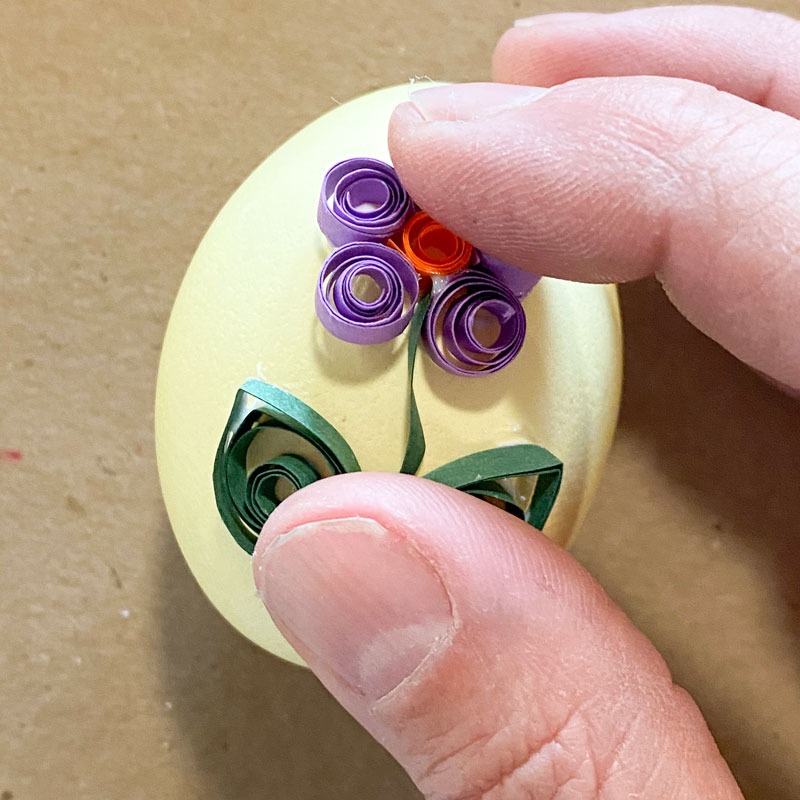
Adding quilled paper decorations to Easter eggs
I think my quilled creations are so adorable! I'm putting these quilled paper designs on Easter eggs, but they could easily go on a greeting card, frame, scrapbook, or just about anything.
To attach the designs to the eggs, just use a toothpick to add some white glue to the backs. Make sure you use a non-toxic craft glue that dries clear (like Elmer's so that your eggs will still be safe to eat.
With the egg resting on a piece of paper towel or foam to keep it cushioned and stable, put the quilled paper design on the egg and hold it in place for a little bit until it sticks.
similar projects
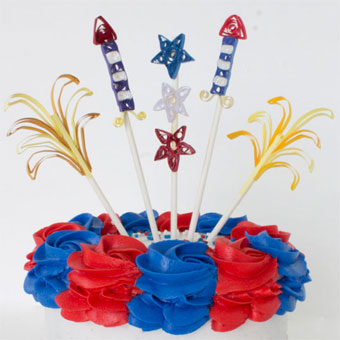
Fourth of July Quilled Paper Cake Topper
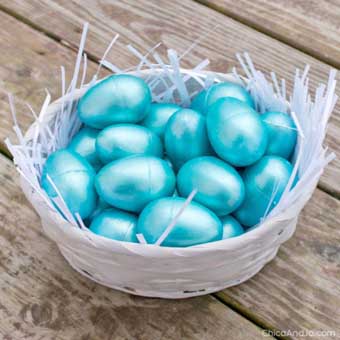
Metallic Easter Eggs
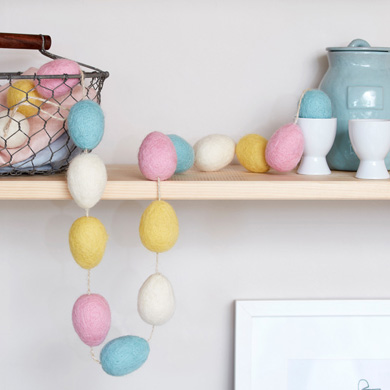
7 Ideas for Decorating with Easter Eggs


13 comments so far:
wow that is so adorable
Wonderful way to use quilling!
It is a wonderful site I really liked ,it is so adorable to have fun and education with all ages.
Congratulations, great project. Thanks for sharig.
Nice work! I LOVE quilling, a lot!
VERY NICE
these eggs are really so simple but beautiful.
Amazing
I just started and your instructions are great. Thank You
Thanks, Kathie. Enjoy your new hobby!
Now I see how to do those larger loops. TY I would like to know also where to buy single colors, like white ,reds, greens and in different sizes. cant seem to find it. Hope you can help. I havent tried cutting my own right now Joyce
Joyce, you can find single colors of paper on Amazon. For example, here's what you get when you search for quilling paper red. Hope that helps!
These are SO darn cute! An ingenious use of quilling. Love them!