


Tips for Decoupaging with Fabric

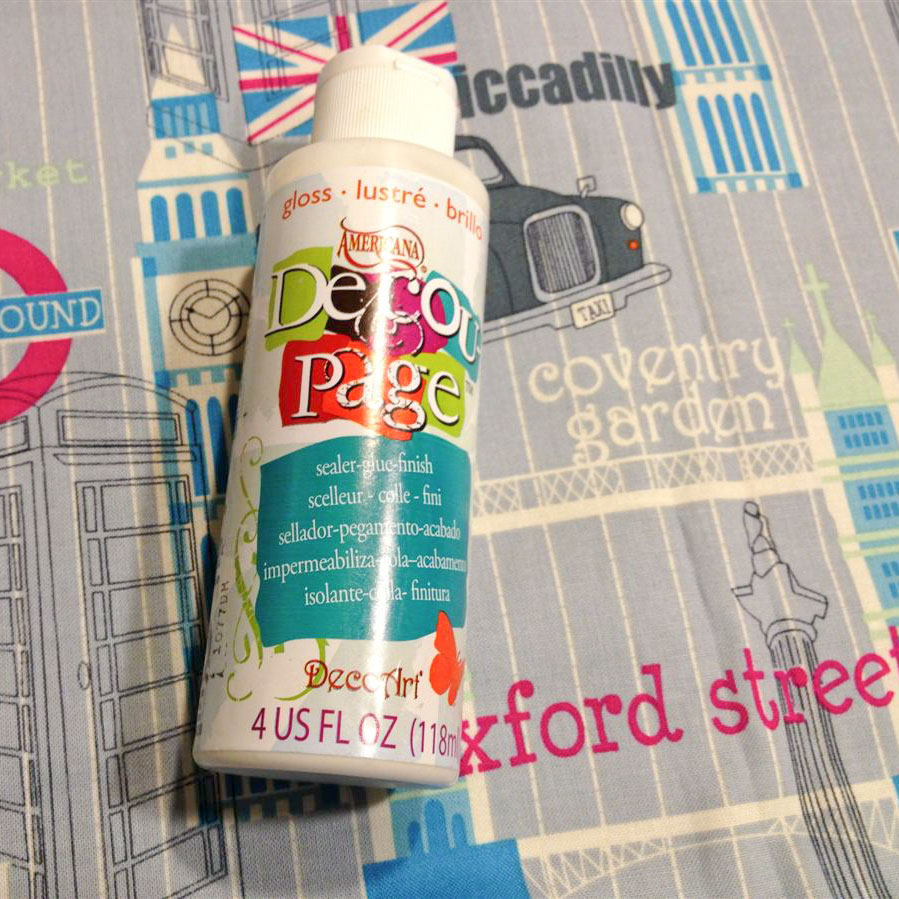
Decoupage is a fun craft technique that has been around for years, and the most common material to decoupage with is paper. But thanks to new formulations of decoupage medium, you can now decoupage with fabric, transforming ordinary objects into something truly spectacular with the myriad of beautiful fabric patterns available.
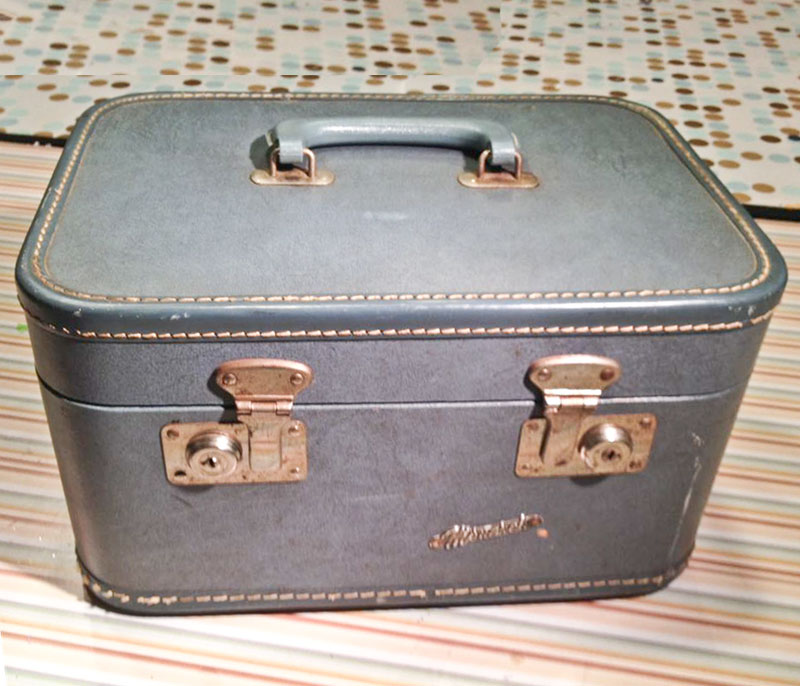
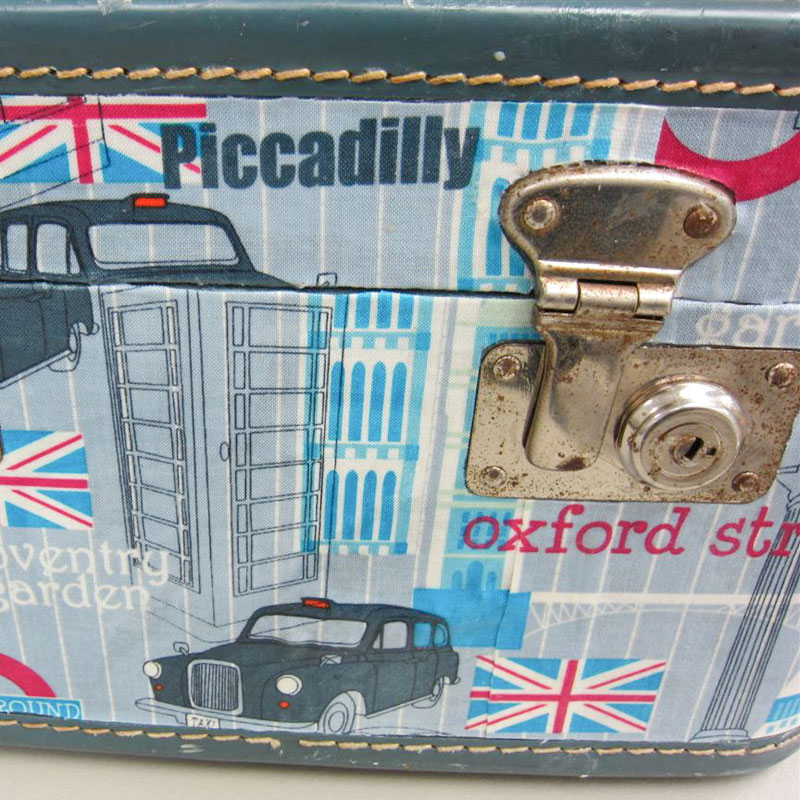
I recently picked up a vintage train case at a local flea market that was in fairly good condition and selling for only $6. The inside was a hot mess but the outside was in great shape, so I knew right away I could give it a decoupage refresh and transform it into a chic piece of carry-on luggage for my travels.
Since this train case is such a specific item, I'm not going to give you a step-by-step of how I covered it. Instead, I'm going to share with you some fabric decoupage tips I learned along the way, to help you with your fabric decoupage project.
Tip #1: Apply decoupage medium to your fabric before cutting it.
Since fabric has a weave and can fray, it's hugely important to always coat it with your decoupage medium before you even cut it for your project. Just lay your fabric out and brush on a coat of the decoupage all over the fabric.
Once the fabric has dried throughly, and then you'll find it's SO much easier to cut your pieces to the exact size you need, with no fraying of the edges. The fabric will feel more like leather or vinyl, and you can just use more decoupage to adhere it to the item you want to cover.
Tip #2: Cut lots of notches around hardware.
Cutting around all the hardware on my piece was daunting, but necessary. Rather than try to cut the exact shape on the first try, I found it best to cut notches over any raised areas as I spread the fabric over the case. Cutting tiny notches a little at a time made it so easy to work around the bumps, and I just trimmed the points away as I went, achieving a perfect fit.
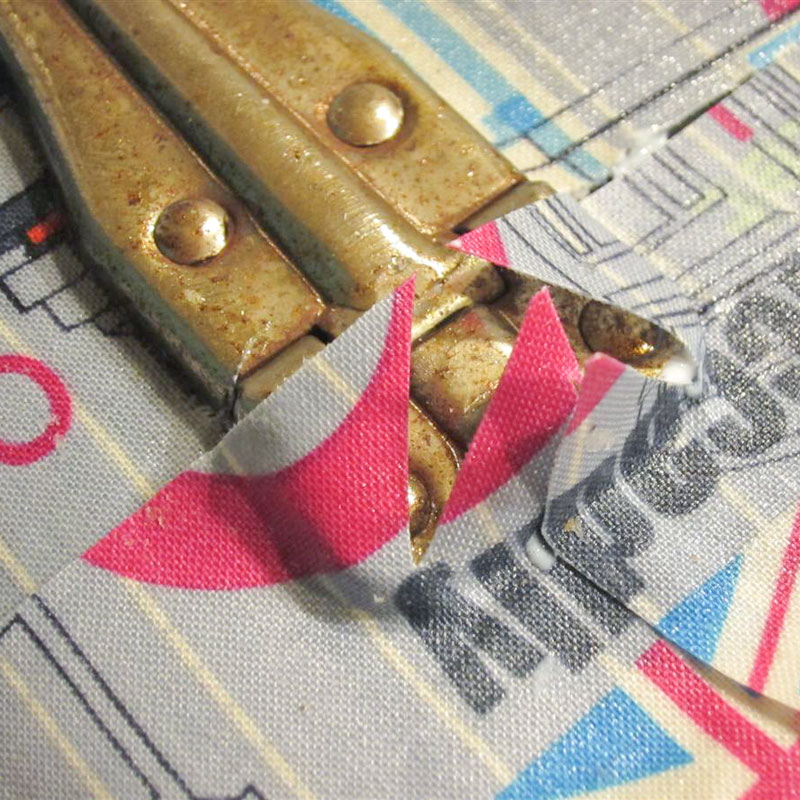
P.S. Just look at those crisp, clean cuts thanks to the pre-coating step I did in Tip #1!
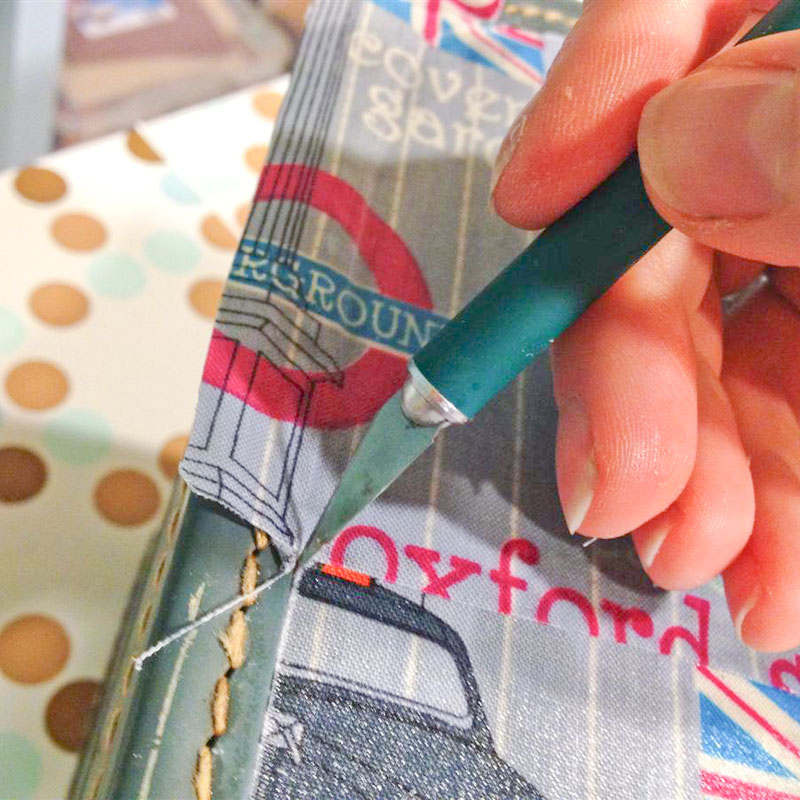
Tip #3: Allow your fabric to dry completely before trimming.
As you adhere your fabric to the piece with more decoupage medium, it will be a sloppy, sticky, mess. It will be wet, especially on the edges, and you will want to trim it immediately to make clean lines. Don't. Don't get so excited about seeing how it will look that you start trying to trim your fabric before it is completely dry. It just doesn't work, trust me.
Instead, let the fabric dry completely before taking a craft knife to it to trim the edges. Walk away from it if you can't resist. Go shopping, take a nap, or read a book — anything to keep you from ruining your piece because you lack crafting patience.
I love how the case turned out. I must be honest, I was actually a bit intimidated by this project at first. I was afraid of messing it up, but I learned a few things as I went along and I couldn't be happier with the end result. I can't wait to carry it through the airport.
similar projects
Scandinavian Fabric Stars Tutorial
Upholstered Fabric Christmas Trees with Tufting
Tips for Painting Outdoor Patio Furniture


15 comments so far:
I love this! What fabric is that????
Karissa, I found the fabric on the clearance shelf at Hancock's a while ago. I will look and see if I can find it online for you.
I love this! I have this exact case! I've had it since I was little but when I was in junior high I wrote all over it in permanent marker, now I'm going to try this! Wish I had that fabric! Lol.
I wish I'd kept the one I had when I was a kid! I never seem to find any of these old suitcases anywhere to decorate....I guess I'll have to start looking around. (Or maybe check with my mom....she saves everything....)
Love it! I have a train case that I use for my vintage jewelry and its in mint condition. After reading your project, I can't wait to go home and start looking at my fabrics to decoupage it!
Cute, cute, cute! What a great project!
Thank you for the great tutorial and wonderful pictures! It was so easy to see exactly what you did and you made it simple to understand. Your project came out really nice....loved it!
I love this tutorial. I have a question though, the old suitcase I have the leather edging is all dried out and coming off, any suggestions on what to do with that? Should I just take it all off or can I repair it somehow?
Becky, that's a hard question to answer without seeing it, but if you decided to remove it, maybe you could glue on a wide piece of ribbon in its place.
I love this project and the fabric! I have a question though? I bought this exact case about a year ago and I actually found this article while I was trying to research it. The front name piece that's on yours is gone from mine which has made it hard to research. Can you tell me what brand this case is? I can't tell from the picture. Thank you!
Chenoa, the brand is Monarch. Hope that helps!
Came across your site a couple weeks ago and the next week found the exact case at the local Goodwill outlet for 50 cents. I have a question about the trim -- the stitching is falling & fraying. How would you handle this? Love the idea of using fleece. I'll be checking out the fabric store this weekend. Question about the name piece -- how did you get it off without ruining the case? Thanks for a great post!
Mickie, what a great find! Perhaps some fray check would work on the stitching? As for the name piece, it was pretty loose, so it just popped off.
I do have that exact case. I have to give it some thought
Try garage sales, junk shops. auction houses & garbage bins behind auction houses. I've redone 6 train cases as gifts. And have 4 more waiting. That's how I did it -- w/the help of a great Son.