


How to Host a Survivor Party

Jo and I hosted a Survivor party for our friends during our summer beach vacation in Sanibel, and it was so amazingly fun! All our friends really enjoyed playing. If you're planning to host your own Survivor party, we've got plenty of ideas to share with you.
We'll go over the structure and rules of an at-home Survivor game, outline some of our example Survivor challenges, share links to our full tutorials for DIY Survivor props, and even list some resources for purchasing other items you may need to host your at-home Survivor event.
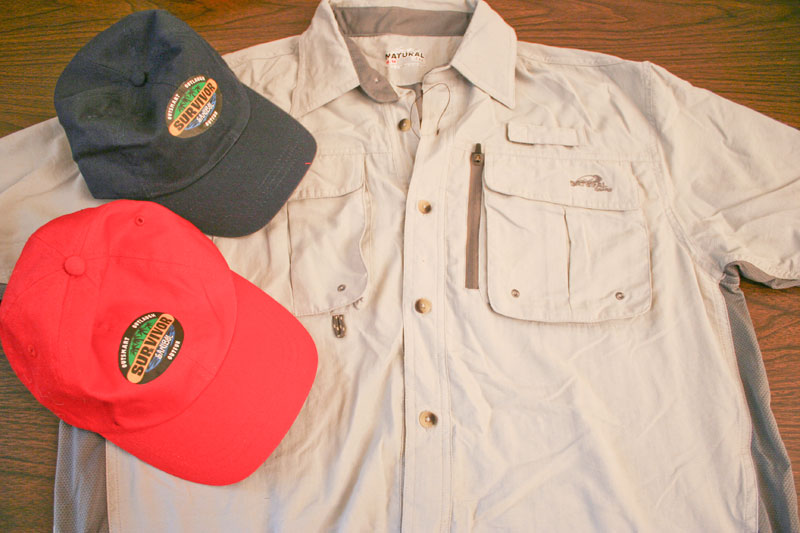
Outfitting the Survivor hosts to look like Jeff Probst
Because there are two of us, Jo and I were both hosts of the game. We each took leadership of one of the tribes, and one of us also got to take bragging rights when our tribe won! It kind of stinks that we couldn't play, but it wouldn't have been fair since we know all the rules. Besides, somebody needed to be there taking pictures!
To properly outfit ourselves for the event, we bought some shirts similar to what Jeff Probst wears and picked up a couple of baseball caps in our tribe colors. We embellished them with a Survivor logo, using some dark shirt iron-on transfer paper.
Setting up the Survivor tribes
The players were divided into two tribes, with an equal number of adults and children on each team. We carefully divided so that the tribes had a good balance of skills among their members.
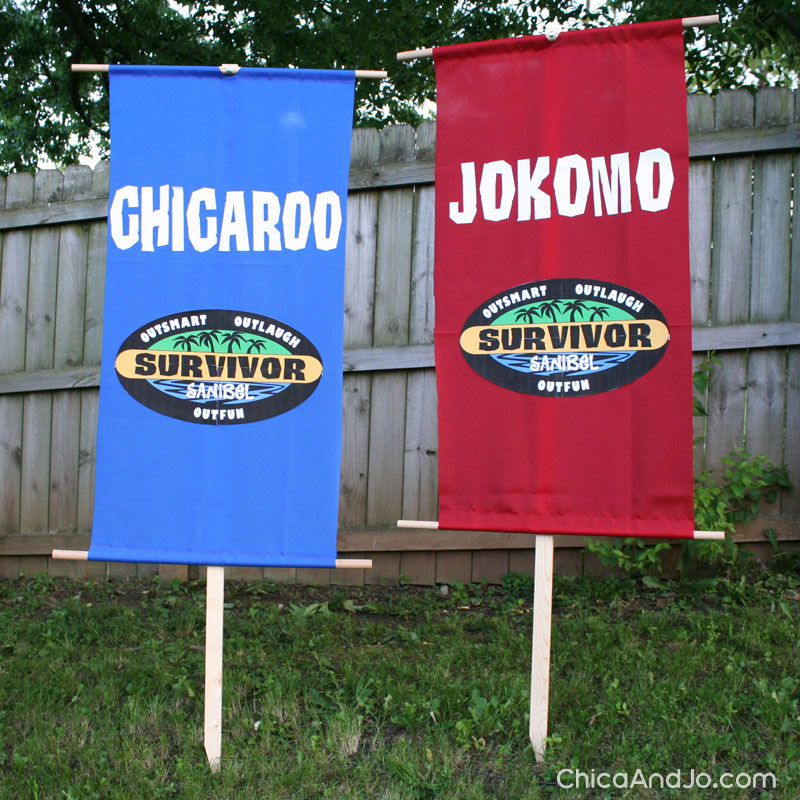
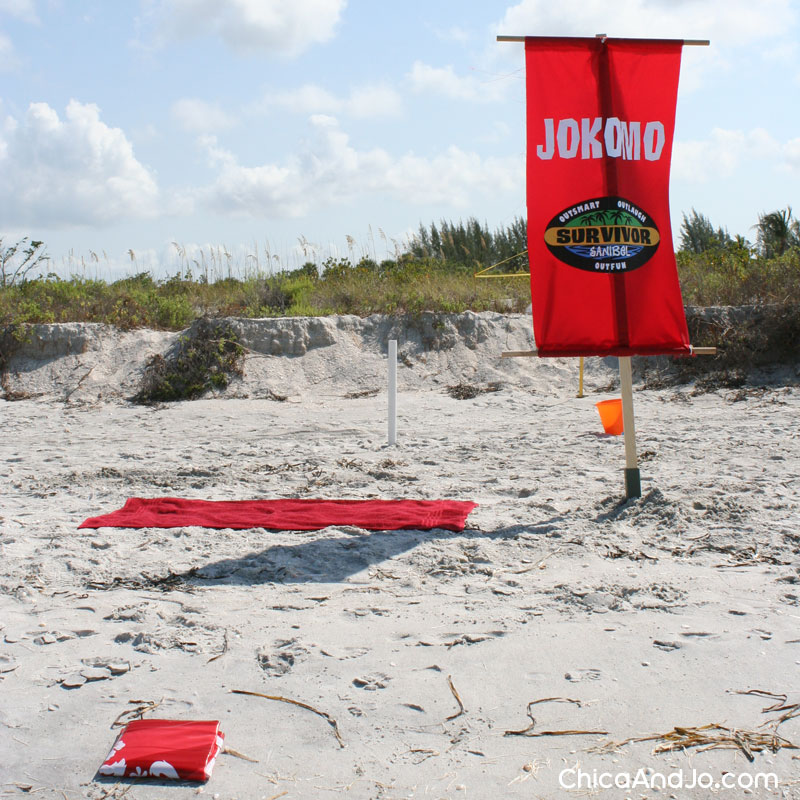
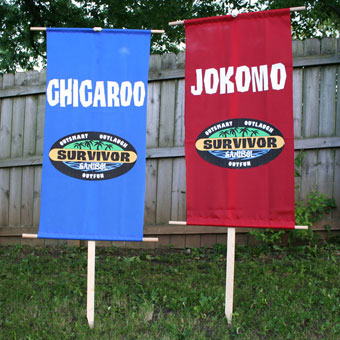
Each tribe got their own tribe flag to carry to each challenge, too. Check out our tutorial to see how easy it is to make your own Survivor tribe flags for your teams.
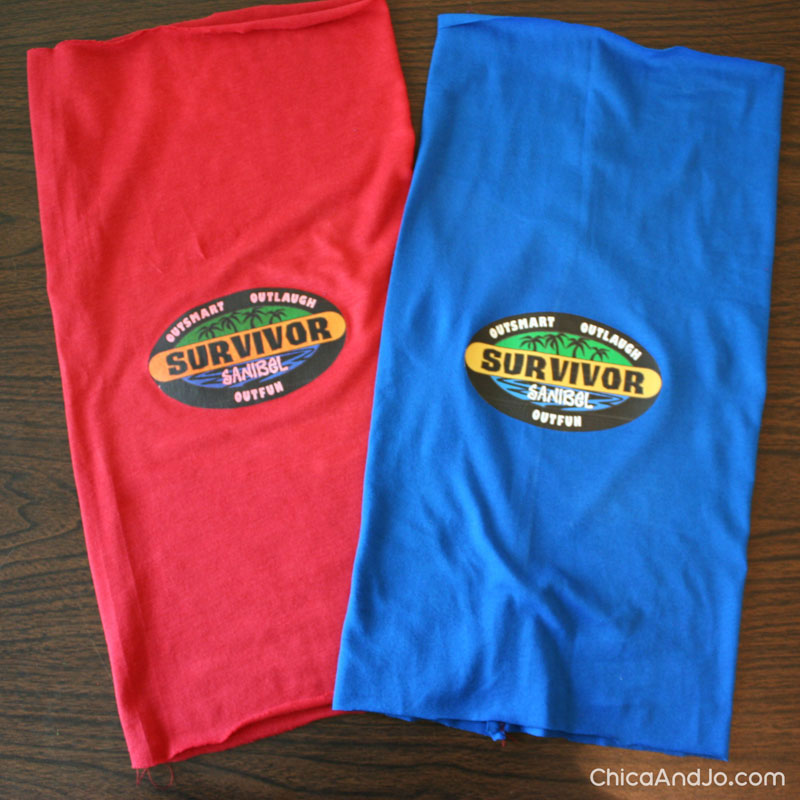
You will also want each player to have their own Survivor buff. It's easier than you might think to make your own Survivor buffs for the contestants to wear, and our tutorial will show you how. Props like buffs are crucial to getting everyone into the spirit.
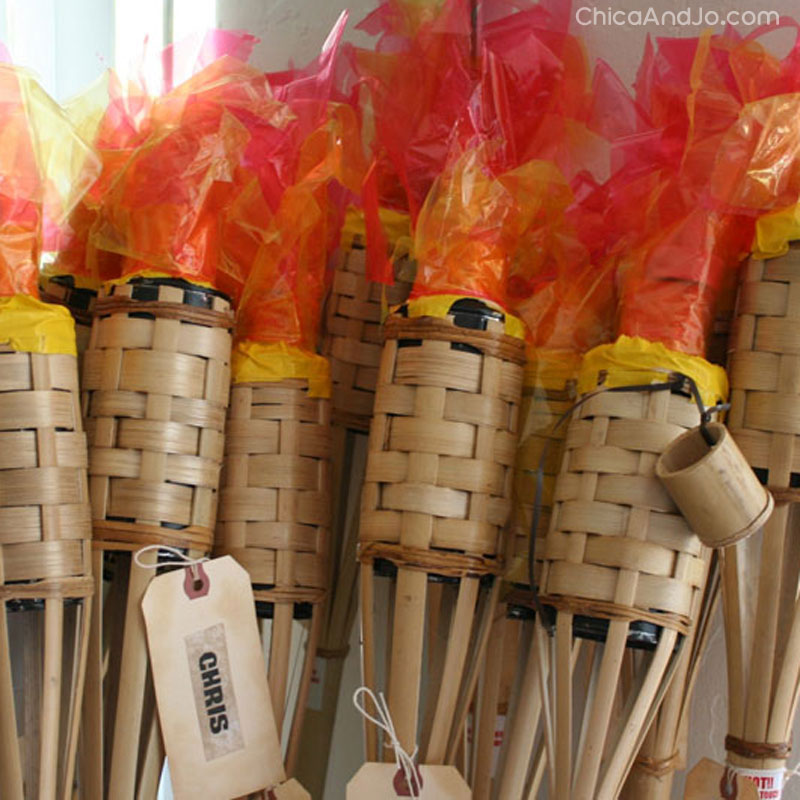
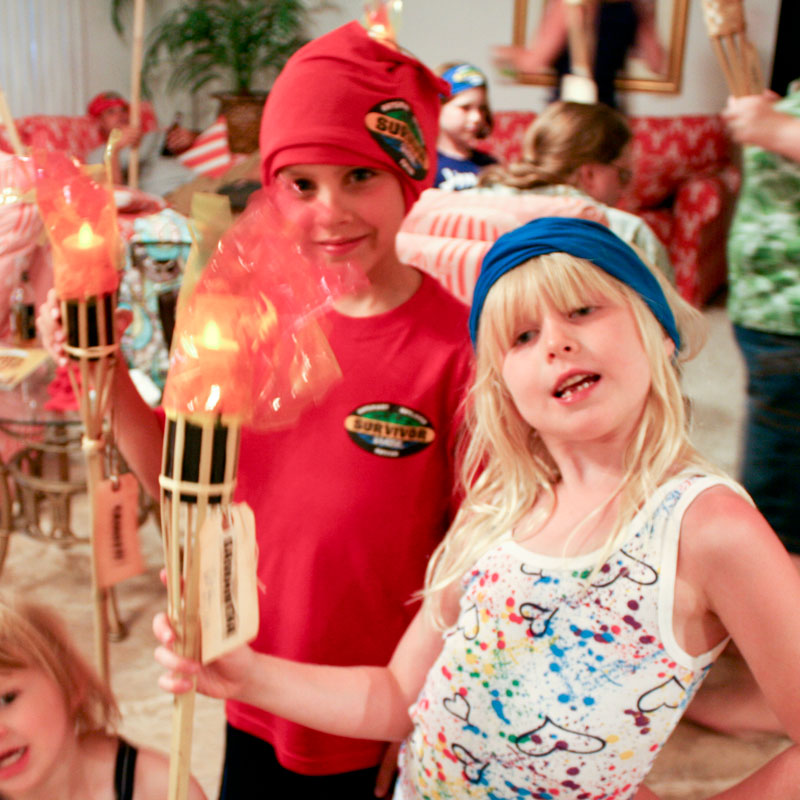
Finally, you'll want to make each player their own kid-friendly DIY flameless Survivor torch to carry with them to tribal council.
Immunity Idol and prizes for winning challenges
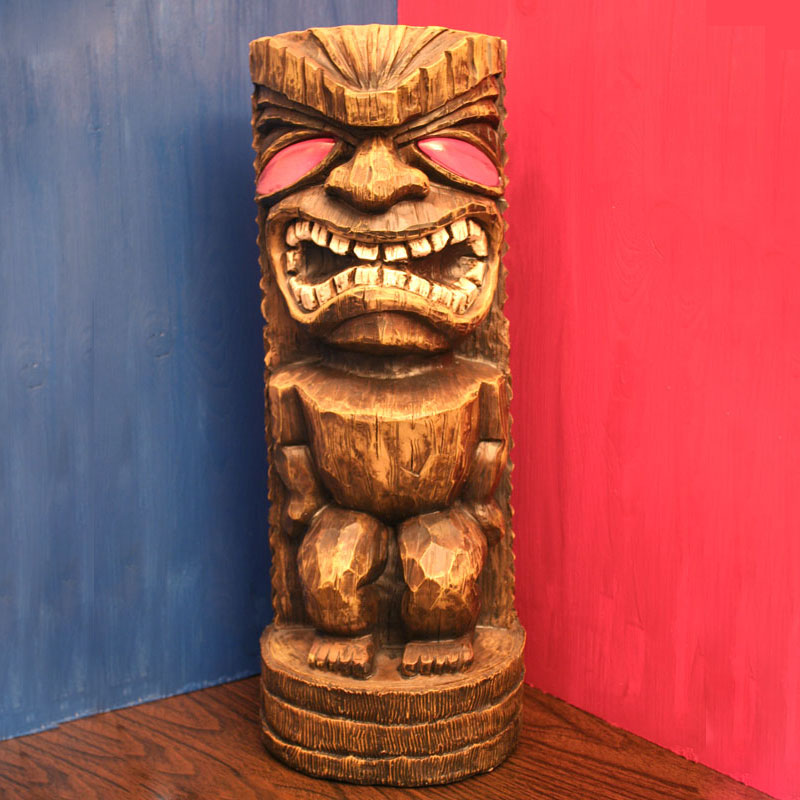
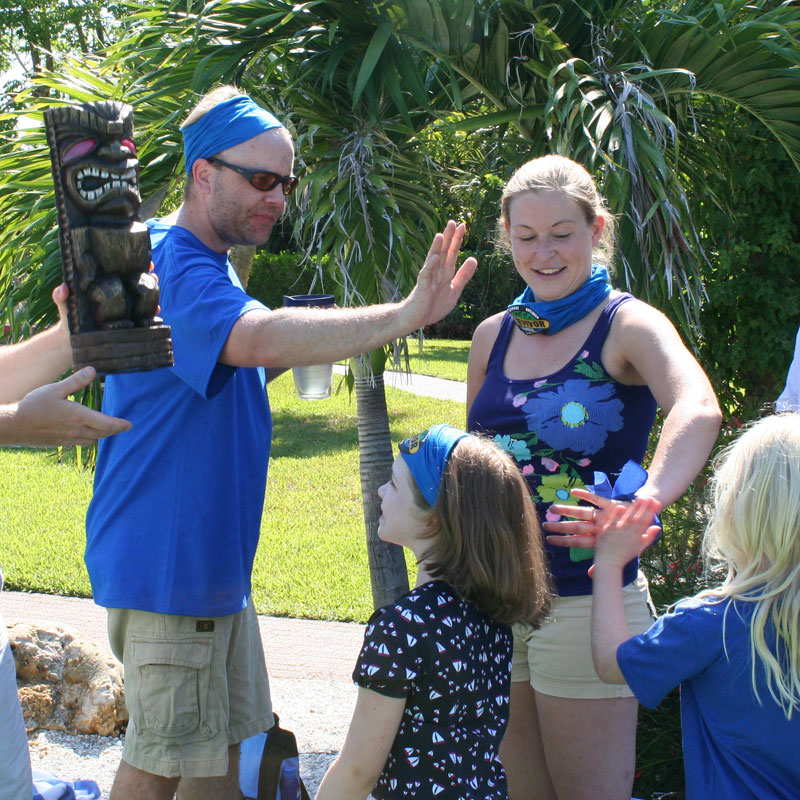
In addition to a small group reward (such as food or toys), the tribe that won each challenge got to keep the immunity idol until the next challenge. The idol we got is fantastic — it's about 2 feet tall and the eyes glow! We found it at a local box store, in the garden/luau department. Shop around your local garden or home improvement stores for inspiration, or choose from the many tiki statues available online.
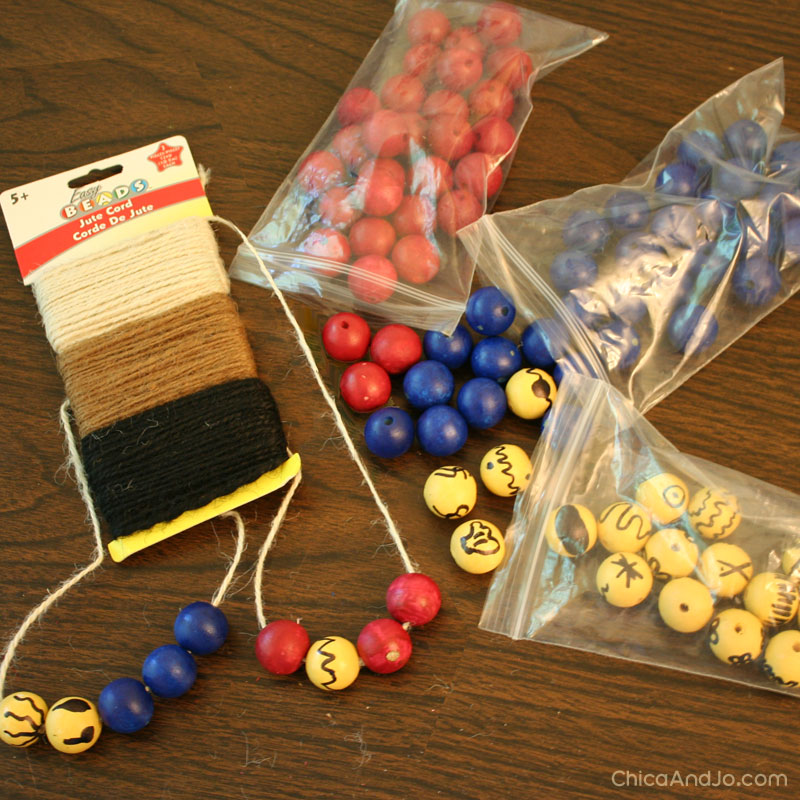
We also added a new twist that helps with the nature of an at-home Survivor game. Each player started out with an empty rope necklace, and at the end of every challenge, we awarded every member of the winning tribe with a special bead (in their tribe color) to add to their necklace.
The tribe with the most red- or blue-colored beads at the end of the whole game was the winning tribe, and got a very special prize. The beads were simple unfinished wood beads that we painted them red and blue (and yellow... but more about the yellow beads in a minute!).
Starting the game... and introducing our tribes!
In addition to the items mentioned already, we also gave each player a T-shirt in their tribe color, to help them all feel like a team.
Here are the four items each Survivor player got at the start of the game:
- a DIY flameless torch with their name on it
- a simple rope necklace
- a DIY Survivor buff buff in their tribe color
- a T-shirt in their tribe color
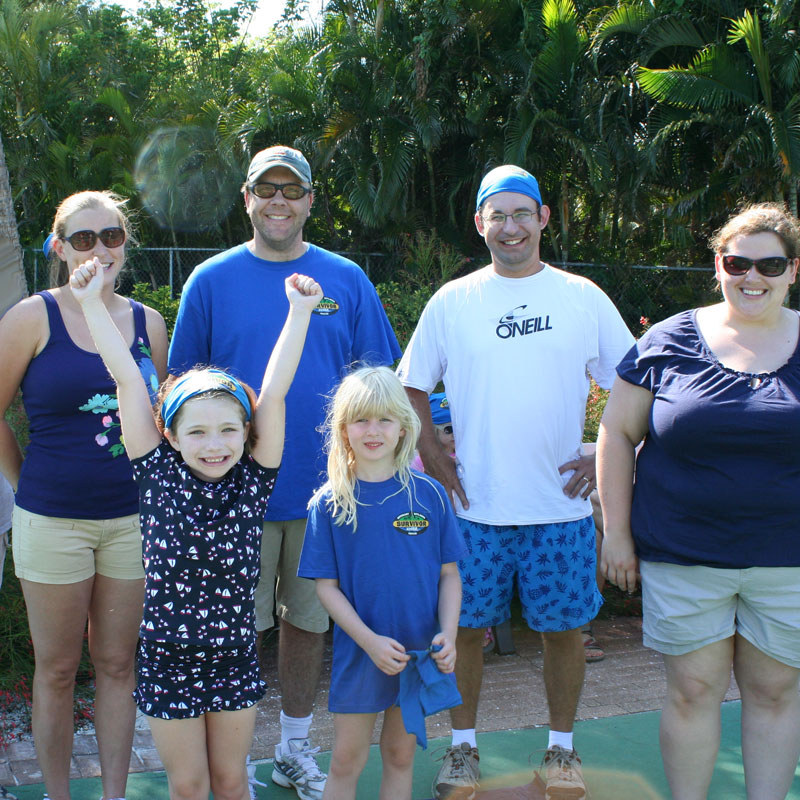
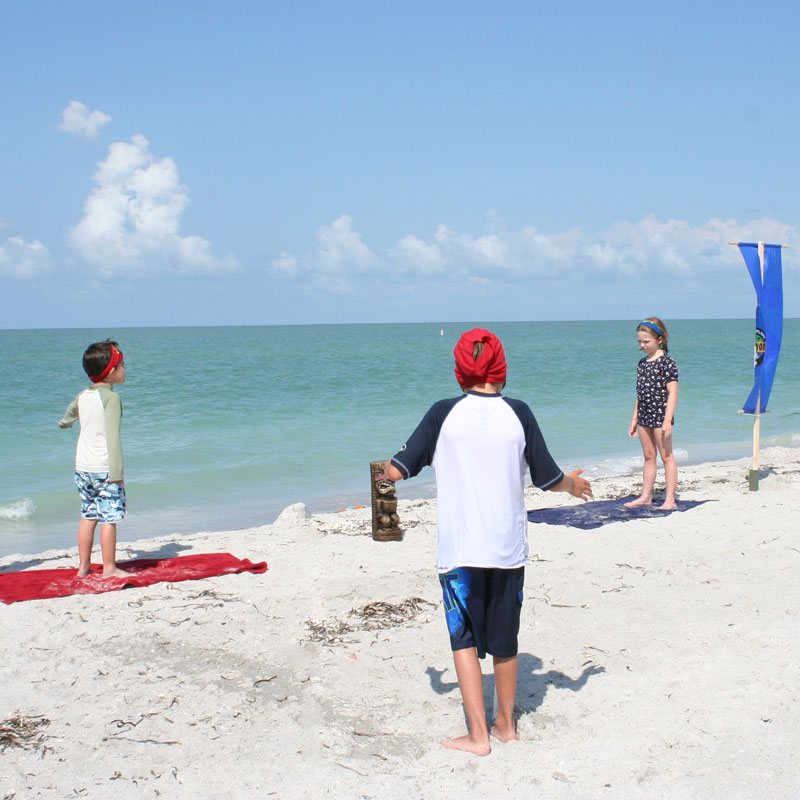
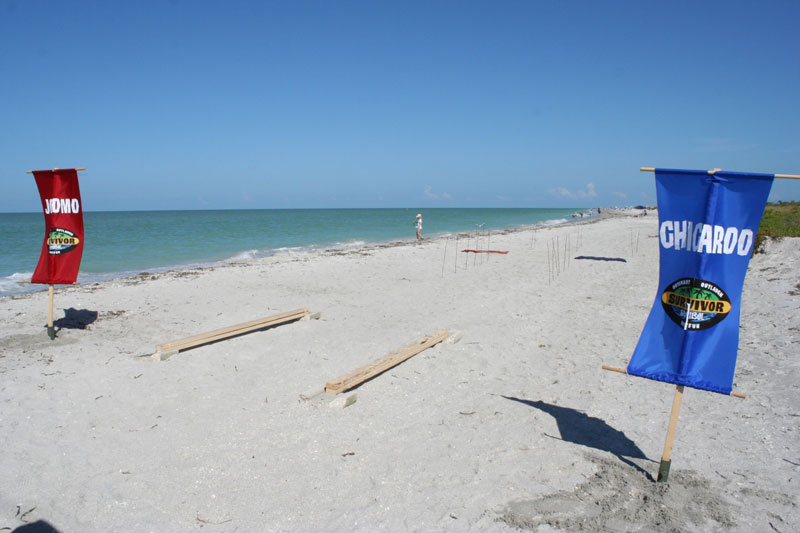
Let me introduce you to the Chicaroo and Jokomo tribes! Nobody knew which tribe they would be on until we handed out buffs and T-shirts the night before we started playing, so it was really fun to anticipate.
I led the Chicaroo tribe, so I was rooting for blue all the way.
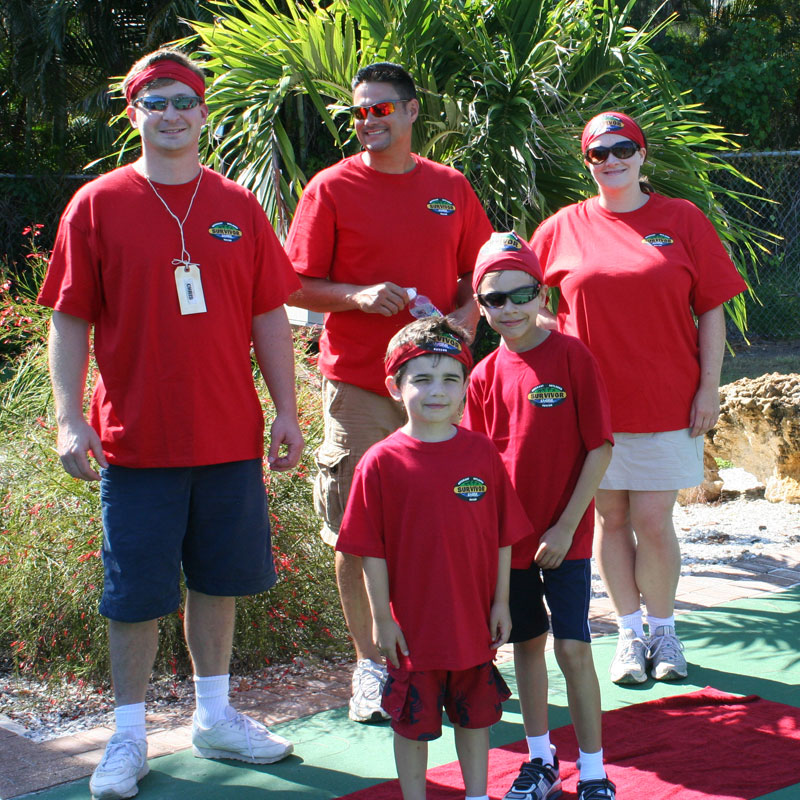
Jo led the Jokomo tribe, and she was rooting for red!
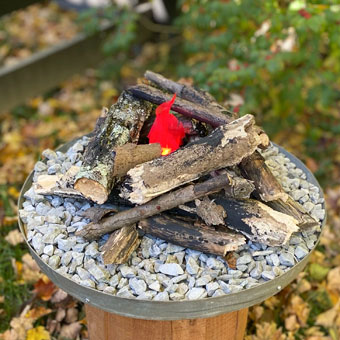
Setting up and running Tribal Council
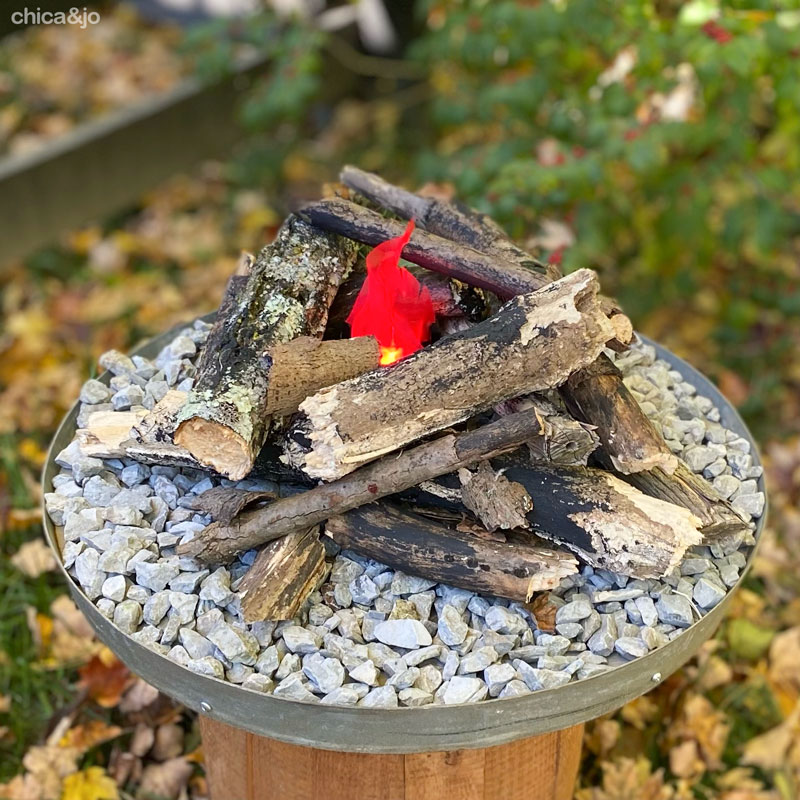
To set the mood at Tribal Council, you absolutely have to have a fire for everyone to sit around. We came up with a easy tutorial to make your own Tribal Council fire using real logs but flameless LED "fire" lights to keep everything safe for the kids.
Voting at Tribal Council is the trickiest aspect of an at-home version of Survivor, because we didn't actually want to vote anybody "off the island". We think that the game is much more fun if everyone gets to continue to play for the duration of the game. But voting is an important to the Survivor experience, so we couldn't leave it out. So, we decided to vote for winners instead of losers!
Instead of voting for a loser at Tribal Council, every member of both tribes cast a vote for the adult player and child player on their own tribe who they thought contributed the most in that day's challenge.
After the votes were tallied, the adult and child with the most votes at that Tribal got a special yellow "individual" bead to add to the necklaces they received at the beginning of the game. The adult player and child player with the most beads at the end of the game were declared the Sole Survivors and also won a special prize.
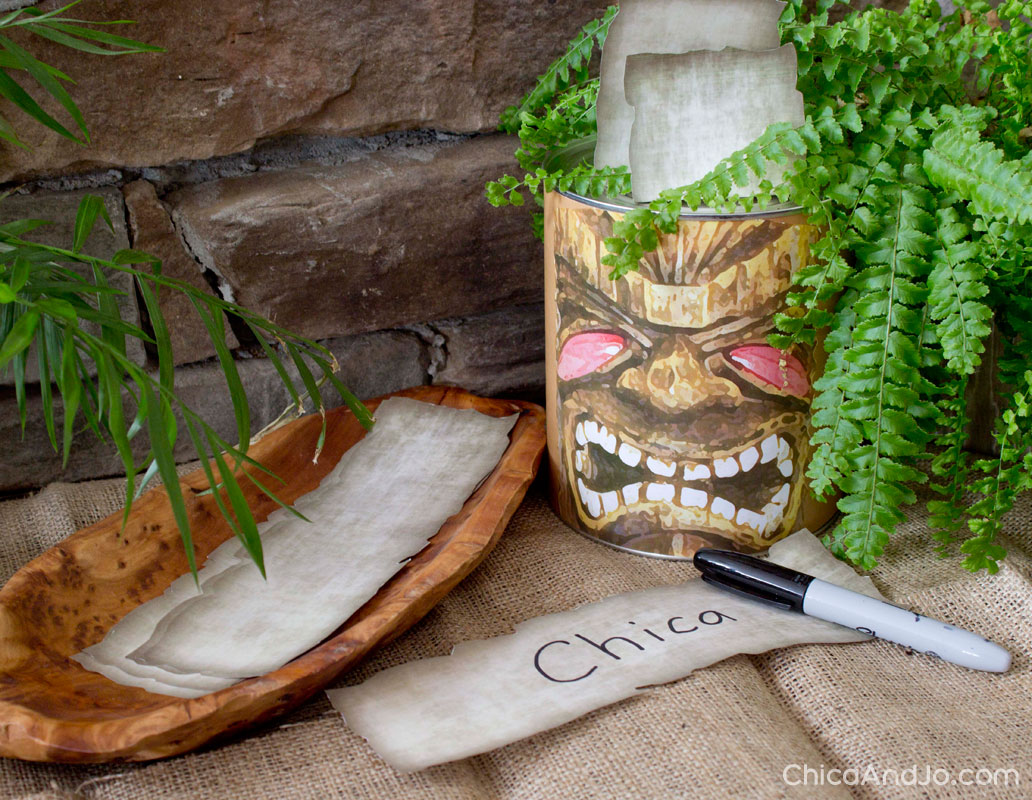
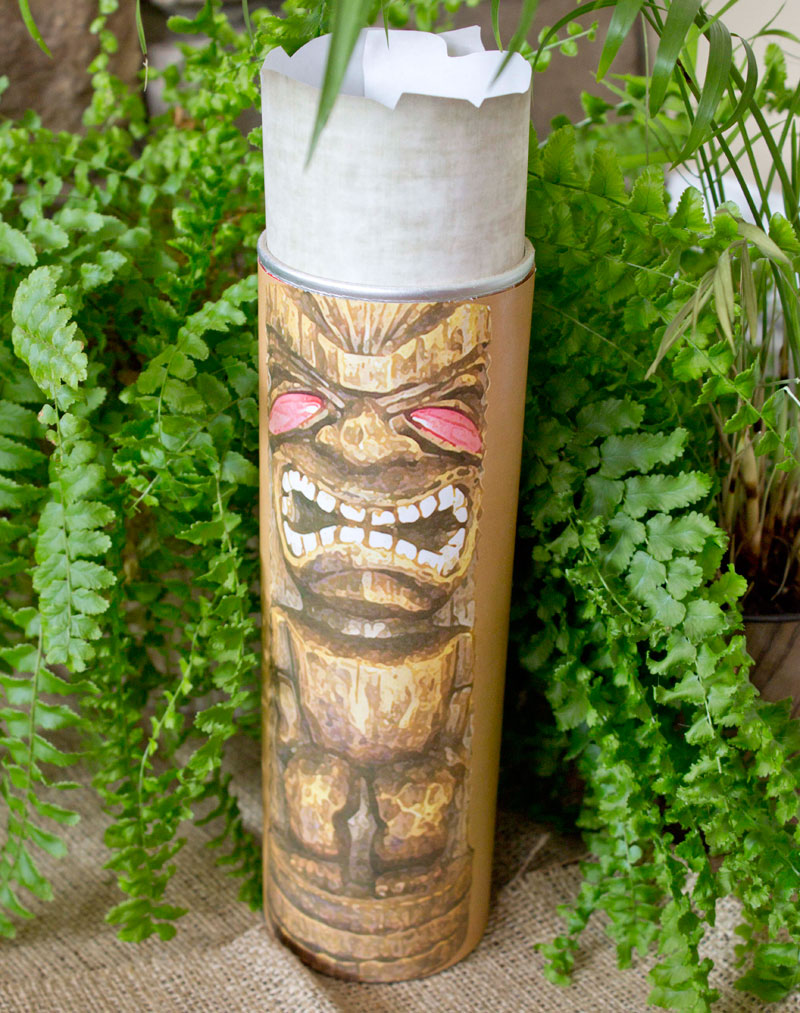
Coming up with rugged-looking voting slips was super easy, thanks to our Survivor party printables set, which includes voting slips you can print and then cut out.
For the container to hold the votes, we got a big #10 can and wrapped it with a Tiki label that was also in the printable set. Instant voting urn!
Our DIY Survivor torches were a huge hit at Tribal Council, and those kids went crazy! They were hooting and hollering around until the wee hours and we were all amazed at their energy. I have to say that giving them FAKE fire was a very good call, since it let them safely play with their fullest imaginations.
Setting up Tree-Mail for at-home Survivor games
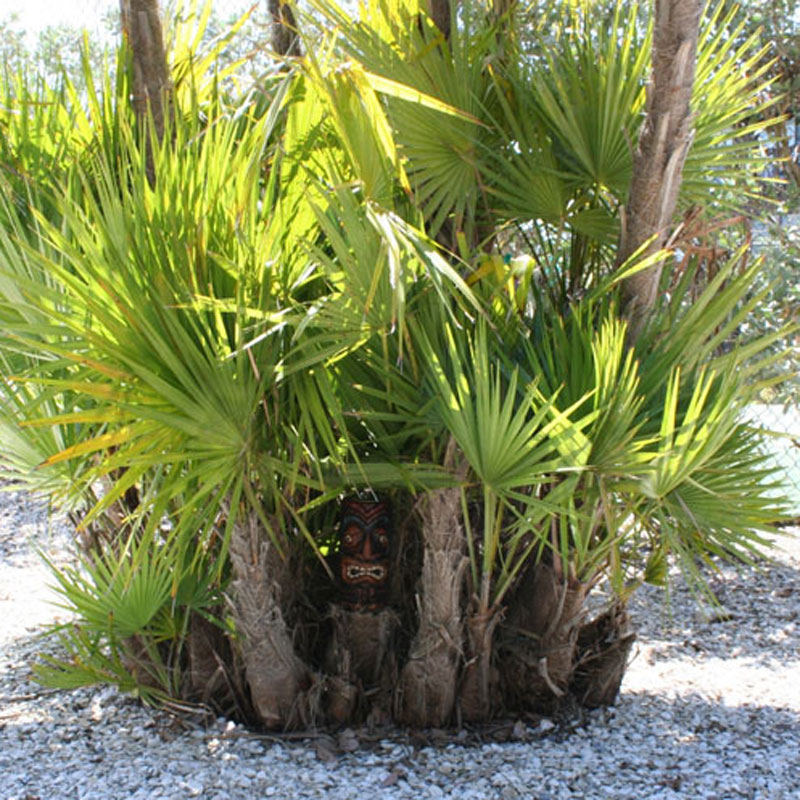
We think Tree-Mail is one of the more fun aspects of Survivor, so we wanted to have it in our game. And once again, our Survivor printables set has what you need, with a simple wrapper that you can wrap around an empty Pringles can. Perfect!
As soon as we arrived at the property, Jo and I scoped out a good location for our Tree-Mail container that would hold all of the clues during the week. We found a perfect spot in a palm tree and nestled the little guy inside. Can you see him?
What did we put in our Tree-Mail? Well, we had a clue every morning that gave the tribes a hint about the challenge to come that day. We also used Tree-Mail to give hints to the players about Hidden Immunity Idols.
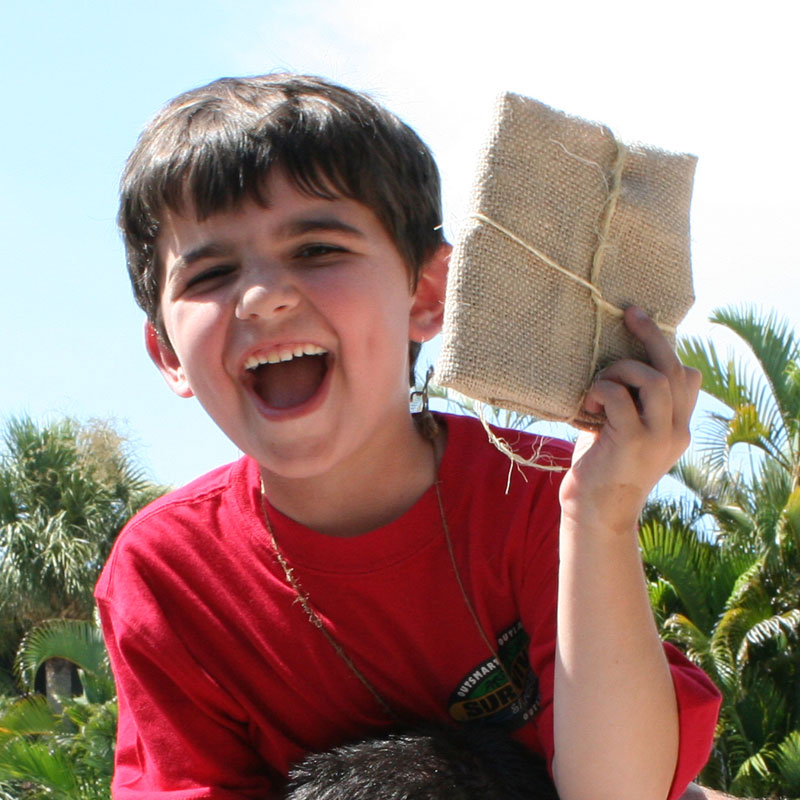
Making and using Hidden Immunity Idols
Resembling the Hidden Immunity Idols from the TV show, our idols were hidden around the property. Since we weren't voting people out, there is no REAL need for immunity, but we wanted to keep that element in our game. So any players who found one could present it at Tribal Council and receive an extra yellow bead to add to their necklaces. This can really help towards that Sole Survivor win!
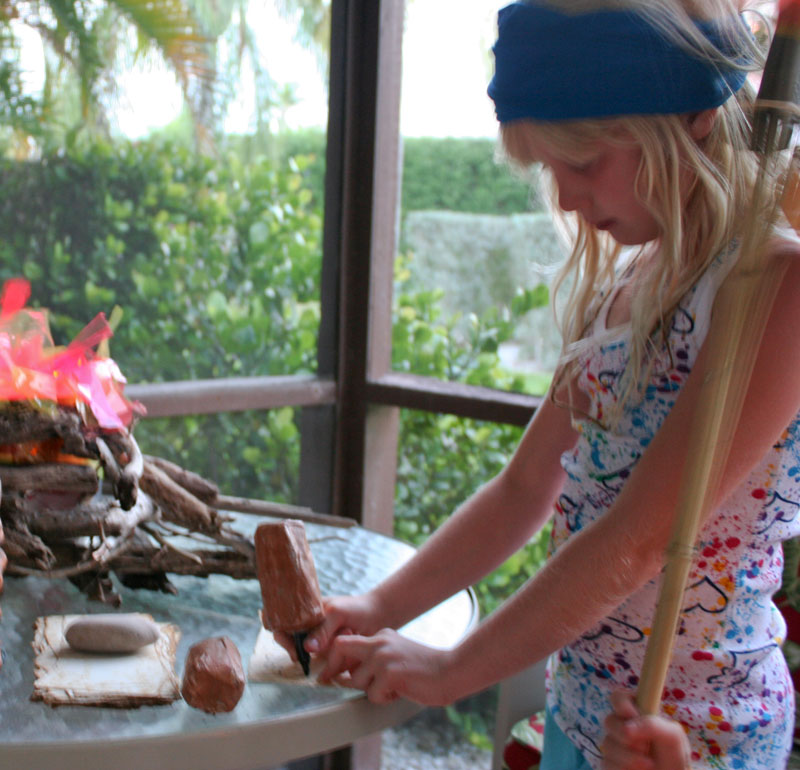
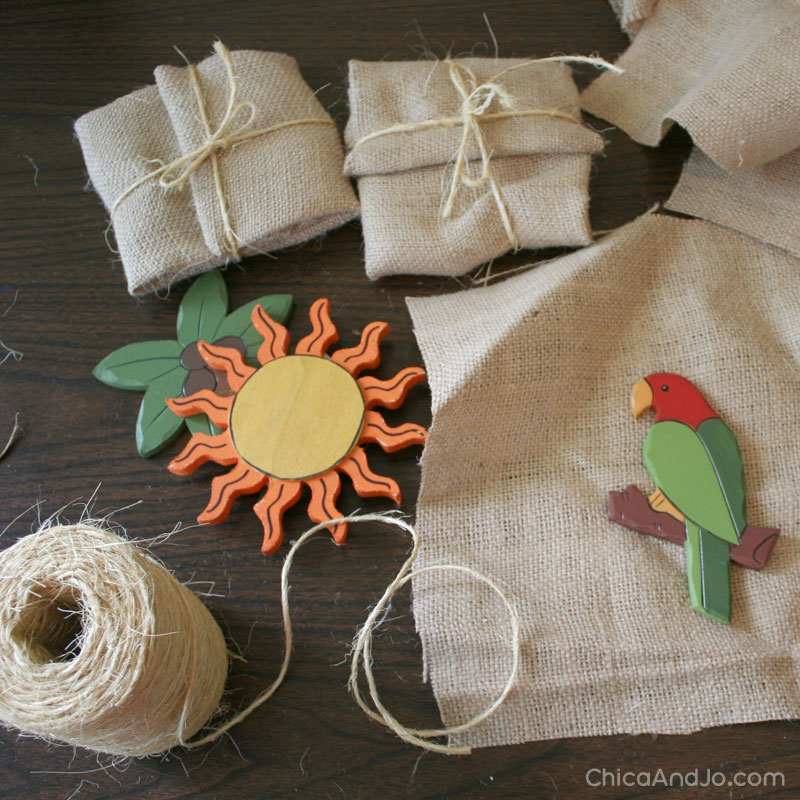
For the idols themselves, we found some pre-painted wooden pieces at our local Michaels craft store that were suitable to the beach/island theme of the game. We wrapped them with scraps of burlap and tied them up with twine, making authentic-looking bundles that were ready to hide.
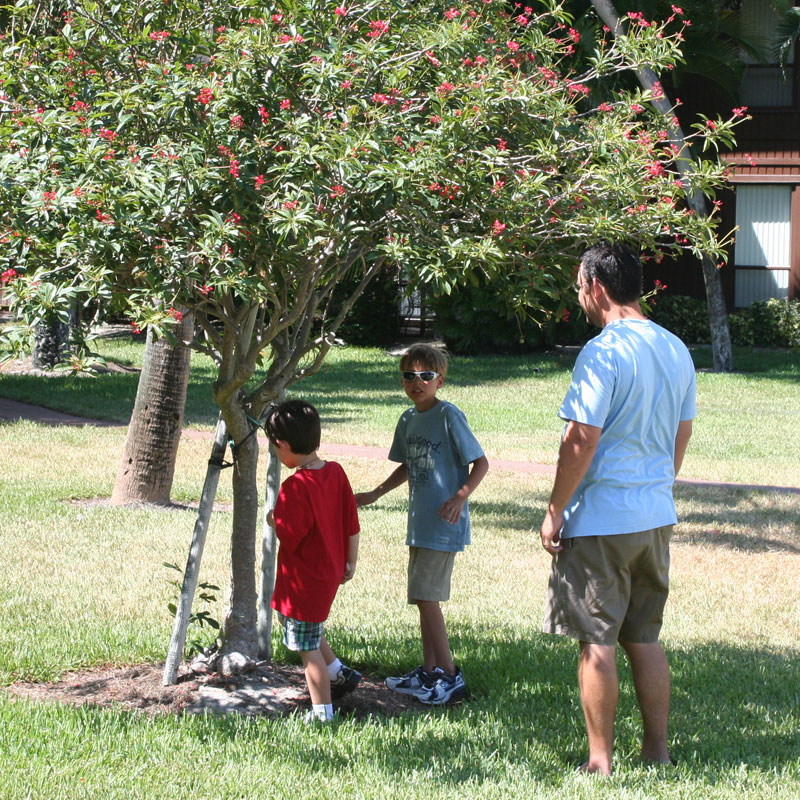
The adults let the kids hunt for the hidden idols, and they had a great time searching. And the ones who found them really enjoyed exchanging the hidden idols for extra beads at Tribal Council. I think finding and turning in the hidden idols was the kids' favorite part.
Ideas for at-home Survivor game challenges
We had five big challenges for this event, and since we were hanging out at the beach all week, we had one challenge each day. Coming up with challenges was a lot of fun, and with the dozens of seasons of Survivor that have aired so far, there's plenty of material for inspiration. When planning your challenges, keep in mind the age and skill level of your players, and be sure to create tasks that everyone can participate in and have fun.
Our at-home Survivor party challenges met these five typical Survivor challenge themes:
- Blindfolds and knots
- Swimming and balancing
- Throwing and catching
- Digging, puzzles, and obstacles
- Strengh
Survivor example challenge - Blindfolds and Knots
We tried to make all of our challenges representative of typical challenges that you see on the Survivor TV show, and incorporated as many elements as we could. Challenge #1 was no exception, and it involved blindfolds, keys, knots, and teamwork. We even brought a traditional reward of chocolate and peanut butter, which is always loved by castaways on the show — a lot more than the rice they usually eat!
| CLUE: | The biggest mouth and best advice can lead to a win that's better than rice |
| LOCATION: | Tennis courts (alternate location: lawn) |
| PLAYER TIPS: | Players should wear sneakers and bring their buffs |
| REWARD: | Chocolate and peanut butter |
| MATERIALS NEEDED: | 8 boxes wrapped in tribe colors (4 of each), fabric to tie wrists together, buffs to serve as blindfolds, rope to tie around boxes, 8 padlocks and keys, 2 pieces of chain, 2 boxes, 2 machetes, 2 tribe flags, rope to hang flags, tribe mats |
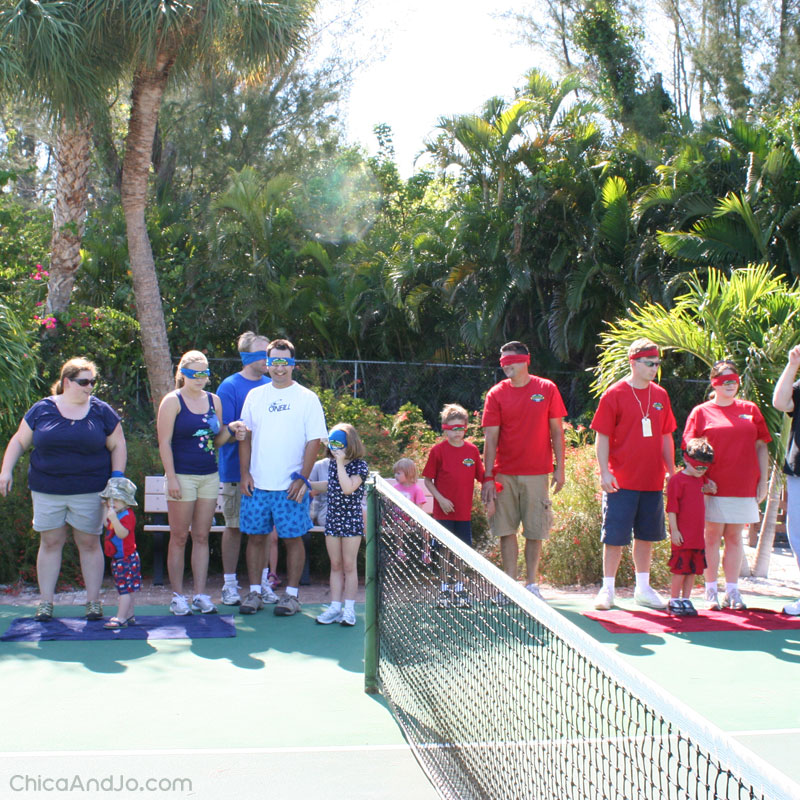
To set up, we wrapped 4 large cardboard boxes in blue wrapping paper and another 4 in red paper, then tied a rope around each one. To the end of the rope, we tied a key. Then we arranged the boxes on both sides of a tennis court.
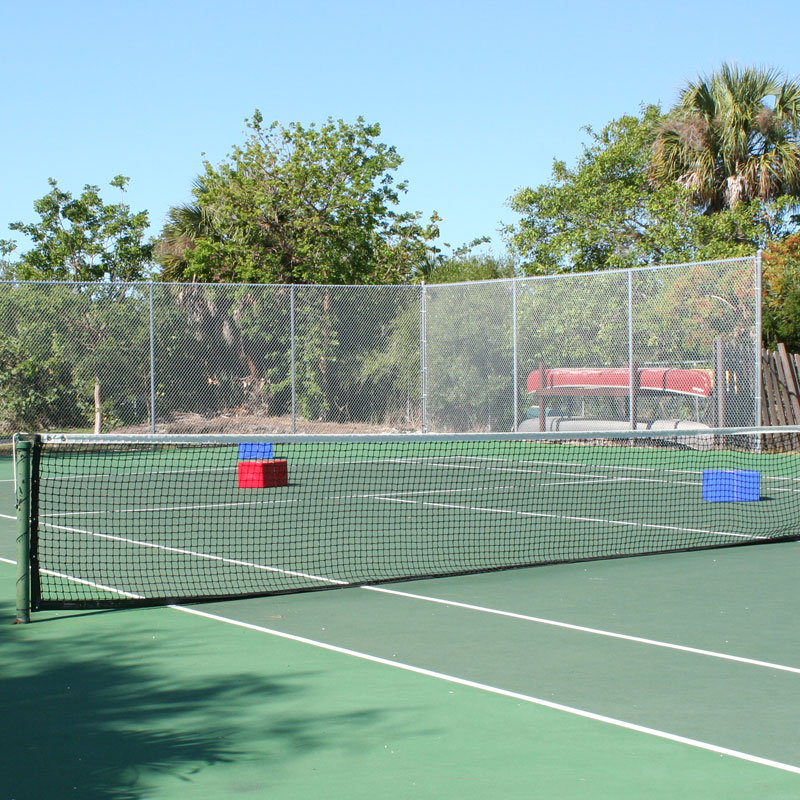
This game could easily be done on a lawn, but we liked the tennis court idea because it had sides which kept the players contained, had a smooth surface so they wouldn't trip in a hole, and had a nice fence in the middle to make it extra hard to maneuver around.
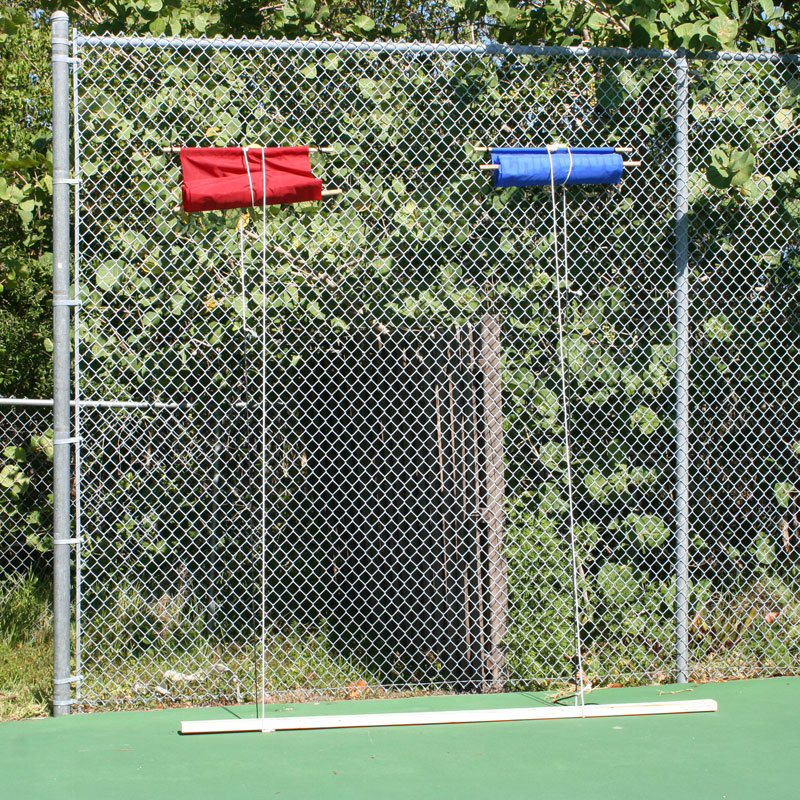
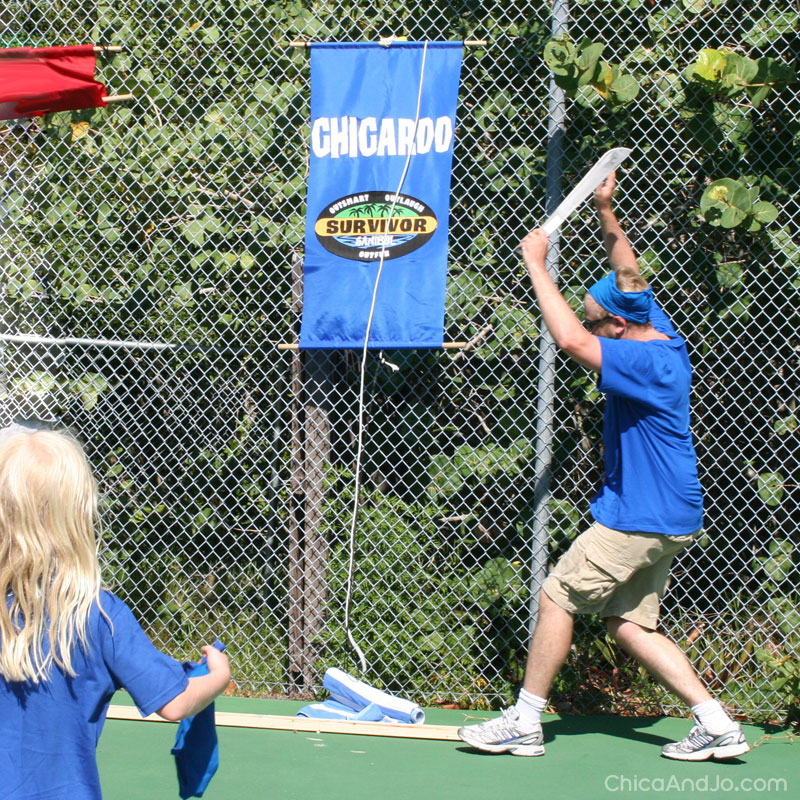
We rolled the tribe flags up and hung them high on the fence, secured with a piece of rope that was tied to a wooden block below (which would provide a good chopping surface later).
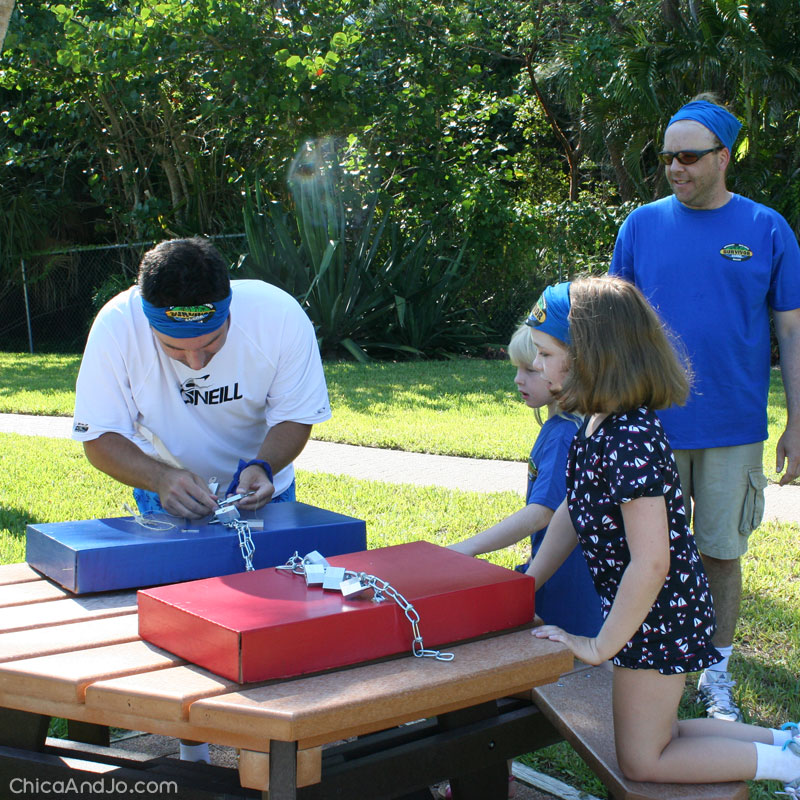
Then we put a machete inside each of two boxes that we painted with the tribe colors. We wrapped a chain around and through the box, so it couldn't be slipped off, and secured each one with 4 locks.
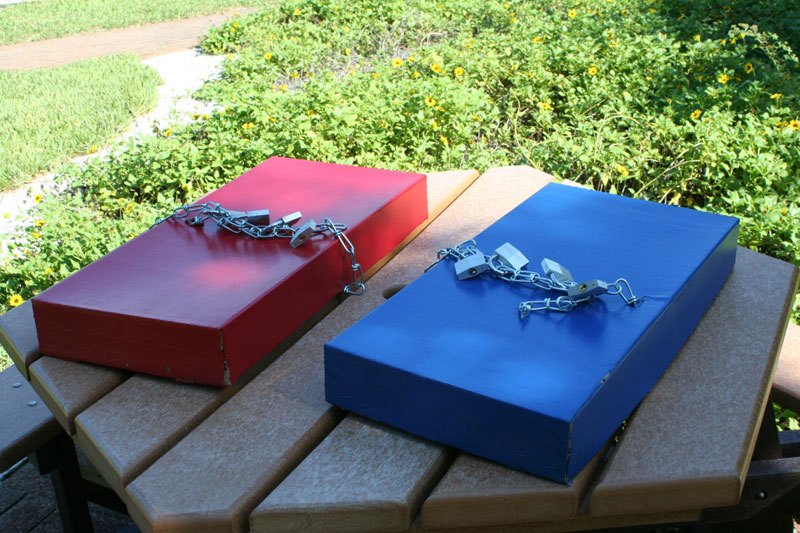
A NOTE ABOUT MACHETES: Yes, we used real machetes. We realize that they are not very kid-safe to have around, and we certainly didn't treat them as toys. We cautioned all the kids that they were not to touch them during the challenge or at any other time, and only an adult was allowed to use them. We also kept them in their protective sleeve when not in use. Machetes are such an iconic part of the real Survivor show that we just had to include them somehow.
| THE RULES: |
|
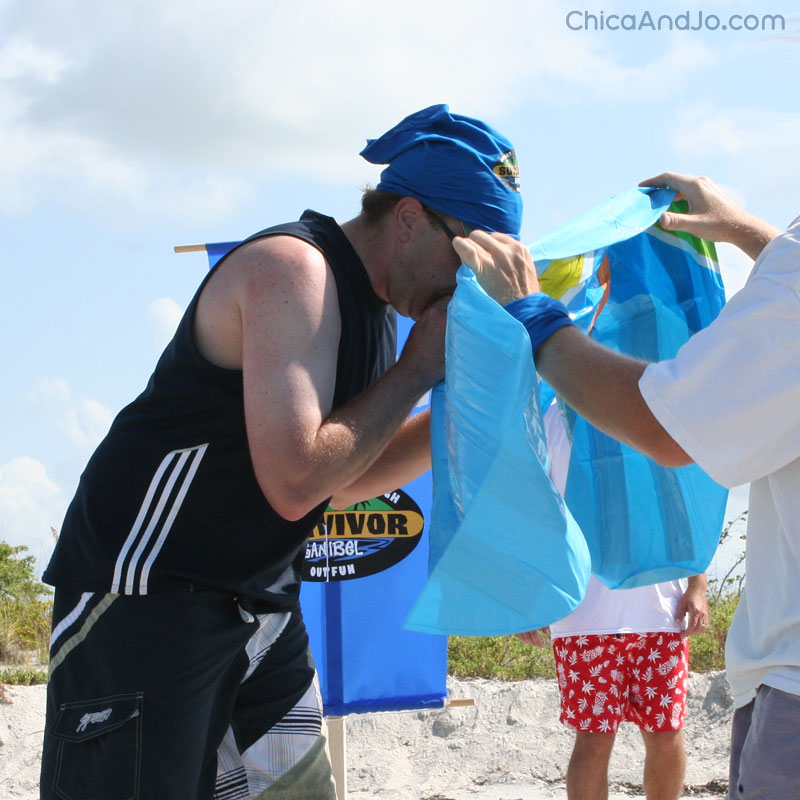
In the words of Jeff Probst, we first gave the tribes "a minute to strategize", and then they were off!
I have to admit that Jo and I had a great time watching the players run around blindfolded, trying to pick up their boxes! Nobody fell or got hurt, but there were plenty of bumps into each other and into the net!
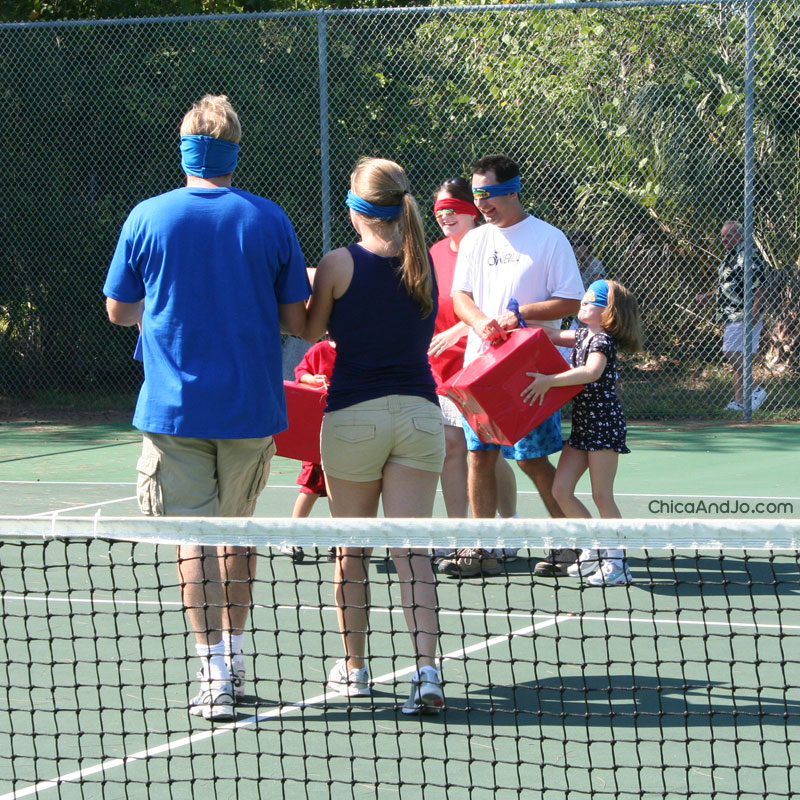
That's Jo's husband there on the red tribe, using his big mouth to shout commands to his team during the challenge. He did a great job for that part of the challenge, and red was leading at that point.

When the boxes were all back, it was a mad rush to get the ropes untied and the boxes unlocked. This is where the blue tribe took the lead, as they flew through those knots and locks!
It was the blue tribe that got to their flag first, winning the challenge. Yay, tribe Chicaroo!
The winners happily took temporary custody of the idol, which they would bring to Tribal Council that night. They also were very happy to partake in the chocolate and peanut butter reward, which they also generously shared with the other tribe. It got eaten so fast I didn't even get a picture!
Survivor example challenge - Swimming and Balancing
For this challenge, we wanted to bring in the popular elements of swimming and balance, which we see so often on the show. We also loved the idea of throwing water, which has turned up in quite a few of the TV show challenges lately. They combined together to make a really fast-paced and fun challenge.
| CLUE: | Water and air are elements you'll master. A steady hand will win this one faster. |
| LOCATION: | Beach (alternate location: pool) |
| PLAYER TIPS: | Players should wear swimming suits and bring towels |
| REWARD: | A cooler full of refreshing drinks |
| MATERIALS NEEDED: | 2 inflatable surfboards, Styrofoam buoy with anchor, 4 buckets (2 red, 2 blue), 2 pieces of PVC pipe with ends sealed, 6 ping pong balls, 2 cardboard disks |
Before we even got to the beach, I got a 6' piece of PVC pipe that was big enough to put a ping pong ball in and cut into two 3' pieces. I cut it at a sharp angle so that it would be easy to stick in the sand.
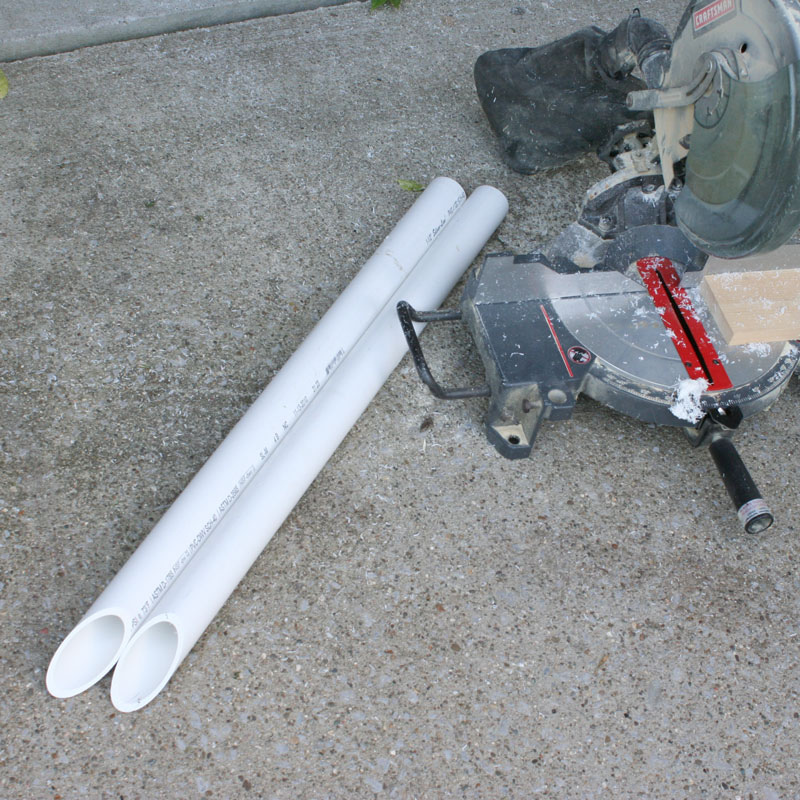
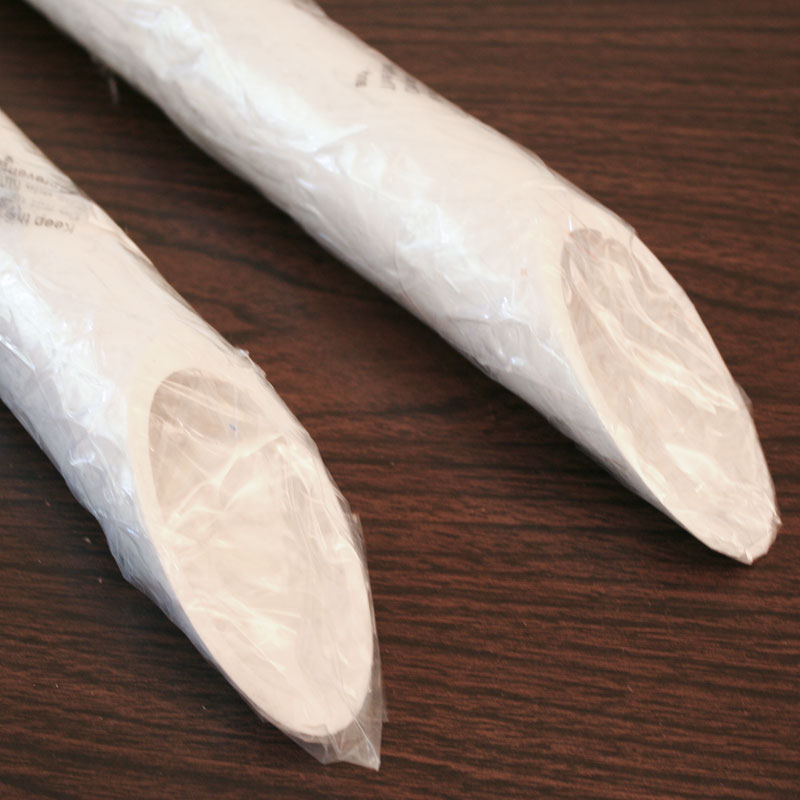
Then I wrapped the pointed ends of each one with lots of plastic and packing tape, to make them water-tight.
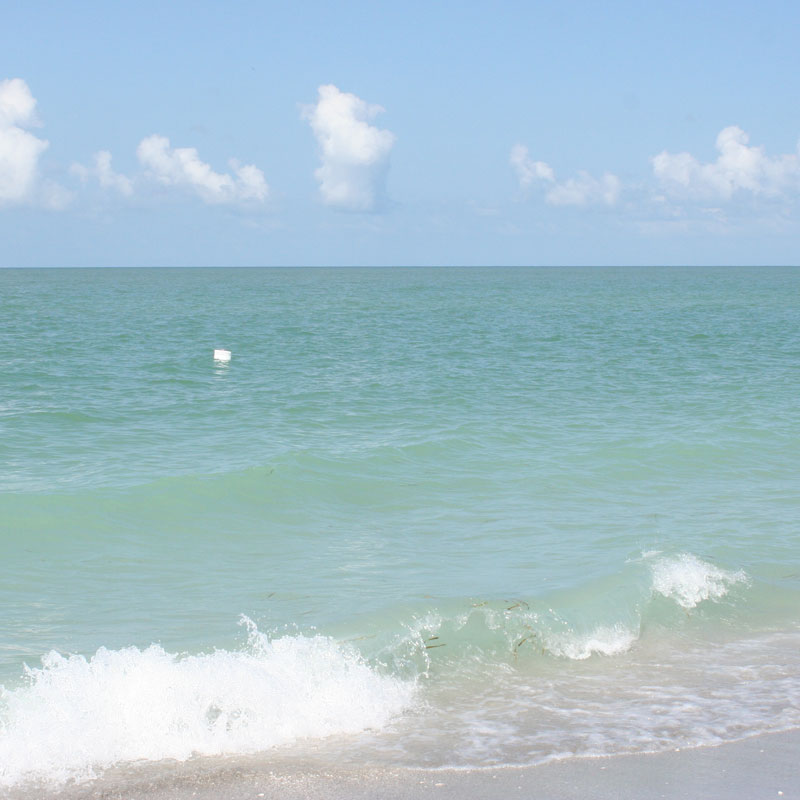
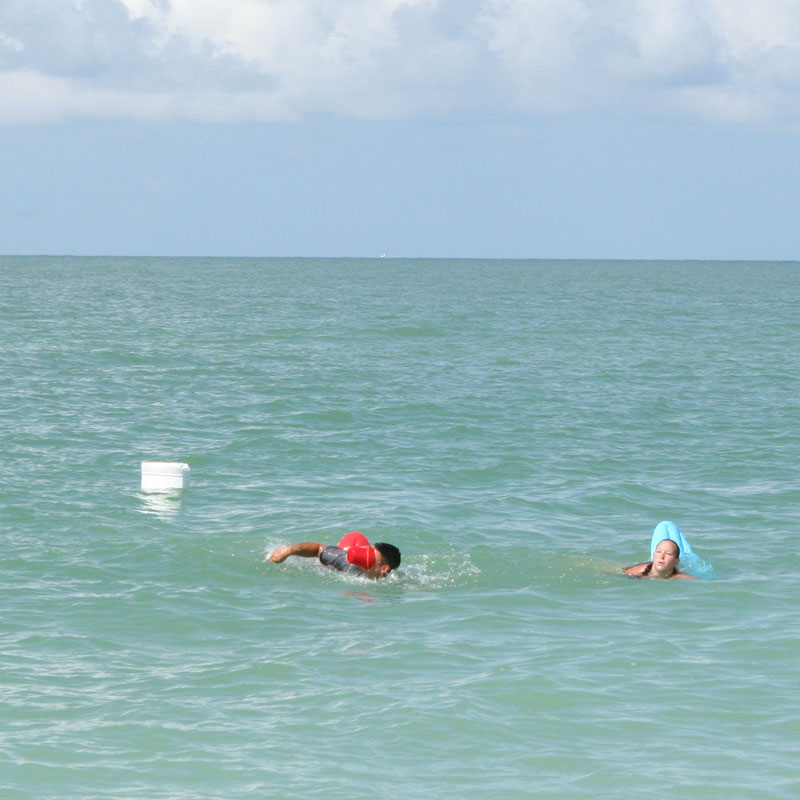
To set up for this challenge, we started by creating a buoy out of a giant chunk of Styrofoam from an old cooler. We tied a rope to it and then tied a rock to the end of it, and put it as far out into the ocean as Jo could manage to swim without getting tired from carrying that rock! Then we put four buckets on top (2 red and 2 blue).
Back on shore, we set up two play areas, one for each tribe. We put a brand new inflatable surfboard by the water, and then put the tribe mat a few feet away. About 8 feet from that, we put the PVC pipe into the sand, filled it halfway with water, and stuck 3 ping pong balls into each one. Next to that, we put a round piece of cardboard for the last phase of the challenge, and drew a finish line in the sand about 20 feet from that. Whew, that's a lot of set-up!
| THE RULES: |
|
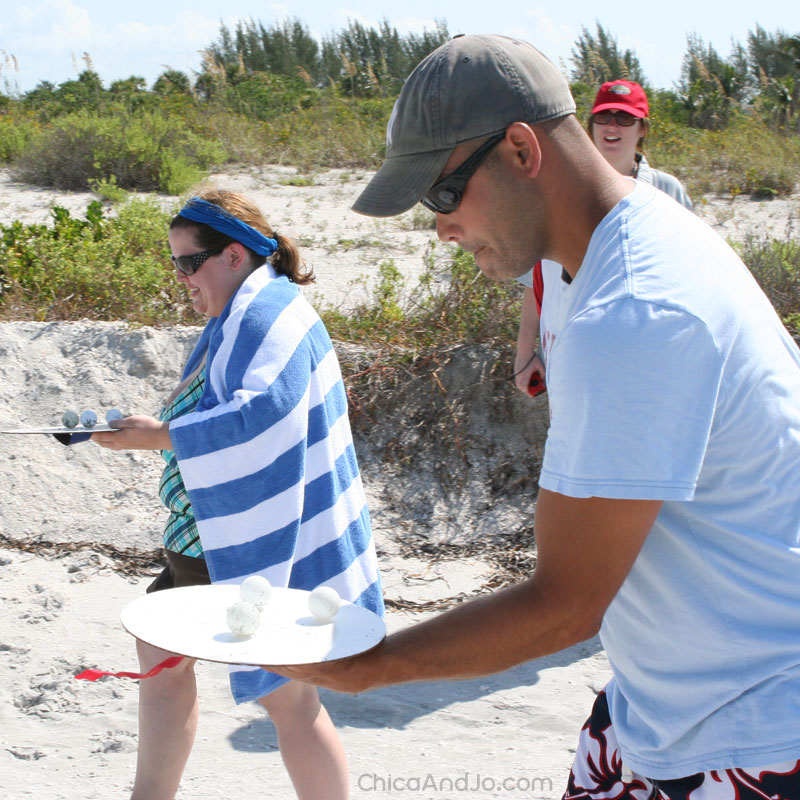
To get started, we put the kids in their positions on the mats and by the pipes. They were really excited about getting to throw water in a few minutes.
Then we gave the go-ahead, and both tribes started with the first task inflating the surfboard.
Before long, both swimmers were in the water, headed for the buoy.
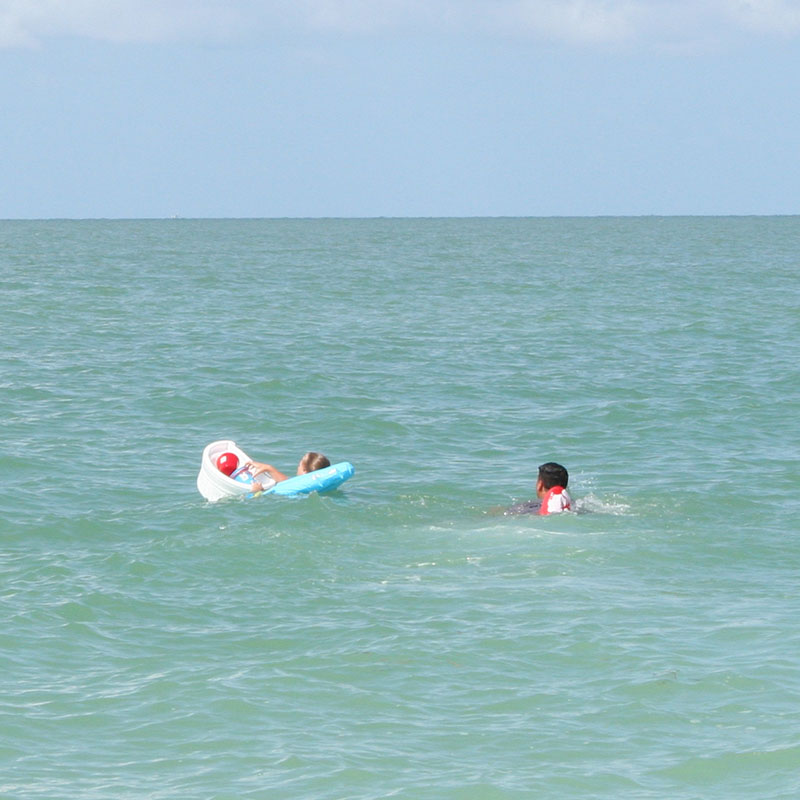
The blue team was in the lead until suddenly the red tribe's swimmer, who happens to be my husband, held the buckets in his mouth and swam like crazy for shore. What a fast change in lead that was.
Then it was time for the kids to take their turn. Oh my goodness, this was a riot!
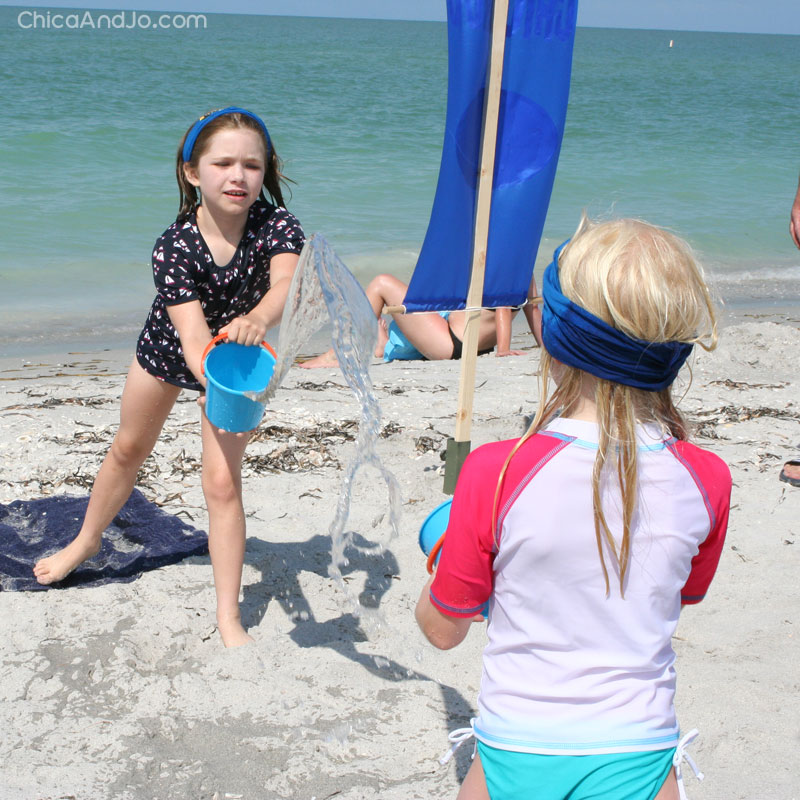
It took them a few times to figure out a good strategy, which involved a lot of stretching and actually aiming for the buckets (instead of faces).
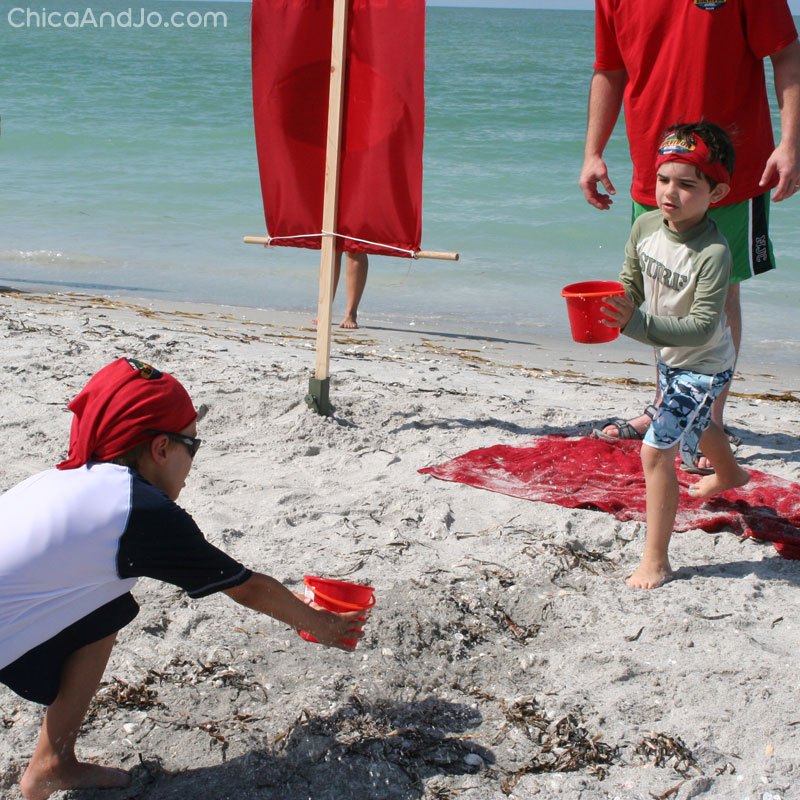
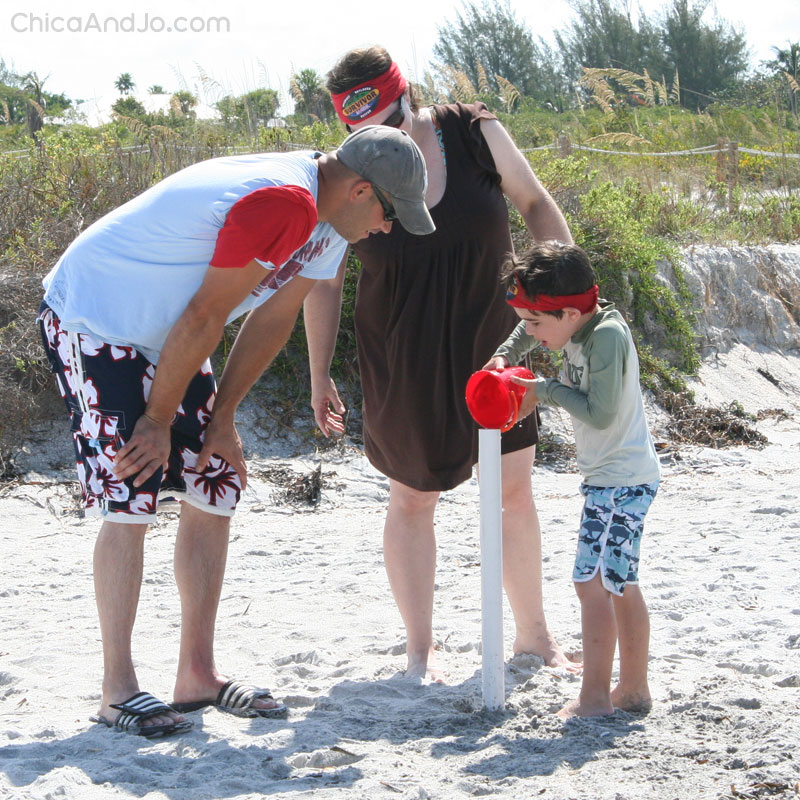
Each time they poured water from the buckets into the pipes, they got a little more full. Once they were completely full, the ping pong balls popped right out. The girls on the blue tribe made up some ground here, so at this point, it was still a very close race.
For the final part of this challenge, a player from each team had to walk a distance with the ping pong balls balancing on a cardboard circle. If they fell off, they had to start over. The player on the blue tribe showed she had better balance and just barely won the challenge. Wow, that's two in a row, Chicaroo!
Survivor example challenge - Throwing and Catching
This challenge was simpler and had a lot fewer steps than the others, but was still very representative of what you see often on the show. Probst is always making those castaways throw things and fight for them, so we did the same. Everybody loves a slingshot, right?
| CLUE: | Keep your eye on the ball and your enemy in sight. To score in this challenge, you may need to fight |
| LOCATION: | Lawn |
| PLAYER TIPS: | Players should wear well-fitting shoes (no flip-flops) |
| REWARD: | Keep the equipment from this challenge |
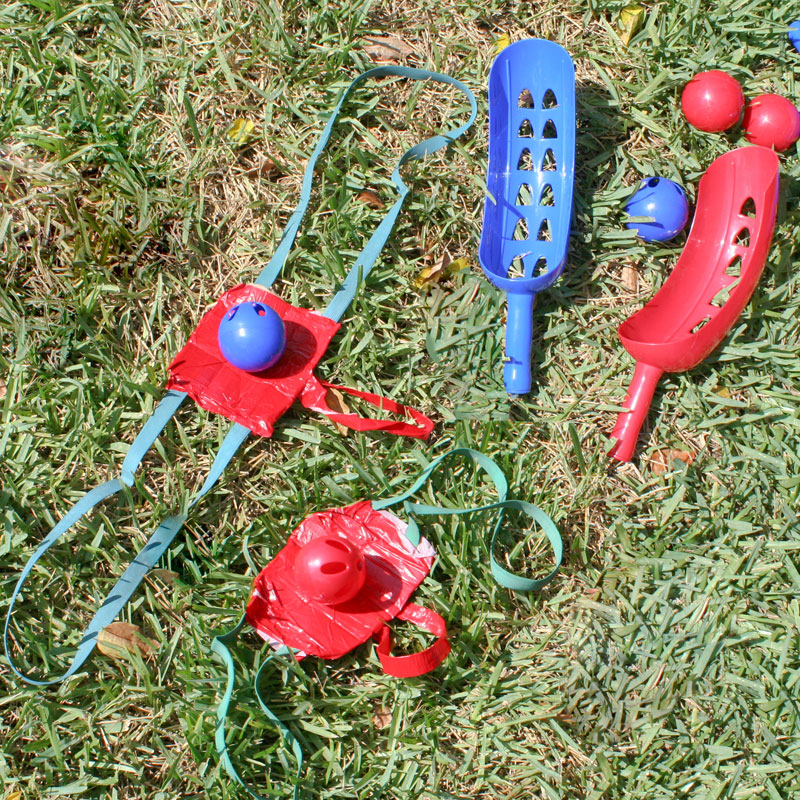
| MATERIALS NEEDED: | 2 giant mover's rubber bands, duct tape, 2 scoop ball sets |
The set-up for this one involved turning the giant rubber bands into slingshots. All we did was create a square of duct tape and attach it to the middle of the band with more duct tape. We also created some straps from duct tape and added them to the back, so they could be pulled to launch the balls.
| THE RULES: |
|
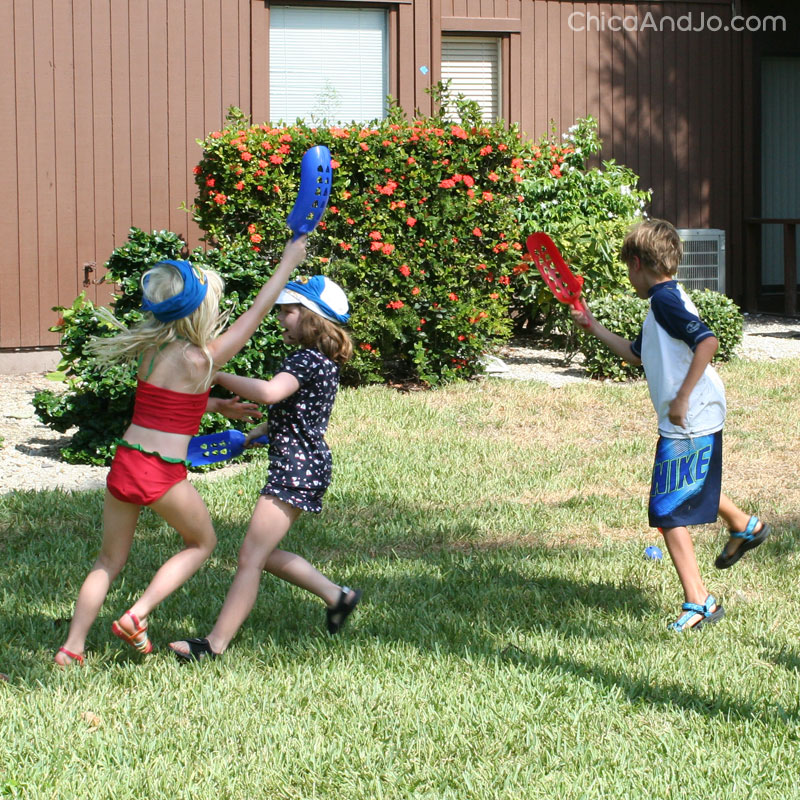
Everybody had so much fun with this challenge. It took a few times with the slingshot to figure out just how to use it, but folks caught on fast and balls were flying.

There were some really amazing reaches and blocks for the ball!
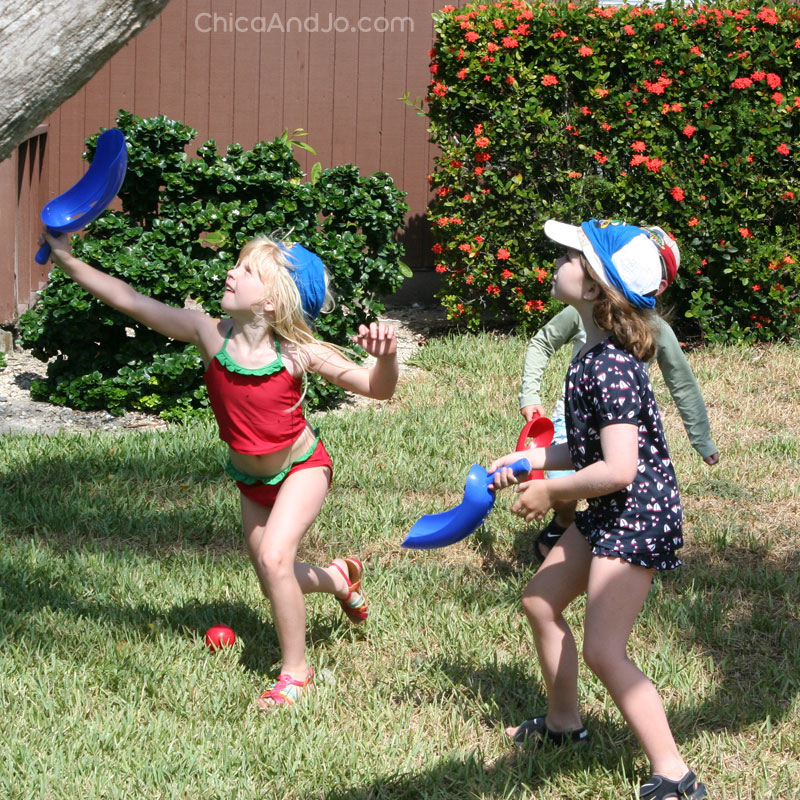
The red team pulled out the win and got to three balls first. Yay, Jokomo!
Survivor example challenge - Digging, Puzzles, and Obstacles
This was my favorite challenge of them all, because it incorporated three huge challenge elements that always prove interesting — digging, puzzles, and an obstacle course. You might be wondering how we managed to get all those things into one challenge, but we did! I also really like how we made the reward for this challenge be a secret advantage in the next challenge — Jeff Probst is always doing that to the castaways, and it's so frustrating for them.
| CLUE: | The only obstacles to an immunity win are agility, determination, and brains within. |
| LOCATION: | Beach (alternate location: sandbox) |
| PLAYER TIPS: | Players should wear well-fitting shoes (no flip-flops) |
| REWARD: | A significant advantage in the next challenge |
| MATERIALS NEEDED: | 2 large balls, four 10-foot 2x4s, rope, cinder blocks, bamboo poles, 5 red cloth bags, 5 blue cloth bags, 2 puzzles |
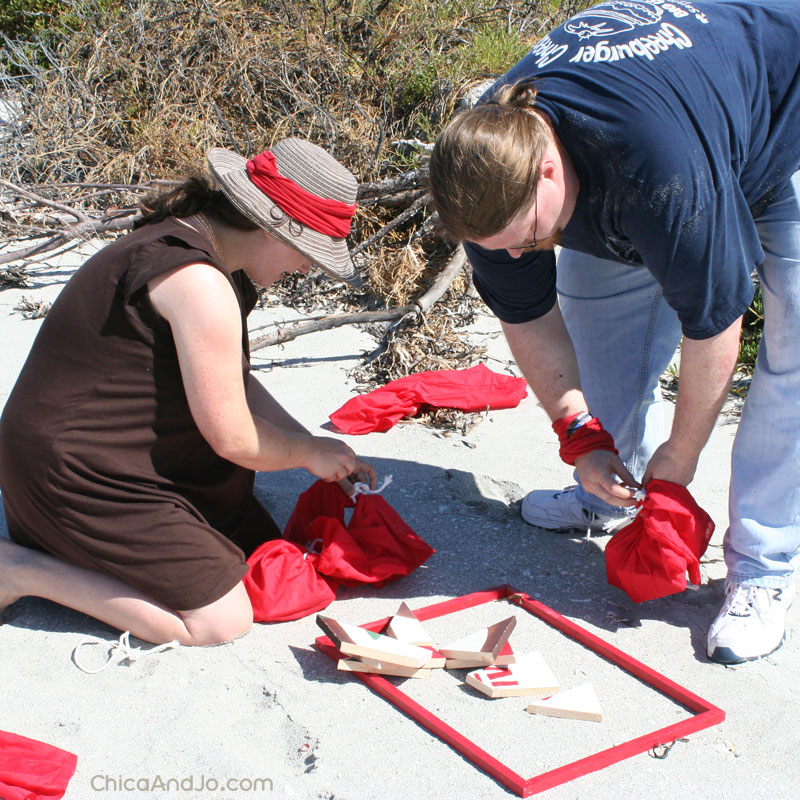
The at-home prep for this challenge included making the cloth bags for the puzzle pieces. I just sewed simple bags made of two rectangles sewn together on three sides. (Nothing as complicated as our drawstring bag tutorial although that would have worked too.)
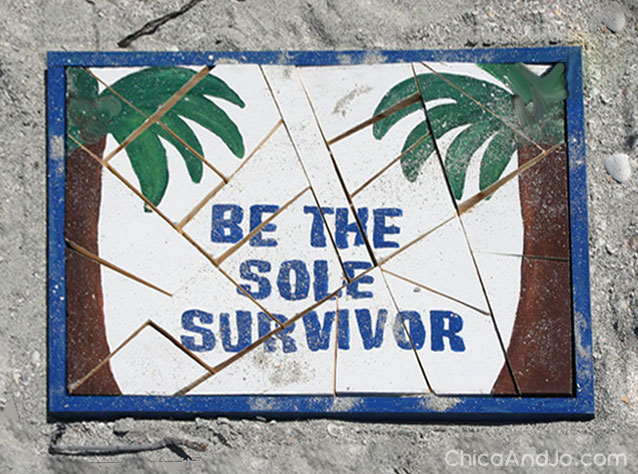
We also had to make two wooden puzzles for the end of the challenge. For those, we just painted a simple design onto two large pieces of wood and then used a table saw to cut them into random pieces. There was no need to get intricate here, as you'll see below when I show you the finished puzzles. I split the puzzle pieces up among the bags and tied them with fat white cord that I tied in 5 knots.
The set-up at the beach started with tying the 2x4s together in pairs (for strength) with some rope. Then we propped them up on cinder blocks that we found on the property. We stayed pretty low to the ground, but you could go as high as you want here if you really want to challenge the players.
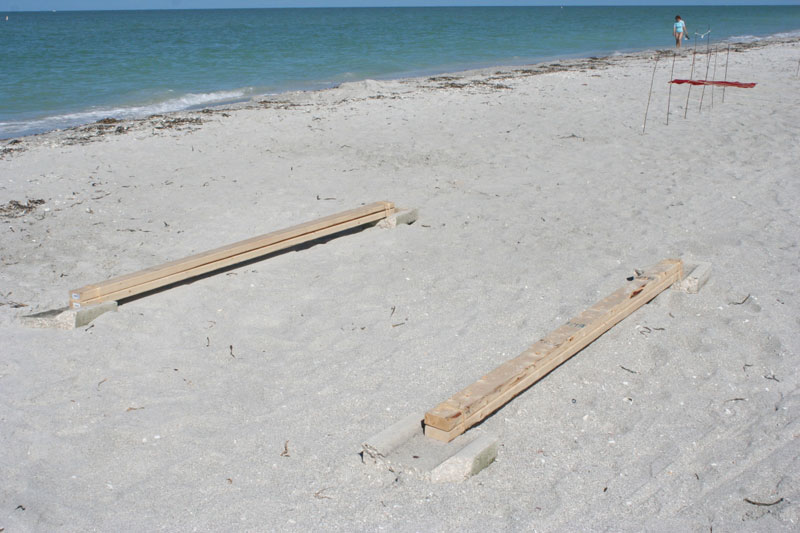
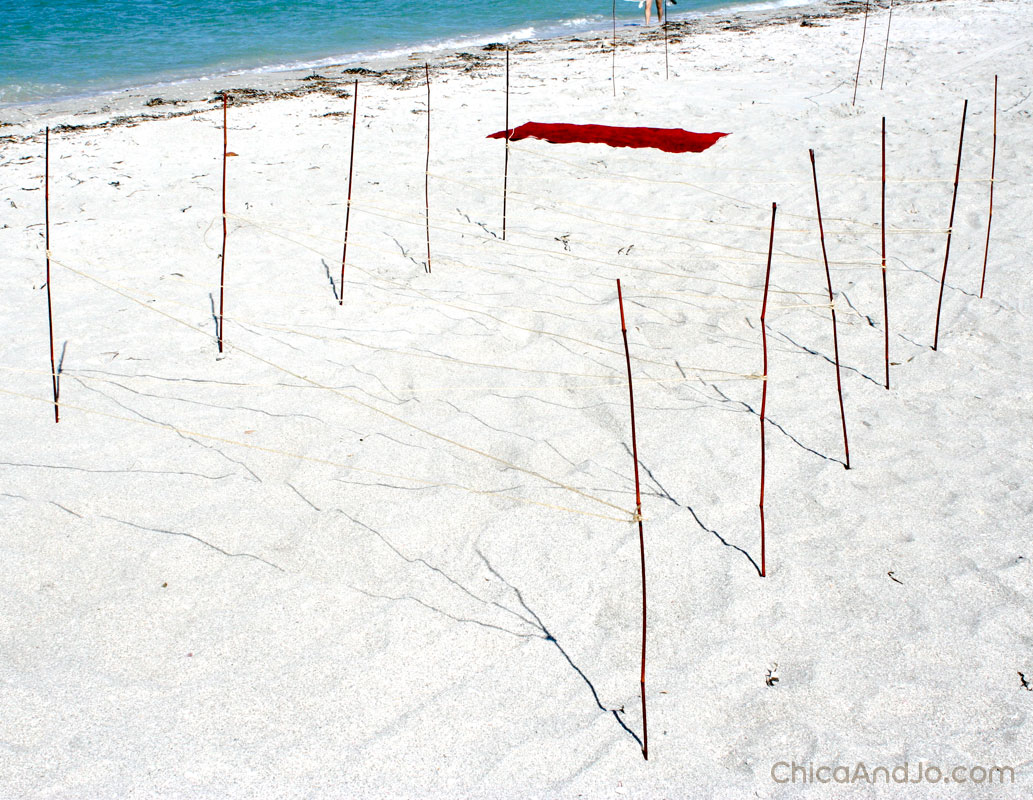
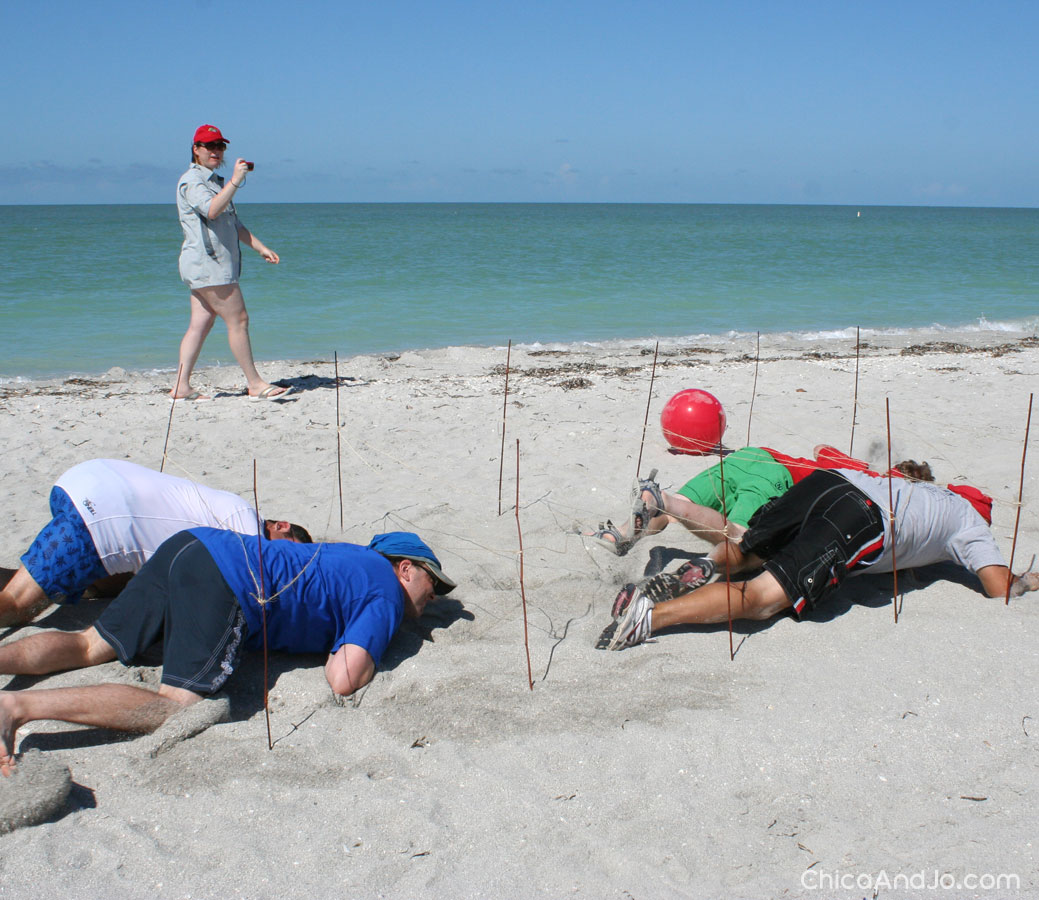
About 20 feet away, we put two lines of bamboo poles in the sand, and tied a bunch of rope back and forth between them, creating a low tangle of rope that was just high enough to crawl under on your belly.
A bit further down the beach, we set the tribe mats and marked off two square areas in the sand. In those areas, we dug shallow holes and placed the five cloth bags inside.
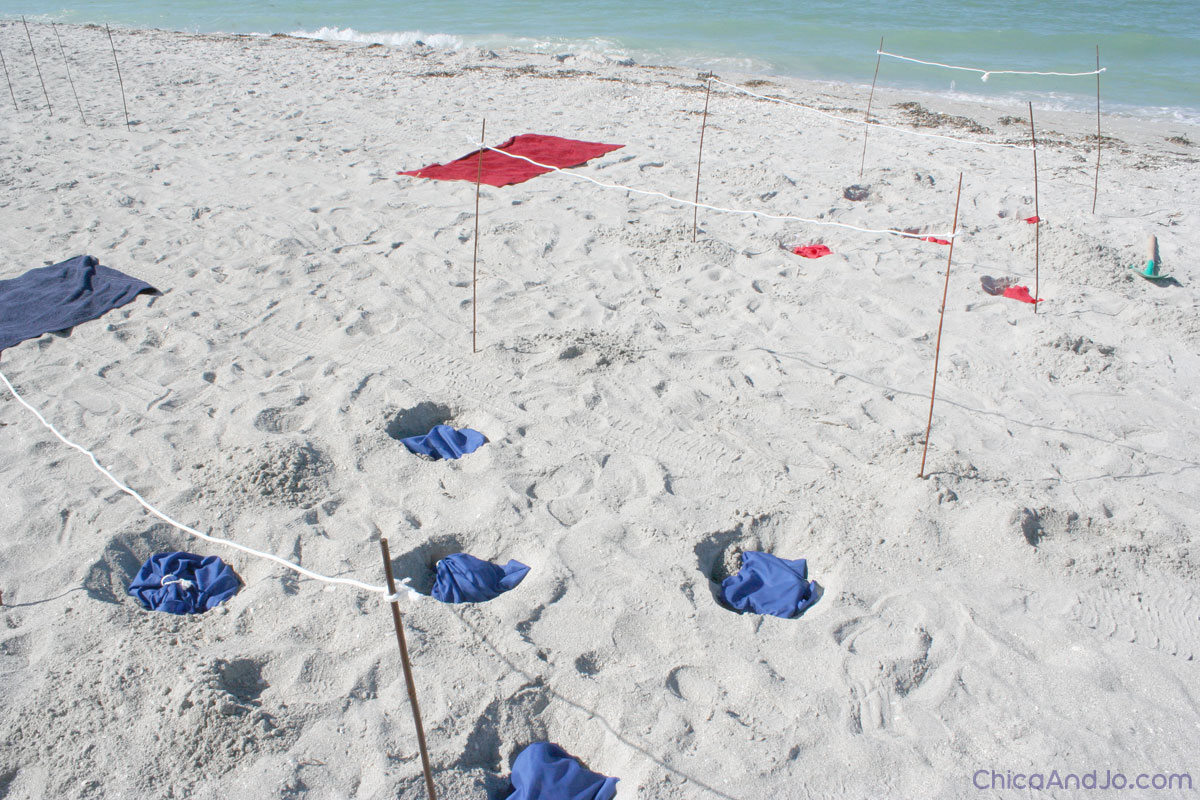
Then we covered them with sand, so the players would have to dig to find them later.
Finally, we put the wooden frames for our puzzles down on a smooth area of the sand, which would serve as a makeshift table for puzzle assembly.
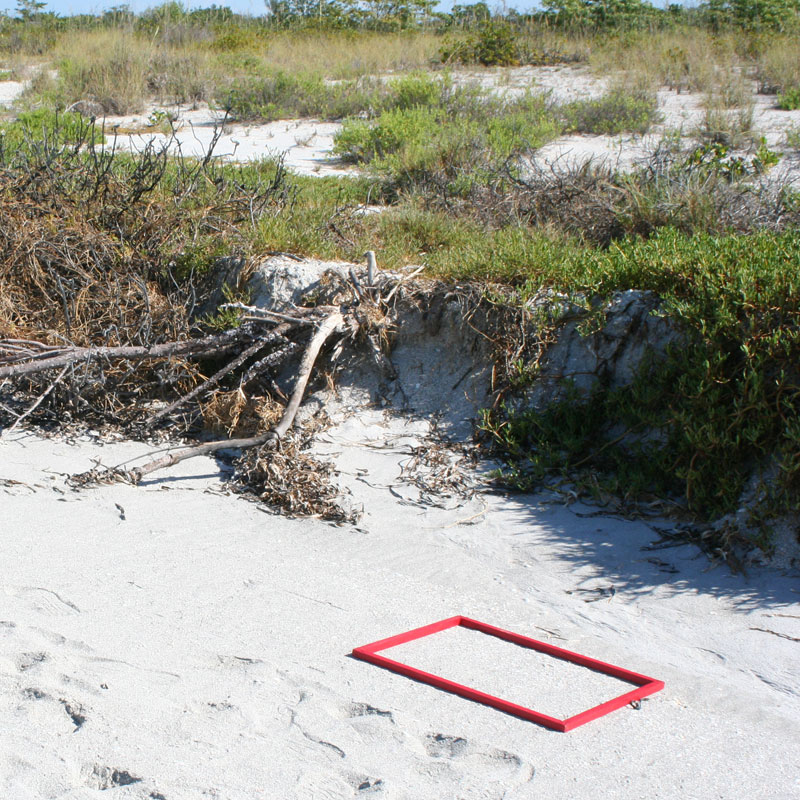
With that, the obstacle course was all set.
| THE RULES: |
|
The tribes started out on the balance beam, which turned out to be a lot easier than we thought it would. Nobody even fell off! We should have made it longer, I think, but they were probably happy to have an easy task.
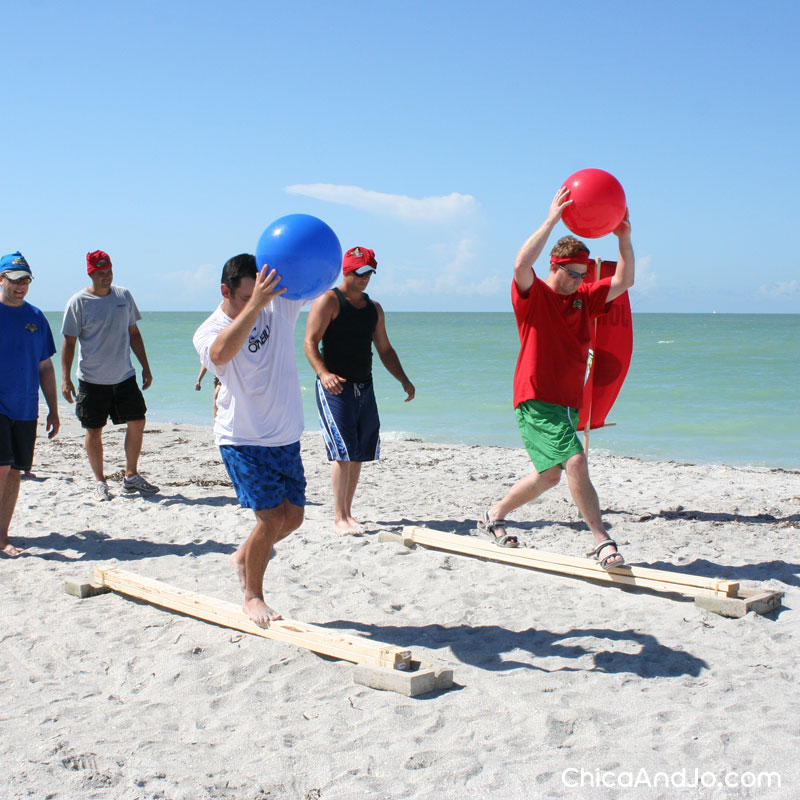
The crawling obstacle was pretty entertaining to watch, especially with some of the guys, who scurried under there like pros. I couldn't believe how fast they crawled so low!
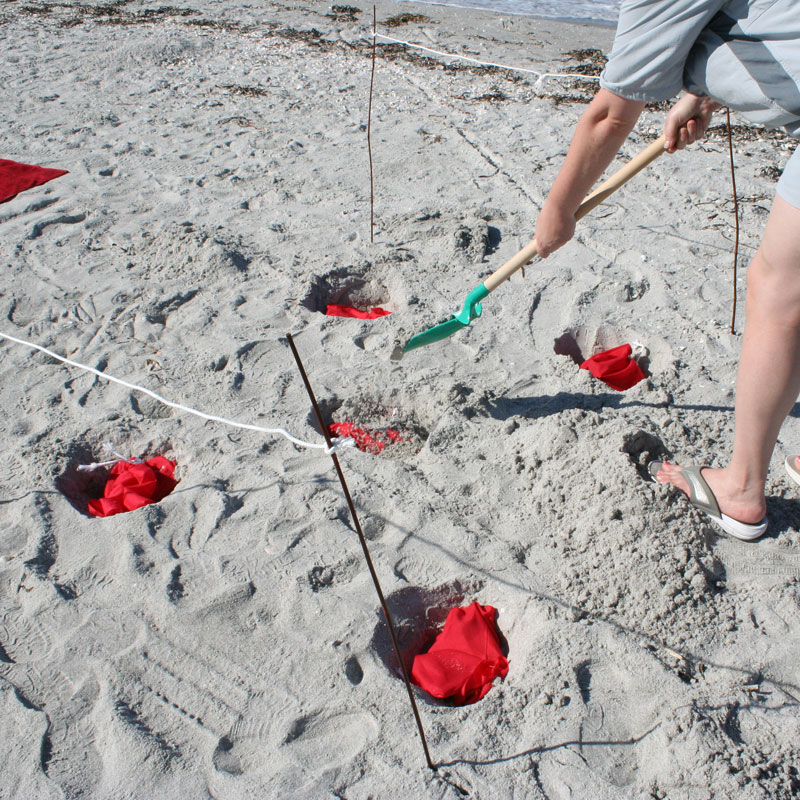
Then it was the kids' turn, and they eagerly started digging for bags in the sand.

Even though we barely buried the bags, it took the kids quite a while to find them. This was mostly due to the fact that every time they dug in an area, they put the sand over one of the other areas inside the square, rather than tossing it out!
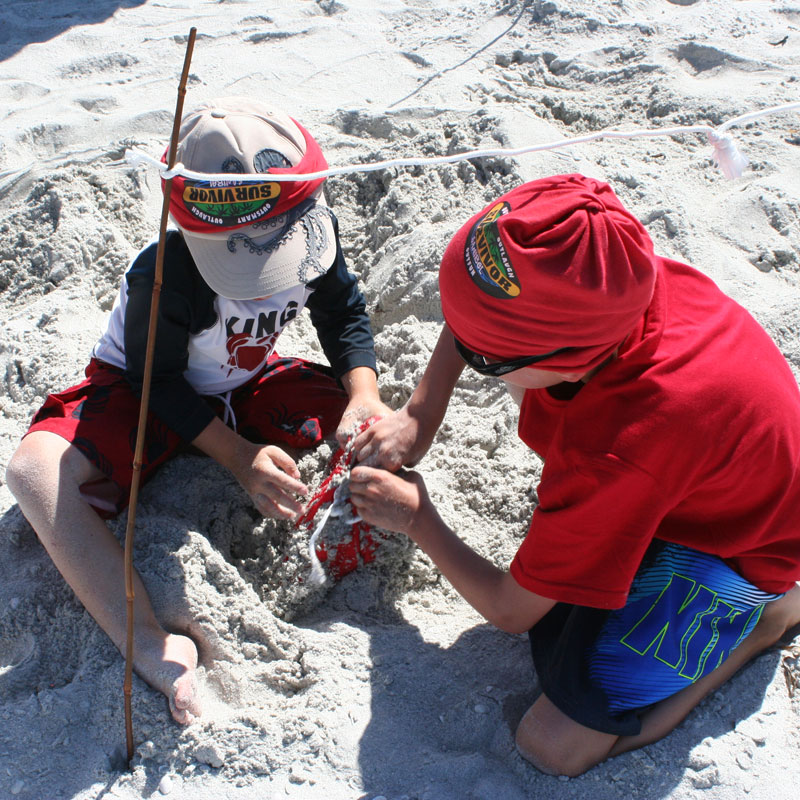
They got them all, though, and then the last two players took them and started untying the knots.
It was so exciting as they hurried to figure out the puzzles. It was so close!
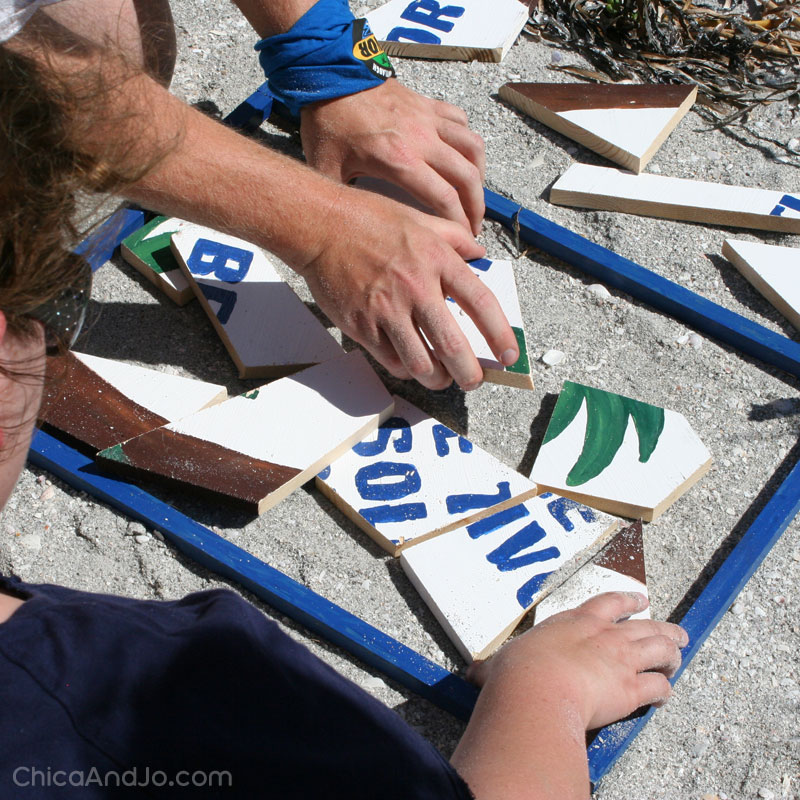
But the blue tribe got their puzzle together first and won. Wow, Chicaroo, you are amazing! You're up three to one!
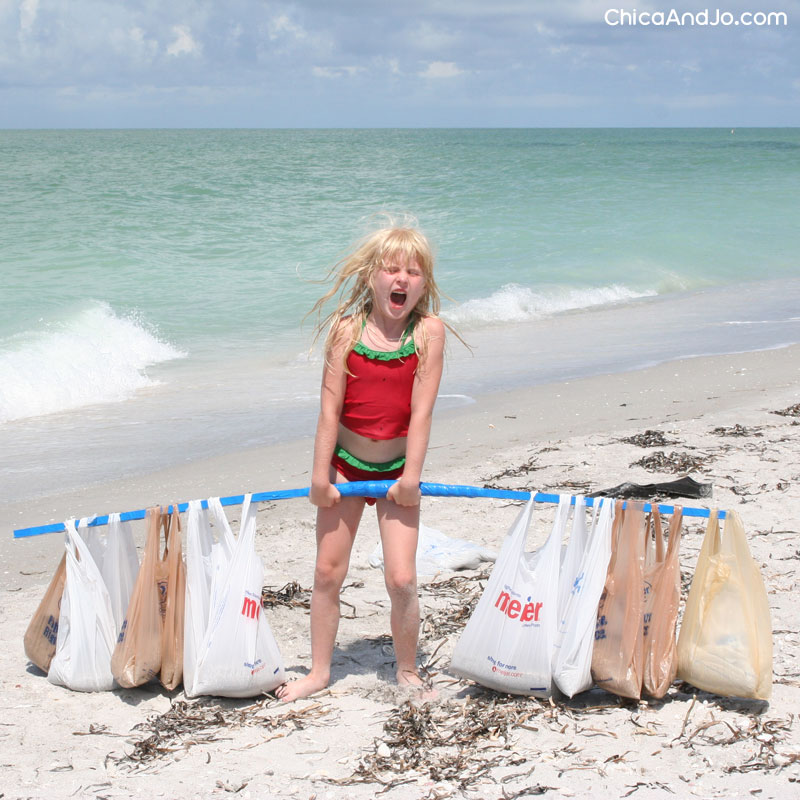
Survivor example challenge - Strength
For this challenge, we went all-out on muscle. Many challenges on the show are based purely on brawn, so we figured we should have one, too. We adapted a challenge we've seen a few times, where players add weight to certain players, to see who can last the longest. Boy, we had some tired shoulders by the time this one was over!
| CLUE: | You don't have to be biggest to get in the "weigh", but brains and brawn will win the day |
| LOCATION: | Beach (alternate location: lawn or sandbox) |
| PLAYER TIPS: | None |
| REWARD: | 15-minute shoulder massages from the losing team |
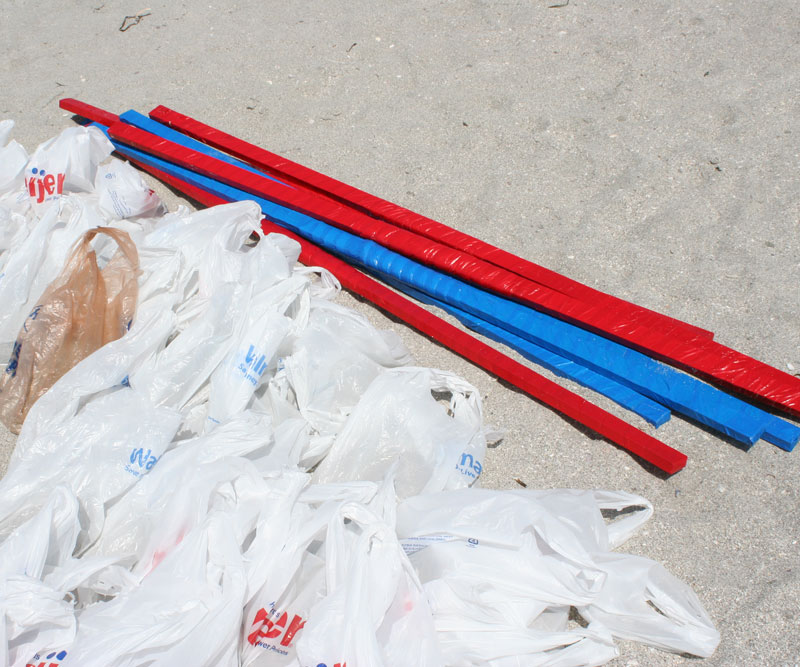
| MATERIALS NEEDED: | 8 wooden poles, several hundred plastic grocery bags, lots of sand, colored duct tape (optional) |
The set-up for this challenge was pretty easy. We got 8 wooden poles and wrapped them with red and blue duct tape to make them match our tribe colors. We also added a little bit of polyester batting to the middle, to soften the edges a little and make them more comfortable. Finally, we made marks on each pole, about a foot from the end, to give a guideline for placing the bags. We didn't want the bags too close to the ends, or they might fall off. Then we took the several hundred plastic grocery bags we had been collecting for weeks from friends and family and filled each one with approximately 5 pounds of sand.
| THE RULES: |
|
Since the blue tribe won the last challenge and had a "significant advantage" to this one, we started the red tribe out with two bags on each player's pole. The blue tribe started out with nothing on their poles. Nice advantage!
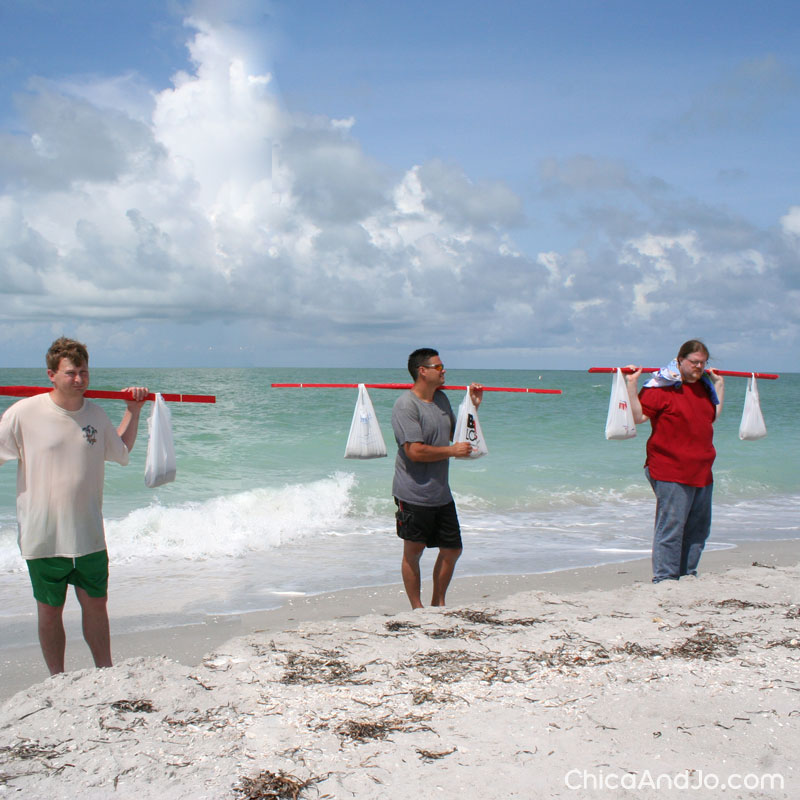
Then the kids got busy putting bags on the players, and it started to build up.
Everyone seemed to be handling the weight quite well. My husband and Jo's husband both ended up with the most weight at one point, and they insisted they could have taken much more, but their poles broke before they got a chance.
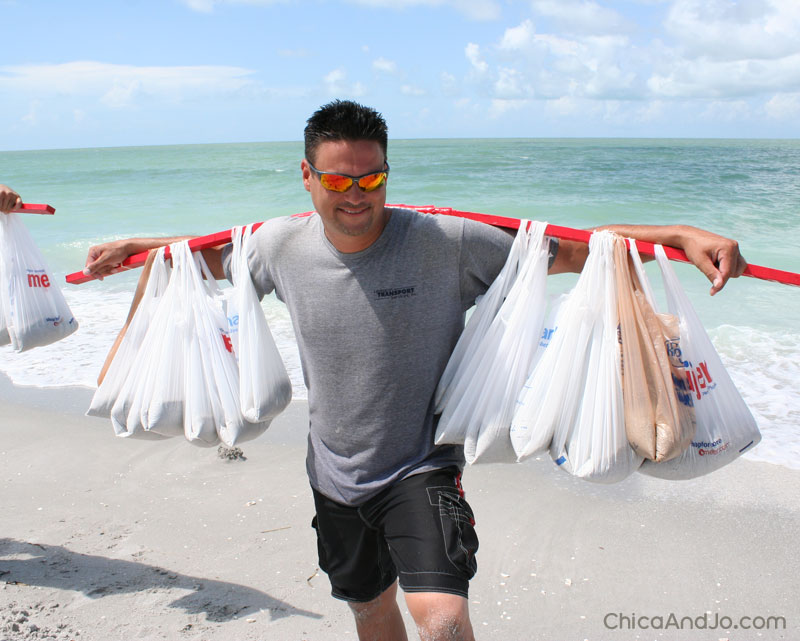
In true Probst style, we tried tempting some players to give up by offering a cold beer to anyone who wanted to quit, but nobody took us up on the offer. They were going to tough it out!
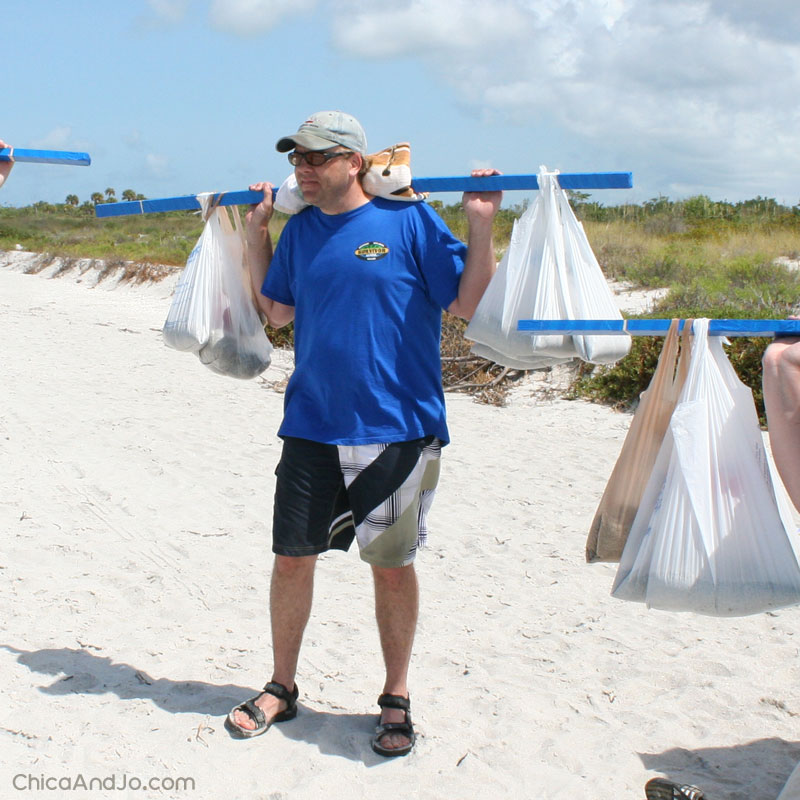
But then they started getting tired, and more poles started breaking.

Players started giving up, and eventually the blue tribe won!
Little Jo thought she could lift one of the dropped poles, but changed her mind really fast.
Additional Survivor Challenge Ideas
Since we put on this race, we've come up with a couple of other projects that would also make great Survivor challenges, so be sure to check them out for inspiration.
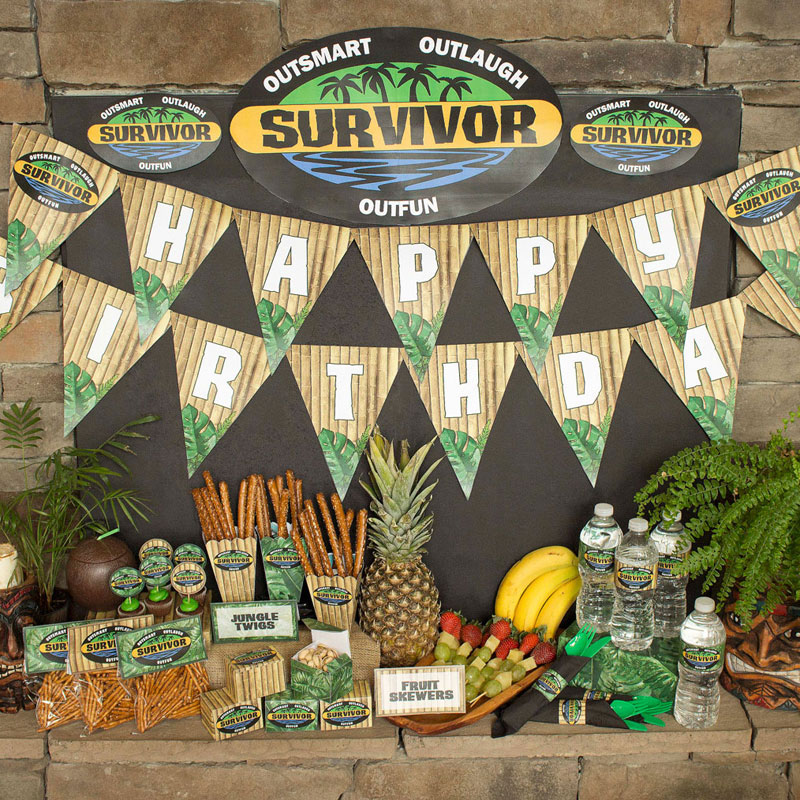
Crowning the Sole Survivor and celebrating the winning tribe
The winning tribe in our Survivor game was the one with the most challenges, and that was the blue tribe, winning four out of five. Jo and I treated the winning tribe to lunch at our favorite spot on the island and then we had an after-party for everyone, including the losing tribe, to wrap up the whole game.
We decorated the party space with an elaborate Survivor party table, filled with Survivor-themed favors, banner, and decor to really drive home the party theme.
We had so much fun putting this event on for our friends, and we know they enjoyed playing along. Thanks to everyone for being such good sports, and if you are planning your own Survivor party, we hope you find lots of ideas here to help you out.
similar projects
How to Make Survivor Buffs and Tribe Flags

Survivor Party Printables
How to Make a Survivor Tribal Council Flameless Campfire


54 comments so far:
This might be the coolest thing I've ever seen.
I'm known for games at parties... but you guys rock! None of my games come anywhere close.
I am so impressed I'm speechless, and how often does that happen?
Jan and Sarah, thanks so much! It took a lot of planning, but it was totally worth it. Jan, maybe you can use some of our ideas for your next party games :)
You both did such an outstanding job that it's BEYOND adequate words! Un-Be-Lieve-Able! How in the world did you have time to plan such elaborate clues, challenges, and everything associated with the party - in addition to just packing the regular stuff for your vacation? You two are awesome!
Thank you SO MUCH for all the information; since we're soooooo far from any water bodies (or at least any that I'd want to put my feet in!), we're going to study your plans to see what we can do to tailor them to our surroundings (and we'll have to wait for the heat to drop down to tolerable levels!). We're all Survivor fans, so it'll be a blast just trying to replicate the challenges and fun!
We hosted an Olympics Party 4 years ago, complete with homemade "flags" of all the countries participating, an opening parade with the youngest participant carrying the "torch", 12 hysterical individual and team events (25 were planned, but we ran out of time!), medals, platforms for the gold, siler, and bronze winners, and red/white/blue desserts, etc. We're thinking of doing another such competition next year (I can't believe all the kids who are waiting for it again!) We had 26 participants, but if we do host it again, we'll probably drop that number and maybe have kids only in order to keep the costs more in line with what we can afford!
Thank you again for your ingenuity and attention to detail - simply incredible!
Casey, thanks so much! A LOT of thought went into the game, but it was a joy to plan and execute. We also tried really hard to make challenges that anyone could replicate at home if they wanted, and it sounds like you're going to be able to do that.
Your Olympics party sounds awesome, too! Hey Jo, maybe we need to think about that in 2012 :)
Where'd you got the puzzle from Challenge#4?
Andrei, I made the puzzles for Challenge #4. I just got two large pieces of wood, painted them white, and then painted a design onto them. Then I stacked both puzzles on top of each other and used a table saw to cut them (at the same time) into random pieces. I did them both at once so that the puzzle pieces would be identical so it would be fair for both teams.
Does it take long to cut them?
Andrei, I probably spent about an hour painting them and a half hour cutting them out. You could leave the puzzle a solid color and not paint a design on it, which would make it faster for you to make, and also more difficult for your Survivors to assemble.
I'll try to copy the Puzzle in RED and BLACK for my Survivor Party..! =)
Last question, are the buffs expandable like in the show? Like expandable as a Tube Top? Because if so, I will not going to buy a Buff lot because it's too much expensive right now.
Andrei, if you use a nice stretchy fabric to make your buffs, they will be expandable. Whether or not they are big enough to wear as tube tops will depend on how big you decide to make them :)
LOVE IT! I'm a huge survivor fan and u just ACED this party. I'm hoping to host one in the summer. Do you have any challenge ideas besides ones you did and can you use regular bandanas for buffs if you want (or are too lazy to make them :P)
Jack, buffs would be more authentic, but bandanas would certainly be a fair substitute.
Thanks
Do you have any challenge ideas for a survivor party with middle school kids?
Also, what colors do you recommend for buffs?
Jack, many of the challenges we used in our game could easily work for kids. (For example, the challenge where you pick up boxes while blindfolded). As for buff colors, you could choose any two you like, but we found red and blue to be great colors because it's so easy to find accessories (balls, towels, buckets) in red and blue, so it was easy to coordinate.
Good Job. I actually made my own survivor. We couldn't get enough players so I had to host and play. I ended up winning in a 3-1 jury vote. But your ideas are good too. I think I will use your ideas for my next Survivor because I don't have many bandanas, So I'll probably use your idea for buffs for your Survivor. I also need to set up. I've been planning it for months now. I still need to get contestants ready because of travel issues and such. But, it will be fun. I think you should make a season 2 of your Survivor. Thanks for all your great Survivor ideas!
Thanks for your comments, Nathan. It was a lot of fun to put our Survivor together, but also a lot of work. We'll see if we get inspired to do it again another summer :)
This is so awesome! I am directing a week long summer day camp for Girl Scouts and we are going to have a Survivor theme this year. All of the tips and step-by-step directions (and pics!) are so helpful! Thank you for sharing all of these wonderful ideas!
Shawn, we're glad we could help. We'd love to hear how your camp went if you have time to come back and share some details or photos :)
I am so excited! I am planning a 6th grade graduation picnic and can't wait to use your ideas for our Survivor themed picnic!!
WOW! Thank you so much! I am a cash-strapped single parent, and these 'easy-to-make' home party ideas will make my 10-year old daughter's day! Were going to have FUN!!
My son is wanting a survivor party for his 10th Birthday this year. I had a few ideas but were very complex to build. Then I came across your site. WOW!!! Loved it. What great ideas you had. And I love that they are not that difficult to put together. I am definitely going to adapt some of these to his party. We have a park though, no beach, any extra suggestions for a large group 16 in a park and we have a pool would be great. Hopefully he is now going to have the best party ever :)
Nat, so glad we would help inspire you for the party. Is there a sandbox or mulched area at the park? If so, you may be able to adapt some of our digging challenges. And our swimming challenges could be turned into running. Hope that helps!
That was totally awesome! It looks like you guys were taking a family camping vacation? Or even just a family vacation? Where did you go?
Rachel, we both (along with several other friends) take a beach vacation in Sanibel, Florida every summer. It's a great time, and we usually try to do a fun game for everyone during the week. Survivor was a big hit that year and we all had a blast!
Love all your ideas! I particulary like how you have outlined everything and made it easy to duplicate. We are going to try to incorporate your ideas into a survivor themed family reunion- which should be alot of fun!
I love your website! We are finishing the touches on our "Survivor Party" and feel so fortunate that you've shared your amazing ideas! Look out Martha Stewart!
Michele, we're happy to have helped you out. Let us know how the party goes!
Hey Chica, I have a question. What challenges ideas could you suggest for individual games that ARE NOT endurance games like the poles and the bags? I love Survivor, and I'd like some inspiration on individual competitions. I have 19 of my own made, but I need as many as I can possibly get!!! If you can help, that would be awesome!
Hi Tanner! For non-endurance challenge ideas, what about doing a quiz? I can remember lots of times on the real Survivor show when Jeff would ask a series of questions (often related to survival or the island) and the contestants would have to guess the answers. Or you could always do some variation of the "gross food" challenge that shows up almost every season!
You people are amazing!!! This is really great! Everything - your flags, buffs and idol! I am from Czech republic and I have to buy everything from America if I want something from Survivor, but now I find out how to do it at home! Thank you! I think I will do similar Survivor party soon :D
Johaney, we're so glad we could help you out!
I happen to be having a survivor party next week! Thank you for posting this. It has been really helpful as I've been planning. Thank you so much. Question: my friend coming is allergic to nuts, so as much as I love it, I cant do chocolate and peanut butter. What would you recommend as a nice reward?
Troy, some of the other favorite food rewards I've seen on Survivor have included pizza, burgers, beer, and milk and cookies. Maybe one of those will work for your friends?
I've organised multiple survivor events for my family and every time I plan a new one I always come back to here for inspiration. This is so amazing.
AJ, thanks for coming back for more! We would love to see pictures of your event, so tag us with @chicaandjo
I am currently planning a youth camp and have gathered much inspiration from you two! I have to submit a timeline for our camp (I am talking in half hour increments) and was wondering if you had a rough idea how long the challenges took. Namely chalenge 1,2, and 4? Thank you for your help!
(I was feeling so overwhelmed by this camp with lists of ideas but too many to narrow down on top of safety, food, permission slips, involving the youth in the planning....I was drowning until I found your blog. It has helped me SO SO SO much!)
B, we're so glad we brought some confidence to your planning! Unfortunately we don't remember how long those challenges took, and our wild guesses at this point wouldn't be very useful because you'll have a different location and different folks. Have a great time!
Hey this is literally the coolest thing ever. I always look up survivor diy at homes and everyone has really bad ones but this is amazing. What kind of boxes did you use. Would cardboard breakup with the locks? And the rope? I want to do the same thing but I feel as if buying 8 wooden boxes or making them is hard. Thank you so much for your help!
Lu, we're so glad you enjoyed our Survivor event! The boxes were indeed cardboard, and held up fine with the locks and rope.
Omg thank you so much. I am so happy it is cardboard. I would've been like wow these people are just like me. I am an extreme survivor fan. I am hoping to get on when I turn 18. I'm 16 and I love making obstacle courses and stuff like that. Thank you for writing back to me. And is ivory parchment paper thick? I have clear parchment paper at home and it’s very thin and see through. Sorry for all the questions.
Lu, we're huge fans of the show as well, as you can probably tell! If you ever do make it on the show, be sure to let us know so we can watch for you. You can read more about how we made the (fake parchment) voting slips in our Survivor party post.
My sister and I are both trying out as she is 18 and knows literally everything about survivor. And I mean everything to the tee. She will most likely make it on. And hopefully she becomes a big player because if they ask her to do blood vs water. I am going on. Thank you for everything!!!
Thank you so much for posting this! I love the creativity and admire the time you out into prepping for this party. I am looking forward to adapting some of these ideas into our cub scout family camp out this fall!
How did you make the puzzle for the obstacle, digging, puzzle challenge?
Kristen, we used plywood for the puzzle, and painted a design on it. Then we turned it into pieces by just randomly cutting it with a saw. We made a frame out of trim to keep the pieces together.
OMG you saved the day with these awesome ideas THANKS A MILLION and kudos to such a amazing job and ideas I got from your post :) :) :)
oh my word! You guys put so much thought and time into this! I'm planning a survivor themed party for my daughter's 10th birthday. I think with just a little adaptation these games will be so fun.
I'm also thinking this would be an amazing church youth activity as well!
Thank you so much for sharing.
Shawna, we're so glad to hear our ideas helped you. Be sure to tag @chicaandjo in your party pics on social so we can see how it turned out!
Have you considered creating this as a survivor party kit to sell to those less talented? It is amazing what you did!
Laura, thank you! We have thought about it, but it's so hard to customize for each person's particular party, so we just offer as much advice here as we can.
Amazing! I don't have a problem going through this. It's AMAZING to see how you create these DIYs!
What is the purpose of winning the Immunity Idol after winning a challenge if everyone votes for the best adult & child on their team at Tribal Council every night? Thank you!
Ellie, awarding the idol after challenges is mostly for fun! The teams love to hold the idol up in victory and keep it with them until the next challenge. It adds a fun touch of authenticity to the game.