


Kentucky Derby Rose Cake

Every year when we have our Kentucky Derby party, Jo and I always look for a way to incorporate the Derby's signature red roses into a cake. The second I saw i am baker's rose cake tutorial, I knew it would be the perfect way to make an edible rose-covered cake for Derby.
I made up a big batch of red icing, using Wilton's red "no taste" coloring to keep the frosting tasty. (Too much regular food coloring can end up tasting bitter with bold colors like red.) Then I frosted the cake with a solid basecoat of red to seal it up.
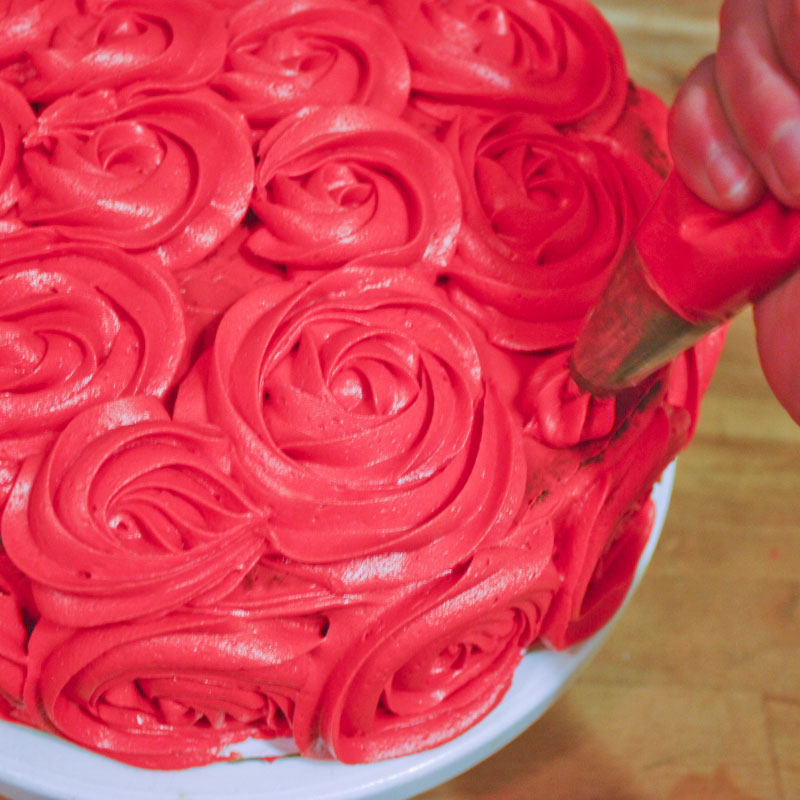
Then I put a giant 1M start tip into a disposable icing bag and used it to pipe giant swirls onto the cake.
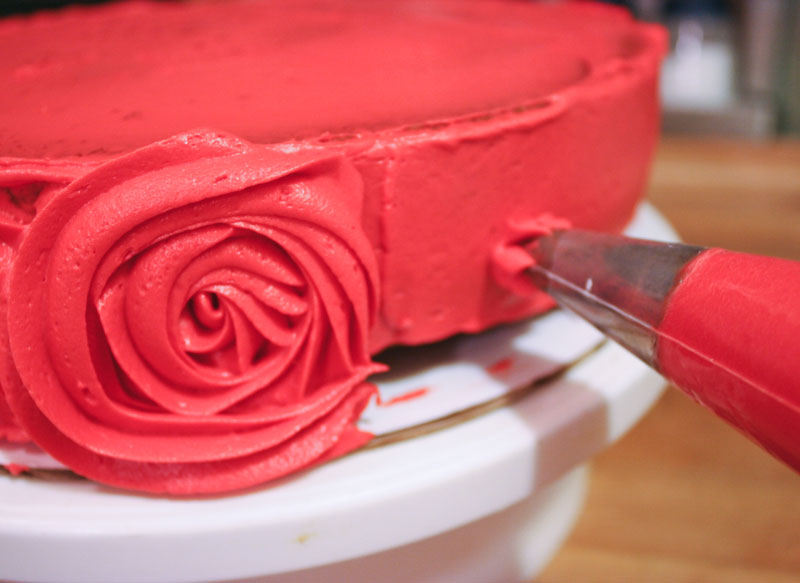
It really is that easy! Just pipe lots of giant swirls all over the cake, and they look just like roses. Fill in any gaps between roses with tiny swirls to finish it off.
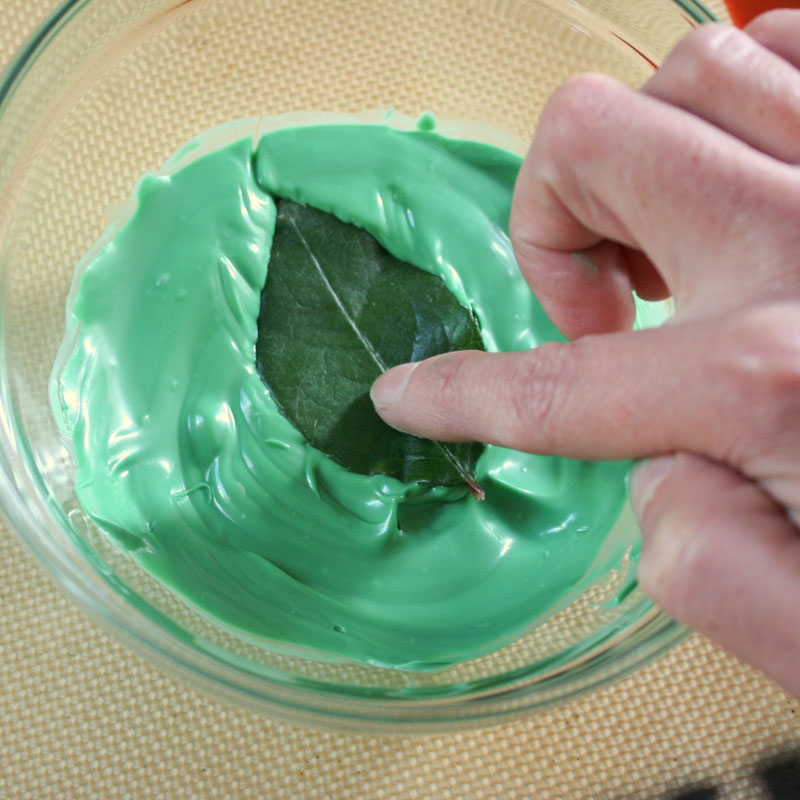
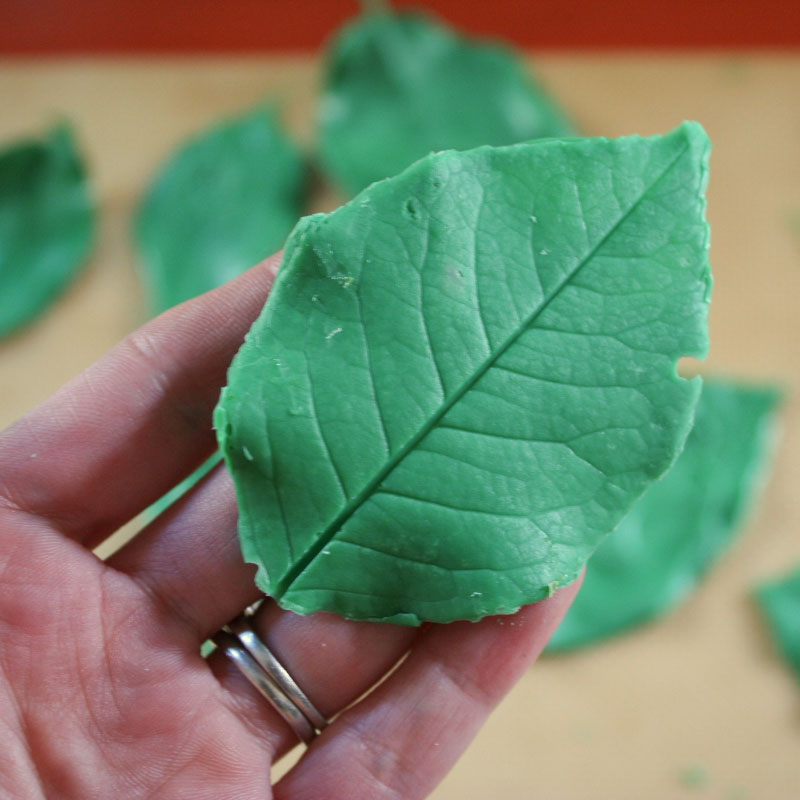
To add an extra touch to the finished cake, I decided to make some edible chocolate leaves for a garnish. I washed some rose leaves thoroughly, then put them FACE-UP into some melted green candy melts, so that the chocolate is on the BACK of the leaf. (This is so the veins will show... you'll see in a minute.)
I left the leaves to set up and harden.
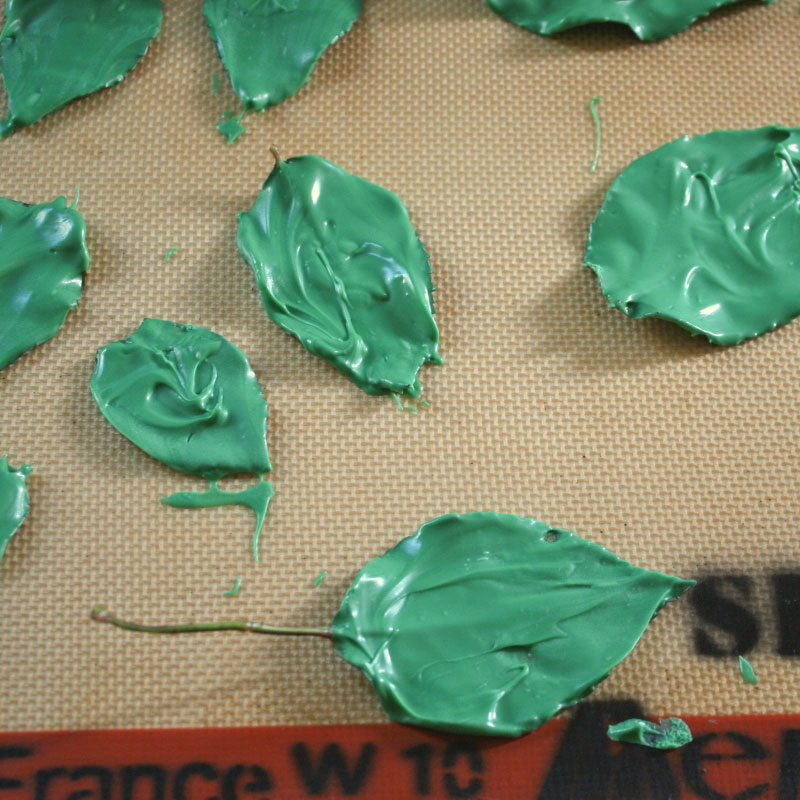
Then I carefully peeled the leaves off the chocolate. Now you see why we applied it to the backs of the leaves — it was so we could get those gorgeous veining lines in the chocolate!
I simply tucked a few leaves into the cake, and it was done.
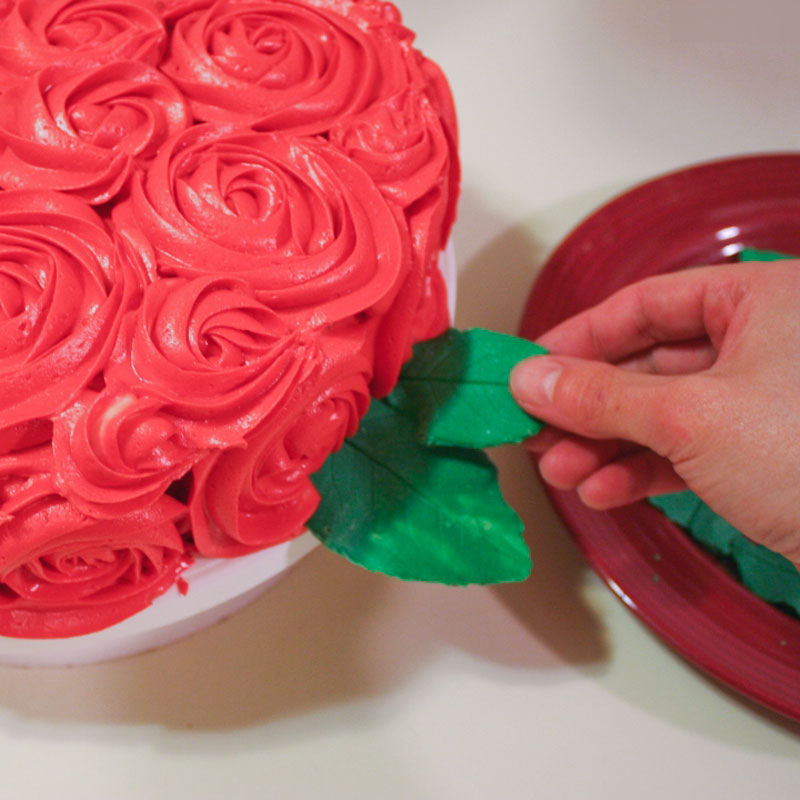
This rose-covered cake was so easy to make and will be the perfect dessert for our Kentucky Derby party.
similar projects
Kentucky Derby Party Food Recipes
Kentucky Derby Cupcakes

Kentucky Derby Party Ideas


10 comments so far:
absolutely gorgeous!
That is so pretty.
You mean I didn't need to take the Wilton cake decorating classes at Michael's? This is a heck of a lot easier... LOL. The cake looks great!
Wow, I LOVE this!
Amazing !!really I am trying to do it but no success tell now but I will try again
I love the leaf idea!
Beautiful cake!!! Loved it!!!
Very cute and is pretty cool
Very beautiful! How did you make frosting? I want to do it for my birthday.
Iva, I used my standard decorator's frosting recipe, which holds up well to decorations like these roses. Mix a 2lb bag of powdered sugar with about 2/3 cup of white shortening, a splash of vanilla, and enough water to get the consistency you like (around 2/3 cup).