


Easy Candy Corn Costume for Kids

If you're looking for easy costume ideas for your baby or toddler, I've got just the thing for you! This easy-sew candy corn costume for kids can be made in under 30 minutes for under $10, with minimal sewing skills required. It all starts with fleece, which is my favorite materials to use for making costumes. It's stretchy, warm, soft, forgiving, and doesn't require hemming, so it's a huge time saver for DIY kids costumes.
VIDEO: Candy Corn Costume Tutorial
If you like watching a live demo, here's a full video tutorial showing how I made this easy and adorable candy costume.

If you can't see the video, try viewing it directly on YouTube.
How to Make a Candy Corn Costume: Step-by-Step Photos
And for those of you who prefer photos and text, I've documented the whole thing here with step-by-step instructions and photos! Keep reading to learn how to make your own kids' candy corn costume.
Step 1: Determine your measurements
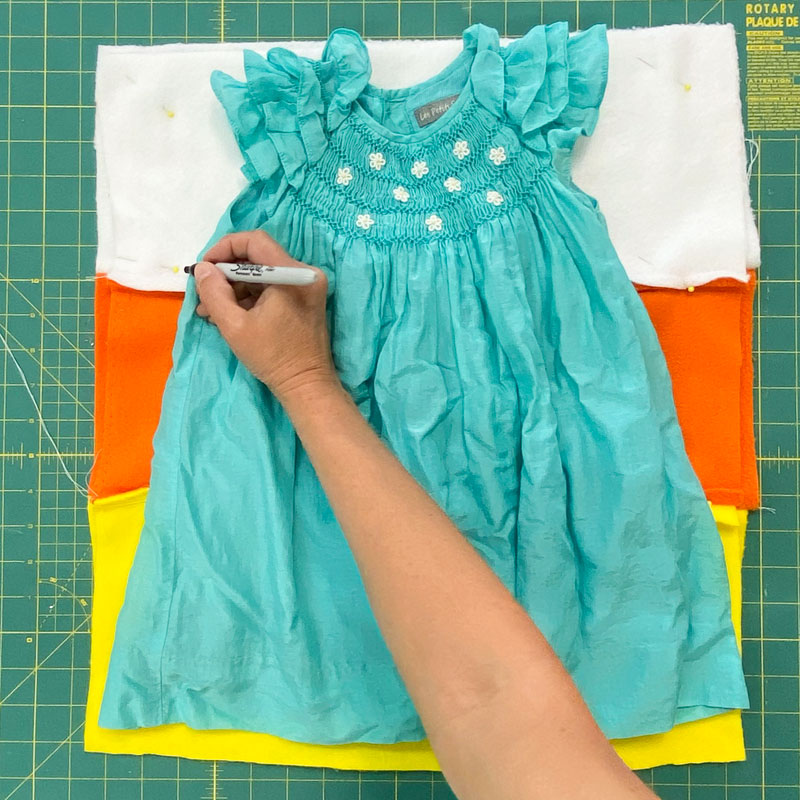
To make it super easy to custom fit the costume to your child, start with a dress or long shirt that fits the child very comfortably. This dress will serve as your pattern. Measure the height of the dress to determine the height for your costume (If you use a shirt instead of a dress, hold a tape measure up to the child to determine the proper length to make the costume.) My dress measured 19" tall.
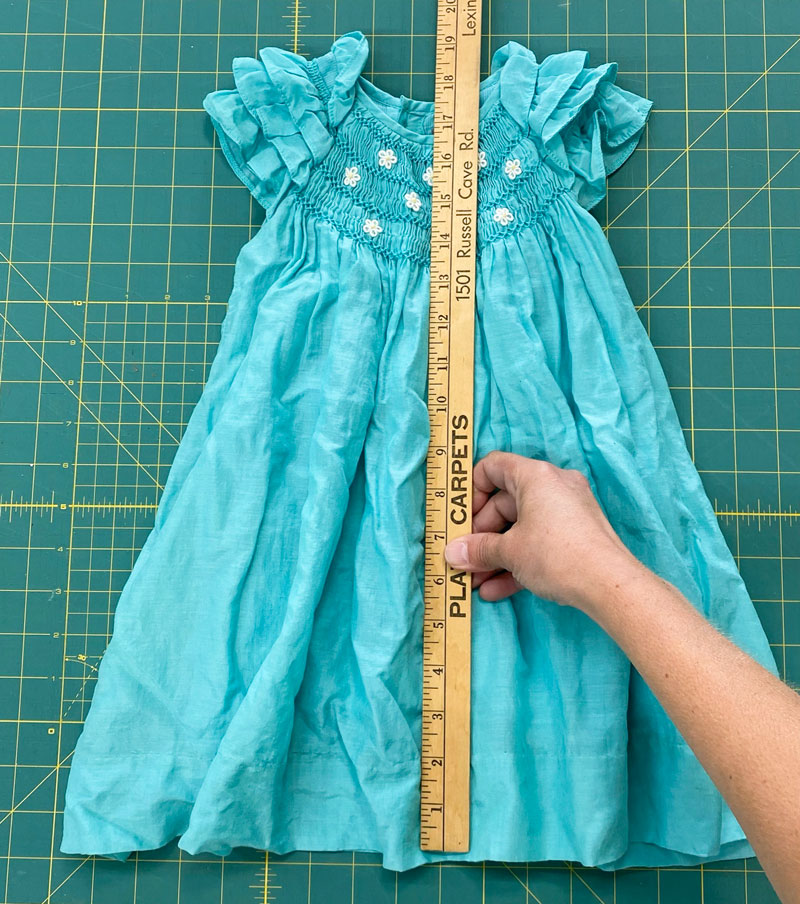
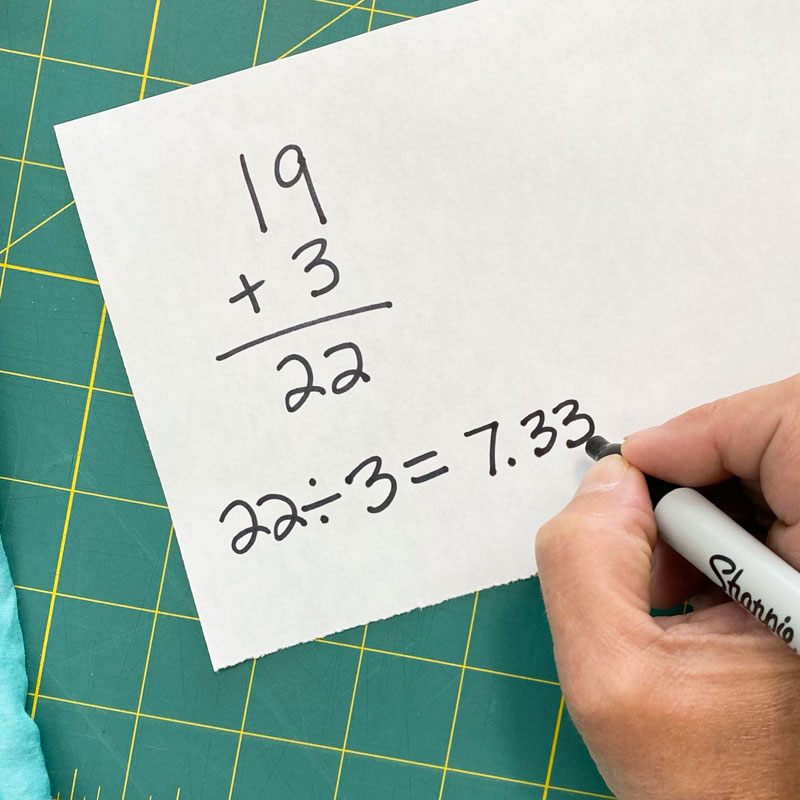
Since the costume will be made up of that familiar white-orange-yellow candy corn pattern, we need to apply a formula to the measurement to determine the height of each stripe. Take the height of the dress, add 3" (to account for seam allowances), then divide the total by 3. My dress was 19" long, and this formula gave me a result of 7-1/3" inches for the height of the stripes.
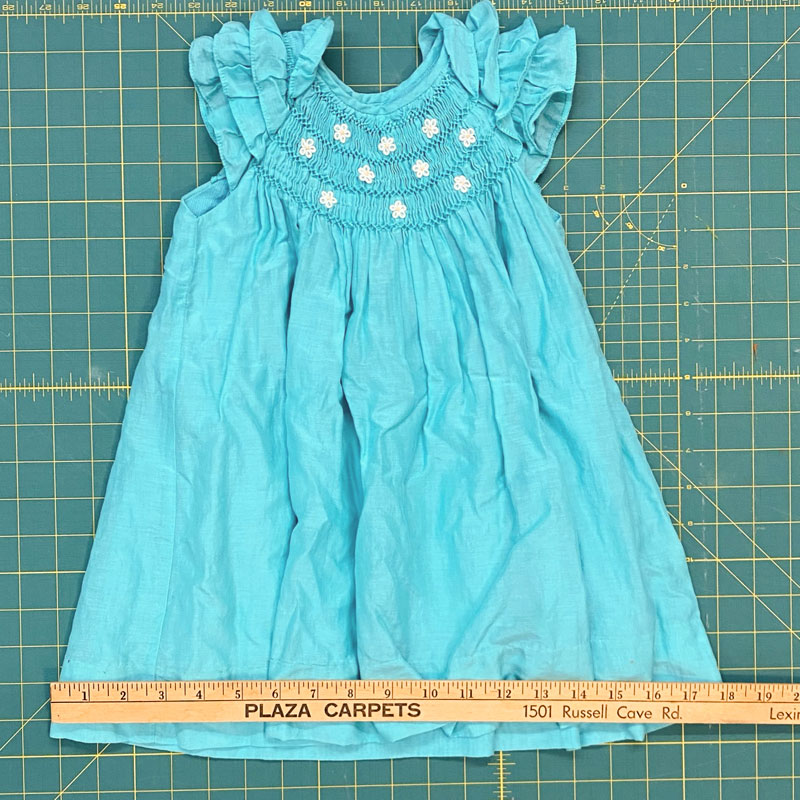
To determine the width of the stripes, measure the width of the bottom of the dress (mine was 18").
Step 2: Sew the costume
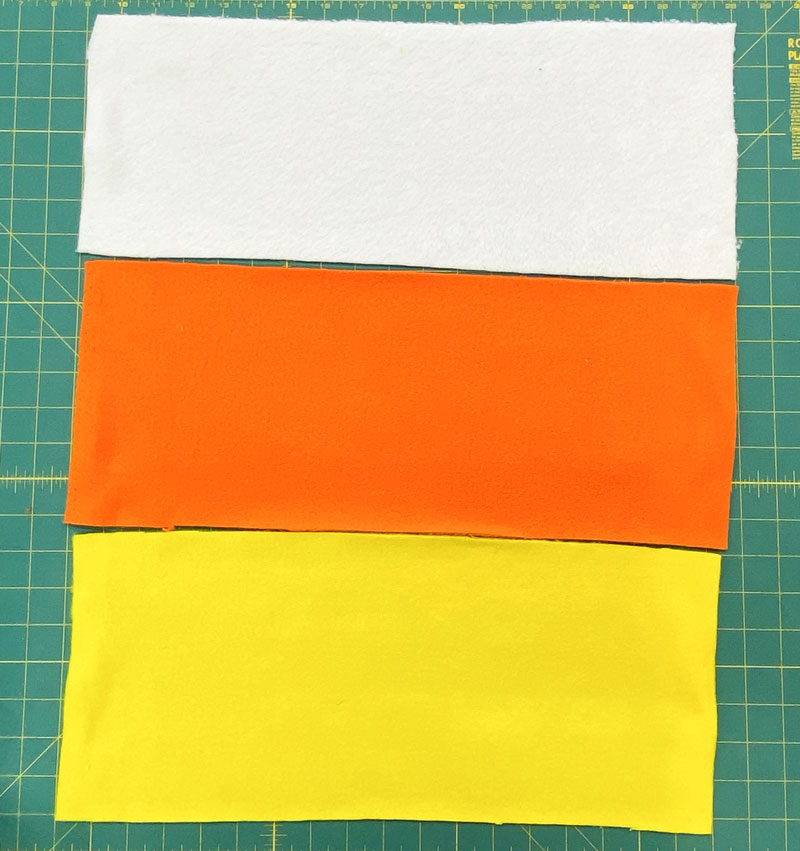
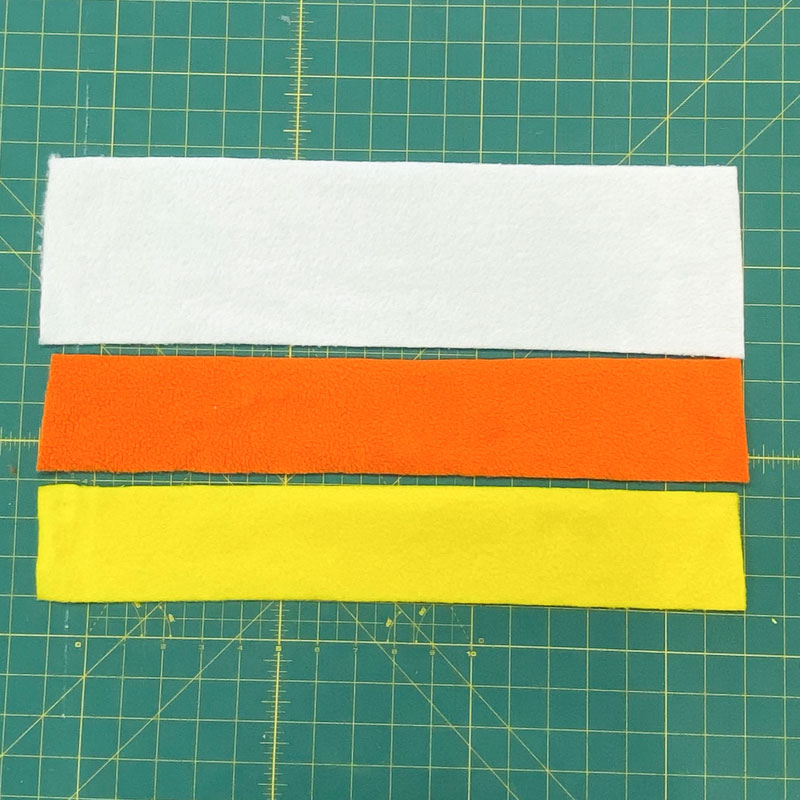
To make this costume, you'll need some fleece in orange, yellow, and white. For a toddler, a half yard of each should be plenty, but you may need more for an older child.
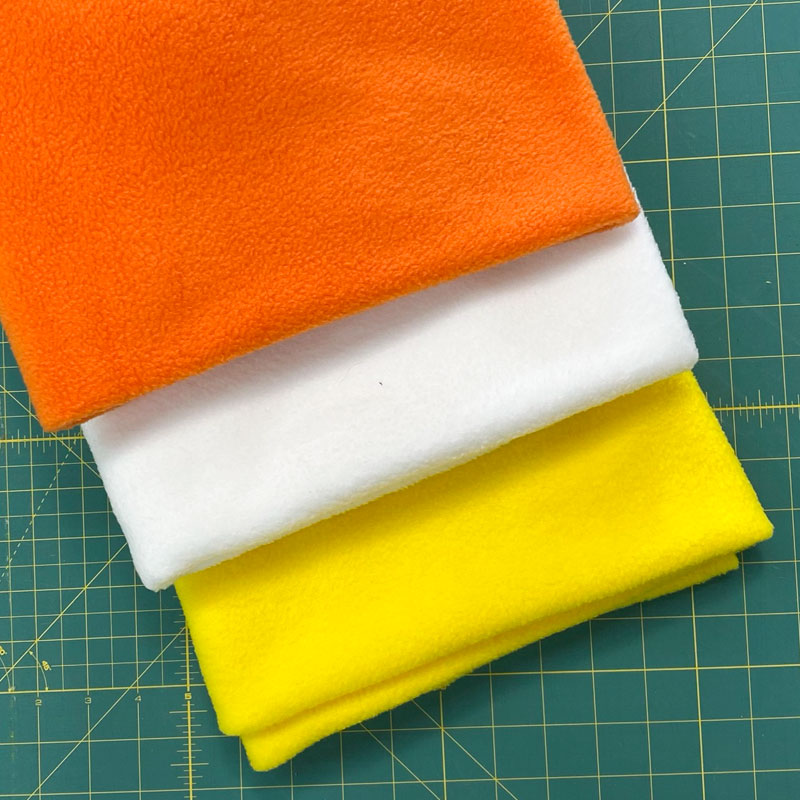
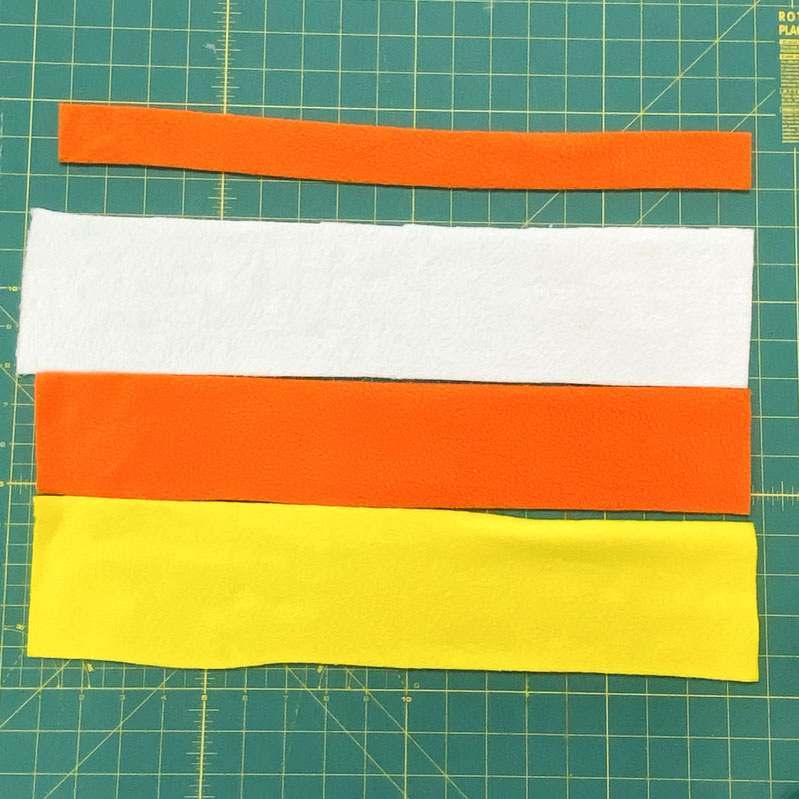
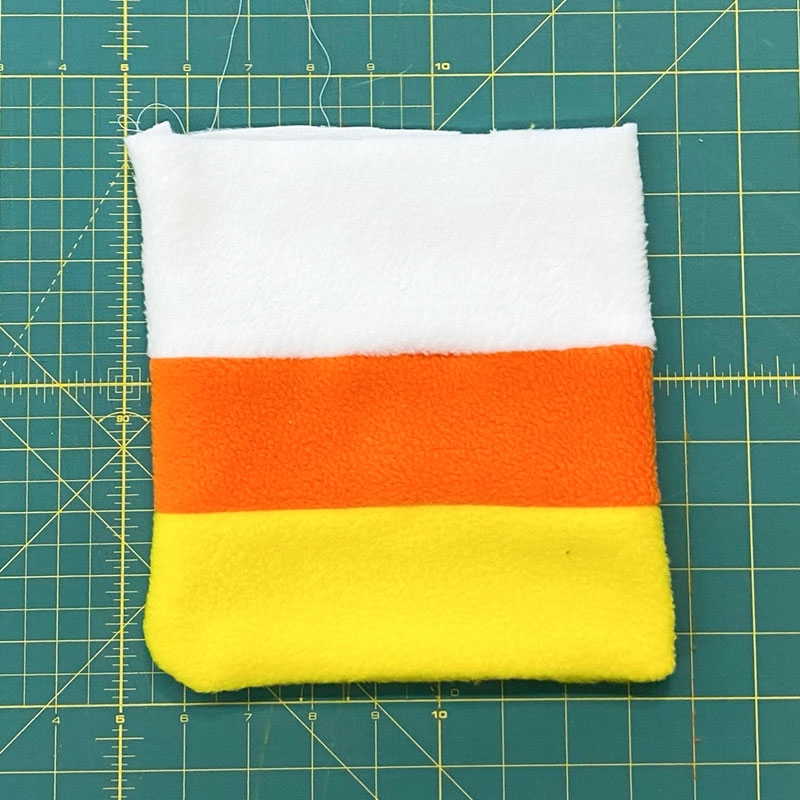
Cut three pieces of fleece (white, orange, and yellow) to the width and height you've calculated. For me, that meant 7-1/3" by 18".
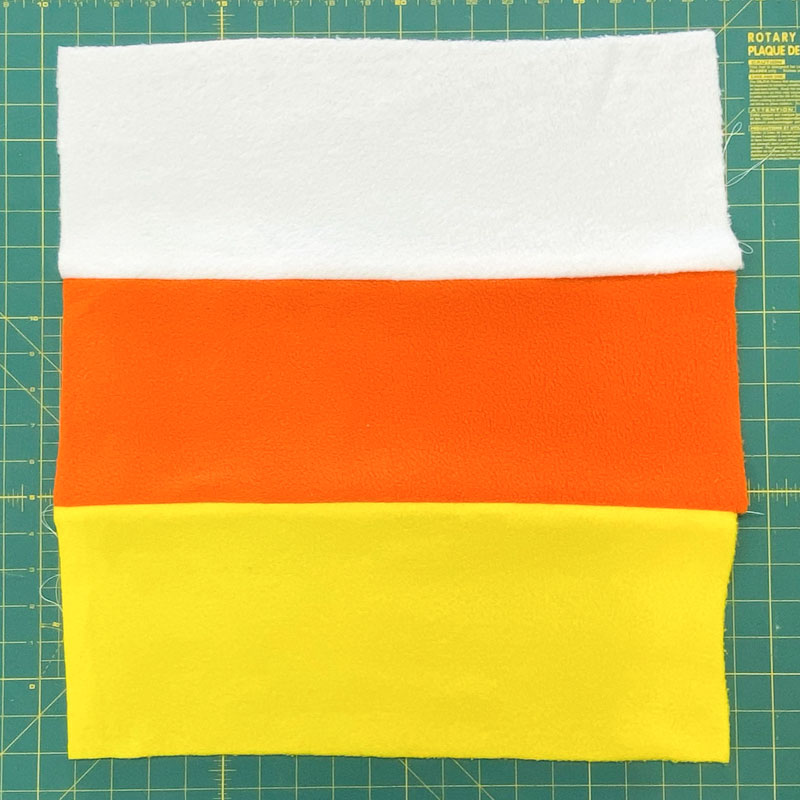
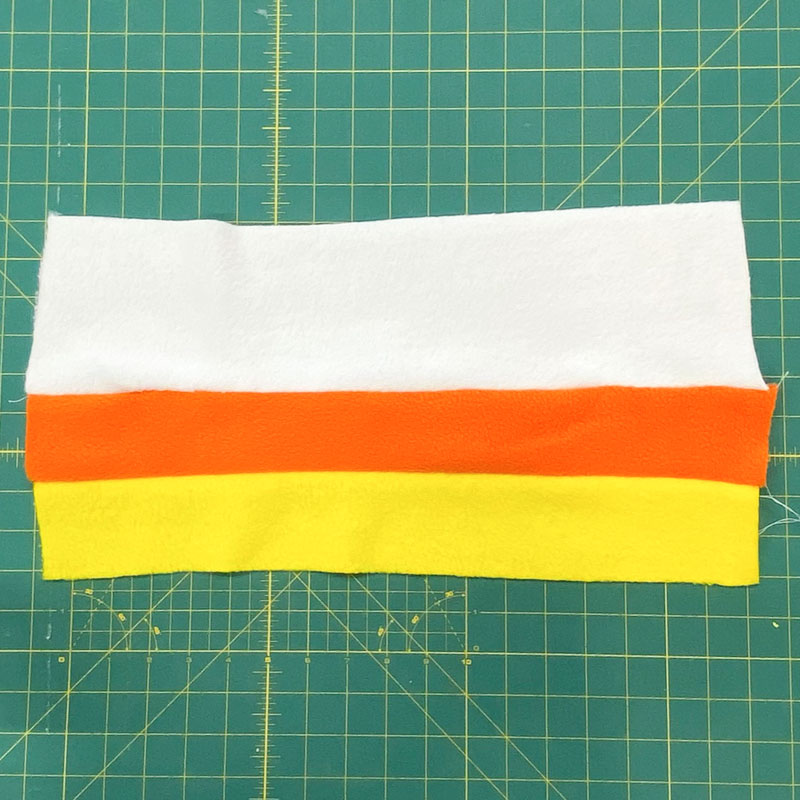
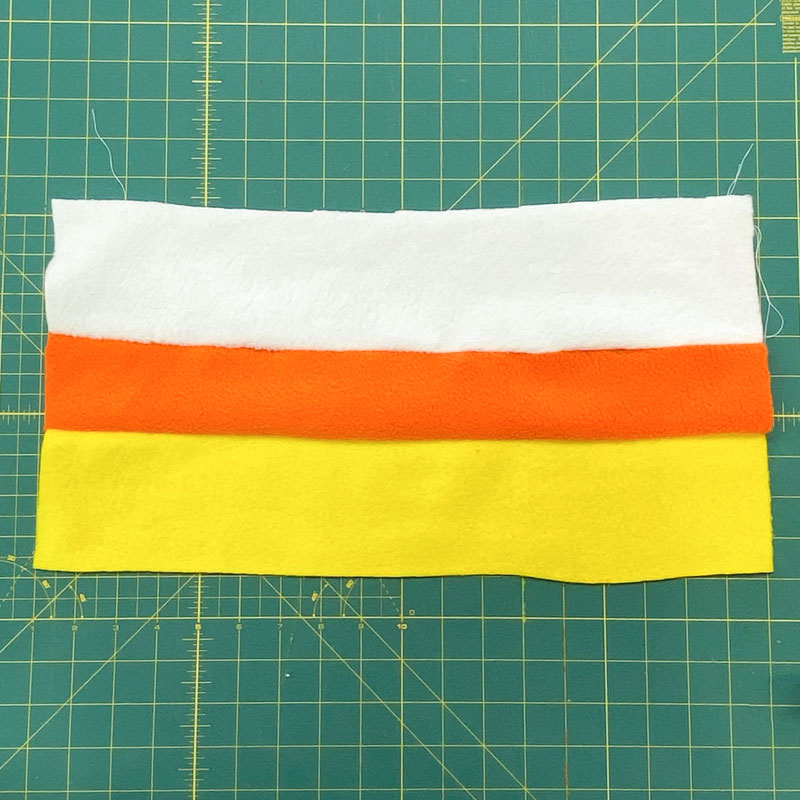
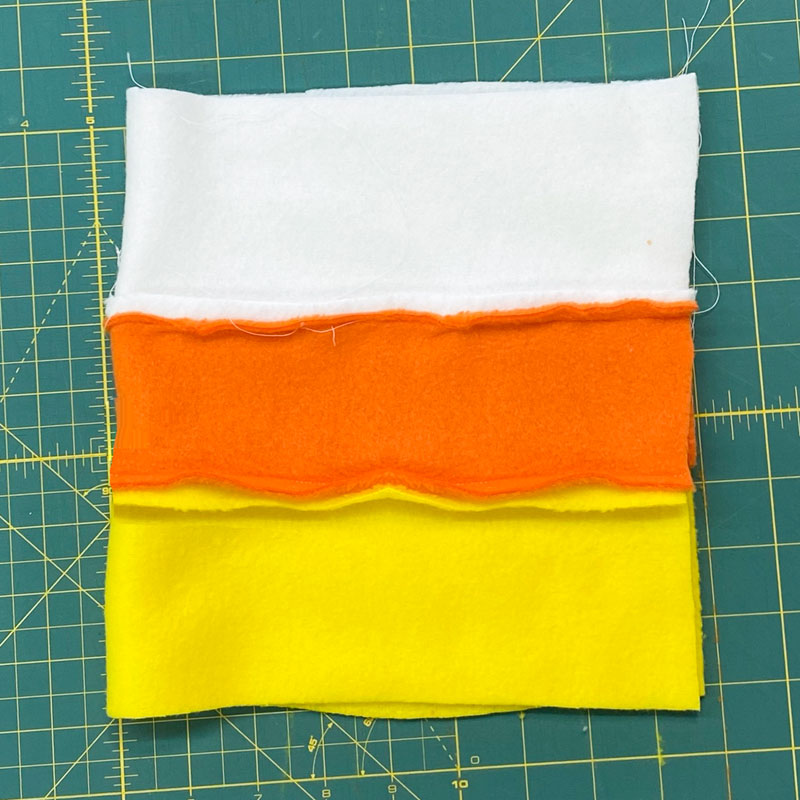
Now use the sewing machine to sew the three pieces together along their longest sides and lay the panel face up on the table.
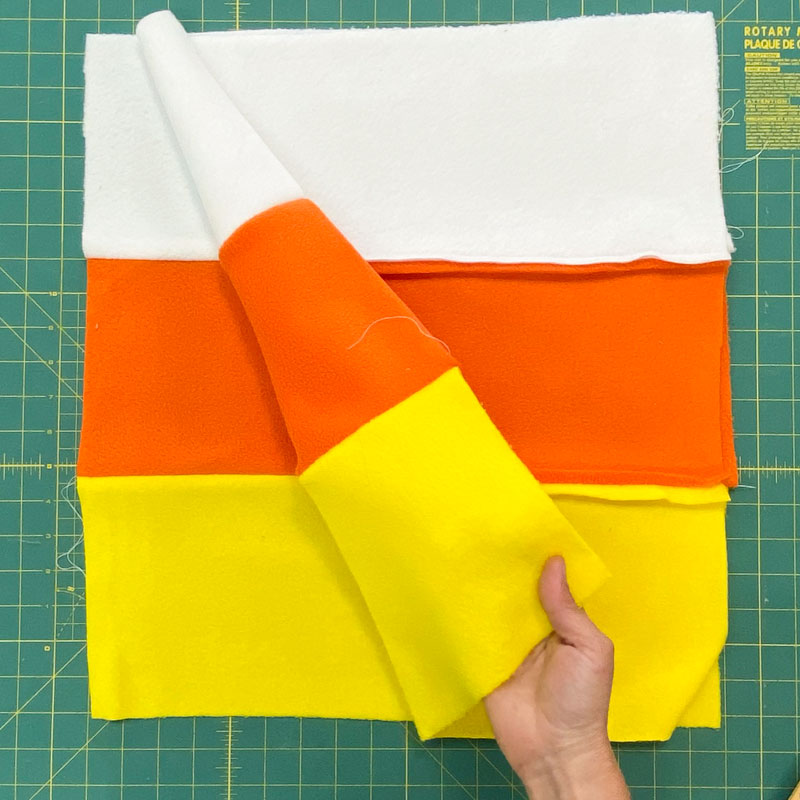
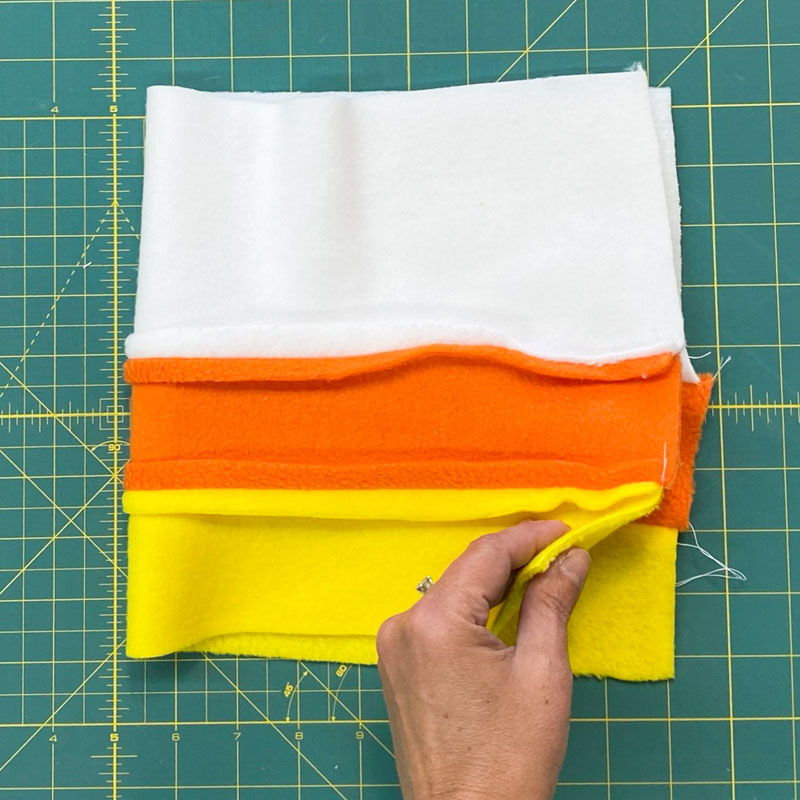
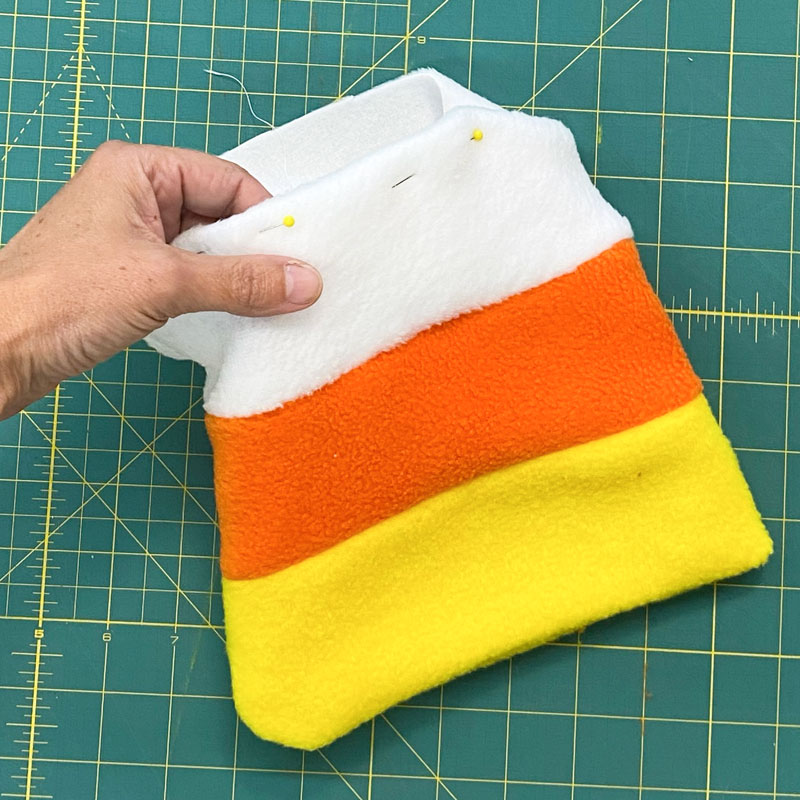
Make a second piece of striped fabric in the same way, and place it face down on top of the first, with right sides touching.
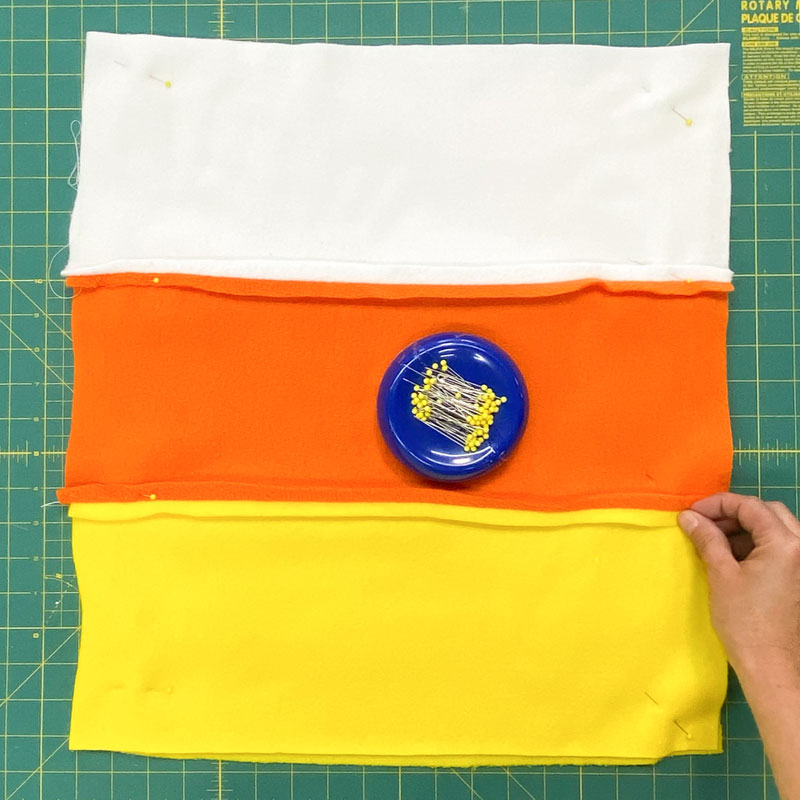
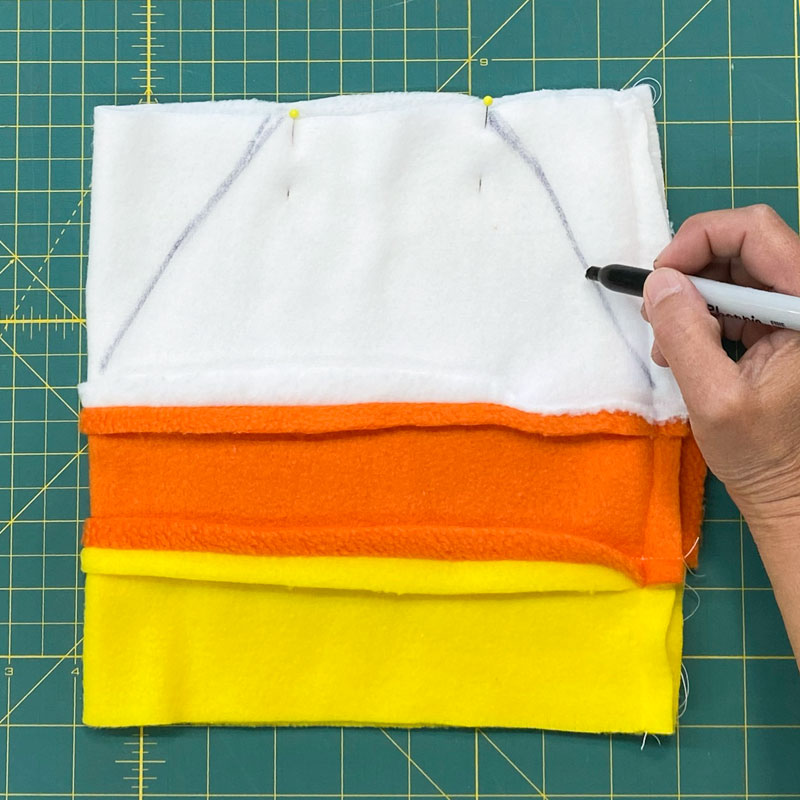
Pin the panels together with some straight pins to keep everything stable.
Place the dress on top and use a marker to trace around it, transferring the pattern to the fleece. Draw your line about a half inch away from the dress, to account for seam allowances.
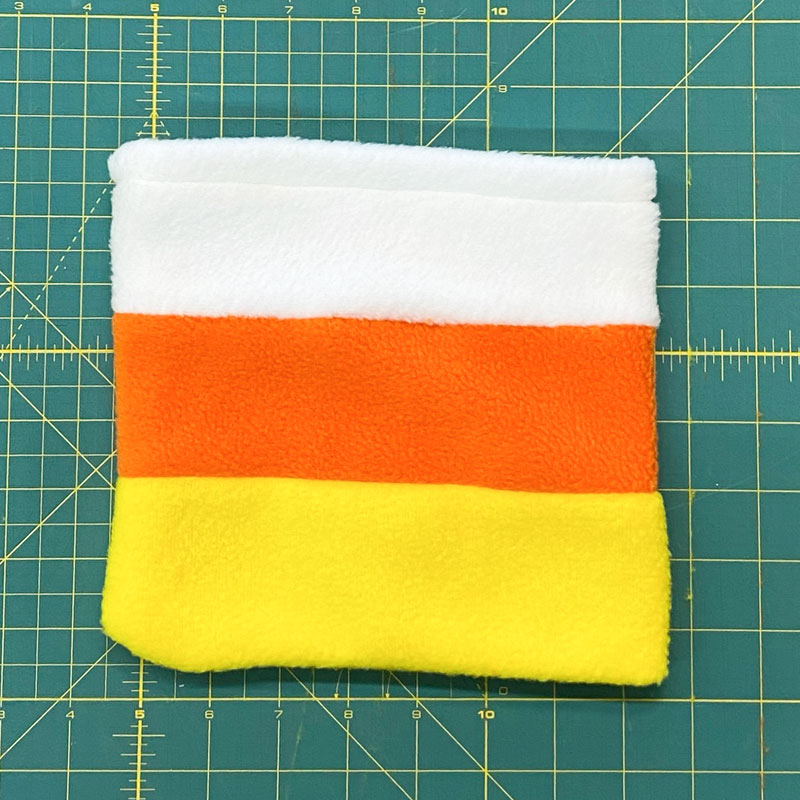
Remove the dress and reveal your pattern. Be sure you have some pins inside the drawn line, so that the pieces stay together after you cut off the excess in a minute.
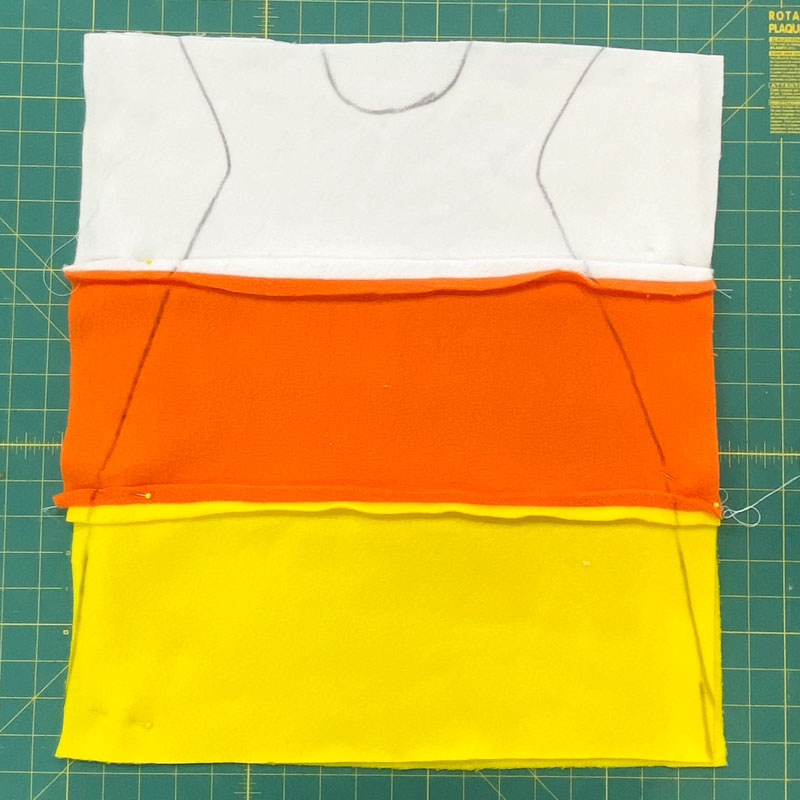
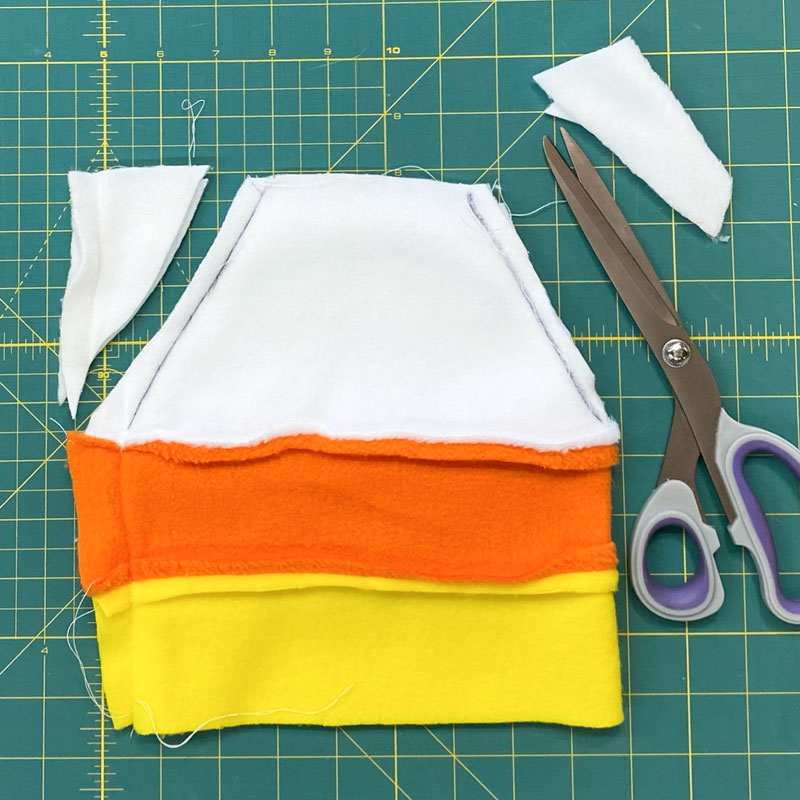
Cut along the drawn line, thus forming the neck hole, arm holes, and sides of the costume. This is where fleece is so amazing, because you won't have to hem these cuts at all.

Use your marker to draw lines across the shoulders, rounding them out a little and removing that harsh edge. Trim off the excess white fleece at the line.
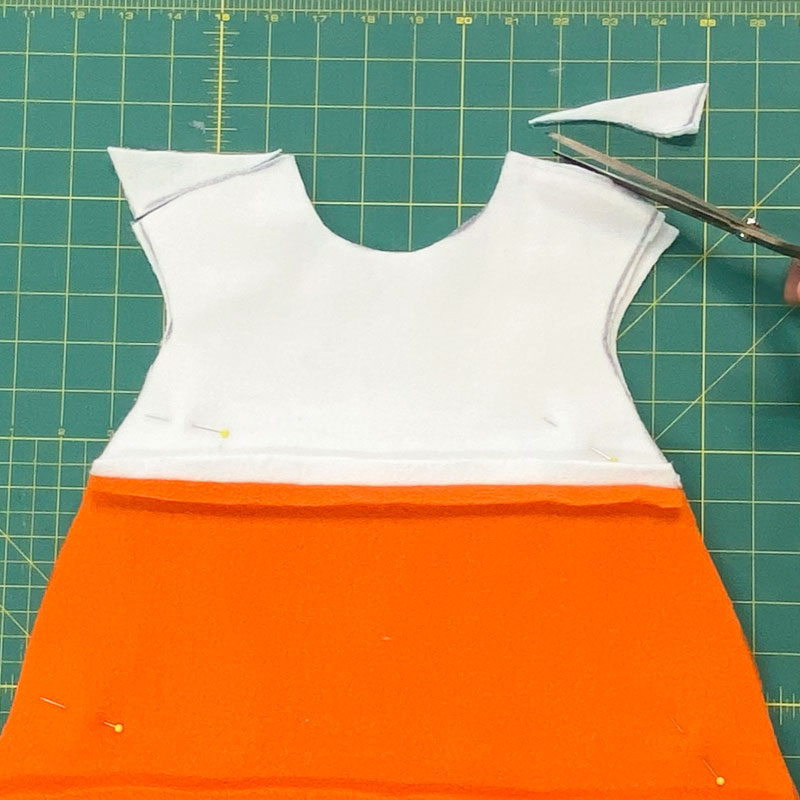
Use the sewing machine to sew across the white shoulders and down the sides of the costume, making sure to NOT sew the neck or arm holes.
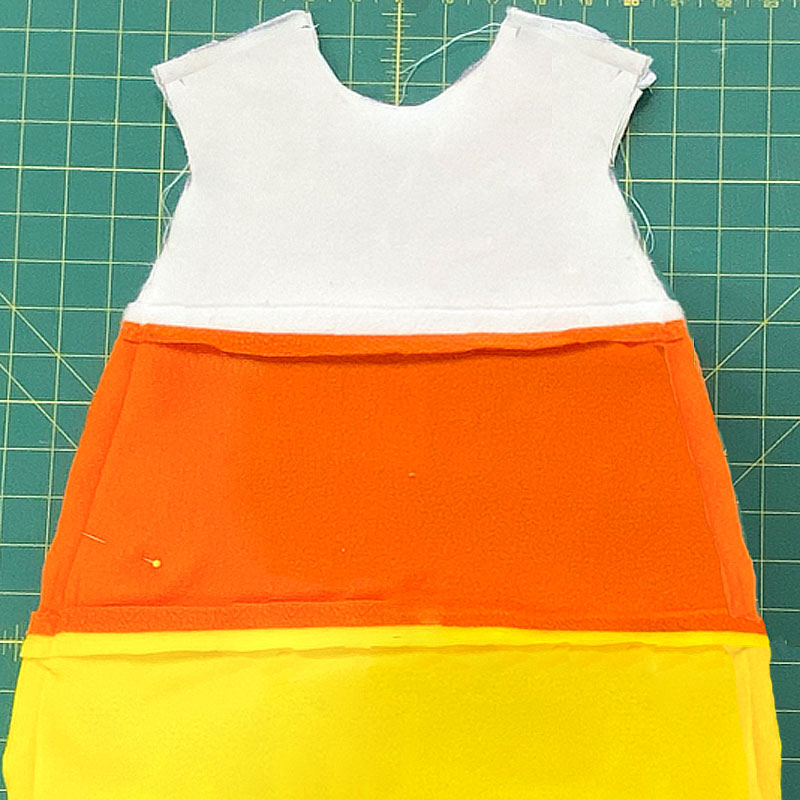
Now just flip it inside out and you're done!
Done? What? Yup! That was pretty easy, wasn't it? I gotta give most of the credit to the fleece. Since that went so fast, let's continue on with some accessories.
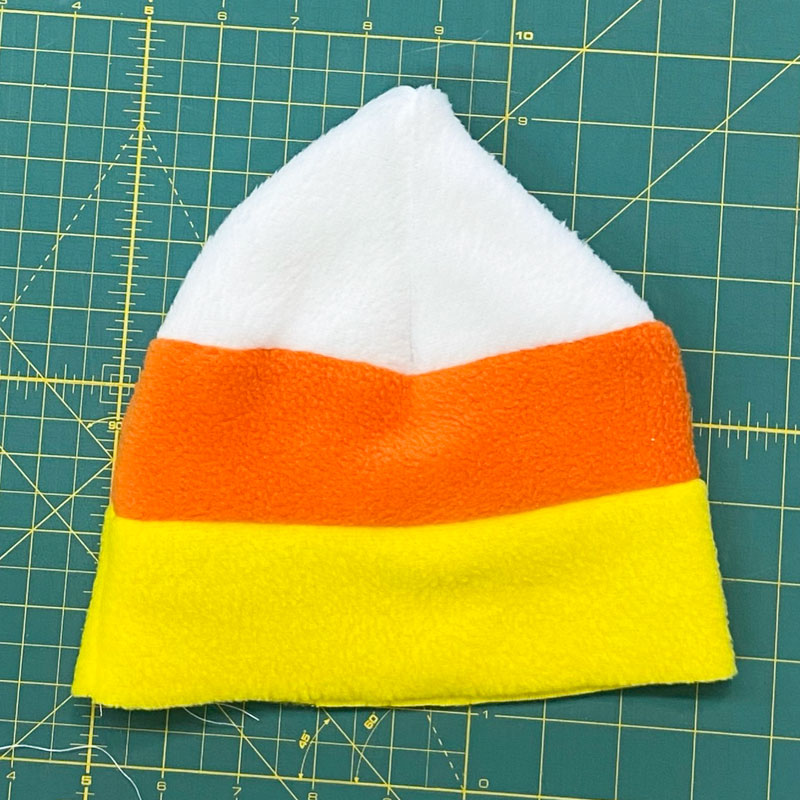
Step 3: Make a coordinating candy corn hat
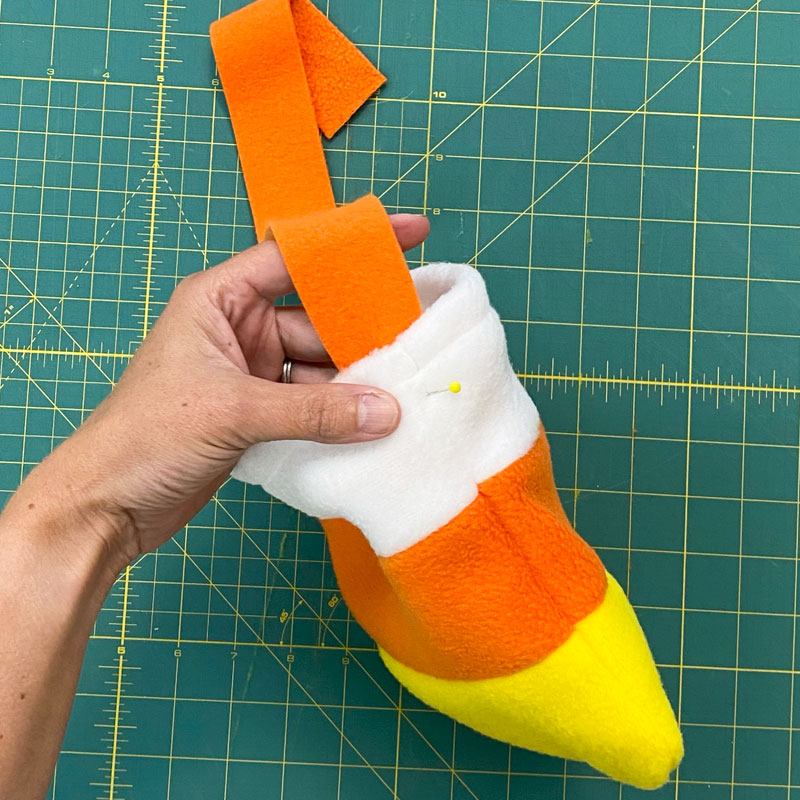
A hat would finish this off nicely, so let's make one. Measure around your child's head and add one inch to that. For my costume, that was 18"+1=19". Then cut three pieces of felt with that measurement for the width. The white piece should be 5" tall and the yellow and orange pieces should be 3" tall.
Sew the strips together to create a striped panel, just as you did with the costume.
Fold the striped piece in half, right sides together, then sew the ends together on the side, creating a tube.
Place two pins along the top of the white band, about 1/3" of the way in from each side. Use a marker to draw lines from those pins down to the bottom of the white band.
Sew along those lines, then trim off the excess white fleece.
Pick the hat up and squish the white end so that the gap opens up. Push the sides together so that the opposite sides pucker out, forming a bit of a cross.
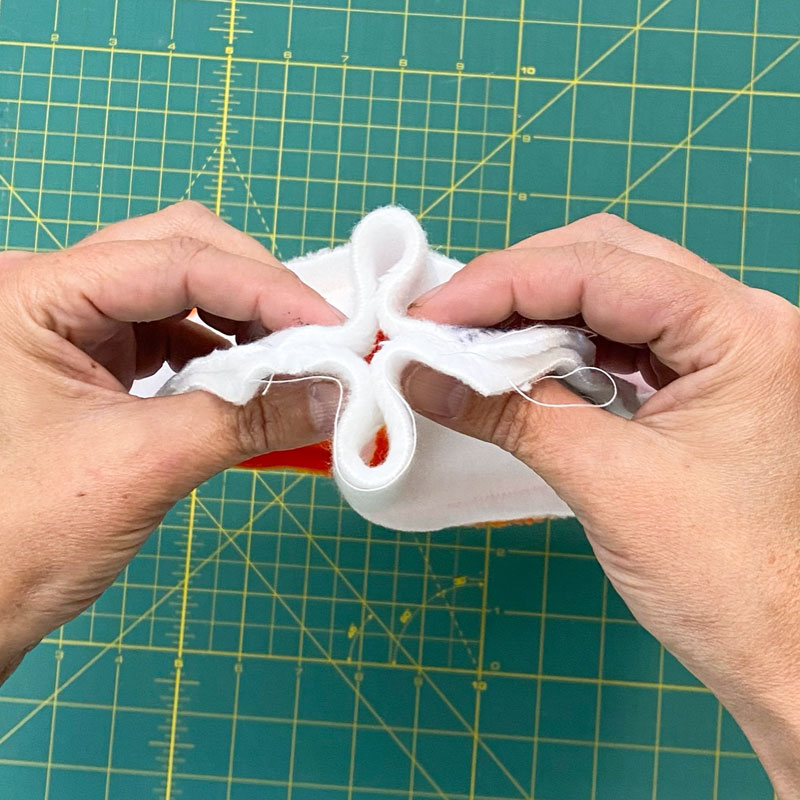
Flatten the hat in the opposite direction it was before, so that the sewn corners are in the middle, instead of on the sides. Use your marker to draw diagonal lines on the white fleece, as before.
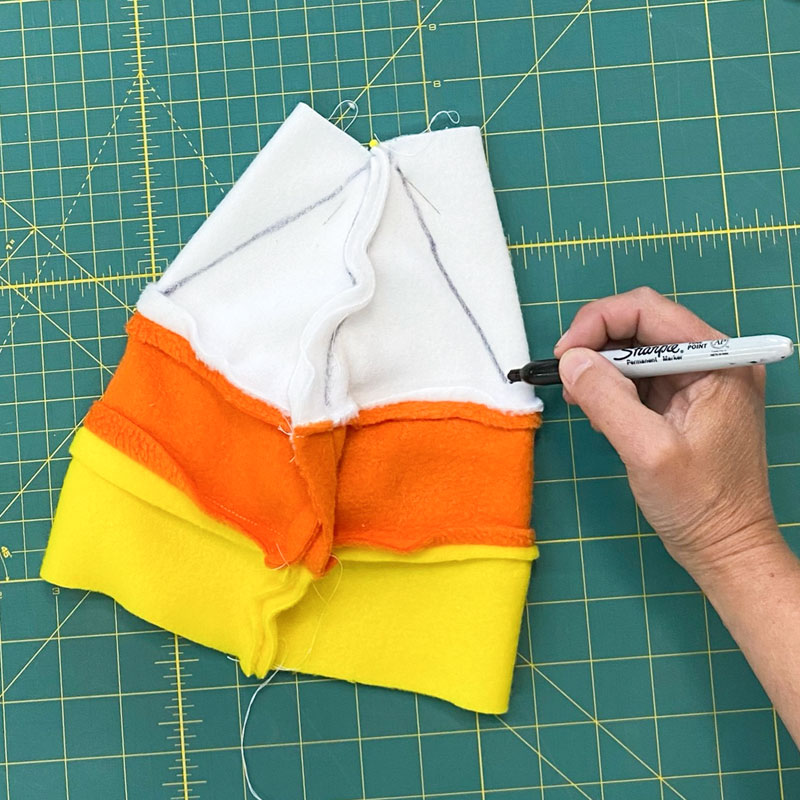
Sew along the lines and trim off the excess white. Flip the hat inside out and it's done!
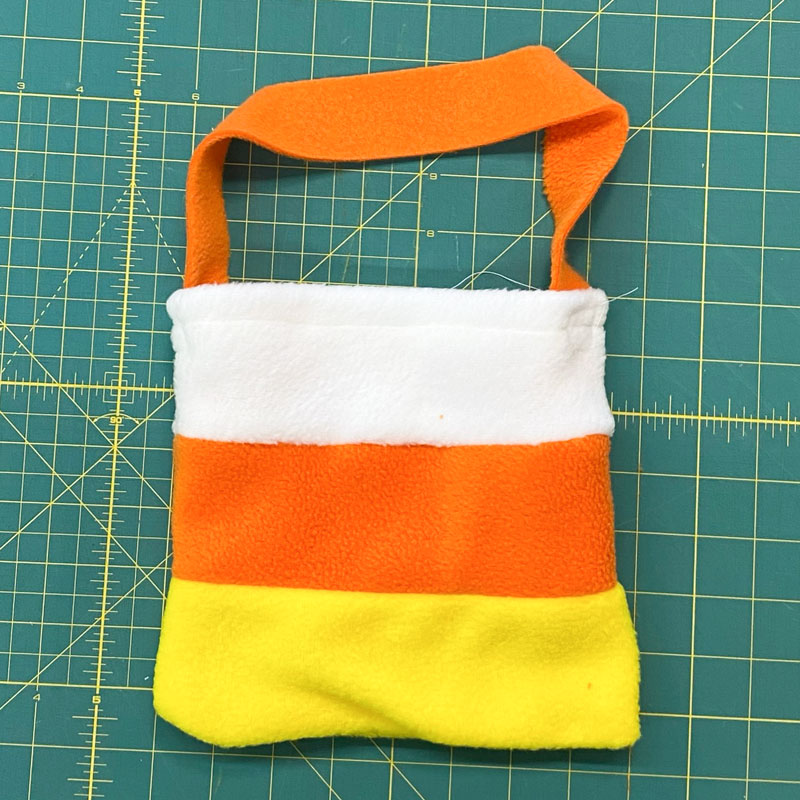
Step 3: Make a coordinating candy corn treat bag
If you've got some fleece left, why not add a matching treat bag?
Cut a piece of yellow fleece that's 18" x 3" and pieces of white and orange that are each 18" x 4". Also cut a piece of orange that's 18" x 1.5" for the handle.
Setting the thin handle strip aside for now, sew the other three pieces together just as you did before.
Fold the striped piece over in half like you did with the hat, right sides together. This time sew up the side AND the bottom, creating a pouch.
Flip the piece right side out.
To make the top a little sturdier, fold it in about an inch all the way around and pin it in place.
Sew along the folded edge with a top-stitch to give it more stability.
Pin the ends of the handle on the inside of both sides of the bag.
Sew the ends of the strap in place and your bag is done.
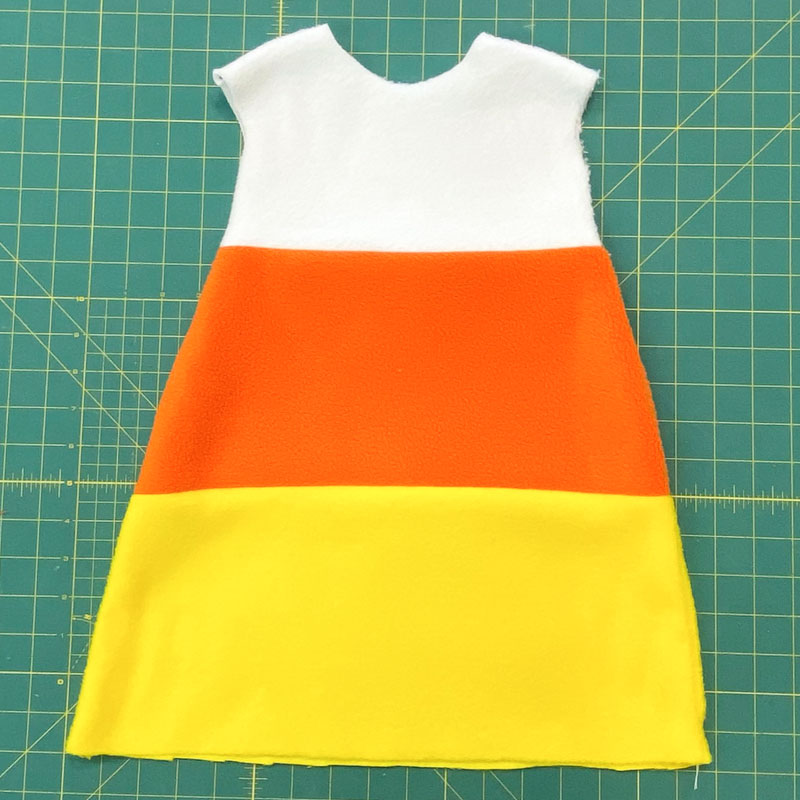
The completed toddler candy corn costume
Can you believe how quickly that went? You've got three candy corn costume pieces with hardly any sewing required.
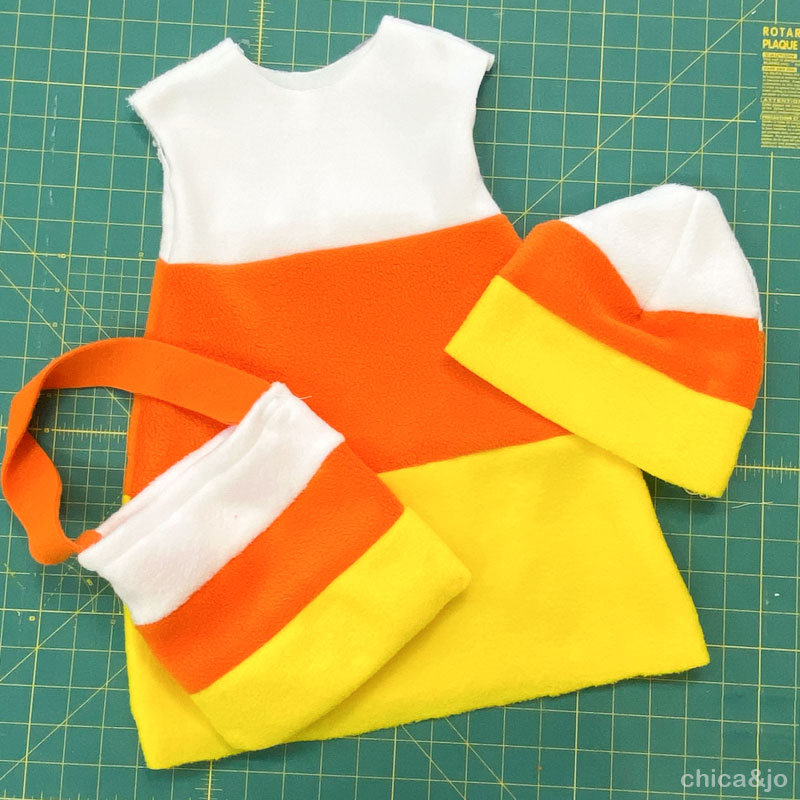
Add a white shirt and tights to finish the look, and your toddler will be all set with this super comfy costume that's so easy to slip on, and looks adorable too. The hat will help her your child warm on a chilly trick-or-treat night and the bag is great for stashing candy.

Not bad for under 30 minutes and ten bucks, wouldn't you say?
similar projects
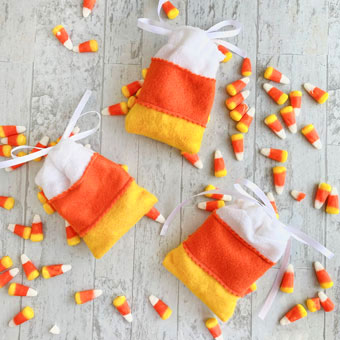
Easy-Sew Candy Corn Halloween Treat Bags
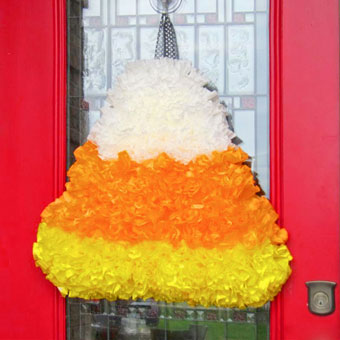
Candy Corn Coffee Filter Wreath
Halloween Party Game - Witch Pitch Candy Corn Toss


27 comments so far:
Hmm - I wonder if this would work as an adult costume... On the other hand, I don't sew... so probably not something I should tackle at this time.
Lisa, we think it would work just fine as an adult costume. Just make everything larger to suit your size!
Cute, cute, cute! I love it, that is a great project, thanks for sharing the tutorials.
Thanks you! I just made this costume for my 4 yro daughter. It was easy and cute. Great instructions.
Thank you so much for the detailed instructions and pictures... I am not a sewer but I was able to follow the directions easily and never got frustrated.. Thank again and my two year old will look so cute!
Thank you so much! I made this for my daughter (16 months) and can't wait to go trick or treating with her tomorrow! My husband requested a matching hat so I also made one for me and him!
Kristin, I bet you and your husband look great in your hats!
Hi there! This is SO CUTE! I have not sewn since I was 15 years old but I am seriously considering making this for my 21 month old daughter. We are in a very warm climate - I'm worried the fleece will be too hot. What other easy to use material could substitute - felt? Not even sure if felt would be cooler...
Brooke, if you don't put a shirt underneath it, the fleece should be cool enough. The fleece is so soft that it would still be comfy without a shirt underneath. Have her wear sandals without socks and I think you should be fine!
Brooke, I echo Jo's suggestion. As for alternate fabrics, you could use a lightweight cotton, but then you'll have to hem all of the edges. The beauty about the fleece is that you don't have to hem anything, so it makes for a really quick project. :)
Thanks guys!
Thank you!! My daughter will be 3 months old this Halloween and its so hard and expensive to find a costume. This turned out perfect for her and I'm not an expert when it comes to sewing. One piece of advice I will add is make sure the neck is big enough for your child's head to fit through :) Thank you!
Kerri, that's a good point about the neck hole. At least with fleece you can always cut the hole bigger without having to re-hem it :)
Hello! I am making this for my Halloween costume this year. I wanted to know if flannel would work with this project because my mom bought me like 3 yards! Would I need to hem the raw edges if I use flannel? *sigh*
Georgia, you could theoretically use any fabric you like, although flannel is quite a bit thinner than fleece, so your finished costume might not "stand up" on the body as well as fleece would. Whether or not you want to hem the raw edges depends on how concerned you are with fraying.
Love this! Made three, one for my daughter and two nieces. I am crazy for candy corns!
Allison, I bet the three girls look adorable together!
Such a great costume! Inexpensive ($5 for the "dress"), fun, and easy! Made one for my 11 year old and she will pair it with skinny jeans, flats, and orange ribbons in her hair. She wanted to be a candy corn so I'm so glad I found your tutorial. Thank you for the photos and detailed instructions -- it really helped!
Rebecca, I'm so happy you enjoyed our tutorial!
Thank you for this pattern. I had to use cotton and lots of interfacing (heavy duty) to make mine because I am allergic to fleece. I have to say I am pretty proud of it and the little girl (8) loves it. So once again thank you. I will mark your site as a favorite.
Bonnie, thanks for the positive report! Sounds like you were very resourceful with the fabric and made one happy little girl :)
I love this idea and would like to make it for all 3 of my kids, but I'm having trouble figuring out how to do it for my boys....you had mentioned using a shirt as a pattern and that's where I get lost! Wouldn't I still want it to be fairly long? Would I make it similar to the dress, but add sleeves? I just can't quite picture it! I live in MN in a rural area and love the idea of it being such a warm outfit, but not to thick for car seat safety sake!
Hi Jennifer! Using the shirt or dress serves two purposes. First, it helps determine the length of the costume. For your son, just get a measuring tape and measure from his shoulder down to where the costume should end, and use that measurement for determining your stripe sizes. Second, the shirt or dress helps you cut out the neck hole to the right size for your child. You can trace the neck hole on the shirt or dress in the same way, per the tutorial. Sleeves are difficult to sew, so I would leave them out completely (let him wear a shirt underneath instead). Just sort of fold the sleeves on the shirt back and draw underneath to create a sleeveless costume. Hope that helps!
P.S. You could always try some of your daughter's dresses on your son until you find one that fits, and use that!
Thank you so much for this tutorial! My 4 year old decided to be Candy Corn this Halloween, along with her 1 year old sister. This really helped me make their costumes & they turned out perfect and adorable!!
Thank you! Such a great, easy, and affordable costume. Love it!!!
What would you recommend if I wanted the white to be smaller than the orange and yellow, like a true candy corn is? Did you use white thread to sew all the pieces together?
Kelli, I used even stripes just to make it easier to cut and sew, but of course you can adjust the widths of your stripe as you wish. I don't remember what color thread I used, and it shouldn't matter because it won't show. I probably used basic white :)