


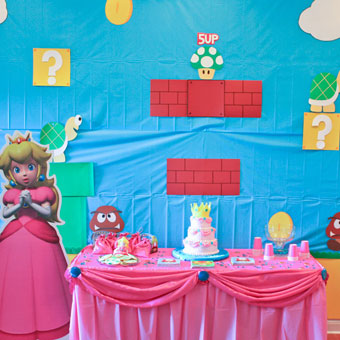
Princess Peach from Super Mario World Birthday Party Cake

It's time for me to show you the most important (or at least the tastiest) part of Little Jo's recent Princess Peach birthday party, and that's the delicious cake complete with edible cake topper!
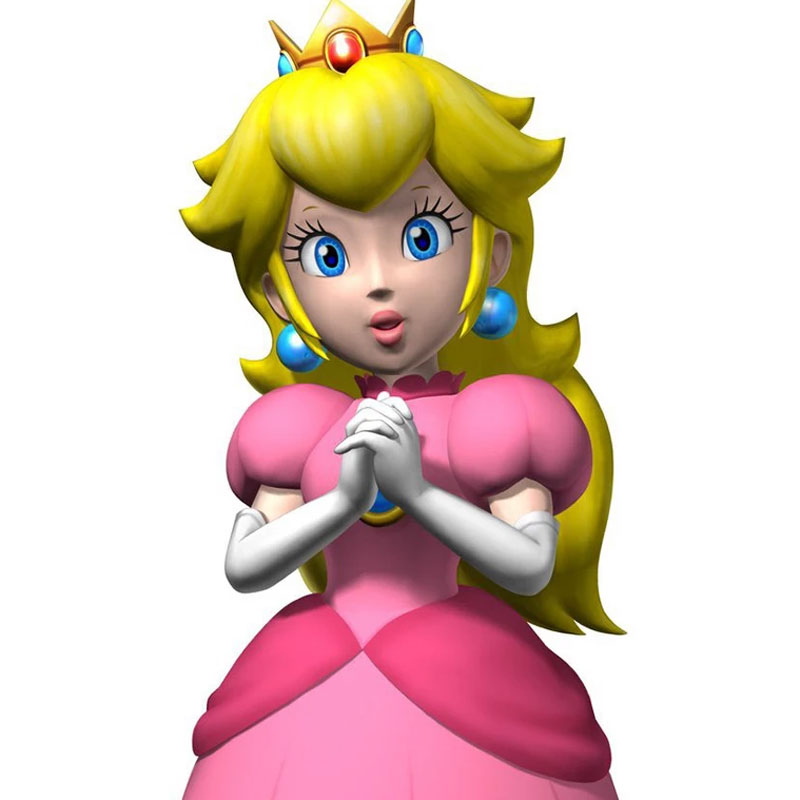
The inspiration: Princess Peach herself
One look at a picture of Princess Peach herself was all the inspiration I needed to know how to make Peach's birthday cake for Little Jo's original Mario party.
In true princess style, the cake would have to have several tiers, and it would have to be pink, pink, pink!
I loved the sashes on Peach's dress, so I knew I wanted those on the cake, too.
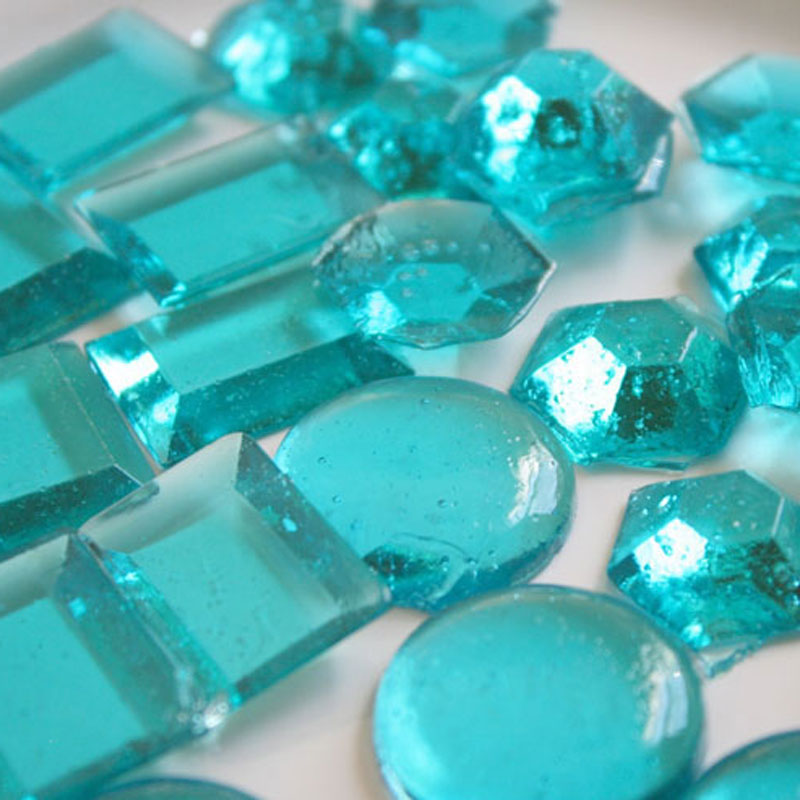
Edible jewel candy decorations
And what about that lovely jewelry that Princess Peach wears? Those teal earrings, her teal brooch, and the jewels in her crown needed to be somewhere on the cake.
We needed teal edible jewels... Aha! Now you know what I made all those hard candy jewels for!
Covering the cake with pink fondant
The cake was pretty easy to put together, using a few simple techniques and massive amounts of fondant. I started by covering each tier of the cake with fondant tinted with pink icing color.
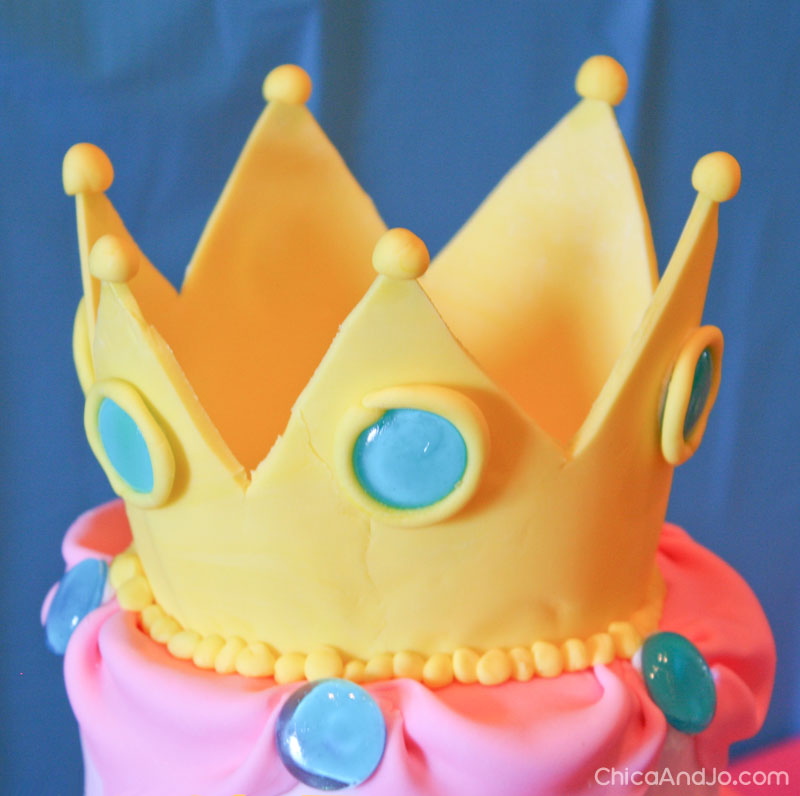
Princess Peach crown cake topper
For the cake topper, I used fondant to make a replica of Peach's crown. I tinted some fondant with lemon yellow icing color, rolled it out, and put draped it over an upside-down bowl with straight sides to form the shape.
Then I cut the points of the crown and then let the whole thing dry for a few days. When it was firm, I just slid it off and it was ready to put on top of the cake.
I put small balls of fondant on the peaks of the crown and around the bottom to cover the seam, then decorated it with candy jewels. To attach the jewels to the crown, I used white icing as "glue", then put a small rope of yellow fondant around each one to frame them.
Pink sashes
I wanted to add some sashes to mimic those on Peach's dress, so I made some darker pink fondant and rolled it out into rectangles about 2" x 5".
I pinched each end of the rectangle to create a sash, and attached it to the cake with a touch of water.
After putting the sashes all the way around each tier, I put a candy jewel between each one. As a final touch, I put little balls of pink fondant around the bottom of each tier.
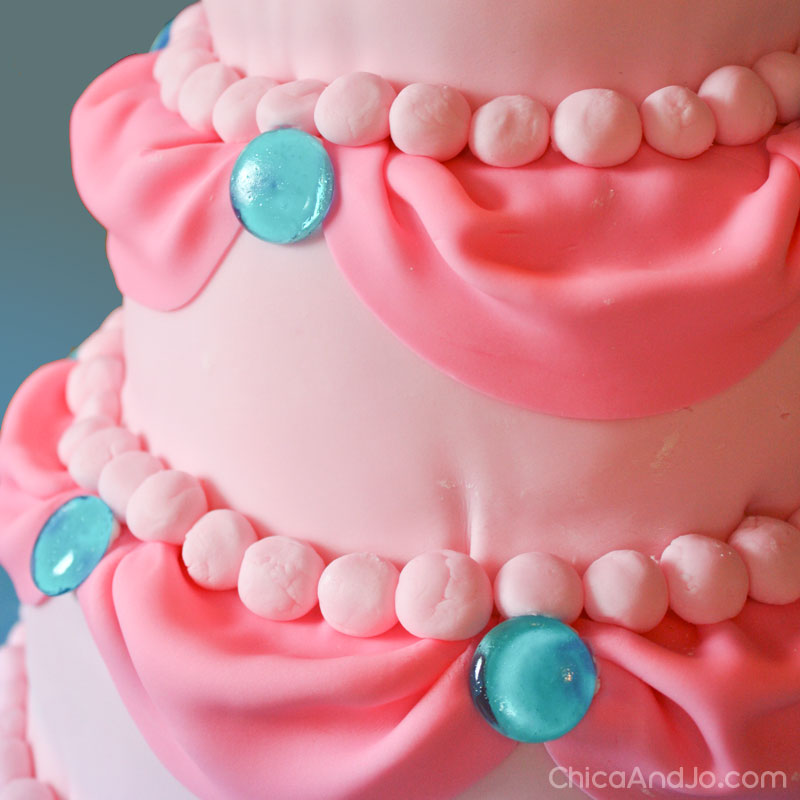
Attaching candy jewels to the cake
I used regular white decorator's icing to "glue" all of the jewels in place on the cake. I discovered that the icing was not only a great adhesive, but also a great way to brighten the color of the jewels.
Since the candy jewels are semi-clear, their color would have been a little off if they were up against the pink or yellow, but the white icing made a background that let the teal color really pop.
Finished Princess Peach cake
Little Jo was so excited when she saw the finished cake, and everyone had a great time eating it. The extra candy jewels were scattered around the cake and the table, making a great decoration and a unique snack during the party.
Be sure to check out our tutorial for how to make hard candy jewels for full instructions.
If you're looking for a good white decorator's icing recipe, look no further than the basic white decorator's icing recipe that we use on our famous rainbow swirl cupcakes.
More Mario-themed party ideas
If you're planning a Super Mario brothers party, be sure to check out our other party ideas. We have so many fun Mario-themed projects!
- Super Mario birthday party featuring Princess Peach
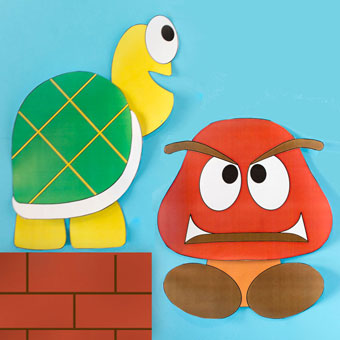
- Goomba and Koopa Trooper characters printables
- 8-Bit Super Mario Brothers pixel art pattern
- Giant Super Mario Brothers pixel art wall decor
similar projects
Super Mario Party Featuring Princess Peach from Nintendo
Super Mario Party Decor - Pixel Wall Art
Super Mario Brothers Character Printables


19 comments so far:
STUNNING! :)
Oh my goodness, that is adorable!
Very pretty. Hope she had a wonderful birthday.
That is just gorgeous, thanks so much for your tips on putting the jewels on... I'm trying to self teach fondant and jewels and was worried I couldn't get the gems to stick.
Thank you all for the wonderful comments!
Christina, fondant is pretty forgiving, so just keep practicing and I'm sure you'll be a pro in no time :)
Hi, this is an awesome cake!!! My daughter wants to have a Princess Peach Birthday Party (oi vey!) and you are the only one I found with this theme!! YAY!!! I'm going to be making my own fondant for the cake, about how much will I need total for the complete cake? I'll be making extra just in case I goof (which I will, it always happens :) but would love to know approximately how much to start with. Thanks for any info you can provide.
Bonnie
Bonnie, I'm so glad we info to help you with this party! Make sure you take a look at our full party post for more ideas. We'd love to hear how the party comes out!
For the cake, I used store-bought fondant, and I think I used about 5 or 6 pounds of it. hopefully that gives you a good starting point. I've never made fondant from scratch before... can you share your recipe?
Thanks, Chica!!! This will be the first time I've ever attempted something quite this big (though I've done the Barbie ones with the cake as the dress)and the first time using fondant. WOOHOO!! I'm always up for a challenge :) I'm using the marshmallow fondant recipe from the following site:
http://whatscookingamerica.net/PegW/Fondant.htm
Keep your fingers crossed!!! LOL!!!
Thanks again!
Bonnie
Laurie, that makes me so happy! Thanks for sharing the link with us :)
I came over from Cake Wrecks and I love your cake!
Jenniffer, welcome to our site! So glad you loved the cake. The jewels really set it off.
Ladies, this is an absolutely beautiful cake and one any little girl would LOVE to receive as her Birthday. Well Done and thank you so much for sharing your ups and downs with the "jewel" lollies, sorry that's what we call them in Australia, the "jewel" hard candies. Best Wishes and Keep Creating, I love your website, Lynda :-)
Lynda, thanks so much for the compliments! We're happy to have you among our loyal readers :)
Wow, this is a beautiful cake my friend is an extreme cake designer and he said thi is stunning thank you for posting this!!!
Briana, thanks for the compliment and please thank your friend as well!
I'm going to make this for my birthday party! :D
I am going to attempt this for my daughter's 5th birthday next month! Question: what sizes of cakes did you make for the 3 layers? And, were they really deep pans or did you have to make two of each diameter and stack them?
Sandra, I used 6", 8", and 10" pans for the layers. All of my cake pans are 3" deep, so what you see is a single cake for each layer. I love the deep pans because then you don't have to mess with leveling and filling layers, and I think the cakes taste much better, too. Good luck with your daughter's cake - we'd love to hear about the party afterwards!
Thank you for the tutorial on this, especially the crown portion. I know what my daughter's 10th birthday cake is going to be!