


Paint Chip Greeting Cards

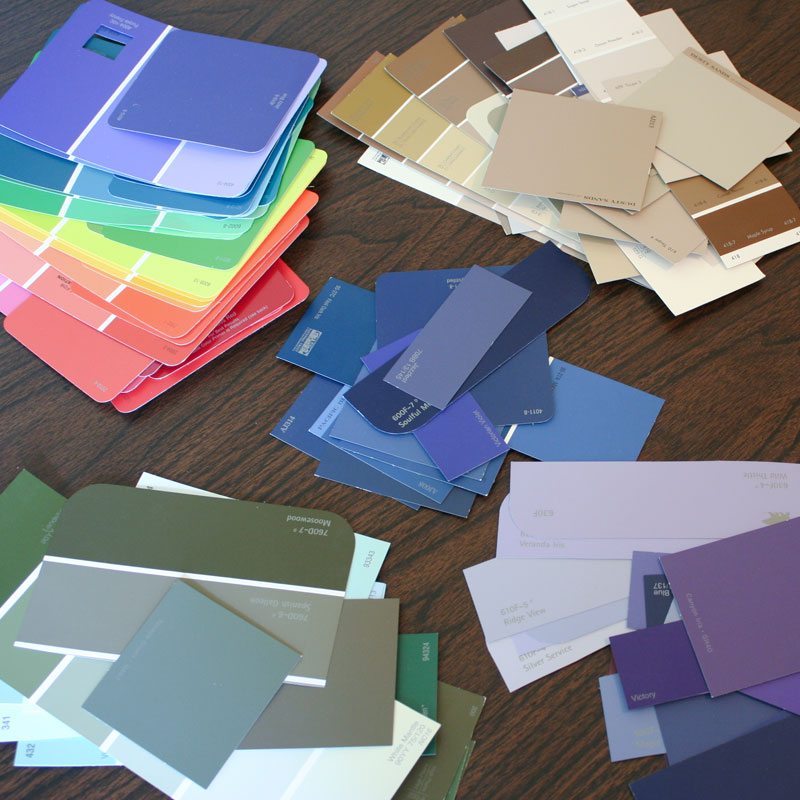
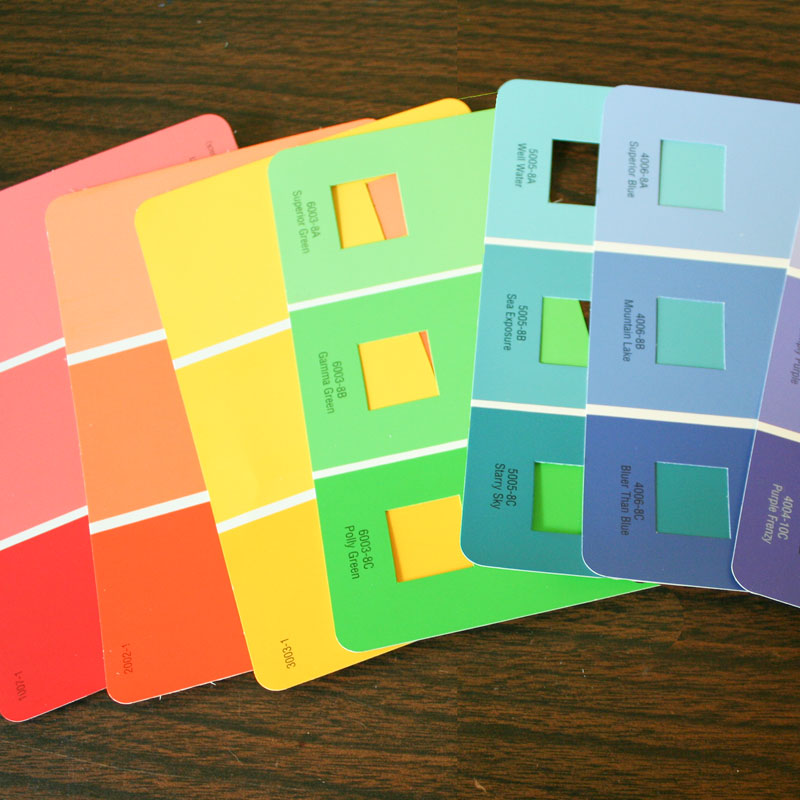
After they've done their part to help me choose a paint color, paint chips are incredibly versatile craft supplies to keep around. Every time I finish a painting project, I toss all my leftover paint chips into a box for later use. I love using paint chips to make mosaic crafts, such as the mosaic greeting cards I'm going to share with you today.
Oh the memories my collection of paint chips brings back! There are the numerous shades of tan that I went through when painting the kitchen. The blues and purples that I considered for the master bedroom and the greens we ended up with. And the rainbow samples from a toy chest project.
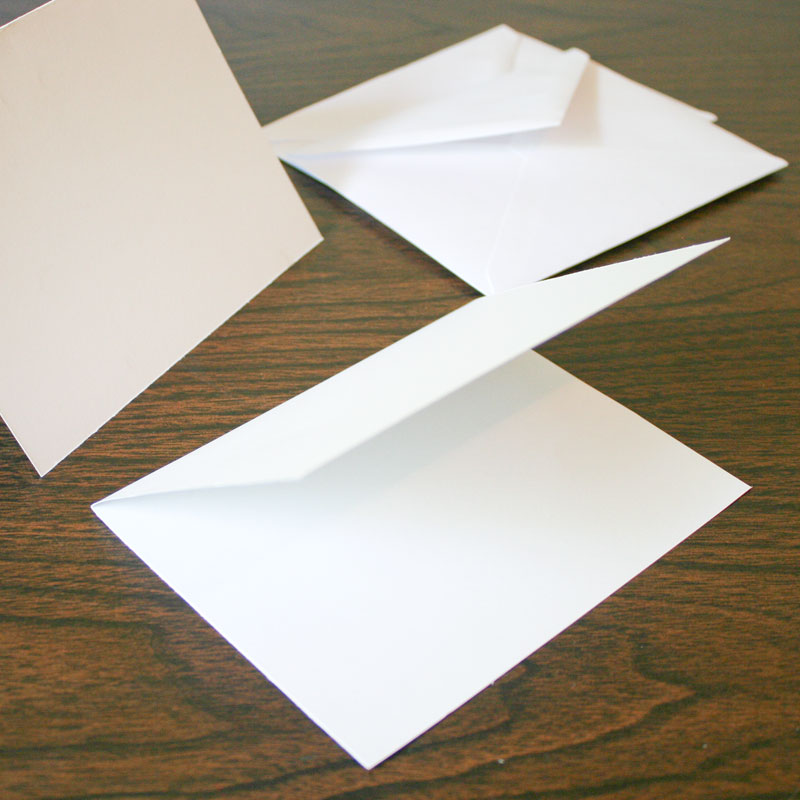
When my collection started to outgrow its box, I decided to pull them out and make some greeting cards with them. To start out, I first cut some ordinary 8.5" x 11" white cardstock in half crosswise, then folded it. This created a great note card size that's a perfect fit for a standard A2 invitation envelope measuring 4-3/8" x 5-3/4".
Then I sorted my paint chips into color families and selected sets of coordinating chips for each card.
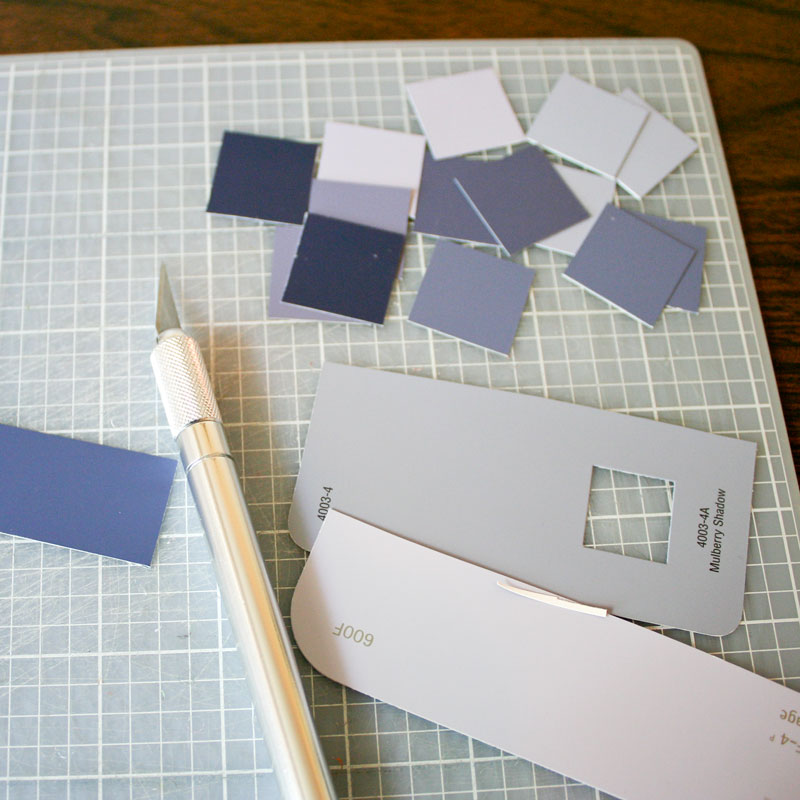
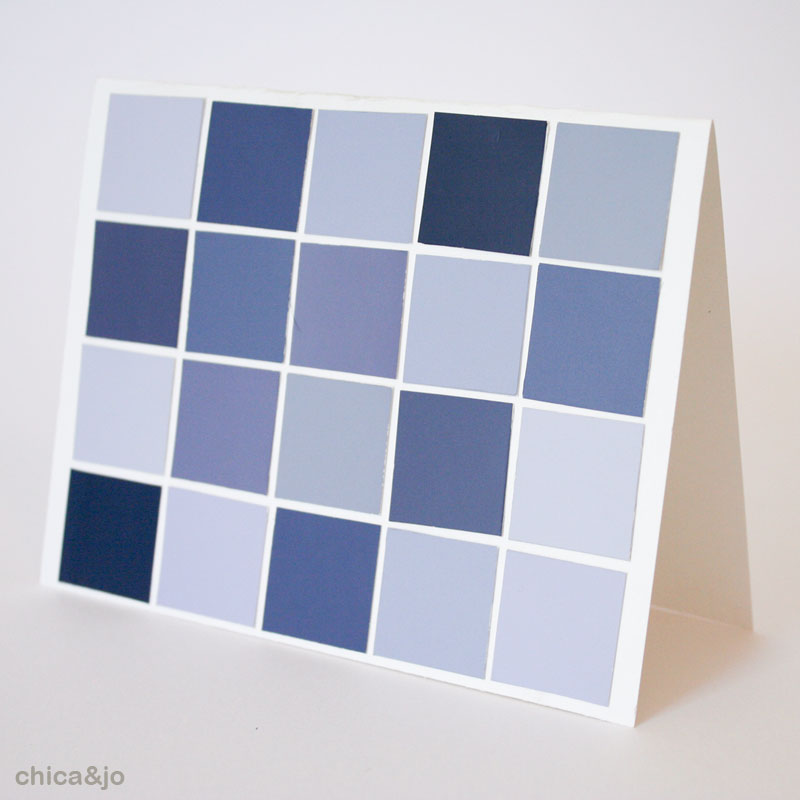
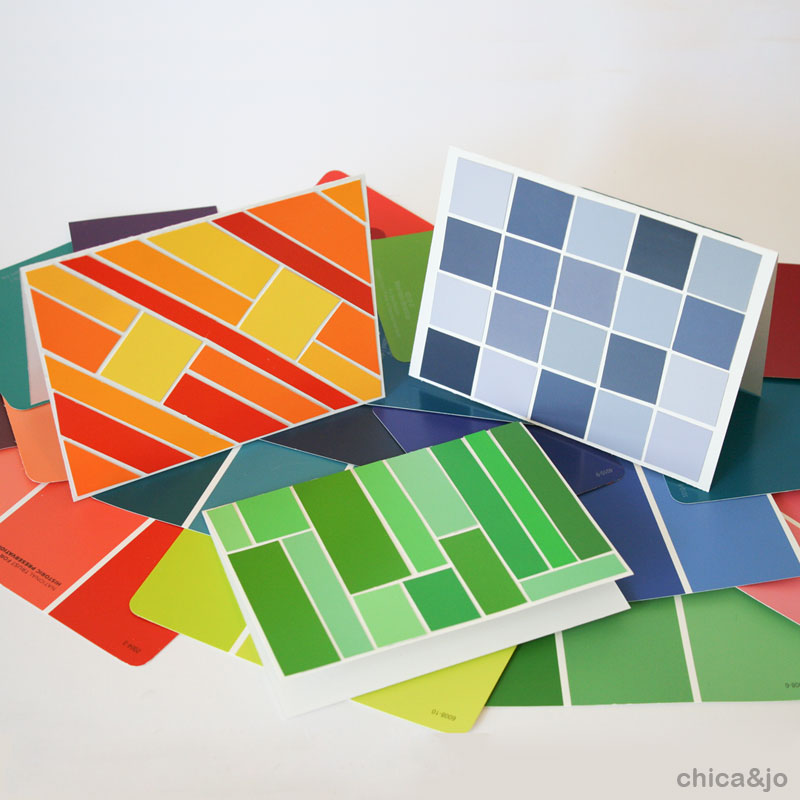
Card #1 - Blue square mosaic
For the square mosaic design, I grabbed a bunch of smoky blue paint chips and cut them into 1 inch squares. I used a ruler and craft knife to cut the squares, but it would have gone a LOT faster if I'd used a 1" square paper punch!
Once I had the squares cut, I just arranged them in a grid on the card and glued them in place.
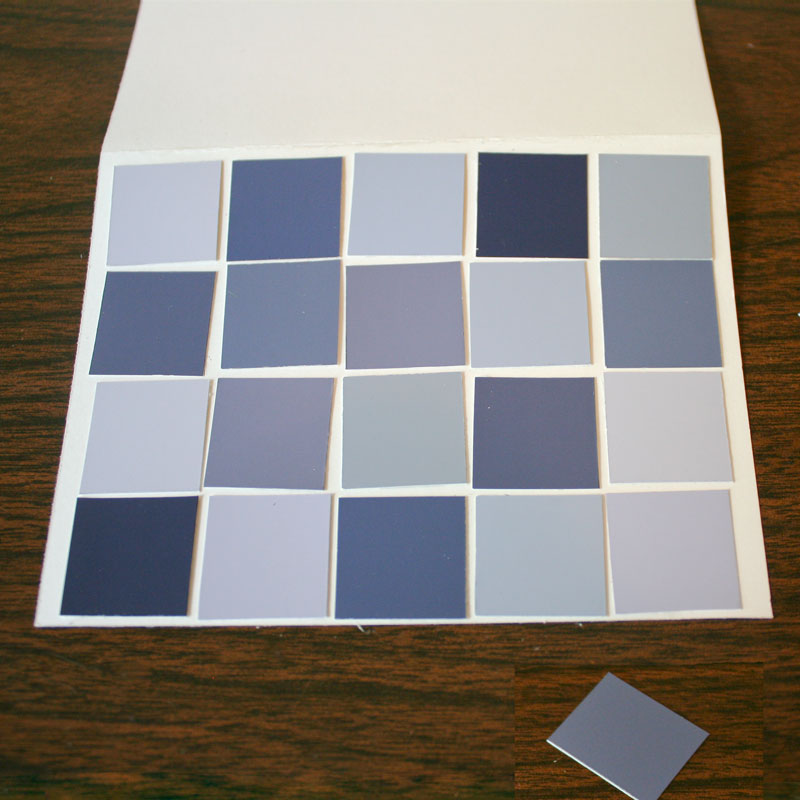
The finished card reminds me so much of the jeans quilt I made.
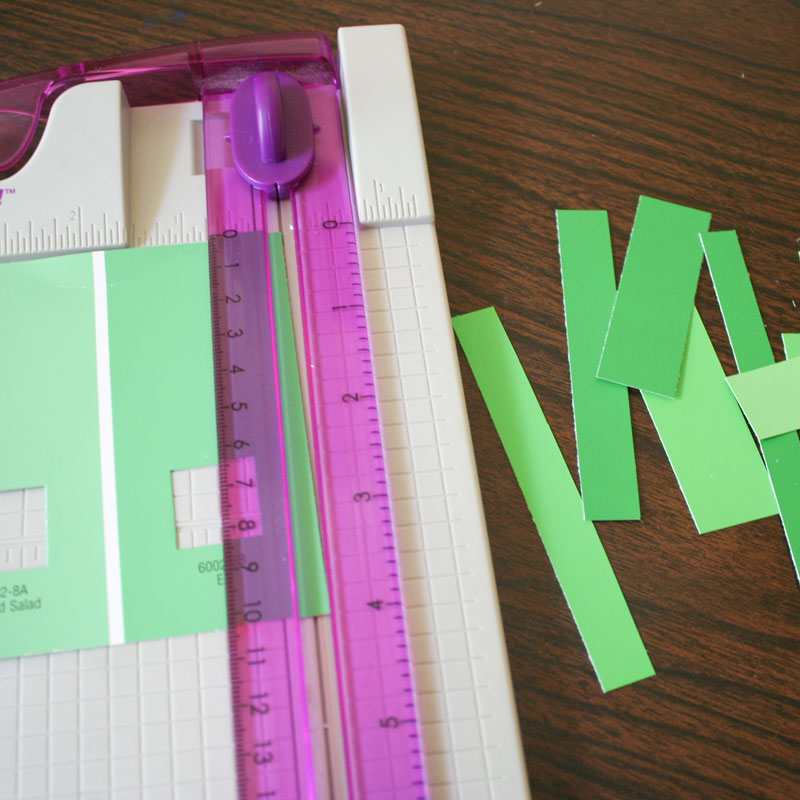
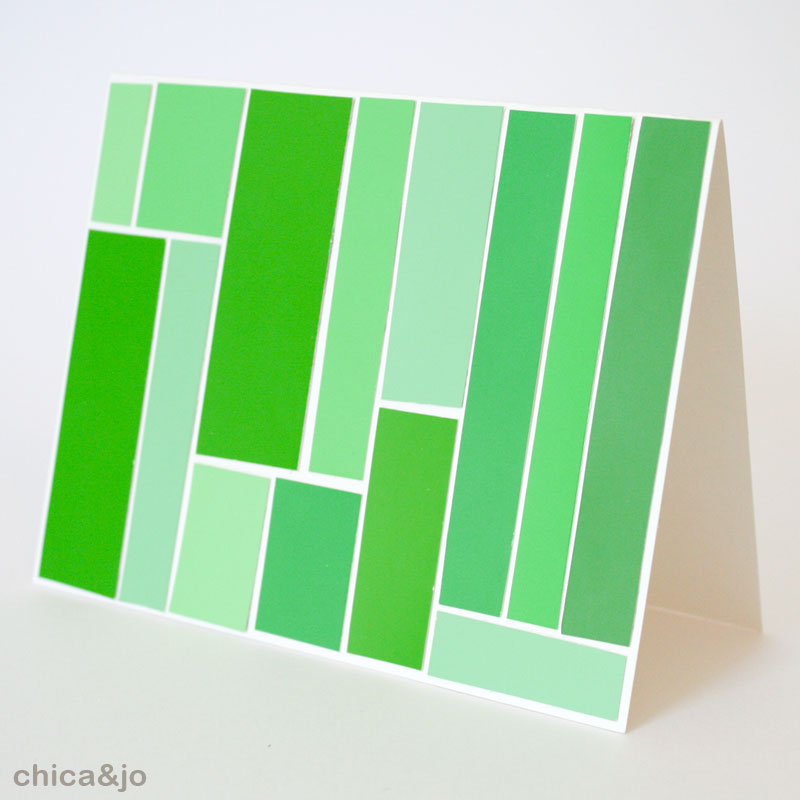
Card #2 - Green vertical stripes
For the green card, I cut all my green paint chips into strips of random widths.
Then I just lined them up on the card wherever they looked right and glued them down.
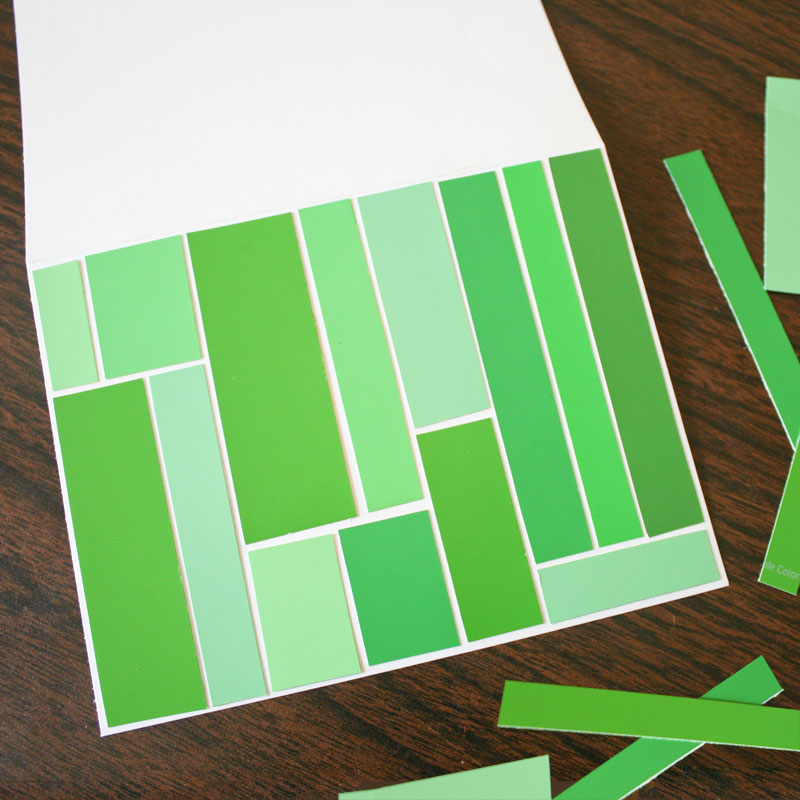
This card was so fast and simple to make, but I just love the results.
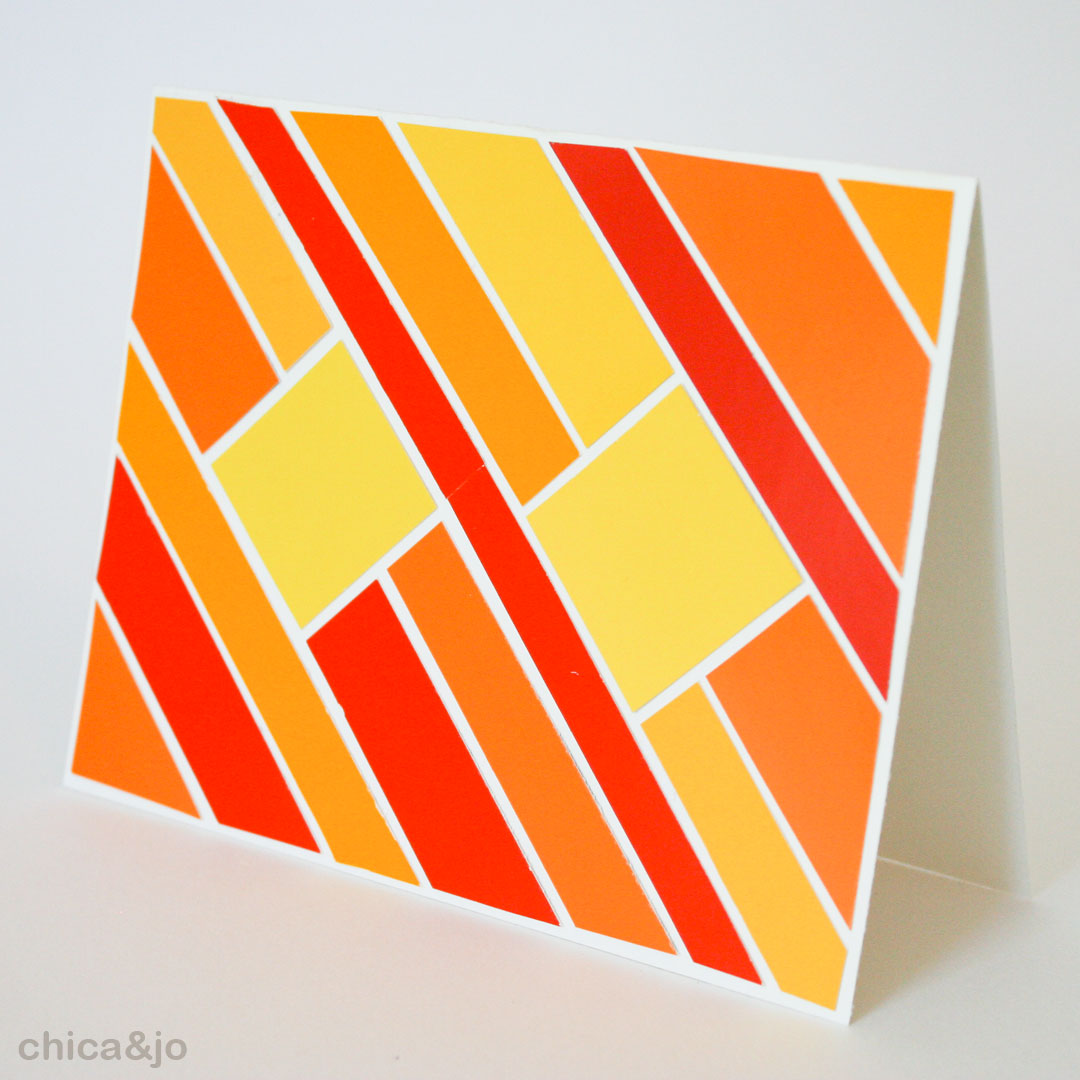
Card #3 - Orange and red diagonal stripes
For the orange card, I took the same strip idea but turned it on an angle. I started with two yellow squares in the middle, turned 45 degrees so they were diamond shaped.
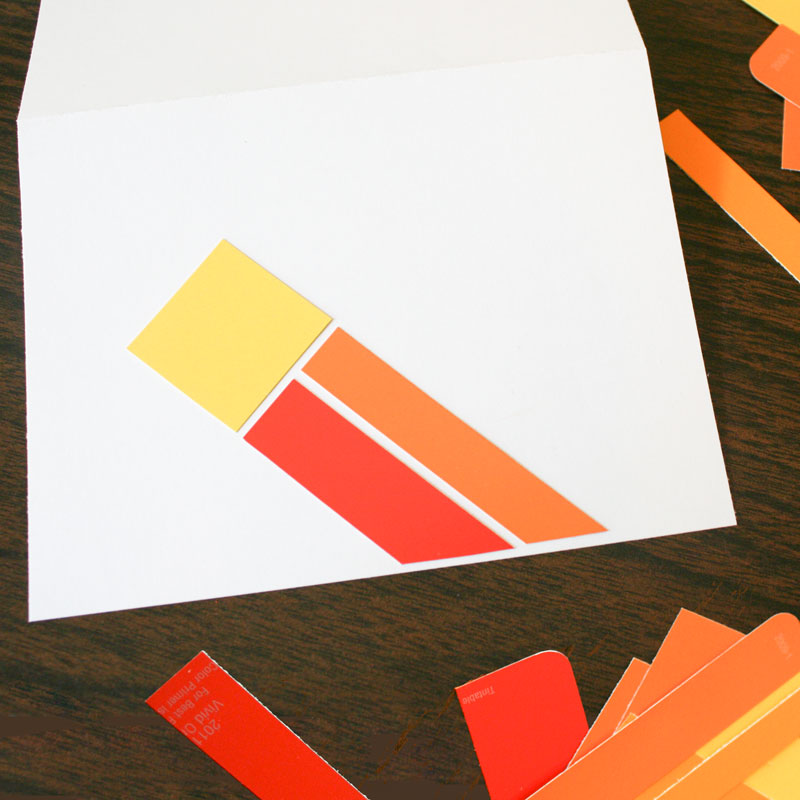
Then I added random strips of red, orange, and yellow in the background.
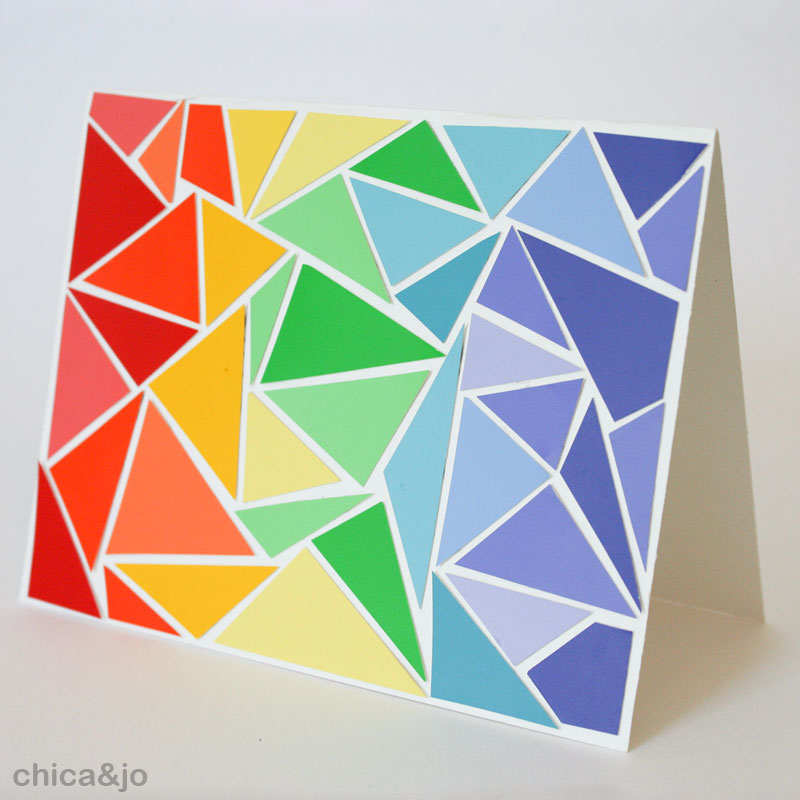
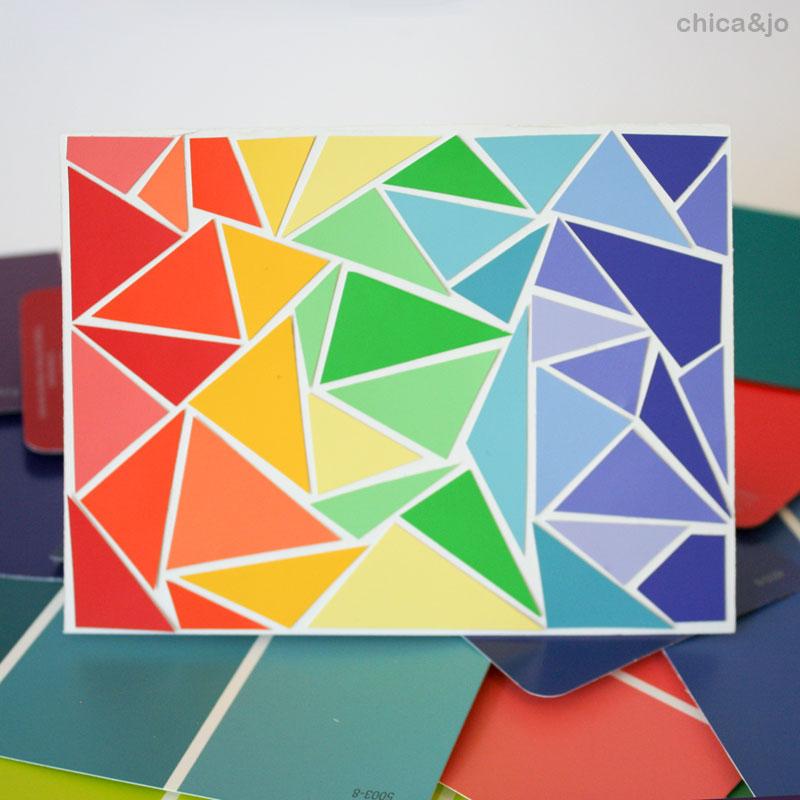
Card #4 - Rainbow triangle mosaic
I spent a lot of time on the final card. I took all of my rainbow colors, two shades of each, and started cutting them into random triangle shapes.
I added triangles to the card, starting with red on the left and worked my way across the card, gradually transitioning through the colors of the rainbow.
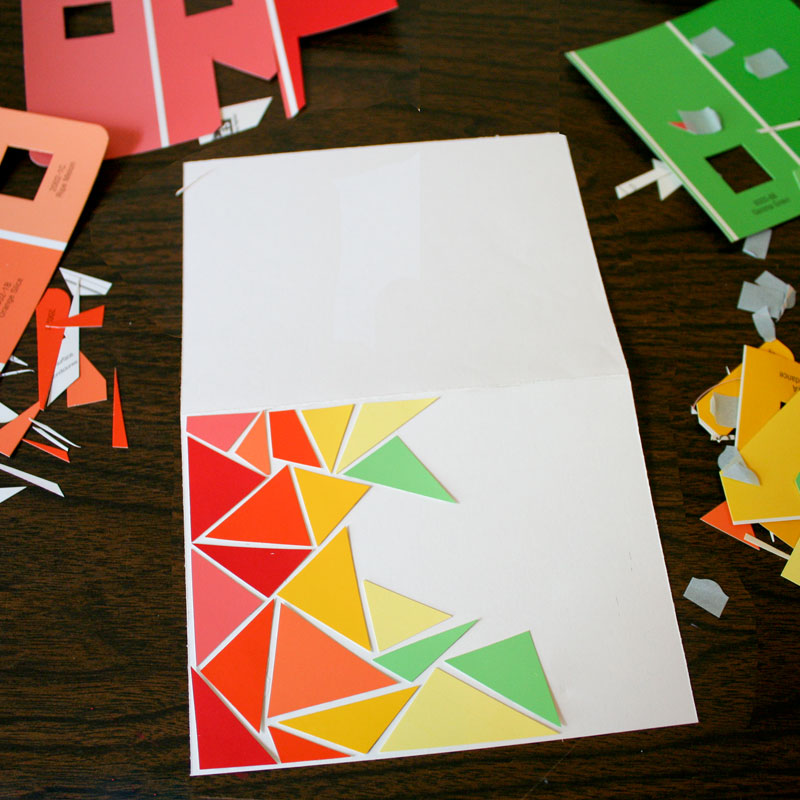
I had to do a lot of cutting and trimming to fit the pieces together and fill the card completely with custom shapes.
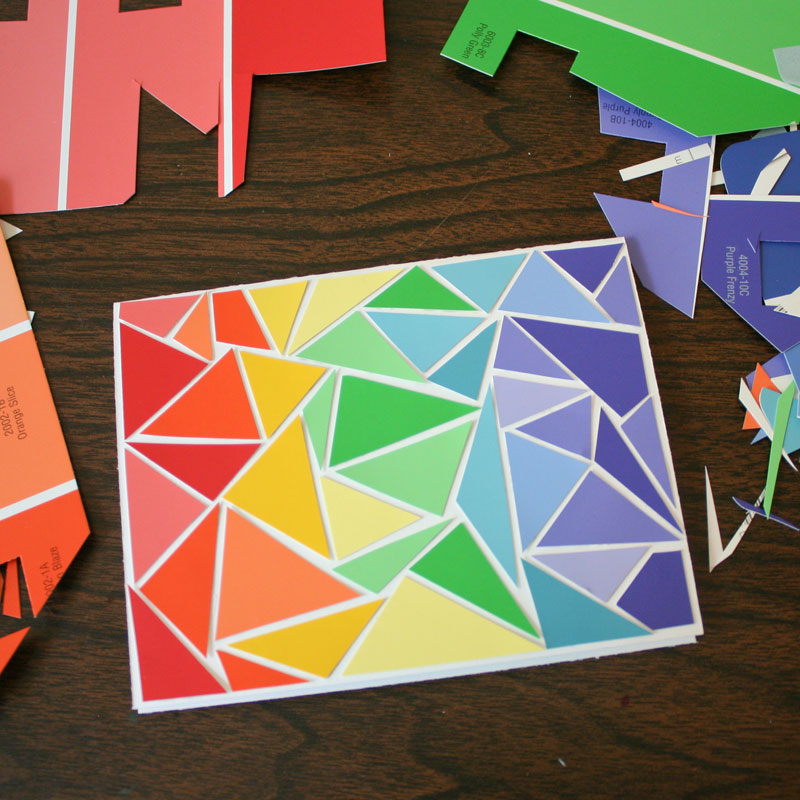
I absolutely love this card, but it took forever to make so I doubt I'll ever be able to give it away!
Of course, you could use this technique with any colored paper, but I just love the fact that they were made with paint chips that would otherwise be headed for the trash.
I am so in love with these cards!
similar projects

Butterfly Shell Greeting Card
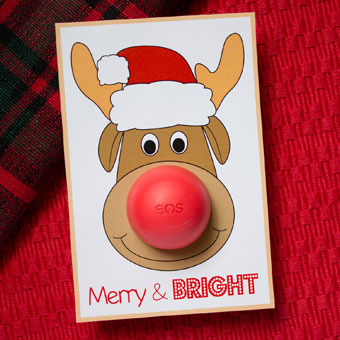
EOS Christmas Cards with Rudolph the Reindeer
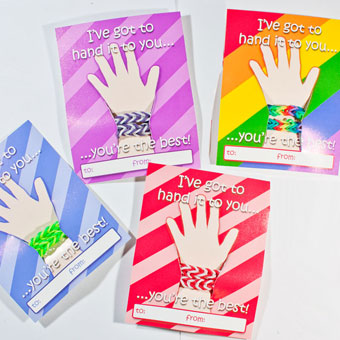
Printable Friendship Bracelet Valentine's Day Cards


50 comments so far:
Wow, I love this idea!
These are SO gorgeous! But I would NEVER have the patience. (Which is weird, since I love Tetris...) ;)
Thanks Grace!
Kelli, with the exception of the triangle mosaic, the cards only took a few minutes each to create. The green striped one was the easiest and could be done with a million different color combinations. (And I love Tetris too!)
Hmm, the possibilities are endless. You're right; I just might have to give this a try. :)
What a terrific idea. Normally I do not keep paint chips...I guess i will start to now :)
awesome idea for the classroom! Students will love it and doesn't cost a ton!
karen, that's a great idea for a classroom activity. Kids can learn about colors and recycling at the same time :)
Wow! These look great!
I absolutely love these! What a fun idea!
Thanks, ladies! It's a really easy idea, too, with unlimited possibilities :)
These look great! I'll hvae to start collecting paint chips.
Lovely idea,I just love it.
Oh My Honk. How ubber talented you are. I'm loving the triangle card to pieces. What a fabulous job.
Thank you so much for sharing your genius idea.
Polly, it only takes a few to make a card. :)
FawnDear, thanks so much. That one is my favorite, too!
What a great idea, it's so graphic and modern looking!
Hi
Great idea for paint swatches, I have been using my scrap paper to do this. but I like your idea because they are free and the paint swatches are thicker.
thanks Marlene
I love this idea. I think I might make a few big one to hang on my wall for a "head board" effect!
What about using the double stick tape (from your photo cube project) in place of glue? Is one more effective than the other?
Stacy, if you ever make that headboard, we'd love to see it! You could certainly use double stick tape instead of glue. It's really up to personal preference and what you happen to have on hand.
Well I completed my "headboard" made out of paint chips. I have a king size bed so I took 1 piece of poster board and cut it in half so I ended up 2 pieces 28" long and 11" tall. I used a glue stick as the tape sheets are not very forgiving!! Once finished I did use the double stick tape sheets to hang on the wall then used my Japanese Washi masking tape as a border on the wall then used another wider tape as a "frame". I will post on your flicker group as soon as I figure out how to do that!!
Stacy, congrats for finishing the headboard! We'd love to see a photo. If you have a hard time with Flickr, you can e-mail it to us and we'll post it for you :)
Stacy shared some photos of her paint chip headboard. It turned out so well! http://www.flickr.com/photos/59279321@N07/5428211698/in/pool-918858@N21/
Oh my goodness, Stacy. I love that!
As a Feng Shui consultant I am working with color ALL of the time. Not only will this idea help me to recycle old paint chips it can be an amazing use of Feng Shui color to gift to people I care about!
You know, using some shaped punches to make lots of interesting shapes in different colors could be also a fun way to approach this project.
That's a great idea, Michele!
Great idea!!!! And you can get paint chips anytime at most home stores!
Those look beautiful! I can't wait to give this a try.. going to have to be sneaky and get some paint chips :)
What type of glue did you use?
Renorr, I'm afraid I don't remember what glue I used, but you can use whatever adhesive you're comfortable with using :)
These are seriously awesome! What a great idea, and they are so colorful, love it!
Thanks, Amanda, love your site!
I've been doing this for years! So glad to see others are too! Great for seasonal cards!!!!
So many beautiful shades of colors... they don't mind me taking samples at the paint department of Lowe's and Home Depot!!! Haven't tried any other stores, though.
Kris, would love to see some of your designs! You can email us or add them to our Flikr group.
I was going to make a card like this for mothers day... Then I remembered my Mom threw away my paint chips while she was cleaning....
What a wonderful idea!!
Great idea! The best thing is that you could do it will all kinds of paper: Old Pictures, Old cards, Newspaper, Gift Bags, Scrapbooking leftovers!
I LOVE this! Can't wait to rush out and get some paint chips to make these! I also just noticed that there is a flickr group for these cards and I'm going to check it out for inspiration! Thanks for sharing this great idea!
Oops. Just noticed that the flickr group is for something else, but lots of inspiration there too!
I just stumbled on this project at StumbleUpon and I think it's fantastic. We have so many paint chips laying around the house because every time we visit hardware store my kids have the need to bring home full pockets.
Bibi, welcome to the site, and I hope you stick around! Maybe you can have your kids make their birthday cards for their friends with the paint chips they bring home :)
what a great idea! :)
I love these!! The triangle one is my favorite too, but they are all lovely!
Yes - I too have kept them all - now to find the time!..........
I really like the triangle one.
Wow, what a great idea and the color possibilities are endless...Thanks!
oh wow!!! So excited about trying this out! The possiblititys are ENDLESS!
Good idea!LOVE the good idea!
Great idea!
Wow, I LOVE the triangle ones! You certainly have an excellent eye for color, it shows in so many of the projects you've created! I found your site last night, there was a link to your DIY Kindle cover from Buzzfeed...and I've been browsing your crafts all afternoon. Thank you so much for detailing your ideas and efforts her; I can't wait to play around with the crafts! Have a great day!! <3, k8
k8fearsnoart, we're so glad you found us!
This is amazing and beautiful work