


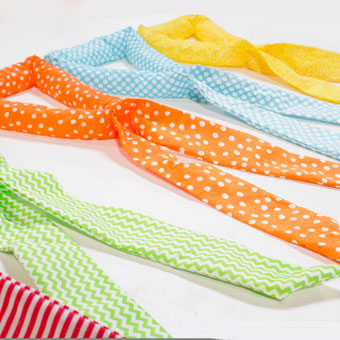
Fused Plastic Sandwich Wraps

As brilliant an invention as disposable zip-top baggies are, they are potentially very wasteful as well. How many of them do you think we've thrown away this year just from lunch sandwiches alone? Ugh, I don't even want to think about it! Instead, I want to show you how to make a reusable sandwich wrap that not only replaces zip-top bags, but it even recycles some of those pesky plastic shopping bags. And if being "green" by recycling and reusing isn't reason enough to make these, how about this -- we're going to make them crazy cute with personalized sayings!
The first step is to make some sheets of fused plastic. Fusing plastic is an easy idea -- you basically layer some plastic shopping bags together, put the stack between pieces of parchment paper, and iron them together so that they meld into one thicker sheet. However, in practice, I've found that it's quite a variable operation, and here are some tips to help.
- The temperature of your iron makes a huge difference. My iron seemed to work best on the Wool setting, but yours may be different.
- You've got to keep the iron moving, but too slow or too fast and it won't work. Too hot or too cool and it won't work.
- The thickness of your bags makes a huge difference too. While you can use any type you want, I've found that thicker ones (like Target) work better than thinner ones (like Walmart).
- I can't emphasize this enough... you've got to PRACTICE on scraps to get a feel for it before you can get good results. Once you've got your iron and your bags figured out, making bigger sheets of fused plastic will be much easier.
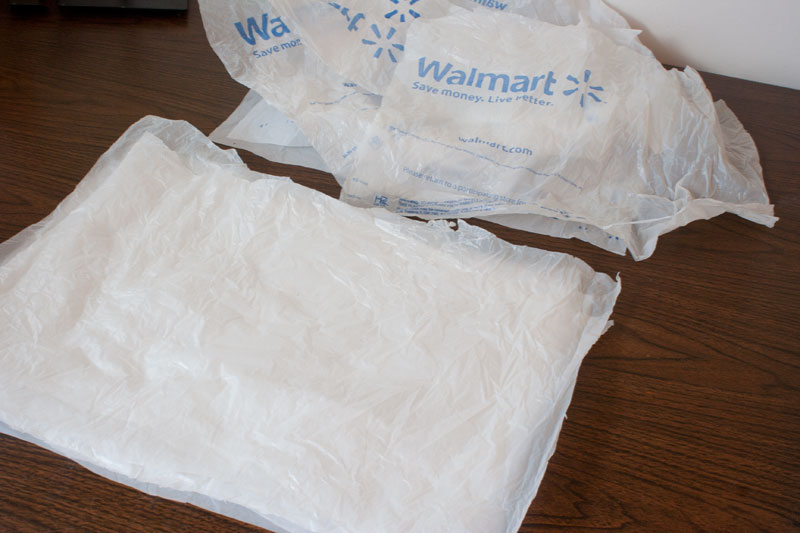
Okay, have you practiced enough to be confident with the process? Ready to do this for real now? If so, go ahead and cut the bottoms and handles off of some plastic shopping bags. Cut away any parts of the bag that are printed and make a stack of 3 or 4 layers that are at least 16" x 16".
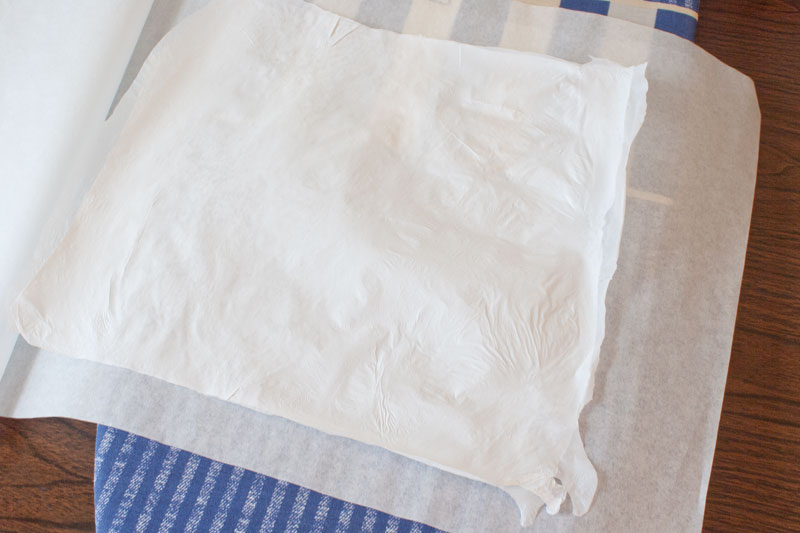
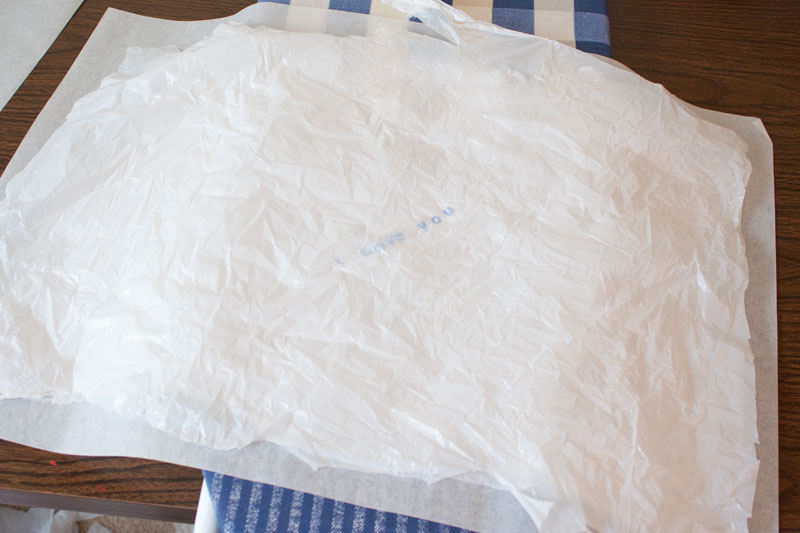
Now sandwich the layers between two large pieces of parchment paper. If you don't have parchment paper, you can use regular white paper (make sure there's no ink on it) or blank newsprint paper, but parchment paper really works a million times better. (Oh and don't try to use wax paper. The wax melts and sticks and is hard to work with.) Put the entire stack on an ironing board and iron using the technique that worked best for you during practice. Make sure you are working in a well-ventilated area, because melted plastic can give off some nasty fumes!
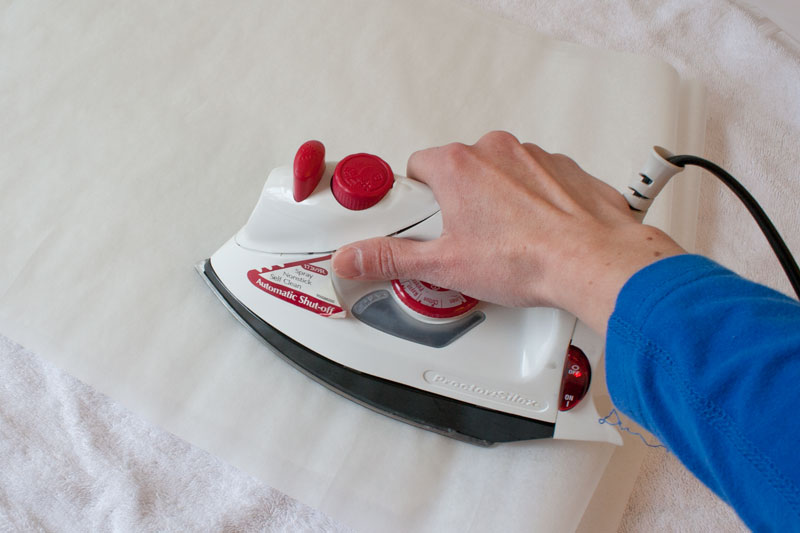
Iron just until the plastic is fused together into one large sheet.
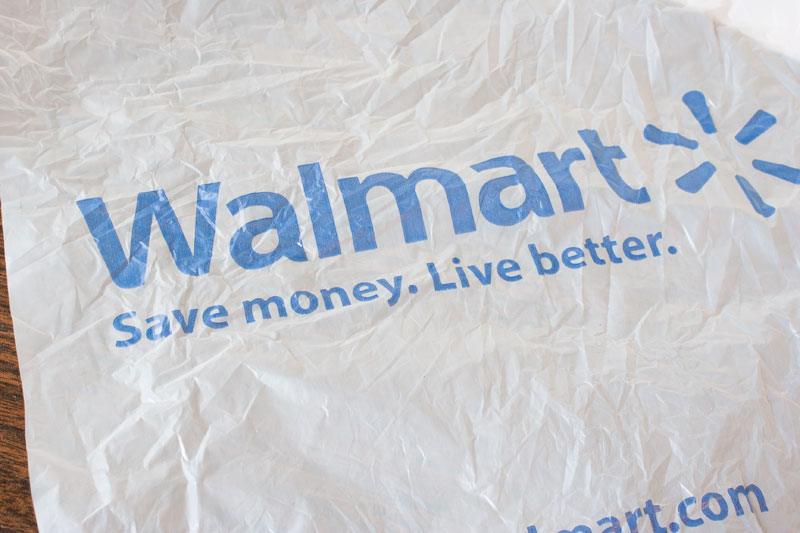
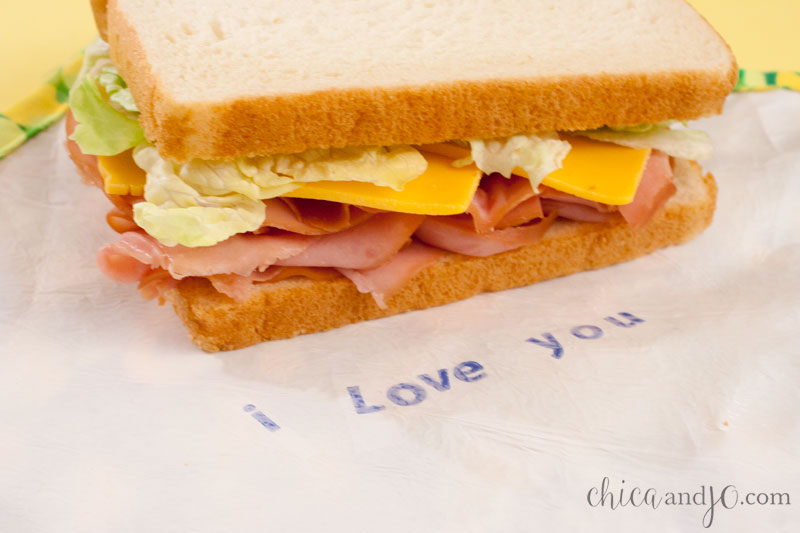
Here's where things are gonna get fun. Take a look at that stack of bag scraps you cut away. In particular, the printed parts of the bags. Odds are you've got a Walmart bag in there with the famous "Save money. Live better." saying on it. It just so happens that those are exactly the letters you need to spell "I love you". Well, okay, you've got to turn the "n" upside down to make a "u", but it still works!
Go ahead and cut the letters out with scissors.
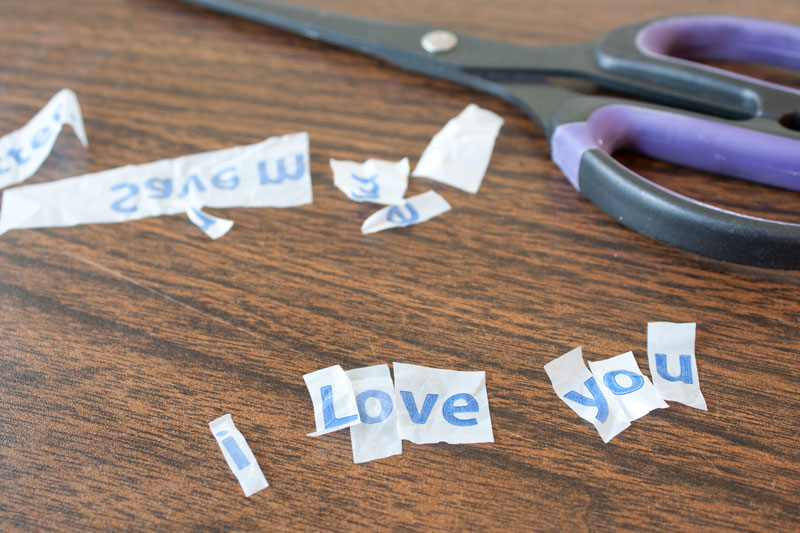
Arrange your letters in the middle of your fused plastic sheet. You can try to line them up perfectly, but I personally like them a little crooked. It's cuter that way.
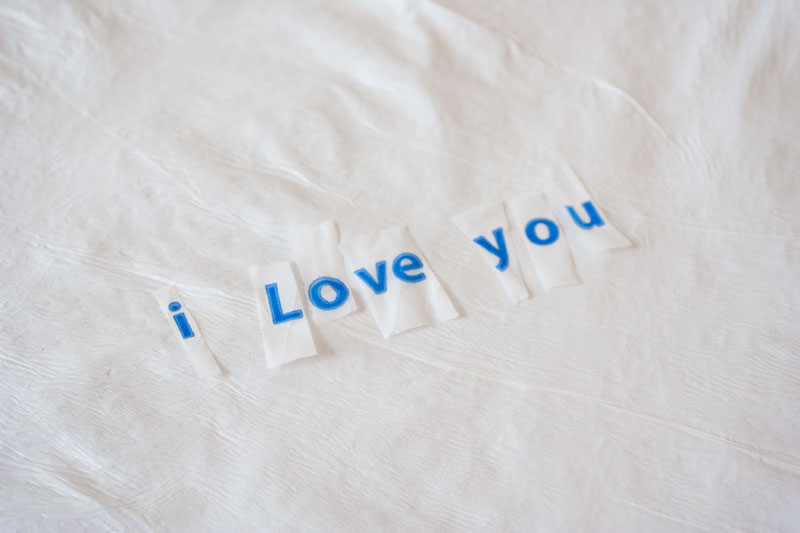
Then take one more large sheet of plastic bag and lay it carefully on top.
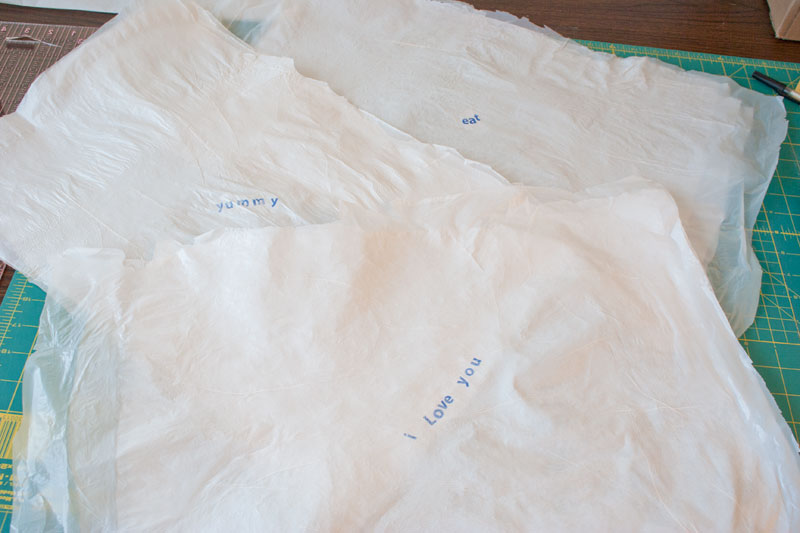
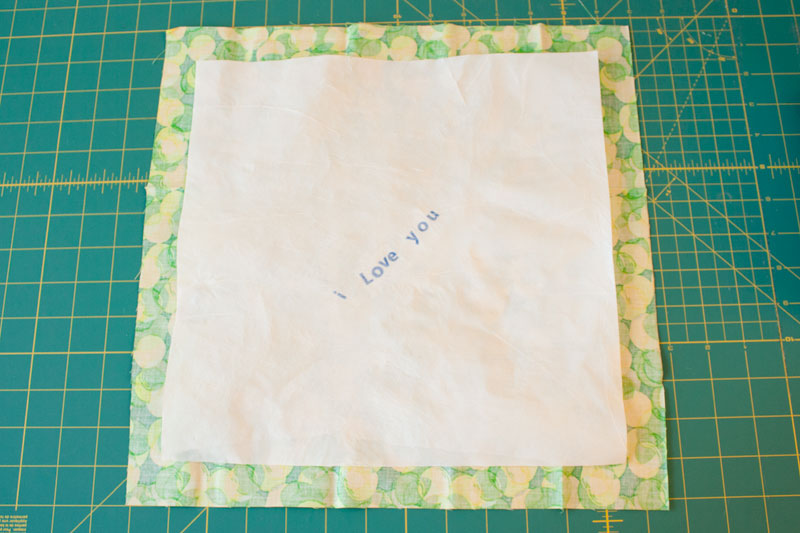
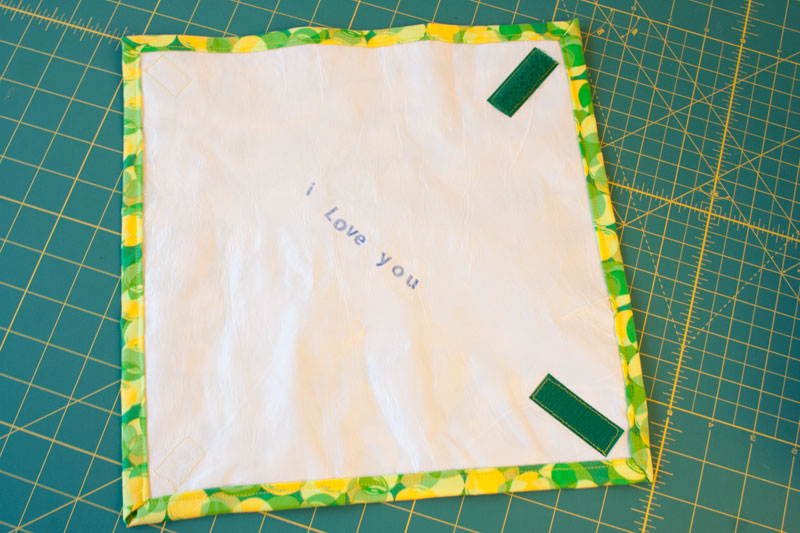
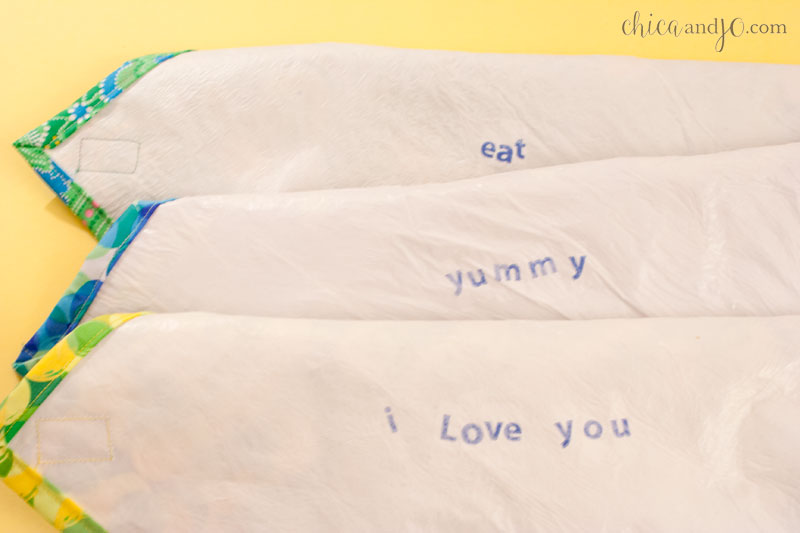
Put the parchment paper back on top and run the iron over the entire piece again, just for a few seconds, to fuse the new top layer down. This will hold the letters in place, and you should be able to see them easily through the top layer. I had fun with my messages, and besides "i love you", I also wrote "eat" and "yummy". You can use letters from whatever bags you like to spell whatever message you want. So many possibilities!
Food Safety Warning: There is some debate over whether or not plastic grocery bags are food-safe for wrapping around sandwiches. If you are concerned about the possible dangers from the plastic bags, we recommend that you cut open a gallon-size, clear, plastic food storage bag (like a Ziploc) and fuse that over top of the final layer of grocery bag. This will ensure a food-safe surface for your sandwich. We have experimented with this process and it works very well, but just be sure to only iron for a few seconds.
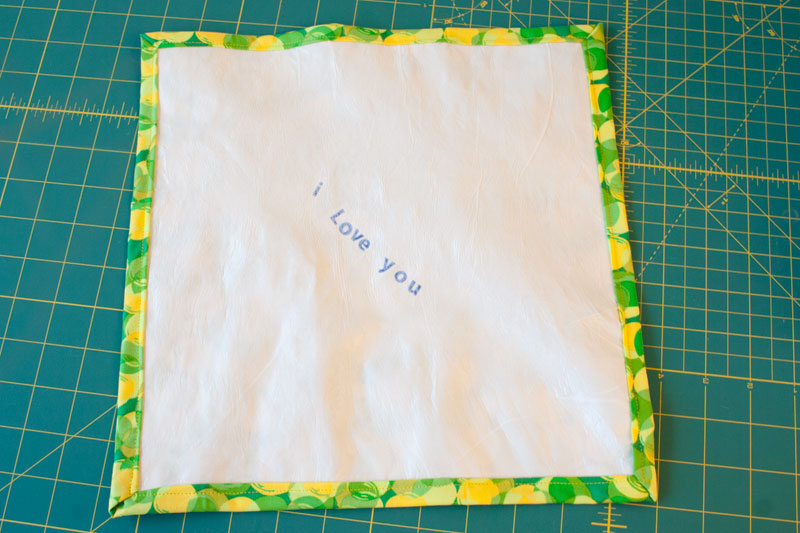
Now it's time to do some sewing. Plastic is boring, so we need to jazz these up with pretty fabrics! With your plastic totally fused and your crazy cute messages in place, use a paper trimmer to cut the sheet of plastic down to a 12" x 12" square. Then cut a piece of fabric to 14" x 14". (Go ahead and grab some sew-on Velcro and coordinating thread, too.) Place the fabric face down on the table and place the plastic face up in the center.
The pinning process that comes next is a little hard to explain, so I'm going to take my time and use lots of pictures. Hopefully you get the idea.
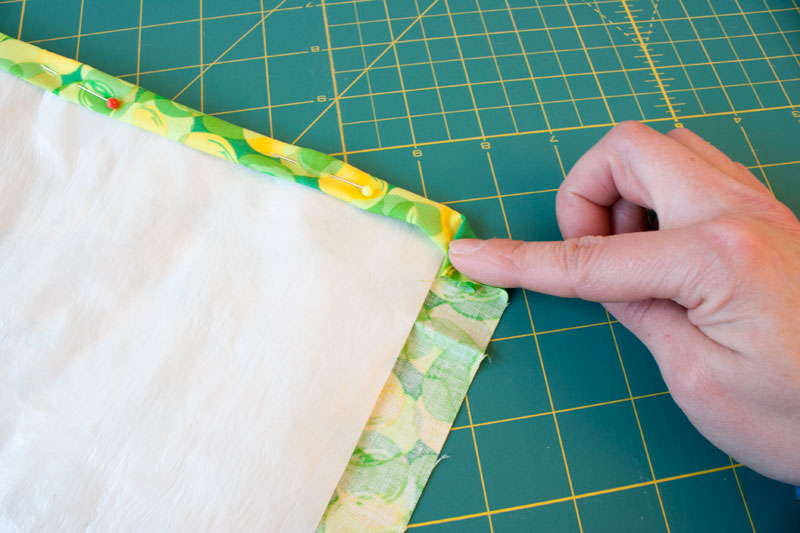
You should have one inch of fabric sticking out on each side of the plastic. Starting with one side, fold the fabric in on itself, so that the end comes just up to the edge of the plastic.
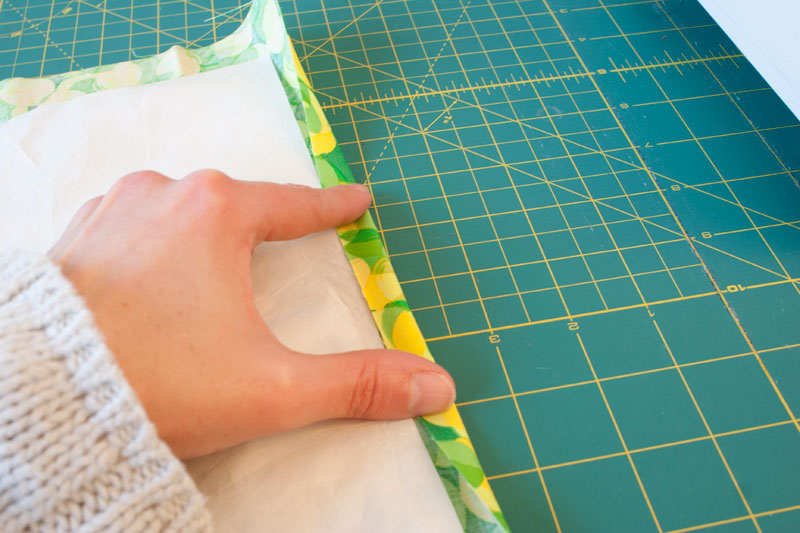
Now fold that fold over again, so that the cut edge of fabric is hidden away, and the fabric comes down over the plastic by a half an inch.
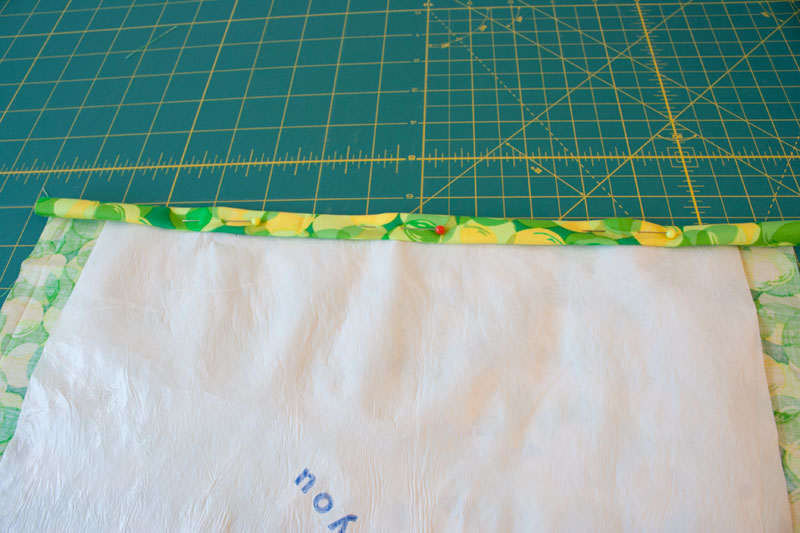
Pin it in place a few times along the side.
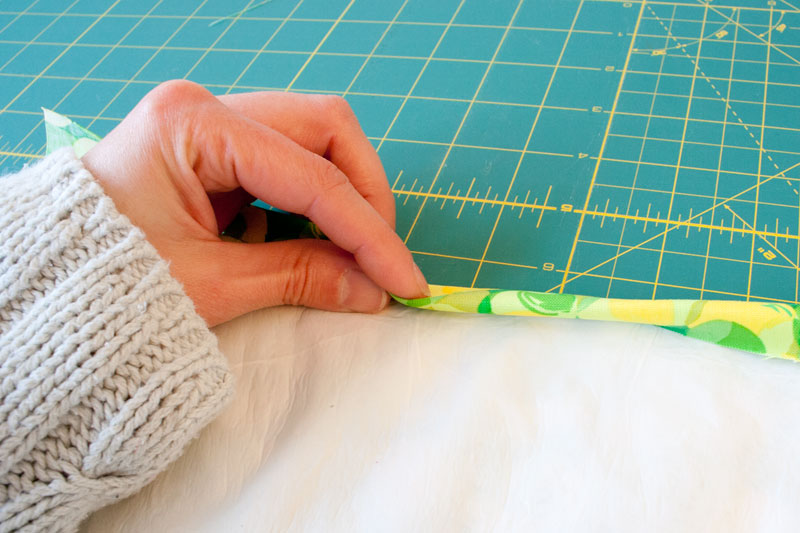
The corner is a bit tricky. Grab the end of the part you just folded twice, and fold it in, forming a triangle.
Now make the same fold you did when starting the first side -- bring the edge of the fabric up to the edge of the plastic.
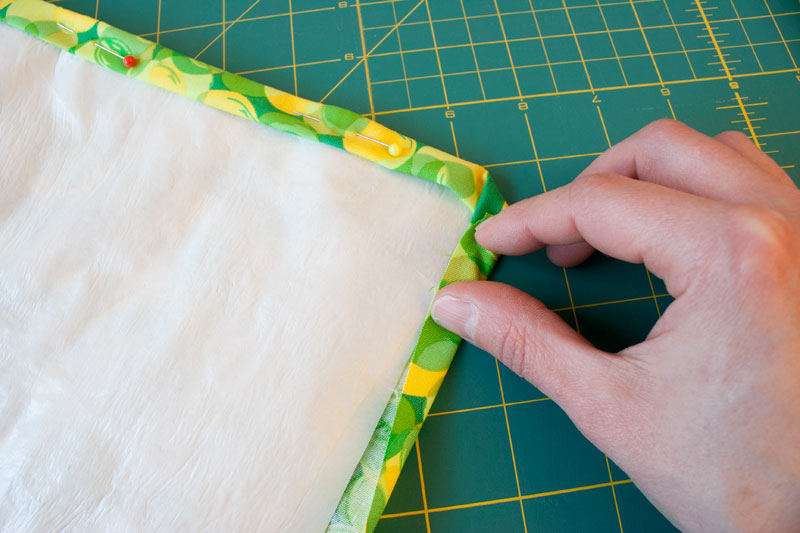
Then make the second fold from before, this time bringing the fabric over the plastic, covering it by a half an inch. You should have a nice mitered corner!
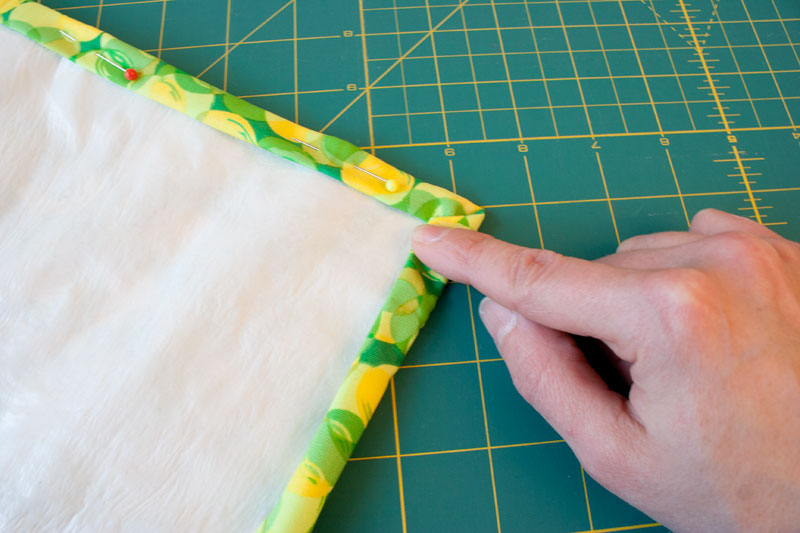
Pin it in place, then continue like this around the other sides, until your piece is all pinned and ready to sew.

Use your sewing machine to sew the fabric down where pinned, as close to the inside edge as possible.
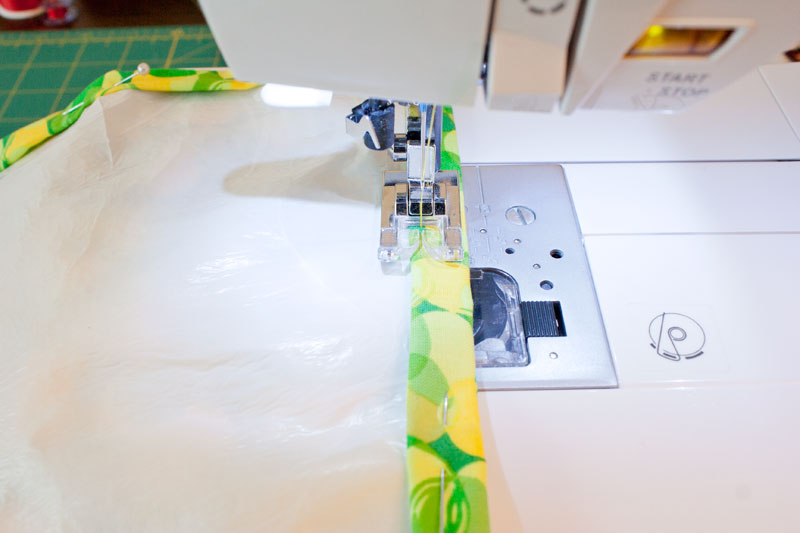
Go all the way around the piece, securing the fabric and plastic together on all edges.
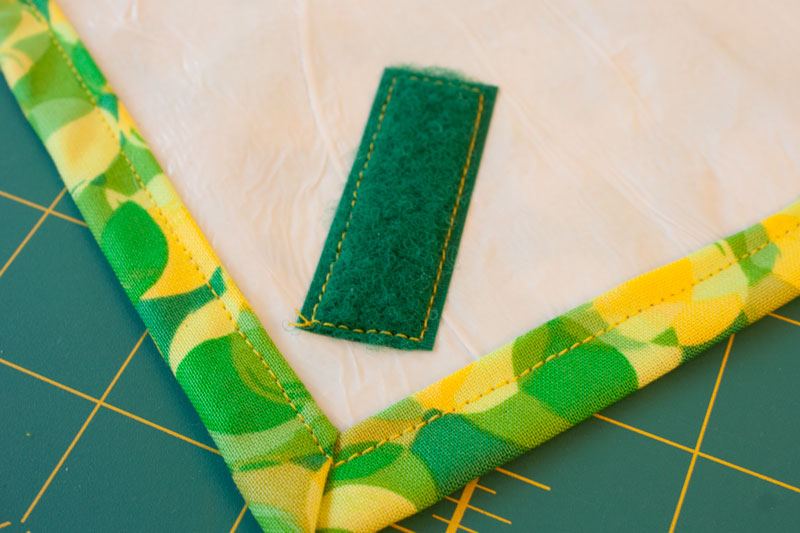
Now grab the hook/rough side of your sew-on Velcro and cut a 1" piece and a 2" piece. Then grab the loop/fuzzy side and cut a 1" and a 2" piece of that. You should have four individual pieces altogether. (I got lucky and found sew-on Velcro in lots of different colors at my local Hobby Lobby store. How awesome!)
With your sandwich wrap plastic-side-up on the table in a diamond shape, put the 2" piece of loop/fuzzy Velcro at the top corner (12 o'clock) and pin it in place. Put the 2" piece of hook/rough Velcro on the right corner (3 o'clock) and pin it in place.
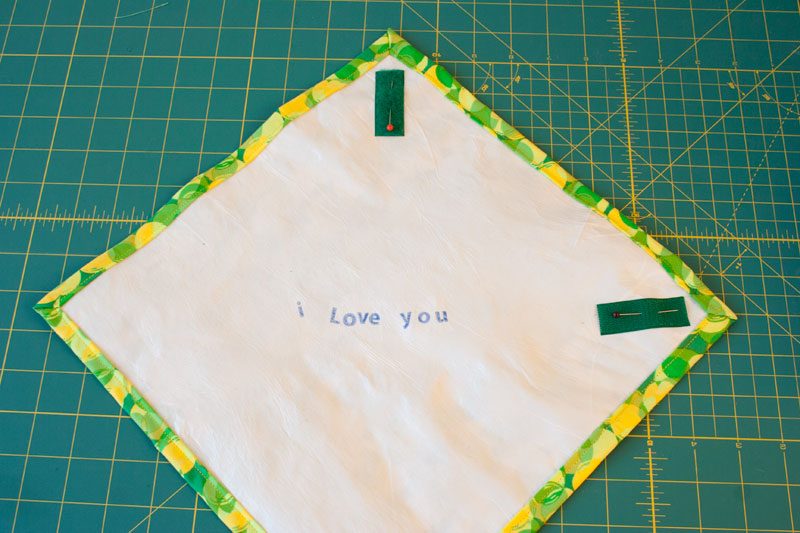
Then flip the bottom corner (6 o'clock) up and put the 1" piece of hook/rough on the fabric side and pin it in place. Finally, flip the left corner (9 o'clock) up and put the 1" piece of loop/fuzzy Velcro on the fabric side and pin it in place.
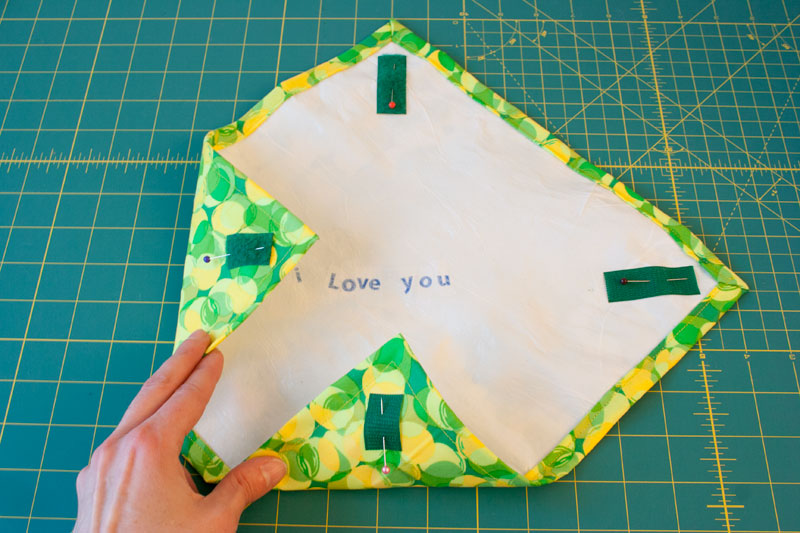
You got that? Let's go over it again to be sure. If you don't get this right, the wrap won't work! The 2" pieces are on the plastic side, and the 1" pieces are on the fabric side. Opposite corners have opposite rough or fuzzy pieces so that they will connect. Go ahead and try it out with the pieces pinned in place and make sure they match up before continuing. I would hate for you to have to take them apart and re-sew!
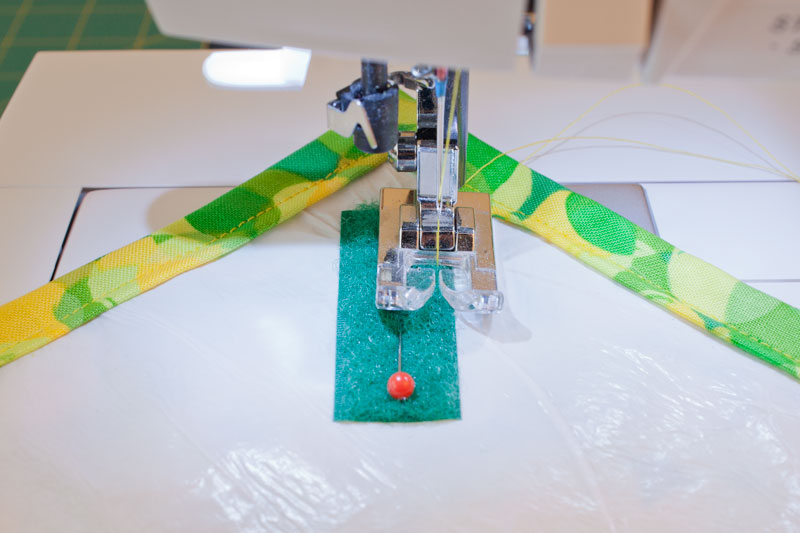
Okay, are we good? Good. Now secure the Velcro in place with the sewing machine by sewing around the edges of it in a rectangle.
Hey look. You're done!
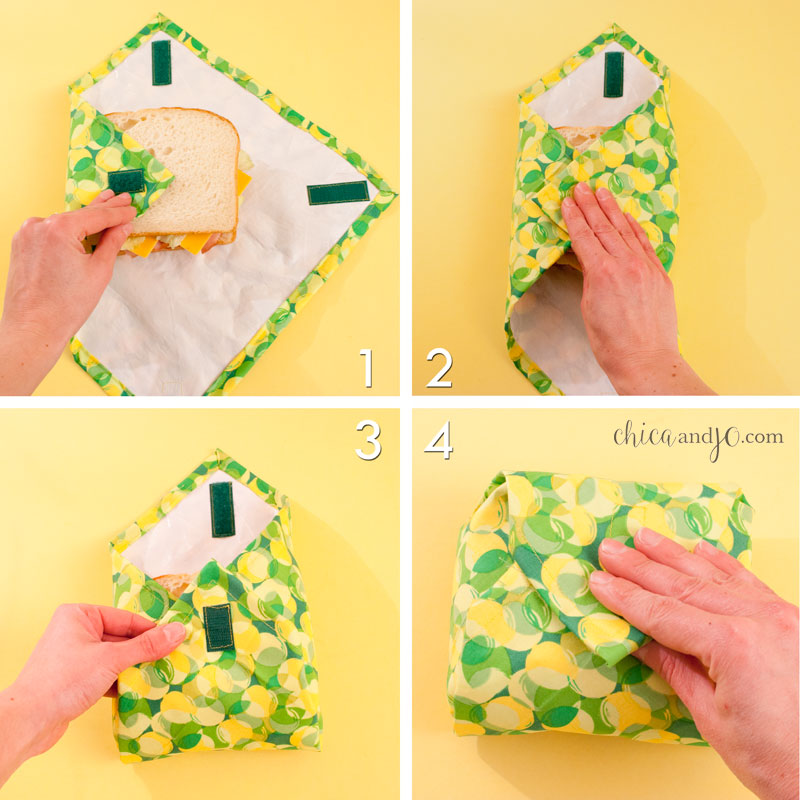
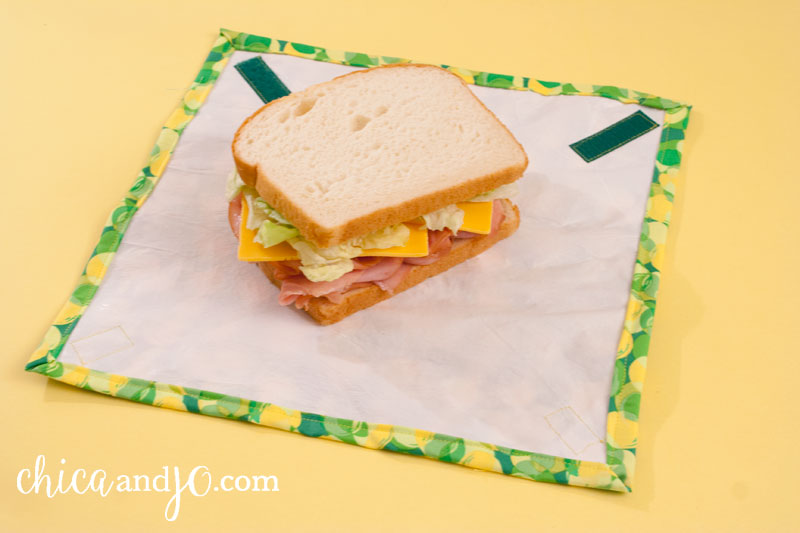
To use the wrap, just place your sandwich in the center, and fold it up as follows: Fold the left corner in. Fold the right corner in, pulling tight, and secure with the Velcro. Fold the bottom corner up. Fold the top corner down, tightly, and secure with the Velcro. Ta-da!
These wraps even make a great placemat for your lunch when you open them.
But my favorite part is the words printed inside. What brightens up a day better than a special message from the loved one who packed your lunch?
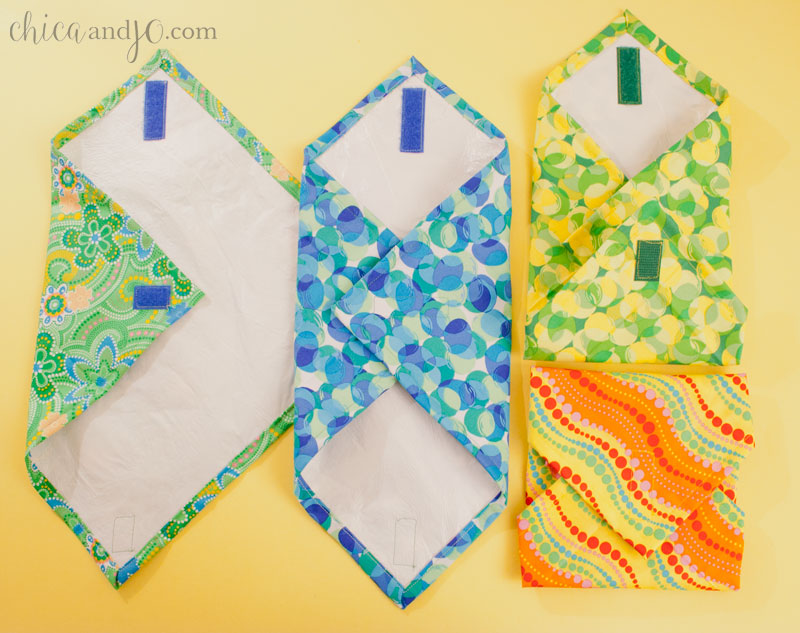
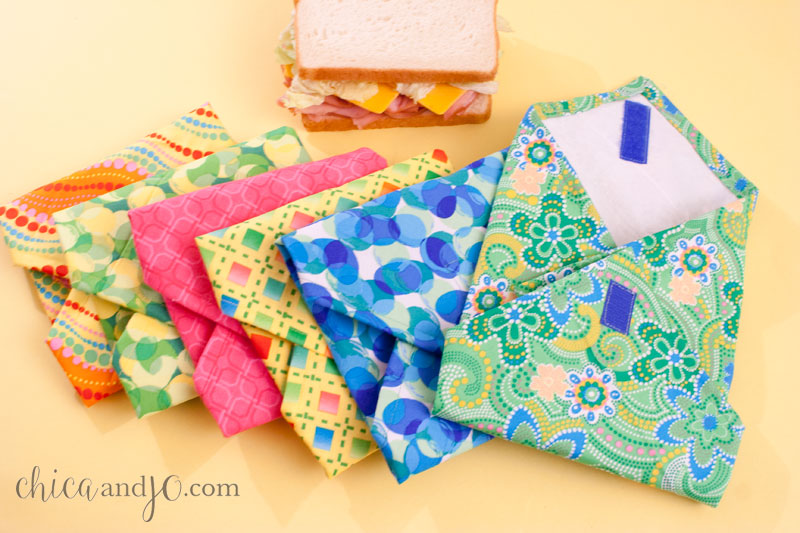
I made a bunch of these in different colors, so that I've got enough for a week's worth of lunches. These wrappers can be wiped clean and re-used, or you can toss them in the washing machine. Just do NOT put them in the dryer, or they might melt!
They're so cute and easy that I'm totally hooked and want to make more. Jo has already asked me to make some for her, and I know my niece will want some. Maybe I'll even use the letters to personalize the wraps with their names.
These reusable fused plastic sandwich wraps are fun and cheerful, but also a economical adn green way to reduce waste. A bunch of these homemade sandwich wraps would be a great gift idea for a teacher, busy mom, or someone starting a new job.
similar projects
Make Your Own Cooling Neck Wraps
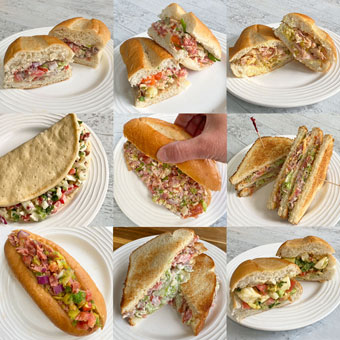
10 TikTok Chopped Sandwich Recipes
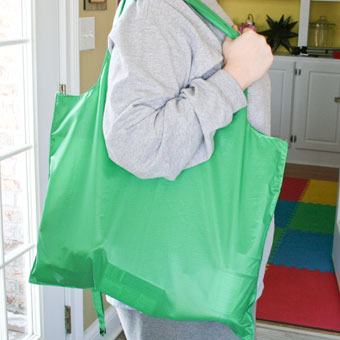
Make Your Own Foldable Reusable Shopping Bags


96 comments so far:
I love this idea. My only question is washing instructions. Do you just wipe them out? Have you tossed them into the washer?
Amanda, I'm not sure if they will survive the washer or not. My plan is to just wipe them clean, but I'll throw one in the washer today and let you know how it does :)
Seriously Cool!!! Love it!
Amanda, I have good news! I washed one of my wraps in the washing machine and it came out great! Just be sure to line dry them, though. I think they would melt in the dryer :)
This is a great idea, love it.
This is fantastic. I haven't had the sewing machine out for ages but I'm definitely inspired by this. Thanks so much for kindly sharing all your brilliant ideas.
These are TERRIFIC! I love this project and will have to get some plastic bags (sadly, the stash of plastic bags is nonexistent since I switched to reusable bags). As a food safety professional, if the wraps are washed first then they will be fine for food use. Not any different than washing a new plastic container prior to use, IMHO.
FANFLIPPINTASTIC IDEA HERE! Thank you!!!
Awesome Idea! As soon as my sewing machine is out of storage, I will be whipping up a lot for family! Thank you!
What a fantastic sustainable, easy, useful, and cute idea!!!! You guys rock!!! :)
I love it and think if you use freezer bags I think it would be fine, if people don't like it, don't make it! Simple. Thanks for sharing.
Love this idea! I waste a ton of ziplocs on snacks for the lunch. I'm making a bunch of these up.
THANK YOU so much for sharing this.
you know you often find projects on the internet that are really great, but quite often repetitive... this idea is so creative! thanks so much for sharing!
Seriously, I've seen the fused bag thing before, and the sandwich wrap idea too (which I thought was brilliant but couldn't afford the steep price tag on the products), but something about your tutorial and the way you've explained it and photographed it so clearly, just makes it seem so doable, so much more so than any other sandwich wrap tute I've ever seen (even those in published books)! Seeing this, I feel like I just have to do this, and though I will refrain right now (it's past 9:30 pm and like 40 degrees outside, don't think I'll be opening any windows tonight), I hope to have a stack of these before the weekend is over. Thanks so much, for making this something I can't possibly not try. :0)
Michelle, we really appreciate your lovely comments. Our goal is to make our tutorials exactly how you've described them, so we are tickled pink to have made such an impression on you. Have a wonderful, crafty weekend!
Wow - this is inspirational!
With three kids I go through an awful lot - and I do try to wash and reuse them but it doesn't always happen. I'm making this a family project for next week end! Thank you so much for sharing such a great idea and keeping it simple :)
Thanks for the great tutorial! I have some concerns about the safety of using any plastic inside. Most plastic bags (even those considered "food safe" like Ziploc) contain PVC which is highly toxic. I thought about using ripstop nylon but I heard it is coated with Teflon-- not exactly ideal to be touching food. Anyone have any other alternatives? Not crazy about my kids carrying around glass jars with snacks.
These look really cute when they are finished!
I have made these from PUL before... we actually used ours yesterday for a trip to the zoo. Love them! I wanted to comment though becuase I think your idea of putting the words under the sandwich is pure genius! What a great little note. :)
Blessings,
Val
Val, thanks for your comment. I really love the messages too :)
I have been practicing all weekend with really poor results, I'm so sad about that but will keep trying! I tried the wool setting but my bags shrank up when they fused. I didn't see a mention of shrinkage in your tute so I was wondering if you (being the expert on these) had a lot of shrinkage when you fused your plastic? Thanks for a fantastic site and great ideas!
<3 Kelli
Kelli, it took me a lot of practice before I got it right, so keep trying. If your plastic is shrinking, then the iron is too hot. Try a lower setting. I noticed that the thinner bags shrink more and require a lower setting than the thicker ones did. Let us know how it goes!
I love this idea. I'm working on beginning sewing classes for young moms and this would be a really great class. Now I have to make some myself.
Thanks, I'll make sure to have everyone check out your website!
I also love the messages underneath, and thank you for adding the suggestion to use cut apart ziploc on top! I came over from Treasures for Tots, and I linked to this on my weekly roundup, the post is under my name. Thanks for sharing!
Fantastic! My daughter and I are planning to try this out over Spring Break! What a great idea!!
What a fun idea. I think I will make one or 2, it is a rainy day and I have the materials. I expect that my boys will laugh at me for being so frilly with such a fancy sandwich cover - but I like it when they laugh.
Great idea! I made some of these for my grandson from fabric scraps left over from his baby quilt and shirts with matching snack pouches also with Velcro closings. They are so cute! I found that the food storage bags may melt at a lower temperature than the grocery bags so recommend experimenting. I thought there was a difference between brands as well.
I had trouble with getting the cut out letters to stay where I wanted them because of static electricity, so I found another way to decorate the inside. You can write on the fused bags with permanent markers, then fuse one more layer on top or your food storage baggie to seal it. Won't interfer with the fusing. And with supervision you could let the kids decorate their wrappers if you have the little ones around.
Elizabeth, I love the idea of just writing on the bags with marker. I never thought of that! Thanks for sharing your idea, and we're so glad you had fun making these wraps for your grandson :)
Also good for cereal bags... Something I learned from another blog.
I heart this you may just be my favorite ever
Not sure if it was mentioned or not but you can use the plastic from cereal box inserts for your wraps. I've been saving the plastic from my cereal boxes and plan to make some reusable food wraps. As these are food grade plastic, there should be no health concerns if people want to use this type of recycled plastic.
I LOVE these!! My only question is: will they really keep your sandwich fresh until lunch? No dry corners? SERIOUSLY?!!! I can't wait to try them!!
Audra, the wraps should keep the bread fresh as long as you wrap the sandwich pretty tightly. Give it a try and let us know how it goes :)
I have been practicing with my fusing to get this right before I start making them. I stumbled across this the other day and was wanting to use fused plastic to make reusable sandwhich bags for a while. I just never knew if they were food safe to use. I am realy big into upcycling and making reusable items. I have tons of cute fabric laying around I am going to use for these. I have found in my practicing that using a double layer of the ziplocks make it stronger and you don't have to worry about holes from melting at too high a heat. I am also trying to find a way to make snack bags using the fused plastic for chips and other stuff.
Victoria, we love the way you think. Let us know what you end up creating!
Ohmygawd that's ADORABLE!!!!!
Cool Idea. And if you are uncomfortable putting your actual food in it you can always use it for something else, like a cd case or something.
I love these! I made one and it worked great. I'm making several in different sizes - since not all sandwhiches are the same and I like wrapping other things, like a couple of cookies or slice of banana bread. I'm also skipping the velcro and using string-ties instead (like a present) since it allows me to change the size more and make the wrap tighter. I also used a Lays potato chip bag instead of the plastic. I put one through the wash, and it was fine. It's cool shiney silver, and I can only guess it's as food safe as any of the other options.
Denise, we would love to see a pic of your wraps if you care to email us one. Glad the potato chip bag worked out and that it went through the washing machine.
As someone who bring her lunch to work, this project seems perfect!! I can't wait to try it. This website is truly inspiring, keep up the great work!
I love this idea and it looks like something I can actually do. My son just started kindergarten and he kept dropping his sandwich on the floor because the lid was too tight on the sandwich container he was using. This will work great because he wont have any trouble opening it. Thanks for your wonderful ideas
I just made my first one of these tonight. I found a pair of quilted pillow covers at the salvation army that I bought. I cut them up to use as the backing for one. Its just a white fabric that has swirly zig zag lines quilted on it. I have also found that using old ice bags as a food safe liner works great. It is strong and helps add another layer of strength to the finished product. I figure if its safe to keep ice in why not safe for food use as well? I also made a matching snack bag. I am looking for a job currently and am going to use these once I get said job. I am going to use some of the rest of the quilted fabric to make a lunch bag to put it in. I would like to find something to use in the liner of it to help keep the cold in. I have some old cooler bags from sams that might work. They have this foily type stuff that helps keep the cool in.
My husband only likes his sandwiches wrapped in foil sheets. Any suggestion on how to jazz them up?
Stacy, you can write on foil with permanent marker. Maybe you could draw designs or write love notes on the outside of your wrapped sandwiches :)
I have been thinking on another way to make these. I have decided on using some biased tape to go around the edges instead of having to fold the edges down over the plastic. I am going to cut the plastic and clothe the same size and then put biased tape around the whole edge and sew it down. It seems like this should be easier and quicker to do.
Victoria, that's a fantastic idea. Wish I'd thought of it!
I just found some clearance fabric at walmart for my kids. They will be in kindergarten next year. I found cars for my son and little mermaid for my daughter. I can't wait to make them for their lunches. I also think they will be great for trips to the zoo.
Hi! I've been making something similar as these for some time using PUL fabric. I recently looked into using fused grocery bags and since they are #2 plastic (HDPE), they are BPA free and not known to leach any chemicals. Check any health website and they will tell you that #2 is one of the safest known plastics. I am not sure if applying heat/fusing to the plastic would change the composition at all. I'm still looking into it.
Groery bags are the same plastic (HDPE) as those cereal box liners someone talked about.
Me again - I did a little more looking into things. Good news! HDPE is a thermoplastic!! Thermoplastics do not change their composition when heated so they can be molded and remolded. That's why HDPE is the most widely recycled plastic. So, since #2 plastics are foodsafe and non-leaching and their composition does not change when heated, I'm going to go with the logical assumption that fused grocery bags are safe to touch food. That, of course, doesn't mean they are't dirty - I may wash mine out and let them really dry before I fuse them.
I hope this helps!
Kristin, thanks for your research! I'm sure that will reassure many of our readers :)
Love this idea! I hate going through all of the sandwich bags in my home, and my daughter will love it!
Thanks so much for your innovative and pretty ideas :)
For anyone who is concerned about the safety of the plastic, why don't you put fabric on both sides of the sandwich wrap? Obviously, you will want to choose your inside fabric with care. Victoria's idea to cut the material to size and use bias tape should work if you have material on both sides...Just a thought for those who are concerned.
I would think that chip bags would work for the lining too. After all, they have held food in them.
THRIFTY! ARE they machine washable and what about perishable items like, cut up fruit and cheese?
Thanks:)
For the "food safety professional", that is seriously flawed logic. Plastic bags washed or unwashed wouldn't be my choice ever to touch my food directly. They are not food safe nor are they meant to be. Now, the solution of adding the food safe ziploc over the top, is perfectly fine IMO as it is meant to be food safe. And keep in mind, not all plastic containers are food safe merely because they are plastic. I would dare to say that a lot of plastic isn't food safe and those that are are food safe so long as never heated while touching food. Not even all Tupperware is safe if HEATED with food in it (unless stated it is... I used to sell it, I know).
That all said, I love the idea for being able to use stuff around the house and put words in the middle, that seems very fun.I wonder if the same would work if you stamped images (colored) onto tissue paper, and sandwiched that between the other layers... just brainstorming. Ever thought of using "rip-stop" fabric?
Sabrina, I have put my wraps in the washer and they survived just fine, but I would not put them in the dryer, or they'd likely melt. As for cut up fruit and cheese, I don't think the wraps are air-tight enough to keep them as fresh as you'd probably like. A good recycling solution to that would be to reuse a plastic tub from some other food, like butter or cream cheese.
Sarah, I've used rip-stop nylon before when in our reusable shopping bag tutorial and it was a lot of fun to work with. The only downside is that it rarely comes in patterns, and can only be found in a few fun colors.
The largest, durable food storage bag I found was Target's 1 Gal. freezer bags. I chose generic over Ziplock or Hefty because I didn't want to see their logos on my homemade wraps. Even when I cut open the 1 gal. bag at the seams, it still wasn't big enough for this project, so I had some rethinking to do.
I came up with the idea of using Green Bags. They are the As Seen On TV type that are supposed to enhance produce freshness and be chemical free. The ones I have are the Debbie Meyer Green Bags, but I believe there is another brand called EverFresh, which promotes their bags as being eco-friendly also. I liked the idea of using Green Bags for this project because once cut open, they are indeed big enough measuring in excess of 16" in each direction, and don't have that unsightly plastic seam that Ziplock and Hefty do. Also, the manufacturers of Green Bags encourage reuse of their bags showing their confidence in durability, though they actually feel thinner than freezer bags.
I have not seen this suggestion online and am rather hoping that it is original, because it would be nice to be the first one to think of and suggest something on the Internet.
I admit that I can stitch facing sides together, turn right side out and topstitch, but have horrible luck with double heming as this tutorial indicates. I plan to baste the cut Green Bag to a cotton fabric square, and then face the bag inward toward the right side of another fabric square and stitch twice around (once straight and then zigzag) for reinforcement. Then turn right sides out so the bag will then be on the outside. Then topstitch once around.
I am going to give this a go now!
Sarranea, what a clever idea to use Debbie Meyer Green Bags. They are certainly food-safe! I have only seen them in person once before, and I seem to remember them being sort of thin, so please let us know how your project goes and if you found them to be thick enough to hold up to the sewing.
I love this idea. I bought a reusable and washable sandwich bag only to discover it can only handle 'normal' (WonderBread) size bread so my (non-standard sized bread) sandwiches didn't fit. The outside was regular fabric but the inside had a fabric that could be wiped between uses when I didn't have time to wash (unless I had several bags to use between washing). Because it was already in a bag shape, not only was it difficult to insert the sandwich but it was also difficult to wipe clean.
i will be making some for myself and friends. If it is OK with you I will also make some to sell by a non-profit organization. I will provide them as a donation, not to be paid.
Kitblu, we're so glad you liked our pattern and I think it will work much better for your larger bread. Please feel free to make and sell these for a non-profit organization, and if anybody asks where you got the idea, please tell them about our site. We love getting new readers! :)
Love this idea!....but has anybody thought about all the BPA's contaminating your food? I think it would be worth researching...but my guess is that none of those items are BPA free.
Awesome tutorial!! And thanks to Kristin for researching the food-safety issue of the fused plastic bags. I am going to make these for me and my friends and maybe even try to make snack bags too!
Just found your site thought pinterest.... I think this is a great idea but before I make some I was wondering if you have had any problem with the bread getting stale? My husband is really picky about fresh bread. I'm afraid that if I make his lunch the night before that by the time he eats it the bread will have that rough stale texture since it is not sealed all the way around.
Wonderhat, I think your results will depend a lot on how tightly you wrap the sandwich, and if you take care to tuck the corners in. I haven't had any problems with staleness, but I might not be as picky as your husband :)
these are wonderful! you can also sew the flaps together to create a re-usable snack bag-- i have a 2 year old and this made it so much easier for him to be able to take snacks on the go!
Thank you for sharing this! I'm not creative, so I LOVE it when someone comes up with a good idea, then shows me how to do it!! I LOVE this idea and can't wait to make them. First though, I have to buy a new iron. My son, age 5, dropped my iron and it didn't survive the fall!
Thanks again for sharing!
June, we're so happy to have inspired you. Let us know how it goes!
I LOVE this!! I can't wait to make some. Of course, this means getting the sewing machine set up but that's ok! I'm feeling some "sewing/crafting" time coming on soon!!
Hello!
This is a wonderful idea! I've been wanting to get some sandwich wrappers for myself for a while now, but all the ones that are available to buy seem expensive or flimsy. Also, I don't want to make one just out of fabric because that seems germy.
I love the idea of fusing plastic bags together to make it, though I would be sure to put a ziploc on the top layer.
I should mention that using straight pins on fused plastic can weaken it, instead I usually just use bobby pins. They work fine, and don't poke unwanted holes.
I will have to be sure to try this out! Thanks so much!
Gwen, I think bobby pins are a grand idea. Thanks for sharing!
Love this idea and maybe someone already said it - but if you are sewing the edges to the fabric then why do you need the step of fusing? Heating plastic is so toxic... Just sayin.
Gin, fusing several layers of plastic together makes a single sheet that's far more durable. Plastic from a single un-fused bag wouldn't be thick or sturdy enough to withstand the handling of this sandwich wrap.
This is one of the best tutorials I have seen. Every step carefully detailed and photographed. Please become a professional pinterest tutorializer =)
great idea! my kids take sandwiches to school and work ( wide range of ages) and these are ideal. fused plastic IS easy to make and use for many other things - aprons, shopping bags - and should be safe enough for food... or wrap your sandwich in a napkin first.. the bobbypins are an excellent choice over pins... i favor the little plastic clips from the dry-cleaners.. the ones that hold the sleeves together.. alas! my husband likes his shirts done profesionally, but i do recycle the clipppys and the plastic too! it makes great plarn...
Great tutorial! I know you said not to use wax paper in place of parchment. But I'm wondering if you could use it to cover the plastic, after it's been melted. For those nervous about plastic touching their food, it would be an additional layer between the plastic and the food. Obviously you wouldn't be able to wash it, making it not as handy... Just throwing a thought out there!
Mindy, you could definitely use a fresh sheet of wax paper to wrap your sandwich each time.
wonderful detailed tutorial, thank you
Had seen one of these someone had and been looking for a pattern
Love the fused plastic idea, have loads of plastic bags as have croched shopping bags from plastic bag yarn, will use some of my fab green ones
Xxx
I actually buy a vinyl or plastic table cloth for $2.00 at Walmart and cut it up to size, still cheap, and easier than fusing the plastic bags.
I've wanted to make these but was concerned about the plastic touching the sandwich as well. I'm going to try this over the weekend and use a plastic liner from a box of cereal for the inside. I have access to cereal liners frequently, plus they must be food safe and they are FREE! Thanks for the great tutorial!
I am worried that my bread would get dry by the time lunch comes around... Has anyone had that problem?
I think these would be great! I absolutely love them! I could even knit up a square for the design then sew it in place! Aaaaaah! The endless possibilities and all the great ideas for recycling different plastic items! This is just amazing, I now have a reason to see if my machine still works! :D :D :D
Hi looks like a fun idea. Are people talking about the cereal that lines a box or the large bags of cereal? do you suppose you could use the bottom edges to make beads out of?
Jan, folks are talking about the bags that contain the cereal inside a box.
So does the parchemnt paper stay in the fused plastic permanently or does it just help during the fusing process?
SM, the parchment paper is to keep the plastic from melting onto the iron. The paper does not attach to the plastic permanently.
How food safe are grocery bags for storage? BPA etc free? I love this idea but dont want to be putting toxic types of plastic directly on my food. Thanks :)
Amanda, there is much public debate over the possible harm from having your food touch the plastic. If you are concerned about this, please try our alternate solution, which is to make the final, top layer out of either a clear, plastic, food storage bag or the inner bag from a box of cereal. Our readers have had good luck with both solutions.
To start I just love this idea and would love to try them. But, in our community we don't have access (per say) to plastic grocery bags as they've been banned. I'm seeing comments on using cereal bags and was wondering if when using the cereal bag (box liner) are you "fusing" several layers together or just sewing a single layer to the fabric?
Jill, so glad you like this idea! We have not tried with cereal bags ourselves, but I think most of the people who have done so are using it as a topmost layer only.
These are cute. I think I still have some left over PUL fabric from the days when I was sewing cloth diaper covers. That would save the steps of needing to fuse the fabric.
Thank you for this tutorial, been looking every where for one that uses the pesky plastic bags I've collected.
I came across this looking for ways to make "waterproof" fabric. I was wondering if this idea would work for making diaper covers?
Frances, that's an interesting idea! If you try it out, let us know how it goes.
Love this idea but I'm wondering if only using the ziploc layer would work? I am uneasy about the fused plastic & really am not excited about plastic in general....not to mention the simplicity of just cutting open a gallon ziploc sounds fantastic!?
Neen, we have not experimented with just using a clear plastic bag, so we can't offer much advice. If you try it out, let us know how it goes!
I have some heavy-duty shipping bags that I keep meaning to take to the store to recycle. I'm going to try using these between two layers of fabric. The fabric touching the food will be untreated muslin, which I think will be food safe. I also have old, white cotton sheets that I think will work. Love any ideas that reduce waste!