


Santa's Velvet Drawstring Pouch

For Christmas this year, decided to use our drawstring bag tutorial to create some cute Santa-themed bags that look like they were made right from his outfit.
To create my Santa-inspired drawstring bags, I used luxurious red velvet, shimmery white satin, and fluffy white fur (fake, of course). It's all so tactile and wonderful, even in a pile of supplies. Also in that pile are some gold jingle bells and black cord, which will be used for the drawstring.
These bags can of course be made with other fabrics (like fleece or cotton) and can really be made in any size you want, once you've learned the technique. For this tutorial, I'm aiming for a finished bag that's somewhere in the 7"x9" range, which is a perfect size for a small gift or decoration.
To make that size of bag, you'll need a 7" x 15" piece of velvet, a 10" x 15" piece of satin, and a 3" x 15" strip of fur. If at all possible, cut the fur so that it runs lengthwise along the strip (not crosswise). This will make the trim look much better, in my opinion.


Now lay the velvet on the table, face up, and put the fur on top of it, face down. Line up the top edge of the fur with the top edge of the velvet. Pin it in place, doing your best to tuck those pesky fur hairs down and out of the way as you go.


Sew the edges together with the sewing machine. Then open it up and lay the whole piece flat on the table.


Now place the white satin on the table, face up, and put the sewn-together velvet/fur piece on top of it, face down. So that means that the plush side of the velvet and the shiny side of the satin are touching each other. Got it? Pin the top edges together and sew with the machine.


Now lay the whole sewn-together piece out on the table, facing up. As you smooth it out, be sure to take a moment to enjoy running your hands along all the soft fabrics! Now fold the whole piece in half by bringing the right edge over until it lines up with the left edge. The fur/velvet/satin side should be on the inside of this fold.


Pin the edges together and sew in place with the machine. While you're at it, sew the bottom edge shut, too. That's the red end, NOT the white end!


Here it is all sewn up. Now flip it inside out and marvel at the cuteness! And it's still got so much more cute to go, too.


Now you want to make sure that your lining is the right length to suit the bag. This will vary depending on your seam allowances, so I find it's easiest to just measure. Measure from the bottom of the red part of the bag to the seam between the fur and the satin (see yellow marks in photo on left). Then transfer that same measurement to the lining, measuring out from the seam between the fur and the satin (see yellow marks in photo on right). Mark this spot with a pin.


Now we need to take care of those nasty edges on the lining. Grab the end with both hands and use your fingers to tuck the edges down inside, making sure the fold lines up with your pin marking.


When you get it where you want it, pinch it to hold it in place, then secure it with a row of pins.


Now you need to sew the seam up. You could be fancy and do a slip-stitch so that the stitches don't show, but let's be honest... it's just the inside of the bag, right? The BOTTOM of the inside, in fact. I just run a row of stitches along the edge and I don't care if anybody peeks inside and sees them!


Then just tuck the lining down inside the bag and again, marvel at the cuteness.


We're not quite done, though. We need a drawstring, and that drawstring will need somewhere to go. With your sewing machine in free-arm mode (most will have a way to remove the bulky piece from the machine so that you have a thinner arm suited for sewing tight sleeves or tubes), slip the bag on. It'll be tight, but it should fit.


Then sew a row of stitches at the top edge of the red, as close as you can get to the fur trim. Go all the way around the bag. Then do it again, about a half inch below that. You'll find that these rows of stitches also help to hold the lining in place down inside the bag.


The channel is there for the drawstring now, but there's nowhere to put it! Find the side seam on the bag and look at the area between the two rows of stitches you just sewed. Use a seam ripper to carefully open up the seam, making a hole that you can stick the cord into.


Try not to cut the fabric, because velvet has a tendency to unravel on the edges. As soon as you have the opening big enough to stick something in (like the other end of your seam ripper for example), you're set.


Grab your black cord (or ribbon), which needs to be about a yard long. Stick a safety pin in one end of it, which will help to feed it through the channel. (Remember our post about that?) The tape you see on the end of my cord is because I used twisty cord that unravels if it's not glued or taped, and I hadn't glued it yet. Stick the pin into the hole you just made and start feeding it into the channel.


Once you get all the way around the bag, your pin will come back out the same hole in went in. Pull it through, take the safety pin off, and even up the length of the two ends, and trim them as desired.


Those ends are ugly, though. They need something sparkly and pretty. Gold jingle bells will do the trick! Depending on the size of your cord/ribbon and the loop on the bell, you can either tie, sew, or glue one bell to each end.


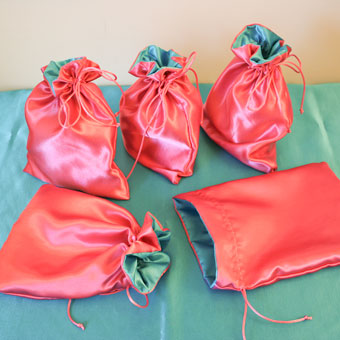
Now your bag is ready to stuff with goodies, then just pull the string and tie it in a bow. By the way, did I mention how pretty the shiny satin lining looks?


Don't even try to tell me this isn't the cutest thing you've seen all day, because I don't think I can believe you!

The potential uses for these little bags are endless. Favors. Alternative stockings. Gift packaging. Place settings. Do you have any other ideas? Please share with us in the comments!
similar projects
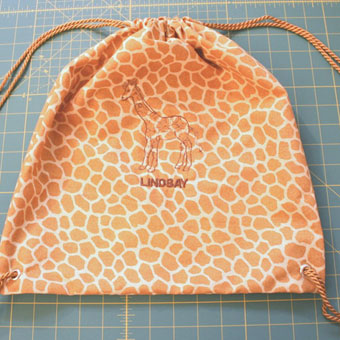
How to Make a Drawstring Bag
How to Make a Drawstring Backpack
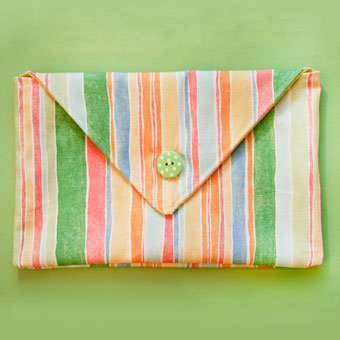
How to Sew a Button Closure Pouch


17 comments so far:
Oh, the possibilities!! Great gift packaging for premium tea bags, or perhaps flavored hot chocolate paired with some candy canes?
I linked to your tutorial on Craft Gossip Sewing:
http://sewing.craftgossip.com/tutorial-fur-trimmed-velvet-drawstring-bag/2009/12/10/
--Anne
Mmm, hot chocolate and candy canes! Thanks for the link, Anne :)
That is so DARLING!
I'm making this for my neighbor's girl for her doll. I'll make a little hat too!
Amanda, thanks!
Lauren, what a sweet idea. We'd love to see the hat after you're done!
AWW! I love it! Thanks so much for yet another great project, I'll be linking.
So cute! You could do a wine bottle bag with the same style as well!
Lisa, I love that idea!!
Dios los bendiga por darnos a conocer tantas cositas tan utiles para la casa y para regalar. No tengo palabras para agradecerle a Dios por haberlos encontrado en mi camino.Gracias y les deseo muchos 'exitos.MERCY.
Mercy, nuestras espanol no es bien! Pero, nosotras comprendemos que digas. Gracias por vistas nuestras Web site!
HEY! MY NAME IS BRUCE LEE! I LIKE THIS BAG VERY MUCH! :D
I made these last year to put in gift cards for my nieces and nephews- the bags were bigger hits than the gift cards! Instructions are easy and the bags come together very quickly. Thanks C & J.
So glad they were such a hit with your family, Catherine!
Hello, I love this project. I will be using it this year...it's just perfect for gift cards and candy canes.
W as a purse for Christmas. will be making this bag for my great grandaughter for Christmas this year. Thanks Ann
So cute! Maybe you could do a little pillow for your room or couch?
Luke, that's a fun idea!