


Make a Carved Apple Turkey for Thanksgiving

Fruit carving can seem intimidating, but let me show you a fun and easy way to carve an apple into a turkey. It's the perfect edible decoration for your Thanksgiving charcuterie board or place settings at the kid's table.
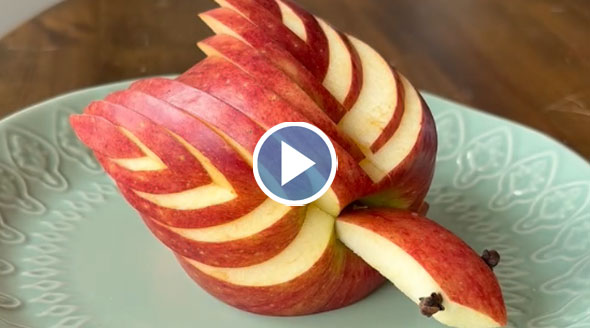
VIDEO: Carve an Apple Turkey
Ready for a demo? Watch this quick video to see exactly how I turned an ordinary apple into a cute and fun little turkey for Thanksgiving.
How to Carve an Apple Turkey
If you prefer step-by-step instructions, keep reading to see how to make this carved fruit decoration for Thanksgiving.
Supplies needed
The only supplies you'll need to make one of these turkey is a big red apple, a paring knife, two whole cloves and a toothpick.
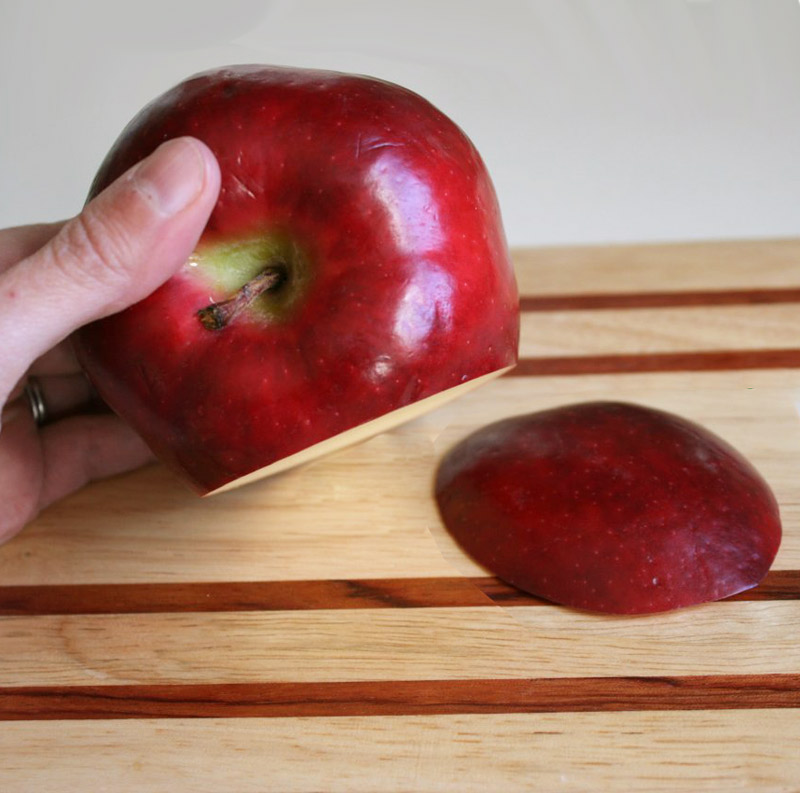
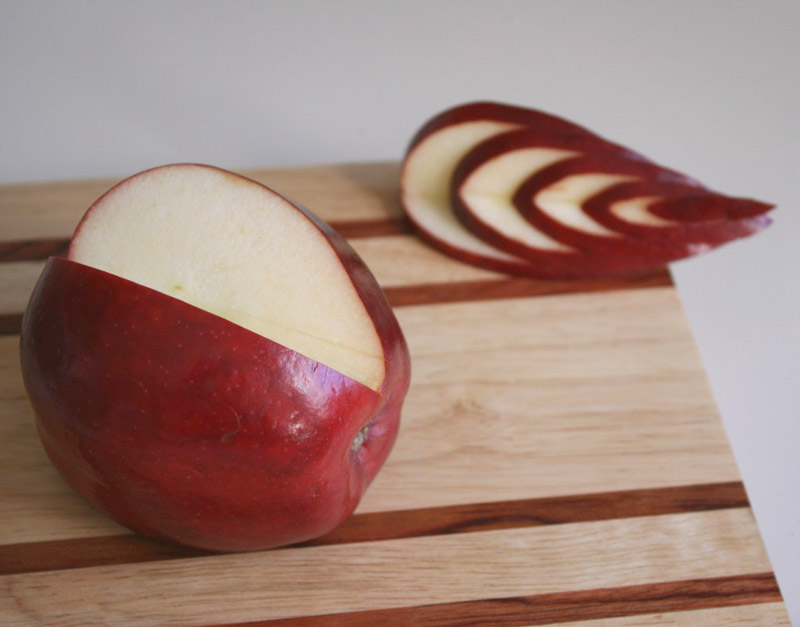
Step 1: Slice off the bottom
Start by slicing about a half-inch thick slice off one side of the apple. This will give your turkey a nice steady base to stand on. Don't throw away (or eat) that slice, though. We're going to need it in a minute.
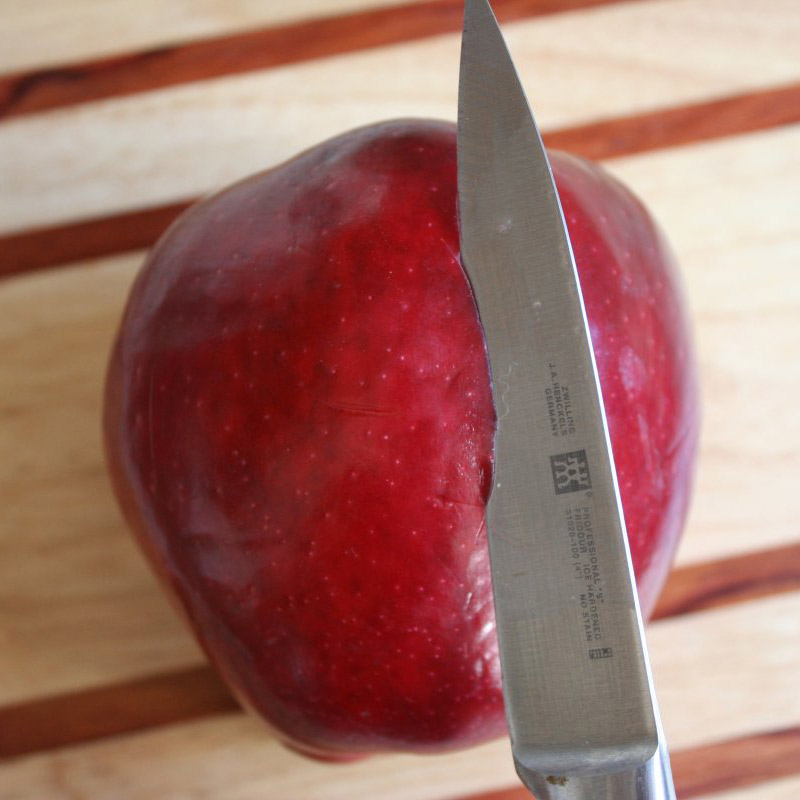
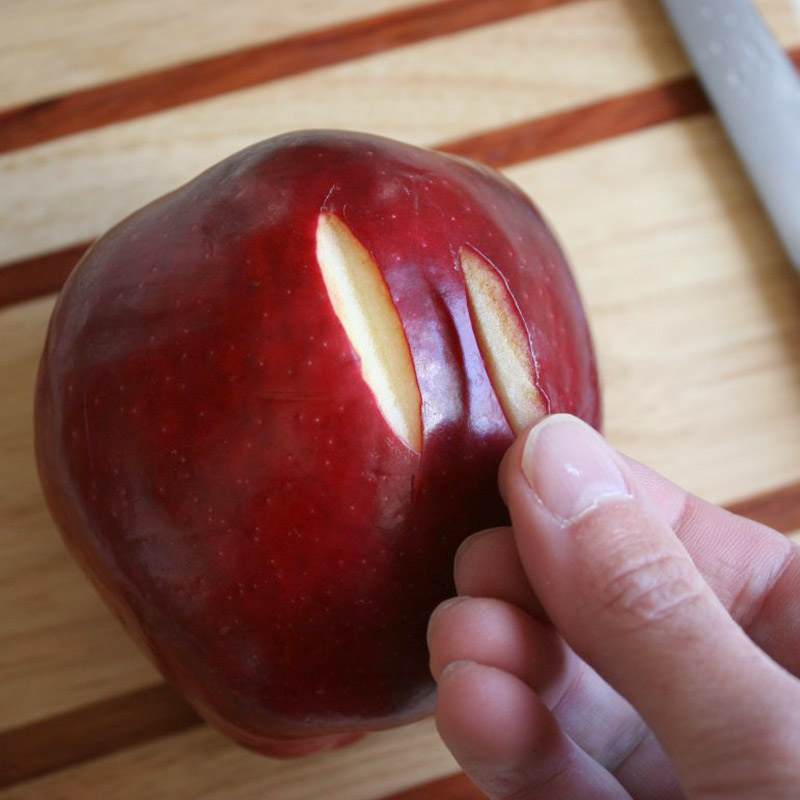
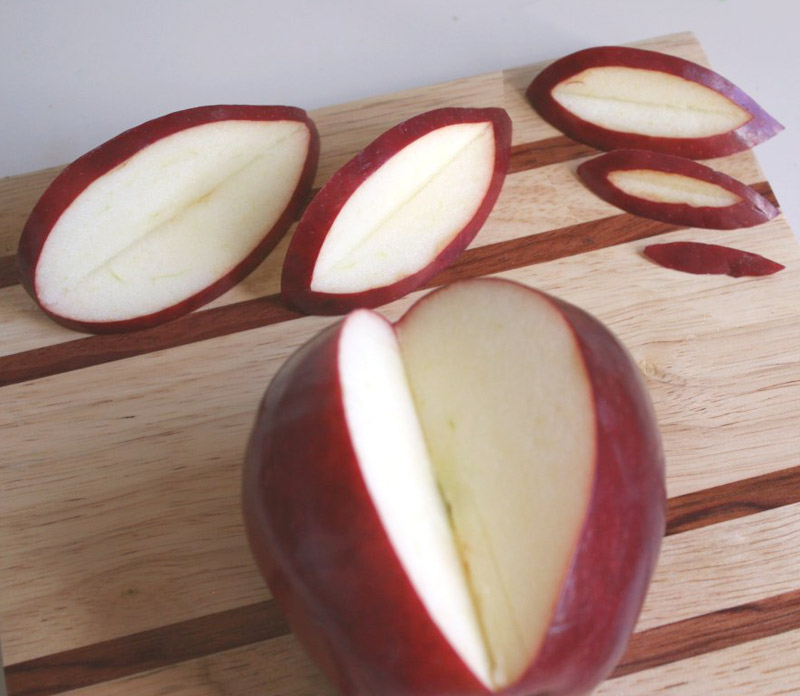
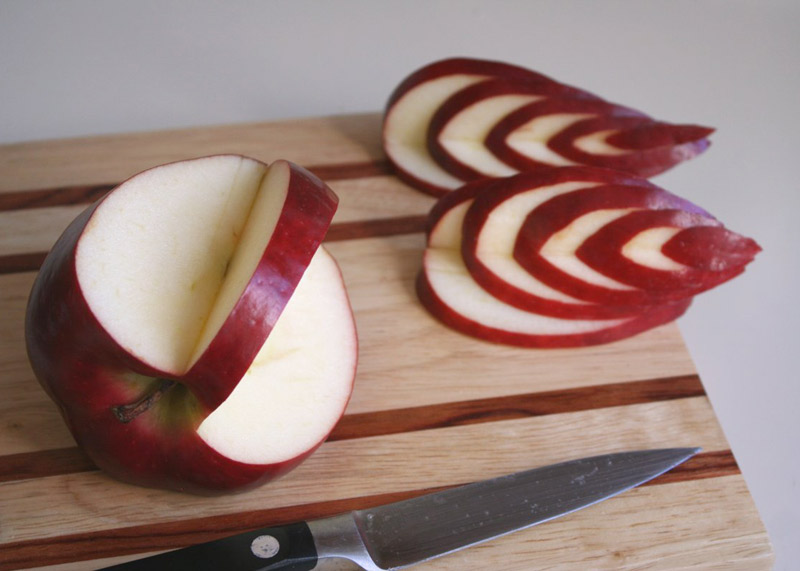
Step 2: Create the top wing
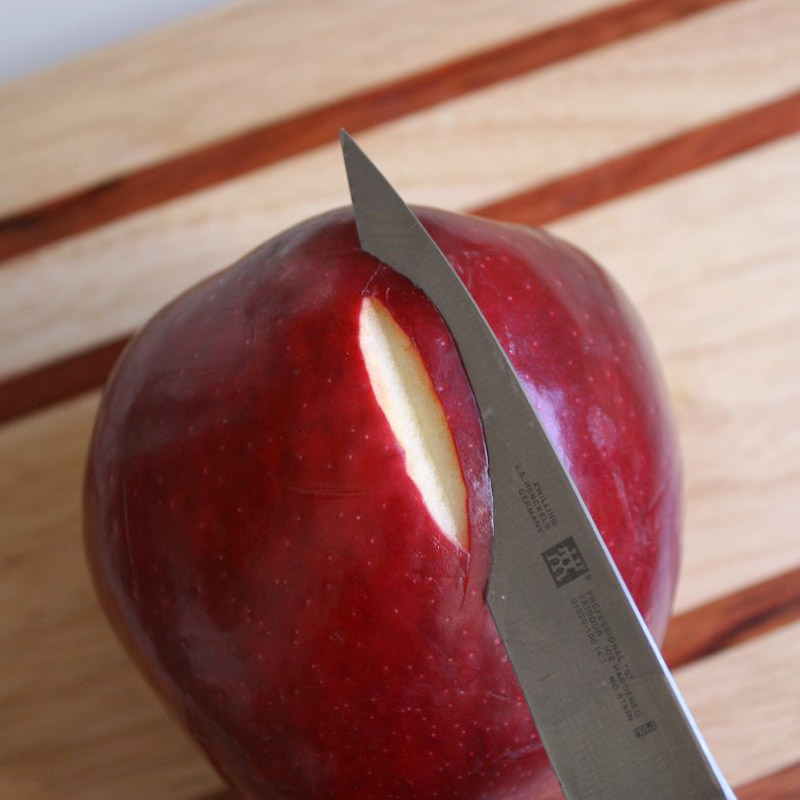
Then take your paring knife, tilt it at an angle, and cut a slash in the top of the apple that's about an inch and a half long and a quarter of an inch deep.
Turn your knife to the opposite angle, and make a matching slash on the left, meeting the top and bottom of the first slash.
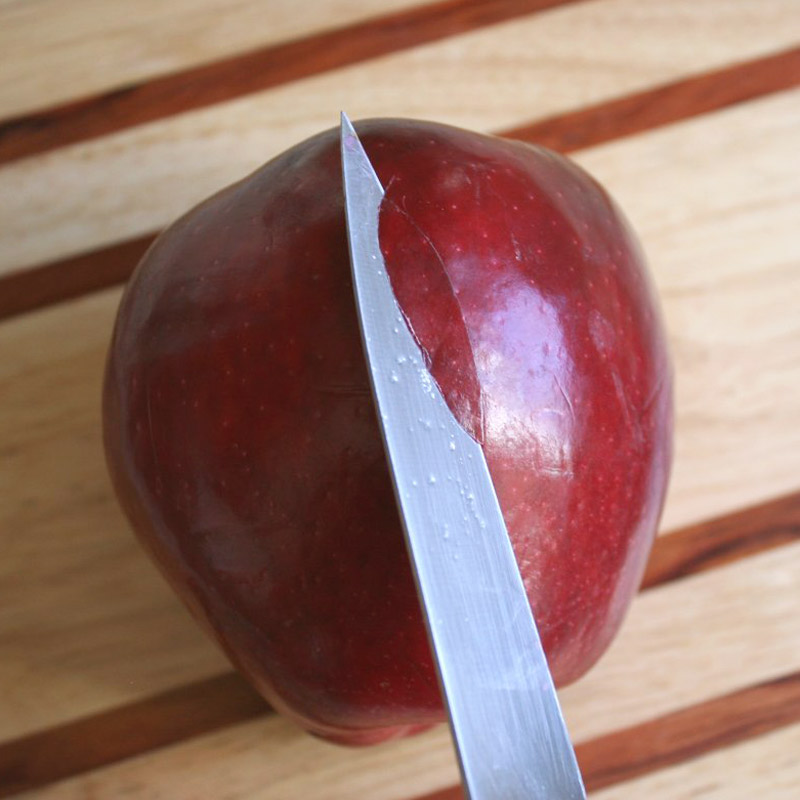
You should have a tiny little sliver of apple that can be removed. Resist any temptations you might have to toss this piece into your mouth. We're going to use all these bits, so keep them!
If you've made it this far, you have already developed all have the skills you need to finish this project, believe it or not. We just need to make more cuts like that first one!
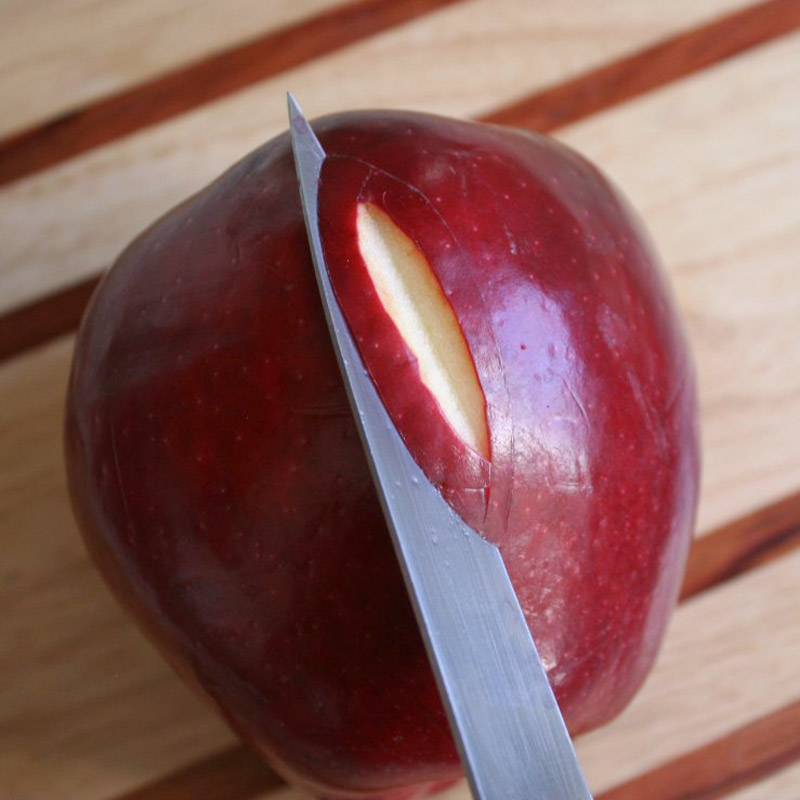
Angle the knife on the right, about a quarter inch away from the first cut, and again slice down into the apple. Don't go too far — just go until the top and bottom of the knife line up with the top and bottom points of your first cut.
Once you've made the cut on the right, switch to the left and make a matching cut.
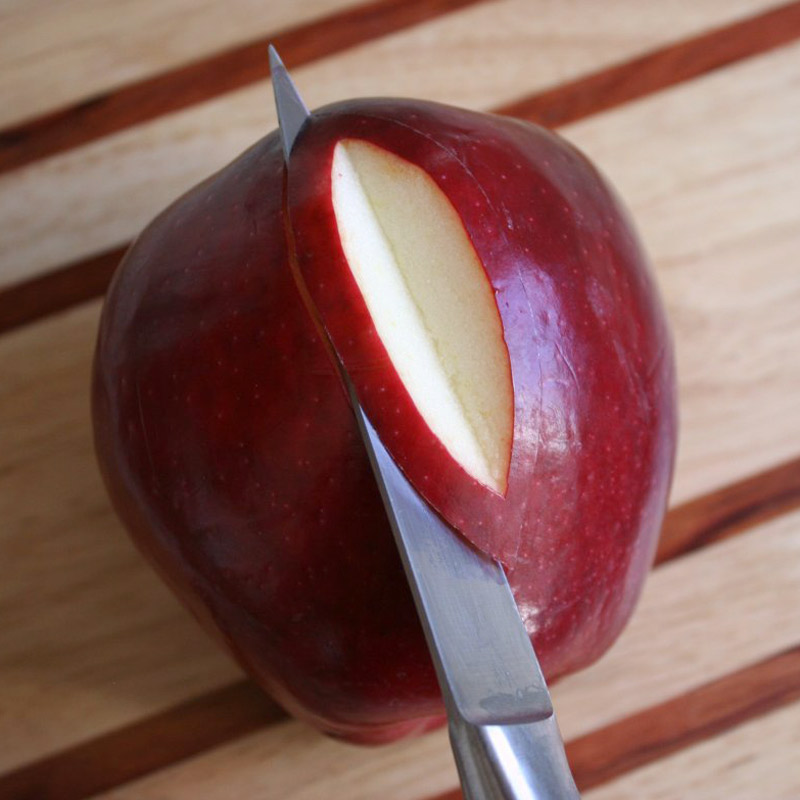
Now pop the loose piece out. Look at that, you made a pretty little feather! (I don't have to tell you again not to eat it, right?)

Repeat the same process and make a third feather, which will be slightly larger than the last one was.
Then, depending on how big your apple is, use the same technique to make a fourth and optionally a fifth feather. Basically you can keep going until you get tired or hit the center of the apple.
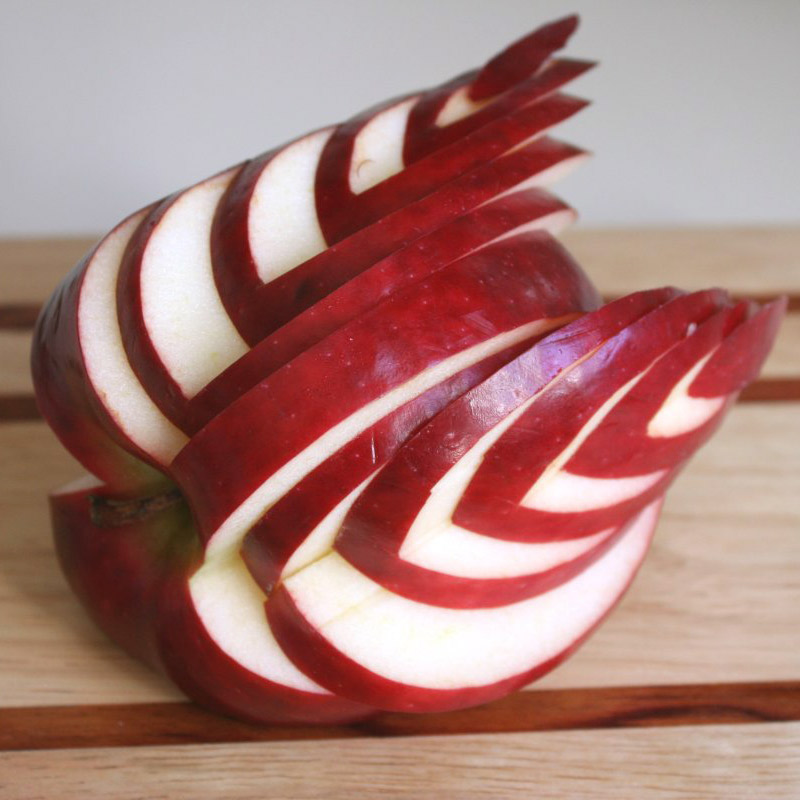
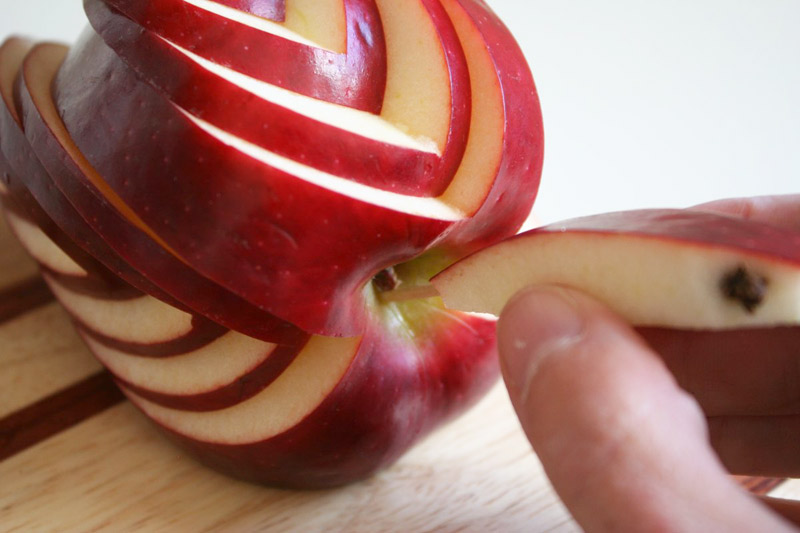
Now we get to have some fun. Take the largest feather you made and put it back on the apple, but scoot it back a bit so that some of the white of the apple below is showing.
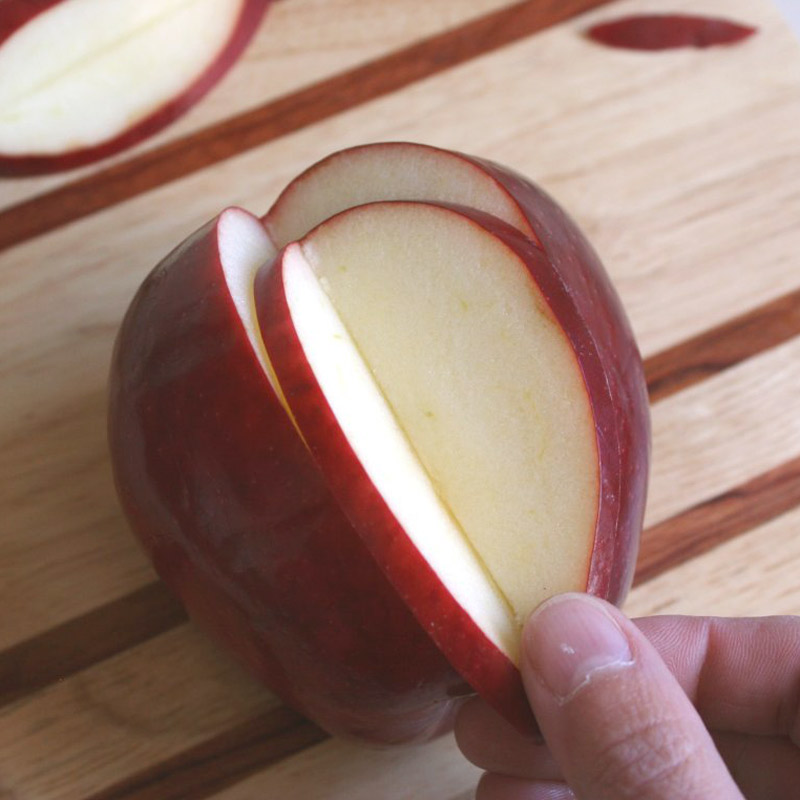
Then place the next largest feather on top, a little further back.

Put the rest of the slices in place, down to the tiniest point. You'll notice that the moisture in the apple provides enough friction that the slices stay put with nothing added to hold them. They just stick! And look how pretty it is. Neat, huh?
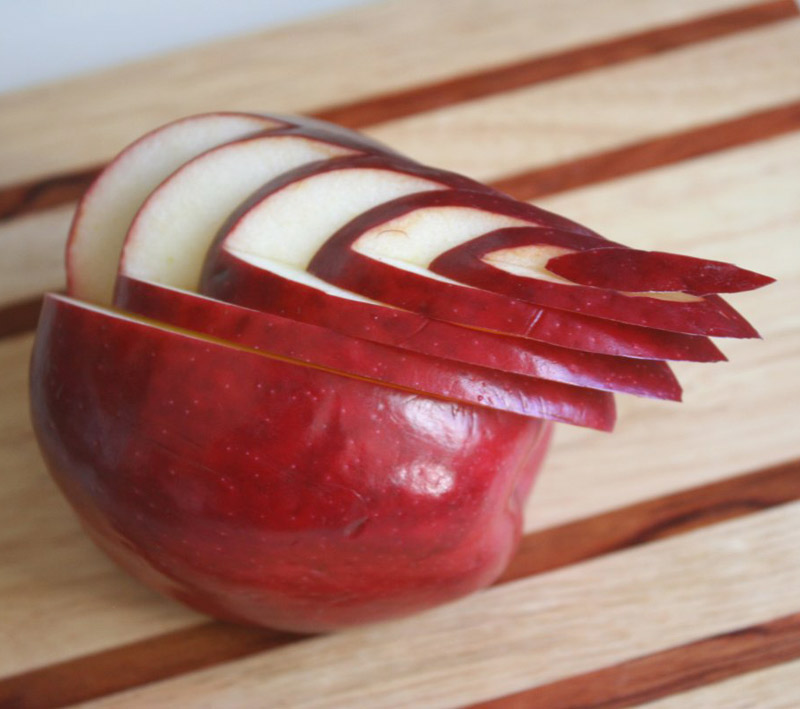
Now take the entire "wing" piece off the body and set it aside so that you don't damage it while you make more cuts. It'll just sit there, stuck together, until you're ready for it.
Step 3: Create the side wings
Then turn your apple to the side and repeat all the steps above on the right side, and make another complete wing, and set that one aside too.
Create one more wing on the other side of the apple body, making three wings total. Leave it on the apple and add the other two wings back. I love it!
Step 4: Create the head and neck
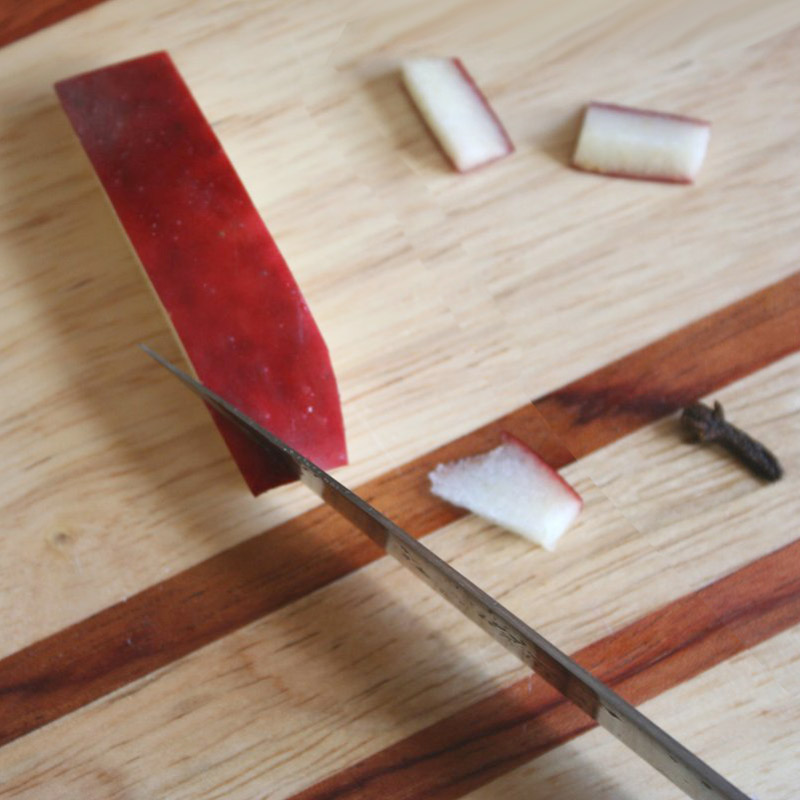
All that's left now is the head. Go find that slice of apple from the first step. Lay it flat on the table and cut a strip out of the middle that's about a half inch wide.
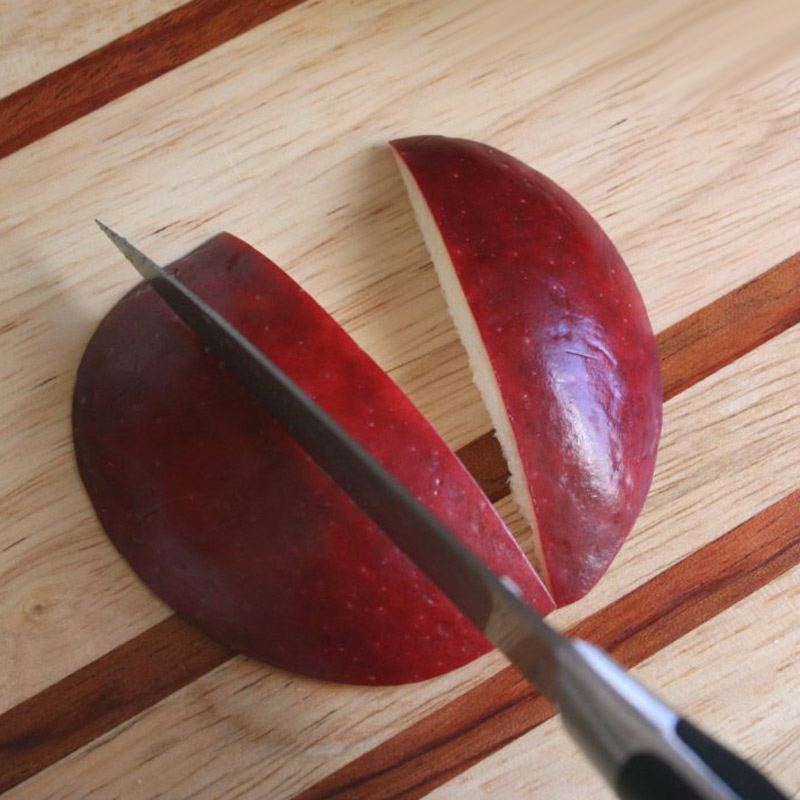
Cut the points off of each end of that strip so that it's squared off. (By the way, you are allowed to eat those two tiny pieces and the rest of the big slice now. Finally!)
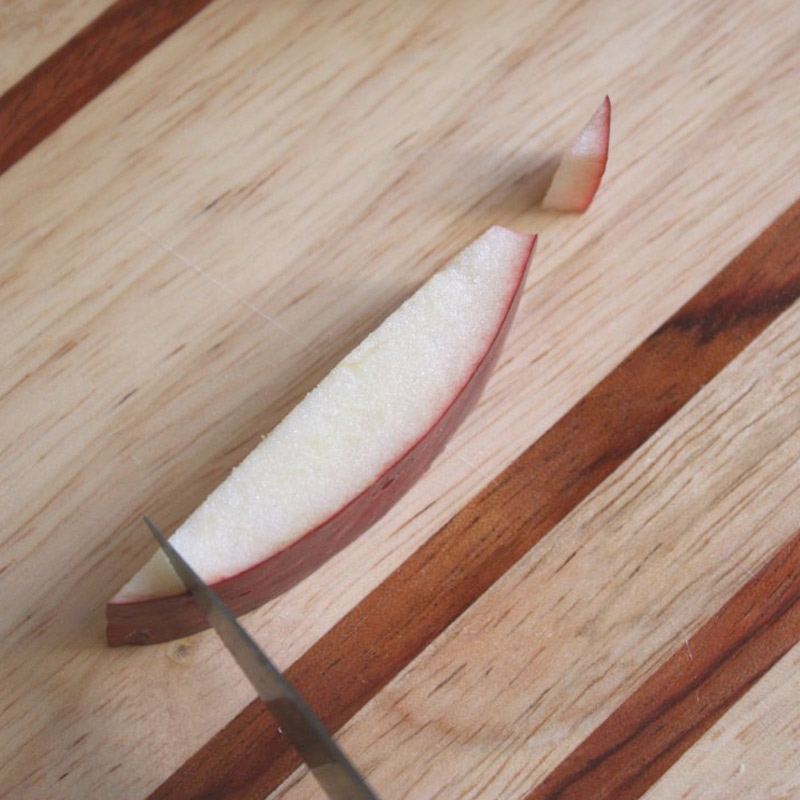
Now flip the head/neck piece so that it's skin side up. Take your knife and cut one end to a bit of a point, so that it more resembles a beak.
Then stick a whole clove in each side of the head, to serve as eyes, and stick a toothpick halfway into the other end of the neck.
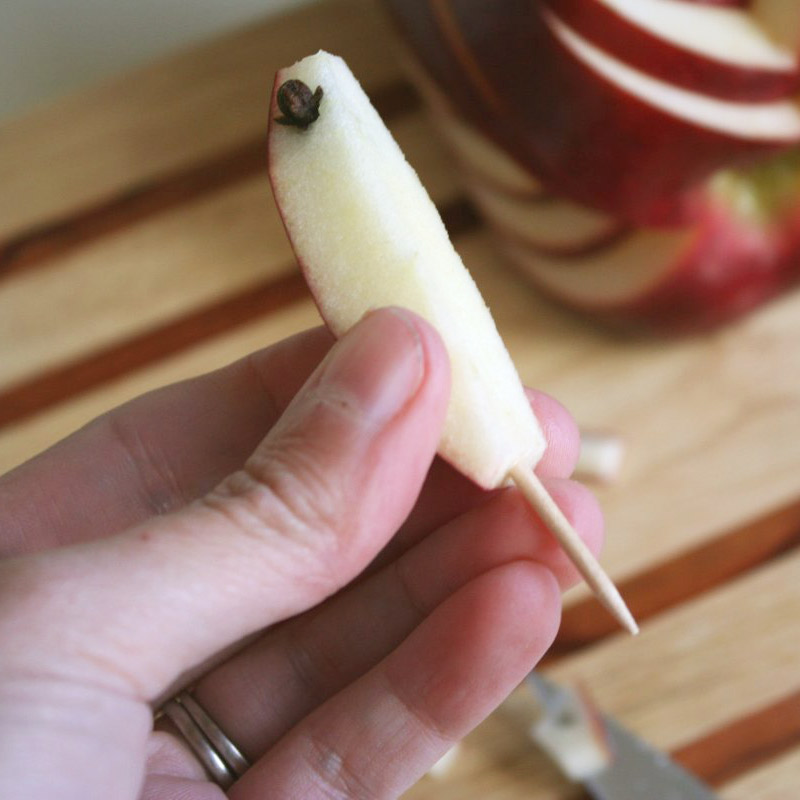
Then stick the whole thing on the turkey, right in the stem area.
And that's it!
Ta-da! Your apple turkey is ready to decorate your table.
Making them ahead of time
Thanksgiving day is hectic, so you may not want to try making these at the last minute. I've timed and monitored one to give you some guidance, and here's what I discovered:
- The apple will stay looking fresh for 2-3 hours, then it will start to brown
- The cut edges will start to dry up and shrivel after 6-8 hours, and it won't look appetizing anymore.
- After 24 hours, it will not look good at all. Don't try to make these the day before!
NOTE: If you want to extend the "fresh" time and keep them from browning, you can try spritzing the cut area with lemon juice. Just keep in mind that it will affect the taste of the apple, as well.
Ideas for using your carved apple turkey
Here are some of my favorite ways to use these carved apple turkeys:
- Put one in the center of your Thanksgiving charcuterie board.
- Give them to the kids (or adults!) to eat as a snack while they watch the Thanksgiving Day Parade
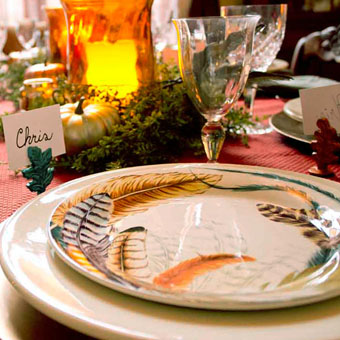
- Put one at each place setting on your table to serve as an edible favor/decoration.
- Arrange a few on a plate for an edible centerpiece at the kids table.
What other ideas do you have? Let us know in the comments below!
similar projects

Pie Slice Box Template for Thanksgiving
Feathers and Metallics for a Thanksgiving Table Setting

Caramel Apple and Pecan Crescent Rolls


8 comments so far:
Very clever and cute! I am going to give this a try. Thank you for sharing it with us!
wow! this is incredible!
I used to do this--years ago--and tried to recall the steps. Thank you for helping me remember!
I love this idea, great for the vegetarian thanksgiving table!
I made turkeys many years ago, but my pattern didn't have the fancy wings and I thought the head was different, too. But thanks. I'll make this one and keep the pattern!
Im so speechless.thanks for not hoarding on ur gift.this is truly very helpful to me.wl practice till im perfect.thank you.
I wrote in 2010 and writing again because I needed a refresher course. Nicely done! Thank you.
Diane, so glad you liked this project enough to come back! Have a great Thanksgiving.