


Free Wedding Favor Box Template

Anyone planning a wedding knows that finding inexpensive and cute favors for your guests can be a daunting challenge. A popular choice is wedding-themed Hershey's Kisses, but then you have to come up with a box to put them in... and we've got you covered! Our versatile favor box template that you can use for wedding favors, shower favors, or any party where you need a cute little favor box for guests.
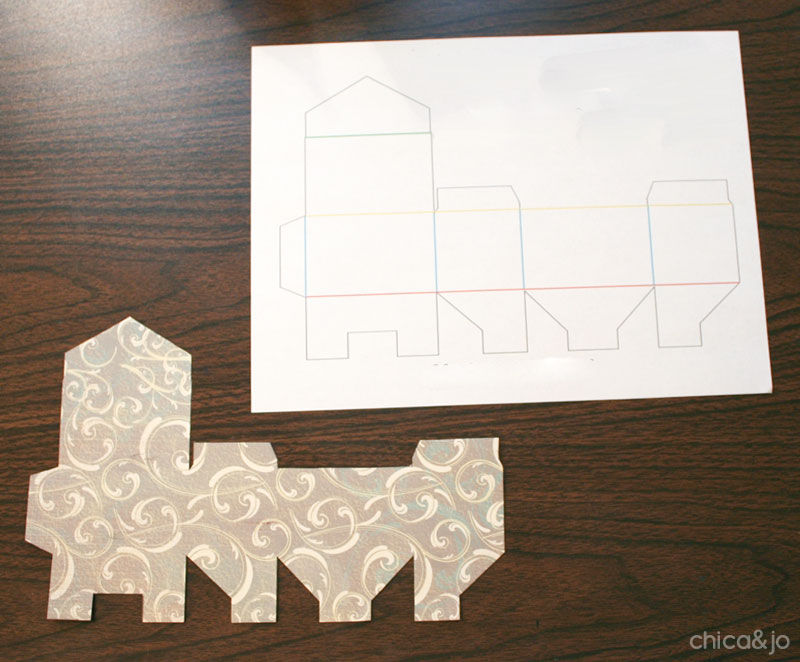
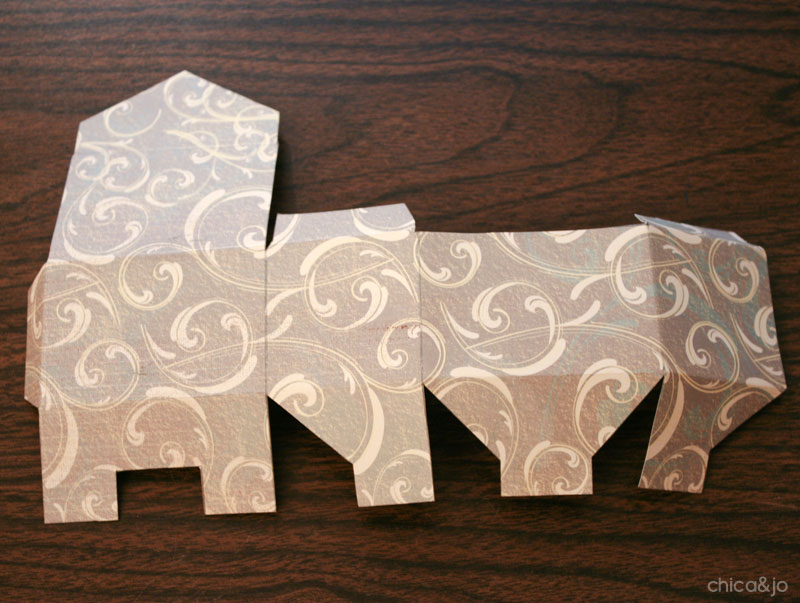
It all starts with our easy printable favor box template, which you can print directly onto 8.5" x 11" sheets of cardstock in whatever pattern coordinates with your wedding or party.
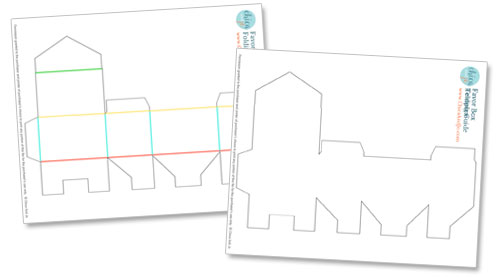
Just print the template page from the download onto your patterned cardstock and cut it out along the outline. Also print the "folding guide" onto plain paper for reference when scoring your box.
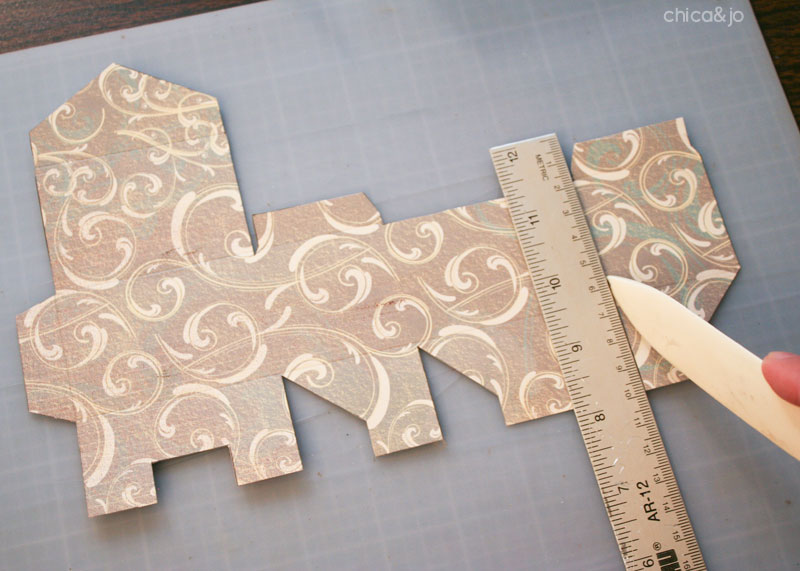
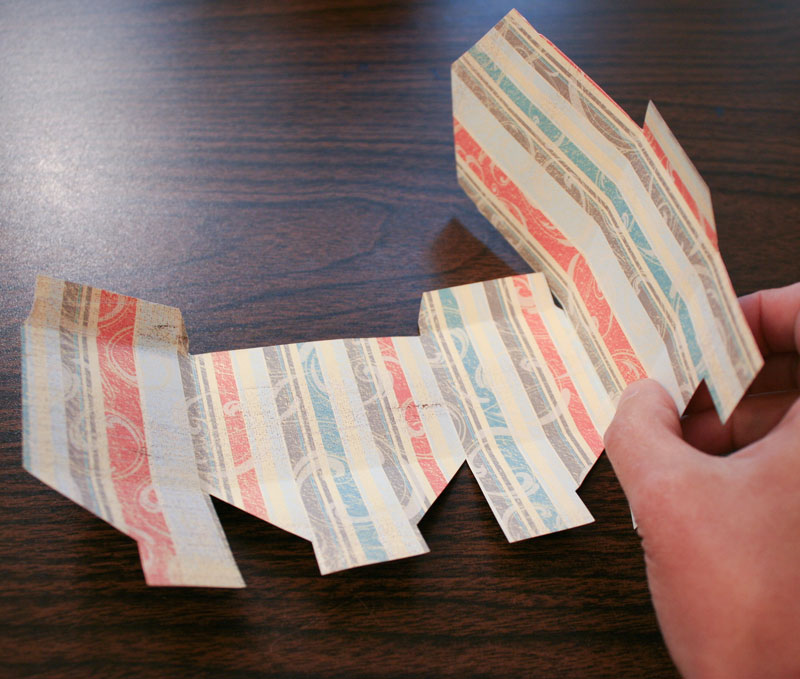
Next you'll score all the horizontal folds. To do this, you'll need a ruler or straight edge and a bone folder. Using the folding guide for reference, line up the ruler on your box where the red line indicates, and run the bone folder firmly once or twice along the edge, to make a nice score line. Then do the same thing for the yellow line and then the green line.
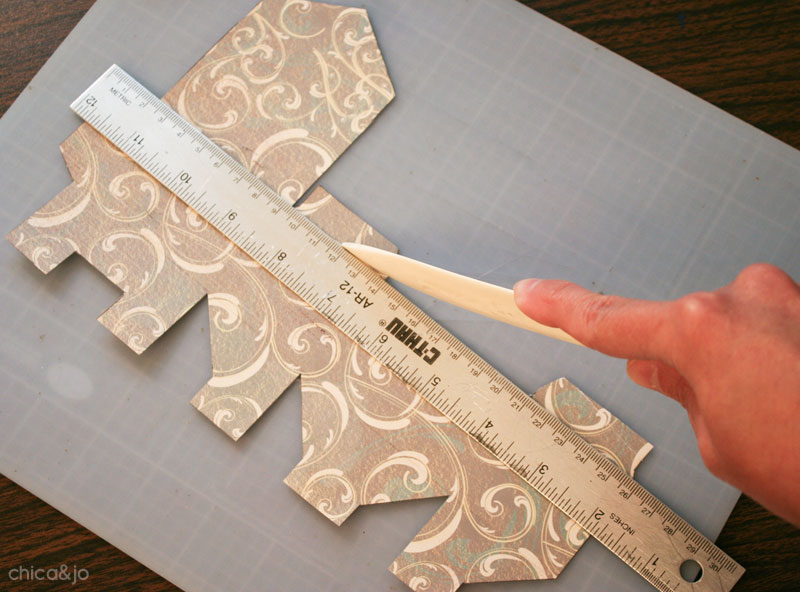
Now do the vertical score lines, which are all marked in blue on the folding guide.
With your box fully scored, it's time to now fold it. Just bend each of the score lines and they'll fold easily for nice straight edges.
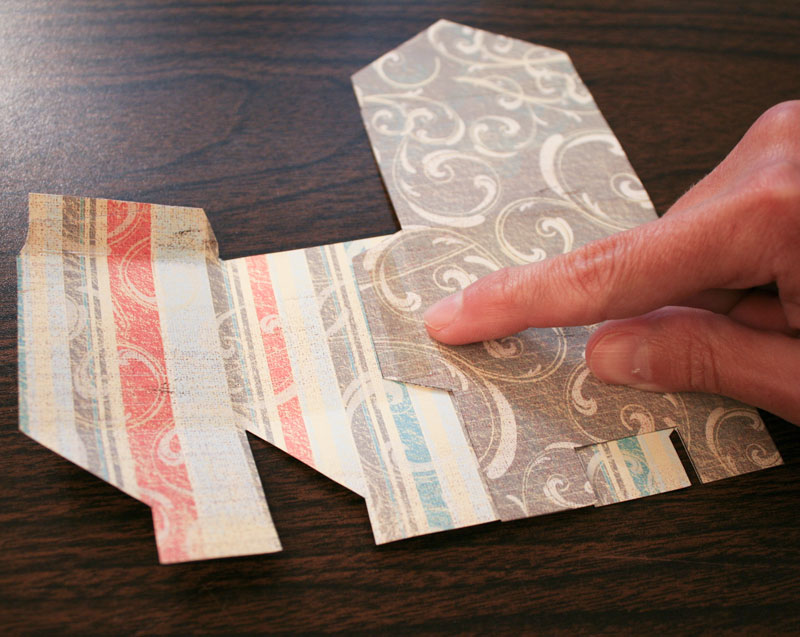
To put the box together, the first thing you need to do is attach the two ends so that you've got a box shape. I've got a sure-fire trick to do this and line the box up perfectly every time. Lay the piece so the inside is on top and the tallest part of the box is on the right. Fold that tall part over on the first crease.
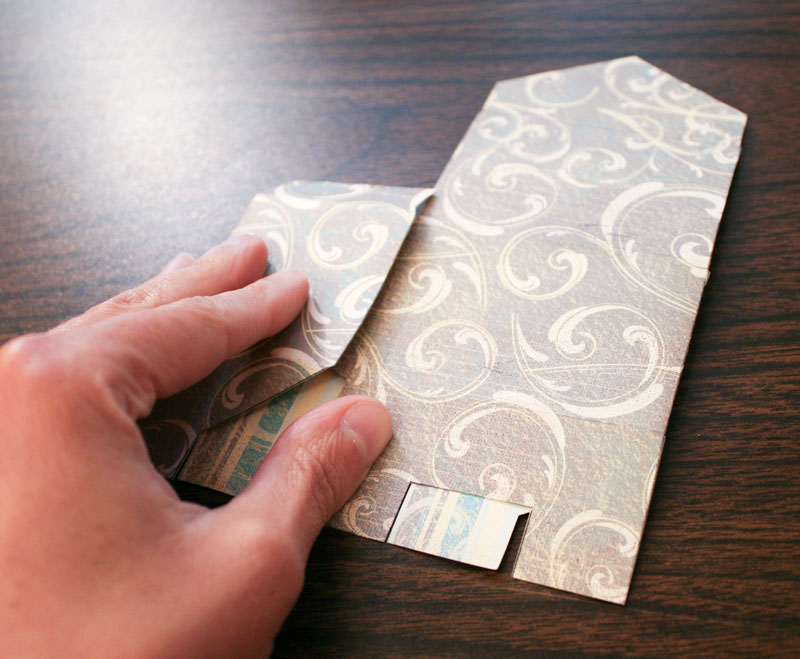
Now apply some double-sided tape along the tab.
Lift the left end of the box and bend it along the first fold line, and press in place onto the taped tab. When folded, it should meet the other end of the box perfectly.
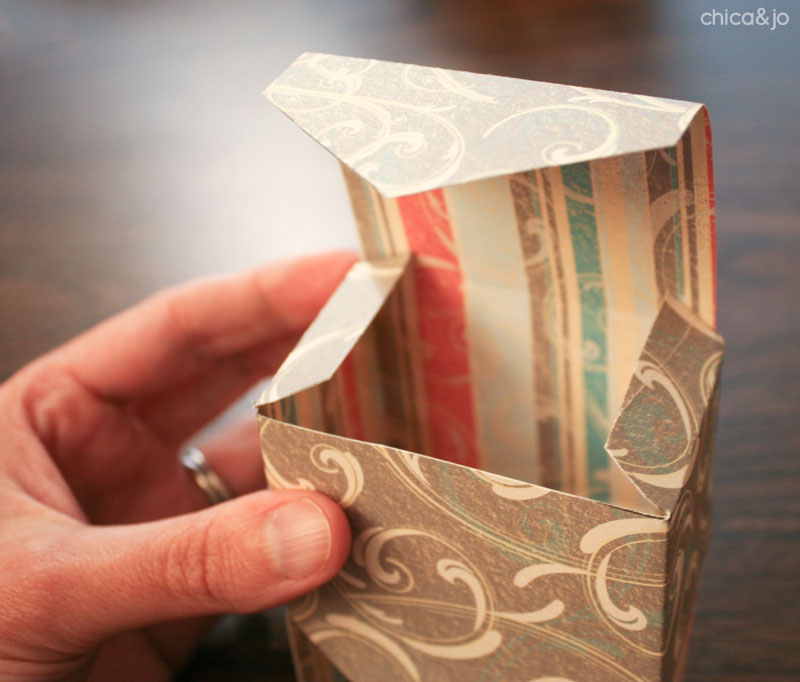
You now have a nice box shape forming.
Closing the top of the box is easy — just bend in the two side flaps, then tuck in the lid.
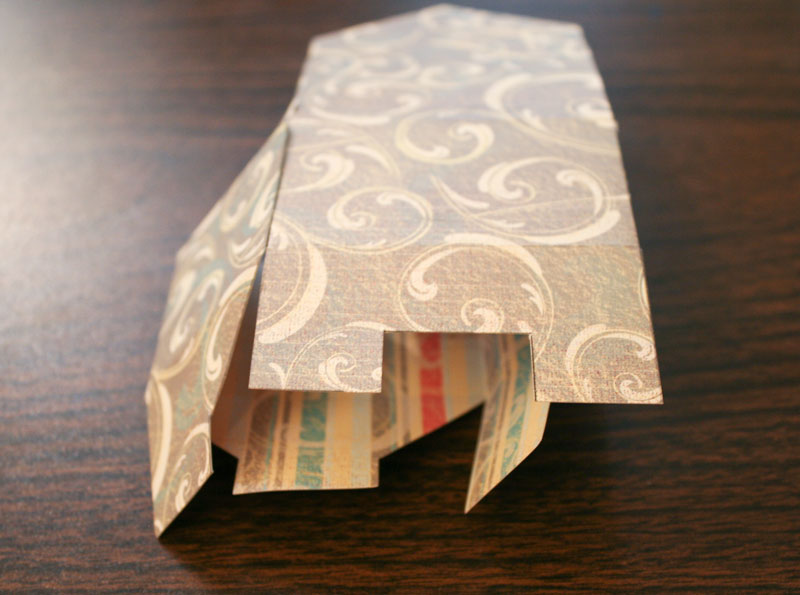
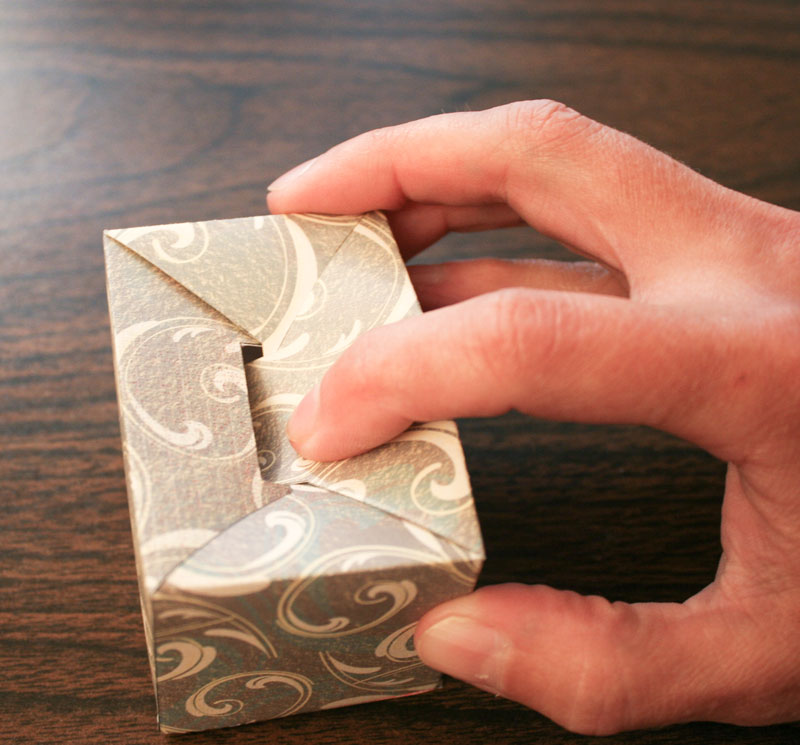
Now put it top-side-down so you can close up the bottom of the box, which is a little trickier. Start by folding in the square flap that has the notch in it.
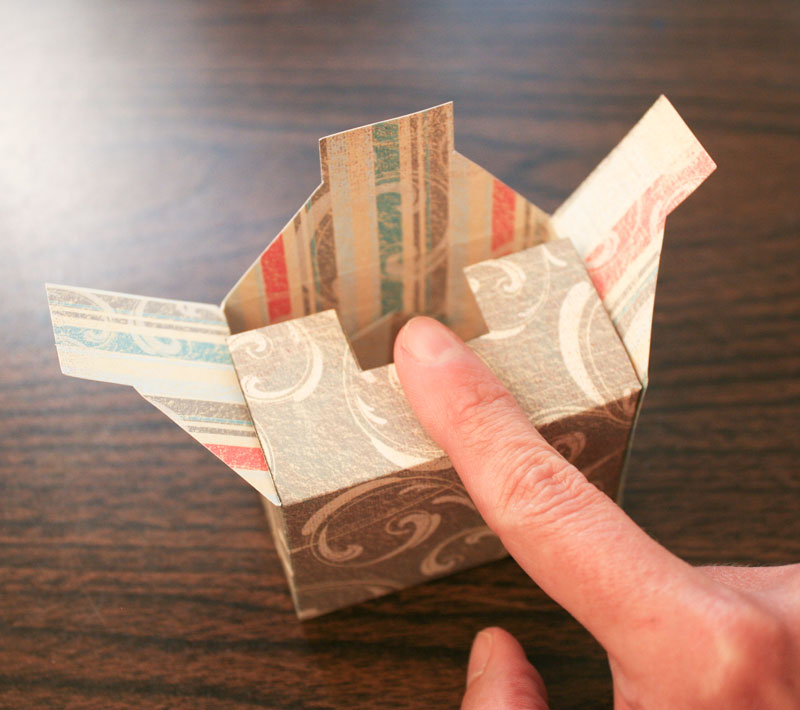
Then fold in the two side pieces.
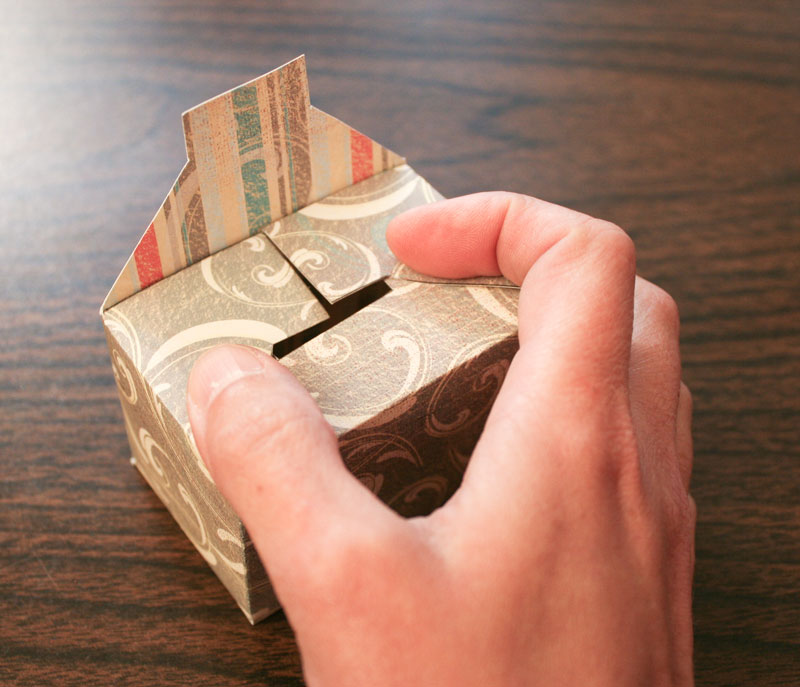
Now fold in the fourth flap, and gently push it down at the center until you hear a slight snap as the tab pops into the hole. When you release pressure, the flaps will move back in place and you'll have a nice, smooth box bottom.
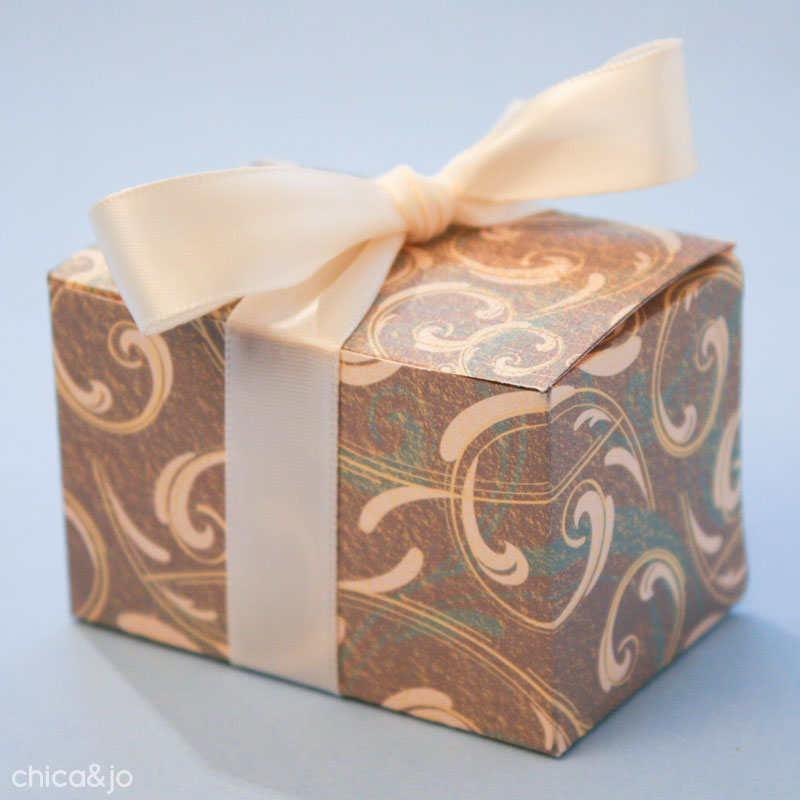
Ta-da! The box is done and ready to fill with goodies and tie up with a ribbon or any decoration you wish.
similar projects
Free Tri-fold Wedding Program Template
7 Lottery Ticket Wedding Favor Ideas

Pie Slice Box Template for Thanksgiving


19 comments so far:
These are just the sweetest boxes I have seen. I love them! Great job and very creative!
Beautiful little box! It would make a great way to package polymer clay jewelry for gift boxes. Thanks for the idea!
Definitely using this for my cookie packaging for our cookie swap! Thank you so much!
this is crazy CUTE!!!!!!!!!! Totally love it! Thanks so much for sharing!
These are going to work great for my daughters Valentine gift for her class. Thanks for all your great ideas.
great idea. I am making these little boxes as a bridal shower favor for my sister. I am going to make homemade tea bags and have the girls fill them with different ingredients. These boxes will be the perfect thing to put the tea bags in!
Hayley, that is a gorgeous idea. We'd love to see how the tea bags come out. Please share a photo after the shower if you can!
These are some fantastic ideas. You have inspired me. My daughter is getting married in June and we will be using the the wedding program template and the wedding favor boxes. Thank you so much for sharing your projects. Do you have any ideas for making wedding favors? Some of those would be really helpful, (giggle), as if you haven't already been. You seem to be really savvy when it comes to being creative. I appreciate your input. ☺
Hi Rose! Thanks so much for the kind words about our site. We're always coming up with new ideas, so keep checking back and maybe you'll see something from us soon. Good luck with the wedding!
This is great!! Thank you so much!!
This is the best instructions I've gotten on how to fold a box, and I've looked at a lot! Thank you so much. I plan on making them for my sister's wedding next year. Patricia
These are super cute! I am getting married in Feb and will be using these for our wedding favour box. We are going to use black with black ribbon and put some lovely mints inside. I just had a go at making one it was pretty easy and looks really good! Thanks so much for sharing :o)
This is a great thing to do I'm having a quincienera (sweet 15) and I am planing to use this for my party favors im just going to buy some stickers with my picture and stick them onto the party favor boxes which i plan to make blue. THX SOOOOOOO Much
Isabel, sounds like a wonderful favor! We'd love to see a photo of what you create. Congrats on your Quincienera :)
This pattern is fantastic! I reversed it in order to be able to print it on the back of the card stock as it made it easier to see to cut it out. The instructions were perfect and the boxes turned out great! I made 30 of them for baby shower favors. (The theme was "B" is for boy.) I used a mix of geometric navy/white patterned card stock then glued on little "collars" and ribbon bow ties/regular neckties. They turned out great. Thanks so much!
This is such an awesome design. Can't wait to make them for my wedding. I plan to fill them with flower seeds and bulbs!!
Thank you soooo much! I got cardstock on sale 2 packs for $1.18 at Michael's Crafts & 2 spools of ribbon for $2.30... so the $50 nightmare price for the boxes i wanted became a $3.50 Reality! THANK YOU SO MUCH!!!!!!!!
Emmi, so glad we could help make these boxes affordable for you. You got a great deal at Michael's, too!
Thank you so much for the gift box pattern and directions!
I am going to make these up and put "bird" prints or rainforest designs on them and make them into "foraging" toys for parrots and other exotic birds!
Foraging toys are boxes or other items filled with treats and other things so that the birds have to work to find their treats and stuff! Just like in the wild. They can also be filled with shredded paper and other stuff that they can rip apart.
These toys normally would cost you $8 and up to sometimes $20-$25 a toy!