


Make a Trash Bag for the Car

Trash always seems to collect in my car and it drives me crazy. Only so much can fit in the ash tray, and I hate to leave papers and wrappers on the floor, so I began searching for a little trash bag to keep in the car. I couldn't find one I liked until Jo showed me the one she has used in her car for years. She loves it, but it's starting to fall apart, so I decided to recreate the design and make one for her and one for me. The bag I made is easy to put trash into, easy to empty, easy to keep clean, and so cute! And because I used upcycled materials I already had on hand, I actually saved trash from the landfill while I was at it!
Gather the supplies
You'll need two 17" x 17" squares of fabric. You can use just about anything you want, but I recommend choosing something that you can wipe clean. A rip-stop nylon or oilcloth would be nice, as would a thin vinyl. (If you really want to use a nice cotton or other fabric, you can, but you'll have to resign yourself to never putting DIRTY trash in your bag, or else it will get stained quite quickly!) I chose to use an old vinyl tablecloth (the kind with fuzzy white "fabric" on the back) that had a tear in it. The vinyl can be wiped clean with a sponge, which made it a perfect easy-to-clean material for the bag. Some other good upcycle options would old tent material or the fabric from a broken umbrella.


You'll also need a 14" piece of wide ribbon to match. I chose a bright orange ribbon from my stash, which matched the cute hibiscus pattern of my tablecloth. For the bag's closures, you'll need a 1" piece and a 6" piece of sew-on Velcro and about a foot of 1/4" wide elastic. And of course you'll need the basics like scissors, straight pins, a ruler, thread, and a sewing machine.


One last thing you'll need is something to give the top of your bag rigidity. The store-bought choice here would be boning but there are lots of creative options around the house. You just need something that's long and tubular, and that's flexible enough to bend, but firm enough to hold its shape in a circle. I used a piece of old electrical wire that I found in a big bundle in the garage. You could also use coax cable, a piece of a scrapped extension cord, or anything else you can find that will work. Just be sure it's not any wider than a drinking straw. Cut yourself a piece at least 18" long.
Attach the strap
Take one end of your ribbon and fold it over about a half inch. Pin in place. Now place the ribbon on one of the pieces of fabric so that the folded edge of the ribbon is positioned 4" down from the top of the fabric and the left edge of the ribbon is positioned 3" away from the left edge of the fabric. Pin in place.


Take it to the sewing machine and sew a 1" square of stitches to secure in place.

Now fold and position the ribbon as shown in the first photo below. Fold the last 1/2" of ribbon over and pin in place. Attach one side of the 1" Velcro piece to the end and pin in place. Use the sewing machine to sew the Velcro to the ribbon, using a square of stitches like the one you made before.


Take the other half of the 1" piece of Velcro and position it so that the bottom edge is 4" from the top of the fabric and the right edge is 3" from the right side of the fabric. Pin in place, then take to the sewing machine and sew down with another square of stitches.


Form the bag
Bring the right and left sides of the fabric you've been working on together so that the entire piece is folded in half, inside out. The handle should be hanging out the top. Sew along the side. Repeat for the other square of fabric.


Turn the second piece (NOT the one with the handle) right side out and put it inside the first piece. Line up the top edges of both pieces (at the end closest to the handle) and pin them together.


Sew the edges in place. If your sewing machine has a removable base that lets you convert to a "free arm", that will be very helpful here.

Now turn the bag right side out so that the fabric with the handle is on the outside and the other piece is forming a lining for the bag.

Use your sewing machine to sew a seam 1/2" from the top of the bag, creating a pocket where you'll later add the elastic.


Now sew another seam a couple of inches from the top, as close as possible to the sewn edge of the ribbon handle. The seam should also line up right above the Velcro that holds the other end of the handle in place. Sew the seam all the way around the bag.


Sew another seam about 1/2" from the last one. This will create the pocket where you'll later put your cord/boning/wiring to create the top edge of the bag. Be sure to make this pocket wide enough to accommodate whatever cord you're using.


Create the bottom closure
Put the bag so that the back side (with the handle) is facing up, with the seam right down the middle.

Put the 6" piece of Velcro so that it is centered from left to right and the top edge is positioned 4" up from the bottom of the bag. Pin in place, then sew with the sewing machine. Make sure you do not sew through both sides of the bag, but instead treat it like a tube or sleeve. The "free arm" on your sewing machine is going to be crucial here.


Now you want to finish the bottom of the bag by turning the fabric in on itself and pinning it in place.

Sew the pinned edges with the machine, again using the "free arm" and treating the bag like a sleeve.


Flip the bag over so that the Velcro you already attached is face down. Then place the matching piece on the bottom edge of the bag, centered from left to right. Pin in place and then sew with the machine.


To close the bag, just fold the bottom edge up twice and let the Velcro hold it in place. Having a bottom on the bag that's easy to open and close makes it that much easier to empty the trash when the bag is full.


Create the top closure
Now it's time to take care of the top of the bag. Start by flipping the bag inside out (so that our cuts are hidden inside!) and use a craft knife to cut a tiny slit in each of the two pockets you sewed.


Take your cord/boning/wiring and push it into the pocket furthest from the top of the bag, and keep pushing until it goes all the way around the bag and comes back out the slit on the other side. From here you can cut the ends so that they are even, or if you can manage, cut them about an inch longer and let the ends overlap each other, adding a little more stability to the loop. See the yellow markings in the photo below for details. If you chose your cord well, the bag will stand up on its own now, but still be flexible.


For the final closure, attach a small safety pin to the end of your 1/4" elastic and use that to help you push the elastic through the pocket on the very top edge of the bag. When you're all the way around, pull the elastic back out the same hole.


Tug on both ends to pull the top of the bag closed, then release tension to allow the elastic to relax. Tie the ends in a knot and trim off the excess.

The finished bag
You're done! Now you've got a cute bag that's ready to hang from the headrest in your car. You can easily shove your trash in the elasticized hole at the top without fear of it spilling out. Then when the bag is full, just open the bottom and shake the trash out into the trash can. So easy!


similar projects
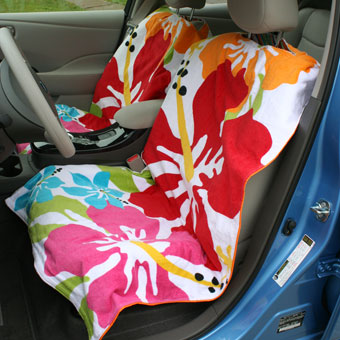
Make Your Own Quick Car Seat Covers
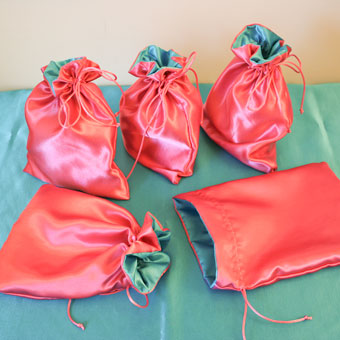
How to Make a Drawstring Bag
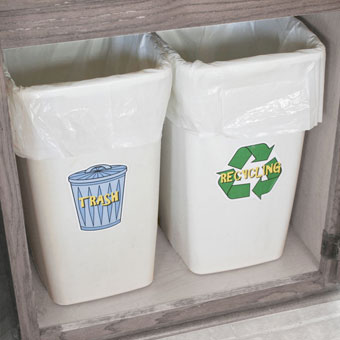
Labels for the Trash and Recycling Cans


23 comments so far:
Oh I love this!! I just wish I didn't throw out my old table cloth already. I am alway just hanging a plastic grocery bag over the arm of my seat. This would look so much nicer and my kids can reach it too!!
Thanks for such a great tutorial.
Katrina
Hi Katrina! Thanks for the nice comments. Tis the season for yard sales, so keep an eye out and I bet you can pick up another tablecloth for less than a dollar :)
Brilliant!
Awesome! I love the design! I'll be linking!
I am taking my kids on our first ever road trip, 16 hours of driving this weekend! I just whipped up window shades, neck pillows, car bibs, and happened upon your site right as I was trying to solve the trash problem. I love it! I am going to get out my tablecloths right now! Thank you for sharing.
Andrea, I'm glad you found us in time!
Great idea. I am putting this on my list of to-do's this summer. Thanks for the picturees and clear instructions. I really like the opening at the bottom of the bag - so easy to throw the trash away.
I just made two of these for my twins... the second one I didn't pay enough attention when sewing on the velcro and put in on backwards.. but it's still functional..
You can see pictures at
http://maplecreekracing.com/mcrblog/?p=2949
It was part of my Tackle It Tuesday. I was going to combine two different instructions but went primarily with your instructions..
:)
carol
Those look great, Carol. Thanks for sharing!
This is just want I was looking for. Thanks so much f/sharing it. I really appreciate it!!!
This is so cool! I just wanted to say that if you wanted to use a nice fabric for the bag, all you would have to do is put a plastic grocery bag inside of it so that the trach won't touch the nice fabric, and the cleaning will be even easier.
Great tip, Ronnie. Thanks so much for sharing!
Hi! Thanks for sharing this. I am going to be featuring this post in my weekly newsletter that will be going out this Monday. You are given full credit and a link back to your website.
It's like free advertising for you!
If there is a problem with me linking to this post, please let me know and I will remove it.
Thanks again for this great tutorial!
Hi Jennifer. We're happy to have you link to our tutorial in your newsletter. Thanks!
So I'm thinking it could be cool to use fused plastic bag material instead of a table cloth-then it's free and reusing! Hmmm... I'm sensing an experiment in the near future...
That's a wonderful idea, Sheila! If you try it out, please send us photos so we can see the finished product :)
Yea! I was about to try and reproduce the one I have to make for gifts. And then I thought, "hmm, maybe Mr. Google already has a tutorial." Sure enough, here you are! Thanks!
I just made one of these for my husband, and he loves it! I'm about to make another for a friend. I left off the elastic and the boning, but it still works well.
Also, I made the inside/lining layer from fused grocery bags, from another Chica&Jo tutorial. It worked out great! I tried to use thinner grocery bags, which failed miserably, and then I tried to fuse the plastic to the fabric, which also failed. The plastic stuck to the fabric decently (I could peel it off like a sticker), but it shrank up instead of just sticking, which made the fabric curl up and wrinkle. Not good.
I finally just made a big piece of plastic from Target bags and used it like another piece of fabric. I snipped off the handles and the bottom seam, then up one side and folded it in half so the printed sides were to the inside (otherwise the ink comes off). It's wide enough but not long enough for the trash bag project with just one, so I overlapped another bag (cut and folded the same way) by a couple of inches to make it longer. It was relatively easy to work with for this project and sewed onto the fabric just fine.
The only thing that gave me trouble was that the plastic wasn't completely flat but curled a little. I ended up just making do and making a little fold like a pleat to make it straight where needed.
Thanks so much for sharing your creativity with us!
Meredith, thanks so much for your comments, and we're glad you enjoyed this project. I love the idea of lining the bag with fused plastic, which we we showed you how to make in our fused plastic sandwich wraps tutorial. It's so awesome when you guys find ways to combine our projects into one!
Love your idea. Try that plastic webbing stuff used to hold cartons together in place of the boning, cord, or wiring. It's flat and gives a crisp edge to the top opening.
Great idea, Donna. Thanks for sharing!
I am going to make this for my car and one for daughter's, grand daughters and daughter in law and grand daughter in law
I am always using a grocery bag and hate them.
love your site and love your ideas
Great idea and easy to follow instructions. Made one today for my car. No more hanging grocery bag for me.