


Make Coasters from Curling Ribbon

Sometimes genius can sprout from boredom, and you end up transforming ordinary craft supplies like ribbon into a unique piece of DIY decor. This happened to me years ago when I was a college student, working part time in a card store. One day on the job, I was fiddling with the curling ribbon we used for balloons. As I twisted and curled it in my fingers, I found myself rolling it into a tight spiral. As it grew and I added more colors, I soon realized I had a really cool design forming, and without too much effort I would have a spiral of color large enough to use as a coaster. Eureka! I bought some rolls of ribbon and that weekend I sat down and made several fun coasters by carefully coiling the ribbon around itself.
Making coasters out of curling ribbon is super simple, and very customizable. You can use scraps of ribbon saved from packages or balloons, or purchase a few big rolls of inexpensive ribbon in exactly the colors you want. As long as your ribbon is all the same width (standard size is 3/8"), you can use up whatever you've got. (P.S. Hit up the store clearance shelves after big gift-wrapping holidays like Christmas!)
To start your coaster, just grab a piece of ribbon and roll the end up as tightly as you can. You have to have nimble fingers and be patient, but eventually you'll get a nice tight spiral of ribbon. If you have trouble starting the coil, try wrapping the ribbon around a toothpick and pulling it tight.
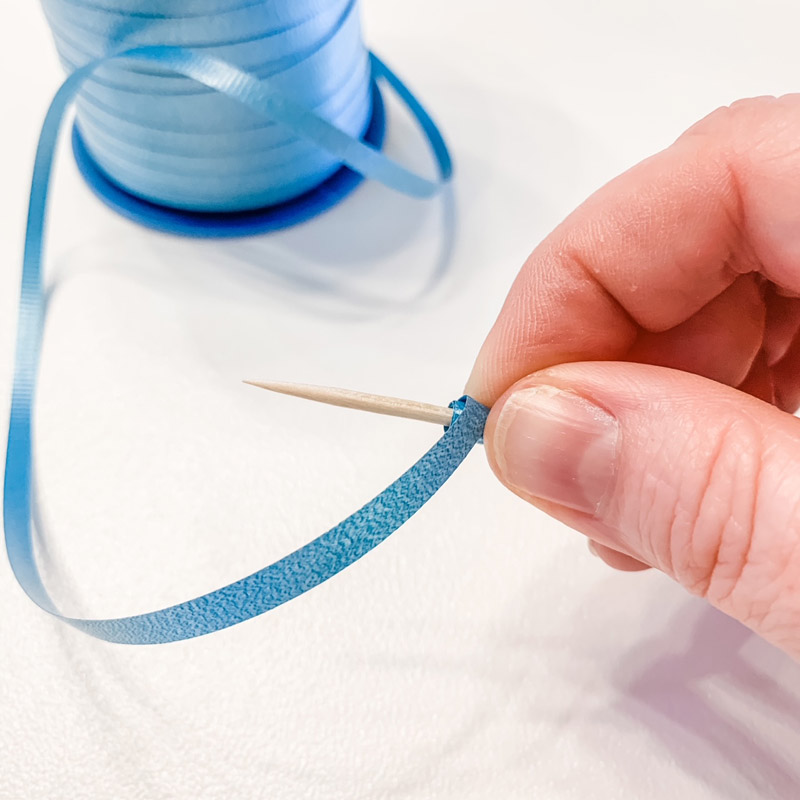
Once you've got a coil about a half inch or so in diameter, cut the ribbon off and use a tiny piece of tape to tape the ribbon on the side of the spiral. Now breathe a big sigh of relief, because the hardest part is done!
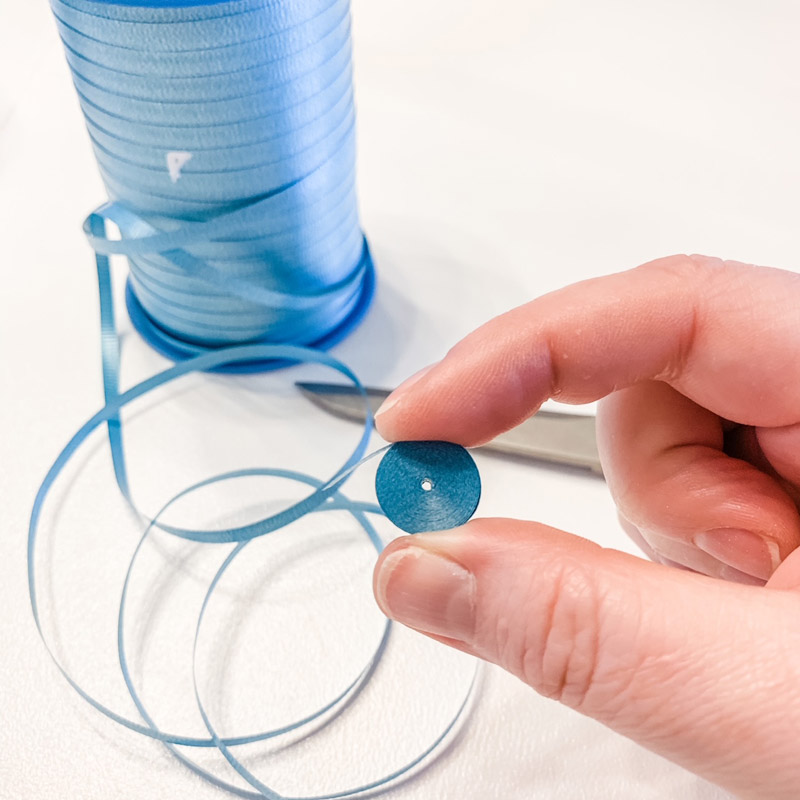
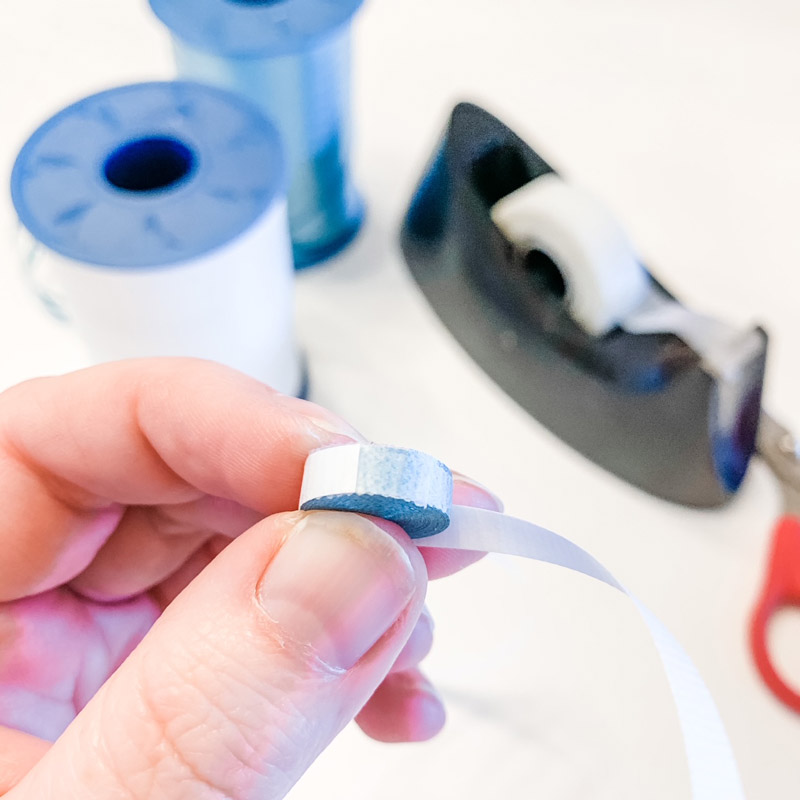
Now for the fun part. Pick your remaining colors and tightly wind them around and around the coil. Each time you want to change colors, cut off the current ribbon and tape the end in place, then attach a new end with another piece of tape. The tape you use should be regular household tape, and you'll need to cut it into tiny strips that are more narrow than the ribbon itself. You need to make sure the tape doesn't stick out past the ribbon on the top or bottom of the coaster, or else you won't have a nice smooth surface.
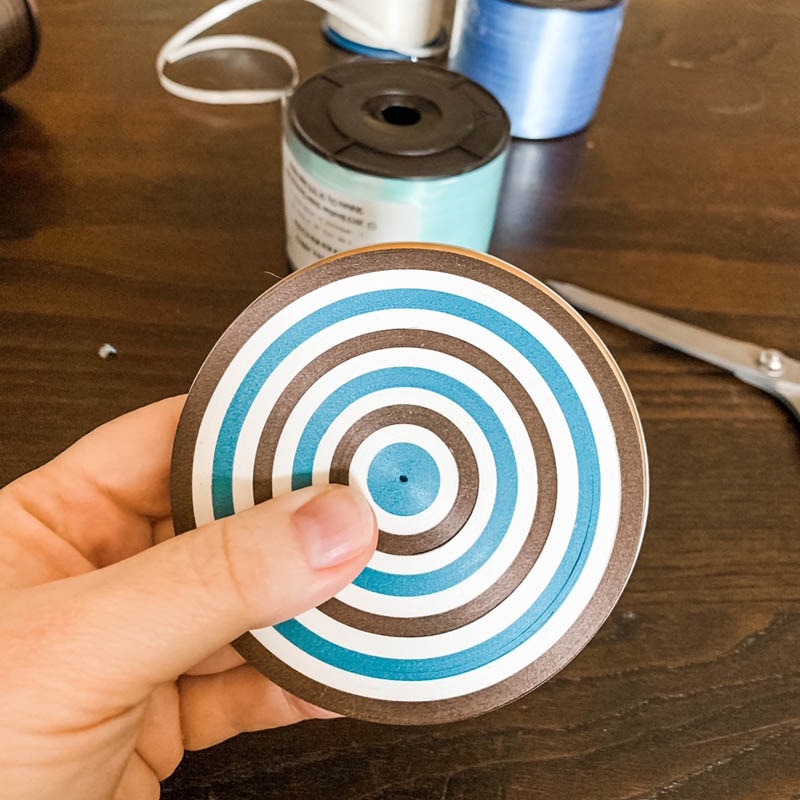
Once the coil gets over an inch or two wide, you may find that it's too hard to hold in your hands and wind, so just place it on the table and keep on wrapping. You need to wrap tightly, but don't strain or pull hard, Just make it tight enough to be able to pick the coaster up without the coil falling apart.
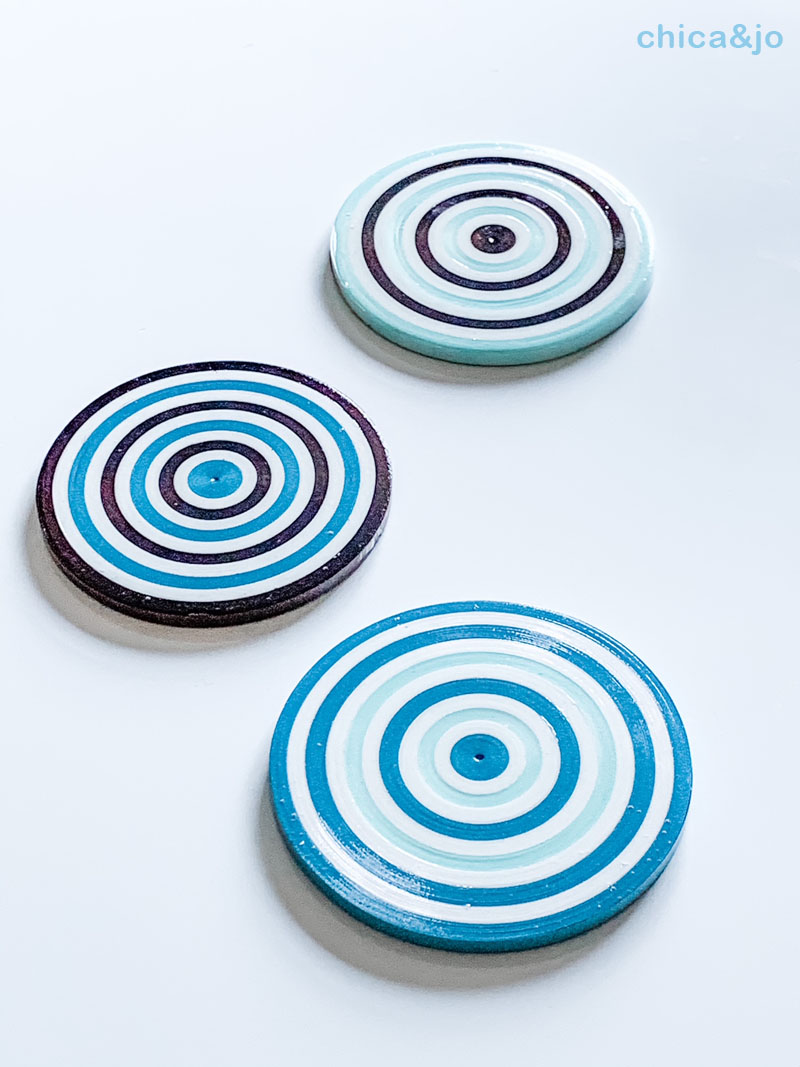
You can see a lot of potential fun here with patterns and colors. You can make each stripe the same width, or random. You can use a couple of colors or many. Your only limit is your imagination! You can stop winding ribbon whenever you reach the size you like (4 or 5 inches across is a good size for a coaster).
These coasters won't last very long as they are, so we need to protect them. The easiest and most effective way to do that is to coat them with polyurethane (or any clear sealer that will make them waterproof or at least water-resistant). You can find polyurethane in the hardware store or the craft store, and it's available in spray or brush-on varieties. You'll want to apply several coats, until you get a nice, thick, glossy finish and the ribbon is sealed together very well. Coat the top and bottom and don't forget the sides!
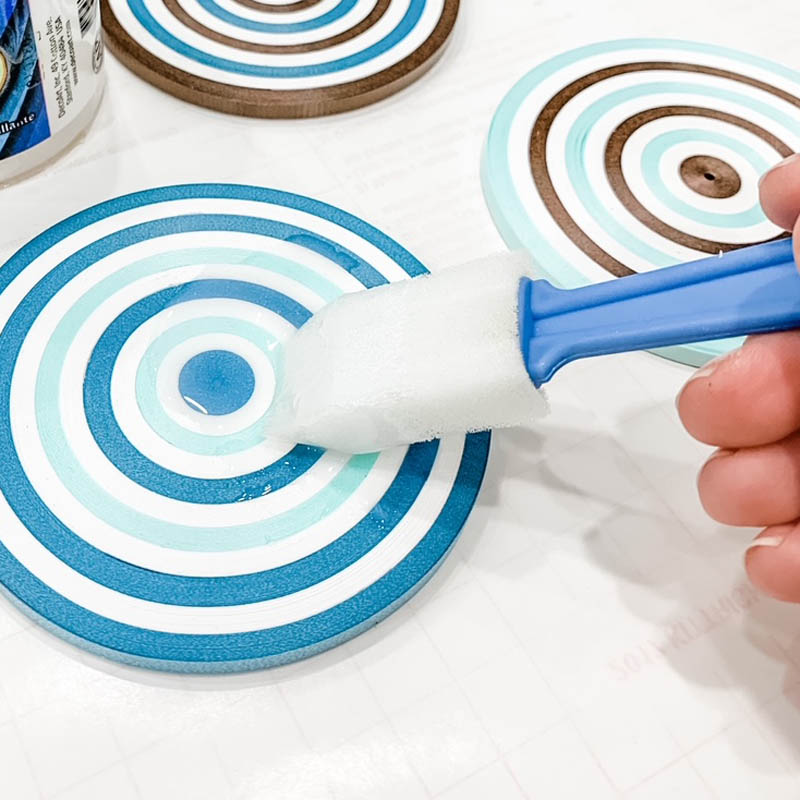
Let the polyurethane dry thoroughly before using the coasters. It will be dry to the touch after a few hours, but it may take 2-3 days to fully cure and be rock hard.
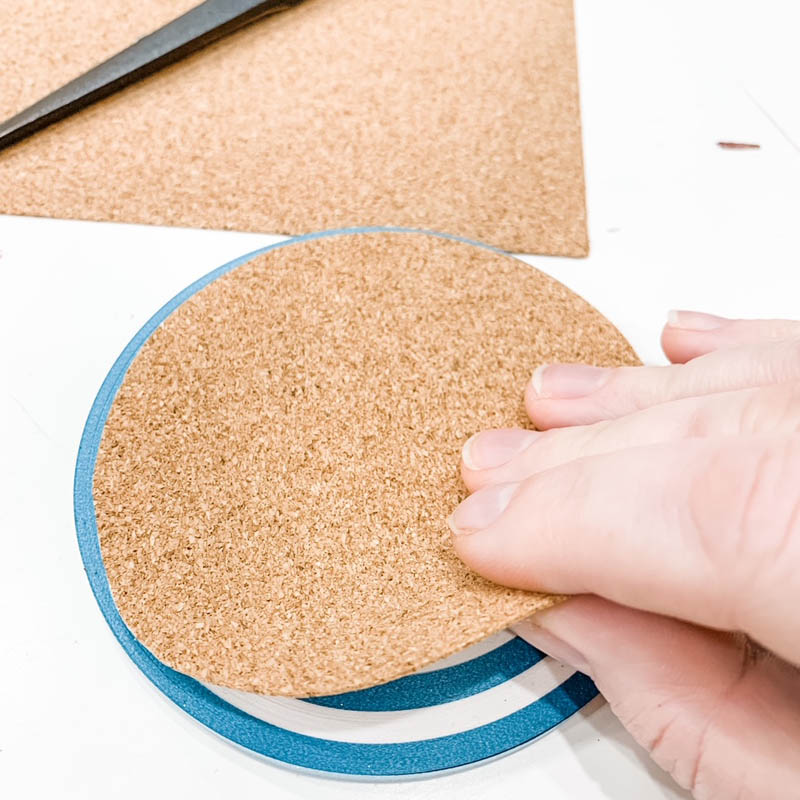
To finish off the coasters and better project the surface of your table, you can add some cork to the bottom. Place your coaster on a cork sheet and trace around it with a pen.
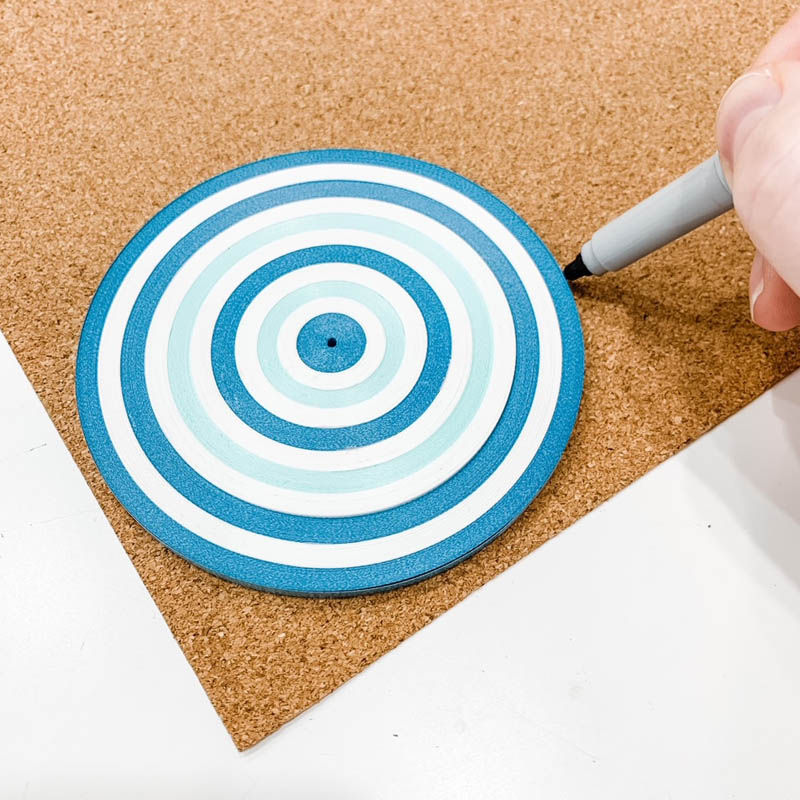
Then use scissors or a utility knife to cut the cork about 1/8" inside the line, so that it's a little smaller than the coaster. Use your hot glue gun to glue the cork onto one side of the coaster, pressing and holding in place until the glue is cool.
Voila! You're done! Just wait til your friends see these awesome coasters on your table. It's fun to see people guess what they're made of.

similar projects
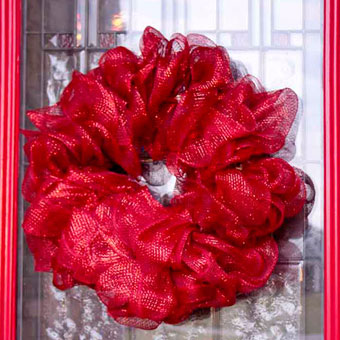
How to Make a Mesh Ribbon Wreath
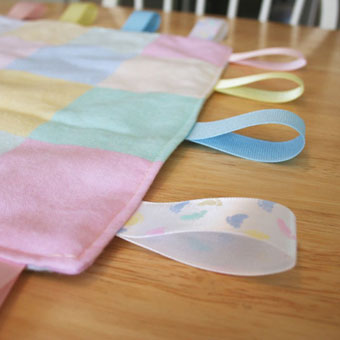
Ribbon-embellished Blankets
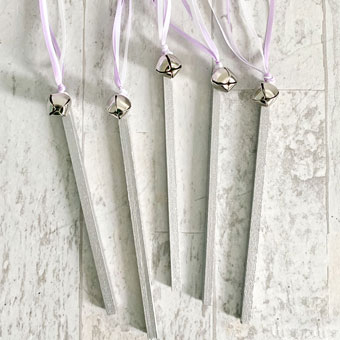
Ribbon Wands with Bells for a Wedding Send-off


76 comments so far:
WOW-these are GORGEOUS! I love the colors and shine! Thanks for sharing.
I love these! Thanks for the idea! I'll be looking for curling ribbon at yard sales this summer.
These are the most gorgeous coaters I have ever seen! I told my hubby I have to make them and he looked at me weird, it figures. I always find curling ribbon at goodwill and I never buy it, guess I will now.
I love this idea-and I admit I love curling ribbon too-perfect :)
Beautiful and creative idea. Will definitely try it out soon and send you pictures :)
Wow...this is a really creative idea! Thanks for sharing!
Those are so cool. I am totally making them!
What the coasters are so gorgeous.They look fun to make can't wait to try them. Thank you for sharing them with us.
These are so cute! I can't wait to try this!!
These are SO awesome!!
This is so cool! This would be a perfect time-killer, and a good way to get rid of all the ribbon laying around. Thank you so much for sharing this.
So much curling ribbon! Those look amazing and must have taken some serious patience.
OMG this is a great idea for making record-esque coasters! wow.... ill have to find some black curling ribbon. ;)
Rachie, I love that idea! If you make them, please share photos with us :)
Very cool looking! Actually I have been collecting curling ribbon...he he! I have gotten them on baby gifts etc. and thought they were too prety to throw away. Now I have a good use for them! Thanks!
aw man! I'm making one right now and it is so pretty!! I'm going to turn mine into Christmas ornaments and wrap the last outer edge with a shiny gold curling ribbon for an extra touch!
Just a quick question: Do you think I should put the screw-hook in before or after the poly coat? is the poly coat too hard to put a small screw-hook into?
Thanks for the awesome idea!
Wow, Lauren, what a great idea to make ornaments! I think I would put the screw hook in before the poly coat. That way you have something told hold on to (or hang it from) when you're applying the poly, so that it doesn't touch the table.
Please send us photos or post them to our Flickr group when you're done. I've just got to see them!
Thanks for the really quick reply! Oh great idea hanging them while drying, duh. I'll definitely add some photos to your flickr group when I'm all done! I'm going to the hardware store tomorrow to pick up some things and I'll get the poly then. I'm really excited! I can't wait to give these all to my friends and family!!
I thought of more ideas while making my second one. If you make them a bit smaller they can be earrings and you can make a matching necklace pendant if you want or link a bunch together and make a charm bracelet. Or you could turn them into buttons or barrettes!
I also wonder if there would be a way to make other shapes like ovals or triangles by using a piece of card stock to hold the shape in the middle and then pulling it out later. The ideas are endless! Ha Ha!
You are a clever one, Lauren. Let us know how those fun ideas come out :)
amazing idea, i am going to do this but do them about 6x and then make smaller and just different varying sizes and use them as a wall decoration.
hey, just wanted to say I added some ornament photos to your flickr. It's just the first batch and I plan on making tons more! I hope you like them!
I'm new at this and I just made 10 coasters for an upcoming party. I know nothing about finishes and I used this polyurethane http://www.minwax.com/products/oil_based_clear_protective_finishes/fast_drying_polyurethane.html to cover them. They are all sticky and not dry after 3 hours. Now I am worried that they won't get hard because this finish is made for wood. If they are ruined, I have no other ideas for my craft!! I'm panicked!!
What a fantastic idea for making the coasters into ornaments for the tree! They look so great! Hey, readers, go check out Lauren's curling ribbon ornaments!
Elissa, most polyurethane is intended for wood, so that is not a problem. However, 3 hours is nowhere near long enough to let it dry. The instructions for the brand you linked to say that it takes 24 hours to dry hard enough for light use, and I have experienced the same type of times in the past. Just be patient and eventually it will harden up :)
Elissa, I used a minwax poly as well. I used the water based one because the drying time was halved and for easier clean up. They came out beautifuly. I let them dry outside over night each time I put anew coat on them. Good Luck.
I love these! They take a lot of patience. They are really fun and pretty. If you don't have cork, you can use old coasters instead!
These are so cute! What a clever idea. Thanks for such a great tutorial!
I'm about to make a set for my boyfriend's apartment in black, dark blue, and bright green. And if all goes well a set for my mom in more fun, bright colours :D
Nicole, we would love to see your finished coasters!
I made a few of these, and I found that polycrylic (instead of the polyurethane) worked a lot better for me. The polyurethane yellows a bit when it dries, so my colors - especially the white - weren't as vibrant as I was hoping. The polycrylic dried glossy and completely clear, and it has a faster drying time as well, though I think it took me a couple of extra coats.
Ana, thanks for the helpful suggestion!
Got so excited about,getting started i stayed up all night..Showed my test projects to my teenager..She says they look like ribbon lollipops.Now we're adding gold thread and popsicle stick.They turned out so well..Great idea.Keep Crafting..
Mellisa, we have got to see those! Please send us a photo or add one to our Flikr group. What a clever idea!
gave you an award at my blog
kimboscrafts.blogspot.com
Oh my goodness.. So creative!!
How clever and very pretty. Thanks for the instructions. How often beautiful things are made of the simplest products. Joyce
I love this project. I can't wait to try it out. I just need to stop on my way home and pick up some ribbon. Thx for the great idea!
HELP!! I made 2 coasters that looked great until I put the polycrylic on them. In a couple of places, the ribbon buckled or drew-up or something. Has this happened to anyone else? Does anyone know why this happened? (They were tightly wrapped....so I don't think that was the problem.)
Lori that sounds really strange, and I have not seen that before. You're sure the ribbon was plastic and not paper, right? I could imagine paper buckling with the moisture, but I plastic shouldn't. Hmm... Was your first coat of polycrylic nice and thin? If you applied it too thick, maybe that would cause the buckling?
I just double-checked...I used polyurethane and not the polycrylic. (I don't think that's the issue, though.)
Chica...I did use the plastic ribbon. Maybe I did apply it too thick. I remember thinking that the ribbon really seemed to soak up the polyurethane and that I couldn't even see where I had applied it. I added more poly until it looked "wet." I didn't think I was using too much, but I've never used polyurethane before....lol! Do you remember how many times you had to do a coat before the coasters got so shiny and amazing?
You definitely want to apply the polycrylic / polyurethane thinly, especially for the first couple of coats. It might take between 5 and 10 coats to build up a really nice, smooth sheen.
Thanks, Chica. I'll make a new one, try again, and report back. :-)
Great job, Tiffany. Thanks for sharing!
I'm totally making these for my coaster obsessed friend for her birthday!!!
These coasters are beautiful, thank you for sharing your idea with us. Best Wishes, Lynda :-)
You could also put poles in the bottom and they could be candy suckers
Do you think that you could use Mod Podge to coat it instead of poly?
Hi Ayla! I would not use regular Mod Podge on the coasters, because it is not waterproof and the moisture from a wet glass would cause it to dissolve and get all gummy. You might be able to use DecoArt Outdoor Decou-Page, though, because it's water resistant.
I made a couple of coasters with a wider ribbon and after applying the polyureathane there were gaps in the roll. What would cause this?
Taylor, I would guess that one of the following things went wrong: 1) you didn't wind the ribbon tight enough 2) you put the poly on too thick or 3) the ribbon was some material other than plastic and absorbed some of the poly.
Fantastic idea!! Thanks so much for sharing!
really fun thing to do when I get board around the house and tryed it right after I found out about it!!! love it!!!
I am interested in making some of these, on average how long does it take to make one?
Steven, you're probably looking at about an hour or so, depending on how big you make the coaster and how fast you work!
I love these. I am off to the dollar store tomorrow to pick up some ribbon. Thanks for sharing
These coasters are really neat. I'm gonna try and make some this week. I love new craft ideas. Accidental craft ideas are the greatest. Look forward to seeing more of your ideas Chica and Jo!
Tracy, you're right -- accidental craft ideas are the greatest. Our recycled phone book pen organizer was the same sort of thing. We hope you continue to enjoy watching our craft collection evolve!
This is a great idea! I'm going to have to try this, I also love the suggestion to make them into Christmas ornaments! Do you know where I can get a big spool of ribbon cheapest? It always seems so expensive and short.
I'll be posting once I've made them!
thejanuel.blogspot.com
Januel, look at your local party store on online for 500-yard spools of curling ribbon, which are usually under $10 and are an affordable way to get a lot of ribbon at once.
Great idea for football teams i.e. Red, White and Gold for the 49ers! :)
Anjie, I love that idea!
Very cute! I would have never thought of something like that!
How creative! A great idea. This is such a useful craft idea. It will be great as gifts. I can't wait to try it out in my own living room. And, as one of your comments said it would be great to work up with some team colors. Thanks.
Ihave made heaps of these ad i tried doing a loveheart instead of circle and it looked great!
I just started making some of these tonight (they're so cute!). My boyfriend and I made 4, although as we're polyurethane-ing, one was lost to battle! As a few other people have mentioned, my ribbon on one coaster sort of "bunched up" and created little gaps in the coaster. It would probably still be usable, but the others are so pretty I think I'll toss that one. I have lots of ribbon, so I can make more! I used the correct kind of ribbon, so I think it bunched due to a combination of being too loose (it was the last one I made and my hands ached a little) and too much polyurethane. I was worried about that one, so I gooped it on a little.
I'm sort of learning as I go, but I would love more specific directions on applying the polyurethane. For example, I'm applying a thin coat to my coasters every hour. Tonight I plan on doing 4 coats and seeing how they look... The original plan was to do 4 coats on the top tonight, 4 on the bottom tomorrow, then 4 on the edges the next day. I may adjust if need be, though! I don't know if this is the correct way to go about this, so I would love some more specific directions.
Amanda, lots of thin coats (rather than one thick one) is always the best approach with polyurethane, and this project is no exception. It takes patience, though! It's hard to give specifics because every situation may vary, but it sounds like you're on track with what you're doing. I think you're right that the bunched up ribbon was due to it being too loose and too thick of an application of poly, both of which will contribute to warped ribbon. Glad you're enjoying this project, and we'd love to see photos of your creations if you want to share them in our Flickr group for reader photos.
I just came across these terrific curling ribbon coasters. LOVE THEM!!!
What a great site. I have to come back soon !!
Hi, I I just love your ideas and these coasters are gorgeous. I am curious as to why they won't last if you are putting polyurethane on them?
Jennifer, I think you misunderstood my comments. I said they won't last long are they are (unfinished), so we put the poly on to protect them, so that they WILL last :)
wow i have to try this at home they are so cute. and to think that i have the ribbons just lying around the house. thanks for the info
Thank you for sharing. I just made 16 two sets of six that are different per set and then a set of 4 which all designs are different. I just put mod podge on them and will do the sealant. I am using them for my Christmas theme I did apple green and white. I only bought one roll of apple green, I had the white on hand. I wasn't sure I would get through it with enough however, I did. I found it hard starting out and almost gave up but I kept going. I had one that the ribbon popped out twice on and I had to start at the beginning two times. Then the ribbon kept twisting so I had to cut and start again some times. I just ordered cork for the bottom already shaped from Hobby Lobby as I don't have one close and Michael's did have the already cut cork.
I just reading the comment about the sealant and the problems people are having. The one that I saw on Home and Friends used regular mod podge first. Maybe that would help from it causing problems.
Diane, we do not recommend Mod Podge on coasters, because it will absorb the water and become gummy. Polycrylic or polyurethane will provide a much more water-resistant surface. You might also have good luck with DecoArt's Outdoor Decou-Page because it is water resistant. By the way, what is "Home and Friends"? We'd love to see what they've done with our coaster idea.
Great idea!. I have tons of ribbon from a balloon and floral business i owned in the 90s. I might try this idea too. Thank you.
Kat, that's a great way to use up all that ribbon! :)