


How to Make Your Own Bows

With Christmas decorations going up and wrapped packages going under the tree, we all find ourselves in great need of bows. This doesn't just happen at this time of year, though. We need bows all year long, for packages, baskets, and boxes.
Whether you need a big red bow to put on a new car, furniture, or other large gift, or if you just might want a bow made with your own special ribbon choice, you can make your own bow. And you can make a bow in any size you need, from just about any ribbon you'd like, using the same easy technique.
VIDEO: How to Make Your Own Giant Bow
TUTORIAL: How to Make a Custom Bow
If you prefer step-by-step photos, keep reading to see how easy it is to make a custom bow in any size with any ribbon.
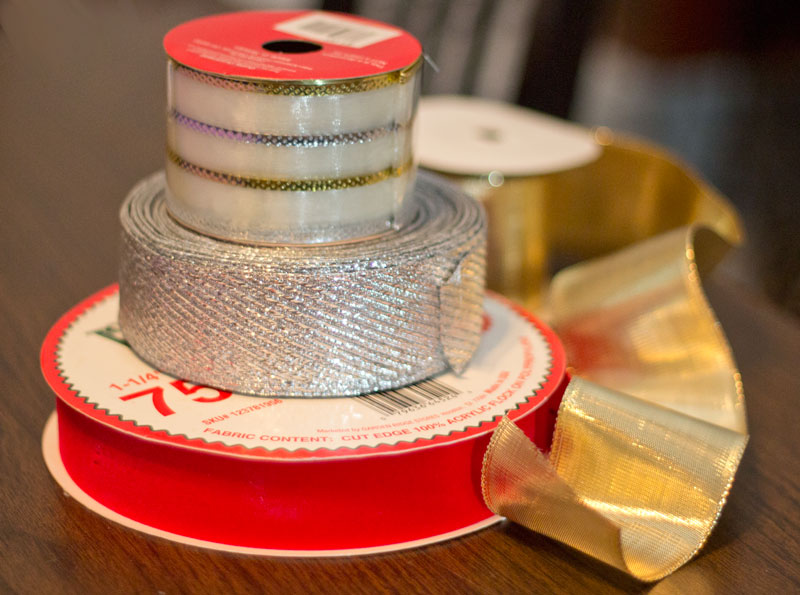
Choosing the ribbon to make your bow
You can use any ribbon you want, but we do recommend using wired ribbon for the best results. The wired edges let you shape the loops exactly how you want them. This technique also works great for ribbon that is only printed on only one side, since only one side will end up showing on your finished bow.
The width of the ribbon will determine the size of your bow to a degree. In general, thin ribbon should be used for small bows, and wide ribbon should be used for large bows.
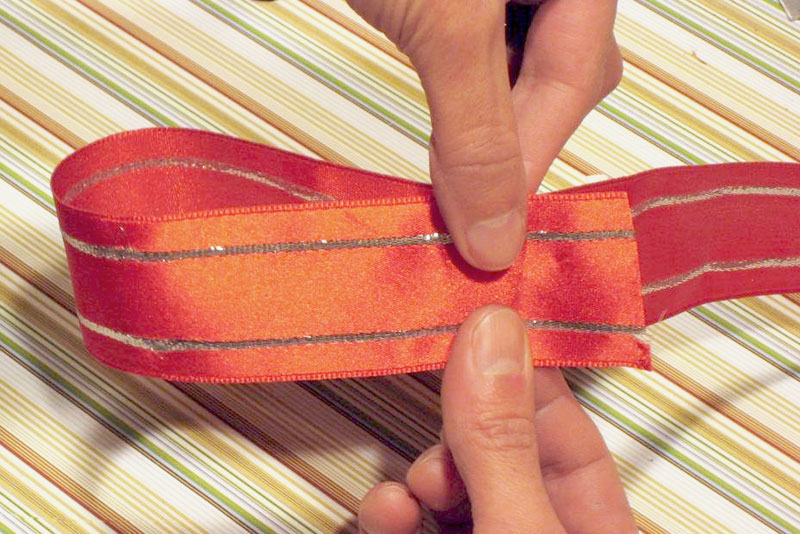
Step 1 - Forming the first loop and determining the bow size
For the best proportional results, you'll want the length of the bow's loops to be about 2-3 times the width of the ribbon. So, if you have 1" wide ribbon, your loops will be 2-3" long, making a bow that's 4-6" across when completed.
You've got some leeway here with the loop size, but don't go to extremes. If your loops are too short or too long, your bow will look funny. For the bow I made in this tutorial, I used 1.5" wide ribbon, and made 3" loops (twice the width).
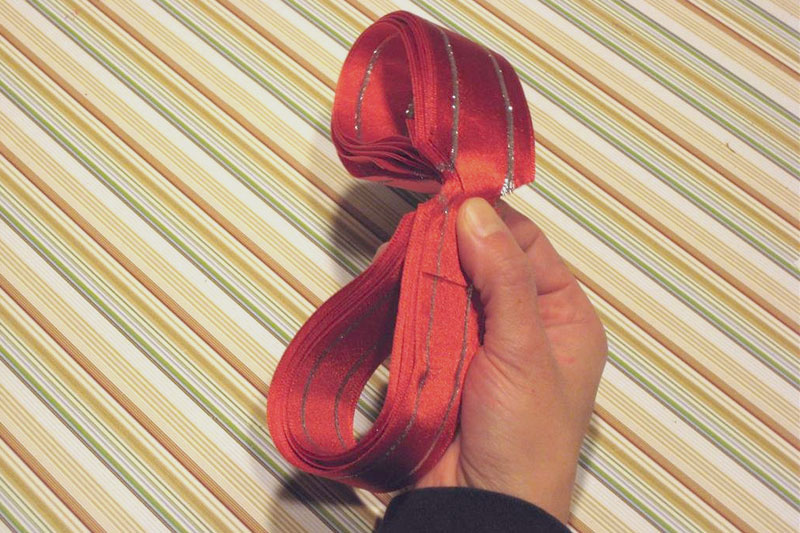
Make the first loop in the ribbon, measuring the width. Let the end of the ribbon overlap your center point by about an inch (so that the end won't fall out of the bow later).
Then make the second loop, and pinch it in the middle. Take care here to measure the width of the loops and the total width of the bow, to make sure you're in the right range. (My bow is 6" wide in these photos, with 3" loops.)
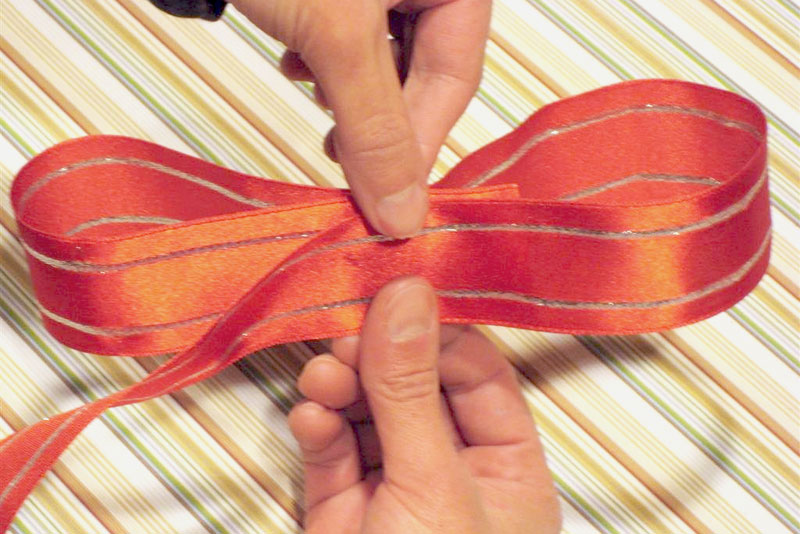
Step 2 - Creating the remaining loops
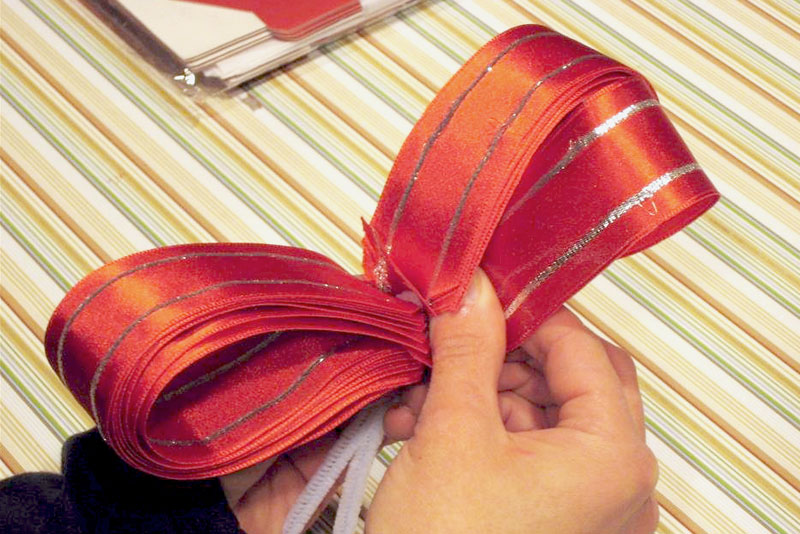
Then wrap the ribbon around about 7-10 times, or more or less if needed, depending on how full you want your bow to be.

When you cut the end of the ribbon off, be sure to let it go about an inch past the center point again, so that the end won't fall out of the bow later.
Step 3 - Opening the loops
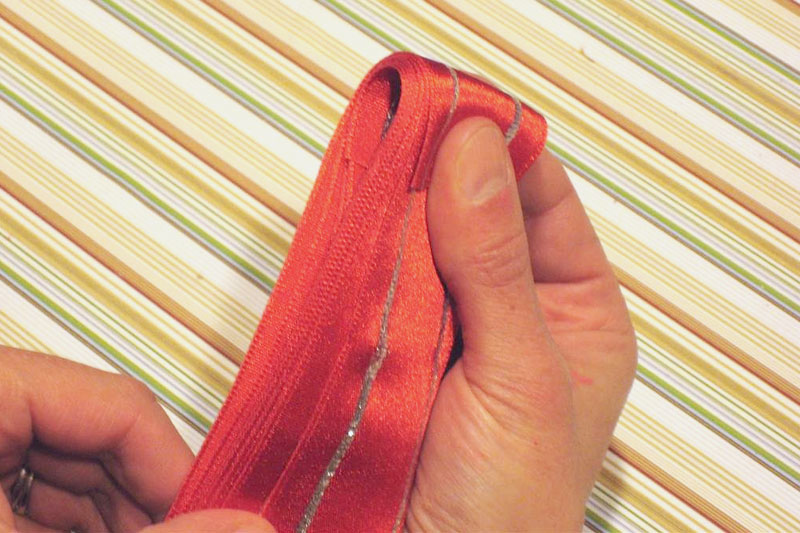
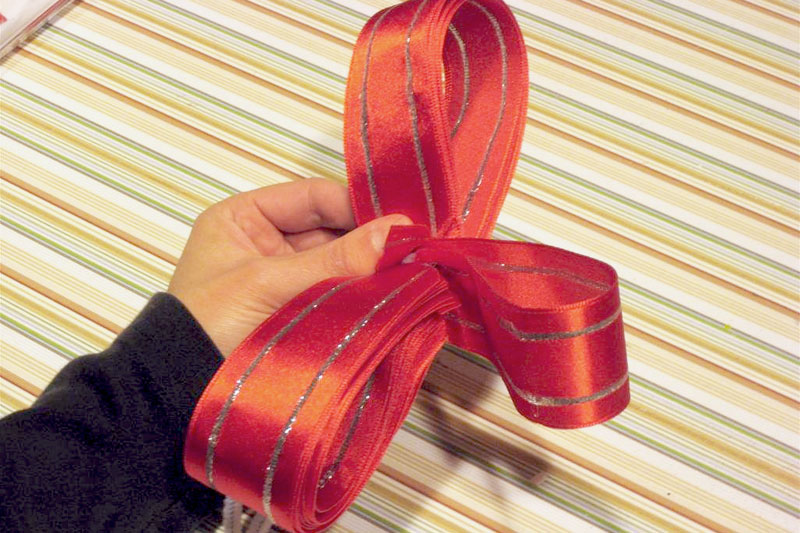
Open up the circle of ribbon a bit, holding the two center points with your fingers. Take care not to drop the two ends of the ribbon.
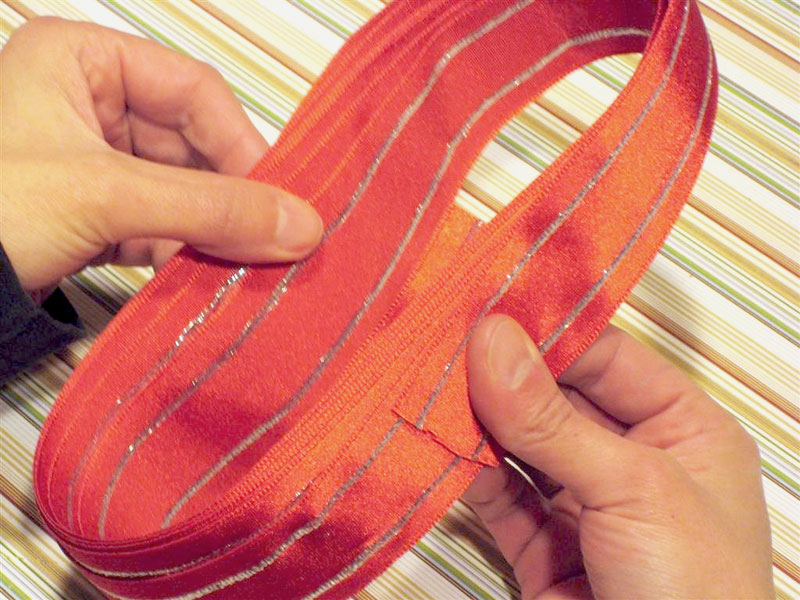
Re-fold the circle so that the center points are now the end points.
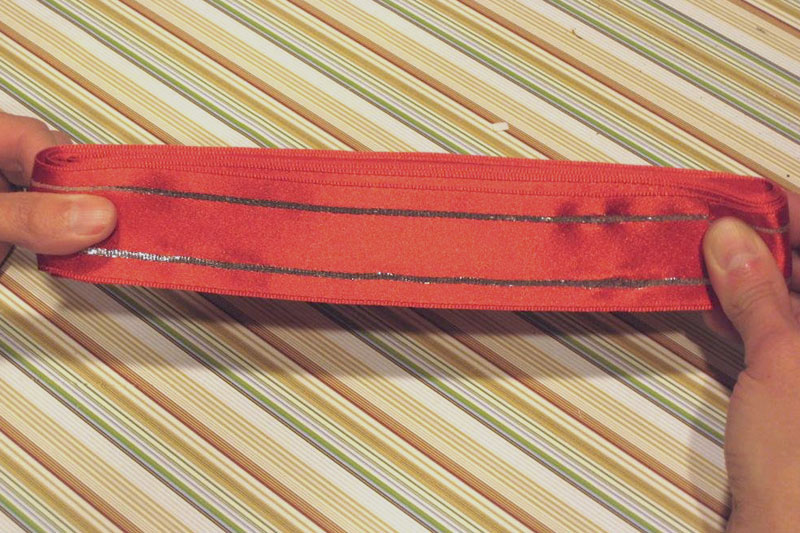
Be very careful to make sure your ends are positioned so that they go about 1-2 inches past the fold. This will keep the ends from falling out of the bow.
Step 4 - Removing excess ribbon bulk
Holding one of the creases firmly in your hand, use a pair of sharp scissors to snip off the corners of the ribbon. Be careful not to cut the ribbon all the way across, or else the bow will fall apart. Just notch out the corners to remove some of the bulk.
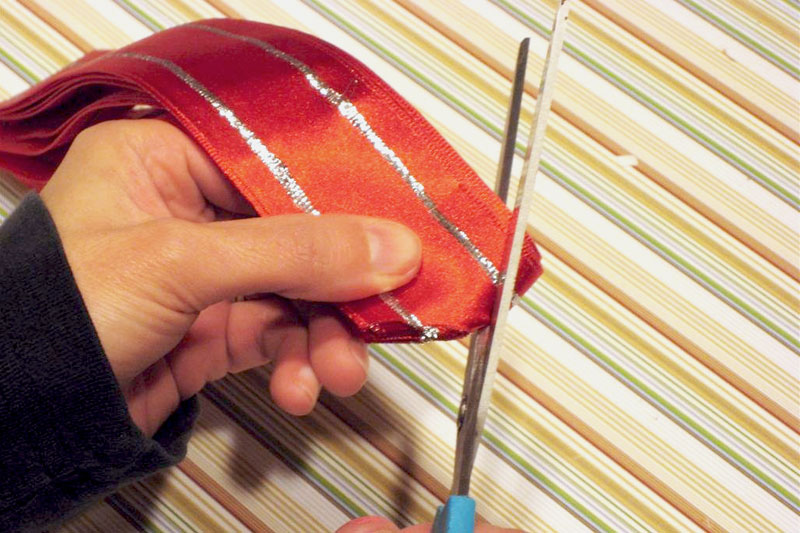
Do the same thing on the other side, notching the corners to remove some of the bulk.
Step 5 - Reforming the loops and securing the ribbon
After notching both ends, separate the circle of ribbon again, holding on to those notched parts and returning them to the center of the bow.
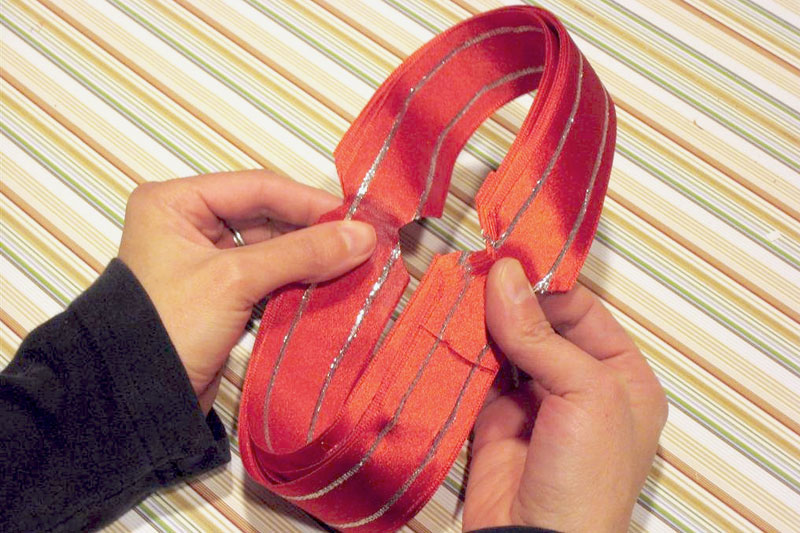
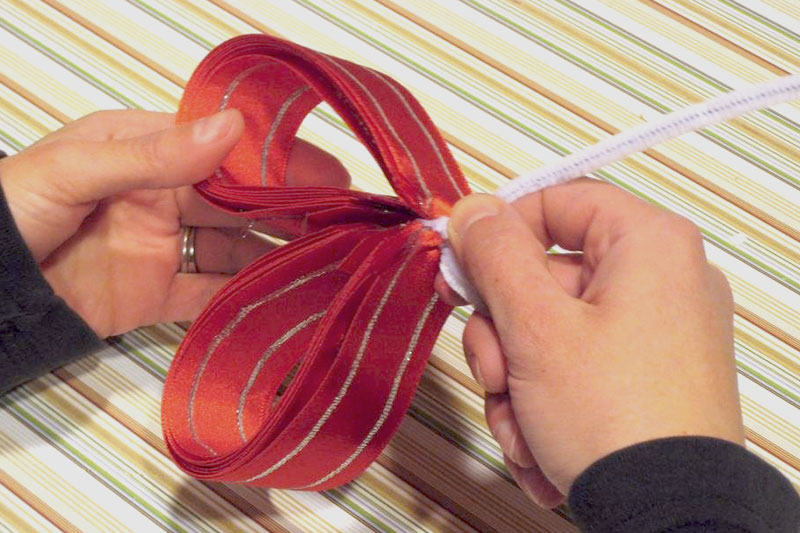
Bring both notched areas together in the middle and hold securely.
Now take a wire, chenille stem, or piece of ribbon and tie it very tightly around the notched area in the center of the bow.
Step 6 - Separating the loops
Then begin working on one set of loops to form the bow. Starting with the innermost loop, pull it out to the right...
...and give it a twist so that it's separated from the others.
Then pull the next loop out, this time to the left, and give it a twist. Continue with the remaining loops, varying the direction you pull them out and the direction you twist them, so that the loops are all independent.
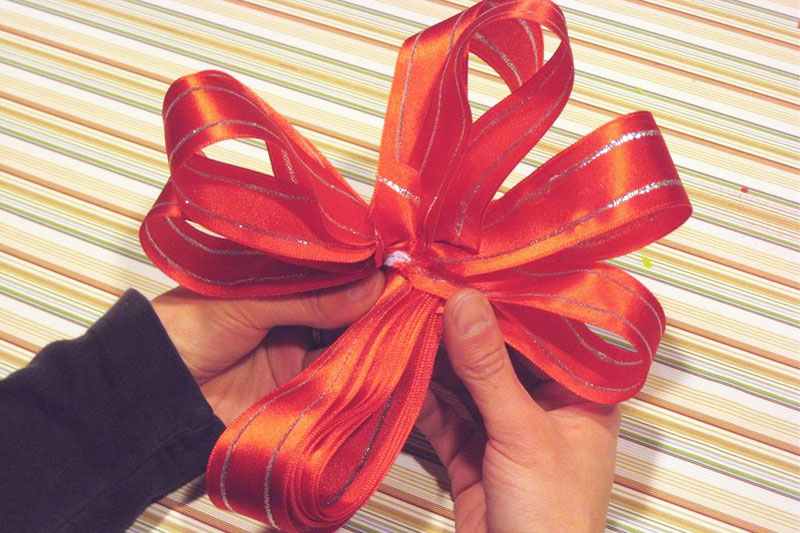
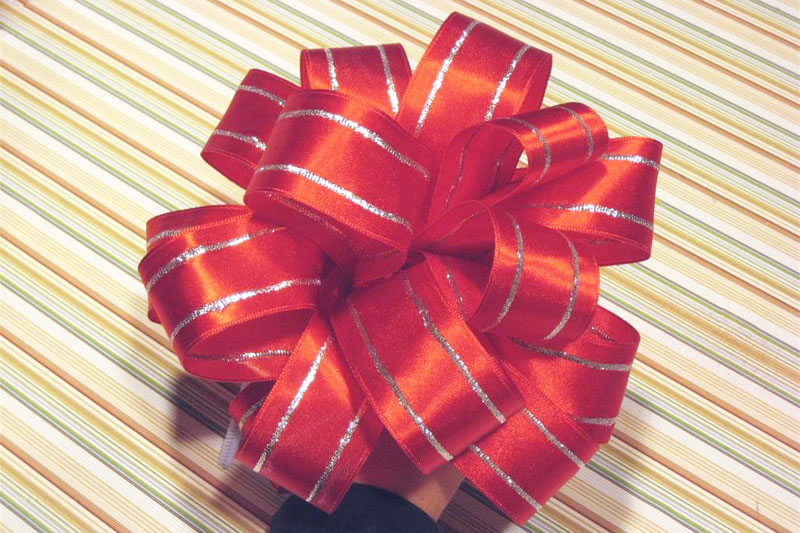
When you're done with one set of loops, do the same for the other set. When all the loops are pulled out, you can shape them and arrange them until they're just right.
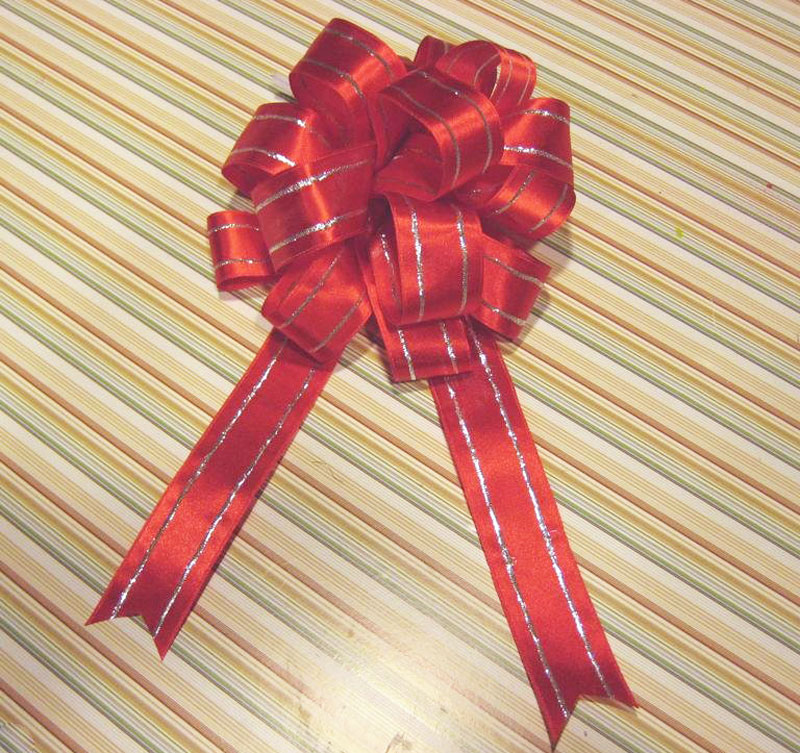
Step 7 - Adding tails (optional)
For an extra special touch, you can add some ribbons to hang from the bow. Just cut a length of ribbon and lay it across the ribbon or wire you've already got on the bow.
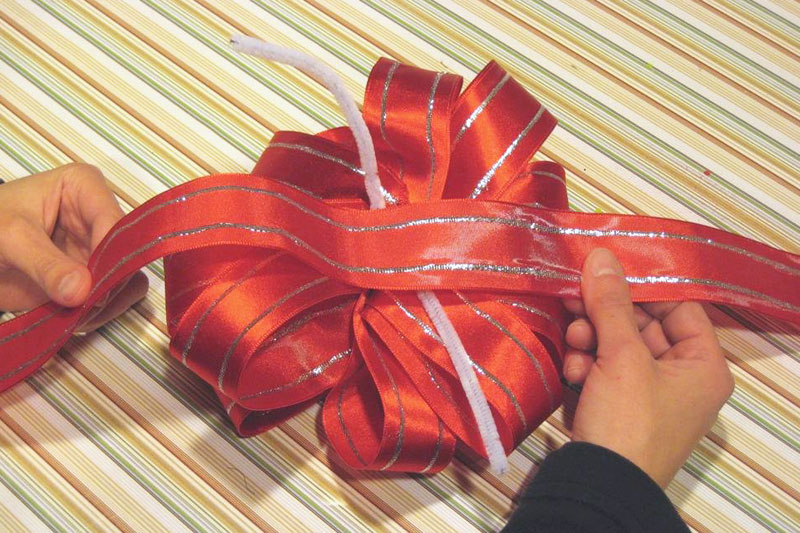
Then twist the wire (or tie the ribbon) to secure it in place.
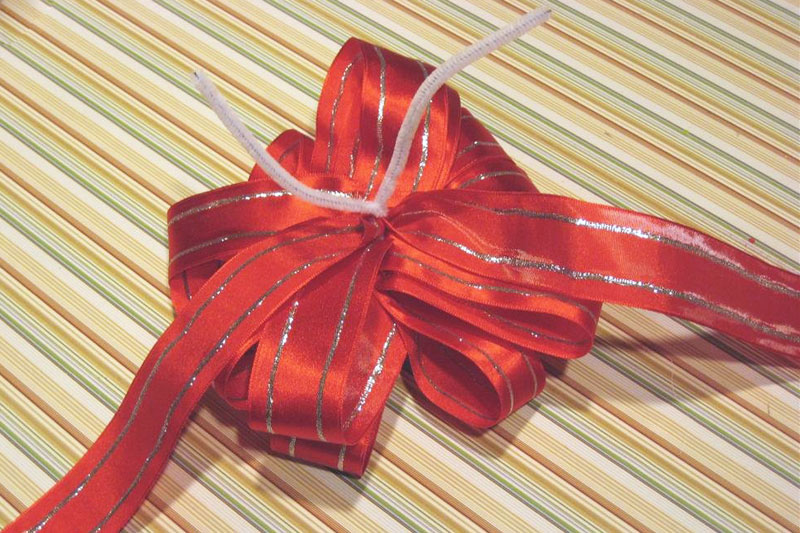
Now it's ready to hang from a wreath or basket, or adorn a special gift.
Using Giant Bows for Giftwrap and Decor
Because you can make very large bows with this technique, it's great for adding to giftwrap and decor. There are so many great ways to use your custom bows.
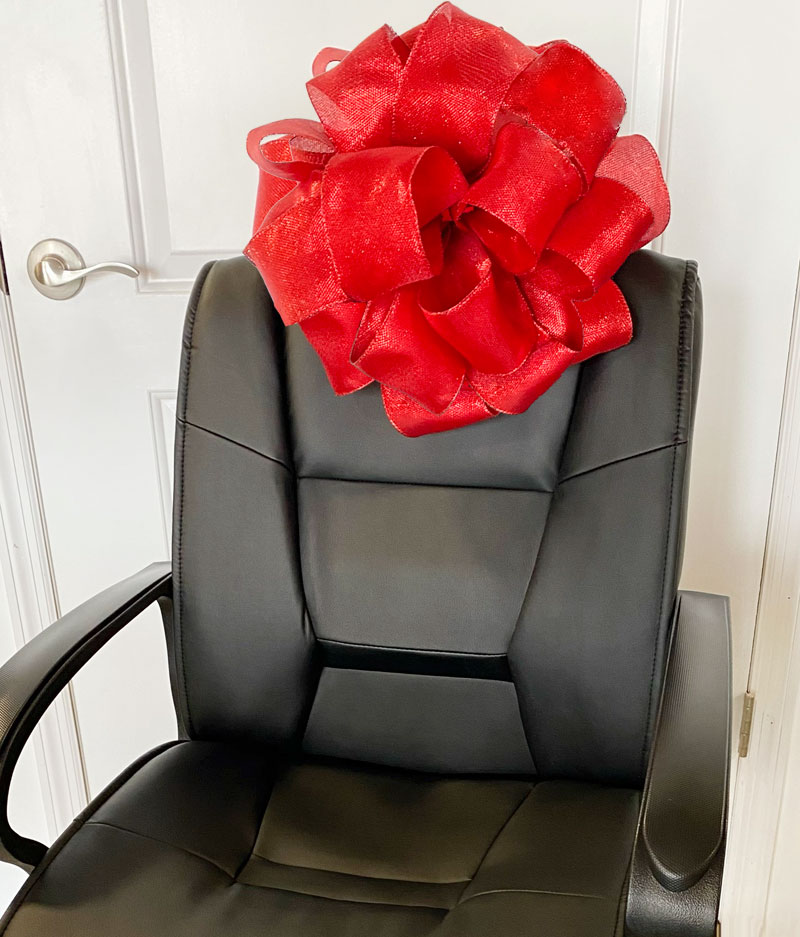
Big bow for gifts that are too large to wrap
Furniture, cars, bikes, etc... sometimes a gift is too large to wrap, but it still needs a bow. Easy! Just attach your giant bow to the top using the ribbon you tied around the center.
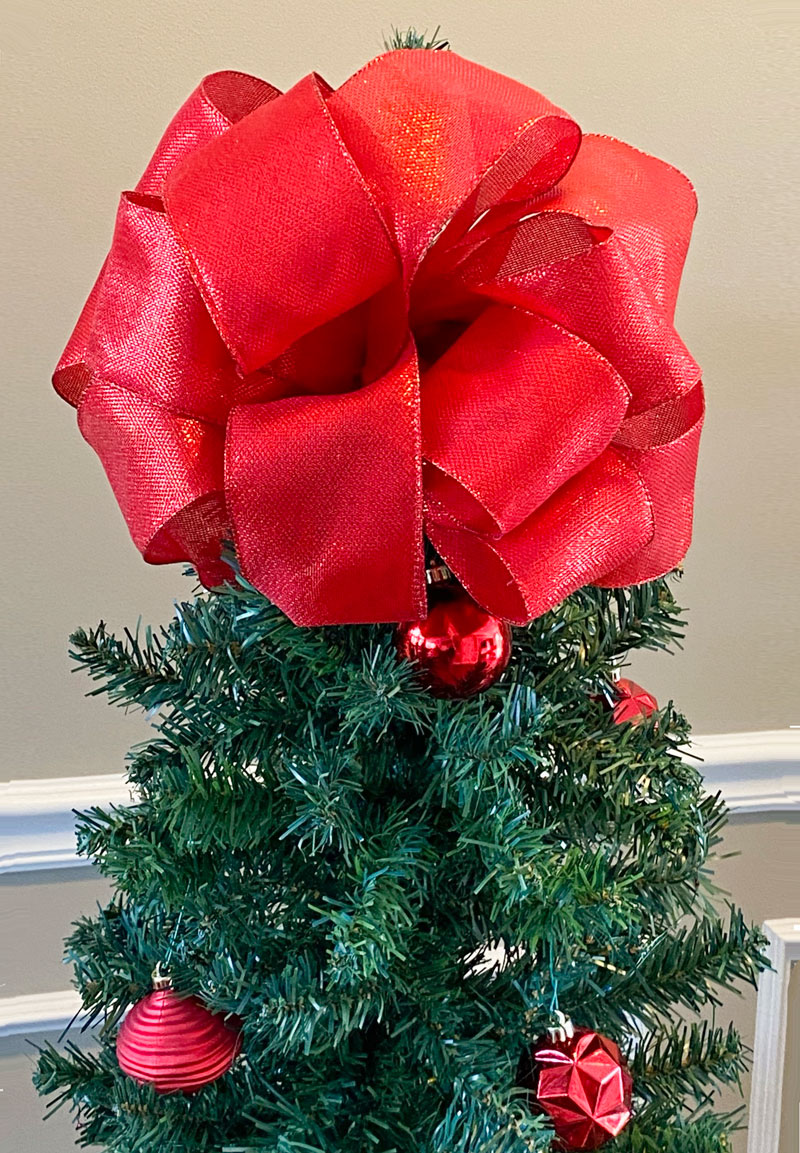
Christmas tree topper bow
If you've decorated your Christmas tree with ribbon, why not add a matching bow to the top? You can easily adjust your loop length to get just the right size bow for your tree.
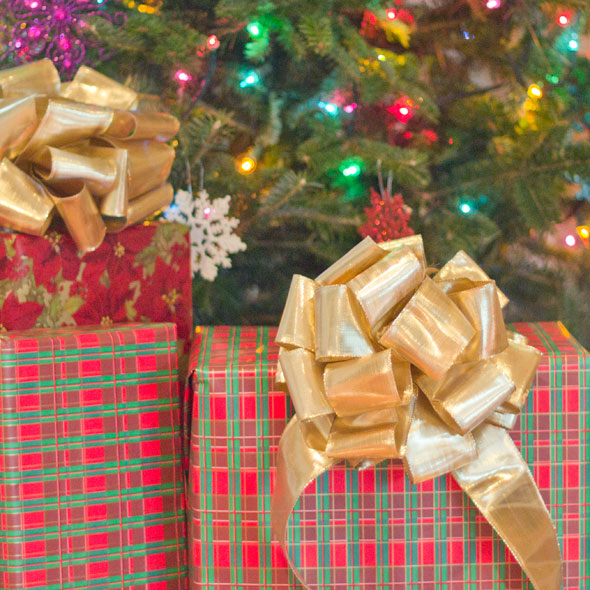
Extra special gift wrap bows
Finding beautiful ribbon and bows to match for extra special gifts can be tricky, but now you just have to find good ribbon, and you can make your own bows. And you can make them whatever size you need for each package.


32 comments so far:
Can you make pew bows for weddings or other events using this same technique? How much ribbon should I use to make a decent sized bow?
This technique would work great for pew bows, Kristi, and I've done so for several of my friends. For one wedding, we made two bows and attached them back-to-back, making a full, round, "bow ball" that was hung from the pew. It was so pretty.
To determine how much ribbon you'll need, work from the size of the bow. For a 6" wide bow, your circles will each need 12" of ribbon, so if you make 7-10 circles, you'll need 7-10 feet of ribbon. Similarly, for a 4" wide bow, you'd have 8" circles and would need about 5-7 feet of ribbon. Hope that helps!
thank you so much. I learned it and made a beautiful bow on my wife's present.
Homecoming is this week and I really wanted to make my own mum. My mom just told me to use the base of my sister's old 1 but I really didn't want to. Do you think this would work?
Hi Chelsea. I had never heard of a homecoming mum before seeing your comment, but I looked them up and they sound like a pretty neat tradition! From the pictures I've seen, I don't think the bow we show you how to make in this tutorial will give you the right look for a traditional mum. Try Googling for "make a homecoming mum" and there are lots of tutorials out there that I think will help. Good luck and happy homecoming!
Yeah my friend told me today that it's more of a Texas tradition. I didn't know that. Thanks for the help!
I skimmed through a few "giant bow" tutorials online before I found this one, and I picked this one because it looked the simplest. It was so easy, and I made the prettiest bows out of sheer wired ribbon to tie onto my banister to go with my Christmas decorations. Thanks for the instructions!
Tracey, so glad you found us!
Hi from England Uk,
Just to say, I have found this bow demonstration the easiest to follow and as a result I have made some wonderful bows for use on my husbands vehicle which we use as a wedding car service. I have added rosebuds, gypsophyillia and pearls glued to the centre of each bow and the results are fabulous and look very luxurious on the vehicle, thankyou.
Thank you for the high compliment, Dawn. We're so glad our bow tutorial has helped you decorate the car. We'd love to see a photo if you've got one to share!
I'm looking for up to date books on how to make a variety of bows, especially those that are unique that I can decorate for Christenings and Weddings. Do you have any books that you can suggest?
I forgot to mention that I did currently purchase a book called, "Creative Bows Made Easy." I'm looking for more ideas.
Hi
I would like to make some bows 10" wide to decorate a boat for a silver wedding. I have seen that you can make two bows and put them together (one at the back that you pull out to be flatter and then a smaller one (8.5") to go at the front in a different colour). What I am wondering is how many times I should wrap the ribbon around for each size that you put together. Do you have any ideas?
Sylvia, I'm afraid you're going to have to do some experimenting to see what number of wraps works best for you. It's going to depend on how wide your ribbon is, how big the bow is, and how full you want it.
Thanks I will try this technique. Never knew how to make a good and pretty bow, but this sounds simple!
I will share this technique to my students. Thanks!
hi I like the bows there awesome
I am so please that i can make my own bows****
THANK YOU
Excellent tutorial for beautiful bows! Thank you very much Chica!!!
SO EASY! My bows on my Christmas presents look so beautiful. Thank you for sharing this!
You're very welcome, Olga and Brooke!!
I could not find larger bows like I wanted. I found your tutorial and successfully made several in yellow to put on my porch pillars and our front-yard trees as our son is a marine deployed. They worked beautifully. Thank you for making it simple. :)
I just tried this and made a beatiful bow!! My first bow!! Thank you so much!!
You are really good at explaining instructions with out having video. I have a 9 ft spool of ribbon that is 1.5 wide. Do I need to find longer spools for making bows topping garland hanging over my brick mailbox and lights on my porch and over the garage. I wanted the ribbon from dollar tree but I don't want to waste money if that's too short. I don't want a 4 inch wide bow. I want them more like 8 inches wide.
Kelly, thanks for the compliment! Afraid I'm not going to be able to tell you if the ribbon you're looking at will be too short or not. It will depend on how many loops you add to your bow. Best best is to just try and see!
thanks much, Chica! helped me alot..
In Sturgis and other area schools it was a tradition to order a white mum with a bow on it with ribbon hanging down. The mum would be pinned on the homecoming girls. School girls, teachers
And Mothers would wear them for Homecoming activities.
I want to make a loopy bow with curling ribbon
Do I notch it? Any suggestions?
Linda, we haven't tried making large loops bows with curling ribbon, but I wouldn't think notching would be possible (or necessary) with such thin ribbon.
My school colors are blue and gold. Can I combine 2 colors of ribbons in the bow? If so, how?
Barbara, you sure can! Just hold both ribbons together as if they were one ribbon when you form the giant loop. That will result in every other loop being blue or gold. Make sense?
Thank you. It is the simple things in life that count, simple information but hard to find. You did a great job of giving me the information and explaining what I spent hours searching for online. I am giving credit where credit is due. May blessings come your way.