


Make Your Own Custom Notepads

If you've ever wondered how to make your own custom notepads, I'm here to share the trick. All you need is a special type of glue called padding compound. With this simple adhesive, you can turn just about any stack of paper to turn it into a notepad.
We have had endless fun making custom, personalized notepads and doing various fun projects with it, and are still coming up with new ideas for more. It's so easy to use, too.
Why make a customized notepad?
Making a personalized notepad that meets your exact needs is a great way to create paper pads that work for you.
For personal use, having the perfect custom notepad that suits your personal style can make it so much easier to track things in the way that works best for you. The options for notepad sizes are limitless when you design your own. You can make small notepads sized to fit your pocket or purse. Or make the perfect notepad that's the perfect size to fit that old favorite day planner that you can no longer find refills for.
For business use, making your own business notepads is a great idea to make a lasting impression that enhances your brand identity. Whether you're making promotional notepads for trade shows or just want a professional way to share notes with potential customers during meetings, there are numerous opportunities to promote your business.
For a special occasion that require a personal touch, custom notepads make great gifts. Create teacher notepads for your child to give to their teachers to ring in the new school year. They also make lovely personalized gifts at the holiday season — imagine a stack of custom-printed notepads tied up in a ribbon, and given to a neighbor or co-worker.
How to make your own notepad
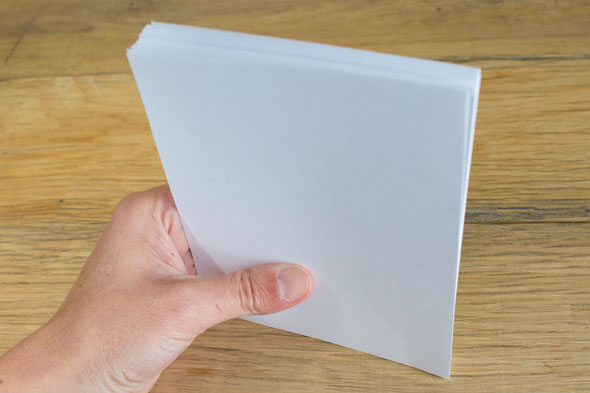
First, take a stack of paper — any color, type, or size you want — and tap it on the table so that one side is as flat as it can be. If you want your notepad to have a sturdy back, add a piece of cardboard, cut to the same size, to the bottom of your stack.
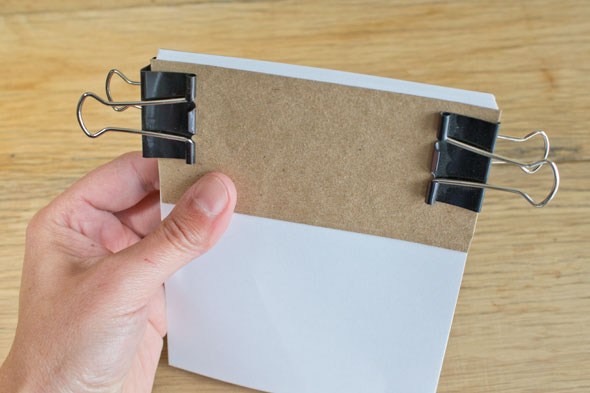
To keep the end of the paper firm and tight, add a piece of cardboard to each side and secure with a couple of binder clips.
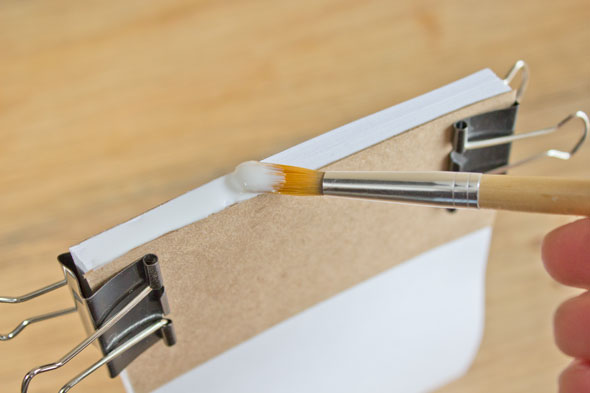
Use a small brush to apply the padding compound liberally along the edge of the pad. It will dry to a smooth, flexible, non-sticky finish with a milky white color. If you have a particularly large notepad and would like extra strength, you can also apply a second coat.
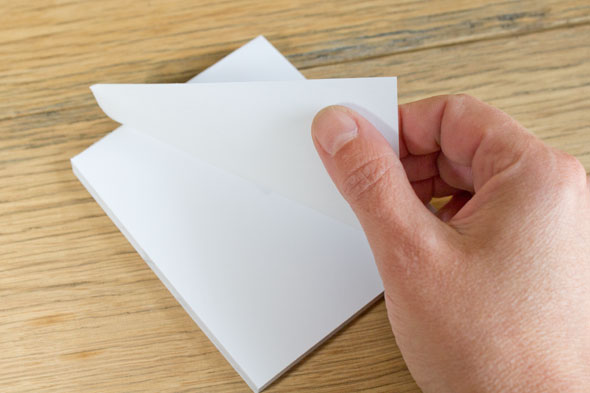
And just like that, you've made your own custom notepad! The padding compound makes a wonderful, flexible bond that will hold the pages tight. And when you're ready to remove a sheet, it will peel off smoothly and cleanly.
Pretty easy, huh? So where do you get padding compound? Well, it's pretty industrial stuff, and most places only sell it by the quart or gallon. Since it takes such a tiny amount of the compound to make a notepad, that would practically be a lifetime supply, which may be a bit much for the typical crafter.
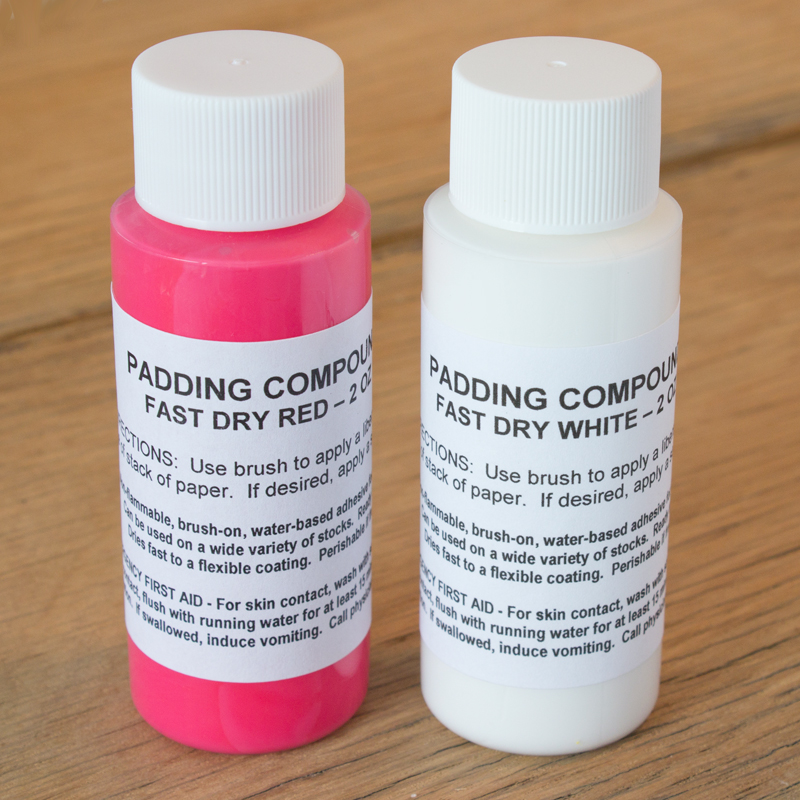
Fortunately for you, we sell more reasonably-sized 2oz bottles of padding compound in red. (We used to sell white too, but had to discontinue it because of supply issues. There are plenty of other white padding compound options on Amazon.)
Make custom colors of padding compound
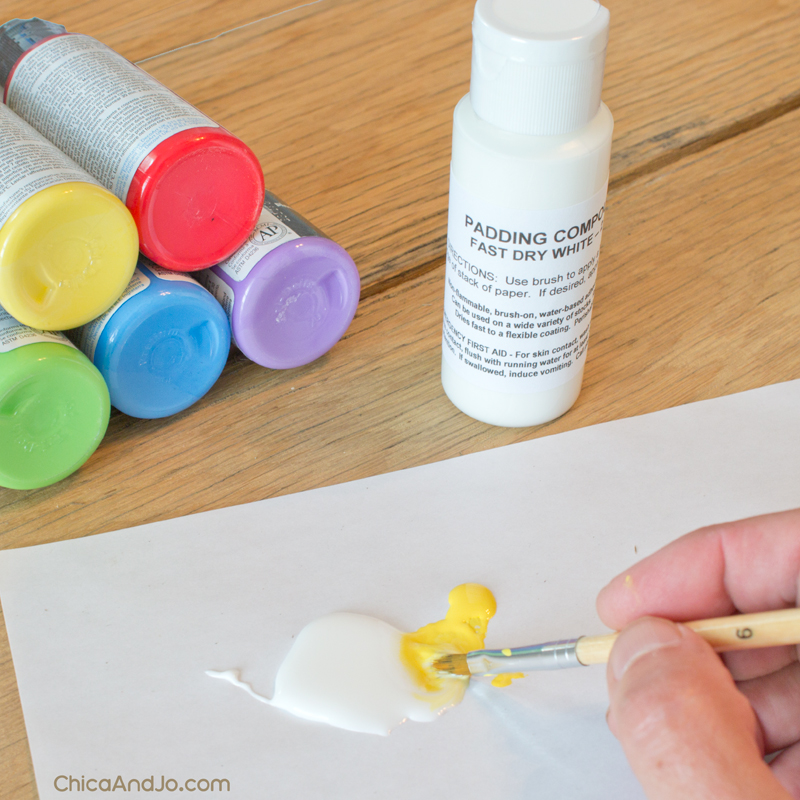
Do you think white and red are boring? Well guess what — most white padding compound formulas can be tinted with ordinary acrylic craft paint to create custom colors. Just mix a small amount of paint into the compound to get the color you want. Just don't add too much paint, or you'll compromise the strength of the compound. And remember that it will dry darker.
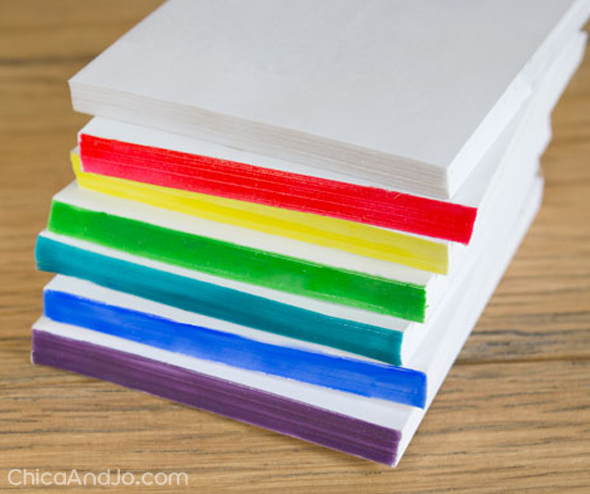
With this trick to make your own colored padding compound, you can make a rainbow of notepads. With the wide variety of acrylic craft paints available, you'll be limited only by your imagination.
What to put in a custom notepad
When you're making your own notepads, there are many different options on what to include. You'll use sheets of paper, of course, but they can be blank pages, lined pages, or full color images in a variety of designs.
You can use premium quality paper for a high-quality notepad suitable for a special event. Or, you can re-use mis-prints from the office copy machine to make recycled memo pads. The pages can be various colors and various designs, all in one pad. The only rule you really need to follow is that all the pages in your notepad need to be the same size.
More ideas for making custom notepads
Once you've started making your own notepads with padding compound, you won't want to stop. Here is a list of some great ideas for custom notepads.
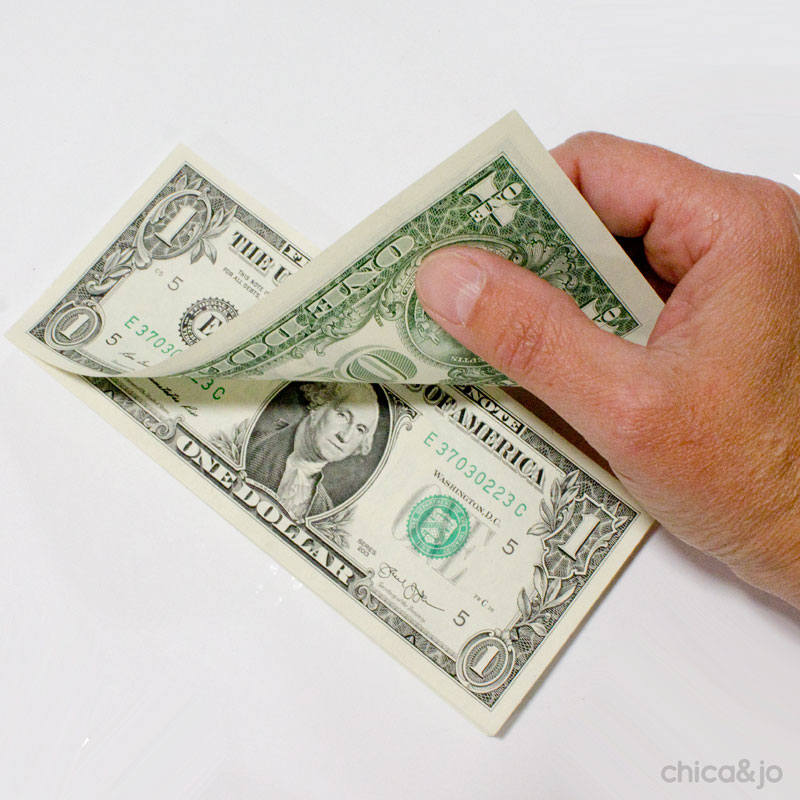
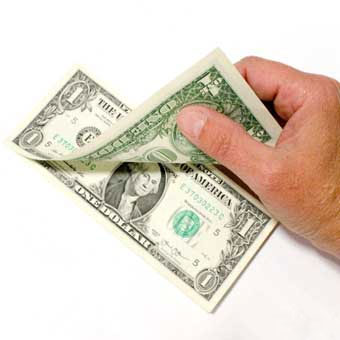
- A money pad made of cash (see below!)
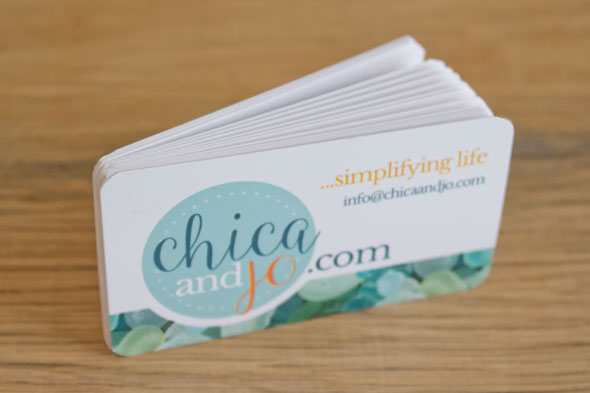
- A pad made of business cards (see below!)
- Card and game score sheets (see the printable gin rummy scoresheets I made for my Grandma)
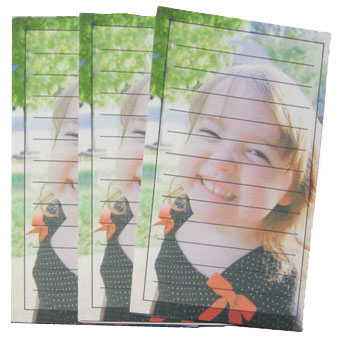
- Custom photo notepads like the ones I made with my niece's photo.
- Grocery list
- To-do lists
- DIY mat stacks for scrapbooking
- Scratch pads for everyday use
- Unlined notepads made with recycled paper from the office
- Estimates, quotes, or receipt pads for your business
- Networking pads with your contact details, email address, phone numbers
Give the gift of a cash with a money notepad
If you're looking for a unique way to give a gift of cash to a high school graduate or newlyweds, get a stack of new $1 bills from the bank and glue them into a pad. They'll enjoy tearing off the money one bill at a time when they're away at college or on their honeymoon. Get the full how-to in our DIY money notepad tutorial.
Keep your business cards organized
We also love bundling our business cards into a stack. My Honey is always scattering his business cards all over his truck if they're loose, but making them into a pad keeps them collected and easy to access.
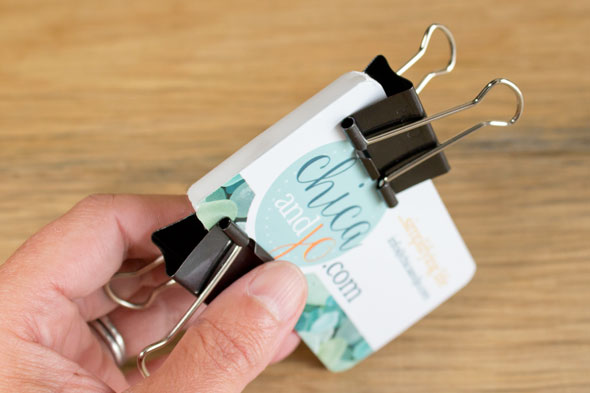
Jo and I enjoy keeping our cards bundled as well, and everyone is always delighted when we pull a card off the stack to hand them.
DIY vs custom notepad printing
If you need super high volume or perfectly perfect results, choosing a notepad manufacturer to create your professional notepads might be a good option, but once you've got your own bottle of padding compound, you'll see that making your own is the perfect way to create a one-of-a-kind notepad that's a perfect gift. You can avoid the middleman markups and stop searching for the lowest prices in an online store. Just create own own design or custom quote that suites your individual tastes and make your own notepad designs. DIY is the best option for super quick production time to make custom tablets and list pads in a variety of sizes.
Padding compound estimation guide
You may also be wondering how many notepads you can make with a bottle of padding compound. To help you out, we've done some testing, and found that one 2oz bottle of padding compound will cover about 120 square inches of surface with one nice thick coat.
To help you with the math, we've made the following chart. You just need to measure the width and thickness of your stack of pages and look them up in the table below to get an estimate on how many you can make. For example, if you're making notepads out of a quarter sheet of paper, measuring 4" wide notepads that are 1/2" thick, you could make about 60 notepads.
| HOW MANY NOTEPADS CAN I MAKE? |
HOW THICK IS THE NOTEPAD? | ||||||||||||||||
|---|---|---|---|---|---|---|---|---|---|---|---|---|---|---|---|---|---|
| 0.25" | 0.5" | 0.75" | 1" | 1.25" | 1.5" | 1.75" | 2" | ||||||||||
| HOW WIDE IS THE NOTEPAD? |
2" | 240 | 120 | 80 | 60 | 48 | 40 | 34 | 30 | ||||||||
| 2.5" | 192 | 96 | 64 | 48 | 38 | 32 | 27 | 24 | |||||||||
| 3" | 160 | 80 | 53 | 40 | 32 | 27 | 23 | 20 | |||||||||
| 3.5" | 137 | 69 | 46 | 34 | 27 | 23 | 20 | 17 | |||||||||
| 4" | 120 | 60 | 40 | 30 | 24 | 20 | 17 | 15 | |||||||||
| 4.5" | 107 | 53 | 36 | 27 | 21 | 18 | 15 | 13 | |||||||||
| 5" | 96 | 48 | 32 | 24 | 19 | 16 | 14 | 12 | |||||||||
| 5.5" | 87 | 44 | 29 | 22 | 17 | 15 | 12 | 11 | |||||||||
| 6" | 80 | 40 | 27 | 20 | 16 | 13 | 11 | 10 | |||||||||
| 6.5" | 74 | 37 | 25 | 18 | 15 | 12 | 11 | 9 | |||||||||
| 7" | 69 | 34 | 23 | 17 | 14 | 11 | 10 | 9 | |||||||||
| 7.5" | 64 | 32 | 21 | 16 | 13 | 11 | 9 | 8 | |||||||||
| 8" | 60 | 30 | 20 | 15 | 12 | 10 | 9 | 8 | |||||||||
| 8.5" | 56 | 28 | 19 | 14 | 11 | 9 | 8 | 7 | |||||||||
You heard me say estimate, right? Actual coverage will vary depending on individual application style!
similar projects
Make Your Own Custom Photo Notepads
Make a Dollar Bill Money Notepad for Gift Giving

Printable Gin Rummy Score Sheet


115 comments so far:
Our Adult Living class would like to know how to make notepads from recyled paper. Could you send a list of materials that we need to recyle.
iraida, have members of your group collect any type of paper that is blank on one side. You can even use a piece of cardboard for the back to make it more like a writing pad. Add a sheet of colorful paper to the front if you would like to bundle the pads together to sell. Best of luck!
Not many art supply stores or office supply stores carry padding compound anymore. Have you had any luck with using Mod Podge instead?
Heather, I gave it a try and made some notepads using Mod Podge instead of padding compound but I didn't like the results the Mod Podge gave. I found that the Mod Podge did hold the pages together, but not in a good notepad way. The padding compound is much more suitable for this task for the following reasons. First, the Mod Podge had a thin, rough surface on the end of the pad when dried, but the padding compound was thick and smooth. Second, the Mod Podge seemed to soak into the ends of the pages a bit, and when I took pages off the pad, the edge wasn't perfectly straight anymore. Lastly, the pages of the Mod Podge pads would snap off whenever I lifted them, (even if I didn't want to remove them) but the padding compound pages would fold all the way back without coming off unless I tugged on them, which made for a much more useful notepad.
When I retired from teaching, I took many of my old worksheets and made them into notepads. We had the advantage of a press though and a unit which cut large stacks of papers. I cannot recall how long the glue needed to stay before the pressure was removed. Also, on the average, what is the most number of papers you can stack for the binder clip. I was really spoiled with the paper press, as the stack could be quite high.
Thank you.
Hi Anne. What a great idea with the worksheets, and I'm jealous about the press!
I've seen extra large binder clips that have a 1" or 2" capacity, which would hold quite a bit of paper. If you need more paper in a pad than that, you could easily raid the garage for some large, expandable clamps. I would put a piece of wood on the top and bottom of the stack of paper and then secure with a clamp on each side.
This is such a great idea! It's on my list.
Hey! Thanks so much for posting. I just started a small business where I am selling stationery, and this is a wonderful new product I can add. I had searched to find a padding vise that wasn't too expensive, and then I found on your site to just use the binder clips. I ordered some of the padding compound, and I've made a few pads so far. I'm a teacher as well, and I think my class would love to make some of these. I can have them hand draw or stamp the pages. My 4th graders will love it! Thanks so much for sharing--they look just great!
Hi Christina! I'm glad to hear you're having fun with notepads. We would love to see what your 4th graders come up with, so please stop back by and show us if you can!
Chica and Jo-I received my Padding compound today and can't wait to give it a try. Anyone ever use fabric as a "topper" for a pad? I was thinking about custom template to make a personalized notepad for a couple of friend's birthdays next week and thought I would embroider their initial on some scrap fabric, serge the edges and maybe use as a cover for the notepad. Would that work, or will it be impossible to remove the pages underneath (does that make any sense?)?
I LOVE the idea about business cards! Got to give that a try, too. Watch my blog to see what I come up with using the compound.
Suzanne, the embroidered fabric cover is a fantastic idea. We haven't tried that yet though so not sure how it would work. We've added your blog to our reader so we can see how things turn out.
Thank you for making this available. I read about it on one of my craft groups on Yahoo and was so happy to hear about it! I've got tons of pads sitting around that I made with rubber cement and they're all falling apart. It was cool to see that you used the binder clips too. A very inexpensive way to clamp the pads! I made my sheets with a variety of graphics at the top so there'd be maybe 4 or 5 different sheets, but also made some with the person's name at the top along with a graphic that was the same on each page. I look forward to receiving this product and re-doing all those pads!
Thanks Sharon, and good luck with your notepad re-dos!
I buy up old games and use the money for scratch paper. GREAT way to make note pads! Thanks
The larger the pad, the larger clamp - I have a pad maker from Ellison, (it's HUGE) but successfully used a flower press for years. Got started when carbon paper was still common, and made multi copy forms. Now, carbonless paper is available, and I rarely make forms. Think about using this for your own mini-books. Instead of a greeting card, a mini cook book.
I'm so excited to make my custom notepads - I'm going to use your template to make favors for a bridal shower. I'm going to order my padding compound today but I'm just wondering, how long do you need to let it dry before you can remove the binder clips and protective paper?
Hi Heather. What a great idea to make favors for a shower! The compound will dry in about 10-15 minutes. As soon as it's dry to the touch, you can remove the clips.
Thanks Chica for your posting on here. You have just helped me save A LOT of money for marketing material for my business. I plan to make our own notepads with our business info on them. Thanks a million!!! Can't wait to get started.
Lisa, I'm so glad we could help! New businesses need to save all the money they can :)
Gosh this is such a clever idea and so simple. Have just ordered my padding compound!
I just ordered the padding compound today -- I can't wait to try it out!
Hey there, I'm working on my own notepads, thanks very much for this site. I put a paper cutter, but I still cant' seem to get my pages straight enough, it doesn't help that the paper cutter I bought can only do up to 10 sheets at a time, it just takes a long time to cut through everything only for it not to be as straight as I would like, okay maybe not even straight, but the edges matching on at least one side. Do you have any suggestions that won't break my pocket book? I'm a struggling artist, thank you.
Hi Kuroitenshi. Getting all your pages exactly the same size can be very tricky, I know, and I wish I had a perfect solution to offer you. Very careful measuring is the best course to take.
One tip you can try is to put a piece of masking tape on the base of your cutter, lined up with the edge of the first page you want to cut. Then for each page you cut after that, the tape can be your guide. Just line it up to the edge of the tape, and that might you help keep the pages all the same size. Good luck!
Sounds fun using patterned paper scraps, and I will try it for my husbands business cards as well - what a great idea! When I was little and visited my Gramps, he would take us to the bank and get brand new crisp dollar bills, and then with a cardboard backing and thin typing paper cut to size make a pad of dollar bills with white pages in between. He used wood glue I believe, which was not as nice, but the rest of our visit we enjoyed the looks of astonishment on cashiers' faces as we made our purchases with these bills ripped off of the pad.
Your Gramps was a smart and fun guy, Sharon. How fun for you kids! I had a friend once who did something similar for a newly-married couple, so that they could have fun spending cash on their honeymoon. There's just something fun about a notepad of cash, huh? :)
This glue is an oldie but a goodie. A former boss of mine had us save all of our scrap paper...we cut it to size and glued it together for note-pads. Not as pretty as yours but efficient. An original green idea.
The copy room at my office uses an actual table saw to cut the papers all the same size. If you are blessed with a wood saw in your workshop, this would work. Make sure you clamp the pages well before you start.
Thank you for this craft project! I have made one for my sister. Also, I printed coloring sheets, mazes, and other puzzles 4 to a sheet of paper for a activity book for my niece. Will continue to use your idea. I love your page and visit it several times a day.
Wow, you guys are all full of great ideas and tips! Thanks for sharing with everyone :)
I used to make tons of pads when I worked in a print shop. The cardboard used on the bottom is called chipboard.
The best pads I ever made were for a salesman who would come in and have a stack of one dollar bills padded up. He'd keep them in a checkbook, and he said the reaction when he would rip out a few bills was always fun.
I just thought of another idea for the backing for the notepads. I think that cereal boxes would also make a good backing for notepads, especially if you're interested in recycling. I now it's not as sturdy as chipboard, but most of us have it in our homes and the price is right!
I also love the idea of a pad of dollar bills, which would make a great gift for teenagers.
Marky, those dollar-bill-pads definitely sound like a winner. Who wouldn't love that?
Sandy, that's a fantastic idea!
Hi
This stuff is awsome!!
When my niece graduated from college and she and her friends did the New York trip thing - I purchased "new" or fresh $1.00 bills from my local bank and padded them. They were for the tipping that takes place everywhere. My sis gave me some for my honeymoon trip too! You can even "pad" foreign currency as long as all of the money is the same size.
I'm super excited!! We have a Young Ladies Cookie Swap every year at our church and some of us participate in a "Bonus Round" which includes small crafts. THIS IS PERFECT! I can't wait to share with the girls! The theme this year is 'stars' so maybe I will stamp a few stars on blank pages. Thanks for sharing this!!
hello- i work in a very large facility that has tons of scrap paper that are made into pads and i always thought they had a padding machine. I was clueless!! Well, I like to use large pads as mouse pads so that I can write notes and not have that extra thing on my desk. I asked the guy who makes the scratch pads if he could glue my "mouse pad" together and he pulled out this huge jug of Elmers Glue All. He said ue used to have padding glue but he ran out and he cant find it thru our supplier so he just uses the glue all. This works amazing! The paper tears off without tearing up and the glue is very sturdy and its cheap!
Hi Mo. We are so happy to hear that your facility has such strong recycling habits and that you are making great use of scrap paper. I also love the mousepad idea. I'm glad you found a backup solution with the glue, but we've tested many adhesives and find that nothing compares to actual padding compound, which really performs the best. :)
We own a small home business and we collect mounds of endless scrap paper from printing. For years now I have torn 8 x 11 paper into quarters to make notepads. Although, one side of the paper has been printed on, we still use the blank side for notes etc...
Thanks for the great idea! This I will use.
Rob, it's wonderful to hear that you are recycling within your home business. Keep it up!
Our local university does this with paper that has been printed only on one side. The students can get these notepads free which helps both the student and the environment!
What a wonderful idea, Paula. Thanks for telling us about it!
For an even more special monetary gift, you can make a pad out of $2 bills. You might have to collect from different banks to get enough.
A $2 pad of money makes for a great gift!
Great idea, Joe! $2 bills are so rare that they are a lot of fun to spend and a pad of them would make a great gift.
just made my first notepad with your padding compound! it works! it is going to be a teacher gift for Halloween! I am so excited! thank you guys so much!!!
What a great idea for a teacher gift. So glad you like the padding compound.
I just ordered my padding compound and I can't wait to get started making my notepads. I plan on giving them as Christmas gifts with each person's name on it and a clip art of something that they like. For instance, my sister likes "Hellow Kitty". So I will be using that for the clip art. I am so excited that I came across this page. Thanks for the template.
Thanks so much for the information! For our teacher gifts this year, I've had my sons write "From the desk of..." and their teacher's name at the bottoms of a piece of paper then took it to Office Depot and had copies made and then I'll glue them into notepads!! I think they'll be a big hit - they're adorable!
I am LOVING the padding compound I purchased on your website! I have made so many unique Christmas gifts. I've made notepads as Christmas gifts for the babysitter, for my son's preschool teachers, for a secret Santa gift. They have turned out so cute! And they REALLY WORK just like a notepad you would buy at the store! Thanks, for the idea of using Fedex Kinkos to cut the paper. They didn't mind at all. Plus I was able to purchase the cardboard backing there and they cute it as well!! WONDERFUL product for making gifts!!!!
Katie, we're so glad you are having such fun making notepads. Once you start, it's kind of hard to stop, isn't it? :)
I had a lot of fun with this stuff at Christmas. I made pads of $1 bills for gifts. Also made notepads but the money books were a big hit.
Have you tried to make a coloring tablet or book with the padding compound? I planning my son's 4th birthday and found the your site looking for crayon birthday ideas. I want to make small coloring books/tablets from pictures of my son celebrating his other birthdays for a party favor or station.
Tammy, a coloring pad is a great idea. We haven't tried that, but I think it would make a fun party favor!
I just ordered the padding compound and am excited to make some of my own notepads. My fiancee and I are starting to build a house and we need notepads as we organize all the details! What a surprise it will be to him when I give him the "perfect home building organizer and notepad". Thanks for publishing your ideas!
This is so awesome! My head is buzzing now!
Thanks, Marie-Anne. Being able to make your own notepads certainly does open up a world of possibilities!
I've made TEXAS scratchpads for many years now. Just order new dollar bills from your bank. Stack as many as you wish and pad them with the compound. Place them in a checkbook holder and label with the saying " TEXAS Scratchpad ". Trust me, when you are ready to leave a tip in a restaurant and tear these off the reactions are priceless!
What a cute idea, Rosie. Thanks so much for sharing!
I am excited to hear about the compound but have not been able to find it at hardware or craft stores in our area so will be ordering from your site! Several years ago I did custom order note pads, invites, stationery, etc. and it was so much fun! At the time I had a print shop pad them for me but love the idea of doing it myself. Do you recommend a certain type cardboard for your backing? I use a Printshop program and used the postcard feature and it works great for making 4 of the perfect size for cutting for notepads. I have recently retired and am planning on doing this again for friends and family. Thanks!!!
So glad we could fill the need for you, Terri. You can use just about any type of cardboard, but something with a porous edge (versus laminated or plastic) will work best. We've had some readers recycle cardboard from cereal boxes, which we think is a great idea for a recycled-paper notepad.
We have often had $1.00 bills padded to give as special gifts. It's totally legal - and they have fun pulling off the dollars for tips or payment. 25 in a pad works well.
These would make cute favors for a baby shower too!
I just ordered your padding compound. After ordering I sat here and read through all 98 comments underneath the tutorial. I don't think I can go wrong with a product that has such RAVE reviews dating back over THREE YEARS!!! I am totally PSYCHED to receive this product and start crafting with it!
Thanks Chica and Jo!
So glad you are excited about this product, Becky. We'd love to hear about any fun projects you make with it.
What a great idea! I found your idea on Pinterest, I will definitely be trying this!
I found this on Pinterest, too, and remembered that we used to make these at school - also had the advantage of a press. We used dies from Ellison or Accucut to make appropriate shapes for the pads. For instance, we made telephone message pads using the telephone die. Used the padding compound - and didn't make the pads too thick.
This looks like such a fun craft!
I'm so excited to try this. I've always wondered how people do this when they make personalized notepads. I assumed they took it or sent it somewhere to have this done. I also just googled it and found that you can make your own padding compound. Just type that in to eHow and you'll see the recipe. I don't have a lot of money but I'm dying to try this. I'm going to try this recipe first and see how it works. Thanks for the idea!
Just ordered my padding compound...can't wait to get started!
I am excited about making these notepads too. Just ordered my compound from Amazon, can start on Friday, Yippee! I plan to do butterfly notepads to match my note cards & bookmarks. Thanks again (:
I worked in the printing field for over 20 years. I used padding compound a lot! It is elastic, it is not stiff/hard. Two coats are better than one. I have used a "padding press" that squeezes the paper together. A piece of wood with a heavy weight on top of it works as well. I have made thousands of note pads, I even padded a stack of "one dollar bills" for a proud Grandparent at Christmas time. The grand kids loved it when they were given a dollar peeled from the "stack"!
Wanted to thank you for this. Found it on Pinterest, and it's such an awesome DIY idea.
I love this. I have been looking everywhere for somthing like this. Thank You...I am off to Amazon.
Is padding compound the same thing as rubber cement? Will that work just as well? Can't wait to make some personalized notepads for my desk at work.
Hi tr! Padding compound is a white, glue-like substance specially formulated for binding notepads, and is not the same as rubber cement. While some of our readers have had varied amounts of success with rubber cement or other alternatives, we have found that padding compound works the best and looks the most professional, since that's what it was designed for and is what the professionals actually use! :)
Thanks Chica.
For quite awhile I have been saving envelopes we receive in the mail which have security patterns printed on their reverse sides. You'd be amazed by the variety of patterns and colors that they come in. Some of them actually are quite pretty. I think they would make really cute little notepads. Thanks for sharing the info about the compound.
Karen, that's a wonderful idea. I bet you could do something really amazing with all those cool blue patterns!
I've been making these for years. Make great teacher gifts! I use popsicle sticks along the top edge and secure with binder clips on top. In the office where I work, we used to waste so much paper. Now we have a bunch of various sized scrap pads for everyone! Great way to recycle! I've also had my jar of padding compound for years. A little goes a long way. Well worth the investment.
Popsicle sticks are a great idea for clamping the paper together, Rosie!
I order the compound last week for a project I found on pinterest. I used left over scrap book paper and card stock to make the note pads. I found that the sie of my pads was only hindered by the size of my clips (small). With just paper I was about to get 86 sheets together, card stock and paper mix was around 60ish, and just card stock I got 42 together. I applied a couple of liberal coats to the edges, and it all dried in about an hour and half.
Thanks for sharing your results, Heather. If you want to make thicker pads and can't find bigger clips, you can also try putting the pad on the edge of a table, sticking out just a little, and putting a heavy book across the top.
That's amazing! It looks very easy to make! I will try if i can make like this too. :) Thanks for sharing.
I happened on this site by accident but am glad I did! I plan to use this to make a quote a day calendar for a very good friend of mine. Thanks so much!
We're happy you found us, Angi, and hope you stick around to enjoy more fun and easy projects!
This is what a print shop I worked at did for large jobs.
Stack the paper, protect the table surface with cardboard and compress with a brick or 2 on top. Apply 2 coats of padding compound drying in between. We used an adjustable "paper knife" to divide into approx. pad sizes (50-250 sheets). Count out the number of sheets you want in your pad put a kitchen knife flat on top and bottom, add spacers as needed and tie together. Stab the paper stack and cut the glue.
I've been using my jar of padding compound for years. I bought it at a local printer's. They only had really large containers, so we agreed on a price and I brought my own jar. Little did I know that it would largely be a lifetime supply. I've coloured small amounts of the compound using paste food colours (the kind used by bakers). You only use tiny amounts and it doesn't seem to affect the padding compound. I've also used two colours and applied them in stripes. It bumps up the personalization level another notch.
Marion, we agree that a little bit of this stuff goes a long way! I love the idea of coloring it with paste food coloring -- we'll have to try that out!
When I make my pads, the ends come out warped and not straight. I've been using two pieces of wood and vices, do the binder clips keep it straighter?
Claudia, the wood and vices should work fine. My suggestions would be to 1) try making sure the pieces of wood are as close to the glued edge as possible, 2) don't apply the glue too thick, and 3) make sure the wood/vices are clamped tightly. Hope that helps!
I have also tried using this padding glue and it really does work out well. I love it because it dries up fast and it is also very easy to apply. I also suggest this to my friends who are making their own notepads.
Thanks for a really fun idea. I have lots of scrapbook paper for which I wanted to find another use. I also enjoy making customized gifts for friends, so this is another thing I can do.
I used to work in a print shop way back when and we made these pads all the time out of recycled paper for all the offices we served. Padding compound works quite well. We even made the spiral twist pads with colored paper. We always used heavy reams of paper to hold the pads together while the compound dried. We used a small 2 inch paint brush to brush the compound on and used two coats of compound. The pads were great and we never wasted printing paper.
RP, thanks for sharing your story! I love the idea of using unopened reams of paper as the weights.
Hi!
Can I use any glue or does it have to be the one you mentioned?
Elli, padding compound is by far the best type of glue to make your own custom notepads. Other glues don't provide flexible surfaces or nice tear-away pages.
If you want to do a big stack a heavy brick will work. Good luck with it padding is a great idea.
I LOVE your estimation guide, thank you so much for putting that up!
i've used this idea for years for gifts for friends and especially small ones. I make a stck of 10-20 dollar bills. (Any denomination) and make them a "pad". Put them in a checkbook cover and give them as gifts. Kids love to have "thief" money and tear off a buck or two just like mommy does a check. Add a check register and have them fill it out to see where their money went.
I want to have various colors except white and red. Where can I buy it?
Park, you can easily make your own custom colors by mixing in a little water-based acrylic craft paint.
hi chico,,,is your padding compound available to me as I live in NEW ZEALAND. ...? Also what is the price? ,,which currency do you sell it in? a really great information site. .Thank you,
Shirley, you can get our padding compound shipped internationally through our eBay listing here.
I wanted to share that it is possible to iron old, crumpled dollar (or 2 dollar) bills if you can’t get enough new/fresh ones. You don’t want to do it long enough to mess with the strips in newer bills, but a little pressing works wonders.
Dede, that's a great tip. Thanks for sharing!
I'm so glad I found this. I had all these paper scraps that are the same size from making cash envelopes and I'm totally going to make notepads. Genius.
Where do you order the actual paper from? smaller size, nice quality - 4x6 or 3.5x5 - A6, etc... I can only find A5 on amazon etc.... thanks!
Amie, try searching for "loose note paper" or "memo sheets". We found quite a few 4x6 options here and a couple of 3.5x5 options here on Amazon.
Does it matter what paper we use?
Spongebob, we have had great luck with a wide variety of paper!
I have a couple makeup palettes I've de-potted and I want to use the makeup packaging as the back/front of the pads (the packaging designs are too pretty to just toss!).
Do you guys have any tips about how to cut paper to size (preferably without a guillotine)?
Ten, that's a fun idea! A paper trimmer (either the sliding type or the guillotine type) is a great tool for precise cuts. Beyond that, one idea would be to look for memo sheets that are available in many sizes. If you can find one close enough, you might be able to trim your packaging to fit.
Great DIY article. Yes, I have seen videos of people making $2 bill notepads - Very funny to spend the twos that way. I hear computer wiz Steve Wozniak uses $2 notepads
What paper weight do you recommend?
Steph, you can use almost any type of paper you want for your custom notepad. We've used everything from regular copy paper to cardstock, or even business cards. :)
where can I buy all five of your padding compound in Salt Lake City?
Mel, we used to sell 2oz bottles of padding compound in white and red, but are discontinuing them and only have red remaining. You'll find the red here on Amazon. For white padding compound, there are lots of other options available on Amazon too. If you want to try to find it locally in Salt Lake City, try looking at an artist supply store.