


Rainbow Swirled Frosting Cupcakes

With as many ways as there are to decorate cupcakes, they can be really boring if you just slap some plain icing on them. I like to make them fun and interesting, and one of my favorite ways to do that is with colorful, swirled icing. If it comes in a rainbow of colors, that's even better!
Rather than mix food coloring into the icing, I use it to paint the decorator bag, creating a result so crazy and cool that you won't believe you got it from such a simple technique. Let me show you how easy it is to do.
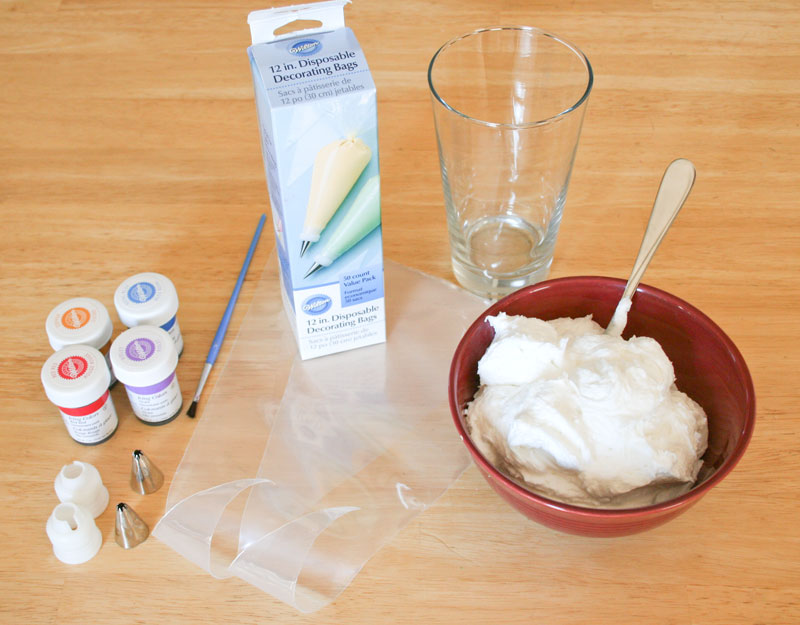
Step 1: Gather your supplies
The first things you'll need, of course, are cupcakes and icing! This technique works best with white decorator's icing (see my recipe at the end of this post). You can use any white frosting recipe you want. Keep in mind that using real buttercream made with butter will result in a yellower icing that will affect your tinted colors.
As for equipment, you'll need some disposable icing bags, a star-shaped icing tip, and optionally an icing bag coupler (this allows you to swap tips easily).
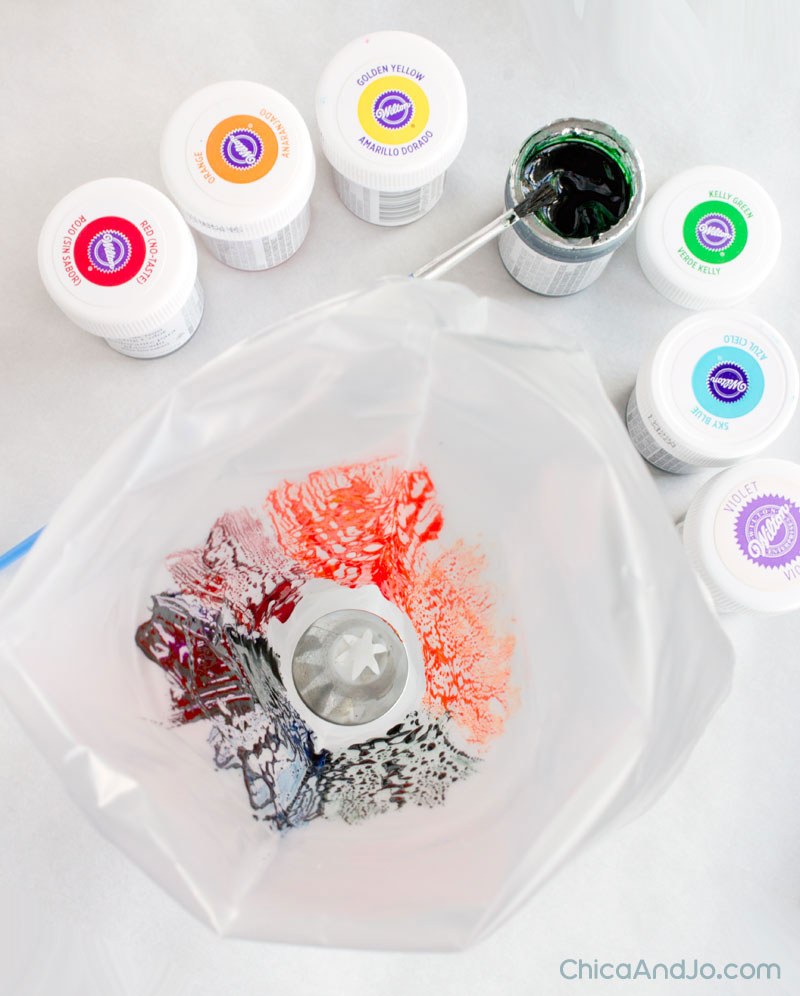
You'll also need a few small, clean paint brushes and some paste or gel food coloring in various colors. (It must be paste or gel. Liquid won't work.) Finally, grab a tall drinking glass, which will help to hold the bag for you.
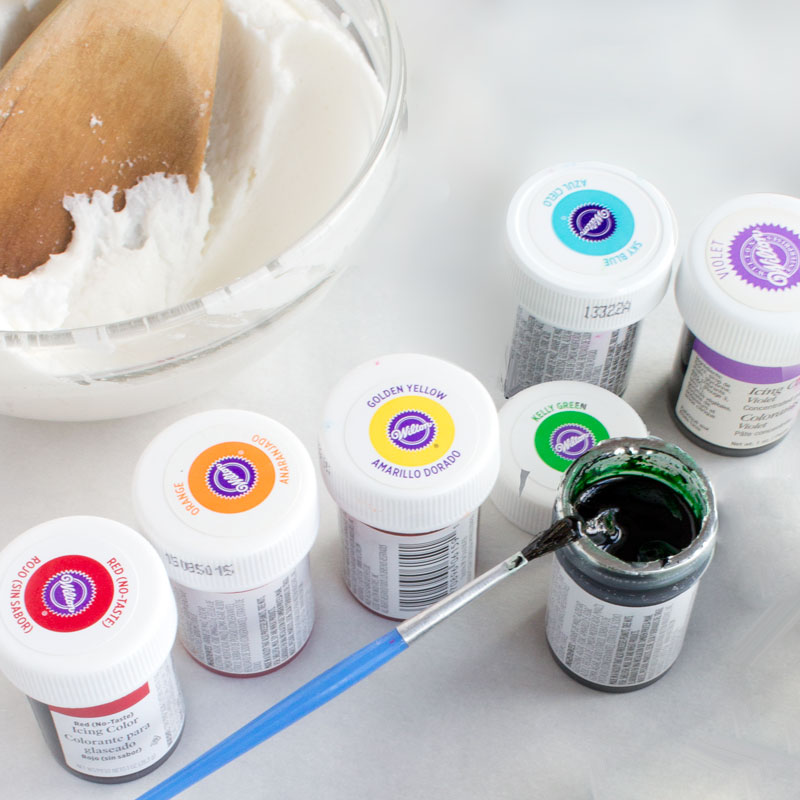
Step 2: Choosing your colors
The best part about this technique is that you can choose any colors you want and can customize it to the occasion. You can use orange and black for Halloween, red and green for Christmas, or pink and blue for a baby shower. A rainbow of colors makes for a fun child's party treat and can even look tie-dyed. Using team colors will make a great addition to any sporting event, from a child's soccer game to a tailgating party.
You'll be painting from 4 to 6 stripes of color for your icing, but you can repeat colors, so you really only need at least 2 different colors (up to 6 max).
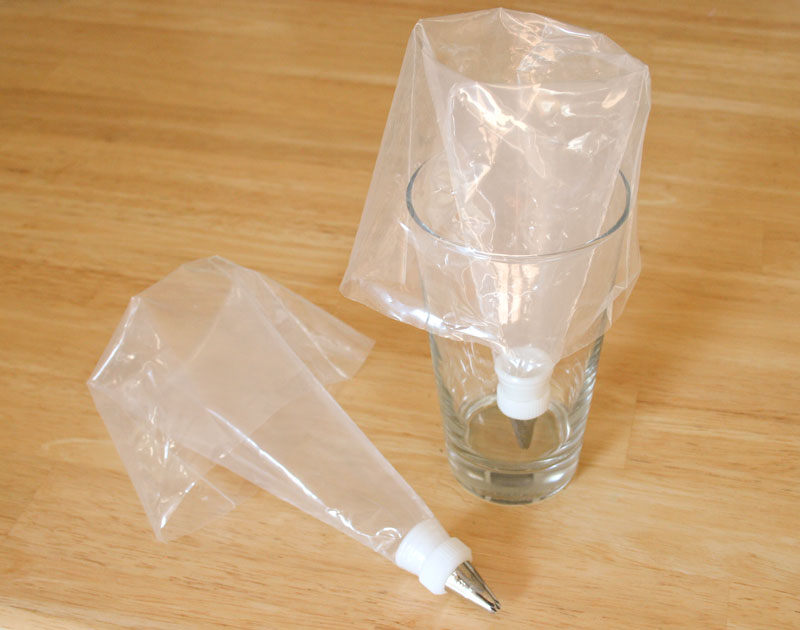
Step 3: Painting the bags
Okay, now for the actual technique! Attach the star tip and coupler to the disposable bag and flip the end of the bag out to form a cuff, so that you can reach the inside easier. Here's where the glass comes in handy, as it serves as a holder for the bag. Put the tip of the bag in the bottom of the glass and let it stand upright.
Now use the paint brush to paint stripes of color on the inside of the bag, starting at the tip and going up about 3-4 inches. Each stripe of food coloring should be fairly thick and about 1/2" wide.
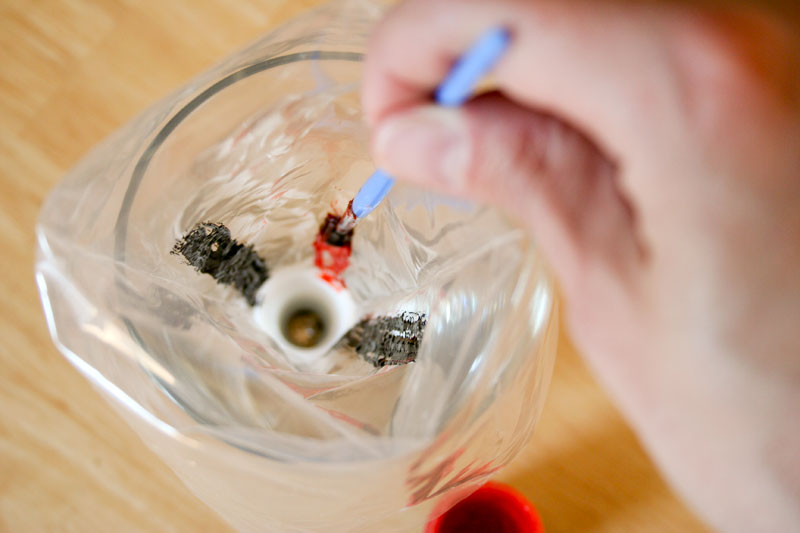
If you are using 2 or 3 colors, paint two stripes of each color, alternating them. If you are using 4, 5, or 6 colors, paint one stripe of each color. Be sure to leave some space between each stripe.
For a rainbow effect, add six stripes of color — red, orange, yellow, green, blue, and purple.
Step 4: Filling the bag with icing
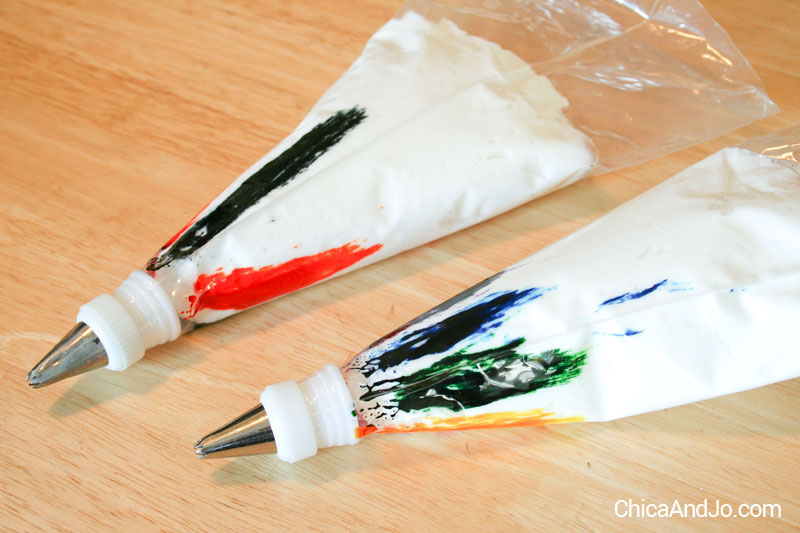
Now scoop a bunch of white icing into the bag with a spoon.
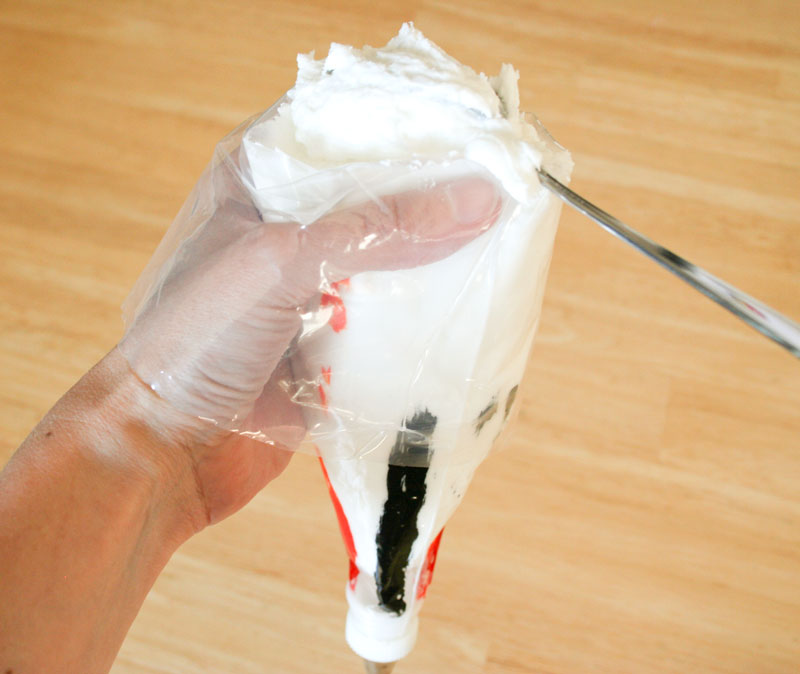
The stripes of color will be very easy to see now.
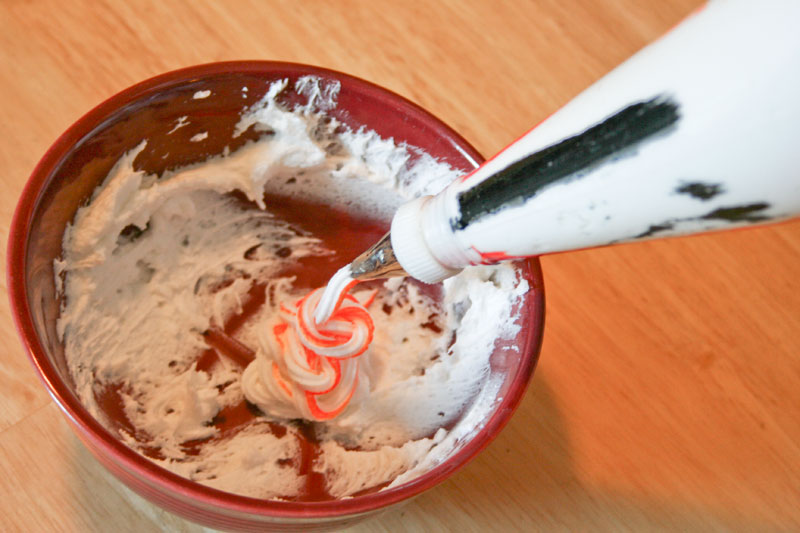
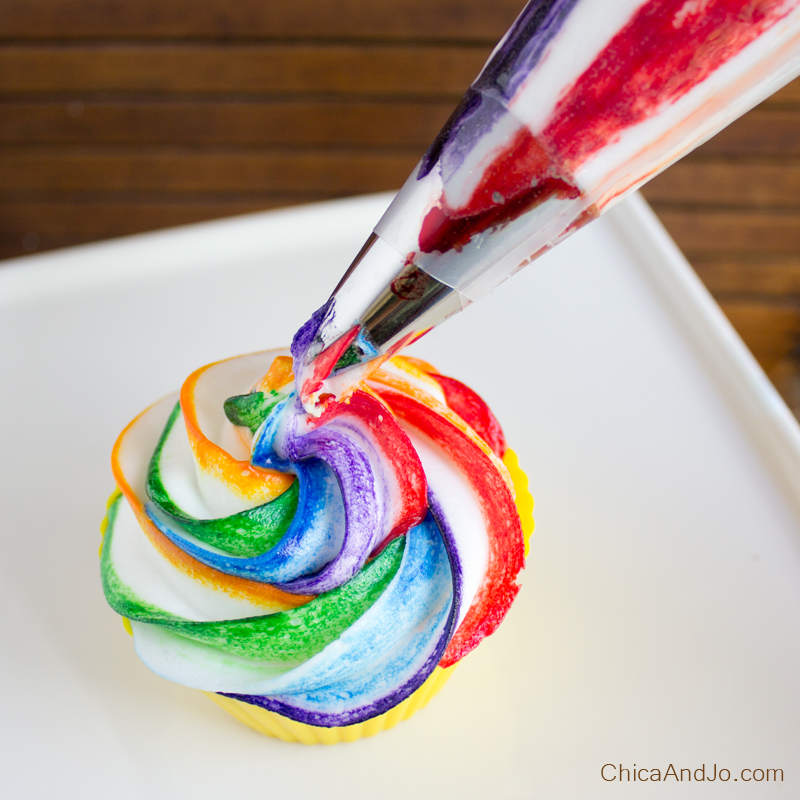
Twist the top of the bag to close it and squeeze icing out of the tip until it no longer flows white, but starts to show the colors you used. Pretty cool, huh?
Step 5: Frosting the cupcakes
Now for the fun part! Squeeze the icing out onto the cupcake in any design or pattern you want.
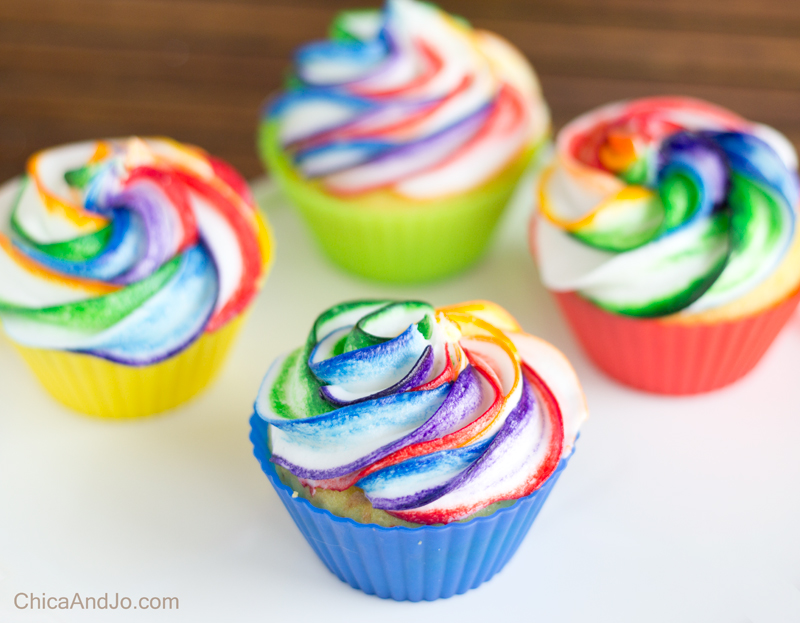
My favorite way to use this technique is with a giant swirl of rainbow frosting. Using a fat icing tip (like a 1M Open Star), pipe a huge swirl over the entire top of the cupcake.
I'm always pleased and surprised by the finished cupcakes!
Other ideas and techniques
You can also get lots of great results with a smaller, super-common #18 star tip, using different patterns. Try covering your cupcakes with stars, swirls, lines, and squiggles.
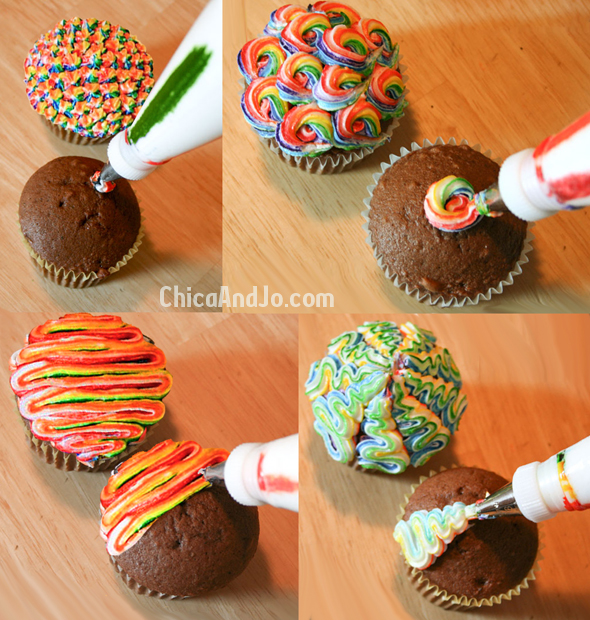
You can see that the color starts out bolder and fades as you do more cupcakes. Eventually you'll run out of icing in the bag, and will need to start fresh with a new bag with more coloring painted on. This is why I like disposable bags so much. You should be able to get about 6-10 cupcakes out of one bag of icing, depending on how much icing you use.
You can use this technique with any frosting, but you'll get the brightest, truest colors if you use a very white frosting. That means shortening instead of butter. The sacrifice in taste is worth it for the colors!
White Decorator's Icing
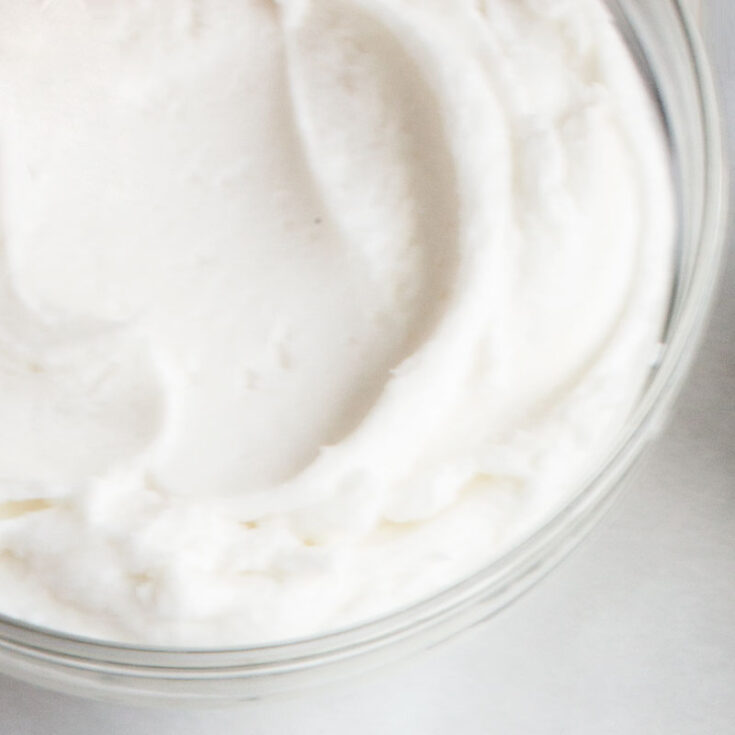
Create a basic, versatile icing that works for all your cake decorating needs. This bright white frosting makes your tinted colors show true, and the quick-dry texture will help keep your decorations firm and in place on your cake.
Ingredients
- one 2lb bag of confectioner's sugar
- 2/3 cup vegetable shortening
- 1 tsp vanilla extract
- approx 3/4 cup water
Instructions
- Add sugar, shortening, and vanilla to the bowl of a stand mixer.
- Add about 1/2 cup of water and begin mixing on slow speed.
- Add additional water as needed until the icing is the texture you like.
Notes
Be careful not to add too much water at once. (If you do, just add more sugar). Finding the right texture takes a little practice. Too thin and your decorations won't be firm, but too thick and you won't be able to squeeze it out of the bag.
similar projects

Rainbow Pot Of Gold Cupcakes for St. Patrick's Day
Zoo Animal Cupcakes
Millionaire's Shortbread Cupcakes


67 comments so far:
Do you think it would work if I just used a Ziploc bag and snipped off the end?
Pauline, a Ziploc would work in theory, but I think it would be very difficult to keep the bag stiff enough to brush the stripes on. Also, the bag being square will make it a lot harder to get good stripes. I think you would be frustrated and would get much better results with an icing bag.
I just love these cupcakes. I will be in Florida and will have to make do with whatever I can pull together. Hope they come out! Thank you for sharing these wonderful ideas!
Just made them for the 4th.... they are awesome and so easy to do.
I made the cakes in the Foil Star molds and then using red and blue used the little stars technique.
They are easy and neat because everyone turned out slightly different.
Thank you sooo much for that tip! I'm making cupcakes for my daughters 1st bday and its carnival themed. I went to Party City today and bought the food coloring gel, brushes, bags and tips....I spent $14. (Don't bother trying with a Ziploc baggie -- it's so WORTH it to just buy the right bag.) I did a test run and it really works!! I just wanted to let people know, I'm totally not a baker. I'm using store bought confetti cake mix but this added touch makes it looks so professional. If I can do it ANYONE can. Thanks again!
Kimmie, we really appreciate you sharing your comments. This technique really is so easy that anybody can do it, and the results are so outstanding! And as you've shown, the supplies aren't expensive, either, especially since most of them are reusable!
Hi...I was wondering if you've ever made these with cream cheese frosting? Do you think they would turn out okay. I'm making cupcakes with homemade cream cheese frosting and wanted to give it a try. They are terrific.
Molly, you can use any frosting you like, but keep in mind that the colors will look best on white-white icing. Cream cheese (or butter) will make it a little more off-white, so be aware that your colors won't have quite the same bright and true look to them.
We are going to have a blast making these! They look like a ton of fun!
Hello, soy de Lima Peru y me gusta hacer torta a mis hijos y me has dado una buena idea...gracias por todos tus proyectos que presentas y de seguro lo voy a poner enpractica
Rosario, mi espanol no es bien. Pero, gracias por su comentario y por visitar nuestro sitio. Por favor, visita otra vez y esperamos que sus magdalenas resulten bien.
I have used ziploc in a pinch too, however, be warned. Even brand name ziploc bags have flaws. I've had several bags rip right down the seam of the bag making a mess and being a real hassle. Hope that helps!
This swirled frosting will look great with tie-dyed cake batter. Off to the kitchen. Thanks for the inspiration!
Wow! This looks so exciting, i haven't seen anything like this in the UK before... I really want to try this out... I am looking at disposable icing bags and i'm wondering what size i should use? On Ebay i can see 12" and 21"... Any ideas... And Gel or Paste, which is best... Love the site, keep it up!!!
Rachel, we're so glad we could inspire you to try something new! 12" disposable bags are plenty big. The 21" ones are for professionals and are too large to easily handle. As for the coloring, from what I've seen, gel and paste are the same thing. As long as you don't get liquid, you'll be fine. Good luck and we'd love to see what you come up with.
This is such a stunning and easy idea! I'll try it next time I bake cupcakes! Thanks for sharing your great photos!
what a quick and simple way to add some flare to cupcakes. i think my sister in law will really love this idea. i've only been on your site for a short while and it just keeps getting better.
I have to make a lot of cupcakes for a cub scout meeting.
How would you handle reloading the bag? Or is it worth it to even reload it? Just start with a new bag???
Charlene, this is one instance where you cannot reload the bag. I would go ahead and prep a couple of bags at the same time and go from there.
WOW! I'm just looking on this site for the first time and I'm dying to try these! They look stunning! I think I might make them for Christmas with green and red coloring and Christmas tree sprinkles. I'm only 16, but my mom likes everyone to contribute something, even my twin sister and my 15 year old sister. These look simple but perfect and I'm so excited for them! Thank you so much for the wonderful idea!
Haley, thanks for finding us! We hope they come out great for you. Merry Christmas!
These should be called "WOW Cupcakes" because WOW is what came out of my mouth when I saw them
I just did a similar cupcake for my daughters preschool class but wish I would have had this frosting technique as I had just used white with sprinkles!! To make an entirely tye-dye cupcake I split the batter into several bowls and added coloring and layered it in the cupcake papers then baked! They turn out fabulous!!! This frosting would have made them even better!
Just tried these for my son's first birthday party. I was doubtful at first, but look AWESOME! It's so EASY, looks cool, and makes me look better than I am. ;)
I made these for my daughter's Kindergarten class they love love loved them...I definitely got cool mom points with these bright creations...thanks so much
Hola! Es una magica idea lo del cubo con fotos. Muy lindo!!
I just stumbled upon you guys from your brilliant diy notepad padding compound tutorial...thanks! This cupcake decorating tip is another one to try for the class bakesale...so many possibilities!! Can't wait to try it out! Thanks :)
Jenn, that's a great idea! I think cupcakes frosted like this would fly off the bakesale table!
This is so epic!!! i will be trying it for this up coming 4th of july! hopefully my cupcakes will look this amazing!
I'm so glad I found this! My little girl is turning 1 in September, and I just started browsing for ideas today. I will certainly be using this method. I've been thinking of ways to make her cupcakes fun without using a giant mountain of icing, and this is the perfect idea. Thank you so much for sharing; I can't wait to start practicing!
Hailey, we're so glad you found us, too! We'd love to see how your daughter's cupcakes turn out :)
this is truly amazing do you think i could use it to make a star tip pattern on a cake??
Julie, I don't see why not! You could even cover a whole care with rainbow stars.
Oh my heck, I can't believe how awesome cupcakes turn out with such a simple technique. You are brilliant. (Just FYI). Thank you for the idea!!
Leilani, isn't it amazing? Even when you do it yourself, you can hardly believe how neat they come out :)
Tried this out this past weekend!! FANTASTIC!! Love love loved it!! Thank you so much!!
This is an awesome technique I am making a zebra and hot pink cake this weekend and will be using this idea to make hot pink and white and black spikey tear drops all over the top of the cake I've been wondering how todo this! Thank you so much! Pray this turns out :)
These cupcakes are fantastic. I just made my first batch yesterday, with plans for many more. Sadly, the soccer practice I made them for was cancelled due to weather today - but we sure enjoyed eating them ourselves! A couple things I noted:
1) After you rinse out the brush between colors, make sure to dry it as much as possible. The paste food coloring kind of slides down the disposable bag as it is, and having any moisture in the brush doesn't help.
2) I thought I needed to have more of the food coloring paste near the bottom of the bag, and less at the top, but the opposite is true. The food coloring seems to slide down a little as it is, and I had a bunch of frosting with too much color in it at first. The second bag with more coloring paste near the top, and less at the bottom, worked much better.
Thanks again for this wonderful idea! : )
Kaiti, I'm so glad you enjoyed this project! The tips you provided are very helpful, so thanks for sharing them with everyone.
amazing! I recently did an Art Birthday party for my daughter. I did a rainbow cake, but this would have been perfect. I will have to try this out!
When I joined Pinterest a couple weeks ago, I immediately thought of these since I loved doing them so much. In fact, I think they were my first pin! Well, today I see them on the popular section - twice!!! Yay! I hope lots of people swing by your site and find more of your awesome projects!! You ladies rock!
Kaiti, thanks for helping to share our projects with the Pinterest world. You rock, too!
This is such a genius idea! My niece's 1st birthday is coming up and I wanted to have cupcakes but, I couldn't find any designs or decorations that were safe enough for the small children to eat (choking hazards with small candies). This frosting is so appropriate for small children. This technique is such a life saver. You guys are phenomenal. Keep up the excellent culinary work. Beautiful cupcakes!
Kattiboo, thanks for the compliments. We hadn't thought about it before, but you're right -- this is a great way to make elaborate decorations that are safe for small kids!
AMAZING! Thank you for the step-by-step. Very much appreciated.
Found your technique through Culinary Concoctions By Peadody - can't wait to try it. I'm going to practice on cupcakes for my co-workers. If I mess up, they won't care what they look like!
Erika, we use our co-workers as testers all the time, they never seem to mind! It's such an easy technique we know they will turn out great!
will the frosted cupcakes colors run if done a day or two in advance??
Jen, I've never had problems with the colors running.
Thanks a million for sharing this! I make rainbow cupcakes for my son's class every year for his birthday and I've been looking for a way to make the icing rainbow too. I will be trying your technique next week.
this is a really clever idea,the cupcakes look amazing, although i am not sure where the food colouring paste is available where i am from...
Michaels or joanns has almost every tip and the paste at an inexpensive price
I just did this late last night/early morning. Turned out great using gel icing and a bamboo skewer as my paint brush. Kinda rolled the skewer from side to side to paint a big enough line. Overall a good method to remember. I hope they are a hit (I doubt my own handy work sometimes)
Oh my goodness! This is PERFECT! I've been trying to figure out how to do this for ages. I've been assigned as Resident Snack-Maker for the Quidditch Games... I'll definitely be making Ravenclaw, Hufflepuff, Ravenclaw, and Slytherin Swirled Cupcakes!
Thank you for this great technique. I used it today for my daughters first birthday, and it came out perfect! I'm going to try this again at Christmas with red stripes and peppermint extract in the icing. Yum.
Did you ever find out if the gel colors work rather than the paste?
Mona, the gel and paste are pretty much the same thing and either should work. The point is to make sure you don't use the liquid coloring, because that won't stick to the sides of the bag.
Could you use gel food coloring instead of paste?
Marianne, as long as the gel food coloring is thick enough to paint on without running down the sides of the bag, it will work fine.
Gorgeous! I'm going to try this technique. My question is, Will you be able to taste the food gel since you're not totally mixing it in the icing?
Pernia, I've never noticed the taste of the gel.
I super love baking and I once saw a cupcake with this type of icing. I did wonder how they made it... super glad and happy that I saw this! Now I'm excited to try it! Thank you!!!!
Just tried this for my son's tie dye birthday party. Cupcakes came out great and it was so much fun to do. I'm so glad I came across this demonstration!
Hi! I’d love to try this technique. Can I use store bought icing for this?
Eve, you can do this with any icing, just keep in mind that store-bought icing tends to be thinner, so you won't get as stiff of peaks with your swirls. And for best results, make sure you choose a bright white frosting, so your colors stay true.
Have you made icing to sit in fridge overnight this way? Does the color still come out OK after it's been in the fridge and come back to room temp or will the color look mushy and bleed a bit?
Liz, I'm afraid I don't have an answer for you... I never refrigerate my cakes or this particular icing, because the moisture can wreak havoc on them. I also try not to frost cupcakes very far ahead of time whenever possible, for the freshest look and taste.