


Recycle Broken Crayon Pieces into Fun New Shapes

Like most kids, my niece loves to color. She has a seemingly endless supply of crayons but whenever they get broken or worn down into small bits, she doesn't want to use them anymore. I've tried melting them down into new shapes before, but the colors would always get muddled and she'd be left with a bunch of new brown crayons. So I brainstormed a bit and came up with new solution, with results that I believe are even better than the original crayons!
The key to my solution is sorting the crayons into color families and melting them separately. The result is a beautiful, layered, rainbow crayon that isn't muddled and is a joy to color with.
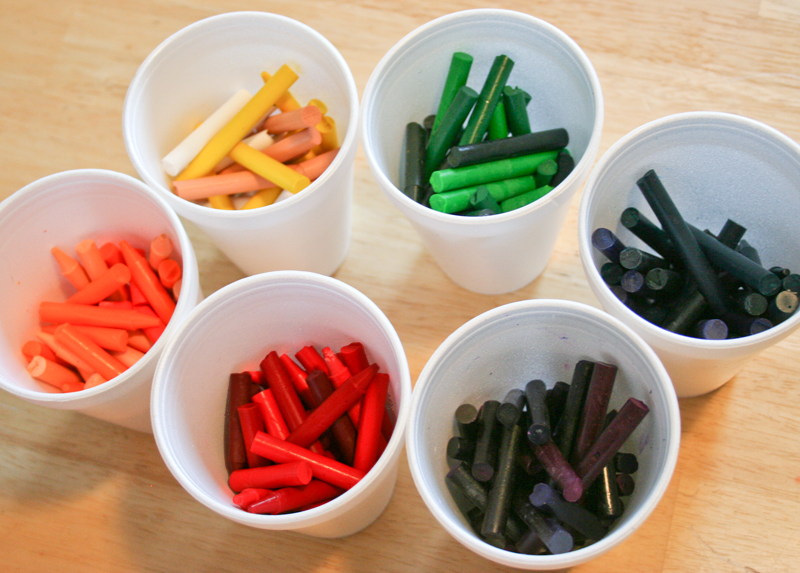
Once you've removed all the paper from the crayons (check out our crayon peeling tips for some help), separate them into color families. I put all shades of red together in one cup, and the same for orange, green, and blue. For yellow, I tossed in the white and tan crayons, which I knew would blend well into the yellow. The result was fun array of colors.
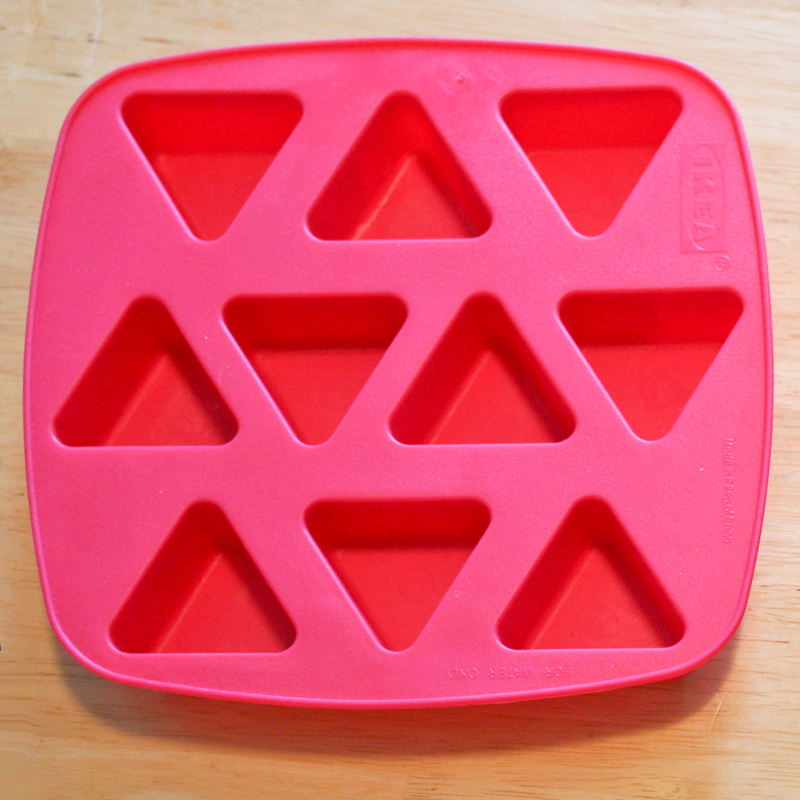
Next you need to choose your mold. I find that silicone ice cube trays work great for this. They come in numerous shapes and sizes, and the flexible silicone makes it so easy to pop the crayons out when you're done. They are also totally non-stick and can handle the heat from the melted wax, so they are perfect. (Please do NOT use them for food after you've used them for crayons!).
Now it's time to melt the crayons! Dump each color into a separate food can that has been washed and dried. You'll need something metal that can handle the heat as you can melt the crayons, and using something disposable will save you a ton of cleanup later! Then place the cans in a pan of water on the stove to heat it gently until the wax is melted.
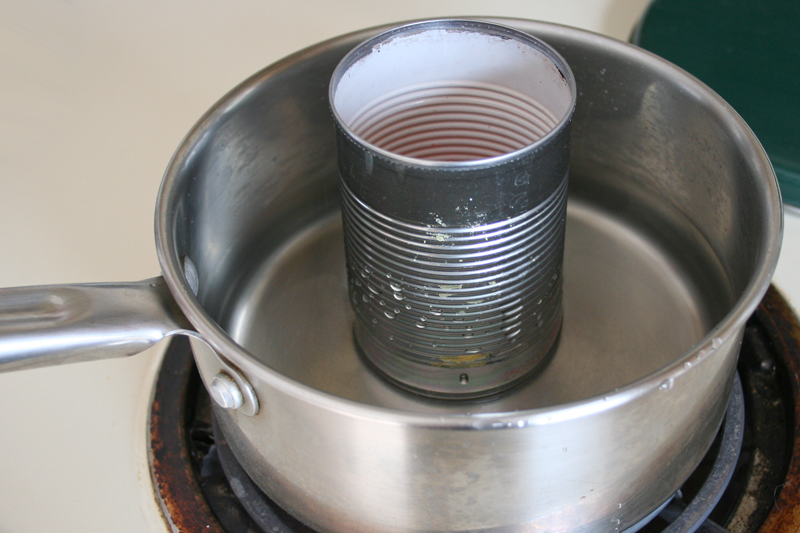
You could also melt the wax by placing the cans in the oven on low heat if you prefer. Either way, be sure to always handle the cans with an oven mitt, because they will get very hot. And be super careful of that hot, melted wax!
Use a disposable plastic spoon to stir the wax until it's all melted, then use it to carefully ladle a thin layer of one wax color into the mold.
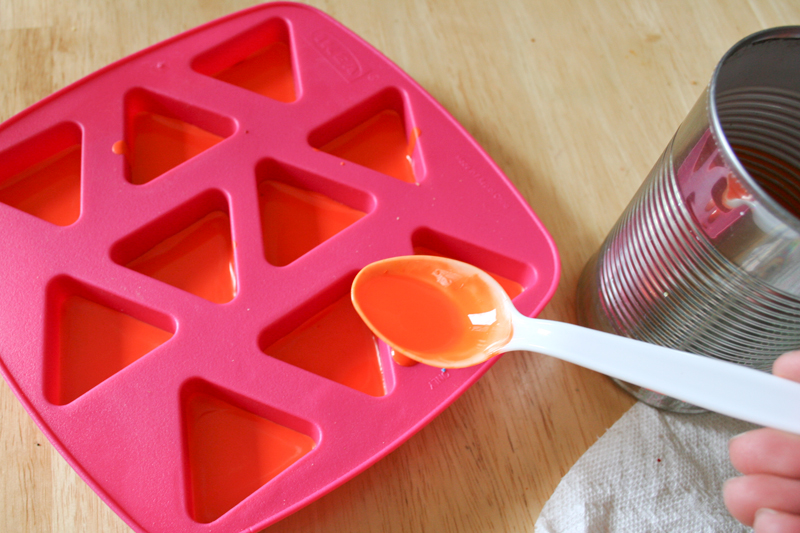
Let the wax harden, then move on to your next color, and spoon in another layer of wax. For my rainbow crayons, I started with a red, then added layers of orange, yellow, green, and blue.
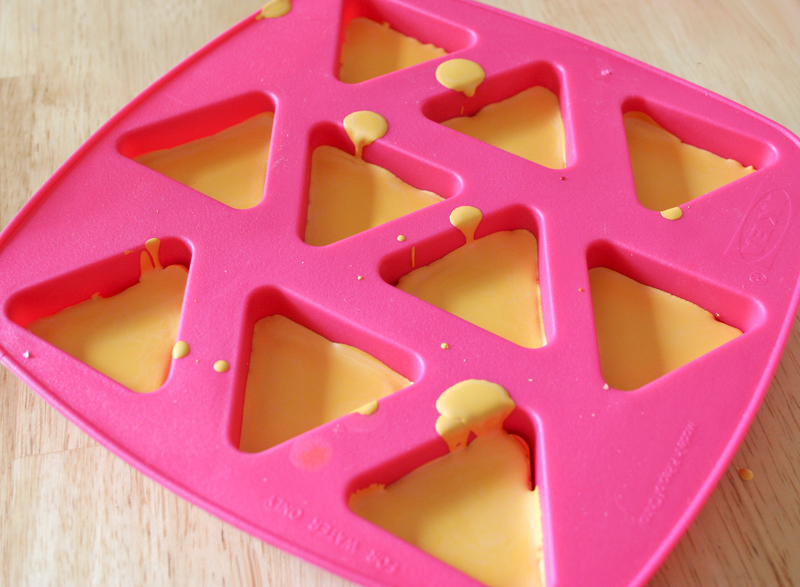
After each layer, you may have some spills and drips. For the cleanest lines between layers, try to clean those out before you add the next color.
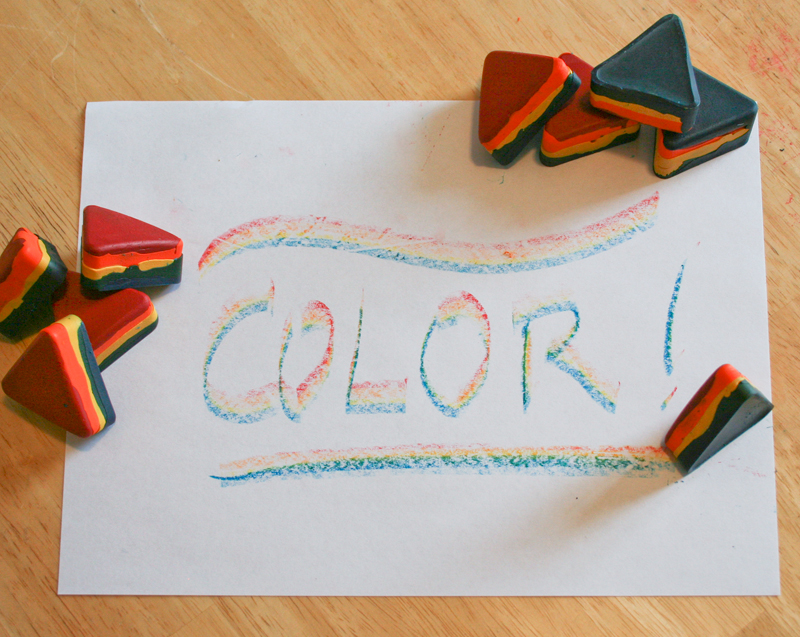
Once you've added layers of color as you wish and your molds are full, let them cool and then flip them out onto the table. If you have any rough edges, you can smooth them down by coloring on a scrap piece of paper.
I love the triangle shapes I made because the corner edges make rainbows. They are also nice and chunky, which makes them very easy for toddlers to hold onto. And the flat sides keep them from rolling away on the tabletop, like regular crayons do!
similar projects
How to Remove Crayon from Hard Surfaces with Vaseline
Custom Crayon Box Invitation
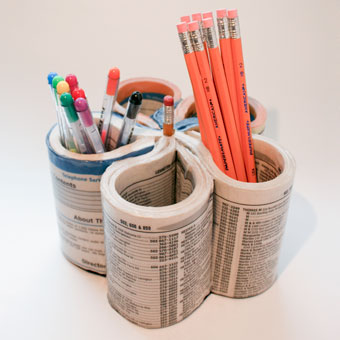
Recycle a Phone Book into a Pen Organizer


19 comments so far:
Love the idea, my girlfriend is in design school and is always using Crayons to sketch and color. This would be perfect for stubs.
I have been looking for a fun way to recycle the crayons I have saved from the restaurant where I work. I was a little apprehensive about peeling all those crayons, so my mom suggested soaking them in warm water. It worked great. I soaked them for less than a minute, and I had nearly 200 crayons ready to go in less then 10 minutes. The paper just fell off!
I love this..I have 3 kids (2 love to draw and color) and work at a school. I'm going to ask the teachers to save the crayons instead of throwing them out. Oh I wish I would have seen this earlier in the school year.
I always tell my kids to take their crayons home. I figured they just got thrown away and they always use crayons at home. I wonder if restaurants would save them if you asked...hmm gonna check on that now
Perfect idea! I work as a preschool teacher and wanted to layer them like that but wasnt sure of a good way to do it. and your way seems very clean also! i just wish i would have seen it before breaking all the crayons into tiny little pieces. oh well!
Can't wait for the kids to do this, i know they'll love it!
thanks for the great idea and it sure beats the $50+ price tag on a crayola crayon maker!! way more fun to make too!
this would be great for the airplane too as they dont roll away!
Awesome! Totally answered my question about hot crayons and ikea ice cube trays! I'm doing crayon hearts for valentine's day: "You color my world"! What would happen if I put the ikea ice cubes trays with broken crayons into the oven or microwave? Would the tray totally melt?
Rachel, we've never tried putting the IKEA trays in the oven, so I don't have an answer to your question. Perhaps you can contact IKEA and see if they are oven safe? If you do try to bake them, I suggest the following precautions: 1) put them in a disposable container in case they melt, 2) use a very low temperature, and 3) make sure the kitchen is well ventilated in case the heated trays give off fumes.
I just found one of mine and it says for ice only so I imagine it will melt if placed in the oven!
Hi
these crayon remakes would be nice to put in a childs gift bag you get at the party. WOW thank you.
marlene
Your project was really inspiring. I found some caterpillar molds and they turned out super cute. I also ended up using cupcake tins instead of the cans since I didn't have any cans and didn't have that many crayons either--they did the trick! Yay!
#22 Rachel - No, they are not ovenproof. I tried it tonight with one from Ikea that says to only use for water. The edges started to droop and there was a little smoke coming from it before I got it out of there.
I bought plastic candy molds (seashells) but they come in a variety...they were less than $1.50...I microwaved the colors (on a power of 7 for less than 2 min) and then poured them in the molds. They cooled quickly and were easy to get out of the molds.
This last February I did something like this too. I found you could use a razor blade to slice down the side of the paper to remove it easier, if someone doesn't have the cutting tool that you have. Also, I took my crayons and broke them into small pieces, Then just mixed the broken pieces of all different colors right into my mold. I then put the mold on a cookie sheet and into a 250° oven for about 15 minutes. Turn the oven off and leave it alone about 45 minutes to 1hour. Once the wax hardens, pop out your crayon and enjoy. The colors will be a beautiful design and not be muddled, the trick is don't move the mold until they are set. I made mine in the shape of small hearts, we gave them to my daughters preschool class instead of candy for Valentines Day. If interested I do have pictures.
If you have the silicon that you can put in the oven then you dont need to melt the crayons down. You just break the crayons load them in and bake! We added glitter and did then as xmas treats for the class
Tara, your method does work well for random-color crayons, but for a true layered "rainbow" crayon, the separate melting of each color is necessary.
I loaded broken crayons into a silicon heart ice cube tray I had been given some time ago but never used. I tried it in the microwave first and partly melted the tray then tried it in the oven on pretty low and melted the tray further. I'm guessing there are different qualities in silicon moulds. Some clearly cant handle heat. :-(
I'm sorry you had those results, Naomi, but you're right -- some molds shouldn't be used in the oven. I would try to stick with ones specifically labeled as safe for the oven.
For a great kid's science experiment, put your mold in a sealed tupperware, leave in the sun!