


Make Your Own Foldable Reusable Shopping Bags

Like many people these days, Jo and I are becoming more aware of our impact on the Earth, and are trying to help reduce waste by skipping the plastic bags and using reusable shopping bags instead. Of course we want those reusable shopping bags to be fashionable, so making them ourselves seemed like the perfect solution. Plus, by creating our own custom bags, we could make them out of durable, inexpensive material, with a fold-up feature to allow us to carry them easily with us at all times.
We studied the features we really liked from Baggu and Envirosax shopping bags and incorporated some of those ideas into our own pattern. So if you're like to sew your own fold-up reusable shopping bags, I'm here to show you how!
Step 1: Choosing your fabric
While you can make these bags out of any material, we especially love using ripstop nylon fabric because it is lightweight and super durable, and thin enough to allow the bag to fold up into a nice little bundle that's easy to tuck away. FYI, the name "ripstop" refers to the tiny grid of strong threads that run through the fabric, so that if the fabric ever tears, the tear will stop at the next thread it reaches. Clever!
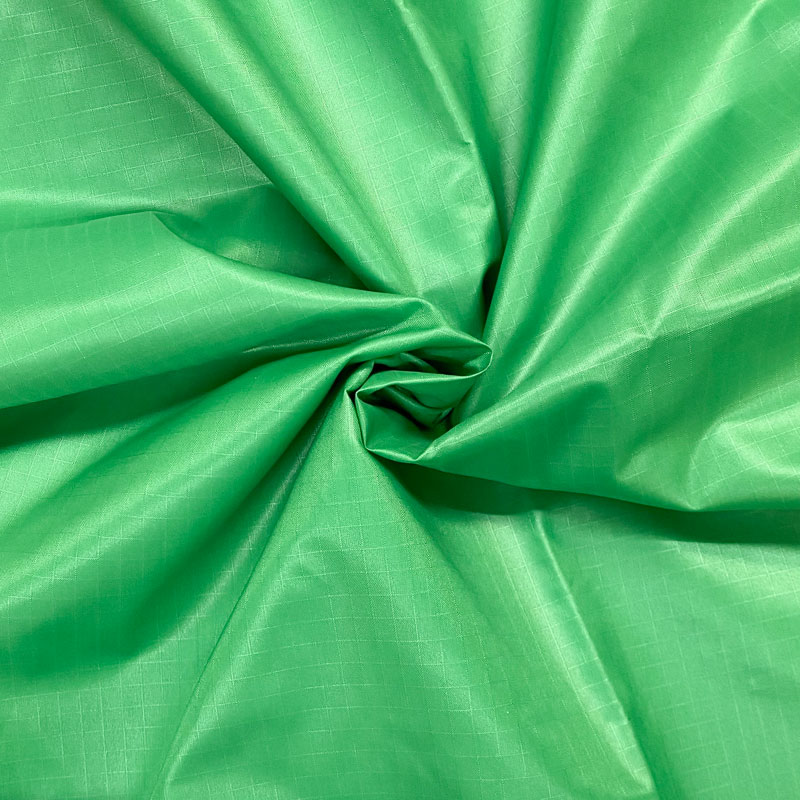
The only drawback to using ripstop nylon is that it's not available in a very wide variety of colors or patterns. I'm willing to sacrifice fashion for durability in this case, but if patterns are more important to you, you could use any non-stretchy fabric you want. Just be sure to choose something thin and lightweight, so that your finished bag is easy to store and carry.
Step 2: Making the pattern
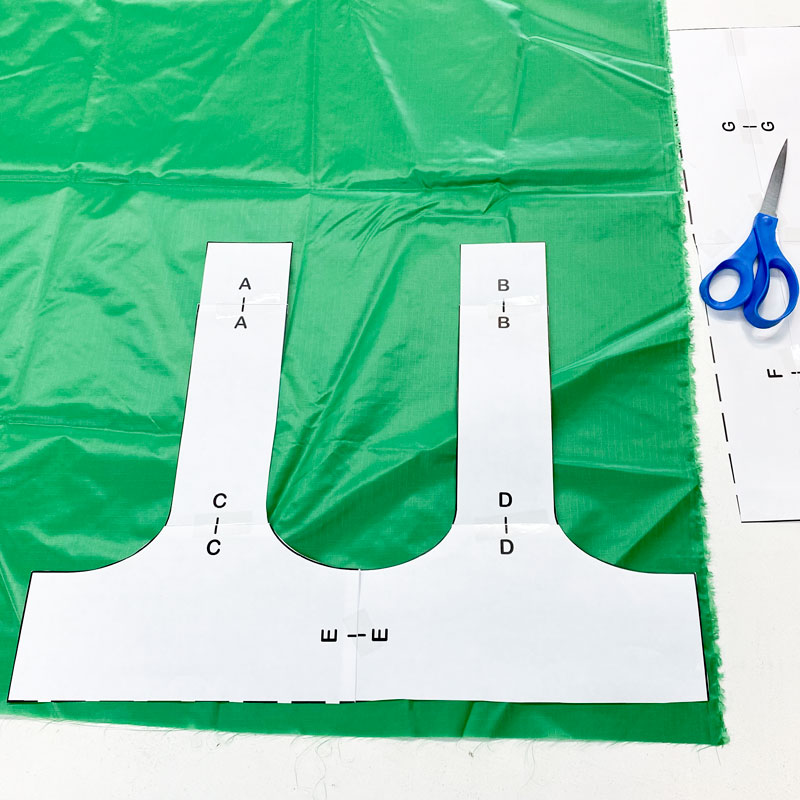
To make your own reusable shopping bag like mine, start by downloading my DIY reusable shopping bag pattern, then print it onto regular paper.
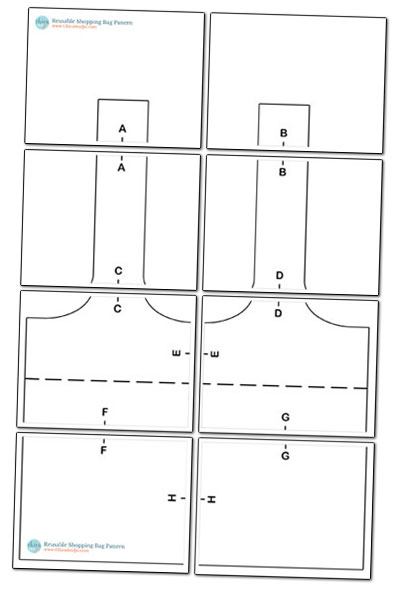
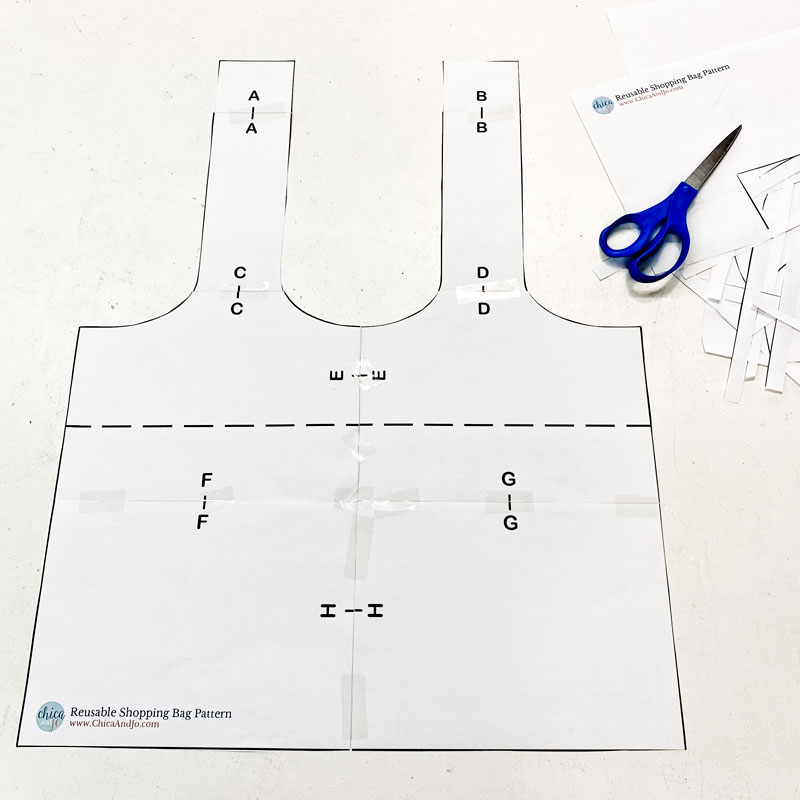
Cut all the pieces out and tape them together, lining up the matching letters at the sides. (Connect A to A, B to B, etc...)
Step 3: Cutting the fabric
Fold the fabric in half so that there are two layers, then lay the full pattern out on it and pin it in place. You need to cut this pattern out twice, and by doubling up the fabric first, you can cut both pieces out at once and save some time. Cut the shape out about 1/2" larger than the pattern, to account for a seam allowance.
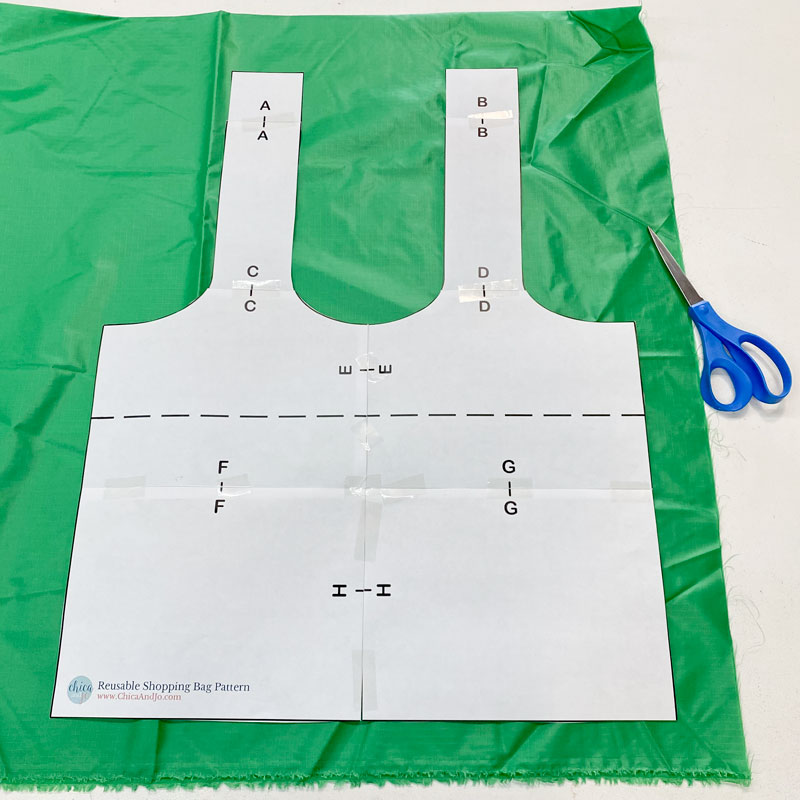
Then trim your pattern at the dotted line and cut out two more pieces (again, doubling up the fabric to save time) from this smaller pattern. Be sure to cut about 1/2" larger than the pattern, to account for a seam allowance.
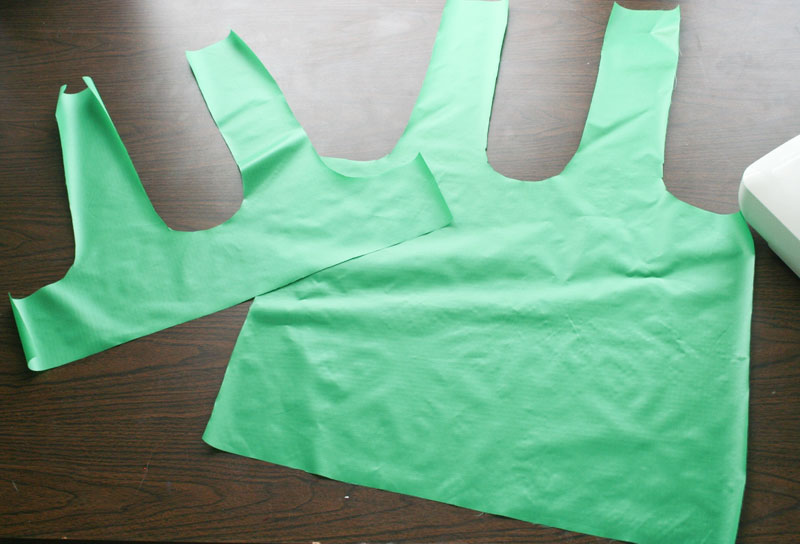
You will end up with four pieces of fabric — two long ones for the bag's shell, and two shorter ones, which will form a liner for the handles.
Finally, you will need a piece of fabric that measures 2" x 10" for the snap enclosure. More details on that later, but go ahead and cut it now while you've got the scissors out.
Step 4: Finish the rough edge on the lining
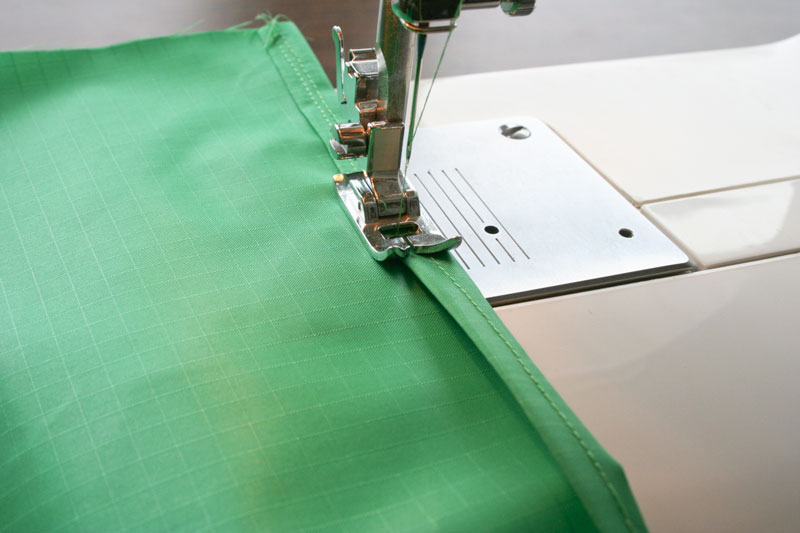
The two short pieces you have, which will be used as a lining inside the bag, need to have the rough edge on the bottom hemmed. To do this, take one piece and just fold the bottom edge over about 1/4 - 1/2" inch and sew it down.
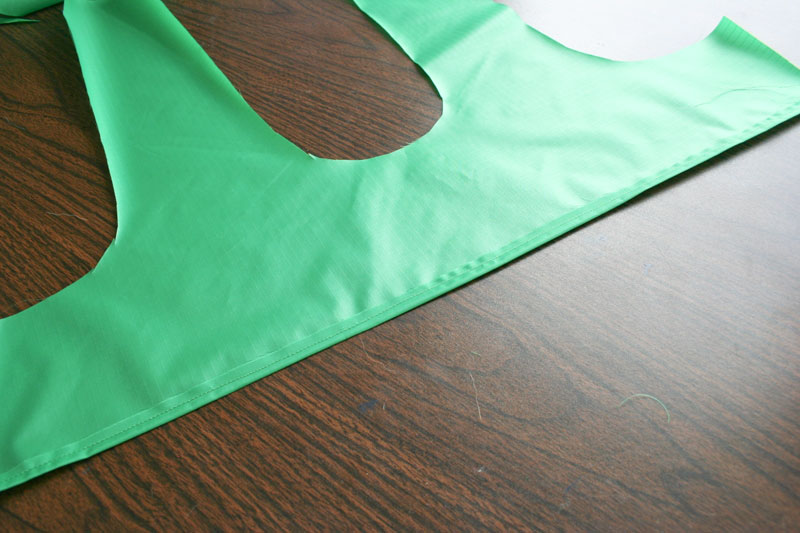
Then fold that edge over again and sew it again, completely enclosing the rough edge.
Repeat this step for the other piece of short lining, so that they both have hemmed edges.
Step 5: Sew lining in place
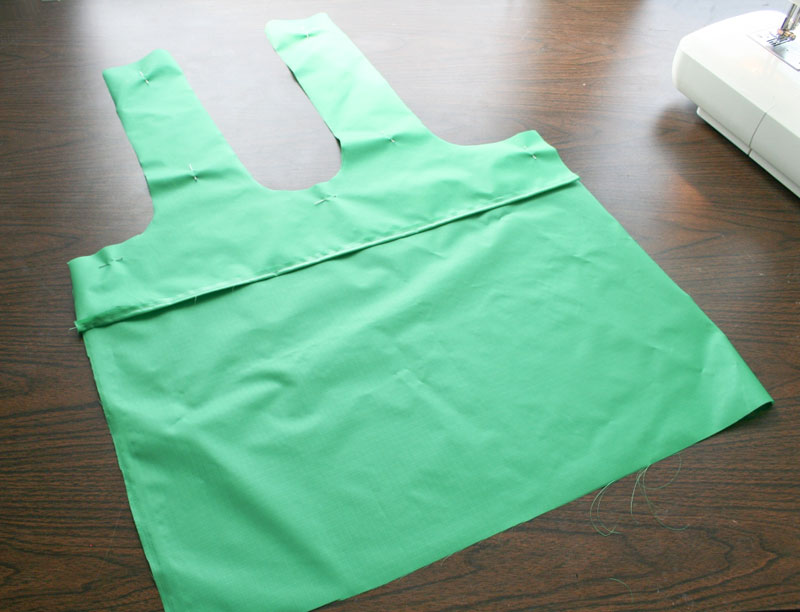
Lay one of your short lining pieces on top of one of the larger pieces, with the finished side up (folded hem edge face down). Line up the handles and pin the lining in place.
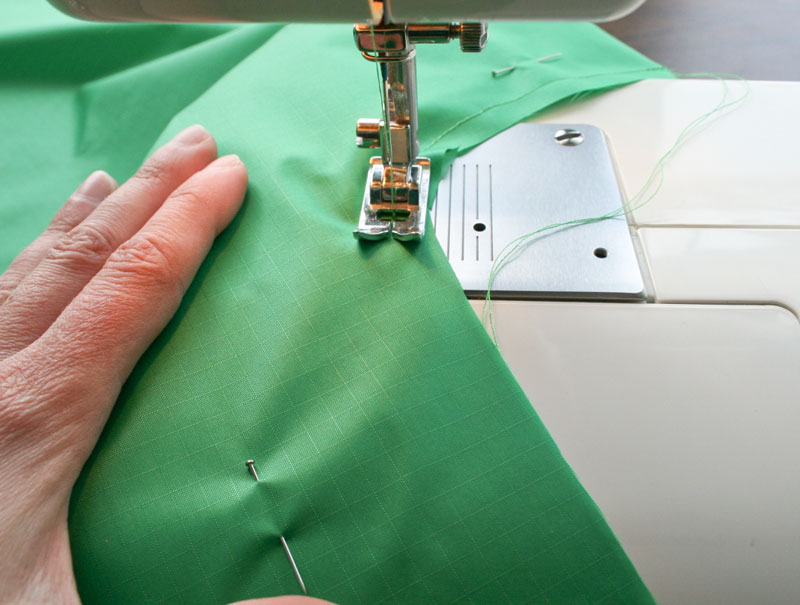
Sew all along the sides only (not top or bottom) of each handle, about 1/2" from the edge.
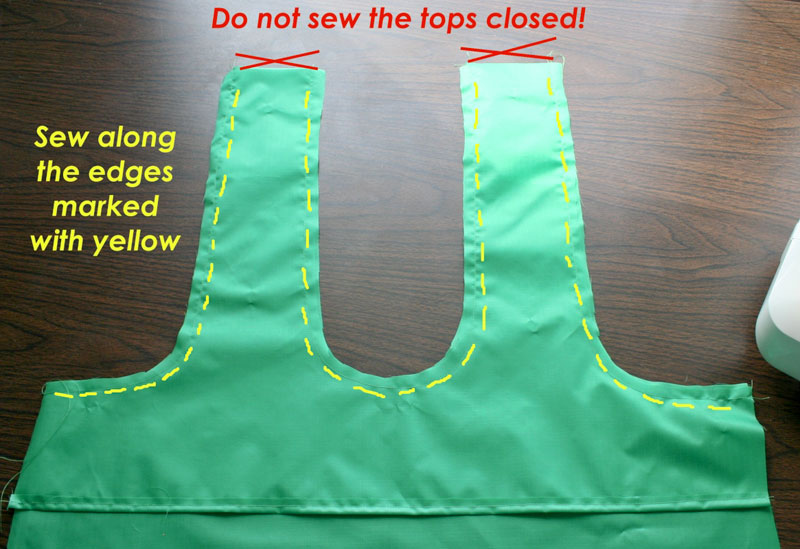
The diagram below shows where you should sew — only along the sides of the handles and the top edge of the bag. Do not sew the top of the handles or the sides of the bag.
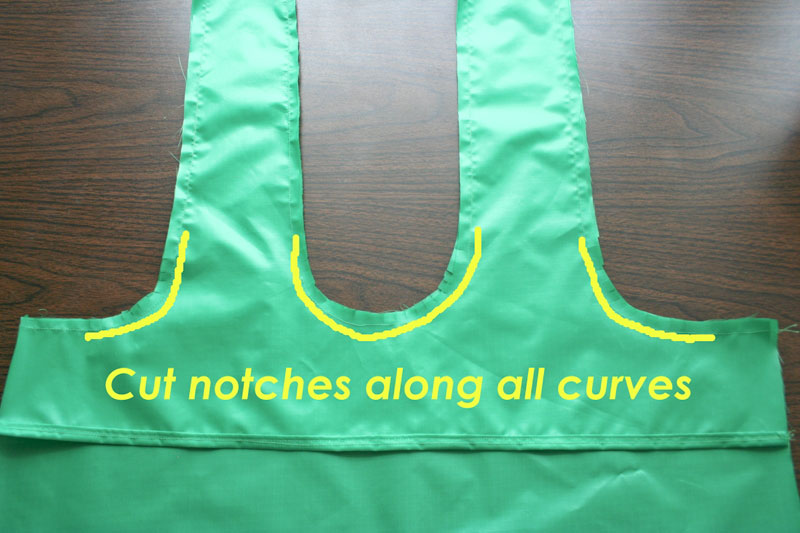
Next you need to cut little notches in the seam allowance wherever there are curved edges on your piece. This is necessary if you want the fabric to lay flat after you turn it inside out. Just make tiny cuts up right up to the edge of the stitches (but not across them!) along any curved edges.
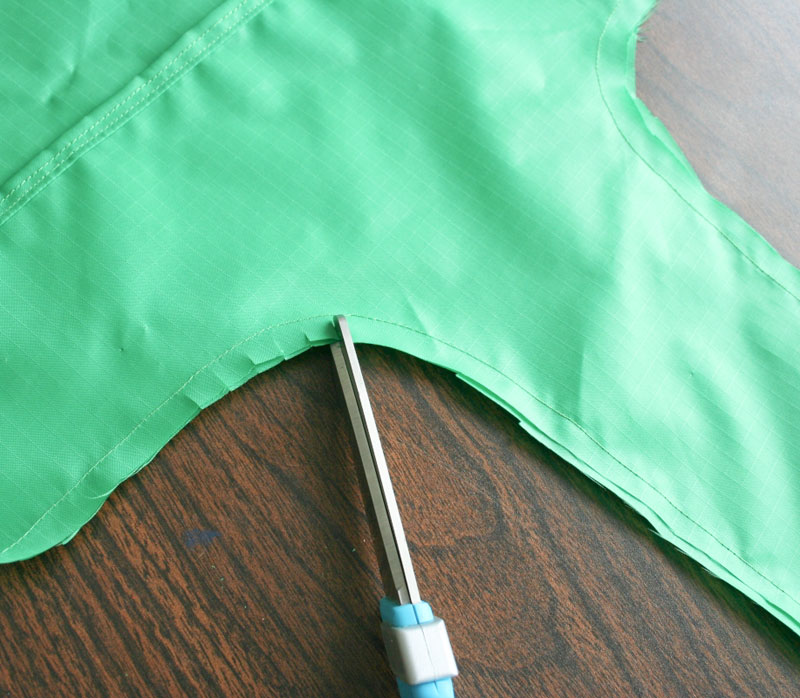
The diagram below shows where you should cut — only along the curves at the base of the handles.
Repeat this entire step for the other two fabric pieces, to create the other side of the bag.
Step 6: Finish the edges of the top
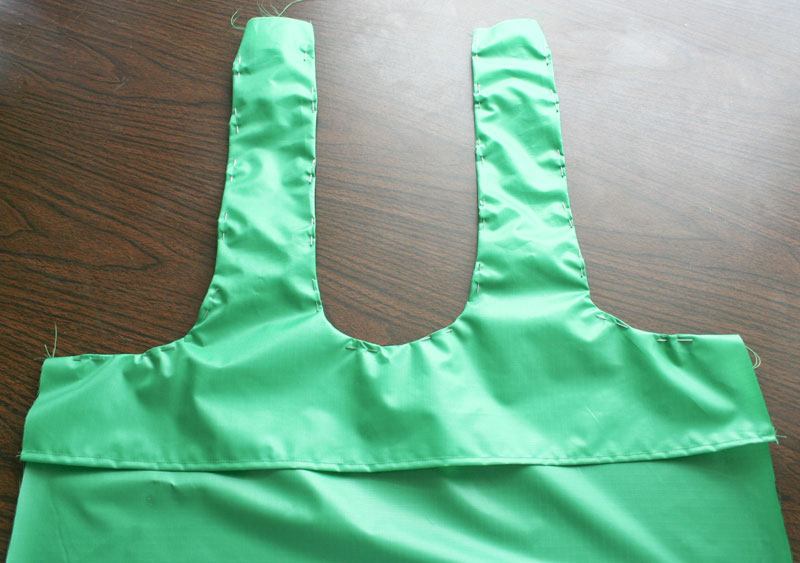
Turn your piece inside out and smooth it down as flat as possible. Pin all your edges for stability.
Run a line of stitches along every sewn edge, as close to the edge as possible. This will strengthen your edges and make the bag lay flat and smooth.
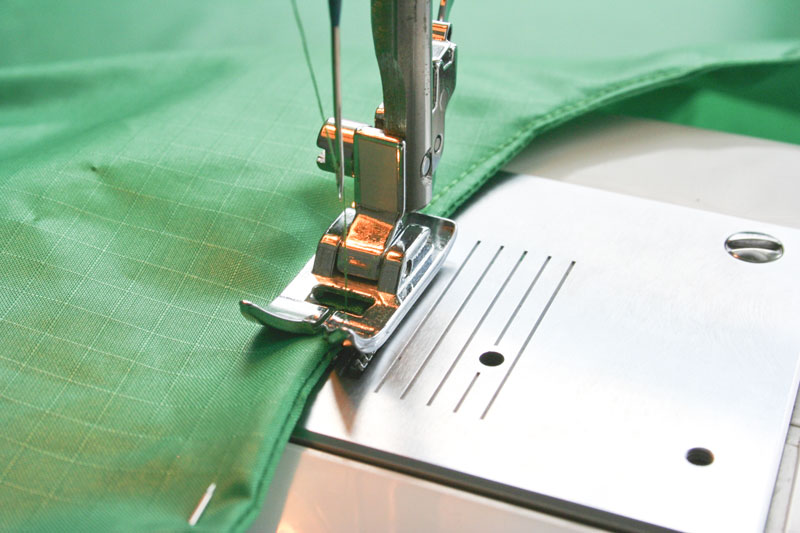
Again, do only the sides of the handles and the top of the bag — do not sew the top of the handles shut.
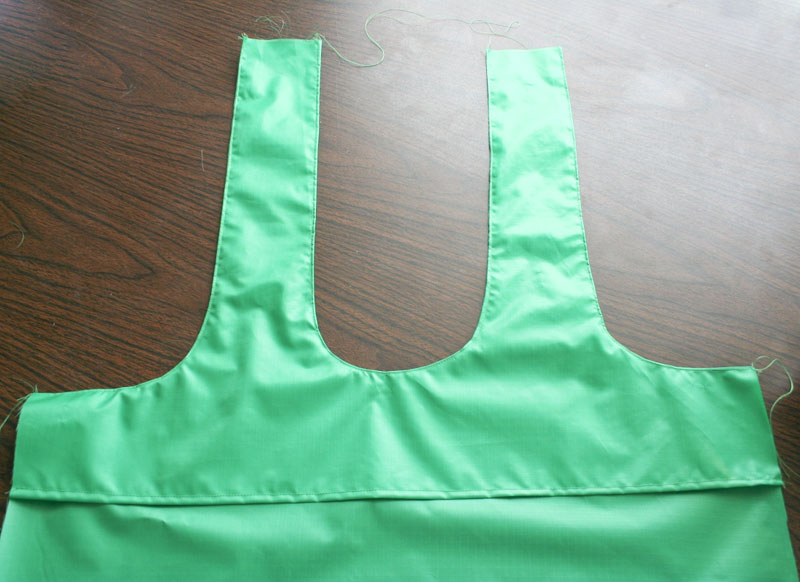
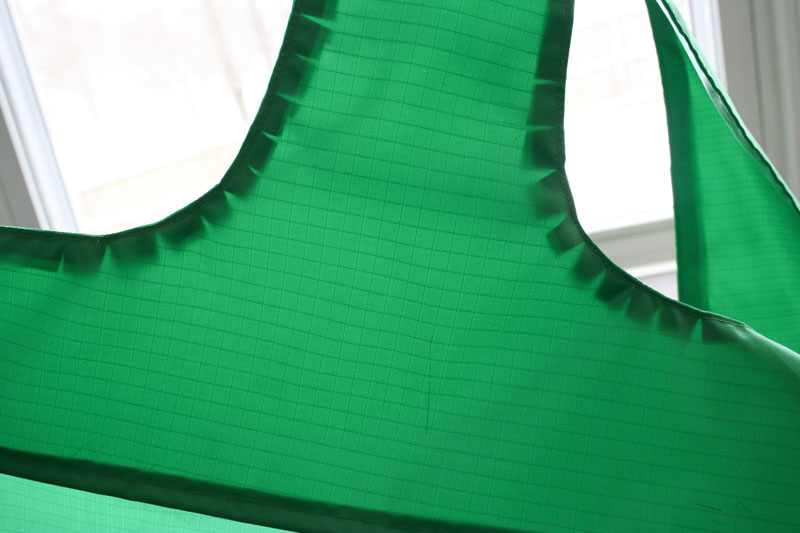
If you want to see the difference those notches made, just hold your piece up to the light and look through it. The notches have spread, allowing your fabric to lay flat around the curves.
Repeat this entire step for the other half of your bag.
Step 7: Finish the handles
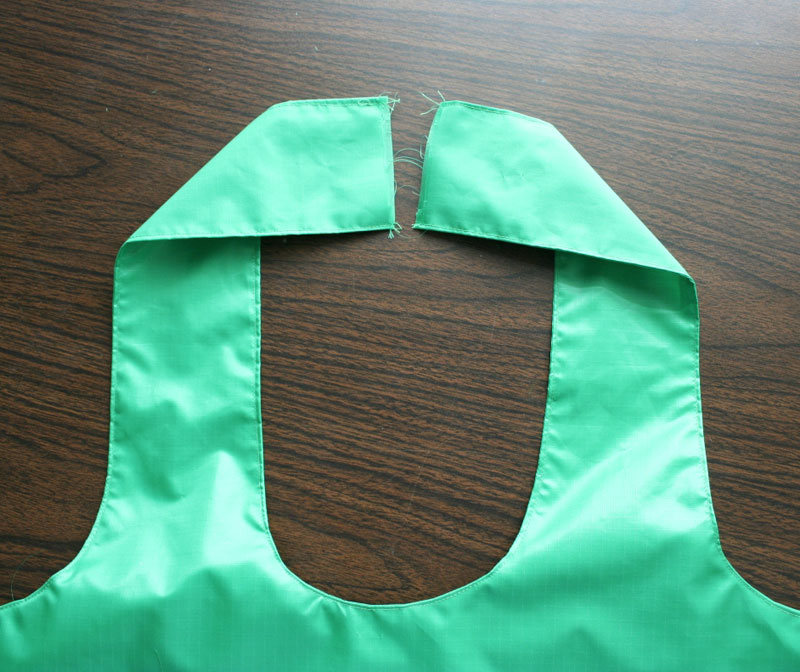
To me, the trickiest part of the bag is sewing the top of the handles together. Because we had to leave these ends open in order to turn the piece inside out, we now have raw edges that need to be taken care of. In addition, this will be a stress point on the bag, so it needs to be sewn well for strength.
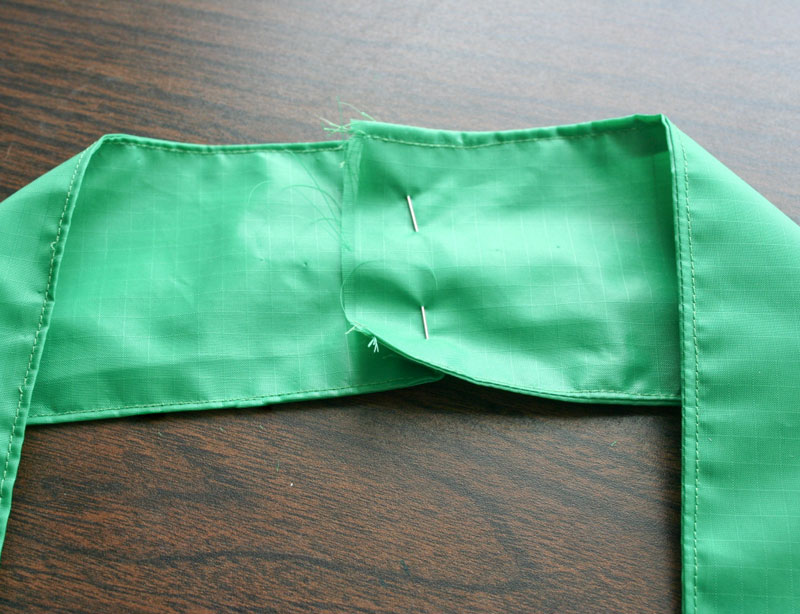
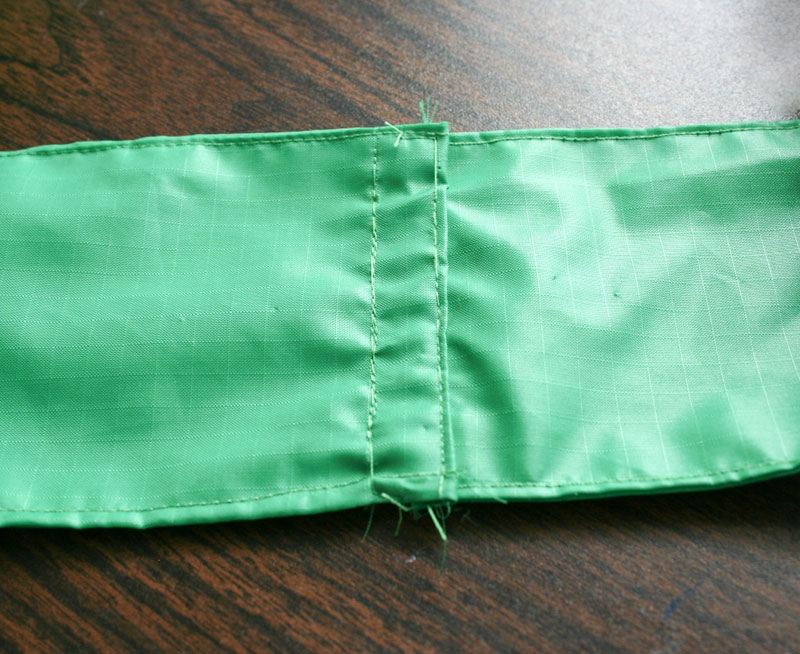
Start by folding the two ends towards each other.
Then take the piece on the right and fold the edge under about a half an inch.
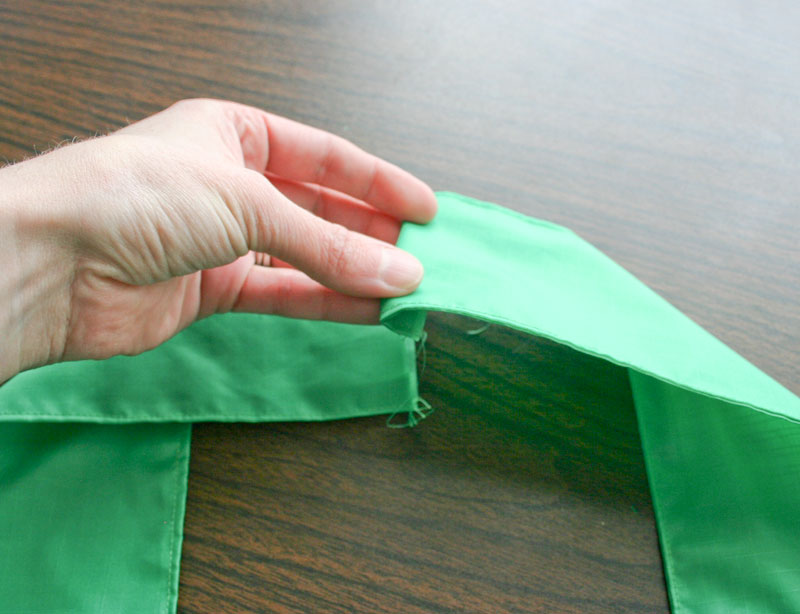
Place it on top of the other side, pinning it in place. This takes care of the raw edge on that side.
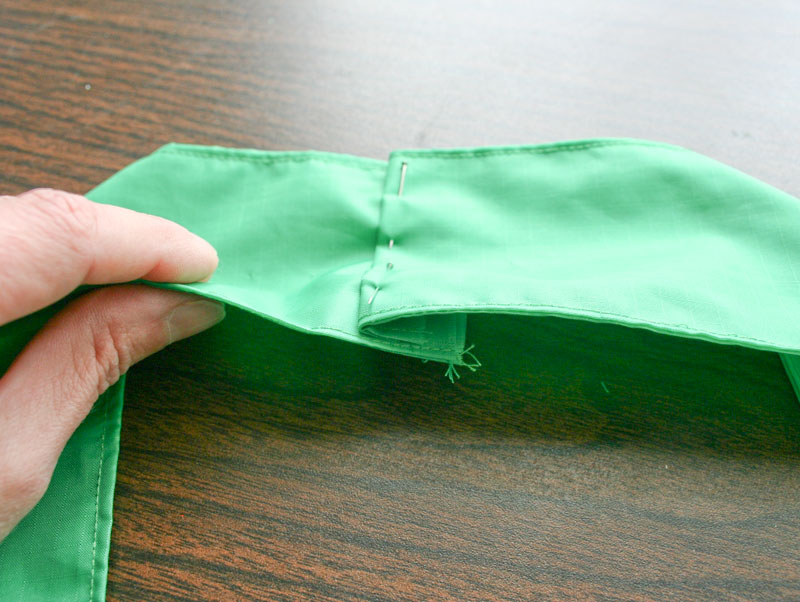
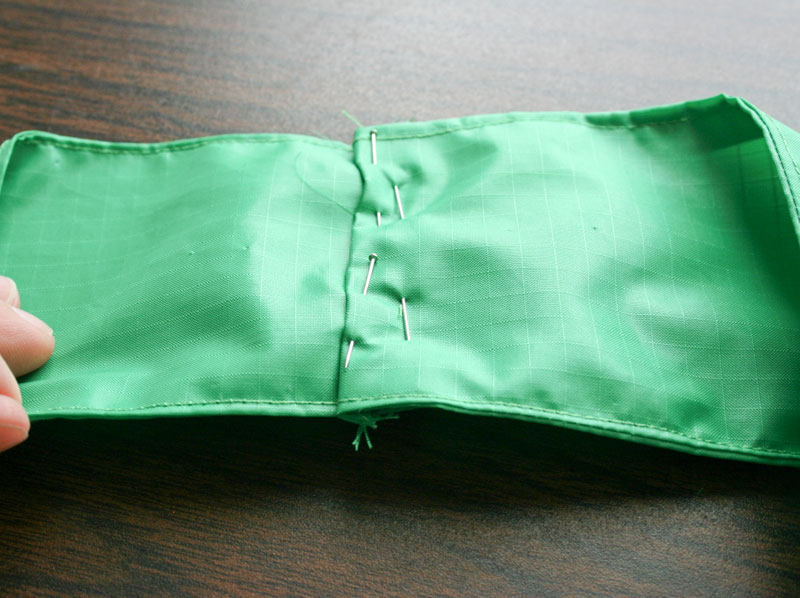
Flip the handle over, and you'll see the other exposed edge, from the left side of the handle.
Tuck that edge under as well, and pin it in place.
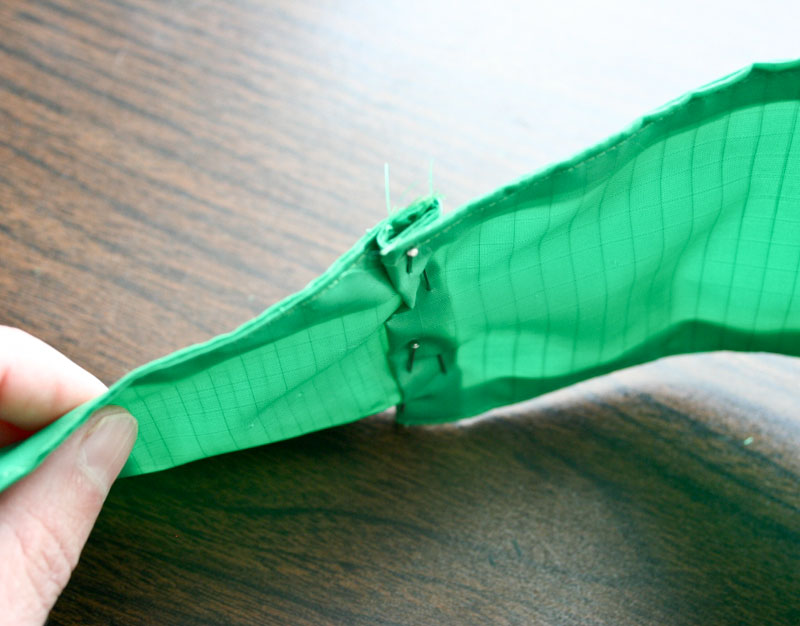
If you look at the seam sideways, you'll see a sort of Z shape formed by both tucked ends.
Head to the sewing machine and sew down one of your folded edges, as close to the fold as you can get.
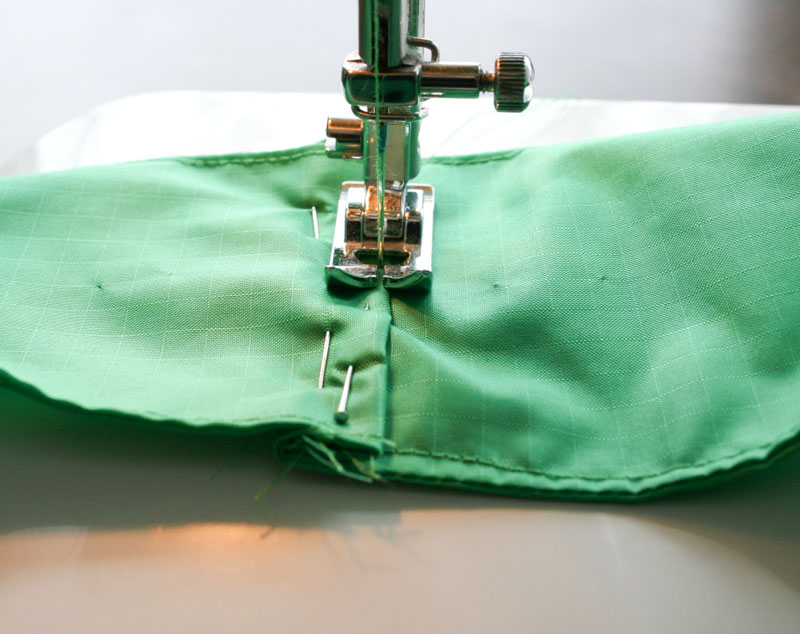
Repeat on both sides, forming a rectangle of stitches that locks the ends together and creates a durable seam.
Next you need to sew up the other handle, and you want to make sure it's the same length as the first. To ensure that they match, lay the piece with the finished handle on top of the other piece and line up all the edges.
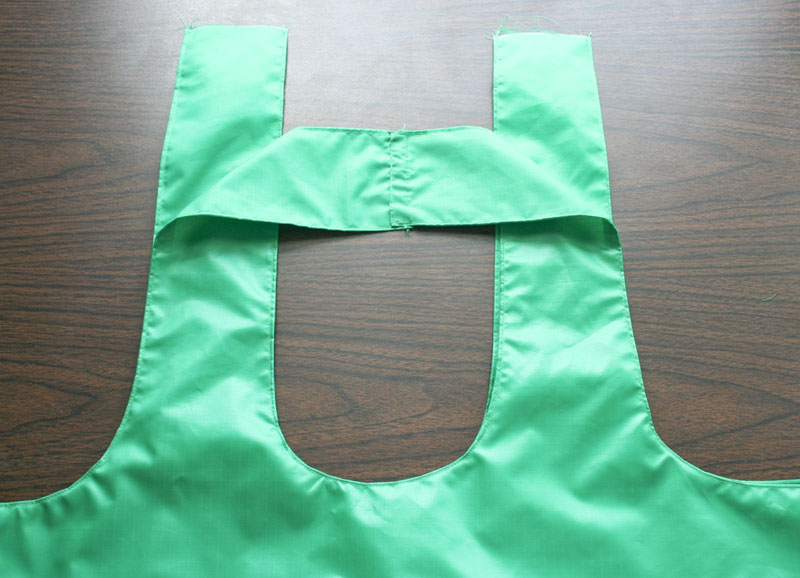
Fold the ends of the handle over the finished handle and pin together.
Separate the two pieces, and you'll see that the handles are the same size.
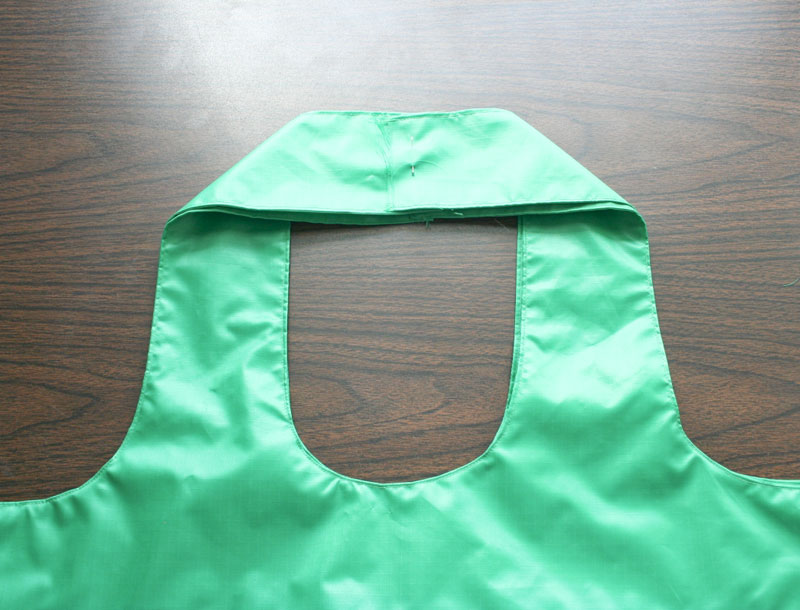
Now use the process described above to finish the second handle with tucks and seams.
Step 8: Create the snap enclosure
The two halves are basically done, but before sewing them together, you first need to create the snap enclosure that will let you fold your bag up for easy storage in your purse, pocket, or car.
This is where you'll need that 2" x 10" piece of fabric that you cut earlier, as well as a sew-on snap.
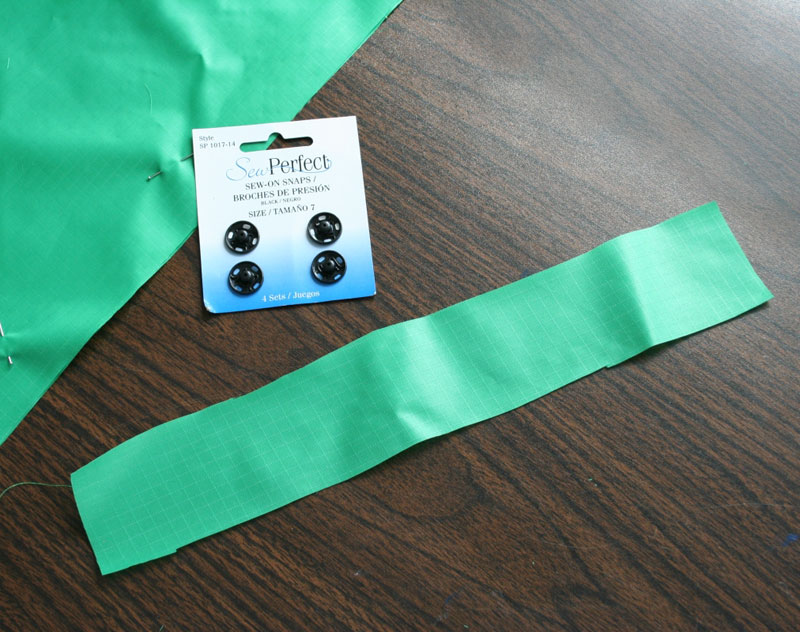
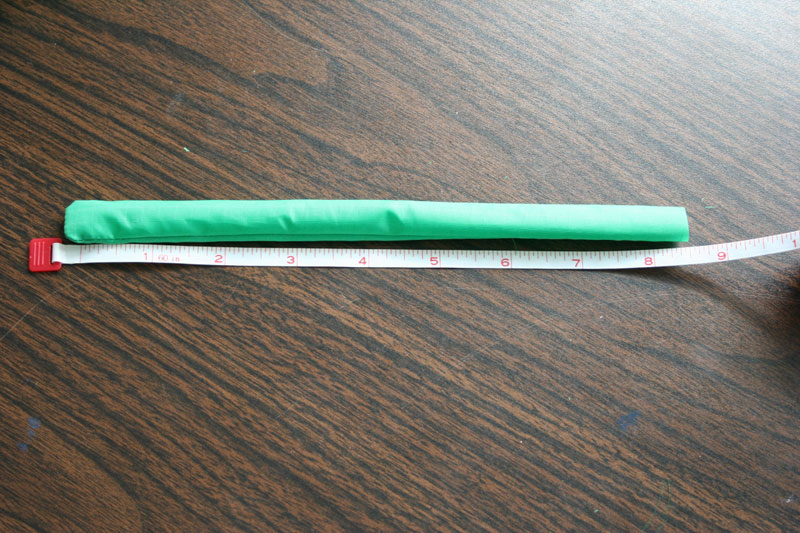
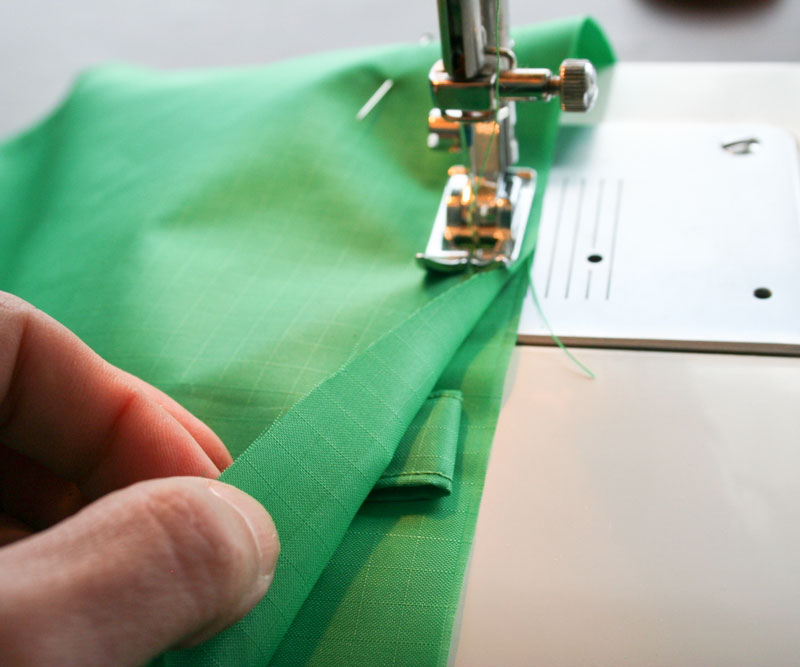
Fold the fabric in half lengthwise, then stitch along the long side and one short side. Turn the tube inside out (poke a pencil in the sewn end to help you flip it) and cut it to 8.5" in length.
Tuck the final open end of the tube in 1/2" and sew it in place. Stitch along all four edges, as close to the edge as you can, for support and to force the strip to lay flat. Then hand-sew on the two halves of a snap to the two ends of the strap.
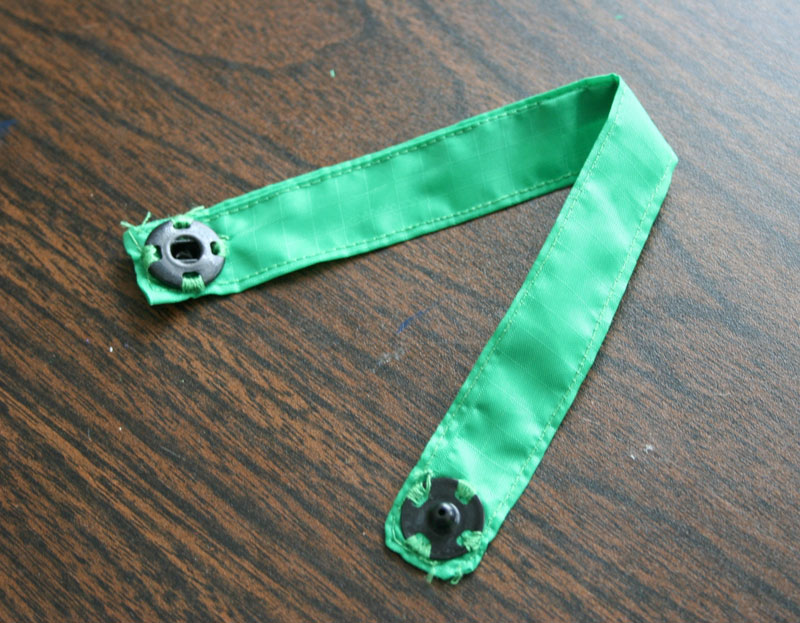
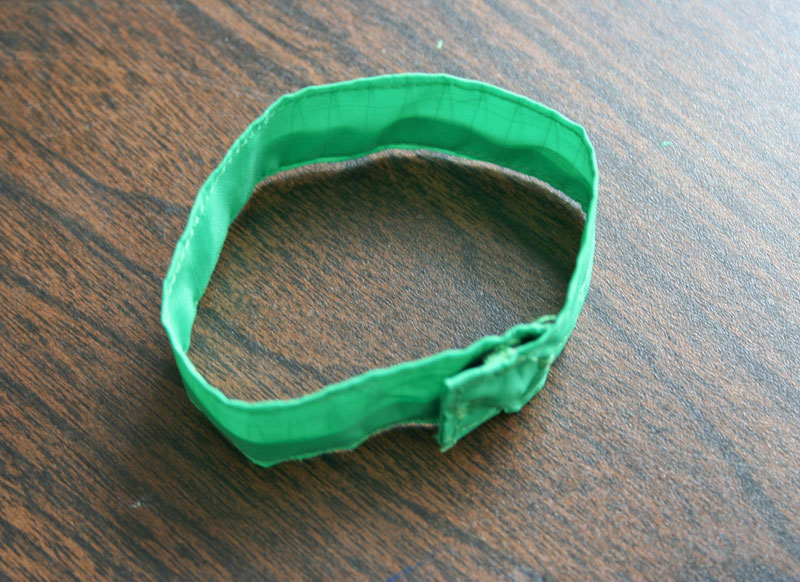
Make sure you sew the snap in a way that the finished stray will snap closed in a circle. Test and re-test before you sew that second snap on, because it's very frustrating if you sew it on upside down on backwards... trust me!
Step 9: Assemble the bag
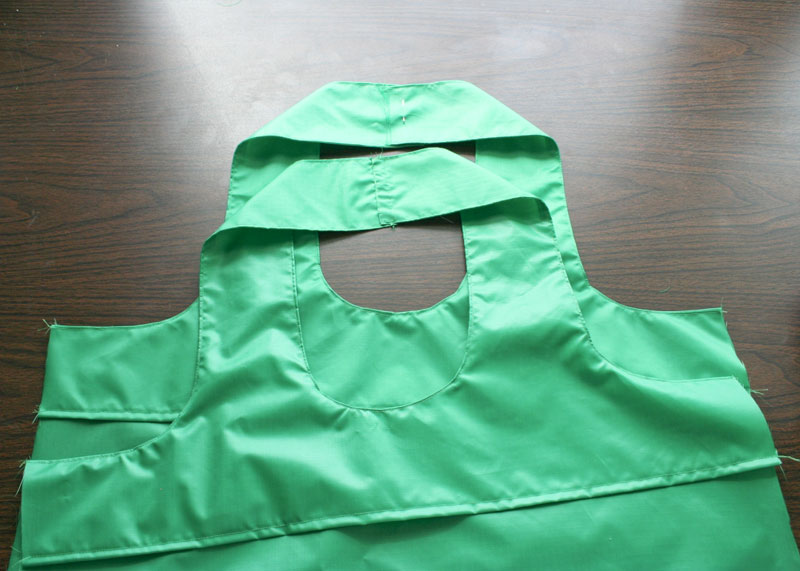
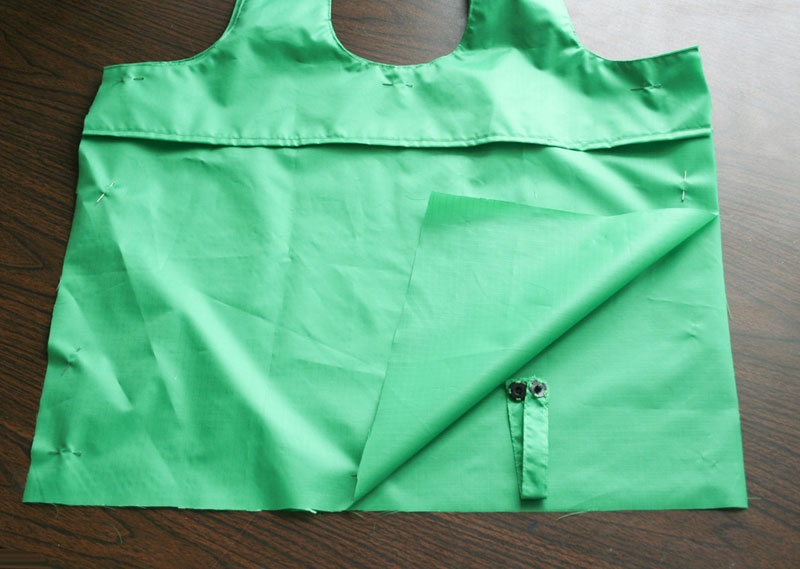
Finally you're ready to sew the two sides of the bag together! Put the first half of the bag on the table with the lining side facing down and the other half of the bag on top of that, with the lining side face up. Then line up the handles and the top of the bag so that everything is even and straight, and pin the two pieces together in several places.
Then take your snap enclosure and fold it in half and tuck it in between the two bottom pieces, putting the fold at the edge of the fabric, and lining it up directly under one of the handles. Pin in place.
Sew the sides and bottom of the bag together, being sure to sew right over the snap enclosure as you go.
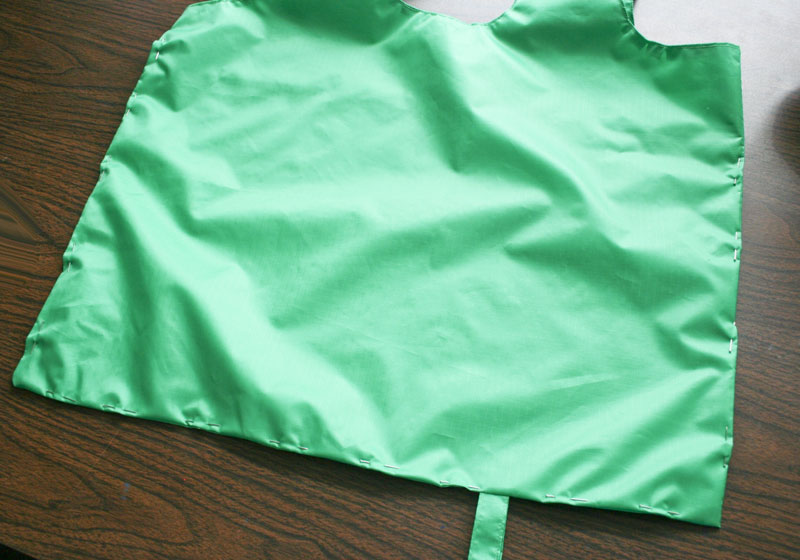
When you're done, turn the bag inside out. Hang on, you're almost done!
Step 10: Finish the edges
The last thing to do is finish the outside edges of the bag (much like we did for the handles) to reinforce the seams and make the bag lay flat. Start by pinning the sides and bottom together, then stitch as close to the edge as possible.
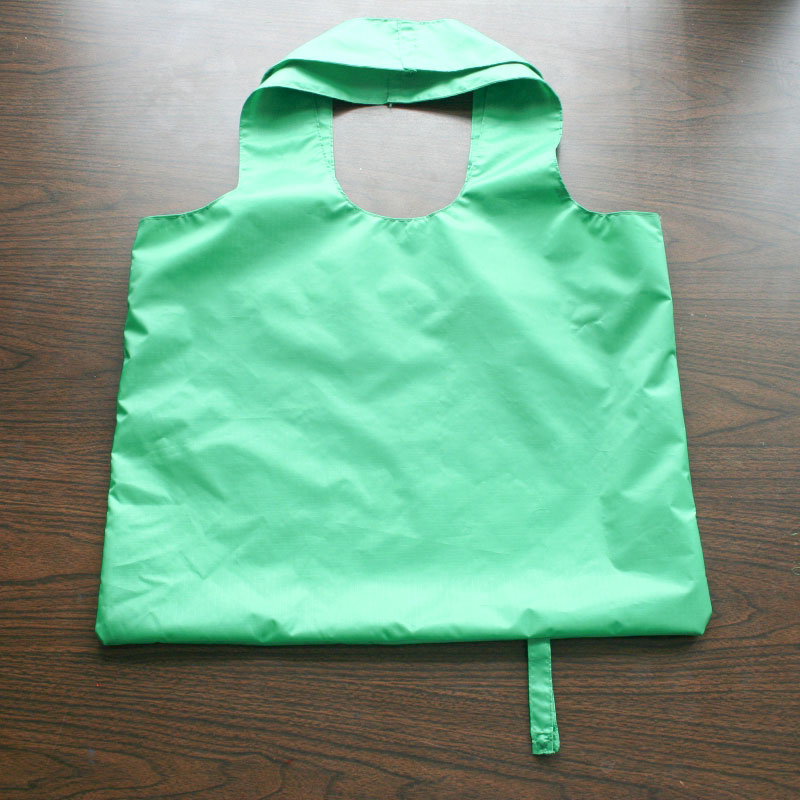
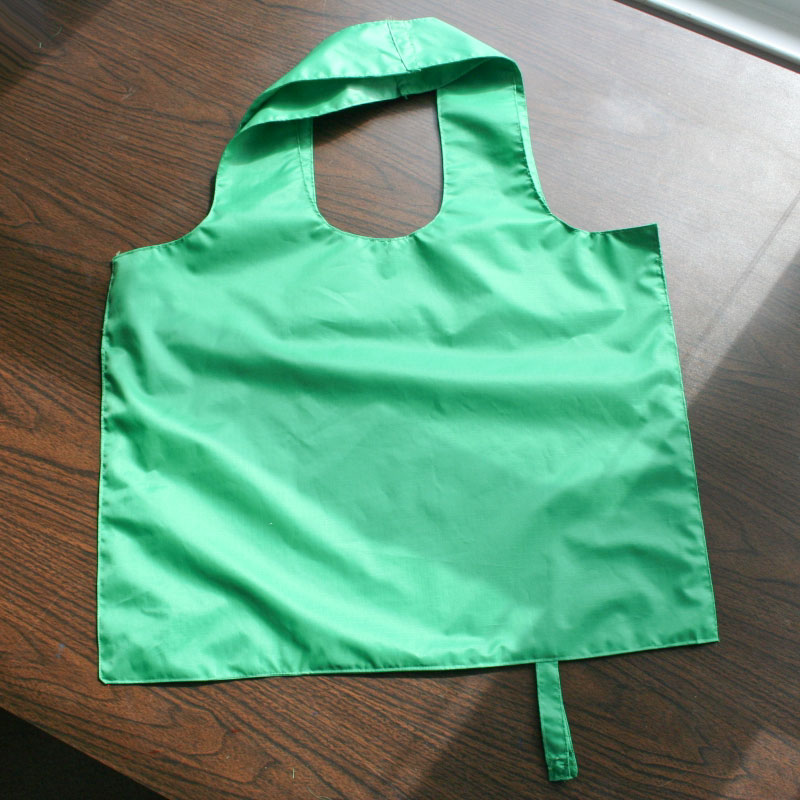
You're done! Now you've got a great and sturdy tote bag that's ready for your next shopping trip!
Step 11: How to fold the bag
Okay, I guess there's one more step before you're done... you need to know how to fold the bag up for easy storage. You may come up with your own brilliant method, but here's how I do it:
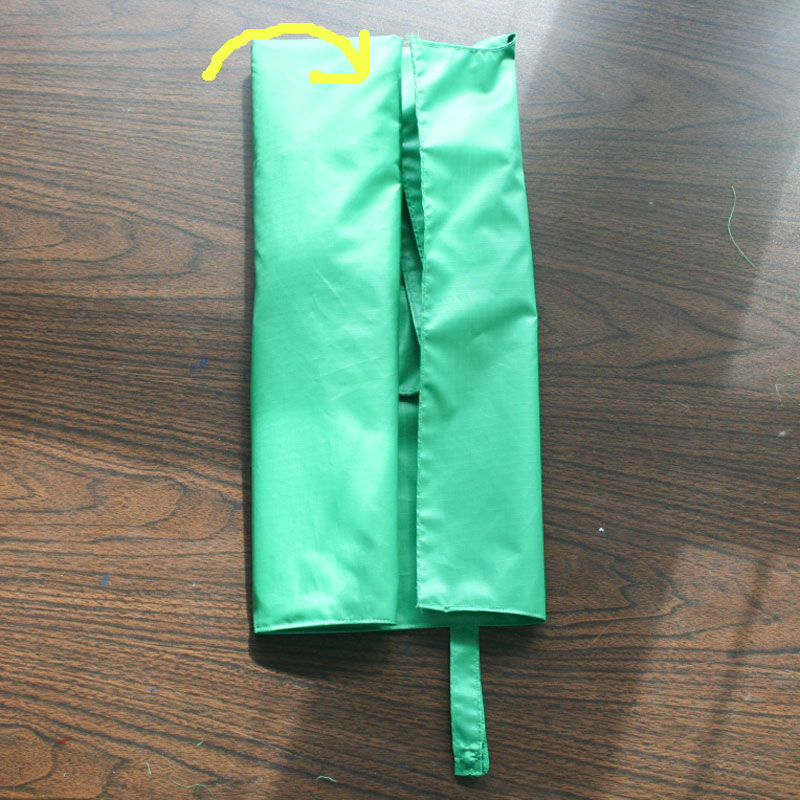
Fold the handles in towards the middle.
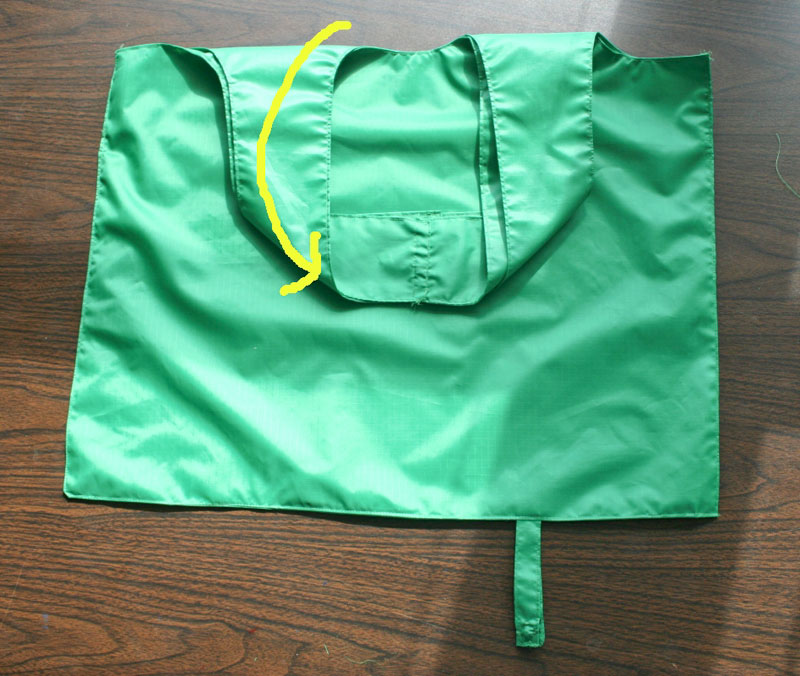
Fold each side over one fourth of the way towards the middle.
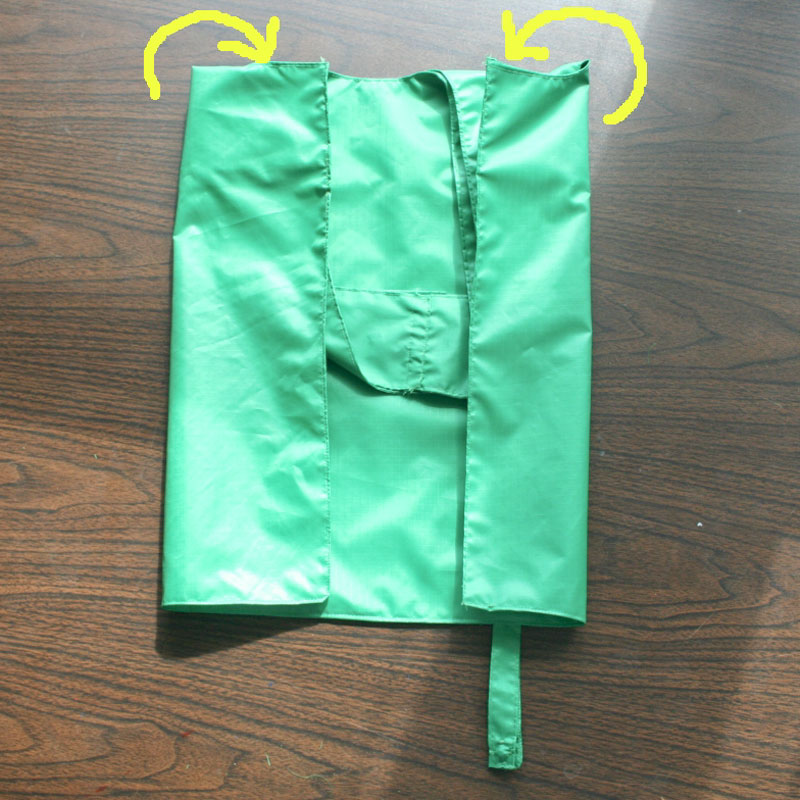
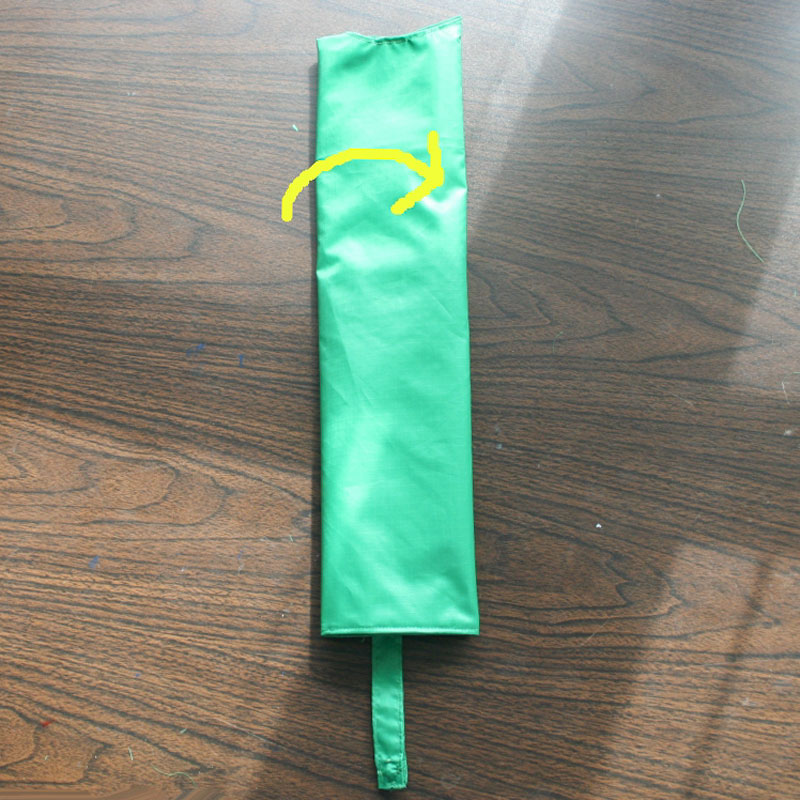
Fold the left side again.
Fold the left side again, so that it completely covers the right side.
Fold the top edge down to the bottom edge.
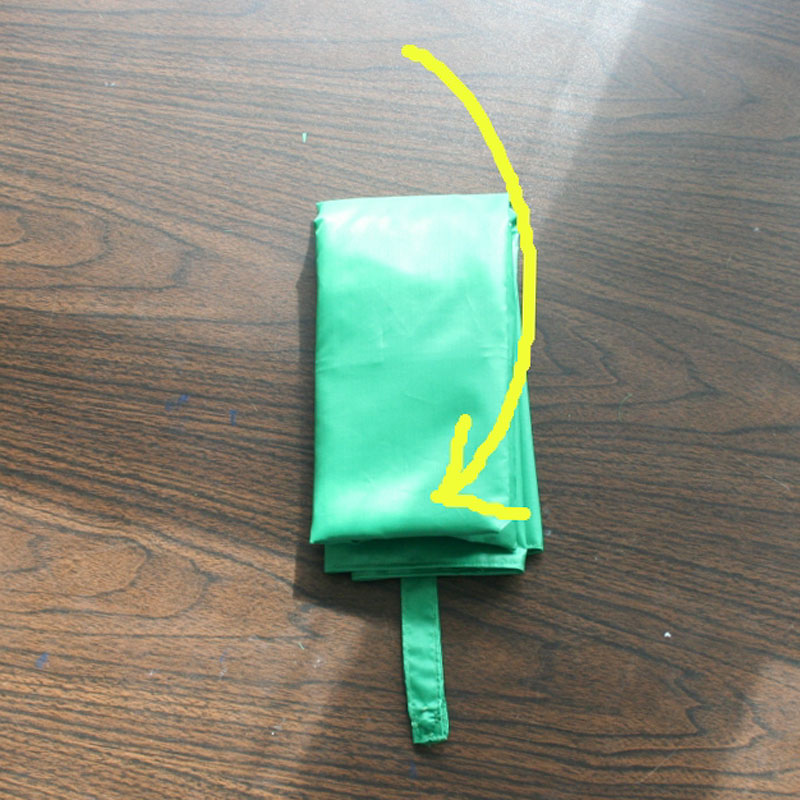
Fold/roll the top edge down until it meets the bottom and secure with the snap enclosure.

Three or four of these bags would make an excellent gift for the person who "has everything" or for a devoted shopper. If you really enjoy sewing, you could make a bunch of these bags and make all your friends very happy.
similar projects
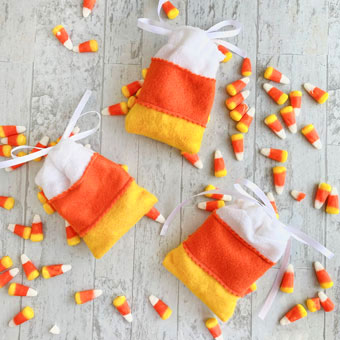
Easy-Sew Candy Corn Halloween Treat Bags
Upcycle Christmas Gift Bags into Art
How to Sew a Button Closure Pouch


54 comments so far:
I made one of these bags and added a little loop to the outside of it that easily attaches to the metal bag holder at the grocery. The Envirosax you link to has this feature and it is well worth the little bit of extra stitching to add it to the bag!
Thanks for the great instructions! I made one of these and it fits in my fanny pack that I use as a purse. That way I don't have to worry about forgetting it.
Thanks so much for putting this pattern together and online. I felt the same way about the cost of the envirosax and other like reusable bags on the market.
Shirley and Shelley, I'm so glad you like the pattern. I've been carrying my bags everywhere and I save SO much plastic from the landfill!
Out of all the grocery tote patterns I have seen on the net this one I like the best, Except for one thing. The material used. You can easily use cotton and there are heavy weight cottons that will work perfectly or even quilt cotton. You can find cotton for a dollar a yard sometimes. Any time we use a product that is not man made (nylon) we help save our environment. But just using the bags is a good start, now to push to use natural fibers that won't last forever or cause pollution being produced.... Thanks much for the great tute!
Hi Donna! I agree that the rip-stop nylon isn't the prettiest or most environmentally friendly fabric in the world, but it is incredibly lightweight, durable, and most importantly for me, it's thin enough for the bag to fold up very small (without wrinkling, too!). I did recently purchase some pretty printed cotton that I was going to try to make a bag out of, but I suspect it won't fold up as nicely as the nylon did. We'll see!
Thanks so much for the kind words and have fun making your bags. Btw, I'm also a huge fan of the dollar-a-yard table at Walmart :)
I also liked Envirosax out of all the bags and was looking for a pattern and very please to have found it here. Thanks for figuring it out. I got my a scrap fabric at Joannes.....have to checkk out Walmart. Thnx for showing me how it's done.
Thanks, Trina. Let us know how it turns out!
Thanks for posting these directions! I drew out my pattern on old wrapping paper, which worked great, and will be easy to reuse. I also used my serger for all the initial seams, which meant less bulk to trim later. I'm thinking about making a little flat bottom by folding up the sides in a corner and stitching across the top. I'm not sure how that will affect the folding, however, which is a major plus of this design!
Hi Lori! Your bag came out fantastic! I'm so happy our instructions worked for you, and I love the blue you used. Let us know how the flat bottom works out. I think it might affect folding, but my main concern is that it won't stay flat when you put heavy things in it, unless you put some cardboard or something in it, but then you'd REALLY have a folding problem :)
I love this this bag and would like to make one, have looked every where for cute printed ripstop nylon, has anyone found a supplier on line?
Deb, if you ever find a source, please let me know. The only non-solid pattern I've ever seen is green camouflage, which is decidedly non-cute!
I have a thought. What about using a tent for the fabric (made out of ripstop or other light weight fabric). That your going to get rid of. I bet you would get lots of bags out of it. Or maybe even a tarp.
Elizabeth, that's a fantastic idea! I wish I could go back in time and save the torn tent I threw away a couple of years ago and use the fabric to make bags. That would be a perfect way to recycle an otherwise useless tent. I will keep it in mind for the future :)
Tarps would be too thick to use for bags that you'd want to fold up into a small pouch, but I like the way you think.
Also I copied and pasted the pattern, enlarged the graphic to fit 8.5 x 11 and than set the printing to print at 300% (poster printing), and it printed the pattern on 9 sheets of paper and is the size on the directions. ( I hate to draw because I can not draw) So now I just tape the sheets of paper together and I'm good to go. I know kinda lazy.
Lazy? I'd say brilliant! Thanks for the great tip, Elizabeth :)
Thank you for posting these instructions. This is exactly what I have been looking for! Until now I hadn't seen instructions for the folding, reusable bags I can keep in my purse. Being a sewer, I just couldn't bring myself to spend the $$ on the ready-made bags being offered. Again, thank you...think I'll whip up several for myself and as gifts for friends.
Hi Carley! I'm glad we were able to give you just what you were looking for. We'd love to see your bags when you're finished, so feel free to post a pic in our Flickr group.
Ripstop Nylon is available online in quite a few colors at http://www.beaconfabric.com/vindex.html. It's 59" wide and currently costs $7.49/yard. Shipping is reasonable and based on total spent not weight. 20 yard rolls are available for the seriously ambitious.
Thanks for the tip, Jeanne. What a great color selection!
Love this pattern. Working up these bags using old nylon shower curtains. Great colors and patterns and chance to recycle. I've been finding the old nylon shower curtains for $1 at my local thrift stores.
Great idea, Barbara! You're so clever. We'd love to see how they come out. You can share your photos with us by posting them in our Flickr group
I just stumbled across this and am so excited! I've been trying to come up with something to make for friends and family for Christmas this year and this is going to be it!
What a wonderful idea, Verena. I'm sure they will make great gifts. Let us know how it goes!
I save the big plastic woven bags that dog food comes in.. take the top and bottom off.. you can then open them up and make bags from them.. use the outside in with the print or leave it on the outside... they are sturdy, and sewable... and this recycles them... you can make any size bag you want.... I use the 20lb sack
Cheryl, I've been wanting to try making something with bags like that, but Jo keeps telling me I'm crazy! I think it's a great idea and would love to see some of the bags you've created if you want to send us a picture :)
Donna talked about using the nylon is not enviro-friendly but if you make this without the handles and attach a strip to wrap and tie with, you can start replacing the plastic produce bags. the nylon does not weigh much more that the produce bags and you can put apples, taters, onions whatever in these and still feel good about it. I make mine about 8 by 16 and use embroidery thread to tie off
Great bag, the ripstop can be personalised with transfer paints, or disperse dyes. Creates your design on paper & iron off onto the fabric [careful not too hot or it will melt!]
Thank you so much-I have been wanting one of these but did not want to buy it online. I can not wait to make one.
I just finished making one of these. As a beginner sewer, I found it very intimidating at first, but quickly became easier. I would say that the handles are more 'messy' than difficult, but I was able to pull it off. I'm on my way to make 30 more of these before Christmas! Here goes nothing!
Congrats, Jenn! I'm so happy to hear that you set your apprehension aside and got through it. I can't believe you're going to make 30 more! You are going to have some very happy friends and family members this Christmas. :)
I made a similar version, also copying one of my Envirosax, but used old council advertising banners. These are the big flag like banners they put up each month for New year or whatever is on. They are made of some kind of tough woven synthetic material. It's a bit thicker, so doesn't roll up as well as an Envirosax bag. Our local "reverse garbage place" sells the banners for $10 (they are several metres long)
Nice tip, Annabel. We love seeing clever ways to reuse materials like that!
Thanks so much for the pattern! I own 4 Baggu bags, and thought about copying, but got too confused when it came to the handles. This bag looks like JUST what I've been looking for. I've ordered some ripstop - and will put the little loop on the sides to help fit it to the bagging station. You're so generous with your ideas - I have several sewing friends I'll pass this along to. You're saving the planet one bag at a time.
Glad we could help you out, Nancie, and thanks for the lovely comments. We love to share!
I've made a lot of these over the years and the only things I do differently is cut on the fold so the bottom of the bag doesn't get seamed (attach the strip to the bottom when its finished with a close machine stitch)and I do French seams on the sides for durability.
I think this gives the bag a lot more strength - I've carried some really heavy groceries in mine with no splits and have had them (and used them) for years and years.
Great instructions, Chica.
Thanks, Vicky, and thanks for sharing your tip!
I was just wondering if for the two 28"-22" could be two different pieces put together?
Katelyn, you can certainly use as many colors of fabric as you like. Just sew the pieces together and then cut the finished piece to the required size.
Thanks for this pattern. I have taken the fabric off old umbrellas to use for bags like this. It's a little bit of work, but absolutely perfect!
Great upcycling idea, Connie!
I'd like to suggest opening up a plastic grocery bag to make a pattern. This would include a pleat, and when you get it all sewn, it would be the perfect size. Thanks for great instructions, by the way. I agree that there should be some magic to do the handles, but we can't have everything.
I have several of these bags from an Environmental website and was glad to find this pattern. I have decided to use recycled sheets for the bags (reduce, REUSE, Recycle) because of the tight weave and thread count. Also you can pick them up from friends and family so they dont go in the landfill. Thanks!!!
Sandy, what a great idea to use sheets! Super soft and easy to wash, too. :)
Great bag. You can also attach a small ring and attach one to key ring.
Deb, that's a great idea!
like the pattern. using fabric scrap material to make this. using heavy weight fusible lining on all
Thank you for the pattern and tutorial! My state has now gone "bagless" -- (no plastic and you have to pay for any bags if you don't bring your own!) I used the rip-stop/utility nylon and it has worked very well. It's strong, light-weight, and washes well. So far, I have made a red one for meat, a white one for dairy, and a green one for produce --- they have been very convenient.
One suggestion -- sew down the bottom perimeter of the handle facings to the bag-body after you complete the bag -- it makes taking items out of the bag easier.
Patty, thank you for the compliment and for the tip!
Could you tell me what weight the fabric is that the example bag is made from? And the name please of the fabric. I would soo appreciate the input.
Cornelia
Cornelia, I used standard rip-stop fabric, available from the fabric store. I don't have the details about the weight of that exact piece I used, but it's very thin (but strong!) and resembles kite material. Hope that helps!
The easiest and most understandable patterns I have come across for this type of grocery bag. I have "lost" a few of my treasured sax in the past few years. Today I looked to replace them and prices are ridiculous. A Google search brought up your site. The chicaandjo name is cute, so I clicked. I'm glad I did! Thanks for teaching and sharing!
LindaE, we're so glad you found us and that we had what you're looking for! We'd love to see your finished bags, so if you post online, be sure to tag us @chicaandjo
Love this tutorial! Very clear instructions.