


Make Kettle Corn at Home

I remember the first time I tasted kettle corn. It was at a local art fair in the park and I saw the booth with cooks making popcorn in a giant copper kettle. I thought they were crazy... that is, until I tasted a free sample. I was instantly hooked and bought the largest bag they had. Since then, I simply can not pass a kettle corn booth without buying some. Fairs don't happen every day, though, and sometimes I need some perfectly sweet and salty popcorn at home, so I learned how to make my own, and for mere pennies a batch!
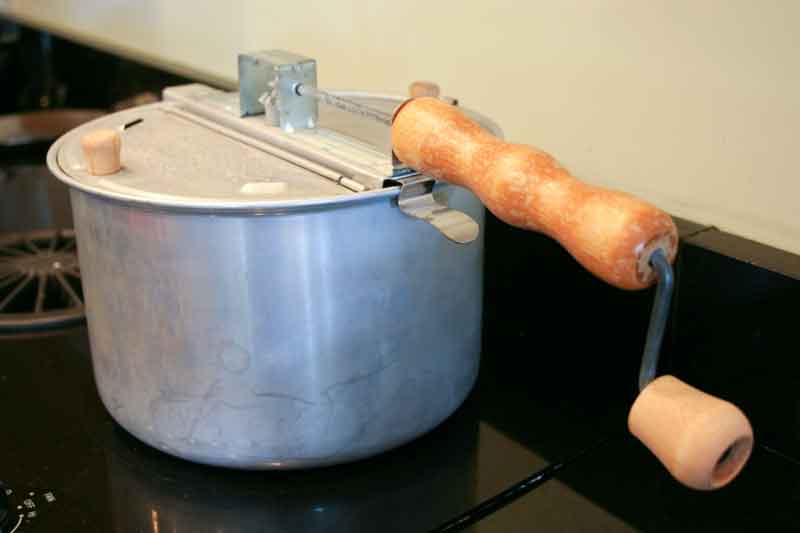
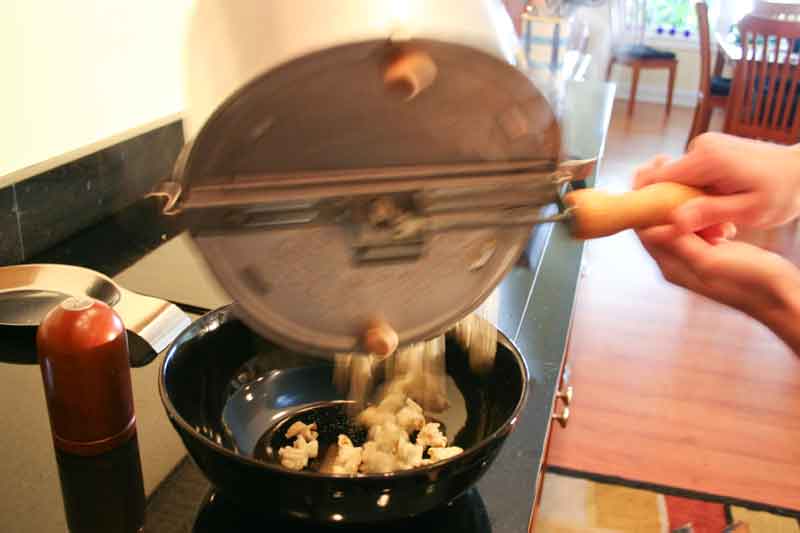
Equipment-wise, you need a hand-cranked stovetop popcorn popper, such as a Whirley-Pop. If you've got one of these old-fashioned poppers in your cupboard, now you've got a reason to actually use it! What's great about these (and key to making kettle corn) is the fact that there's a little stirring blade inside that you can turn with the crank on the handle. This lets you keep the popcorn moving and evenly coat it with sugar as it cooks (and you don't have to shake the pan at all while it's popping).
Kettle Corn Recipe
- 1/4 cup popcorn kernels
- 1/4 cup sugar
- 3 tbsp vegetable oil
- salt to taste
Measure out sugar and set aside. Have a large bowl and shaker of salt ready. Add popcorn kernels and oil to a crank-handle stovetop popcorn popper, and put on medium-high heat. Turn crank slowly (1-2 seconds per rotation) while the oil and popcorn heat up. As soon as you hear a kernel pop, quickly add sugar to popper. Continue to turn crank slowly until the popping resumes, then speed up (3 rotations per second). When popping has almost stopped, pour popcorn into bowl and toss with salt.
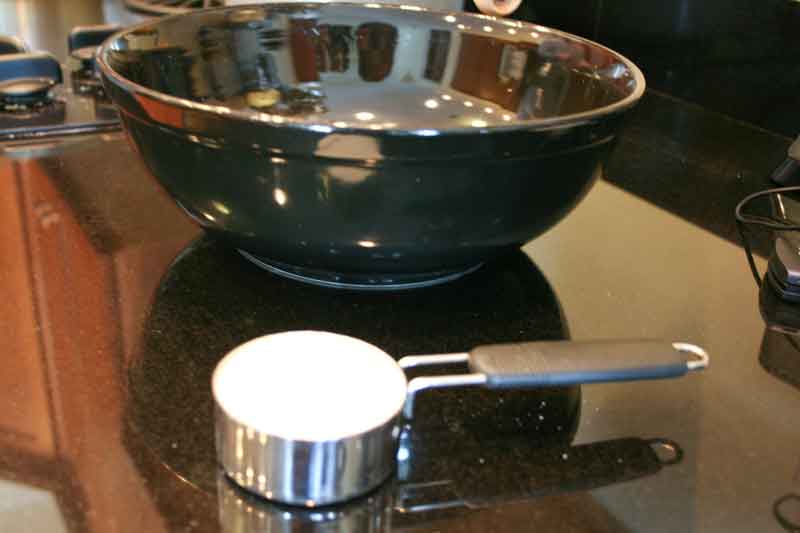
With this recipe, it helps to have a few things ready ahead of time, before you start cooking. Once the popcorn starts popping, things happen fast! So measure out your sugar and set it aside, along with a large bowl and your salt shaker.
Then add your kernels and oil to the popper.
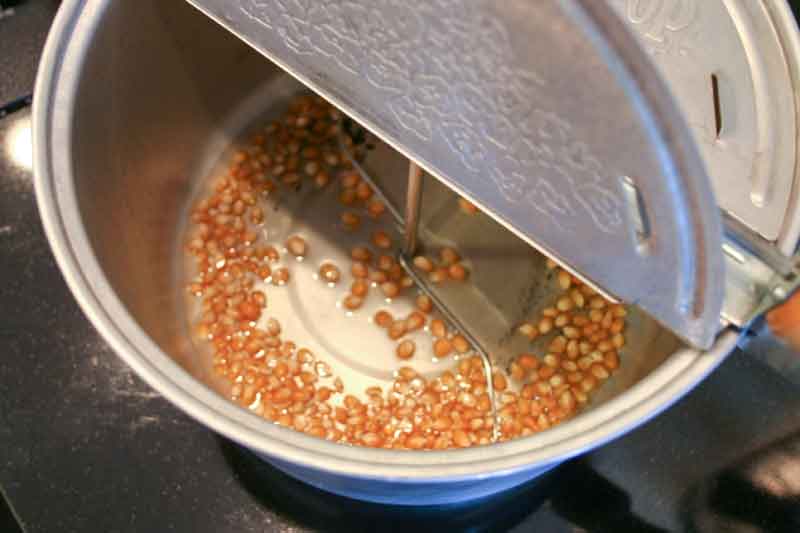
Put the popper on the burner on medium-high heat, and start turning the crank on the popper somewhat slowly (take about 1-2 seconds per rotation) while the oil and popcorn heat up.
As soon as you hear one or two kernels pop, QUICKLY open the lid, dump in the sugar, and close the lid back up. Do this fast so you don't end up with popcorn all over your kitchen!
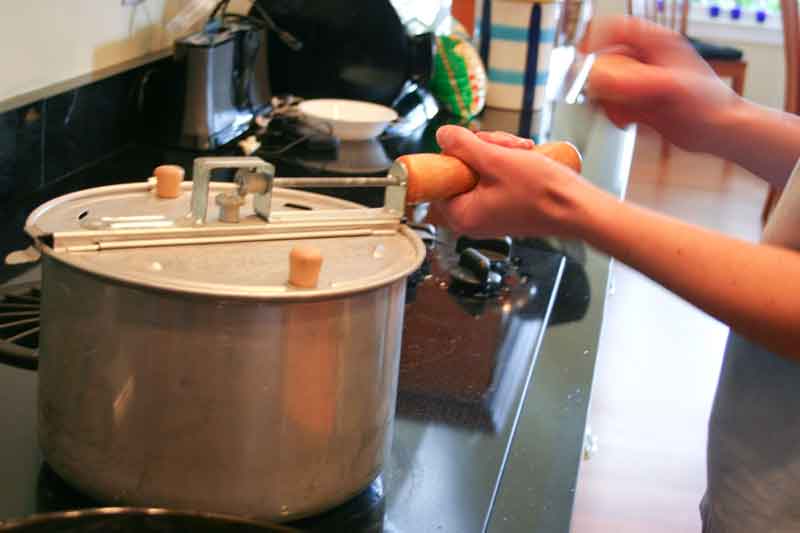
Continue to turn the crank on the popper, at the same rate. You'll notice that the popping slows down, because the sugar has cooled the oil slightly. Keep turning the crank and soon you'll hear the popping start up again.
As soon as the popping starts again, increase your speed on the crank to about 3 turns per second. You've got to keep it all moving so that the sugar doesn't burn and the popcorn is evenly coated.
When the popping reaches its peak, remove the popper from the burner but KEEP turning the crank! Do not stop until the popping has almost stopped. Then dump the popcorn into the bowl you had ready and waiting.
Immediately sprinkle the popcorn with salt.
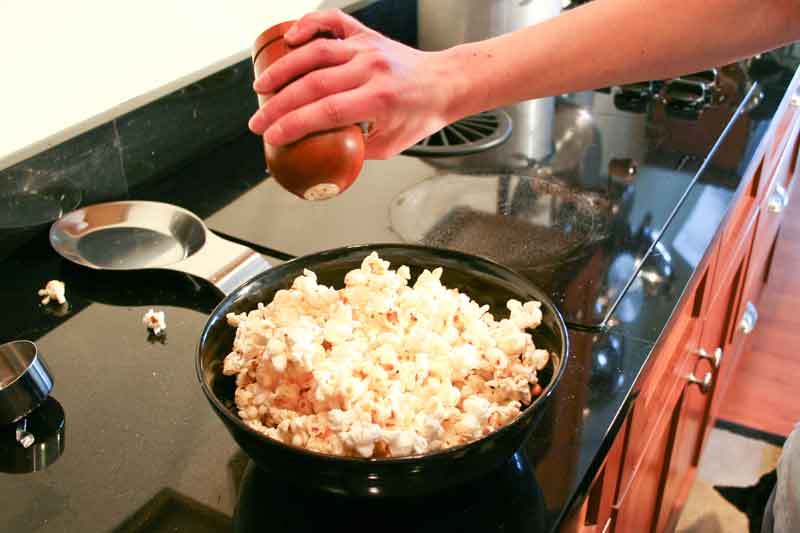
You'll see that the popcorn is sticking together and may be one giant clump. Turn it over and over in your hands and add more salt, as desired. You don't want to put too much salt on, but you want to get it on all the kernels.
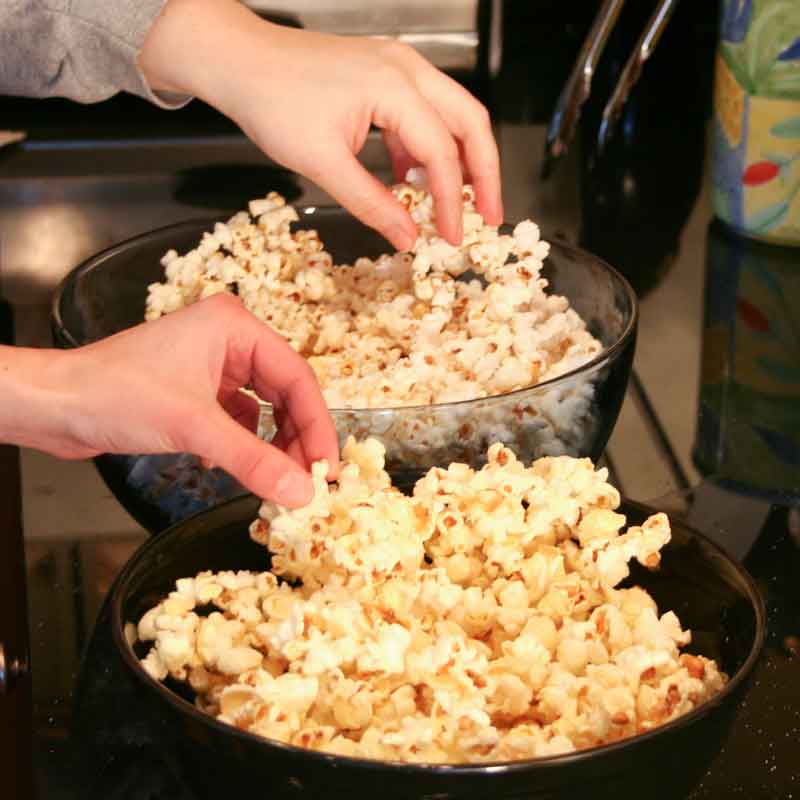
As the popcorn cools, the clump will break apart easily with a quick stir.
Now you've got yourself a yummy, sweet and salty snack to enjoy, and it's low-calorie and inexpensive to boot. And it was so easy!
Some final tips:
- Cleaning the sugar-coated popper is actually really easy. Just put it in the sink and fill it with hot water. Come back an hour later and all the sugar will have dissolved and it will rinse clean.
- If you want to make more popcorn in a single batch, you can try increasing your quantities of kernels and sugar to 1/2 cup of each, but be careful not to do too much at once, or it won't fit in the popper! I prefer smaller batches, which gives me control over the sugar and prevents burning.
- If you want to make a second batch after the first one, you can do so without cleaning the popper in between uses. Anything more than twice, though, and you'll have too much sugar build-up in the popper and it'll burn.
- Kettle corn will stay fresh and crispy in an air-tight container for several days. If you set it out for a party or outdoor event, keep in mind that humidity will cause the popcorn to lose its crunch and stick together (I learned that lesson the hard way!)
FREQUENTLY ASKED QUESTIONS
Can I use a regular pan and shake quickly?
I’m afraid from our personal testing it doesn't work out very well. However, a few readers have had some success with varying techniques and pan types that you can read about in the comments below.
For our tests, the sugar syrup that forms is so thick that it sticks to the bottom of the pan and shaking doesn’t help. It really needs to be stirred instead, and that’s why you need the Whirley-Pop. My sugar turned into a brown caramel and when I poured the popcorn into a bowl, the caramel was all on the bottom, and had an almost burned taste to it. I tried stirring it with a spoon, which helped to distribute it, but it just didn’t taste right.
Would this work in a commercial popper?
We tried making it in one of the small at-home-theater poppers and it didn’t work! My husband cursed me as he was trying to chip popcorn and hardened sugar out of the kettle. So, if your kettle is rather small, I wouldn’t suggest it. The turning mechanism got stuck once a lot of the kernels started popping. However, if you have a really large kettle you could try it. What we managed to get out did taste good.
Can you use a sugar substitute?
You can use a sugar substitute. We suggest mixing in a little bit of real sugar to enhance that crunch and authentic flavor.
similar projects

Easy Elotes Recipe (Grilled Mexican Street Corn)
How to Make Greek Yogurt at Home
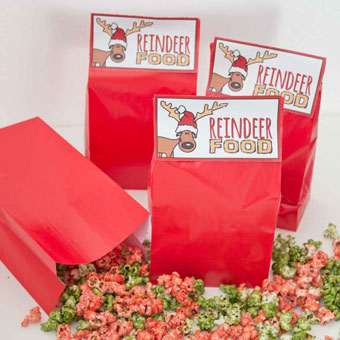
"Reindeer Food" Christmas Popcorn Treat Bags


33 comments so far:
I have tried this recipe before and lately toward the end of the day or several hours later, it gets really soft. I wonder if its the brand of popcorn. So, once you make the kettle corn, don't y9u have to let it cool before putting it in an airtight container? Just asking because I want to give these as gifts and so am hoping for ways to make them stay crunchy a little longer... Thanks for any tips...
Hi Mikayla! I often take kettle corn to parties, so whenever I need to package it right after making it, I usually only wait about 5-10 minutes for it to cool. I then dump it right into gallon-sized zip-lock bags and seal them up tight. On the rare occasion that I have any leftovers, I find that it stays crunchy for a couple days in the bag.
I'm not sure how long you are keeping yours out before packaging, but it sounds to me like humidity is getting to it. If you leave it out in a bowl on a humid day, it will go soft in a matter of hours. I assume its nice and crunchy as soon as you make it, so if it's getting soft on you there's got to be moisture coming from somewhere. I don't think the brand will make much difference because I use the super-cheap stuff and Jo uses the fancy stuff, and we both get along fine.
Please let me know how it goes!
you can store the kettle corn in the freezer and it stays crunchy...
I tried twice before with other recipes and made quite a burnt mess. Your recipe, however, worked out great! The difference was waiting until the popping started before adding the sugar. Also, removing from the heat once the popping was full swing really helped. I made this in a regular old large pot, but I made sure I stirred the sugar with a wooden spoon really well, then recovered and shook like crazy, and kept removing from the flame so as not to burn the sugar. It was just a tad overdone (my fault), but still really great. I think I'll invest in a Whirley-Pop and make it perfect next time. Thanks for a great recipe.
This recipe was soooo good. I made first batch this afternoon and loved it so much,made another one with double amount. After that made 3rd finally 4th after dinner. And you know what? It's almost all gone and everybody loved it. Thanks for the recipe.
I am so happy to have found a recipe for Kettle corn. I just had a batch for the first time up in New Hampshire, and the kids and I fell in love with it! I can't wait to try it at home, and I will be making the pink kind for a Valentine's Day treat for the fam. I LOVE the Chica and Jo page for fun creative ideas. Keep it coming! Oh-and with 3 kids I appreciate frugal ideas!!!
I made a batch this afternoon, and the kids ate it all! We love it and I'm making more for myself and hubby once they are in bed. Thanks again for all the great ideas.
AMAZING!! I am a popcorn lover so I am going to have to seek out a whirley pop so I can make kettle corn. Very very excited!
Just have to tell you that I made my first batch of kettle corn per your recipe.. ( notice I said FIRST batch ) and it is sooo good. My granddaughter (who is 5) is over for an overnighter and she did the measuring out of stuff and most of the crank turning-until it got too hard to turn when grandpa took over the job. There is a little left over which she said she wants for breakfast tomorrow!
Just a little story to this: I didn't have a whirly popcorn popper. But when I read your recipe I made it a quest to find one. So I posted my request for a whirly popcorn popper on freecycle and wouldn't you know! Within hours someone emailed me to say she had one that was brand new, with instructions and all sitting in her garage that she'd give me. So off I went to pick it up. I also love freecycle.
Thanks again Chica.
joanne-California
Someone once shared a secret with us about this Kettle Corn...they said it's made with COCONUT oil. I am going to try this recipe but sub. with the coconut oil.
I just made kettle corn about one minute ago. It tastes really good. I was tired of running to the store trying to find good kettle corn every week, just to find that it's all gone if I got their to late. My son loves it also. Thanks for the recipe, it's also easy to adjust the suger for more sweetness. I used seasson salyt on the first batch, and regular table salt on the second. YUMMMM!!!!!
Thank you for the great website and awesome recipe! I found this website though another site about kettle corn, you said something like, sounds nice, but sounds more like carmel corn,etc...anyways, I made that one first before reading your reply and it was a disappointment with the brown sugar syrup made separate on the stove, as the pop corn got all mushy and wet. I read their replies and found your website and hurried to make another batch with your suggestions as I already had a Whirley Pop that I use and love. All I can say is WOW, AWESOME!! As per your reply instructions, I have had excellent luck adding everything all at once from the beginning without preheating. The sugar does not burn and I have delicious results each time so far. Mine says crunchy at least 30 minutes, the time it takes to eat it all... :) Thanks again for your time to share a great Whirley Pop revival!! I gotta go make a popper of kettle corn, buh - bye!
Just tried this tonight and LOVED it! Your recipe was the inspiration for me to buy a Whirly-Pop. The instructions are very clear! Thanks!
Thanks for this! I've been making this kettle corn all week! We don't have the Whirly-Pop, I just use a cast iron pot. It has turned out perfect every time. I heat the oil up before adding the popcorn and sugar.
I've tried several ways of making kettle corn but had poor results. Using a Whirley Popper was the big break through. I was very skeptical when I first got my hands on the popper, seemed kind of light weight and cheap. It did exactly as you described though and made an instant believer out of me. My sincere thanks for the tutorial.
Thank you soo much for the recipe! I live in Italy, and very few times I found kettle corn bags in the shops, and my kids love it! Unfortunately, not being exactly an italian dish, it's next to a miracle to find it here. I tried to make it but with no success (sticky burnt mass and all...) Your recipe is exactly what I need, now I must find a way to build myself a Whirley Popper replica ... Any suggestions? :)
Thanks for the sugar substitute recipe. I just made a batch and it tastes sooo good! I wasn't sure if splenda alone would create the crunch I love so much, but adding white sugar did the trick.
And if you are looking to change it up (just a little), add 1/4 to 1/2 tsp of vanilla extract. Yum!
Necessity is the mother of invention. I don't have a Whirley Pop and I had an uncontrollable craving for kettle corn this weekend so I figured I'd try it in a pot and just go for it. It worked! I have one of those non-stick pasta pans with holes in the lid to drain water from (this was perfect for letting the steam vent). I googled several recipes and settled on 1/4c oil, 1/2c kernels, 1/4c sugar. You add the oil in the pan on medium-high heat, and toss in 3 kernels. Once all three kernels pop the oil is hot enough, then you dump in the sugar and kernels. To keep it from burning I used a wooden spoon and stirred for 20-30 seconds or as long as I dared before the popcorn starting going. Then I put on the lid and started shaking while keeping it on the burner. I took it off the heat before it was done popping (it goes extremely fast) and then once it stopped, immediately put it in a bowl to sprinkle with some kosher salt. Shake it up and you're good to go! I've made it 3 times since then (Yes, every night - this is bad, very bad!) and haven't burnt it once. :) Plus, since the pan is non-stick it is a breeze to clean.
Stephanie, I'm glad to hear you had good results with a regular pan and stirring. I tried that myself and it didn't turn out well at all. You must be a stronger (or braver) stirrer than I am! :)
Kettle Corn has been around for ages and I have had my Whirly Pop for years, since before 2005. Recipes came with it, incluing the one above, thought they recommend as the #57 post states to put 3 kernels in the oil, then when those pop add the rest of kernels and the sugar. They also had a recipe variation, that I am surprised hasn't been mentioned yet. Use brown sugar instead of the white/granulated sugar and it gives a caramel corn taste to it. Yummy!
Hi.... I just made a batch of kettle corn for the first time the other night...I used a Stir Crazy and the recipe was 1/4 cup each of popcorn, sugar and oil. I used olive oil and I used white popcorn.
I let the oil heat a bit, added the corn and when the first kernel popped, I dumped in the sugar..had to be fast to do that for the corn was starting to take off... end result was PERFECT..the corn was just the way it should be, it had a nice crisp coat to it and did not burn.
I flipped it over into its own bowl..then started breaking it up..but realized the plastic bowl which is also the cover to the Stir Crazy had hardened sugar drops on it...so I put the corn in to a different bowl and soaked the plastic bowl/lid..the sugar dissolved by the time the popcorn was eaten...lol..so no issue there.
The bottom of the Stir Crazy has a non stick surface..so it wiped clean very easily...however I have been wondering if the sugar will build up in the mechanism that turns the wire stirrer??...I dont know yet as I only made the one batch..but it came out perfect..and I am trying right now to justify making another batch tonight.... IT IS A KEEPER! But think I will try a bit of Splenda or Truvia next time and not use so much real sugar.. I will try to come back here and post if I do that and what the ratio was that I used..
joann, we've been making the kettle corn in our Whirley Pop for years now and it hasn't clogged up our stirrer so as long as you soak it immediately in some hot water, you should be fine. Let us know how your batch turns out with the lower sugar. I have been trying to perfect that myself!
I have made this for several years. I use a pan on stove. The key I found is to only use glass lid. And a non stick kettle. I put in 1\2 cup oil, and 3 kernels when they pop I add 1\4 cup sugar and stir it in than add 1 cup of pop corn. And let it pop shaking a bit. When done I dump in glass cake pan and salt. than when cooled enough to handle I put in large container with lid. 1. You do not have all the unwanted kernels . 2. It is ready and fresh for many days kept up to a week in Tupperware.
For the true authentic Kettle corn recipe you have to use mushroom popcorn. It pops into a round ball and has more surface area to hold the sugar and salt... I just bought some mushroom popcorn on Amazon and it makes the world of difference:
Hi. I was just wondering, I've never done this previously, but is there a way to color dye the popcorn ? I wanted to make kettle corn this year as gifts to give to family members since I'm on a strict budget. I don't know how to go about adding food coloring and making sure it coats evenly. Thanks!
Sara, you can definitely color the kettle corn. Jo first tried this last year for some Halloween popcorn and has used the technique several times since. Check out that post to see the details on how to do it!
I just made a variation of this recipe using a sugar substitute. I put in a stir popper 1/4 cup of Orville Redenbacher Buttery Popcorn Oil; 1/4 cup of yellow popcorn, 1/4 cup of Altern which is Walmart's Great Value sugar substitute. I think any sugar substitute would work. I set the electric stove on medium high.
I stirred the popper three or four turns and then shook the kettle so the mixture would be in the center of the kettle. Let stand and cook 20 seconds and did another three to four turns, shook to center oil and corn and let cook again.
When it started to pop, I continued to stir until it started to give a good strong popping acting and then shut the heat off. I stirred another 15 seconds and then dumped it into a large bowl.
I then took a fine salt salt and mixed it in. The popcorn came out 99.5 percent perfect. The taste was great. I only had around 6 to 7 slighly burned pieces and they even were good to eat.
Clean up was simple. Fill the kettle half full of hot water. Add some soup and any sticky materials in the kettle wash right away. If there is anything burnt on the bottom, use a scrub pad and it will come right off. Clean the top the same way. Everything washes up perfect. Clean up took about five minutes.
Next time I will put the sugar substitute in when the first piece pops and see if there is a difference.
Highly recommend using a sugar substitute if you are watching carbs or need to be on a low sugar diet.
This recipe for kettle corn was so easy and quick...and the best part is it is even better that the kettle corn we usually get at our local farmer's market. I'm definitely addicted. Thanks for posting.
I had bought some kettle corn packets from an on line supplier and although the popcorn was great, it was quite expensive. I took one of the packets and separated the contents into measuring cups to get the exact amounts. I get great kettle corn every time now. The commercial kettle corn recipe uses soy oil. I have found that it's soooooooo much better using coconut oil. The flavor is lighter and you can taste the popcorn along with the sugar and salt instead of just sweet and salty. The commercial recipe id 1/3c soy oil, 1/4c sugar, 1c popping corn and salt to taste
Thanks for the recipe and all the tips in the comments! I just tried this with a couple of my own variations (coconut oil and less sugar) I also read some where else to put about 3 kernels in the oil and wait for them to pop before you add the rest. I'm a bit impatient so I only waited until I heard them sizzle. I also turned up the heat, because of previously mentioned impatience, a couple of pieces came out a bit caramelized but still yummy!
Thanks so much for this recipe! I love popcorn! The REAL kind.. not those in the microwave bag, or popped in an air popper. Over the stove and in a pan! :}} I'm 54 yrs old and JUST tried kettle corn for the 1st time a few weeks ago at our downtown counrty market. It's closed now for the season, and I was so sad to know I missed the last day when I had planned on getting one last bag of kettle corn. I don't know how I found your page, but boy am I glad I did. I want to make this recipe for family members for Christmas gifts and give it along with some Harry Potter ButterBeer! I can just imagine the combination! YUM! BTW, thanks Sharon ^ for the diabetic recipe (I'm diabetic myself, so that really helps!) I don't have a Whirley Pop yet, but I just hit Amazon after reading all these wonderful posts and one is now on it's way! I can't wait to have my grandbabies taste all the yummy goodness of the kettlecorn once I make it! (I hope mine comes out as good as yours!) Again, thanks so much for all the tips and comments and posting something I know I am REALLY going to enjoy for years to come! :}}
I have been looking for a good kettle corn recipe, and came across your post. I was so excited because I had just purchased the Whirley Popper about 2 weeks ago, and just got a great sale on the Orville Reddenbacher pop corn, so I had everything that I needed. This is the best kettle corn I've ever tasted, so satisfied, thank you for sharing.
BTW. I used the walmart brand, True Value, popcorn and was surprised at how big the popcorn kernel was. Thanks sooooo much for the recipe.