


Make a Patchwork Denim Quilt from Upcycled Jeans

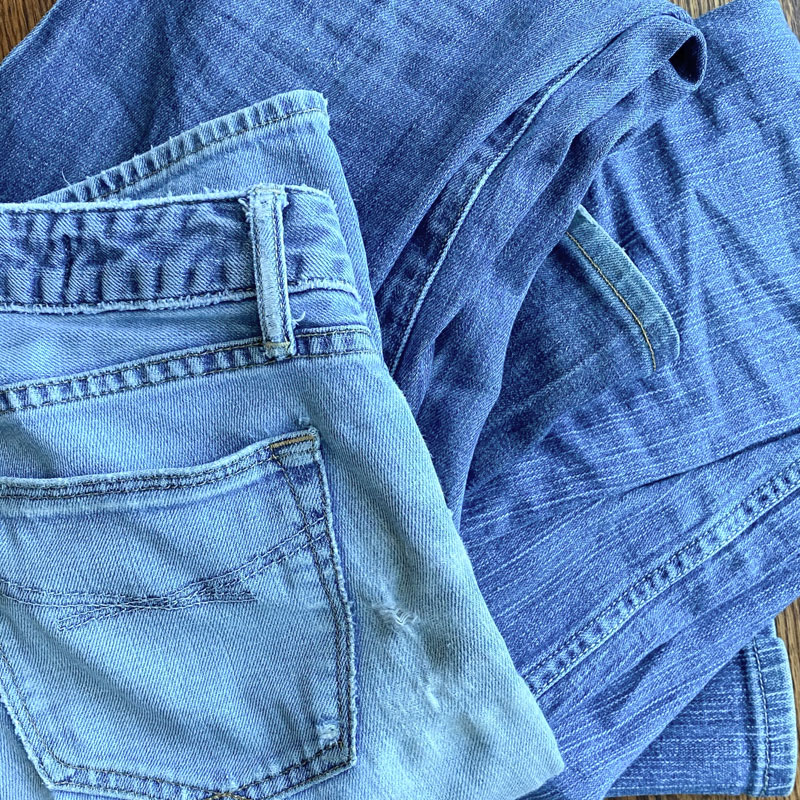
Ever wonder what to do with old denim jeans? Maybe they don't fit anymore, maybe they have holes, or maybe they're no longer in style, but even if you can't wear them, they're way too cool to just throw away. What about making a quilt out of your old jeans? That's what I decided to do, and after a year of saving my old jeans and asking friends for donations, I finally had enough for the project I had in mind, which was a large, patchwork, jean quilt. The result was so much more wonderful that I had even imagined.
The biggest element to this task is, of course, collecting the old jeans. Depending on the size of quilt you want, you'll need many pairs. My quilt is about 6' x 6', and has 144 six-inch squares in it. I found that I could get about 4 squares out of a pair of jeans, so I needed about 36 pairs for the whole project. That may seem like a lot, but if you start asking your friends to keep an eye out for discarded jeans, you'll find that you reach your goal sooner than you thought. You can always adjust your finished quilt size to suit the amount of material you have, too. If you get impatient, you could also try local salvage stores or look for (#ad) bulk used jeans on eBay
Once you have enough jeans gathered for your quilt, start by making a pattern. I wanted my finished squares to each be 6" x 6", so I made my pattern 7" x 7", which gave me a half-inch seam allowance around all edges. I cut the pattern out of card stock.

Then I took a pair of jeans and laid it out to see how I wanted to cut my squares. Most jeans will have two types of seams. The one on the outside of the leg is usually cleaner, and the one on the inside of the leg has the double stitching.
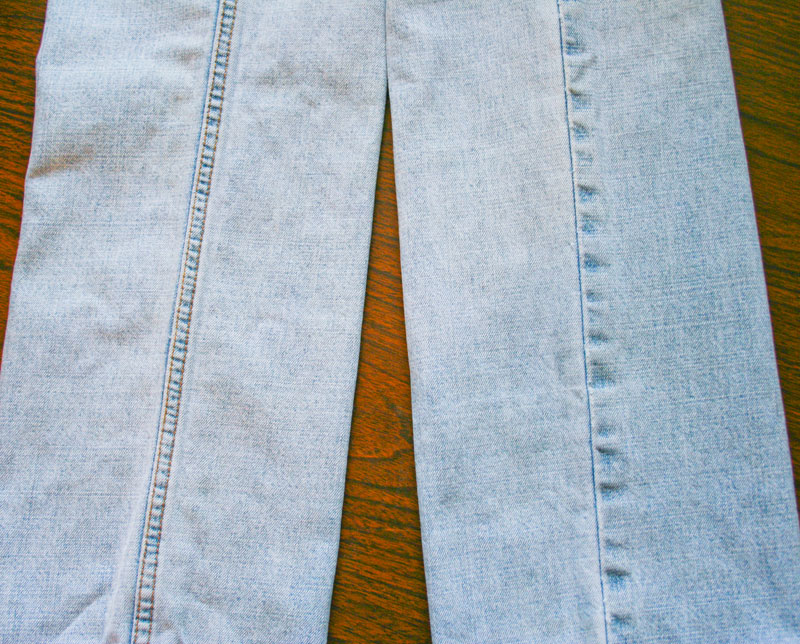
I decided I wanted to feature the double-stitched seam on my square, so I cut the pant leg apart along the other seam, to give me a large surface to work with. I then took my pattern card and positioned it on the material and turned it until I got the desired impact. I decided I wanted my seam to go diagonally across the square. (I kept the seam out of the corners, though, because I knew that much bulk in the corners would make the squares too thick to sew.) Once I had the pattern card positioned the way I wanted it, I drew a line on it to mark where the seam was, so that I could easily make all the squares match as I cut them.
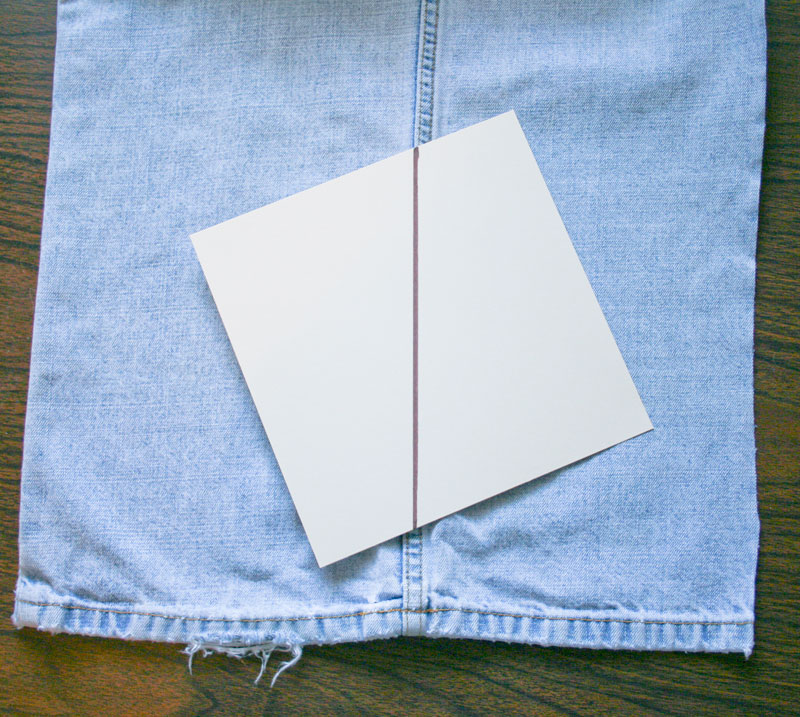
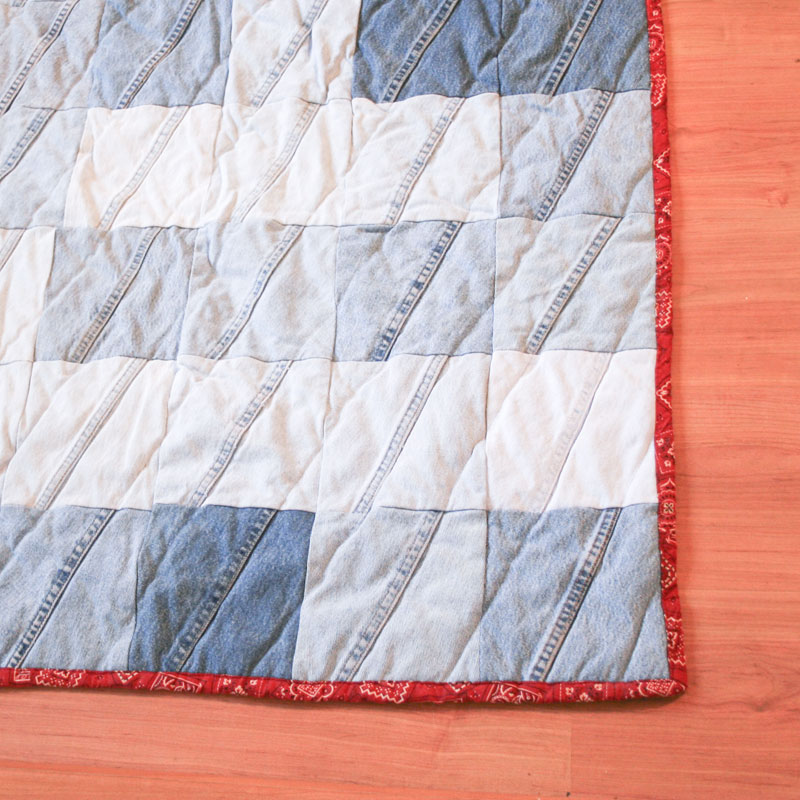
Then the lengthy task of cutting the squares began. For each one, I put my pattern on the jeans, lining up the seam with the line I drew, and traced around the pattern with a marker. Then I cut them all out, make sure to use good fabric scissors that could handle it. The number of squares you'll need will depend on your quilt size. Mine was was 12 squares wide and 12 squares long, which meant 144 squares. Whew!
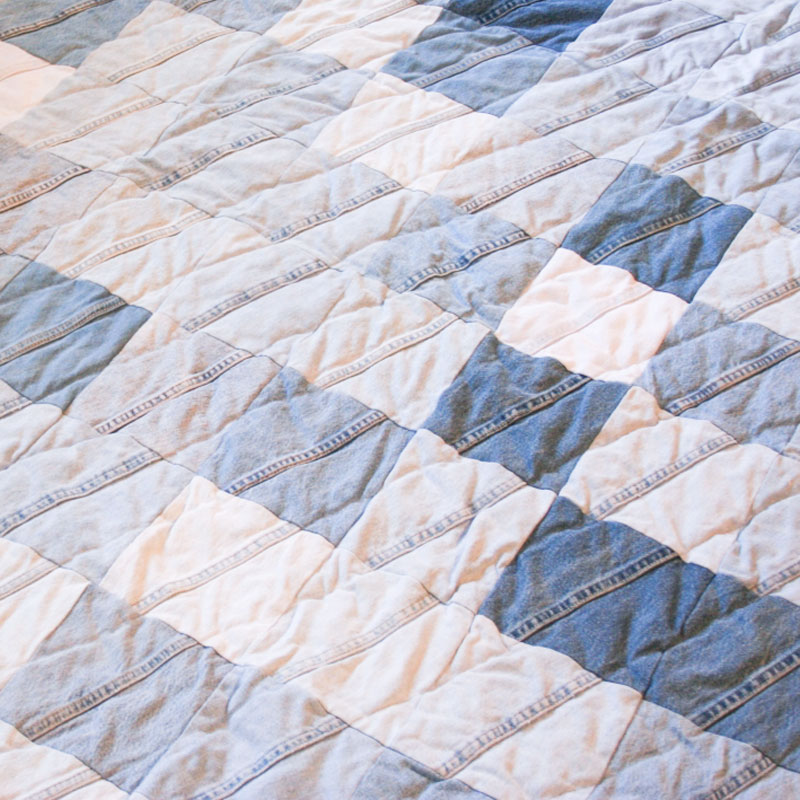
Once all the pieces were cut out, I used the sewing machine to sewing them into strips of 12, choosing random pieces from the pile to ensure the denim colors were distributed well. Then I sewed the strips together into a large sheet.
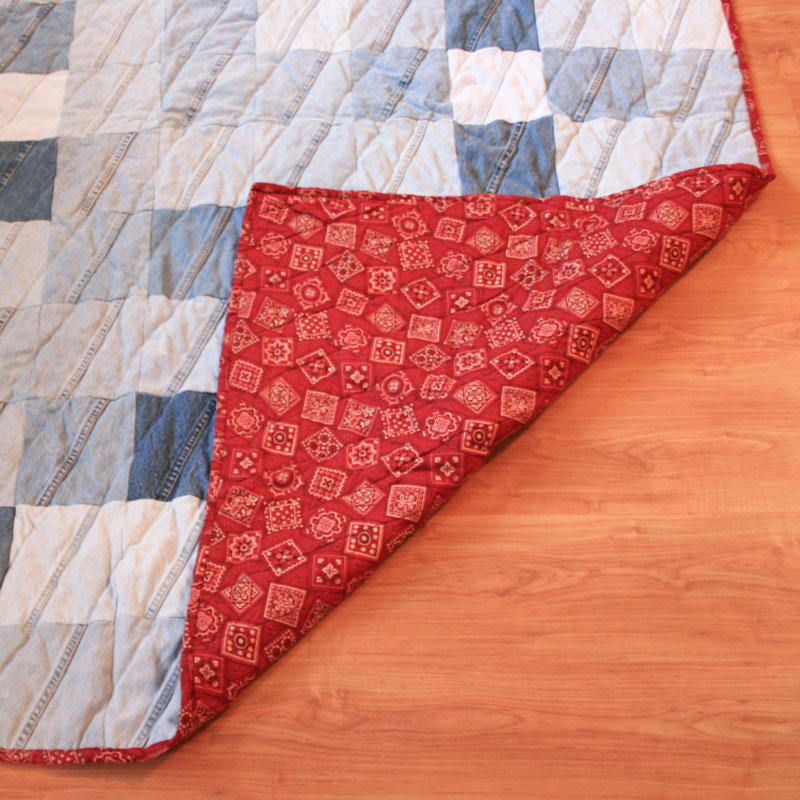
When I finished sewing all the squares together into a sheet, I backed it with polyster quilt batting and a large piece of red bandana fabric for a fun pop of color on the back.
With my three layers in place, I pinned them together with large safety pins. I put one pin in each square, so that I could be sure the layers weren't going to slide around on me.
Then I quilted it, using my sewing machine to run diagonal rows of stitches across the entire quilt. matching the seams on each square. I just fed the quilt through the machine over and over, until the whole thing was covered in diagonal stitch lines.
When the quilting was done, I trimmed the excess batting away, folded the fabric over the edge, and sewed it in place around the edges, creating a neat red border.
The finished quilt is unbelievably tough, durable, and warm. It's also quite beautiful and fun! The denim is so heavy that it covers you well and warms you up quickly. And the red bandana fabric backing? It's one of my favorite parts!

similar projects
Apron Pockets Made from Old Jeans
Make a Bean Bag Toss Game

Upcycled Patron Bottle Cheese Serving Set


11 comments so far:
That looks great!!! I recently made a toddler quilt out of jeans from family members!!! I put fleece on the back and no batting( it was heavy enough). Around the outside rows,I put a pocket patch. One of the pockets(it was from corduroy shorts)had an inside pocket. To form the border, I cut 6"x2" strips(from my stash) and sewed them together and made 6" at the corners. Then I sewed right sides together and turned it near the inside pocket. I cut the bottom off of the pocket, pulled the open sides through, sewed it, pulled the side back out and sewed the pocket shut and tucked it back inside. The Shorts came from the child's deceased Grandfather and on the plain side,I embroidered his monogram and put it in the center(or close to it)!!! Some of the strips came from projects that I made for him and his brother and even his mother. Then ,I'm sorry to say,I tied the corners with yarn. I wasn't sure I could quilt it because of the bulk at the corners. I't looks very nice and was a nice keepsake for him!!
HI!!... I made one out my husbands old jeans that I had saved for a couple years, but i ripped all the seams out of them... you know there was almost an inch extra fabric!! I used a pinwheel pattern and alternated with solid blocks. The effect was pretty nice (i thought). HOWEVER the corners got really thick in a couple of the blocks making it tough to get the needle thru. If i had it to do over I would use only the "simple" pinwheel pattern.
I found a new product that helps a TON with sewing denim. It turns out they make special blue jean thread that's super strong and matches the gold-colored top-stitching on your jeans. I've sewn a bunch of jeans with this thread now and it never breaks on me. I love it!
I wish I'd had this stuff back when I made my quilt. The diagonal quilt stitching would've looked awesome with this thread.
Very fun! I am making a queen-size jean quilt, I have the top of it finished. I used seams, pockets, rivets, everything in my squares and it is so cute and quirky. (but you have to be careful sewing some of them or you'll break your sewing machine needle) I even left belt loops attached and tacked them down to the next square. I alternated jean squares with a cute blue Moda fabric with red flowers; the back will be red flannel. (My local thrift store saves old ripped jeans and gives them away for crafting by the garbage bag-full. Ask at your local thrift stores! They'd probably be happy to find a use for things.) Anyway, your tutorial will really help me with the backing and batting since it's my first large quilt~thanks!
I went to the thrift store today to get some jeans for this project and have found long jean skirts to also be a great source of fabric (fewer seams)!
This is going to be fun.
Hi,I am new to quilting and was wondering how far apart you made your seams in the quilting stage of this project?
Lesley, I think the quilting lines were around 2 or 3 inches apart, but the real guideline I used was the original side seam from the jeans. Everywhere I had a side seam showing, I put a row of stitches.
hey i was just wondering how u attached the squares into strips of 12? what did u do with the frayed edges of the squares?
Cami, I sewed the squares together by putting them with right sides together, sewing one edge, then opening it up to lay flat. The frayed edges are then underneath and never show.
How many pairs of jeans would it take to make a king size quilt
Lori, that will depend on how big you cut your squares and how many you can get out of a pair of jeans. Larger size jeans will give more squares than smaller. My suggestion is to decide on how you want to cut (mine had a diagonal seam on each piece, for example) and practice on a pair of jeans to see how many you can get. From there, you can figure out how many you'll need for the finished size you want.