


How to Make Photo Corners

Photo corners are a classic and elegant way to frame your photos in your scrapbook or photo album. You can buy the little gummed-back cheap ones available at office supply stores, or you can go into a scrapbook store and buy expensive fancy ones. It seems that no matter what you buy, though, they never quite match what you need, or you didn't get enough. The good news is that they are so easy to make yourself!
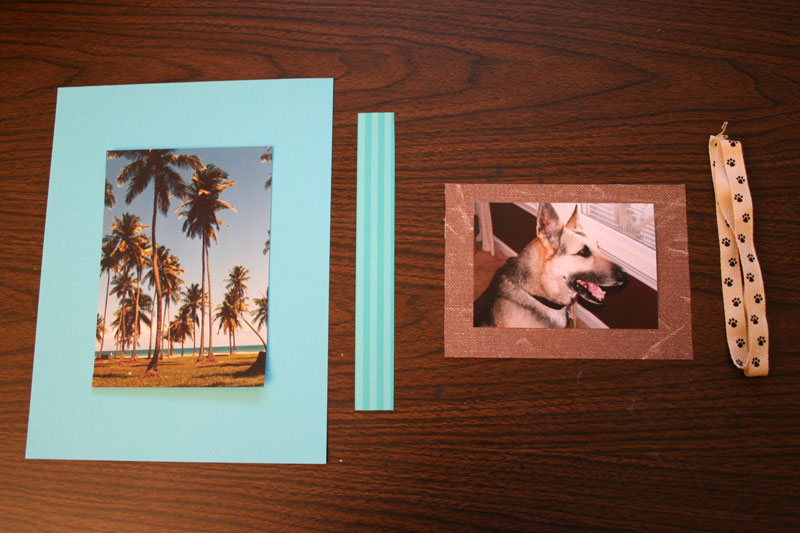
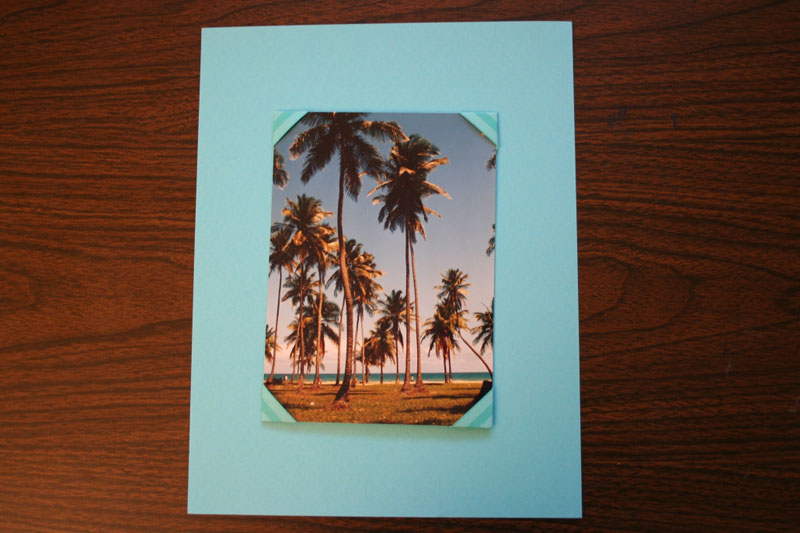
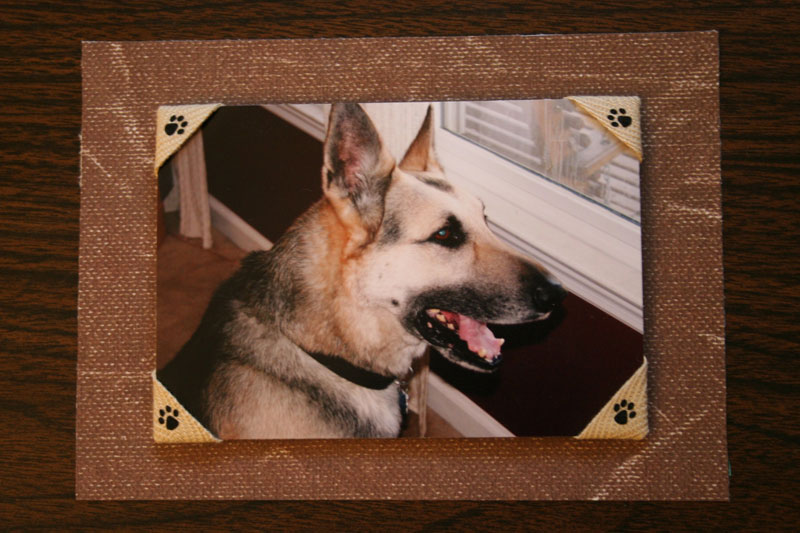
You can easily turn any paper or ribbon into a photo corner in less than a minute, and you can use paper or ribbon. I had two photos I wanted to mount with custom corners. For the palm tree photo from our recent beach vacation, I chose a coordinating piece of scrapbook paper. For the photo of our old dog Max, I selected a piece of ribbon with paw prints on it.
To create the paper corners, I cut the strip down to about 1/2 inch wide, although you could use any width you like. Then I folded one end of the paper back, forming a right angle. Then I folded the other end down, lining it up with the first one, and pressing the seams down firmly
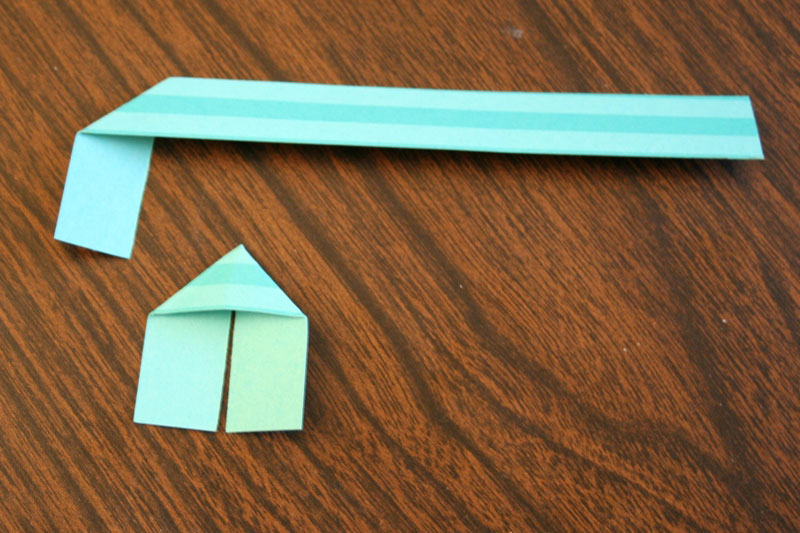
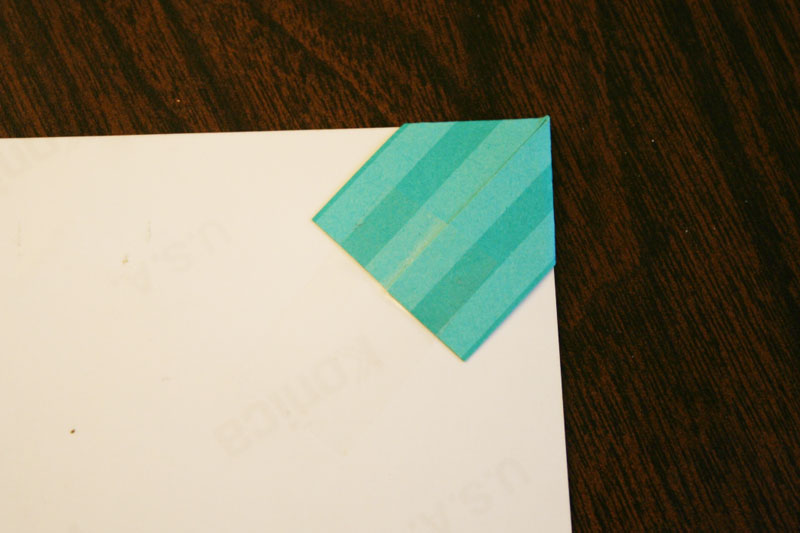
Then I just trimmed off the long piece of the strip and repeated the steps to make one for each corner of the photo. I slid the little folded papers over the corners of the photo.
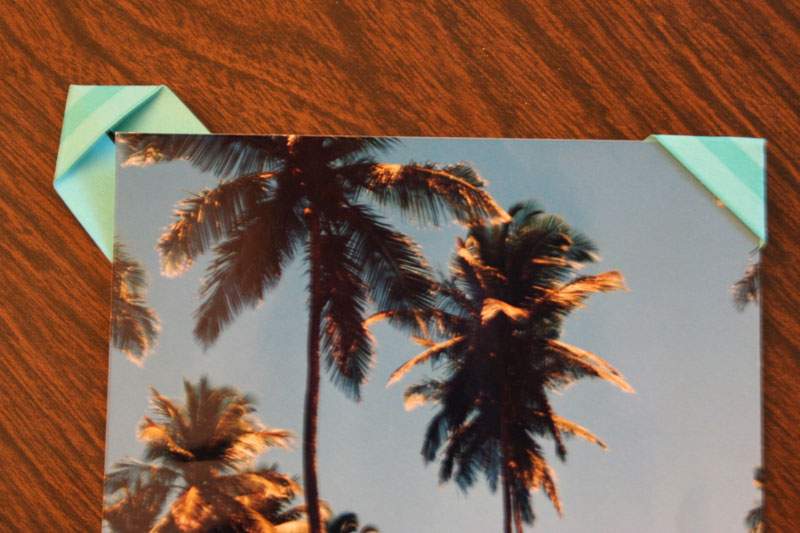
I added a little piece of tape to the back to secure the corner, and that was it!
I think it makes a pretty big difference, and adds a lot of customization options.
Making corners for the dog photo was pretty much the same steps, although I did take care to line up the paw prints on the ribbon so they were centered in each corner.
Whether you use paper or ribbon, this is a great way to use the leftovers from a scrapbook layout to finish off the pictures. It's also a fun way to finally find a use for those tiny ribbon scraps you know you've been saving. Making your own DIY photo corners is so cute, quick, easy, and best of all, cheap!
similar projects
Make a Photo Mosaic Scrapbook Page
Make Your Own Custom Photo Notepads
How to Make a "Magic" Folding Photo Cube


14 comments so far:
I'm so doing this when I get around to placing things in my wedding guestbook/scrapbook! I have tons of leftover paper, ribbon and cloth scraps. Glad I was browsing around!
So are we!
Great idea and well explained!!! Thanks, it helped me a lot!!
Hi Chica and Jo,
I really like your idea!!I just thought that you might like to try using embossing on the paper strips to really fancy it up. There are some cool embossing folders that only do 1/2 inch strips that would work quite nicely.
Very nice idea!
The photos don't show up for me. Do you have them anywhere else? Or have they been removed?
Bill, we just went through a site update and a few of our older posts had problems with images. We've been going through them as fast as we can, but you found one we hadn't gotten to yet! I've just updated the tutorial and added the pictures back. Thanks for the heads-up!
wow, simple but nice. glad i came across here. Was trying to find a way how to display my First day covers but not to damage the envelope...again, simple but nice tips...thanks
Thank you! So simple but so effective!
Silver, we're glad we could help!
Thank you, this is so simple and so well explained. Lovely photos too!
Thank you! Love the German Shepherd the most
: ) sooooooo cuuuute! The paw prints on the photo corners are a great added touch! Again, thank you for your time and talent. GOD bless you!
I was trying to find a tutorial for this exact little craft and its so cool to see this post be over 17 years old! its older than me lol (by a few months)
JJ, we've been creating here for a lonnnng time for sure! So happy you found your way to our post and that we were able to help you solve your crafting problem. (Hmm, I might need to refresh the pics here!) Thanks for saying hi :)